Lesson 22
Property Lists
A property list is an XML key-value store that allows applications to store small amounts of data locally. Property lists are best suited to storing small amounts of data (less than a few hundred kilobytes). It is quite common for applications to use property lists to store application configuration information, such as server addresses and URLs.
Creating Property Lists
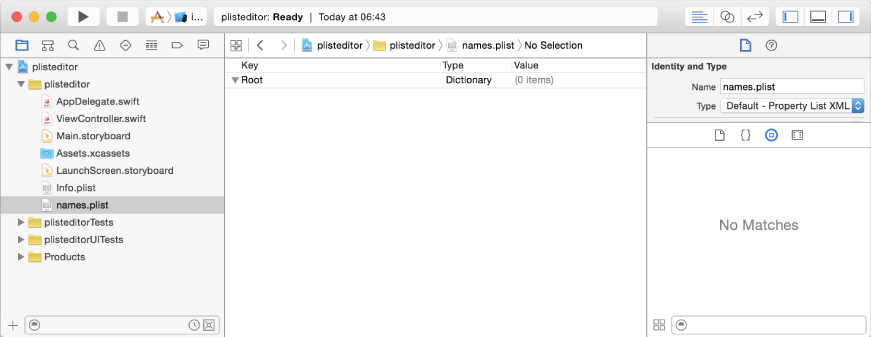
A property list can be created using the property list editor, or programmatically. The GUI property list editor that is integrated with XCode displays a property list file as a hierarchy of nodes and elements, all contained under a root node (see Figure 22.1). The root node can be either an array or a dictionary.

To create a property list, add a new file to the project and select Property List from the iOS Resource section in the file options dialog box (see Figure 22.2).

This will add an empty property list file to your project, with a single dictionary element called Root (see Figure 22.3).
To add a new entry to the property list, select the parent node and select Editor ![]() Add Item (see Figure 22.4).
Add Item (see Figure 22.4).

The default data type for new items is String; you can change that using the drop-down picker in the second column. If the parent node is a dictionary, then each child is treated as a key-value pair with keys being unique Strings.
To create a property list programmatically, you need to build a dictionary or array with data you wish to save and write it to a file in your application's documents directory. The following code snippet shows how you can achieve this:
func writeToPlist(fileName:String!, data:NSMutableDictionary!)
{
    let paths = NSSearchPathForDirectoriesInDomains(.DocumentDirectory,
               .UserDomainMask, true)[0] as String
    let path = paths.stringByAppendingPathComponent(fileName)
        data.writeToFile(path, atomically: true)
}
If all the data you wish to write to a property list file can be represented using a combination of NSNumber, NSString, NSArray, NSDictionary, and NSData instances, then your task is straightforward. If, however, you wish to write instances of your own classes to a property list file, you must implement the NSCoding protocol.
NSCoding defines two methods encodeWithCoder(aCoder: NSCoder) and a designated initializer init?(coder aDecoder: NSCoder).
The following code snippet lists a class Employee that is NSCoding-compliant and can be inserted into a property list.
import UIKit
class Employee: NSObject, NSCoding {
    var name:String?
    var address:String?
    func encodeWithCoder(aCoder: NSCoder)
    {
        // write to plist here.
        aCoder.encodeObject(name)
        aCoder.encodeObject(address)
    }
    required init?(coder aDecoder: NSCoder)
    {
      // read from plist here
      name = aDecoder.decodeObjectForKey("name") as? String
      address = aDecoder.decodeObjectForKey("address") as? String }
}
Reading Property Lists
To read a property list file, you need to load its contents into an array or dictionary. The following code snippet assumes you have added a property list file called Config.plist to the project:
var plistDictionary: NSDictionary?
if let path = NSBundle.mainBundle().pathForResource("Config", ofType: "plist") {
     plistDictionary = NSDictionary(contentsOfFile: path)
}
if let unwrappedDictionary = pListDictionary {
    // Use unwrappedDictionary here
}
Try It
In this Try It, you create a simple iPhone application based on the Single View Application template called PropertyListTest that populates a table view with contents read off a plist file. The contents of the plist file will be generated programmatically.
Lesson Requirements
- Launch Xcode.
- Create a new iPhone project based on the Single View Application template.
- Create a storyboard with a single scene.
- Add code to the application delegate object to create the plist file when the application is launched.
- Read the plist file in the view controller and display its contents in a table view.
Hints
- When creating a new project, you can use your website's domain name as the Company Identifier in the Project Options dialog box.
- To show the Object library, select View
 Utilities Show Object Library.
 - To show the Assistant editor, select View Assistant Editor Show Assistant Editor.
Step-by-Step
- Create a Single View Application in Xcode called
PropertyListTest.- Launch Xcode and create a new application by selecting File New Project menu item.
- Select the Single View Application template from the list of iOS project templates.
- In the project options screen, use the following values:
- Product Name: PropertyListTest
- Organization Name: your company
- Organization Identifier: com.yourcompany
- Language: Swift
- Devices: iPhone
- Use Core Data: Unchecked
- Include Unit Tests: Unchecked
- Include UI Tests: Unchecked
- Save the project onto your hard disk.
- Launch Xcode and create a new application by selecting File
- Add a
UITableViewinstance to the default scene.- From the Object library, drag and drop a Table View object onto the scene.
- Ensure the table view is selected and use the Pin button to display the constraints editor popup.
- Ensure the Constrain to margins option is unchecked.
- Pin the distance between the left edge of the view and the table view to 0.
- Pin the distance between the right edge of the view and the table view to 0.
- Pin the distance between the bottom of the view and the table view to 0.
- Pin the distance between the top of the view and the table view to 20.
- Click the Add 4 Constraints button to dismiss the constraints editor popup.
- Update the frames to match the constraints you have set.
- Click on the View controller item in the dock above the storyboard scene. This is the first of the three icons located directly above the selected storyboard scene.
- Select Editor Resolve Auto Layout Issues Update Frames.
- Set up the data source and delegate properties
- Right-click the table view to bring up a context menu. Drag from the item labeled “dataSource” in the context menu to the item labeled “View Controller” in the document outline.
- Drag from the item labeled “delegate” in the context menu to the item labeled “View Controller” in the document outline.
- Set up the table view's appearance.
- Select the table view and ensure the Attributes inspector is visible.
- Ensure the Content attribute is set to Dynamic Prototypes.
- Ensure the value of the Prototype Cells attribute is 1.
- Ensure the Style attribute is set to Grouped.
- Set up the prototype cell.
- Expand the table view in the document outline; this will reveal the table view cell.
- Select the table view cell.
- Use the attribute editor to ensure that the value of the identifier attribute is
prototypeCell1. - Ensure the Style attribute is set to Basic.
- Add code to the application delegate to create a plist file.
- Open the
AppDelegate.swiftfile in the project explorer. - Replace the implementation of
application(application, didFinishLaunchingWithOptions) -> Boolwithfunc application(application: UIApplication, didFinishLaunchingWithOptions launchOptions: [NSObject: AnyObject]?) -> Bool { // create contacts.plist in the documents directory, if it does not exist let fileManager:NSFileManager! = NSFileManager.defaultManager() let documentsDirectory:String = NSSearchPathForDirectoriesInDomains( NSSearchPathDirectory.DocumentDirectory, NSSearchPathDomainMask. UserDomainMask, true)[0] as String let plistPath = documentsDirectory + "/contacts.plist" if fileManager.fileExistsAtPath(plistPath) == false { let contacts:NSMutableArray = NSMutableArray() contacts.addObject("Elana") contacts.addObject("Sonam") contacts.addObject("Jane") contacts.addObject("Paul") contacts.addObject("Abhishek") contacts.addObject("Nick") contacts.addObject("Steve") contacts.writeToFile(plistPath, atomically: true) } return true }
- Open the
- Load the plist file in the view controller class.
- Open the
ViewController.swiftfile in the project explorer. - Add the following variable declaration to the view controller class:
var arrayOfContacts:NSArray? = nil - Replace the implementation of the
viewDidLoadmethod with the following:override func viewDidLoad() { super.viewDidLoad() // load contacts.plist into arrayOfContacts let documentsDirectory:String = NSSearchPathForDirectoriesInDomains( NSSearchPathDirectory.DocumentDirectory, NSSearchPathDomainMask. UserDomainMask, true)[0] as String let plistPath = documentsDirectory + "/contacts.plist" arrayOfContacts = NSArray(contentsOfFile: plistPath) }
- Open the
- Implement the data source and delegate methods in the view controller.
- Implement the
numberOfSectionsInTableViewdata source method as follows:func numberOfSectionsInTableView(tableView: UITableView) -> Int { return 1; } - Implement the
numberOfRowsInSectiondata source method as follows:func tableView(tableView: UITableView, numberOfRowsInSection section: Int) -> Int { return arrayOfContacts!.count } - Implement the
cellforRowAtIndexPathdata source method as follows:func tableView(tableView: UITableView, cellForRowAtIndexPath indexPath: NSIndexPath) -> UITableViewCell { let cell = tableView.dequeueReusableCellWithIdentifier("prototypeCell1", forIndexPath: indexPath) as UITableViewCell let contactName:String = arrayOfContacts!.objectAtIndex(indexPath.row) as! String cell.textLabel?.text = contactName return cell } - Modify the declaration of the
ViewControllerclass to inherit fromUIViewController,UITableViewDataSource, andUITableViewDelegate:class ViewController: UIViewController, UITableViewDataSource, UITableViewDelegate {
- Implement the
-
Test your app in the iOS Simulator.
Click the Run button in the Xcode toolbar. Alternatively, you can select Project
Run.