Pain méthode directe
( Bread, direct method )
Practical, fast and almost failproof, the direct method is the best way to start your bread-baking journey. These breads, with their thin crispy crust, white crumb and relatively mild flavour, have a much broader appeal in France than the more pungent sour breads, which tend to overpower the subtleties of the food they are supposed to complement. The following steps will clarify how to knead your dough and, just as importantly, how to shape it.
Makes 800 g (1 lb 12 oz)
500 g (1 lb 2 oz) plain (all-purpose) flour (‘0’/T55 or ‘1’/T65)
350 ml (12 fl oz) cold water (20°C/70°F)
8 g (¼ oz) dried yeast
10 g (¼ oz) fine salt
Making the dough
By mixer Using an electric mixer fitted with a dough hook, mix the flour and 300 ml (10½ fl oz) of the cold water on low speed for 2–3 minutes, or until a rough dough forms. Cover the bowl with a clean damp cloth and set aside to rest for 15 minutes (see tip).
Put the yeast and the remaining water in a small bowl and whisk until fully dissolved. Add to the hydrated dough, then add the salt and knead on low speed for 10 minutes. Increase the speed to medium and knead for another 2 minutes, or until the dough is smooth and elastic and comes away from the side of the bowl. Be careful not to overheat the dough; regularly check for any sign of heat by testing it with the back of your index finger. Stop kneading if the dough feels like it is warming up. Shape the dough into a ball.
By hand Put the flour on the work surface and make a well in the middle. Slowly add 300 ml (10½ fl oz) of the water (photo 1). Using your fingertips, start to incorporate the flour into the water (2). At this stage, don’t worry if some of the water escapes from the well; simply scrape it back inside your flour well and continue incorporating and binding the dough together. Using the heel of your hand, press the dough roughly together (3), then cover with a damp cloth and rest for 35–40 minutes (see tip).
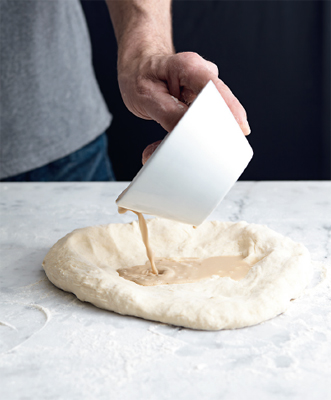
Shape the dough into a disc with slightly elevated sides. Put the yeast and remaining water into a small bowl and whisk until fully dissolved (4). Pour the dissolved yeast onto the dough (5), then add the salt and gently pull the sides of the dough towards the middle (6) to incorporate the liquid into the dough. At this stage the dough will be soft and tacky, so begin the kneading process by gently pushing the dough across the work surface with the palm of your hand, folding the dough over itself (7) until it becomes more elastic. Then, push the dough away from you with the heel of your hand and bring the outside edges of the dough towards the middle (8), until the dough is smooth and stops sticking. This process should take 15–20 minutes. Shape the dough into a ball (9).
Windowpane test
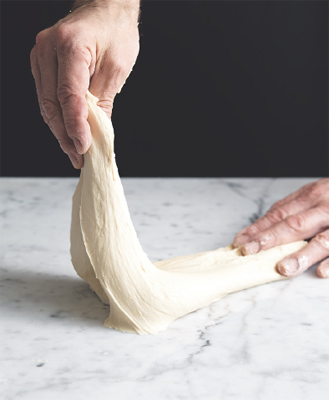
To check whether the dough is kneaded properly, use the ‘windowpane’ test. Hold a small piece of dough in your hands and stretch the dough until it is almost thin enough to see through (photo 4). If not, continue kneading for another 2 minutes.
| 1 |  |
| 2 | 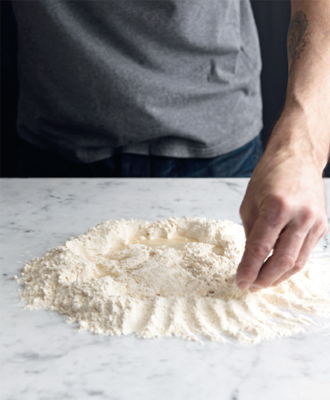 |
 |
3 |
| 4 | 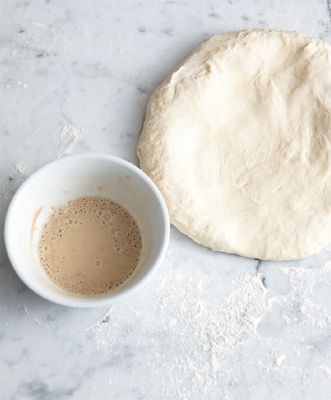 |
 |
5 |
| 6 | 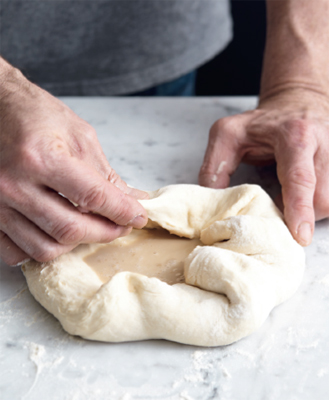 |
 |
7 |
| 8 | 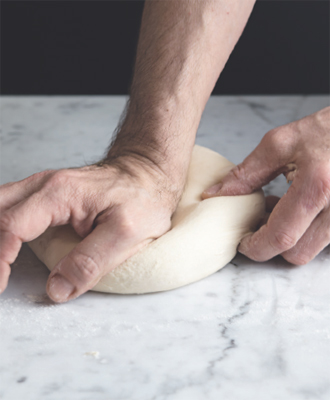 |
 |
9 |
cooking tip :
L After the flour and water have been kneaded, the dough must be left to rest. This crucial step is ‘autolyse’ and is designed to hydrate the flour and improve gluten development. Dough kneaded without this step will need a longer mixing time, which often leads to a weakening of the yeast.
First prove
Place the dough in a lightly floured bowl and cover with a cloth. Set aside in a warm place to prove for 1 hour, or until risen by half. The time this takes will depend on the temperature of the dough and your kitchen.
When the dough has risen, knock it down with your fist, then remove as much gas as you can by folding the dough over a few times. This first prove (pointage) is an essential part of the leavening process and is largely designed to refine the final texture of the bread. During this stage, the yeast fungi are still relatively clumped together and will create large bubbles of gas (carbon dioxide), resulting in an irregular bread studded with large holes. The process of knocking the dough down is largely aimed at spreading the fungi around the dough, resulting in a bread with a denser and more refined texture.
Dividing and balling the dough
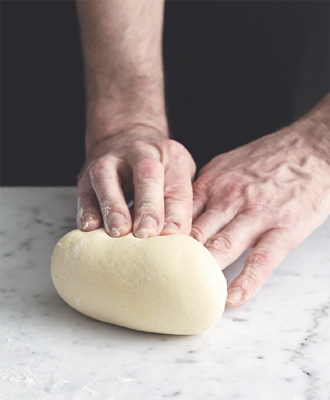
All breads need to be divided into the appropriate size and ‘balled’, a process aimed at tightening the dough prior to the final shaping of each individual product. (Doughs for flat breads such as pizza and fougasse do not need ‘balling’, as this will develop the gluten, making it difficult to roll the dough out flat.) Although it is difficult to accurately describe the balling technique used by professional bakers, as long as you know that the aim of the process is to stretch the gluten rather than make a nice round ball, your technique will develop with experience.
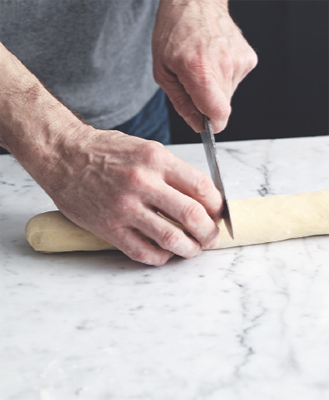
Place the dough on a lightly floured work surface and shape it into an even log (photo 1) — it doesn’t matter what size, this is just to help you cut even portions of dough. Use a plastic scraper or small knife to cut the dough into the size needed (2). If you are making one single loaf, skip this cutting step.
Remove any excess flour from the work surface. Take a portion of dough in the cupped palm of your hand and flatten slightly, then bring the outside edges into the middle and pinch to seal (3). Turn the ball over and drag the base over the work surface several times (4) — this will ensure any air bubbles trapped in the middle are released and you don’t end up with a big hole in the middle of the bread.
If you are making a full loaf, apply the same balling technique as above, but use the whole amount of dough. Use both your hands to run the dough ball over the work surface, to stretch the dough and tighten up your loaf.
Place the balls, seam side down, on a lightly floured tray, cover with a cloth and set aside to rest for 15 minutes.
| 1 | 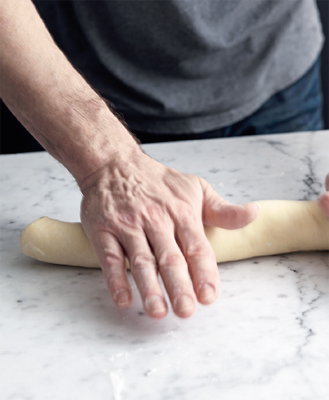 |
 |
2 |
| 3 |  |
 |
4 |
more on yeast :
L To understand the correlation between the dosage of yeast and flavour, you need to understand how dough ferments. Yeasted doughs rely mainly on fungus to metabolise sugars into gases (carbon dioxide and ethanol), which are then trapped by the gluten during baking. These gases, along with steam, help the dough to rise.
The sourness and depth of flavour are the result of a slow bacterial process that turns sugar into lactic acid and a small amount of carbon dioxide and ethanol. The less yeast you add to a dough, the longer the dough will take to prove, and therefore the more time for lactic acid to build up. This will result in a bread with a more complex flavour and creamier flesh. So, if you prefer a bread with slight undertones of sourness (but are not yet confident with the process of pre-fermentation needed for semi- or sourdough breads) and have a lot more time on your hands, simply reduce the initial amount of yeast. As an approximate guideline, every 1 g (1/32 oz) reduction in yeast will increase the proving time by an hour.
proving times :
| flour | yeast | first prove |
| 500 g (1 lb 2 oz) | 8 g | 1 hour |
| 500 g (1 lb 2 oz) | 7 g | 2 hours |
| 500 g (1 lb 2 oz) | 6 g | 3 hours |
| 500 g (1 lb 2 oz) | 5 g | 4 hours |