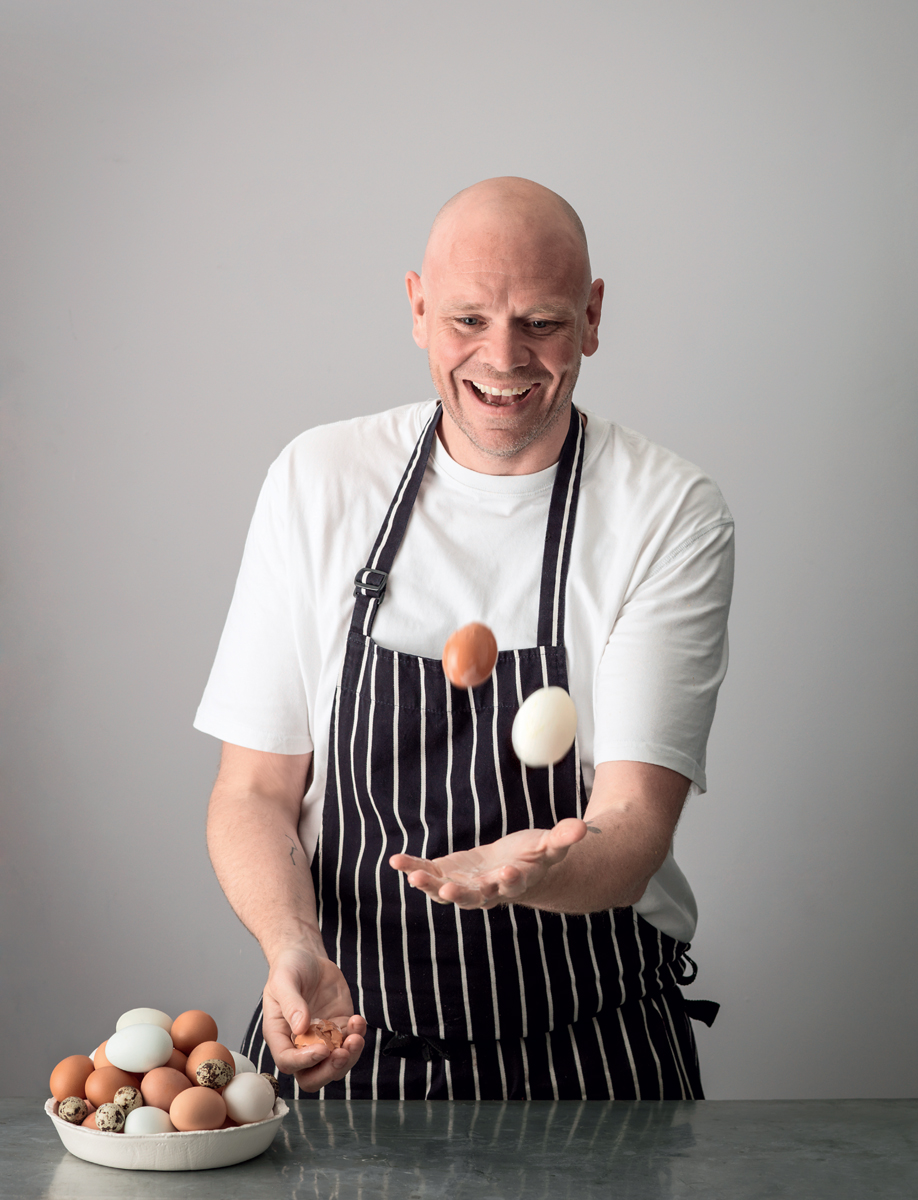
PUDDINGS
Who doesn’t love a pudding? In Britain we famously have some of the world’s finest. I’ve taken a selection of those old favourites and ramped them up a bit, so a basic bread and butter pudding becomes a nutty brioche pudding, speckled with chocolate and dried apricots. Similarly, inspired by the lovely custard tarts from my childhood, I’ve created individual little tarts that are a bit like the Portuguese pasteis de nata.
There are plenty of larger tarts too, because I think everyone should know how to throw one together. Whether you fancy a simple honey tart or something more elaborate, such as the peanut butter, cherry and chocolate one, with its lush combination of salty, sweet and silky, there’s something to suit every mood and menu. The beauty of these tarts is that you can prepare them ahead – always a good thing if you want to spend more time with your family and friends than at the cooker.
For those who fancy more of a challenge, there are sophisticated whisky and rye puddings, which have a great depth of flavour and are not overwhelmingly sweet. Or there’s my classic crème caramel, which I regard as foolproof. Or, for an easy treat, try the strawberry shortcakes – don’t worry too much about making these look perfect, just put them together and dive right in!
In some ways, there’s a bit of overlap here with the next chapter, Baking & Treats, as I like to think these puddings could be enjoyed at any time of the day. If you’re like me, you don’t always want a pudding after a big meal, but round about 11am or 4pm, and pretty much all points in between, you might feel the need for a boost that only a cup of coffee and something sweet can provide. So they’re multi-purpose, user-friendly and infinitely adaptable… and I hope you’ll give them a go.
Nutty Brioche Pudding with Chocolate >
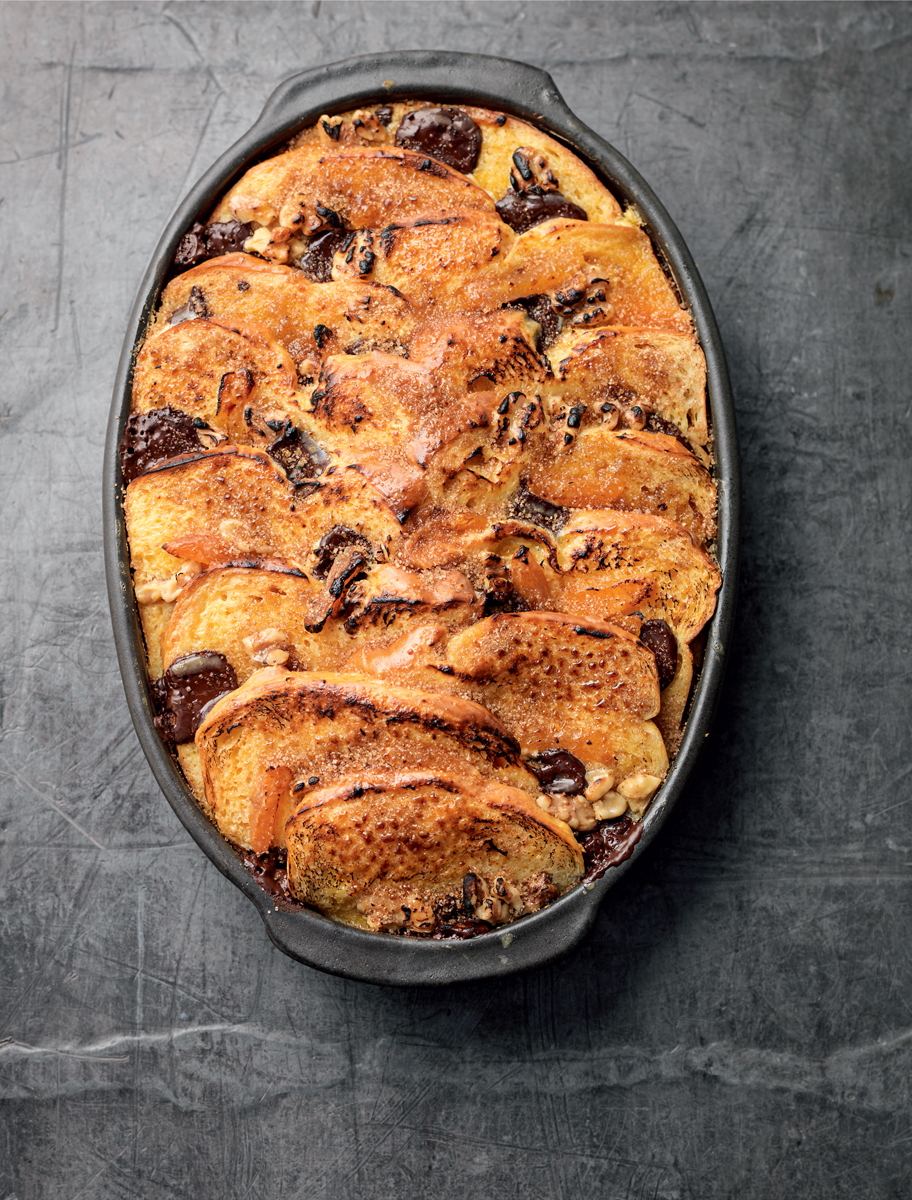
NUTTY BRIOCHE PUDDING WITH CHOCOLATE
Creamy and comforting, bread and butter pudding is one of my all-time favourite puddings. This brioche version, which includes dried apricots, walnuts and chocolate, is especially luxurious, yet simple to make.
SERVES 6–8
1 brioche loaf, about 500g, sliced (it can be slightly dry)
100g butter, softened, plus extra for greasing the dish
8 egg yolks
75g caster sugar
600ml double cream
1 tsp cardamom pods, lightly crushed
150g dried apricots, roughly chopped
150g shelled walnuts, toasted (see Waldorf Salad) and chopped
150g dark chocolate (70% cocoa solids), broken into small pieces
Demerara sugar, for glazing
Lightly butter an ovenproof dish, about 23 x 33cm. Spread the brioche slices on both sides with the butter and set aside.
To make the custard, using an electric hand mixer, beat the egg yolks and sugar in a large bowl until the mixture becomes pale and fluffy. Meanwhile, put the cream and cardamom pods into a saucepan and place over a medium-high heat until bubbles start to appear around the edge of the pan.
Pour the cream through a sieve onto the egg and sugar mixture, whisking constantly. Pour the mixture back into a clean pan and return to a medium heat. Cook, stirring, for a few minutes until the custard thickens just enough to coat the back of a wooden spoon. Pass back through a fine sieve into a bowl or jug and let it cool slightly.
To assemble the pudding, pour a layer of custard into the greased dish. Scatter in half of the chopped apricots, walnuts and chocolate, then arrange a layer of buttered brioche on top. Repeat these layers, so you have two layers of brioche, then finish with a layer of custard. Leave to stand for 30 minutes (or refrigerate for up to 3–4 hours) before baking.
Preheat the oven to 140°C/Fan 120°C/Gas 1. Bake the pudding for 25–30 minutes until the custard is just set. Remove from the oven and leave to stand for 10 minutes.
Sprinkle a layer of demerara sugar on top of the pudding and glaze, using a cook’s blowtorch, until caramelised and golden brown. If you don’t have a blowtorch, place under a medium-hot grill for a couple of minutes until the sugar is caramelised. Serve with cream or ice cream if you fancy, though the pudding is very good just as it is.
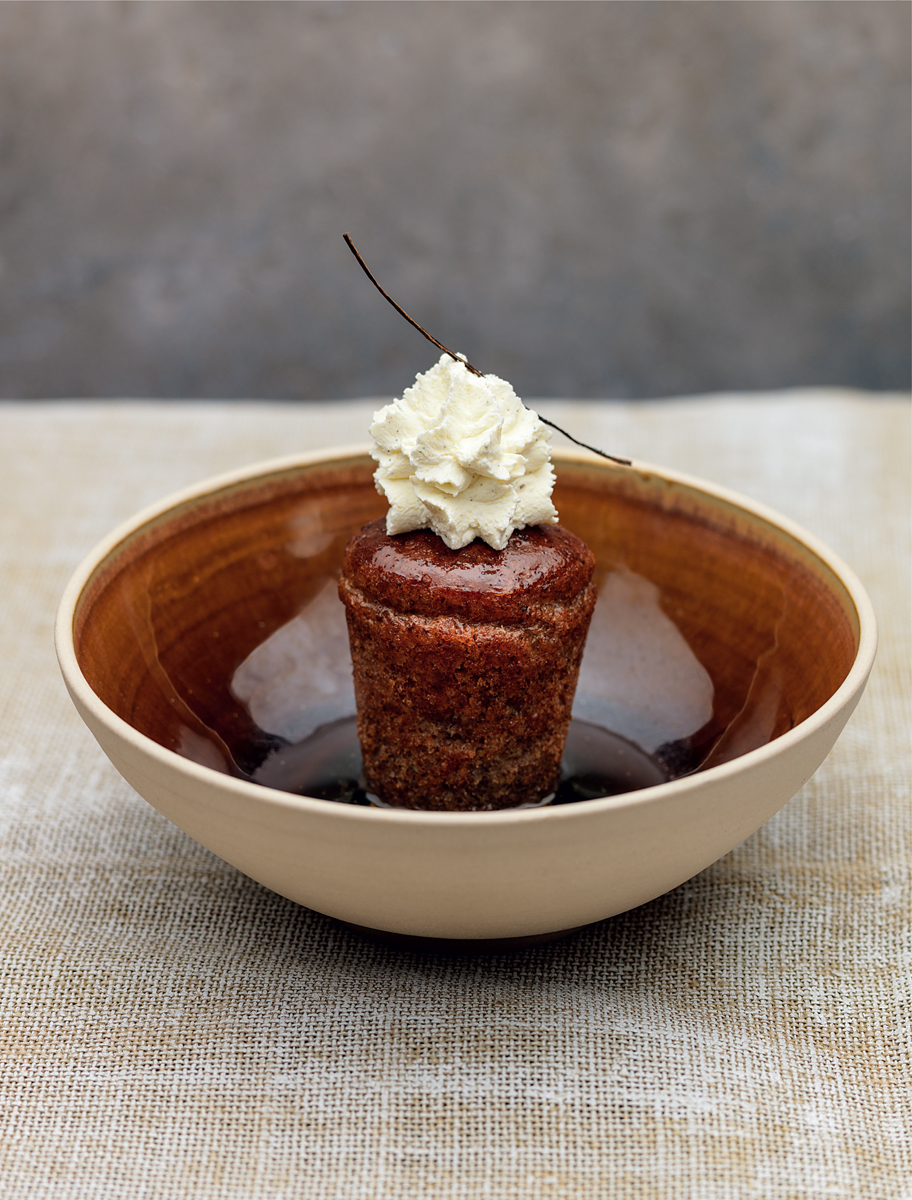
WHISKY & RYE PUDDINGS
These sophisticated puddings are a cross between a rum baba and a baked doughnut. Soaked in boozy syrup, they taste utterly delicious, with a great balance of flavour from the rye breadcrumbs and the whisky. I like to serve them with crème Chantilly – whipped cream sweetened with a sprinkling of sugar and flavoured with a little vanilla extract.
MAKES 6
For the puddings
70g butter, softened, plus extra for greasing
80g plain flour, plus extra for dusting
80g rice flour
40g dried rye breadcrumbs
½ tsp ground mace
A pinch of salt
7g sachet fast-action dried yeast
10g honey
4 medium-large eggs (250g total weight in shell), lightly beaten
For the whisky syrup
200ml water
200g caster sugar
75ml whisky
To serve
Crème chantilly (see above) or crème fraîche
Thin slivers cut from a vanilla pod (optional)
Lightly butter 6 savarin, dariole or timbale moulds, about 200ml capacity, then dust with flour and tap out any excess.
Put all of the pudding ingredients into a freestanding mixer fitted with the dough hook and combine on a medium-low speed for 5–10 minutes, to form a smooth, elastic dough.
Spoon the mixture into a piping bag fitted with a medium plain nozzle, or use a disposable piping bag with a 1cm hole cut at the end. Pipe the dough into the prepared moulds, cover loosely with cling film and leave to rise in a warm place for 45 minutes to 1 hour, until doubled in size.
Meanwhile, make the whisky syrup. Put the water and sugar in a saucepan and bring to the boil, stirring to dissolve the sugar. Boil for a couple of minutes until slightly thickened and syrupy, then take off the heat and stir in the whisky. Set aside.
When the puddings are almost ready, preheat the oven to 180°C/Fan 160°C/Gas 4. Remove the cling film and stand the moulds on a baking tray. Bake for 10–12 minutes until cooked through, golden and bouncy to the touch. Let cool in the tins.
Gently release the puddings from the moulds and place them in a deep dish (one in which the puddings just fit comfortably). Bring the whisky syrup back to the boil, then carefully pour over the puddings to submerge them. Cover the dish with cling film and leave the puddings to soak in the syrup for about 15 minutes, gently turning them a couple of times with a spoon so they absorb most of the syrup.
Serve the puddings warm or cold, with a little syrup spooned over and some crème chantilly or crème fraîche on top. Finish with slivers of vanilla pod, if you like.

SWEET SPICED CRÈME CARAMEL
This is my spiced-up crème caramel. It’s always a winner and so simple to make. The key is to cook it very gently to make sure the custard doesn’t split. Once you get that right, you’ll go back to this recipe again and again, as a failsafe easy pud.
SERVES 6–8
For the caramel
150g caster sugar
For the custard
600ml double cream
375ml condensed milk
2 tsp vanilla extract
1 tsp ground mace
½ tsp ground nutmeg
½ tsp ground cinnamon
8 eggs, plus 1 extra egg yolk
3 tbsp soft light brown sugar
Preheat the oven to 140°C/Fan 120°C/Gas 1. Have ready a round metal or ceramic pie dish, about 24cm in diameter and 5cm deep.
For the caramel, put the caster sugar and a splash of water into a large, stainless steel saucepan or deep sauté pan over a medium-high heat. Heat, stirring until the sugar dissolves.
Continue to heat the sugar syrup, swirling and shaking the pan rather than stirring to ensure even cooking, until it forms a light, coppery amber caramel. Immediately remove the pan from the heat to prevent the caramel from getting too dark and pour it directly into the pie dish. Set aside while you prepare the custard.
Put the cream, condensed milk, vanilla extract, mace, nutmeg and cinnamon into a large saucepan over a medium-high heat until bubbles start to appear around the edge of the pan, stirring a couple of times. Remove from the heat and set aside for a few minutes to let the flavours infuse.
Using a freestanding mixer fitted with the paddle attachment, or an electric hand mixer and large bowl, whisk together the whole eggs, egg yolk and sugar until the mixture is smooth, fluffy and thickened.
Strain the hot, spiced cream and milk mixture through a fine sieve onto the whisked mixture, whisking well to combine. Pour the mixture into a large jug and let it stand for a couple of minutes to settle and lose any air bubbles. Skim off any foam and carefully pour the custard on top of the caramel in the pie dish.
Stand the dish in a roasting tin and pour boiling water from the kettle into the tin until it comes halfway up the sides of the dish. Bake for about 40–50 minutes, until the custard has just set. Be careful not to overcook it – you want it to have a slight wobble to it when you gently shake the dish.
Remove from the oven and carefully lift the dish out of the water bath. Leave to cool, then cover with cling film and chill in the fridge for at least an hour before serving. (You can make this pudding a day or two before you want to serve it.)
To serve, gently release the crème caramel by running a small palette knife or table knife around the inside edge of the dish. Invert a large, lipped plate on top and carefully flip the dish and plate over, so the pudding sits on the plate and the golden caramel pours down the sides. Serve immediately.
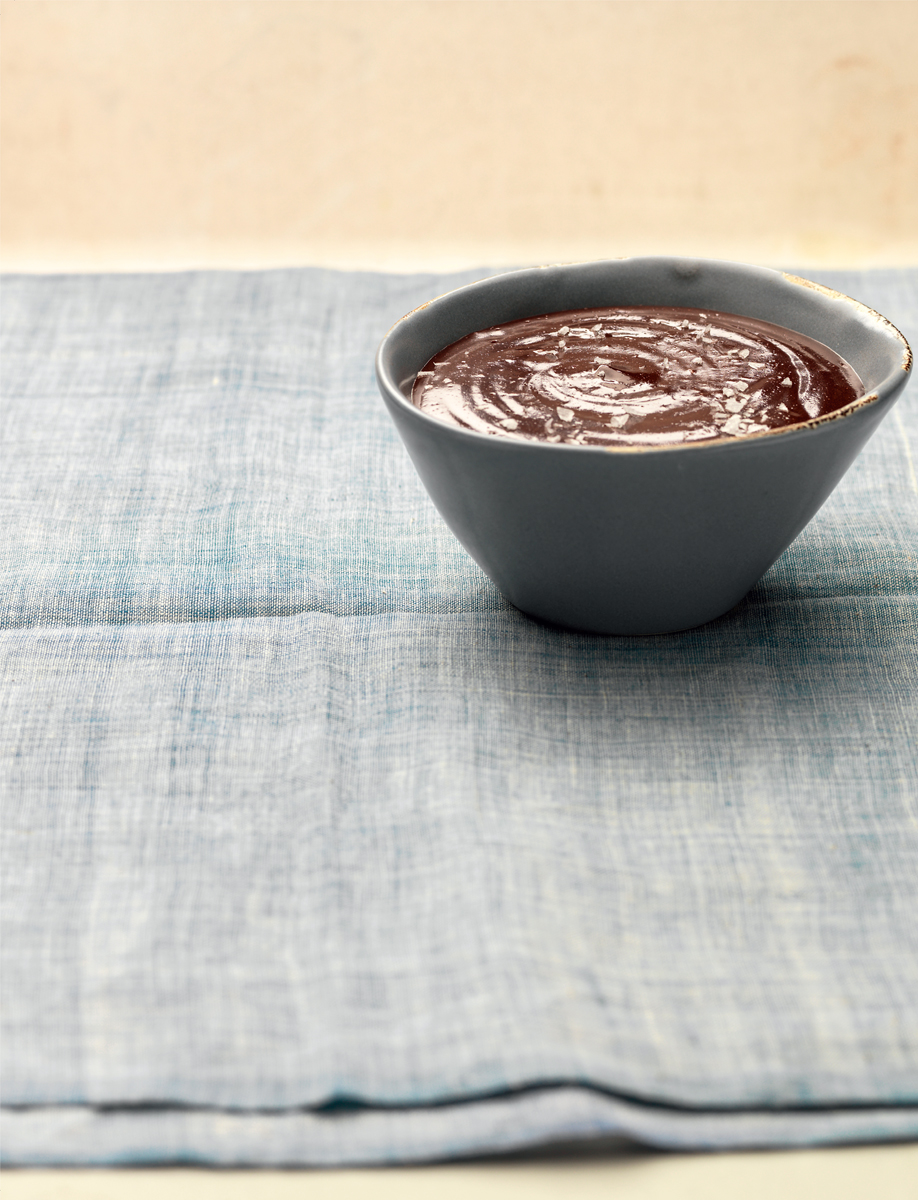
Rich Chocolate Pots with Port Raisins >
RICH CHOCOLATE POTS WITH PORT RAISINS
These rich, decadent little puddings are so easy and you can prepare them a day ahead if you like. The port-soaked raisins are a great addition, but do experiment with other combinations too: try dried mango and rum, prunes and brandy, or even dried apricots and cider – they all work brilliantly.
SERVES 8
For the raisins
100g raisins
100ml ruby port
For the chocolate pots
200g dark chocolate (about 70% cocoa solids), chopped into very small pieces
400ml double cream
1 vanilla pod, split in half lengthways
5 egg yolks
80g dark muscovado sugar
A pinch of flaky sea salt
100g crème fraîche, stirred until smooth
Put the raisins into a small, heatproof bowl. In a small pan, bring the port to the boil. Pour it over the raisins, cover and leave them to soak up the liquid for at least 30 minutes (or up to 4 hours). Drain the raisins of any excess port.
To make the chocolate pots, put the chocolate into a medium heatproof bowl. Pour the cream into a saucepan. Using the point of a small, sharp knife, scrape out the seeds from the vanilla pod directly into the cream and add the pod too. Place over a medium heat until bubbles start to appear around the edge of the pan.
While the cream is heating, using an electric hand mixer, whisk the egg yolks and sugar together in a bowl until the mixture is light and fluffy. Remove the vanilla pod from the pan, then slowly pour the hot cream onto the eggs and sugar, whisking all the time. Pour the mixture back into a clean saucepan and heat gently, stirring constantly, until thickened enough to coat the back of a wooden spoon.
Pass this custard through a fine sieve onto the chocolate. Let it stand for a couple of minutes or so until the chocolate starts to melt, then add the sea salt and stir until smooth. Allow to cool, then stir in the crème fraîche.
Divide the raisins between 8 ramekins or other small dishes, 125ml capacity. Spoon or pipe the chocolate custard into the dishes – it’s easier to get a neat result with a piping bag. Cover with cling film and leave to set in the fridge for at least 2 hours.
Take the puddings out of the fridge 20 minutes before serving. Sprinkle with a little flaky salt, if you like, as you serve them.

BUTTERNUT SQUASH TART
In my version of pumpkin pie, I use butternut squash because it has a silky texture and a lower water content than other pumpkins. If you can, prepare the squash a day ahead, to allow plenty of time to drain off the excess liquid. Alternatively, you can use a tin of solid-pack pumpkin – just make sure it is not seasoned.
SERVES 8–10
For the pastry
220g plain flour, plus extra for dusting
140g butter, chilled and diced
½ tsp salt
75ml iced water
Juice of ½ lemon
1 egg, lightly beaten
For the filling
2 butternut squash, about 500g each (or a 400g tin of solid-pack pumpkin)
A pinch of salt
4 eggs
120g soft light brown sugar
1 tsp ground ginger
½ tsp ground cinnamon
½ tsp freshly ground nutmeg
125ml maple syrup
350ml double cream
To make the pastry, put the flour, butter and salt into a food processor and pulse until the mixture resembles breadcrumbs. (Alternatively, you can do this in a bowl, rubbing the butter in with your fingertips.) Add the water and lemon juice and bring the dough together with your hands.
Remove the pastry from the bowl, wrap in cling film and leave to rest in the fridge for at least an hour, or overnight.
Preheat the oven to 180°C/Fan 160°C/Gas 4.
Roll out the pastry on a lightly floured surface to the thickness of a £1 coin. Use to line a 25cm loose-bottomed tart tin, gently pressing the pastry into the base and sides and allowing any excess to hang over the edges of the tin.
Stand the tart tin on a baking sheet. Line the pastry case with baking parchment and fill with ceramic baking beans, dried pulses or uncooked rice. Bake ‘blind’ for 20–25 minutes, then remove from the oven and lift out the parchment and baking beans. Bake for a further 10 minutes until the pastry is evenly golden brown all over.
Brush the base of the tart with beaten egg and return to the oven for a further 2 minutes to help seal the pastry. Let cool, then trim away the excess pastry with a small, serrated knife.
For the filling, halve, peel and deseed the squash, then cut the flesh into 3cm chunks. Place in a foil-lined roasting tin, season very lightly with salt and add a small splash of water. Cover with a second sheet of foil and scrunch the edges together to make a parcel, sealing it well. Bake for about an hour, until the squash is very tender. Tear open the foil and leave the squash to cool. Lower the oven setting to 170°C/Fan 150°C/Gas 3½.
Transfer the cooled squash to a food processor and blitz to a silky smooth purée. Pass through a fine sieve. (If it’s at all watery, tip into a muslin-lined colander and leave to drain off the excess liquid, preferably overnight but at least for a few hours, then squeeze well.) Weigh out 400g pulp for the filling; any excess squash purée can be frozen for another use.
Using a freestanding mixer fitted with the beater attachment, or an electric hand mixer and large bowl, whisk the eggs and sugar together until the mixture is light, creamy and aerated. Add the ginger, cinnamon, nutmeg and maple syrup and beat well to combine. Add the squash along with the cream and beat for a minute or two, until the mixture is very smooth.
Pour into the pastry case and bake for 40–50 minutes, until the filling is just set, with a slight wobble in the centre. Take out of the oven and leave to cool. Release the tart from the tin and cut into slices. Serve with soured cream or crème fraîche.

PECAN TART
Pecans have a rich flavour and a great texture, particularly if you toast them, but you can make this tart with walnuts instead if you prefer. Whatever nuts you use, a sprinkling of flaky sea salt at the end really lifts the flavours. Serve a slice just as it is with a cup of coffee or tea, or with a scoop of good vanilla ice cream as an indulgent dessert.
SERVES 8–10
For the sweet pastry
250g butter, softened
120g caster sugar
400g plain flour, plus extra for dusting
1 egg, lightly beaten
For the filling
500g shelled pecans nuts
3 eggs
180g caster sugar
1 tsp ground mace
50ml golden syrup
50ml black treacle
50g butter, melted
1 tsp salt
2 vanilla pods, split in half lengthways and seeds scraped out
50ml whisky or dark rum
To finish
Flaky sea salt
To make the pastry, using a freestanding mixer fitted with the beater attachment or an electric hand mixer and large bowl, cream together the butter and sugar until smooth and pale. Reduce the speed and slowly add the flour. Just before it’s fully combined, add the egg and mix briefly, just until smooth.
Remove the pastry from the bowl, wrap in cling film and leave to rest in the fridge for at least 1 hour, or overnight.
Preheat the oven to 180°C/Fan 160°C/Gas 4.
Roll out the pastry on a lightly floured surface to the thickness of a £1 coin. Use to line a 28cm loose-bottomed tart tin, about 4cm deep, gently pressing the pastry into the base and sides and allowing any excess to hang over the edges of the tin.
Stand the tart tin on a baking sheet. Line the pastry case with baking parchment and fill with ceramic baking beans, dried pulses or uncooked rice. Bake ‘blind’ for 20–25 minutes, then remove from the oven and lift out the parchment and baking beans. Bake for a further 10–15 minutes, until the pastry is evenly golden brown all over. Leave to cool, then trim away the excess pastry with a small, serrated knife.
For the filling, scatter the pecans on a large baking tray and place in the oven at 180°C/Fan 160°C/Gas 4 until fragrant and lightly toasted, about 5–7 minutes. Leave to cool.
Put half the toasted pecans in a food processor and pulse to crush lightly. Continue to pulse further if you’d like a finer-textured filling. Alternatively, place the nuts in a self-sealing plastic bag and bash with a rolling pin until you achieve the texture you like.
Using a freestanding mixer fitted with the whisk attachment, or a hand mixer with a whisk attachment, whisk together the eggs, sugar and mace until pale, light and fluffy. Add the golden syrup, treacle, melted butter, salt, vanilla seeds and whisky or rum and whisk until incorporated. Now use a spatula to fold in the blitzed pecans until evenly combined.
Pour the pecan filling into the pastry case. Arrange the whole pecans decoratively on top. Bake the tart for 25–30 minutes until it’s evenly coloured, lightly golden brown and almost set – it should still have a slight wobble in the centre when you gently shake the tin.
Remove from the oven and leave the tart to rest for about an hour before serving. Don’t be tempted to serve it too early as the filling needs to cool and set, to stop it being runny when you cut into it. Once cool, sprinkle with flaky sea salt. Serve as it is, or with scoops of good vanilla ice cream, if you like.

HONEY TART
This tart has a fantastically rich, subtle flavour with a seductively silky texture. You only need a small slice, as a little goes a long way. If I can, I like to use a good local honey in this recipe. It’s an excellent way to enjoy the unique and distinctive flavour. Source one from a farm shop or local market if you can, otherwise use a good quality supermarket honey.
SERVES 8–10
For the sweet pastry
170g butter, softened
80g caster sugar
270g plain flour, plus extra for dusting
1 egg, lightly beaten
For the filling
5 eggs
1 vanilla pod, split in half lengthways and seeds scraped out
A pinch of salt
250g soft light brown sugar
100ml double cream
85g honey
70g butter
65ml white wine vinegar
2 tbsp golden syrup
50g fine polenta
To finish
Edible flowers, such as violas, or a pinch of flaky sea salt
To make the pastry, using a freestanding mixer fitted with the beater attachment or an electric hand mixer and large bowl, cream together the butter and sugar on a medium-high speed until the mixture is smooth and pale. Reduce the speed and slowly add the flour. Just before it is fully incorporated, add enough egg to bring the dough together (you won’t need all of it) and mix briefly, just until smooth.
Remove the pastry from the bowl and wrap it in cling film. Place it in the fridge to rest for at least 1 hour, or overnight if that’s more convenient.
Preheat the oven to 180°C/Fan 160°C/Gas 4.
As the pastry is fragile and a bit tricky to handle you’ll find it easier to roll out between 2 sheets of cling film. Roll it out to the thickness of a £1 coin and use to line a loose-bottomed oblong tart tin, about 36 x 12cm, or a 25cm round tart tin, about 3cm deep. The easiest way to do this is to peel off the top layer of cling film and invert the pastry into the tin, then remove the other layer of cling film. Gently press the pastry into the base and sides of the tin and allow any excess to hang over the edges of the tin.
Stand the tart tin on a baking sheet. Line the pastry case with baking parchment and fill with ceramic baking beans, dried pulses or uncooked rice. Bake ‘blind’ for 20–25 minutes, then remove from the oven and lift out the parchment and baking beans. Bake for a further 10–15 minutes, until the pastry is evenly golden brown all over. Leave to cool, then trim away the excess pastry with a small, serrated knife.
Lower the oven temperature to 170°C/Fan 150°C/Gas 3½.
To make the filling, whisk the eggs, vanilla seeds and salt together in a large bowl until combined.
Put the sugar, cream, honey, butter, wine vinegar and golden syrup into a medium-large saucepan over a medium-high heat and bring to the boil, stirring.
Remove from the heat and slowly stir in the polenta and the egg mixture. Return to a very low heat and cook, stirring constantly, for about 5 minutes until smooth; don’t let the mixture boil or it will curdle. Transfer to a large jug and allow it to sit for a few minutes.
Pour the filling into the pastry case. Bake for 20 minutes, or until the filling is evenly coloured and just set – it should have a slight wobble in the centre when you gently shake the tin.
Leave to cool, then carefully remove the tart from the tin and place on a board or serving plate. Decorate with edible flowers or finish with a sprinkling of flaky sea salt.
Cut the honey tart into slices and serve with clotted cream or good vanilla ice cream.

PEANUT BUTTER, CHERRY & CHOCOLATE TART
Layers of great flavours are the key to this fantastic tart. There’s very little cooking required, but it does take a little time for the layers to set so you will need to be patient – I promise you it’s worth the wait!
SERVES 12–16
For the base
50g shelled hazelnuts
150g digestive biscuits
50g butter, melted, plus extra for greasing the tin
For the filling
200g smooth peanut butter (at room temperature)
40g caster sugar
A pinch of salt
50g butter, melted
For the jam layer
250g black cherry jam
For the chocolate ganache
300g dark chocolate (70% cocoa solids), very finely chopped
300ml double cream
25ml sesame oil
Preheat the oven to 180°C/Fan 160°C/Gas 4. Lightly grease a 23cm loose-bottomed shallow round cake tin with butter and line the base and sides with non-stick baking parchment.
For the base, scatter the hazelnuts on a baking sheet and roast in the oven for 10–12 minutes, until the skins are blistered. Wrap in a clean tea towel and let them steam for a couple of minutes then rub in the tea towel to remove the skins (as much you can).
Turn the oven up to 200°C/Fan 180°C/Gas 6.
To make the base, whiz the hazelnuts in a food processor until coarsely ground; don’t over-process or they will become oily. Add the biscuits and blitz to a fine powder. Now pour in the melted butter and blitz for a few more seconds to combine.
Tip the biscuit mixture into the prepared cake tin and use a spoon to press and level it out. Bake for 10 minutes until set, then remove from the oven and leave to cool in the tin.
Meanwhile, make the filling. Using an electric hand whisk and large bowl or a freestanding mixer fitted with the whisk attachment, whip the peanut butter, sugar and salt together until the mixture is soft, light and nicely aerated. Pour in the melted butter and whisk again briefly, to combine.
Pour the filling over the cooled biscuit base and spread it out evenly, being careful not to break the biscuit layer. Cover with cling film and chill in the fridge for about 2 hours until firm.
Spread the cherry jam over the set peanut butter filling, cover with cling film and return to the fridge for at least 15 minutes. At this stage you can leave it for several hours, even overnight if that’s more convenient.
For the ganache, put the chocolate into a large, heatproof bowl. Pour the cream into a pan, add the sesame oil and heat until bubbles appear around the edge of the pan. Immediately pour onto the chocolate and leave to stand for 2 minutes. Stir with a spatula just until smooth, glossy and shiny – no longer.
Pour the chocolate ganache over the surface of the tart, spreading it evenly over the jam layer with a spatula or the back of a spoon. Cover with cling film and return to the fridge to set for at least 2 hours, or overnight.
When you’re ready to serve, remove the tart from the tin and cut it into slices – it’s very rich, so a thin sliver per serving is usually enough. Serve with whipped cream or crème fraîche, if you like.

CUSTARD TARTS
Custard tarts are such a classic from my childhood. Made with puff pastry, these individual tarts are very easy. They look rustic – like traditional Portuguese tarts – and have a delicate, crispy case and velvety soft filling. If you can, serve them warm when they’re absolutely delicious, but they’re great cold too.
MAKES 12–14
Butter, for greasing
Plain flour, for dusting
500g ready-made all-butter puff pastry
For the custard
375ml whole milk
150g caster sugar
2 vanilla pods, split in half lengthways and seeds scraped out
1 tbsp cornflour
90ml evaporated milk
4 eggs, plus 4 extra egg yolks
Freshly grated nutmeg
Preheat the oven to 180°C/Fan 160°C/Gas 4.
Grease 14 deep-fill foil mince pie tart cases with a little butter. Dust each one with a good sprinkling of flour, shake out any excess and set aside. (If you can’t find foil cases, use 2 large, 12-hole muffin tins, greasing only 14 of the moulds.)
Roll out the pastry on a lightly floured surface to roughly the thickness of a £1 coin. Using a suitably sized saucer as a template, cut out 12–14 circles, making sure they are big enough to comfortably line the foil cases.
Gently press the pastry into the foil cases (or moulds), making sure it sits snugly on the base and sides. Allow the pastry to overlap the top of the moulds just slightly, to allow for any shrinkage. (You can trim away any excess after baking.)
If you’re using foil pastry cases, place them on a couple of baking sheets. Bake the pastry cases for 20–25 minutes, until the pastry is evenly coloured, golden brown and just crisp. Remove from the oven and allow to cool.
Lower the oven temperature to 150°C/Fan 130°C/Gas 2.
While the tart cases are cooling, make the custard. Heat the milk, sugar and vanilla seeds in a medium-large saucepan over a medium heat, stirring occasionally, until bubbles start to appear around the edge of the pan. Take off the heat.
Put the cornflour into a large bowl, add a splash of evaporated milk and whisk together to make a smooth paste. Pour in the rest of the evaporated milk and whisk until it is fully incorporated. Add the eggs and egg yolks to the bowl and beat together until evenly combined.
Now pour on the hot milk mixture, whisking constantly. Return to the pan and heat gently, stirring, until thickened enough to coat the back of a wooden spoon. Pass through a fine sieve into a jug. Let the custard sit for a few minutes to settle any air bubbles, then skim the top to remove any foam.
When the tart cases are cold, trim off the excess pastry from the edges. Gently hollow out the tart cases slightly, removing some of the pastry to make room for the custard filling.
Carefully pour the custard into the tart cases, to reach almost to the top, then dust generously with grated nutmeg. Bake for 10–15 minutes, until the custard is set but still has a slight wobble to it when you gently shake the cases (or tins). Make sure you do not overcook the custard.
Remove the tarts from the oven and leave to stand for about 5 minutes before serving. They’re lovely eaten while still warm.
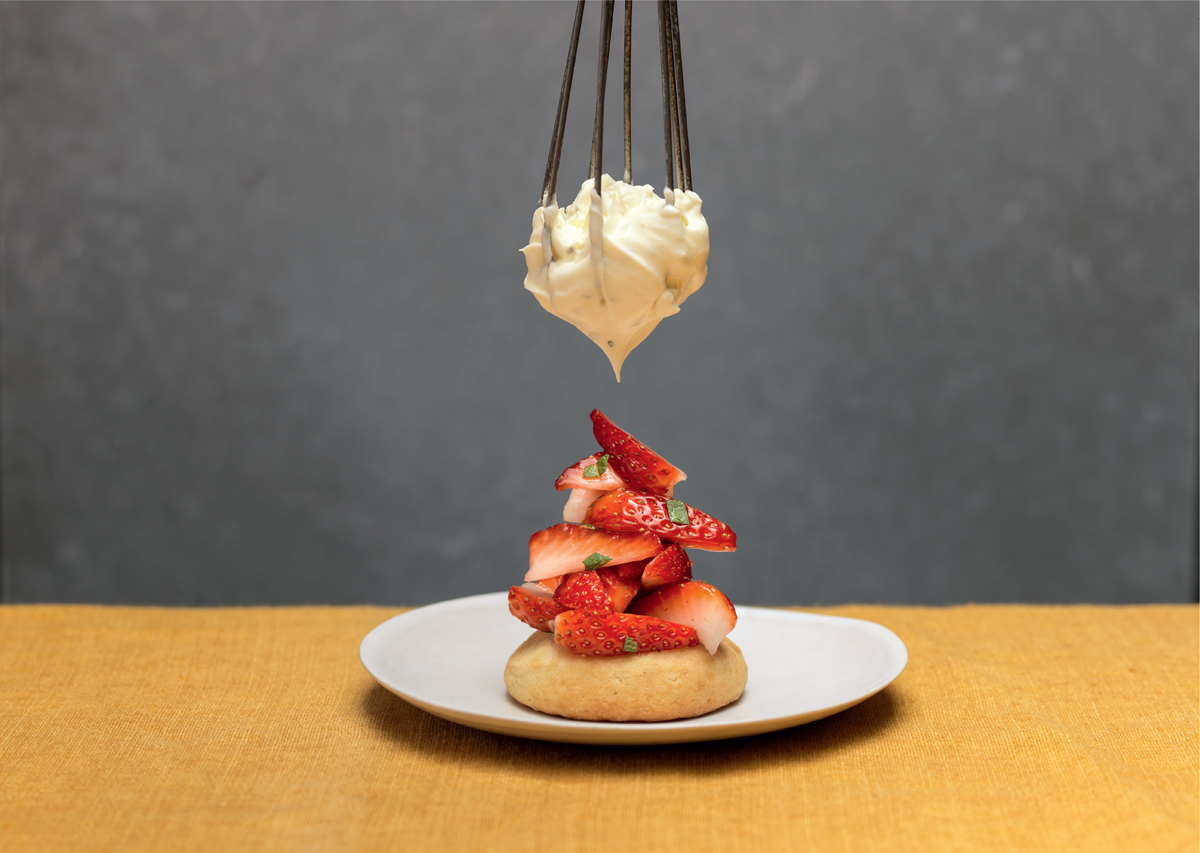
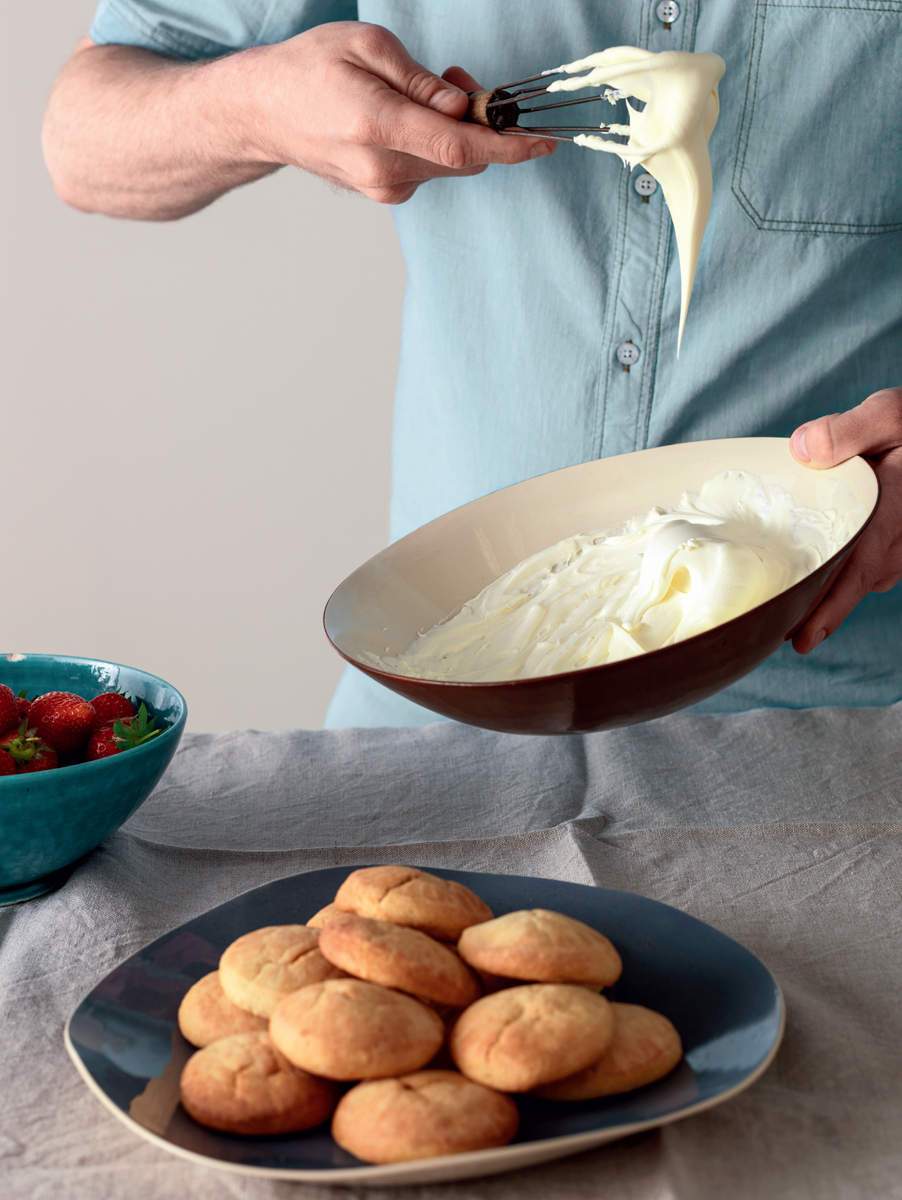
STRAWBERRY SHORTCAKES & MASCARPONE CREAM
These luscious little shortcakes are a gorgeous, informal way to end a summer party, when strawberries are ripe, plentiful and cheap. I don’t worry about how these look – if they’re a bit messy, who cares? They taste amazing.
MAKES ABOUT 16
For the shortcakes
300g plain flour, plus extra for dusting
50g caster sugar
1 tbsp baking powder
½ tsp salt
225g butter, chilled and diced
1 egg, lightly beaten
150ml whole milk
For the strawberries
600g ripe strawberries
3 tbsp caster sugar
2 tbsp chopped mint leaves
For the mascarpone cream
100g mascarpone cheese
100ml double cream
35g caster sugar
¼–½ tsp cracked black pepper
To serve
Icing sugar, for dusting (optional)
To make the shortcakes, put the flour, sugar, baking powder and salt into a large bowl and stir to combine. Add the butter and use your fingertips to rub everything together, lightly working the mixture until it resembles fine breadcrumbs.
In a small, separate bowl, mix the egg and milk together. Stir into the rubbed-in mixture to create a smooth, soft dough. Knead very briefly, bringing the dough together to form a ball – the secret to a tender shortcake is working as quickly and lightly as possible. Wrap the dough in cling film and chill in the fridge for an hour.
Preheat the oven to 200°C/Fan 180°C/Gas 6. Line one or two baking trays with non-stick baking parchment.
Roll out the dough on a lightly floured surface to a 1.5cm thickness. Using a 5cm round pastry cutter dipped in flour, stamp out 16 shortcakes from the dough. (Don’t gather up and roll out the pastry trimmings, as they will be tough.)
Carefully place the shortbread rounds on the prepared baking tray(s) and bake for 12–15 minutes, until lightly golden and crisp. Remove from the oven and leave to cool on the tray(s) for a few minutes, then transfer them to a wire rack and leave to cool completely.
Meanwhile, prepare the strawberries. Quarter or slice them and place in a bowl. Sprinkle over the sugar and mix gently, just to coat the strawberries evenly. Leave to macerate for at least 30 minutes – the sugar will soften the strawberries and bring out their juices, allowing them to steep in their liquid. Just before serving, toss through the chopped mint.
For the mascarpone cream, put the mascarpone, cream and sugar in a bowl and whip together, using an electric hand mixer with a whisk attachment, until smooth and holding peaks – be careful not to overbeat it. Fold in ¼ tsp of the cracked pepper, taste and add a little more pepper if you like.
Place the shortcakes on serving plates, pile the strawberries on them and then add dollops of the mascarpone cream. Finish with a trickle of the strawberry juices, and a dusting of icing sugar, if you like.

BLACK GRAPE, MINT & MERINGUE TART
I never understand why we don’t cook with grapes more often. We might use them as a garnish for a cheese plate, but we’re seldom more adventurous than that. But they contain so much lovely natural juice and have such a great balance of sweetness and acidity, they’re up there as my favourite fruit – this tart is my celebration of that.
SERVES 8–12
For the sweet pastry
250g butter, softened
120g caster sugar
400g plain flour, plus extra for dusting
1 egg, lightly beaten
For the filling
1.2kg seedless black grapes
50g caster sugar
30g cornflour
Juice of 1 lemon
4 tbsp chopped mint leaves
For the meringue topping
150g egg whites (about 4 large whites)
300g caster sugar
70ml water
25g glucose syrup
To make the pastry, using a freestanding mixer fitted with the beater attachment or an electric hand mixer and large bowl, cream together the butter and sugar on a medium-high speed until the mixture is smooth and pale. Reduce the speed and slowly add the flour. Just before it’s fully combined, add the egg and mix briefly just until smooth.
Remove from the bowl, wrap in cling film and refrigerate for at least 1 hour, or overnight.
Preheat the oven to 180°C/Fan 160°C/Gas 4.
Roll out the pastry on a lightly floured surface to the thickness of a £1 coin. Use to line a 25cm loose-bottomed tart tin, about 4cm deep, gently pressing the pastry into the base and sides and allowing any excess to hang over the edges of the tin.
Stand the tart tin on a baking sheet. Line the pastry case with baking parchment and fill with ceramic baking beans, dried pulses or uncooked rice. Bake ‘blind’ for 20–25 minutes, then remove from the oven and lift out the parchment and baking beans. Bake for a further 10–15 minutes, until the pastry is evenly golden brown all over. Leave to cool, then trim away the excess pastry with a small, serrated knife.
Next prepare the filling. Cut half of the grapes in two and place them in a large saucepan over a very low heat with the sugar. Poach gently for around 10 minutes, stirring from time to time, so the grapes steep in their own juices but still retain some of their shape.
In a small bowl, mix together the cornflour and lemon juice to form a paste. Whisk this into the grape juice in the pan and continue to heat very gently for 1–2 minutes, until the mixture thickens. Remove from the heat and leave to cool.
When the grape filling is almost cold, stir in the chopped mint. Once cooled completely, stir in the whole grapes. Spoon into the cooked pastry case and spread out evenly with a spoon.
Next make the meringue. Make sure all of your equipment is scrupulously clean. Using a stand mixer or electric hand mixer, whisk the egg whites on a medium-high speed until they form soft peaks. Set aside briefly while you make the hot sugar syrup.
Put the sugar, water and glucose syrup into a saucepan over a medium heat, stirring to dissolve the sugar. Bring to the boil and heat until it registers 118°C on a cook’s thermometer, i.e. the ‘soft ball’ stage. (If you don’t have a thermometer, to test, drop a small amount of the syrup into a glass of cold water: it should form a soft ball.) With the mixer running, slowly pour the hot syrup onto the egg whites and continue whisking until the meringue is cool. It will be incredibly glossy, shiny and have reached firm peaks by this stage.
Spoon, spread or pipe the meringue on top of the grapes in the tart tin. It’s up to you how you decorate it – give it some height, swirls and peaks. Leave to set for 30 minutes.
Using a cook’s blowtorch, carefully caramelise the surface of the tart until the meringue is lightly coloured. If you don’t have a blowtorch, place the tart under a medium-hot grill for a minute or two to colour – keep a close eye on it, as the meringue can quickly burn.
Serve immediately, cut into slices using a serrated knife.

BLITZ TORTE
This gorgeous German concoction is part cake, part meringue and part custard, with a bit of fruit thrown in for good measure. What more can you ask for from a pud? I use strawberries here, but you can change the fruit to match the seasons or your tastes – tropical fruits work particularly well.
SERVES 8–10
For the cake
120g butter, plus extra for greasing
70g caster sugar
4 egg yolks (save the whites for the meringue, below)
1 tsp vanilla extract
140g plain flour
1 tsp baking powder
3 tbsp whole milk
For the meringue
4 egg whites
¼ tsp cream of tartar
130g caster sugar
1 tsp white wine vinegar
100g slivered almonds
For the custard filling
4 egg yolks
130g caster sugar
3 tbsp plain flour
1 vanilla pod, split in half lengthways and seeds scraped out
300ml double cream
200g strawberries, very large ones halved
To finish
Icing sugar, for dusting
Preheat the oven to 160°C/Fan 140°C/Gas 3. Lightly grease the base and sides of two 24cm square loose-bottomed cake tins with butter and line the bases with non-stick baking parchment. If you don’t have loose-bottomed square tins, use ordinary tins and let the parchment overhang the sides a bit, to make it easier to remove the cakes.
For the cake batter, using a freestanding mixer fitted with the beater attachment, or an electric hand mixer and bowl, beat the butter and sugar together on a medium-low speed until the mixture is light, pale and fluffy. Add the egg yolks and vanilla extract and mix together briefly to combine.
In a separate bowl, sift together the flour and baking powder. On a low speed, add the flour mixture to the butter and sugar a little at a time, beating just enough to combine; do not overwork. Add the milk to loosen the mixture a little. Divide the batter between the prepared cake tins and set aside.
Next make the meringue. Make sure all of your equipment is scrupulously clean. Using the mixer, whisk the egg whites on a medium-high speed until they form soft peaks. With the machine running, add the cream of tartar, then the sugar, a spoonful at a time, whisking until the mixture forms stiff, glossy peaks. Add the vinegar and whisk briefly to incorporate.
Using a spatula, spread half of the meringue over the batter in one of the cake tins. Using a piping bag fitted with a large nozzle, pipe the meringue on top of the batter in the other tin and sprinkle with the almonds – this will be the top layer.
Bake the cakes for 30–35 minutes, until the meringue is set and lightly golden. Leave to cool in the tins for 10 minutes, then carefully transfer to a wire rack to cool completely.
Meanwhile, make the custard filling. Using an electric hand mixer fitted with the whisk attachment, beat the egg yolks and sugar together in a large heatproof bowl until the mixture is pale and fluffy. Fold in the flour and vanilla seeds. Pour in the cream and whisk to combine.
Now place the bowl over of a pan of barely simmering water, making sure the water doesn’t touch the bowl, and whisk constantly until the custard thickens. This could take as long as 15–20 minutes; don’t let it boil or it may curdle. Once it is the consistency of thick custard, remove the bowl from the heat and leave to cool completely. As the custard cools, it will thicken a bit more.
To assemble the cake, spread the custard on top of the plain meringue cake. Arrange the strawberries in rows on top and gently press them right down into the custard. Position the decorated meringue cake on top, with the almonds uppermost. Dust the cake with icing sugar and cut into slices to serve.
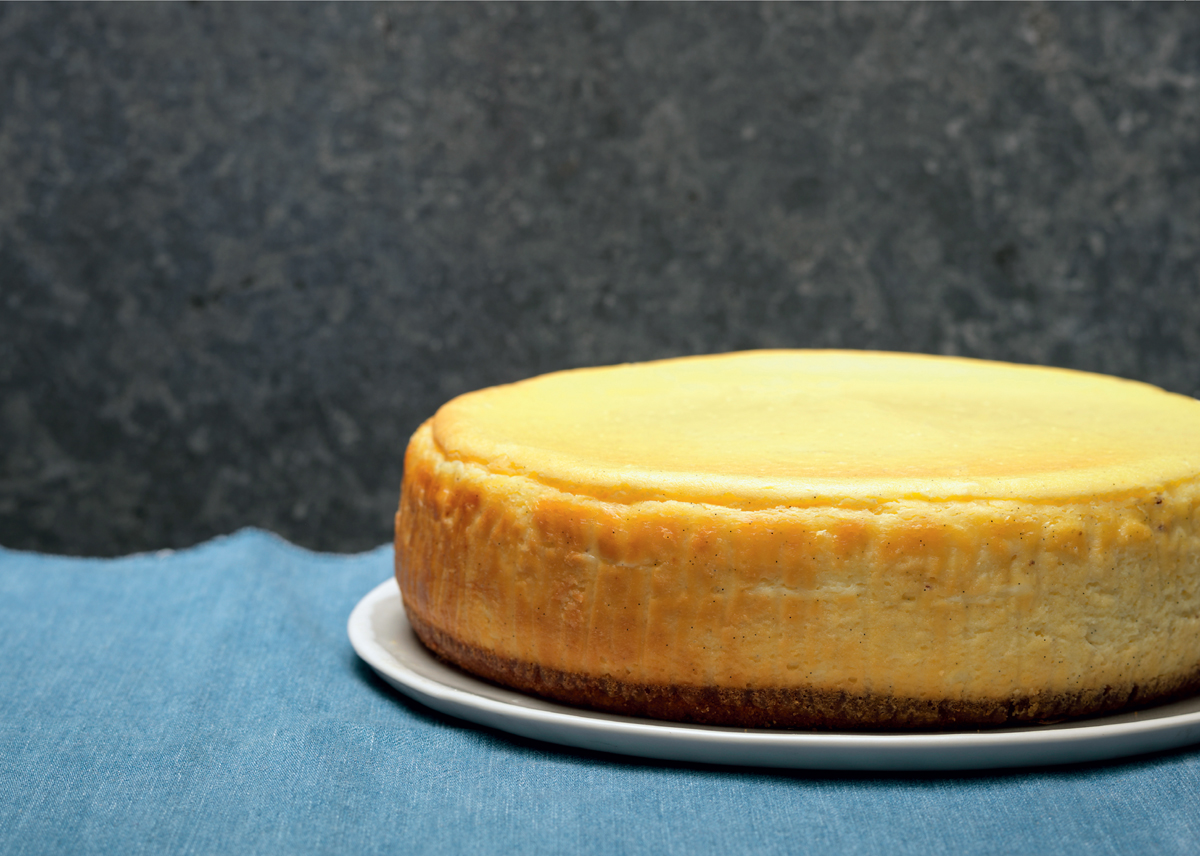
BAKED VANILLA CHEESECAKE
Baked cheesecakes have a rich and creamy texture and are more satisfying than their uncooked counterparts. Serve this classic baked cheesecake with ripe berries in summer, or a spiced fruit compote in winter. It really is a pud for all seasons, so feel free to adapt it as you like.
SERVES 10–12
For the base
225g digestive biscuits
40g caster sugar
100g butter, melted, plus extra for greasing
For the filling
750g soft full-fat cream cheese, such as Philadelphia
400g crème fraîche
170g caster sugar
45g plain flour
A pinch of salt
2 vanilla pod(s), split in half lengthways and seeds scraped out
Finely grated zest and juice of 1 unwaxed lime
6 large egg yolks
To serve (optional)
Seasonal fruit
Preheat the oven to 180°C/Fan 160°C/Gas 4.
Lightly grease the base and sides of a 23cm round springform cake tin with butter and line with non-stick baking parchment. Butter the parchment.
To make the base, put the biscuits into a food processor and whiz to crumbs. Alternatively, place them in a self-sealing plastic bag and bash with a rolling pin until finely crushed. Tip the crumbs into a large bowl and stir in the sugar. Add the melted butter and mix to combine.
Tip the crumb mixture into the prepared cake tin, spread evenly and press down firmly with the back of a spoon so the base is nice and compact. Bake for 10–15 minutes. Remove from the oven and leave to cool completely in the tin.
Meanwhile, prepare the filling. Using either a freestanding mixer fitted with the whisk attachment or an electric hand mixer and bowl, beat the cream cheese, crème fraîche and sugar together on a medium speed for a couple of minutes until the mixture is very smooth and creamy.
Sift the flour and salt over the mixture and mix again briefly, just to combine. Add the vanilla seeds, lime zest and juice, and whisk slowly, until evenly blended. Now incorporate the egg yolks, one at a time, beating briefly after each addition and scraping the bowl down as necessary with a spatula. Do not overbeat – you want the filling to be smooth, light and aerated.
Pour the filling on top of the biscuit base, gently levelling out the surface with a spoon or a palette knife. Give the tin a gentle tap on a flat surface to ensure there are no air pockets in the mixture, and stand the tin on a baking sheet.
Bake at 180°C/160°C Fan/Gas 4 for 10 minutes, then turn the oven down to 140°C/Fan 120°C/Gas 1 and bake for a further 1 hour and 10 minutes. The filling should be set but have a slight wobble in the centre when you gently shake the tin. Do not overcook, as it will firm up considerably as it cools.
Turn off the oven and prop the oven door open slightly. Leave the cheesecake inside to ‘rest’ for around 15–20 minutes, then remove from the oven and leave to stand at room temperature for at least 3 hours. It’s now ready to serve, but can be chilled if you’re not eating it straight away.
To unmould the cheesecake, run a knife around the edge of the tin, removing the parchment, and transfer the cheesecake to a plate. Cut into wedges and serve just as it is, or with fruit.