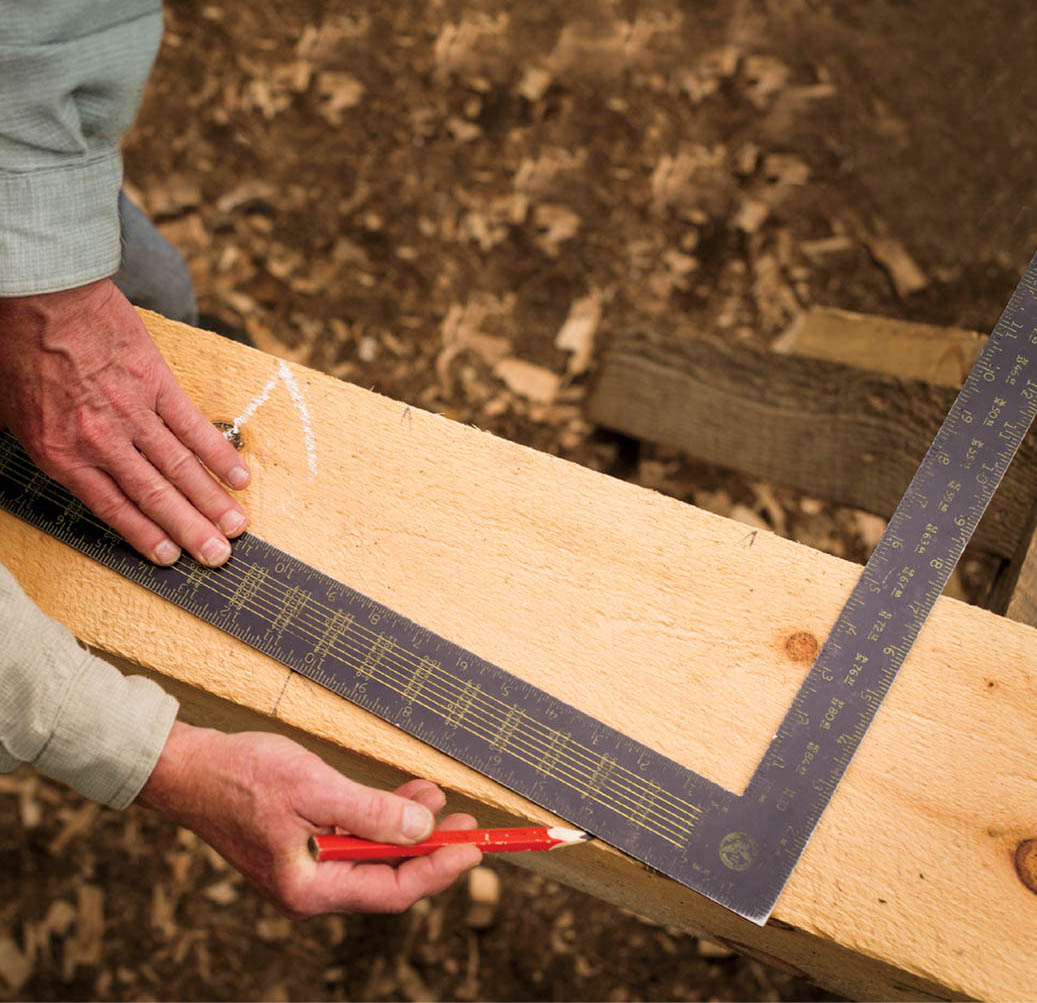
It’s a beautiful day to start your timber frame. Your timbers have been delivered and they’re neatly stacked and stickered. Your sturdy and faithful sawhorses stand ready. Set them as level to each other as possible; not only will you be more comfortable, but since you’ll tend to saw and drill plumb, even on sloped ground, this will help your accuracy.

This code will help you visualize each timber in the frame as you work and will also help identify it on raising day as you are hunting through the pile for the next piece to go up. Some pieces (braces, joists, rafters) are identical and interchangeable, but others will have subtle differences, such as fewer mortises, or faces with defects you’re trying to hide. The label on a timber indicates its location and orientation within the frame. (So, for example, a post in the second bent on wall B would be labeled “2B.”) Girts, plates, and ties are labeled according to their bent or bay, and their ends marked with the code of the piece they are going into (unless they are interchangeable).
It doesn’t matter what system you use as long as you’re consistent and can avoid duplication. You’ll label the timber with white chalk once you get it on the horses, then permanently mark it on the end grain with a felt marker or crayon after it is cut. Traditionally, carpenters marked the faces of timbers with a chisel or gouge and used a Roman numeral system with “flags” or other symbols attached to the numbers to further distinguish locations.

The labeling system you develop for your frame will keep you oriented while you’re working on individual timbers and will make the raising more efficient.
|
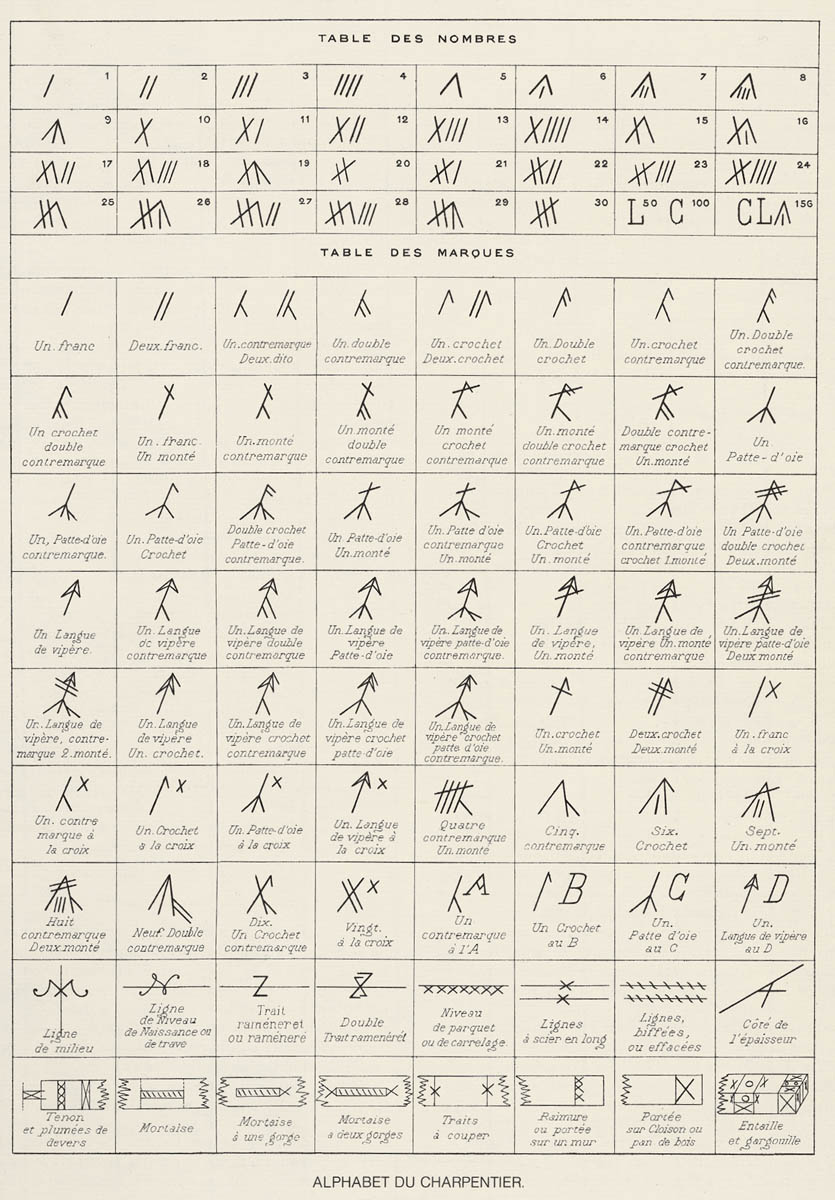
On many historic timber frames around the world, you’ll find carpenters’ marks made in chalk or incised into the timbers with chisels, gouges, or knives. Various systems were used; the French have used Roman numerals and other symbols to indicate orientation of timbers, location in the frame, waste to be cut, centerlines, and more. This system is still in use today.
Double-tap the image to open to fill the screen. Use the two-finger pinch-out method to zoom in. (These features are available on most e-readers.)
Shoulder-to-shoulder length is the critical dimension. Calculate and use it to lay out the timber, leaving enough length to add tenons later.
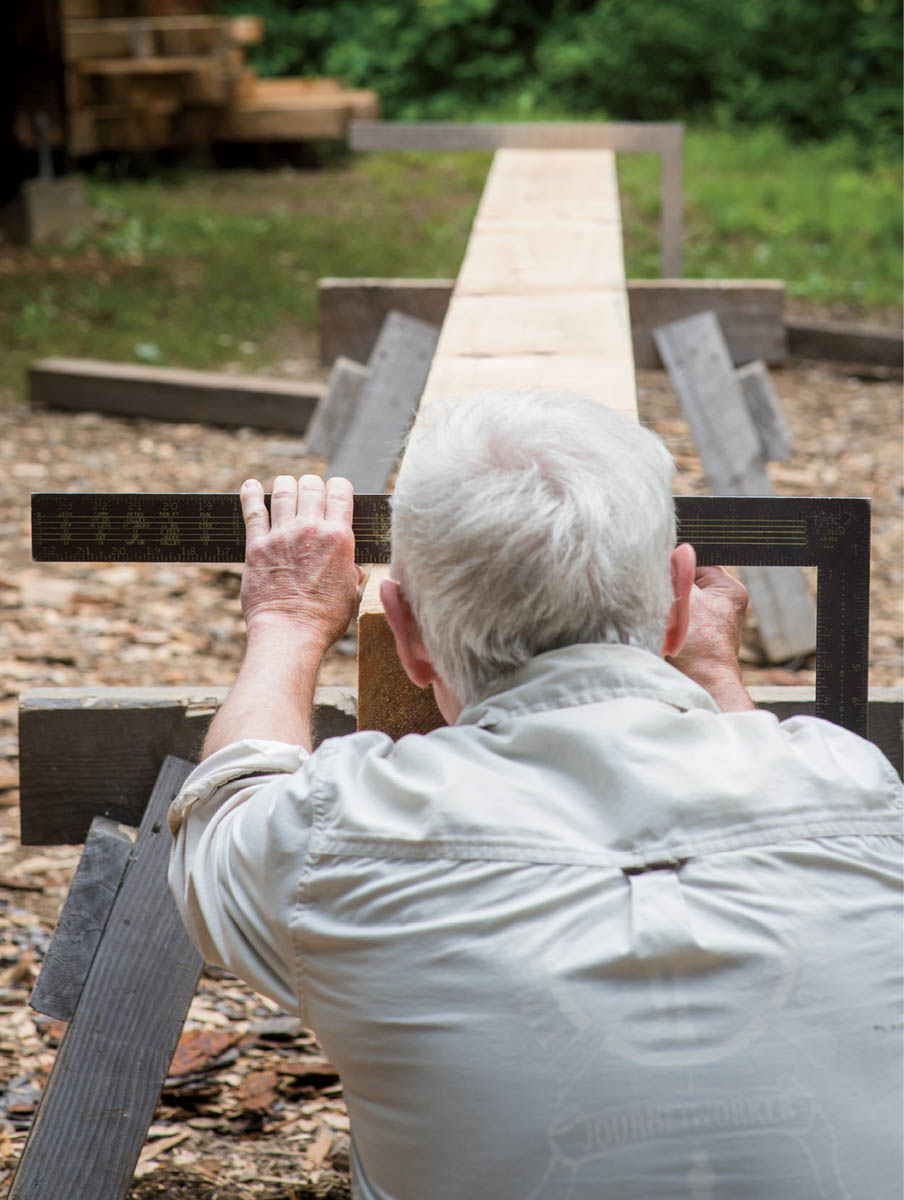
Reference faces are dimensional benchmarks. On horizontal members, the top surface is usually a reference face (floor level, roof surface, etc.). Outside faces are also usually reference faces. A corner post, for example, must have its two outside faces as the reference faces. For timbers where this top or outside face guideline is not applicable, choose some other way to keep track so that these reference faces are oriented the same way; we traditionally use the north and/or west faces.
Keep appearance in mind when selecting reference faces: they are often hidden, so the best-looking faces are often not reference faces. Faces with staining can be oriented so that they are hidden or covered. Timbers with large knots in the middle of the length are not as structurally sound as clearer pieces, so they could be used over a partition wall (framed with studs to help carry the load) or where the load is less, such as a gable end rafter. Timbers will usually check toward the face that’s closest to the pith. This is cosmetic and doesn’t affect the strength. If you find it objectionable, you can orient that face so that it’s hidden. This may seem like a lot to consider, but the point is that nothing is random. Without being obsessive (or developing “analysis paralysis”), you want to evaluate the timber for its best orientation.
Using reference faces (instead of centerlines) from which to measure joinery assures that all timbers on the outside of the building will have flush surfaces for the application of sheathing. This exercise also helps you visualize your “castle in the air” — it’s critical that you always know what your timber will look like in the finished frame in order to avoid mistakes. Once the reference faces are identified, you should be able to visualize which end of the timber is which.

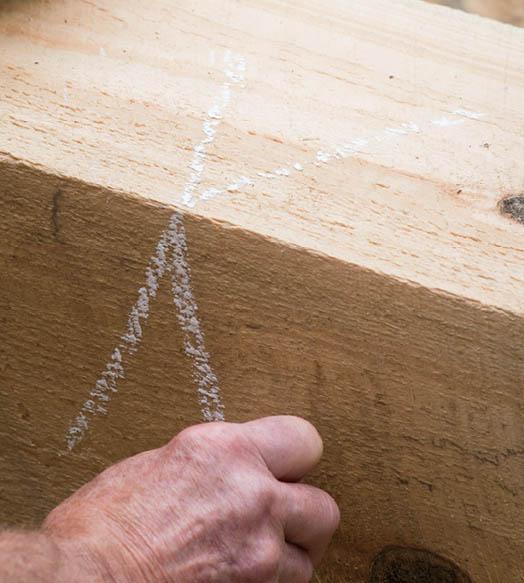
The arris where the two reference surfaces meet is marked with a chalked V.
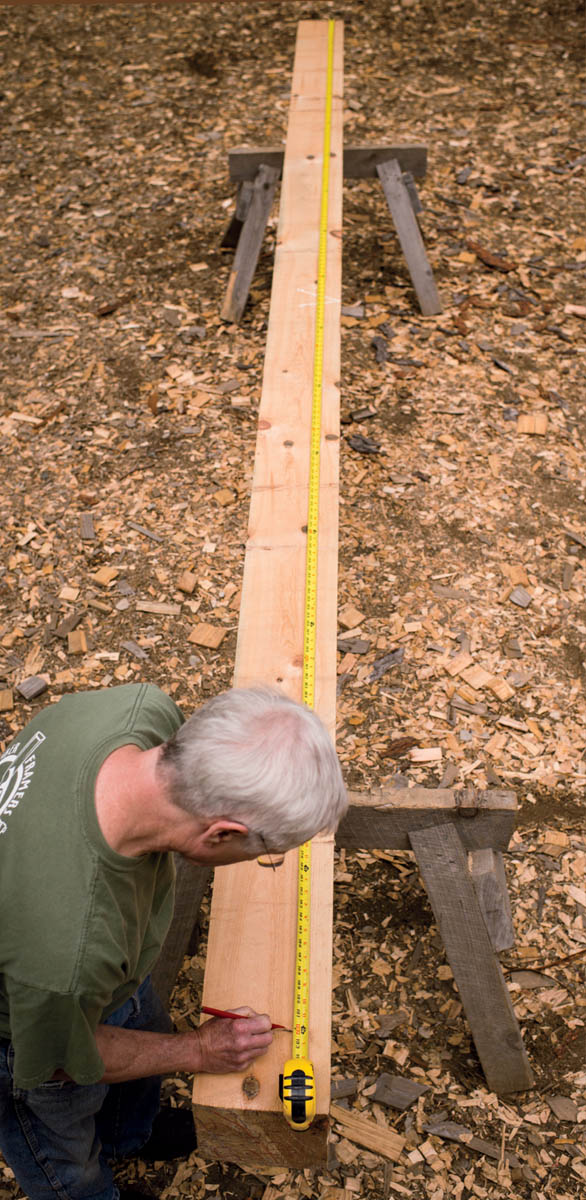
As an example, let’s lay out the mortise-and-tenon joint that joins the sills that we looked at in chapter 3. The procedures explained here will apply to other joints in the frame as well.

As explained in the section on square rule, the mortise in the long sill will have a housing to accept the reduced width of the short sill. This housing will be laid out 71⁄2 inches from the outside reference face.


Nothing is random. Any decision you make about the layout of the timber — which face is exposed, where the joinery occurs, how the piece is oriented — should have a reason behind it. If you find yourself saying, “It doesn’t matter,” think again. Be careful not to take it too far, however, and end up in “analysis paralysis.”
Planing your timbers for appearance after the joinery is cut could affect the final dimensions of the frame. Instead, you should plane visible reference faces before you do layout, remembering to keep adjacent faces square to each other as you plane. Reference faces that are going to be covered by sheathing or flooring don’t need to be planed, since they will be hidden. Non-reference faces can be planed after cutting without affecting dimensions, since the housings establishing the perfect-timber-within are well below the surface. The main purpose of the planing here is to get rid of saw and pencil marks and blemishes from shoe prints and the like and to create a smooth surface. Some people prefer the rough-sawn look and don’t plane at all, but these surfaces tend to pick up dust and cobwebs more readily. All timbers shown in this book are rough sawn.
The tenon layout on the short sill mirrors the mortise layout. If the end of the timber is fairly square, you may not need an end cut since the end of the tenon is buried in the mortise and not a critical length.


Keep in mind throughout the cutting process that some of your layout lines may disappear with the cutoff, so reestablish those lines if necessary on the new surface after each cut. There’s no need to lay out the reduction and the 2-inch relish to be cut off the tenon, nor the pin hole on the tenon, until the tenon cheeks are made.
It’s a good idea to work with another person, not just to help move timbers, but also to have him or her check your layout before cutting. Remember that parts of the joinery — tables (faces) of housings, cheeks and faces of tenons, sides of mortises — are usually parallel to the reference faces (exceptions might be parts of rafter and brace joints that come in at an angle). Keep this in mind when you’re transferring lines around the timber onto non-reference faces that are out of square, or when setting up boring tools to drill holes from these faces.
We’ll go deeper into the specifics of laying out each joint when we get to the frame details in chapter 6, but for now let’s discuss the general procedures for cutting. Joinery design (as we’ll see later) derives from an understanding of the anisotropic nature of wood. So, too, do techniques for cutting the joinery: the wood’s directional grain determines how it can be most efficiently cut and shaped and how it will resist the stresses imposed on it.
In the layout phase, you located your joinery to avoid most knots and other defects; this will make cutting much easier as you work the clear and predictable grain. The proper sequence of saw, drill, and chisel work generally involves severing the long wood fibers to a certain depth (crosscutting or boring), which then allows you to easily split out (rip) parallel to the grain, thus removing a large hunk of wood to that depth. This technique is similar for both mortises and tenons.
When cutting mortises, “sawr it, score it, and bore it.” Saw any housing shoulders first, then score the sides of the mortise before boring it out. This will prevent tearout from the bit traveling onto a visible surface. Bore the end holes of the mortise before boring out the wood in between and chiseling out the waste. If the mortise is near the end of the timber, finish the mortise before cutting off the end so that as you work the mortise you avoid blowing out the end grain.

The finished sill mortise and housing (above) is started by cutting the housing shoulder (see photo in step 1, below).


Cut or score a shoulder line before boring a mortise so that the boring bit doesn’t tear grain out over the layout line. Finish a mortise completely before removing the housing so you have a good surface to reference from for depth.

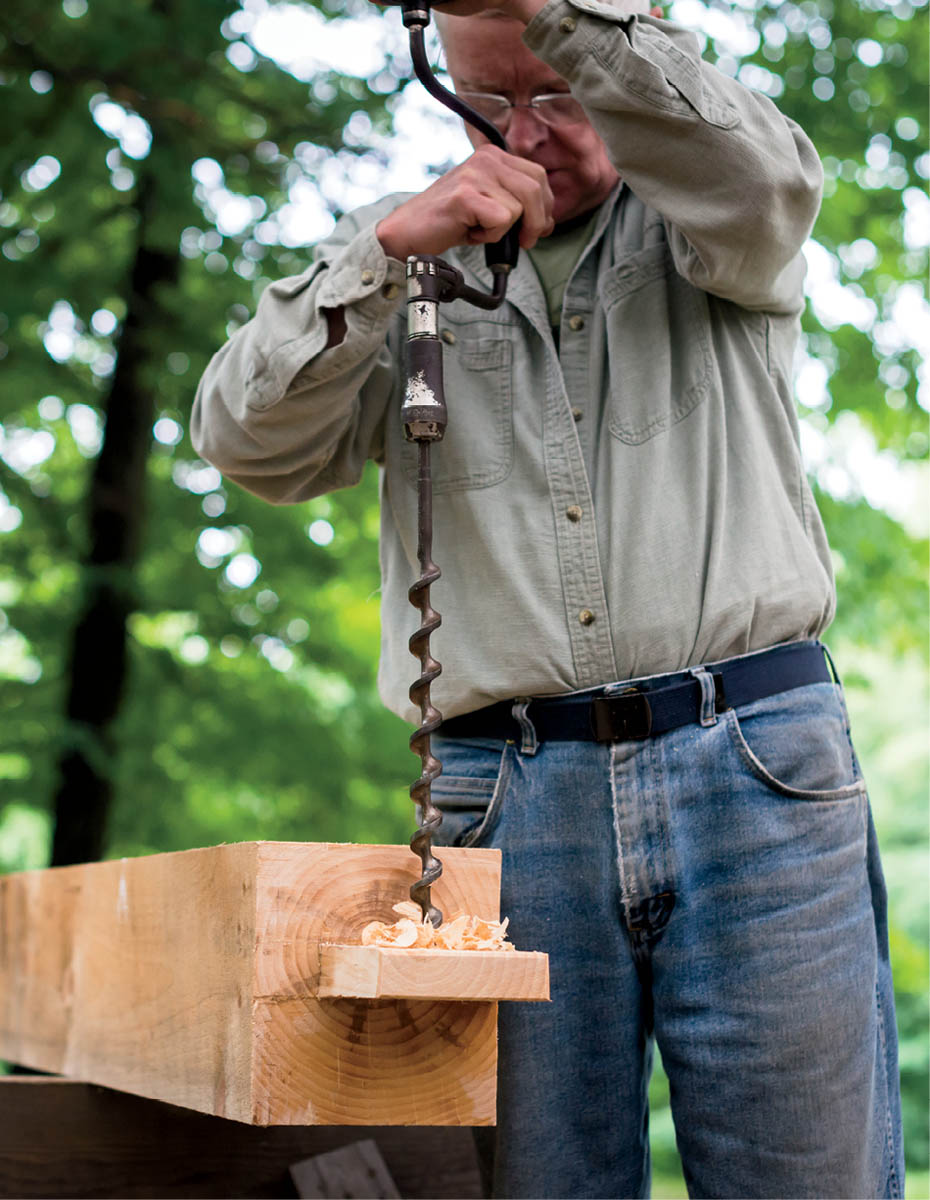
Bore the end holes of the mortise first (3b), setting the depth by marking the drill bit with tape (if using a portable drill). If you’re using a boring machine or chain mortiser, you need to lower the bit to the surface to set the depth stop, making sure to add the length of the feed screw or curve of the chain bar to get full diameter at the proper depth. You will need to add the housing depth to the nominal depth of the mortise to determine the actual depth to set your boring tool to. Keep in mind that the housings are not necessarily 1⁄2 inch deep; they will differ depending on how oversized or undersized your timber is. For example, if this sill timber is 81⁄4 inches wide instead of a nominal 8 inches, the housing will be framed 71⁄2 inches from the outside reference face, so the housing will be 3⁄4 inch deep as measured from the inside (non-reference) face. Thus the mortise will be bored 53⁄4 inches deep (slightly more is okay, but no less).
Bore holes in between the end holes, but don’t overlap holes, as this could cause the bit to wander. You can overlap holes if you are using a chain mortiser, though. Because of the curve of the chain, you may want to add 1⁄2 to 3⁄4 inch to the depth so you don’t need to clean up the bottom.


The mortise is cut first and finished before the housing because you need a good surface to bear on when checking its depth and squareness and to rest your boring tool on. If the mortise is at the end of the timber, as in our corner sill joint, finish the mortise completely before cutting off the end of the timber and creating the housing. This will allow you to work the mortise with less chance of blowing out the relish.


Pin holes get drilled all the way through from the reference face; through mortises get drilled halfway from opposite faces.
Novices can often make a better cut with a handsaw than a portable circular saw; because the former is slower, you have more time to correct any error as you go. Start at the arris on the far side of the timber, and place the saw just to the waste side of the pencil line. Saw teeth are bent slightly, or set, outward from the body, alternating left and right, so that the kerf the saw makes is wider than the body of the saw, thus allowing the saw to drop through the cut. You want the teeth that are angled toward the pencil line to remove about half of it, so most of the saw should be outside the line.
Draw backward lightly on the saw to get it started at the corner (the arris), using your thumb as a fence to keep the saw from jumping around (A). By starting at the corner, you remove only a small amount of wood, and the cutting is easy as you get the kerf started. Don’t try to cut across the whole face of the piece at the beginning.
As you cut, lower the handle of the saw to cut at an angle across the top face without going down the far side, which you can’t see (B). When you reach the upper corner nearer you, keep to the line you have just made across the top as you saw down the vertical line facing you. Once you reach the bottom of the timber in the front, you will have made half the desired cut. To continue cutting down the back vertical line, stop and go around to the other side of the timber in order to watch that line as you cut it (C). The kerf you made on the first side will help guide your saw.
Simply by seeing what you are doing and paying attention, you can cut very accurately instead of hoping that the saw is cutting true on the blind side. Of course, all this advice assumes that your saw is correctly sharpened and set.


Don’t cut a line you can’t see.
Work one side of the tenon at a time. You’ll start shaping the tenon by first crosscutting the shoulder line down to the cheek using a saw. This is a critical cut, so take your time (perfect is good enough).

Set the depth of the circular saw to 1⁄16 inch above the layout line and make multiple kerfs about 1⁄2 inch apart. If you’re on a non-reference face, be sure to set the saw to the shallowest depth, since the depth will vary across the timber if the face is not square.


I prefer the first method if the wood is clear and straight-grained (planned for during layout): Place the chisel bevel-side-down at an angle across a corner on the end grain of the waste to be removed. Since you’ve severed the grain at the shoulder, driving in the chisel with a mallet should remove a chunk of wood all the way to the shoulder cut (2a).

Now look at the way the grain slopes. If it rises toward the shoulder, you can be pretty confident that you can continue to remove material without splitting down into the tenon. If the grain goes down, you’ll have to be more careful and switch directions, or go cross-grain, or start paring as you get close to the tenon cheek. As you remove large pieces, go halfway down to the cheek line each time; when you get to within 1⁄8 inch of the line, you can start paring.
Orient your chisel according to what you want to accomplish with it: To remove a large amount of material, go bevel-down and strike the chisel with your mallet (2b). Placing the bevel down causes the chisel to rise up in the cut and keeps it from diving down into the material. But when it comes time to pare or finely trim the surface, flip the chisel over so its flat bottom acts as a guide.

Both the tenon and the mortise should be shaped to be parallel with the grain of their respective members.
Be careful not to pare all the way across the tenon from just one side; you could tear out the other side and lose your cheek line. Always work from the edges in toward the center. When paring, keep both hands behind the cutting edge by gripping the blade with the forward hand and using it to brace against the side of the timber as you steer and push with the rear hand on the end of the handle. For finer shavings, try making a slicing cut by pivoting the chisel in your forward hand as you push with the rear hand. For more aggressive action (but less control), move both hands to the end of the handle. Avoid letting your forward hand move out in front to hold the timber — if you’re having to push so hard that the timber is moving, you probably need to sharpen your chisel.

Besides using a chisel, you can also pare tenon cheeks with a hand plane (though it must be a rabbet plane to work right up to a tenon shoulder) or with a slick if it’s a very large tenon or a scarf joint.

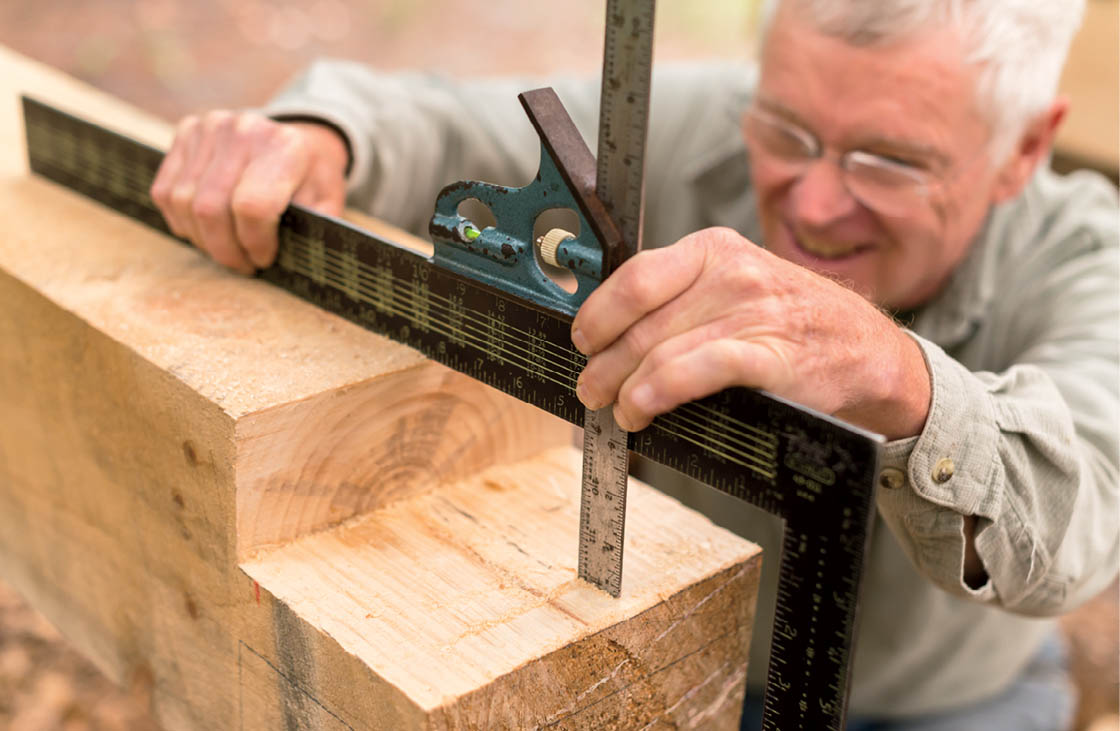


Carry this reduction back far enough to clear the housing on the widest mating timber. Although these housings are nominally 1⁄2 inch deep, they could be as much as 3⁄4 or 1 inch, depending on how much variation your sawyer has provided. To be safe, we usually make these reductions, on all tenoned members, 11⁄2 inches back from the shoulder.
After coming out the 11⁄2 inches, lay out a 45-degree bevel to the surface of the timber rather than making a square notch. You could also make this a gradual curve, using an adze and spokeshave. Carry these lines around to the opposite side of the tenon. Use a rip saw to cut the reduction (6b), and then chisel out the remaining triangle of wood to create the 45-degree bevel (6c).


Note that this reduction only occurs on tenoned pieces going into non-reference faces that have housings cut to meet the perfect-timber-within. Post bottoms, for example, don’t get reduced because they are resting on reference faces (top of sill) that represent the perfect timber. An exception would be where girts or braces enter a reference face with a similar member coming from the opposite side. Then we might house the tenoned end into the reference face for aesthetics to make it match the other side. (See Rules of Thumb for Joinery Design in Square Rule.)

Cut tenons a bit (1/8 inch) shorter than nominal — or cut mortises that much deeper — to avoid having the tenon bottom out.
Lightly chamfer the end to reduce the danger of a chip splitting off as it enters the mortise (8b).


The pin hole on a tenon is offset about 1⁄8 inch toward the shoulder to pull the joint tight as the pin is driven.
How tight should a finished mortise and tenon joint be? Both the mortise and tenon will shrink somewhat, but it’s hard to predict how much or if it will be the same amount. Too tight a fit can cause a joint to split during assembly, raising, or seasoning; too loose is, well, sloppy, and can result in stepped surfaces where timbers should be flush. However, plenty of clearance is helpful and sometimes essential during raising when many joints must come together at once. You should strive for a perfect, sliding fit, at least over the last inch or two as the joint is pulled together.
Clean up your cut timber by erasing any pencil marks on surfaces that will be visible, or by planing. Label the timber on the end grain and lightly chamfer its edges with a block plane before taking it to the “done” pile. This last step will help prevent splinters when carrying the timbers.
Some timber framers drawbore, offsetting the holes in the mortise and tenon slightly to cause the joint to draw up tight. Others avoid drawboring, as it requires a bit more work and thinking. It’s well established by tradition, however, and it intrigues many people new to the craft. Drawboring causes the pin to bend slightly as it goes through the tenon, pulling the joint together snugly as it is driven through. As the timbers shrink, the pin then acts as a spring to keep the joint tight. Assemblies pulled together with come-alongs and then drilled without drawboring will never get any tighter, and the joints are free to open up as the mortised piece shrinks.
Pins for any kind of drawboring are heavily tapered on one end so the point can catch the far-side hole after diversion by the offset hole in the tenon. While some pin holes are blind for aesthetic or other reasons, most are bored right through to allow the tapered end of a pin to be driven far enough to yield full or nearly full diameter at the exit side.
Sometimes a drawbored pin hole should be offset in two directions, as with sloped members like braces and rafters. One way to think about it is to visualize which way you want the mortised timber to be drawn, and then offset the hole in the tenon in that direction. Measure for the pin layout using the framing square; traditionally, pin holes in square rule layout are centered 11/2 or 2 inches from the shoulder of the joint.
The amount of offset for the drawbore in softwoods should be a heavy 1/8 inch for 3/4-inch pins, and a light 1/8 inch for 1-inch pins, which can’t bend as much. Tenons with lots of relish beyond the pin hole (more than 3 inches) can be drawbored more than shorter tenons. Hardwoods should be drawbored a bit less than softwoods. Most novices tend to overdo the offset, so test-fit a few joints at the start of your project to see how you’re doing.
During assembly, be sure to look through each joint’s pin hole to see if the holes are offset just slightly, and in the right direction. If less than two-thirds of the tenon’s hole is visible, you’ll need to elongate it a bit with a long 1/4-inch chisel, or put a very long, sharp point on the pin. If less than half the hole is visible, or if you drawbored in the wrong direction, it’s best to take the joint apart, glue and plug the hole in the tenon, and re-drill.
|

Timber frame designers follow some key basic principles when designing joinery. In this book, much of the design work has been done for you (for example, lengths of tenons are given in the instructional text in chapter 6). However, it is important to understand the bigger picture of how a frame comes together, and these rules may come in handy if you choose to make variations on the core frame.


These pegs will hit each other because they are centered on the same size tenon. To avoid this, offset the pegs 3⁄4 inch in opposite directions.