-
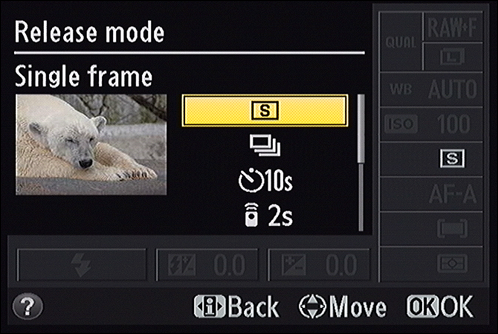
Confirm the camera is ready and check shooting options.
Make sure the lens cap is off and out of the way, the camera and any powered attachments are on, you’re in a still photography mode (as opposed to movie), you’ve set the correct shooting mode, and the focus mode is set correctly. Nothing hurts more than not realizing the camera was set to manual focus mode after shooting 20-30 photos.
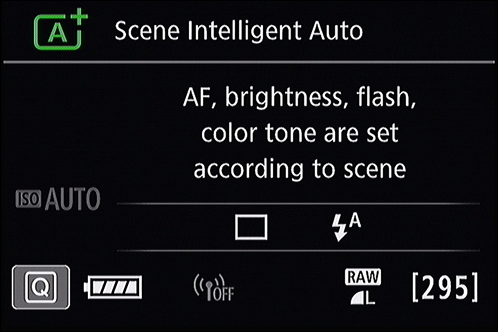
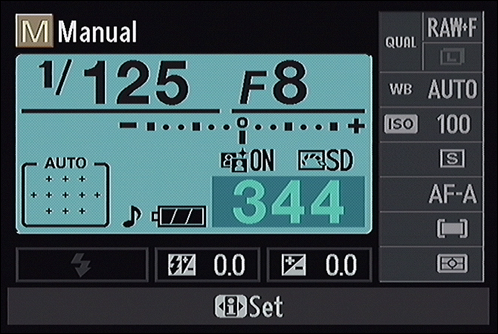
Double-check settings for image quality (see Figure 5-27), exposure controls, color space, noise reduction, red-eye reduction, image review, creative styles, and so forth. Your specific checklist depends on your camera.
- Canon users should check Picture Style, Auto Lighting Optimizer, Creative Filters, and the like.
- Nikon users should look at Picture Control, Auto Distortion Control, Active D-Lighting, and so forth.
- Sony users should check settings like Creative Style, Picture Effect, and D-Range Optimizer.
These options are dependent on the shooting mode you're in. The more automatic modes keep you from changing certain settings.
After completing this step, you need not obsessively check these options before every photo. This step is to make sure the camera is set up the way you want before continuing.
 Unless you’re engaging in tripod-mounted landscape, macro, or other studio-type photography, it will take longer for you to read through the next few steps than it will to actually accomplish them. That’s because composing, focusing, and metering can take place almost simultaneously.
-
Compose the scene.
Aim the camera at the subject and place it in the frame of the viewfinder or monitor. If desired, zoom in or out to alter the composition. If you’re using a prime lens, you can move yourself closer to or farther away from the subject to change how the photo is composed.
When shooting certain types of shots (animals, people, or action shots), this step may only take a moment. When you’re setting up a portrait or shooting macros in a studio, you’ll spend more time perfecting the scene.
If things are totally out of focus and impossible to see, quickly press the shutter button halfway to autofocus or turn the focus ring on the lens to manually focus. Otherwise, you'll be looking at blobs and vague shapes. You need to see your subject with some clarity to compose, even if you have to refocus later.
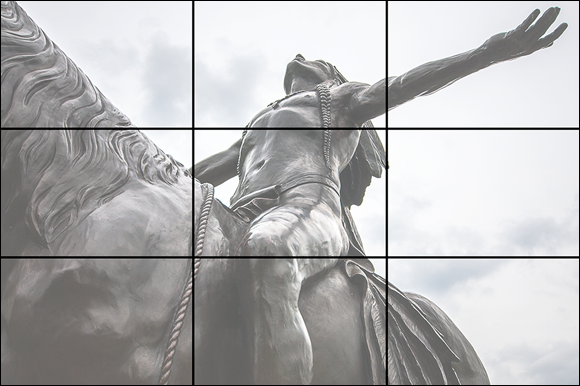
There's a tried and true framing rule you should know about. It's called the Rule of Thirds. The rule suggests that you divide the frame vertically and horizontally into thirds — like a Tic-Tac-Toe board (see Figure 5-28). The idea is to place dominant vertical or horizontal lines in the scene (like building edges, the horizon, people, and so forth) on the dividing lines. You should place important objects at the intersection of those lines or within them. You can also work along the diagonals.
 An advantage of using the Rule of Thirds is being able to align or balance objects in the scene against each other and the empty space. Balancing a scene involves weighing things in the frame (take size, shape, color, brightness, texture, and other factors into account) and positioning them so that most things average out. You can train your eye to see balance well enough that it becomes more of a gut feeling than a conscious act. You'll start to frame photos with balance because they “just feel right.”
Do you have to use the Rule of Thirds? No. Should you? Mostly. Although there are always exceptions, humans find it more visually pleasing when things are arranged this way.
-
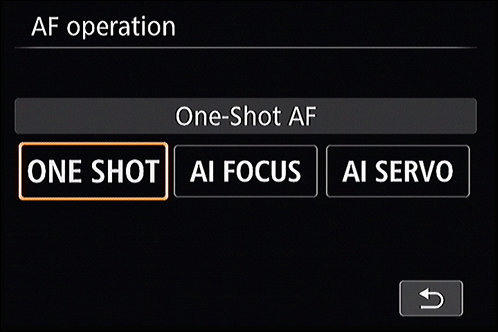
Focus.
If using autofocus, press the shutter button halfway to establish autofocus. Don't stab at the button — press it smoothly. Practice a bit to know what halfway feels like, and how much more pressure causes the camera to take a photo. If you’re focusing manually, use the focus ring.
If you’re using Live View, focus according to the procedures for your camera. That may involve moving a focusing frame over the subject you want to be in focus. If using Live View and a tripod, you can zoom in and check focus very precisely. I use this technique all the time when shooting close-ups in my studio.
Metering also occurs when you press the shutter button halfway. The camera quickly evaluates the brightness of the scene and calculates the correct exposure to produce a good photo. If desired, enter exposure correction now. If you’re in manual mode, make changes to the exposure controls now. Watch the exposure index to see what affect they have on the exposure (more on this in Book 3, Chapter 1).
When you’ve focused and the exposure looks good, you may have time to quickly adjust your aim. At times, you won’t have this luxury. If you only get one take at it, make it a good one. However, many types of photography give you plenty of time to compose the scene, focus and meter, adjust exposure settings, think about it for a while, fine-tune the focus, and then readjust the composition of the scene.
Here are some thoughts to keep in mind when focusing and metering:
- You may be able to press a different button than the shutter button to autofocus. This reduces the chances of accidentally taking photos when focusing. You may also be able to change button assignments.
- In low light, you may have an AF-Assist beam shine out from the camera or flash to help the camera lock onto the target. If this bothers you, you may be able to disable it. Other cameras use a pulse from the built-in flash to help autofocus.
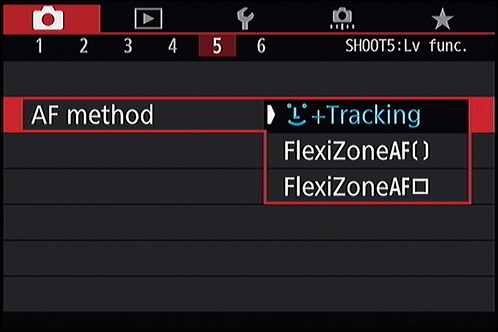
- If you're using autofocus and there is a problem focusing on the subject you want, change focusing modes or focus points if necessary.
- If you’re using AE lock, you’ll compose the scene differently than normal. Center your subject, focus, and then press and hold the AE Lock button. While holding the AE Lock button down, recompose and take the photo.
-
Reality check.
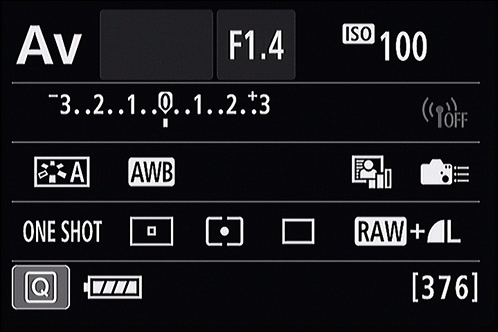
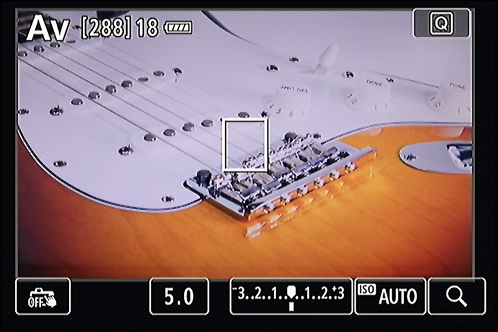
Check focus indicators, exposure settings, and, if possible, depth of field. This may take only a fraction of a second. Get used to working quickly. For example, if you see the ISO spiking and don’t want a noisy photo, you may want to make changes before you take the shot. By the same token, if you’re photographing people and notice that the shutter speed is so low that they will be blurred, change it. See Figure 5-29.
-
Press the shutter button fully to take the photo.
If you released the shutter button earlier, press it halfway again to focus and meter. When focus is confirmed, press the shutter button fully to take the shot.
-
Review the photo.
I like reviewing every photo unless the action is fast and furious. Then I review the first few and glance at the rest until there is a break in the action. At a minimum, you should periodically review sample shots to make sure you're not wasting your time.
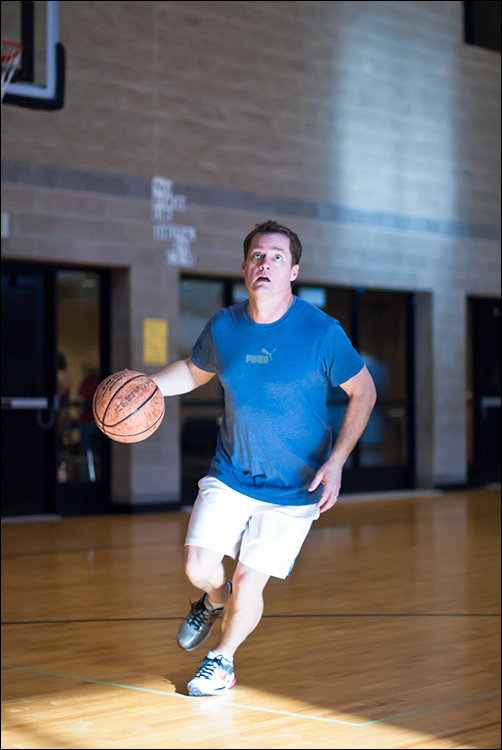
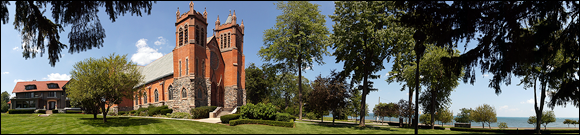
Check to see that photos are in focus, well-lit, have good color, and framed the way you want them to be. If necessary, use the zoom in or zoom out buttons in Playback mode to look closely at the photo, and the left, right, up, or down buttons to pan. This is also a good time to look at the histogram. Figure 5-30 shows the final shot.
-
Correct problems.
Correcting problems is an important step. If you identify problems when reviewing photos, make changes to correct them.
You're looking to solve these general issues:
- Composition: Level, even, or as planned.
- Exposure: Good, with details in bright and dark areas, or as intended. Check metering mode if necessary to get a better reading of the scene.
- Focus: Sharp, unless you're after a special effect.
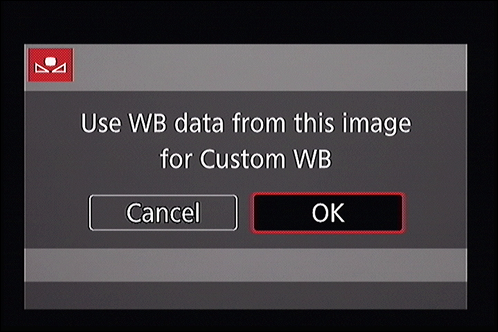
- Color: Good, with correct white balance.
- Subject-related: Eyes open, looking at the camera or where you intend.
-
Rinse and repeat.
Depending on what you’re shooting, you may be able to quickly cycle back to Step 2 and keep at it. If you want to make dramatic changes to your setup, such as changing lenses, trying different shooting modes, or changing other major settings, return to the earlier section “Setting Up Your Camera” and reconfigure the camera.
 Planning for success
 Formatting erases photos and cleans the card. Make sure that you first transfer photos (see Book 5,


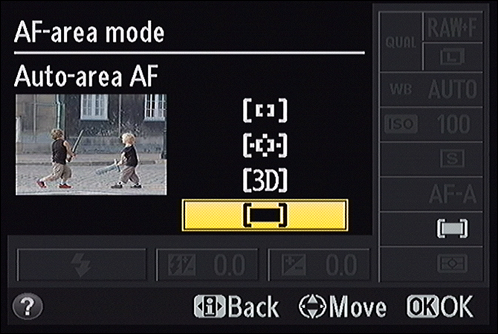
 More expensive cameras have additional AF point selection options. The Canon 5D Mark III professional-level full-frame camera has no fewer than six AF area selection modes. They are: Single-point Spot AF (Manual selection), Spot AF (Manual selection), AF point expansion (Manual selection, 4 surrounding points), AF point expansion (Manual selection, 8 surrounding points), Zone AF (Manual selection of zone), and 61-point automatic selection AF.