

When I first began making my own soups there was a lot of trial and error. If there were mistakes to be made, I probably made them. From the big disasters (almost burning down the kitchen) to the smaller mistakes (forgetting to take out the bay leaf before blending) I have learned quite a bit along the way. So this chapter is dedicated to the Stephen of the past – it includes all the tips, tricks and staples I wish I had known before I started. I have made the errors, so you don’t have to.
RECIPE LIST
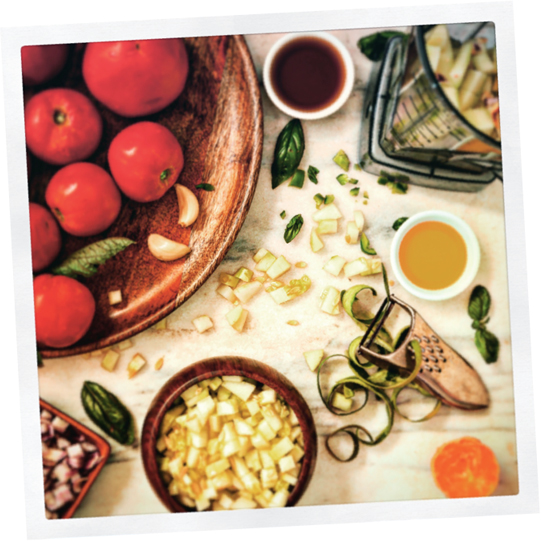
One of the great things about making soup is that you don’t need any special equipment, so you’ll probably already have everything you need to get started. If you do need to buy a piece of equipment, such as a liquidiser or blender, buy the best you can afford, because this will save you time and effort during soup preparation. In this section I have put together all the ‘essentials’ that will help you recreate my soup recipes really easily.
I like to have a small paring knife and a larger knife (for chopping) ready to hand. Buy the best knives you can afford and keep them as sharp as possible. Blunt knives slip off the vegetables easily and can cause accidents. Take care of your knives by washing them carefully in soapy water; never put them in the dishwasher as it blunts them and it’s a struggle to get them really sharp again. Remember always to chop and cut vegetables at a slant, moving away from your fingers.

Ideally, use a flexible plastic chopping board. They don’t absorb smells, can go in the dishwasher and you can fold the board at the edge after chopping vegetables and tip them directly into the pan, avoiding spills. Wooden boards are great but do need a lot of care and glass boards tend to blunt knives very quickly.
You don’t always need to peel the vegetables for our soups, but when you do, use a peeler that you’re comfortable with. They come in many shapes and sizes, from side peelers to front peelers, serrated blades and easy-grip handles. We have ended up with several at home because each of us has our own particular favourite.
Digital cooking scales will provide the most sensitive weighing mechanism, allowing you to measure accurately to within 1 g or 1 oz.
Measuring spoons are really handy for measuring out ingredients in ‘teaspoons’ and ‘tablespoons’. A good-sized ladle is also invaluable for easily dishing up generous helpings of soup. A long stirring spoon made of either metal or silicone would be handy, but avoid using wooden spoons as they can absorb flavours, which can then be accidentally transferred from one soup to another.
Use glass or clear plastic jugs so that you can easily see the liquid level. You will need jugs with a minimum capacity of 1 litre (2 pints).
The more powerful the blender, the quicker and more smoothly it will blend the soups. I use a 700W hand blender that has seen me through the development of a multitude of textures, blends and flavours. (Read more about blenders and blending techniques here.)
Any counter-top or jar blender will happily do the job of blending the soups but you do have less control over the texture than you would with a hand blender.
An infuser or muslin is necessary for any recipes where herbs or spices have to be put into the soup during the cooking process and then removed before blending or serving.
The main requirement here is a pan with a heavy-bottomed base that will sit firmly and evenly on the hob. I avoid aluminium as I find it can react with the food and therefore slightly change the taste. The best options are stainless-steel pans as they work well on all types of hobs.
The Soupologie soups all freeze really well, so if you do want to cook and store, simply decant any excess soup that you’ve made into sturdy freezer bags with a good seal (and remember to label them with the recipe name and date!). The soups can be frozen and stored for around three months, ready to defrost and use at any time. When you’re ready to use some frozen soup, defrost it slowly in the fridge over a period of 24 hours, rather than zapping it in the microwave. The process of freezing breaks down the cell walls of the vegetables, with the result that when you defrost the soups, the water content from within the vegetables will have separated. By defrosting them slowly, this separation is less apparent and the soups will simply need a good stir when you are heating them up.
Certain skills and techniques that I have honed over the years have become an integral part of my recipes, which is why I want to share them with you here. None of them are complicated or time-consuming.
Caramelising is the technique by which vegetables such as onions are slowly cooked in a little oil to enable all the natural sugars from the onions to be released. The onions should be peeled and chopped, but not too finely. Heat the oil in the pan before adding the onions and then keep the heat on medium to low so that the onions sauté gently without burning. As the sugars are released, the onions will change from being opaque in colour to translucent. At this point you need to stir the onions around well, but gently, picking up any brown deposits at the bottom of the pan (these are the caramelised natural sugars). Keep stirring well to avoid burning. The colour of the onions will change from white to golden brown, at which point they are done.
If the onions are under-caramelised, they won’t have released as much sugar and the soup will not blend as well as it should; it may also have a slightly ‘raw onion’ taste to it. If the onions are over-caramelised, they will create a bitter taste – like burnt sugar – and the colour will be dark brown, which will obviously affect the colour of the soup. It’s difficult to suggest a precise time for the caramelisation process, as it depends on the strength of your hob, the type of pan you are using, the amount of onions, and so on, but it is likely to be around 8–10 minutes.

“If ever I’m asked to supply a head shot of myself, no-one ever knows how close I’ve come to needing my eyebrows and eyelashes photoshopped into the picture thanks to a near-disaster in the kitchen. Unfortunately I had left oil heating in a pan which I then forgot about. Trust me, when you watch actors on TV and in the movies saving all and sundry amid black smoke and flames, it’s not like that in real life. In a split second, the entire kitchen was choking and overwhelmed. So a word of warning: it’s not just chip pans that go up in flames; once you’ve got heat under some oil, never leave it unattended.”
I’m a bit passionate about blending! It’s the stage in soup-making where you can release the natural creaminess from the vegetables and create a velvety smooth soup. When we do tastings in stores, people often remark that they can’t believe my soups don’t have cream in them. I never use cream and, as I explain, it’s all about the blend. The starting point is that the vegetables must be soft enough to blend. If you can cut through them easily with your stirring spoon, they are ready to be blended. I like to use a stick blender as it means I can blend the soup in the pan without having to transfer it to a jug, and I can move the blender around the pan, clockwise and anti-clockwise, ensuring that every part of the soup is reached.
The time it takes to blend a soup will vary according to the power of the blender, the volume of soup in the pan and the type of vegetable that’s being blended. For example, a soup with a high proportion of celery, leeks or kale will be tougher to blend than one with potatoes or broccoli. To achieve a really smooth soup using a 700W hand blender, you will need to blend for around five minutes, then cook the soup for a few more minutes before blending again. By partially blending first, you will be breaking down the vegetables into small particles, so they will soften more quickly and break up more easily in the second round of blending. If you prefer more texture to your soups, reduce the blending time to suit your taste.

The general rule is that the finer you chop the vegetables, the quicker they will cook. The most important rule, however, is that all the vegetables should be chopped to more or less the same size so that they cook evenly.
You’ll find that in the instructions to all my recipes I recommend partially covering the pan with the lid. This speeds up the cooking process and also decreases the amount of evaporation that occurs during the cooking process, ensuring that the soups do not become too thick or dried out.
There are some ingredients that I always like to use, some that just make life easier and others that give the soups a higher nutritional value. All of the ingredients listed here have a permanent home in my store cupboard.
This is a pretty, pink salt that has a slightly more subtle flavour than sea salt and ordinary table salt. I like using it in my recipes but I leave the choice entirely up to you, as you need to season to taste. I would caution, though, that despite being rock salt and having more minerals in it than table salt, like all salts, it should be used sparingly.

My pepper mill is never far away. I tend to leave seasoning my soups until the very end: if you season too early, you don’t allow for the natural evaporation that occurs as the soup is cooking and you can end up with a more intense seasoning than you anticipated. Season to taste with both salt and pepper once the soup is blended, and add them gradually, in small amounts. It is difficult to correct seasoning if you overdo it.
My vegan broth recipe here can be used as a stock for all the soup recipes in this book that need ‘vegetable stock’. Alternatively, you can buy stock in many forms, from fresh to frozen, powdered or cubed, or with certain health features, such as reduced salt, gluten-free, organic ingredients and so on. If you are buying stock, choose the healthiest one available, with the least amount of salt and preservatives (watch out particularly for monosodium glutamate). Some people may prefer to use a meat stock. I always use a vegetable stock with a vegetable soup as I feel that the vegetables should not be overwhelmed by a stock – the idea is to subtly enhance the flavour profile, not drown it out. The use of stock at all is entirely optional; you may prefer to use plain water and just let the natural flavours of the vegetables shine through.

Rapeseed oil used to be demonised, with good reason, because it contained large amounts of toxic erucic acid. In the 1950s it was banned for human consumption by the American FDA. However, a cleaned-up version of rapeseed oil emerged in the 1980s and it has become steadily more popular, as it is low in saturated fats and has a higher smoking point than olive oil, making it good for frying and sautéing. It is now grown extensively in many countries and there is also a wonderful assortment of artisanal cold-pressed varieties on offer. I don’t think it’s necessary to use an expensive cold-pressed oil for the soups, but I do prefer rapeseed over olive oil in this instance, as I find that olive oil leaves behind a taste that, for me, interferes with the flavour of the vegetables.
I always like to have a selection of dried herbs for those occasions when fresh ones aren’t readily available. You can substitute fresh herbs for dried ones, but remember that dried herbs are up to four times more intense than fresh ones, so you will need to adapt the quantity you use in the soups accordingly.
It is so useful to have canned tomatoes in your cupboard – just make sure that the brand you buy is free from added sugar and salt. Check labels and buy tomatoes that are sitting in their own natural juice, without additives.
A packet of wild rice in the cupboard means that you can always summon up a healthy meal. Wild rice is low in fat and has no cholesterol. It is very versatile and – for some people – it is the ultimate comfort food, making it a perfect addition to any of the soups.
From adzuki to cannellini, pinto to butterbeans, I always have a couple of tins of beans handy as they’re all rich in protein, high in fibre and full of minerals and vitamins. Having them in cans, rather than dried, means that they are readily available for adding to soups, casseroles or stews, giving them an immediate nutritional kick.
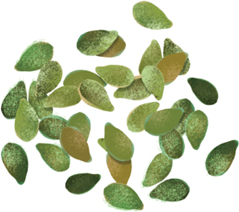
All of my soups taste delicious on their own, but sometimes it’s fun to add a topping for additional flavour or texture. Listed here and pictured (below) are some of my favourite soup toppings.
These delicious flakes add texture, fun and exotic elegance to most soups. For maximum absorption of their iron, eat with a soup that is rich in Vitamin C, such as our Mulligatawny or Spicy Tomato and Red Pepper. To toast your own, bake them in a low oven (150ºC/300ºF/Gas Mark 2) for 8–10 minutes until golden brown.
Amaranth is a wonderful ingredient for pumping up the protein content of your meal. You can buy it ready-popped from health-food shops or you can prepare your own. Simply heat a heavy-based frying pan – no oil needed – then add a couple of tablespoons of amaranth. It will begin to pop in a couple of seconds. Tip it into a cool dish immediately to prevent burning.
This is simple and delicious. Put some fresh or canned corn kernels on a baking tray, sprinkle with paprika and ground black pepper, and place in a hot oven (220ºC/425ºF/Gas Mark 7). Cook for around 15 minutes. Popped corn (popcorn) is a great soup toppper too.
Sesame seeds are a fantastic source of essential vitamins and minerals, so it’s no wonder they have been linked to anti-inflammatory properties as well as metabolic function and oral health. To toast for use as a topping, sprinkle into a dry pan and cook over a medium heat for 3–4 minutes.
Hemp seeds are full of plant protein, but a bit tough. However, if you buy them shelled, exposing the ‘heart’, you’ll find them really delicious. They are thought to be hunger suppressants, so a great choice if you are trying to shift a little weight.
These nutty seeds are high in zinc, so if you are suffering from a cold, they are an excellent option for helping your immune system. Buy them toasted or toast as for sesame seeds (above).
These tiny seeds pack a big punch when it comes to nutrition. As you sprinkle them onto the soup, they’ll quickly swell up and soften as they absorb the liquid. If you stir them in to thinner soups they will act as a great natural thickener.
High in Vitamin E, sunflower seeds are great for skin health. They are delicious to snack on and work perfectly sprinkled on our soups.
Flaxseeds really are considered a ‘souper’ food and they are currently the subject of clinical studies that aim to fully substantiate all their health benefits. To unlock their goodness, it is best to partially grind or crush them (or buy them already milled) so your body can digest them easily.
A cashew-cream swirl on top of a soup is a beautiful way to brighten up the dish. Soak the cashews overnight, then drain and blend with fresh water, a little garlic and a squeeze of lemon. Not only does it add a luxurious extra level to your soup, it also adds valuable protein.

Inspired by the classic miso soup, we believe tofu is a great topping option! Whether it is silken and soft, or oven-baked and chewy, tofu adds protein to make that bowl of soup a ‘souper-healthy’ meal.
Try sprouting your toppers! By soaking dry grains, seeds and nuts, you encourage enzymes in them to break down certain molecules that are difficult for the body to absorb. Once this has happened, you can dehydrate them again for a crunchy topping, knowing all the goodness is more accessible to your body. The other option is to continue to let them grow for a few days, and eat them as sprouts. Either way is delicious and nutritious.
Popped or boiled, quinoa has become incredibly popular because it is loaded with important nutrients from protein to minerals, such as manganese. It does not have a strong flavour but adds texture and nutritional value.
Crunchy rice crackers are a great gluten-free snack food. Why not use them as an alternative to croutons? Crumbled on top, they add bulk to the soup, helping keep you full and satisfied.
Walnuts, pecans, almonds, pistachios and peanuts can enhance the flavour of soups and will add a contrasting crunch. They are also full of healthy fats, fibre and protein. So go nutty and garnish your soups with them on a regular basis.
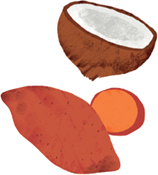
The wide variety of vegetables and fruits in this collection of soup recipes provides you with a glorious edible rainbow, which is why I have organised the soups into colour ranges, creating my very own soup palette. The medical community considers it important for us to eat a balanced diet consisting of different coloured whole foods so as to ensure our bodies absorb a good combination of essential vitamins and minerals. When thinking about those ‘five portions of fruit and vegetables a day’, as recommended by dietitians and governments around the globe, bear in mind that ideally this should be made up of five different types of fruit and vegetables. Most of my soup recipes will provide you with two of your five-a-day per serving; having two or more soups in a day will get you well on your way to helping your body receive many of the essential nutrients it needs.
As each soup has particular nutritional properties that form part of a healthy diet and lifestyle, I thought it would be helpful to create icons so that you can see at a glance the nutritional highlights of each individual soup (see below). These may help you decide which soup to cook when you are having difficulties making up your mind.

“Many of the vegetables that I use can be bought frozen and already prepared. I’m not averse to using frozen veg; in fact, it can often be more nutritious than so-called ‘fresh’ vegetables that have clocked up hundreds of air miles before landing on your supermarket shelf. If buying and using frozen veggies will encourage you to make these soups and eat more healthily, go for it.”

Cleansing
This icon appears next to all the soups that are in our cleansing plans because they contain a variety of different veggies that provide you with as wide a range of nutrients as possible. This includes lots of cruciferous veg (the cabbage family), B vitamins and fibre, as these may all help with the body’s natural detoxing process.

Fuller for longer
These soups are the best at filling you up and ensuring you don’t crash a few hours later. The magic comes from the combo of fibre, complex carbs, protein and healthy fats, which slows down digestion and absorption. This gives you that lovely comforting, long-lasting feeling of satiety.

Energising
These soups are great when you need a little boost. If you’re feeling tired or fatigued, look out for the recipes with this sign. These soups contain naturally occurring carbohydrates and sugars, in combination with fibre. This gives you a steady release of energy, avoiding blood-sugar spikes and falls – keeping you good to go, go, go!

Immune-boosting
These soups may be particularly helpful at the time of year when it seems that everyone has a sniffle or the first pang of a sore throat. You’ll find the selection of soups with this icon feature vegetables that are good sources of vitamins C, A and B6, zinc and folic acid, all of which can contribute to the normal function of the immune system and the body’s inflammatory responses.

Protein
This icon shows which soups contain a hit of protein. Unlike fat and carbohydrate, protein cannot be stored in the body, so it is very important you ensure you are eating enough.

Skin, hair and nails
Soups with this icon contain hydrating ingredients and lots of vitamins A, C or E. Vitamin C is important for collagen production and counteracting ageing free radicals. Vitamin A helps with water retention and hydration and Vitamin E is great for protecting and repairing your skin and hair.

Stress-busting
These soups contain nutrients such as potassium, magnesium and vitamins B and C. Potassium contributes to the normal function of the nervous system and blood pressure; Vitamin C is important for keeping adrenal glands, which are responsible for the production of stress hormones, healthy. Magnesium can help to relax muscles and reduce anxiety, and Vitamin B helps provide the body with energy after a period of stress.

All the rage for the past few years, broths are back in a big way – but why? What are they good for? The answer is ‘pretty much everything’, because they are so versatile that you can turn them into innumerable brilliant dishes once you know the hard part, which lies in getting those deep and delicious flavours. Here is my recipe for the perfect vegan broth, and a few of my favourite ways to honour and enrich it.
I believe sipping on broth throughout the day is far more comforting than tea or coffee. Hot and steaming, brimming with nutrients, it soothes and restores me. Sipping on it throughout the day is also a great way to satisfy your savoury cravings without snacking. You’ll see that I have recommended this as part of the souping plans.
My broth is very easy to turn into a delicious noodle soup. Simply add vegetables chopped into small matchsticks and a few rice noodles (sea spaghetti or kelp noodles make a great alternative). You could also include sesame seeds or tofu to boost the protein content.
You can use this broth as a substitute for stock in an indulgent risotto. The depth of flavour in the broth will automatically turn your risotto into a delicious dish. In fact, this broth is a great replacement for stock in many recipes.
Why not try a veggie take on the Provençal classic? Bake root vegetables and haricot beans in this broth with a dash of mustard, thyme and garlic cloves for a truly delightful meal.
Homemade veggie gravy often lacks the depth of the meatier varieties, due to the absence of meat juices, but the rich taste of this broth makes it a perfect base for a vegetable gravy. To make the gravy, caramelise some onions (see here), garlic and any herbs you might fancy, until you have a sticky paste. Slowly stir in some chickpea flour (a good gluten-free option) to make a roux, then gradually add the broth, little by little, stirring steadily until you reach the desired thickness.
This broth is such a useful thing to have on hand that it’s worth making more than you need and freezing some for later use. Allow the broth to cool, then pour into labelled, sealable freezer bags or rigid containers and freeze immediately. Remember to allow for expansion, because liquids increase in mass as they freeze. This broth can be stored for 2–3 months. To use, defrost the broth overnight in the fridge, then gently heat in a pan.


If you use this broth as vegetable stock for the recipes in this book, you’ll find that its rich umami flavour adds a depth that is rare in vegetarian food. The long ingredient list provides a wonderfully broad selection of nutrients, including vitamins A, B and C, while turmeric’s anti-inflammatory properties make this a soothing, restorative broth.
Makes: 2.5 litres
2 tbsp rapeseed oil
2 large onions, chopped
2 carrots, peeled and chopped
2 celery sticks, trimmed and chopped
1 leek, trimmed and chopped
3 garlic cloves, peeled and chopped
15 g (½ oz) fresh parsley, chopped
1 bay leaf
1 tsp fresh thyme
¼ tsp mustard powder
¼ tsp ground nutmeg
¼ tsp ground turmeric
1 tbsp tomato purée
½ tsp dried kombu flakes
15 g (½ oz) dried porcini mushrooms
Salt and freshly ground black pepper
Caramelise the onions in the oil until they are golden brown (see here).
Add the carrots, celery and leek and continue to cook on a low heat for 4–5 minutes.
Add the garlic and cook for a further 1–2 minutes, then add the parsley, bay leaf, thyme, mustard, nutmeg and turmeric.
Cook for 1–2 minutes. Add the tomato purée and stir well.
Add 2.5 litres (4½ pints) water and bring to the boil. Turn down the heat and simmer gently, partially covered, for 35–40 minutes, stirring occasionally.
Add the kombu flakes and the dried mushrooms, and continue to simmer, partially covered for another 15–20 minutes. Season to taste and take off the heat.
Line a sieve or colander with a muslin cloth, some kitchen paper or a coffee filter. Pour the soup through the lined sieve to leave a clear broth.
