Chapter 9
Applying Layer Styles

You can apply special effects to layers by using Photoshop’s built-in layer styles. With these styles, you can add shadows, glows, and 3-D appearances to your layers. Photoshop’s Styles panel enables you to easily apply predefined combinations of styles to your image or create your own styles.
Apply Multiple Styles to a Layer
Apply a Drop Shadow
You can apply a drop shadow to make a layer appear to float above the canvas. You can control many aspects of your drop shadow, including its opacity, distance, color, and angle. To make the shadow more subtle you can lower its opacity and distance from the layer to which it is applied.
A drop shadow can be added to text as well as objects in a layer. For more on working with text, see Chapter 12. For more about layers, see Chapter 8.
Apply a Drop Shadow
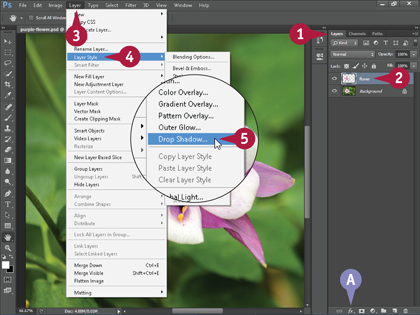
 Click the Layers tab to open the Layers panel.
If the Layers tab is hidden,you can click Window and then Layers to open the Layers panel.
 Click the layer to which you want to add the effect.
 Click Layer.
 Click Layer Style.
 Click Drop Shadow.
A You can also click the Add a Layer Style button ( ) and then choose Drop Shadow from the menu.
The Layer Style dialog box opens.
Note: Perform steps 6 to 11 if you want to enter your own settings. If you want to use the default settings, you can skip to step 12.
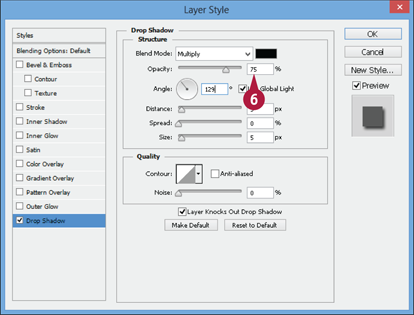
 Type an Opacity value from 0 to 100. The lower the number, the more transparent the shadow.

 Click the color swatch to select a shadow color.
Note: The default shadow color is black.
 Type an Angle value to specify in which direction the shadow is displaced.
 Type a Distance value to specify how far the shadow is displaced.
 Type a Spread value to specify the fuzziness of the shadow’s edge.
 Type a Size value to specify the size of the shadow’s edge.
You can also drag a slider ( ) to change the Distance, Spread, and Size values.
 Click OK.
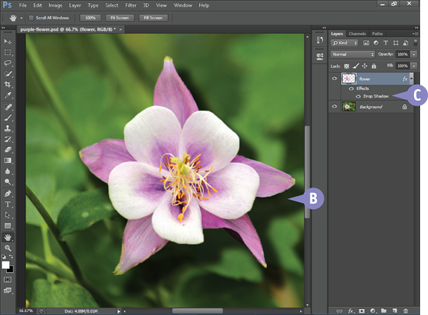
B Photoshop creates a shadow in back of the selected layer.
C Photoshop displays the name of the style under the affected layer in the Layers panel.
TIP
How do I add an inner shadow to a layer?
An inner shadow creates a cutout effect, with the selected layer appearing to drop behind the image canvas. To apply it, click a layer in the Layers panel and then click Layer, Layer Style, and Inner Shadow. Photoshop applies the style to objects in the layer. You can adjust the inner shadow in the Layer Style dialog box that opens.
Apply an Outer Glow
The Outer Glow effect adds faint coloring to the outside edge of a layer’s content, which can help highlight the layer. The effect can give an object in your image a ghostly or electric look and feel, depending on the color and size of the outer glow.
Photoshop offers various preset outer glow styles. You can also fine-tune your Outer Glow settings by adjusting the color, size, opacity, and other options to create a specific look. You can apply glow styles to both objects and text in layers. See Chapter 12 for more about working with text.
Apply an Outer Glow
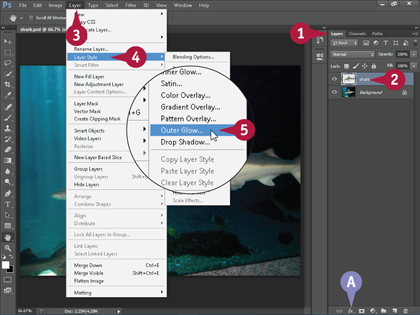
Click the Layers tab to open the Layers panel.
If the Layers tab is hidden, you can click Window and then Layers to open the Layers panel.
Click the layer to which you want to add the style.
Click Layer.
Click Layer Style.
Click Outer Glow.
A You can also click the Add a Layer Style button () and then choose Outer Glow.
The Layer Style dialog box opens.
Note: Perform steps 6 to 10 if you want to enter your own Outer Glow settings. If you want to use the default settings, you can skip to step 11.
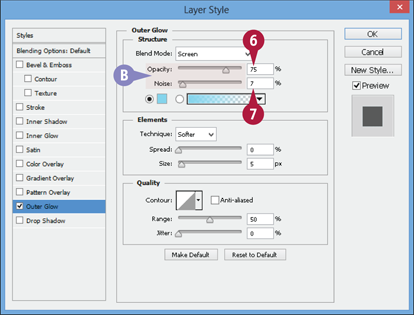
Type an Opacity value to specify the glow’s darkness.
Specify a Noise value to add speckling.
B You can also drag the sliders () to change the Opacity and Noise values.

Click the color swatch to choose the color of the glow ( changes to
  ).
).
C You can also choose from a series of preset color gradients by clicking here ( ).
).
Type a Spread value to determine the fuzziness of the glow.
Type a Size value to specify the size of the glow.
You can also drag the sliders () to change the Spread and Size values.
Click OK.
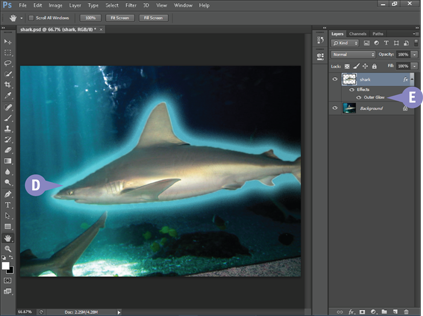
D Photoshop creates a glow around the outer edge of objects in the selected layer.
E Photoshop displays the name of the style under the affected layer in the Layers panel.
TIP
How do I give elements in a layer an inner glow?

The Inner Glow style adds color to the inside edge of a layer. To apply it, click a layer in the Layers panel, and then click Layer, Layer Style, and Inner Glow. Photoshop applies the style to objects in the layer.
Apply Beveling and Embossing
You can bevel and emboss a layer to give it a three-dimensional look. This can make objects in the layer stand out and seem to rise off or sink into the screen. Beveling and Embossing can be especially useful when placing a title or caption over a photograph or other complex image, because it can help separate your text from the image behind it.
You can also use a drop shadow to help your text stand out clearly. See the section Apply a Drop Shadow for details.
Apply Beveling and Embossing

Click the Layers tab to open the Layers panel.
If the Layers tab is hidden, you can click Window and then Layers to open the Layers panel.
Click the layer to which you want to add the style.
Click Layer.
Click Layer Style.
Click Bevel & Emboss.
A You can also click the Add a Layer Style button () and then choose Bevel & Emboss.
The Layer Style dialog box opens.
Note: Perform steps 6 to 9 if you want to enter your own settings. If you want to use the default settings, you can skip to step 10.
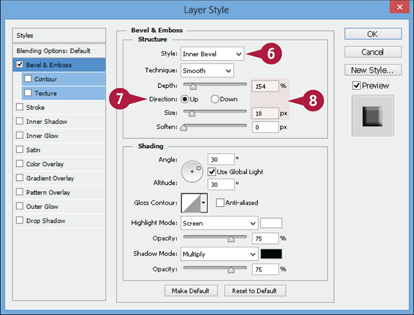
Click here ( ) to choose an effect style.
Choosing Inner Bevel creates a three-dimensional look.
Specify the direction of the style’s shadowing ( changes to ).
Type Depth and Size values to control the magnitude of the style.
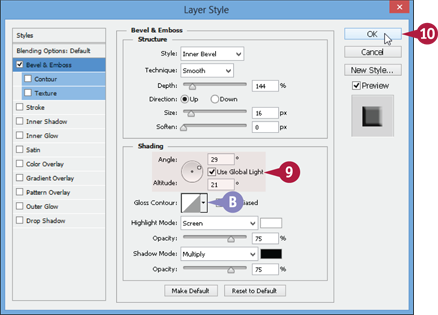
Specify the direction of the shading by changing the Angle and Altitude values.
B You can click here () to choose one of the Gloss Contour settings to apply abstract styles to your layer.
Click OK.

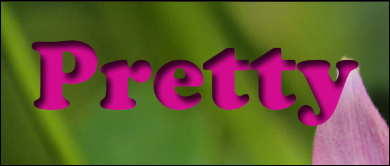
C Photoshop applies the Bevel and Emboss settings to the layer.
D Photoshop displays the name of the style under the affected layer in the Layers panel.
Note: In this example, the style is applied to a text layer. For more on text, see Chapter 12.
Apply Multiple Styles to a Layer
You can apply multiple styles to layers in your image. This enables to you to enhance the look of your layers in complex ways. By carefully adjusting the setting of each style you apply, you can ensure that the styles work smoothly together to create the effect you want.
See the tip in this section for a quick way to turn off the effects of individual styles so that you can easily view them separately. See the next section, “Edit a Layer Style,” for more on how to fine-tune your styles.
Apply Multiple Styles to a Layer
Apply the First Style
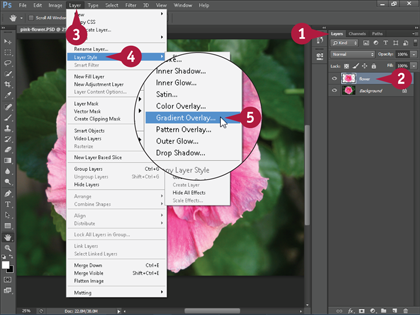
Click the Layers tab to open the Layers panel.
If the Layers tab is hidden, you can click Window and then Layers to open the Layers panel.
Click the layer to which you want to add the style.
Click Layer.
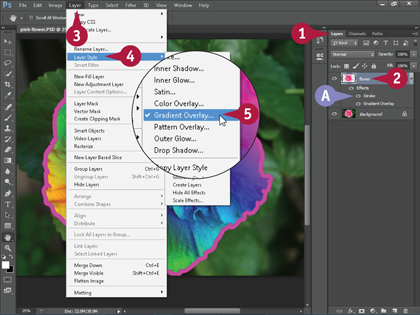
Click Layer Style.
Click the name of the first style you want to apply.
In this example, Gradient Overlay is applied to the layer.
The Layer Style dialog box opens.
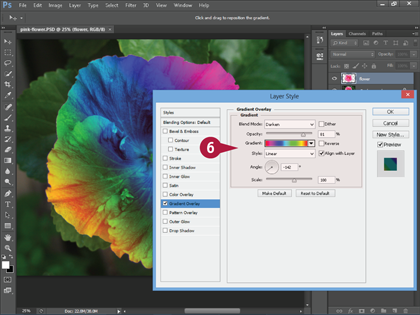
Specify the settings for the first style.
Apply the Second Style

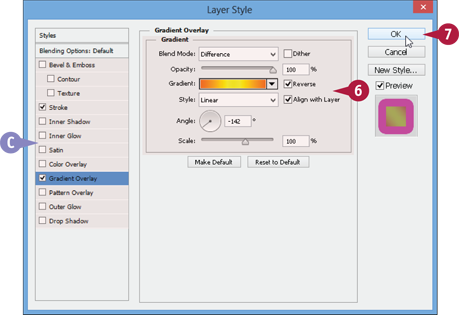
Click the name of the next style you want to apply ( changes to
  ).
).
In this example, the Stroke style is also applied to the layer, with the Technique set to Softer.
Specify the settings for this style.
You can apply other styles to the layer by repeating steps 1 and 2.
Click OK.
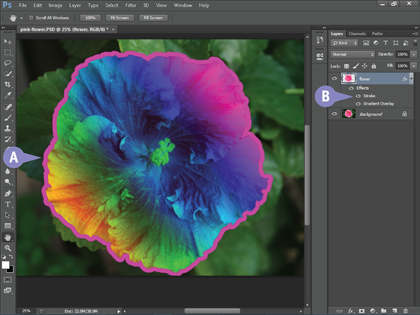
A Photoshop applies the styles to the layer.
B The effects appear below the selected layer in the Layers panel.
TIPs
How do I turn off layer effects that I have applied?
When you apply a style to a layer, Photoshop adds the style to the layer in Layers panel. You may have to click  on the right side of the layer to display a layer’s effects. You can temporarily turn off an effect by clicking the visibility icon (
 ) in the Layers panel. You can turn the effect on by clicking the now-empty box again to make reappear.
Is there a quick way to remove the styles from a layer?
Select the layer and then click Layer, Layer Style, and Clear Layer Style. Photoshop removes all the styles currently applied to the layer.
Edit a Layer Style
You can edit a layer style that you have applied to your image. This enables you to fine-tune the effect to achieve the appearance you want. This is especially helpful if you have applied multiple layer styles to your image and need to achieve a specific look and feel. See the previous section, “Apply Multiple Styles to a Layer,” for more information.
A sidebar in the Layer Style dialog box enables you to select and edit different styles applied to a layer.
Edit a Layer Style
Click the Layers tab to open the Layers panel.
If the Layers tab is hidden, you can click Window and then Layers to open the Layers panel.
In this example, the gradient overlay of a layer object is edited.
Click the layer that has the style you want to edit.
Click Layer.
Click Layer Style.
Click the style you want to edit.
A You can also double-click the style’s name in the Layers panel.
The Layer Style dialog box opens.
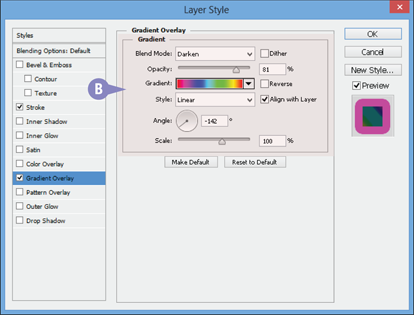
B Photoshop displays the current configuration values for the style.
Edit the values in the Layer Style dialog box.
This example changes a gradient overlay.
C You can click another style in the Layer Style list to edit it ( changes to ).
Click OK.

D Photoshop applies the edited style to the layer.
You can edit a style as many times as you want.
TIPs
How do I keep a layer effect from accidentally being changed?
You can lock a layer and its styles by selecting the layer and then clicking the Lock icon ( ) in the Layers panel. The layer is then locked; you cannot change its styles or apply additional Photoshop commands to it. You can click the Lock icon () again to unlock the layer.
Can I copy styles between layers?
Yes. Select the layer you want to copy from and then click Layer, Layer Styles, and Copy Layer Style. To paste the style, select the destination layer and then click Layer, Layer Styles, and Paste Layer Style. You can also press  (
( on a Mac) and then click and drag a style from one layer to another in the Layers panel to copy it.
Using the Styles Panel
You can apply a custom combination of Photoshop styles to a layer to give it a colorful or textured look. The Styles panel offers an easy way to apply such complex effects. After you apply a style combination, you can edit the individual styles to further customize the look and feel.
You can access different categories of styles through the panel menu. Categories include button styles, text effects, and textures.
Using the Styles Panel
Apply a Style from the Styles Panel
Click the Layers tab to open the Layers panel.
If the Layers tab is hidden, you can click Window and then Layers to open the Layers panel.
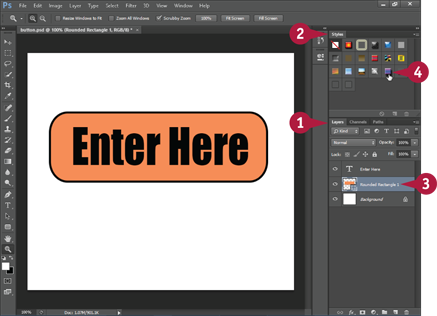
Click the Styles tab to display Photoshop’s styles.
If the Styles tab is hidden, you can click Window and then Styles to open the Styles panel.
Click the layer to which you want to apply the style.
Click a style.
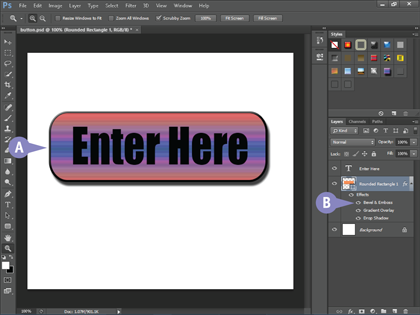
A Photoshop applies the style to the selected layer.
B The style appears as a set of effects in the Layers panel.
Access More Styles
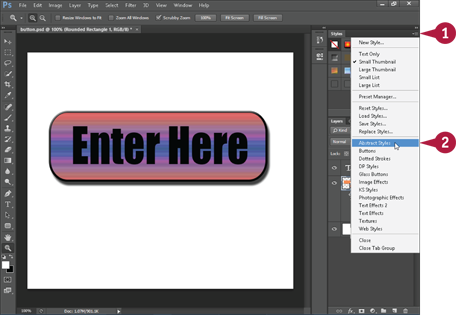
Click the panel menu ( ).
).
Click a set of styles.
A dialog box opens to ask if you want to replace the current styles with the new set or append the new set.
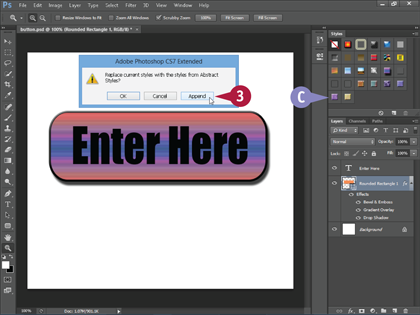
Click OK or Append.
C Photoshop places the new styles in the Styles panel.
In this example, the new styles have been appended to the current ones.
TIP
How do I create my own custom styles?
Perform the techniques covered in this chapter to apply one or more effects to a layer in your image, and then select the layer in the Layers panel. Click the panel menu () and choose New Style. In the New Style dialog box that opens, type a name for your new style
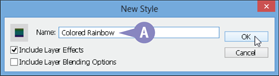
(A) and click OK to save the custom style. An icon for your new style appears in the Styles panel.