Chapter 12
Adding and Manipulating Type
Photoshop lets you add type to your images and precisely control the type’s appearance and layout.
Add Type to an Image
Adding text enables you to label elements in your image or use letters and words in artistic ways. You insert text in Photoshop using the Type tool. The Toolbox contains horizontal and vertical versions of the tool.
Text that you add appears in its own layer. You can manipulate text layers in your image to move or stylize text. Text in Photoshop is vector-based, so you can resize and transform it without a loss in quality. Photoshop comes with a number of expensive typefaces not typically preinstalled on computers.
Add Type to an Image
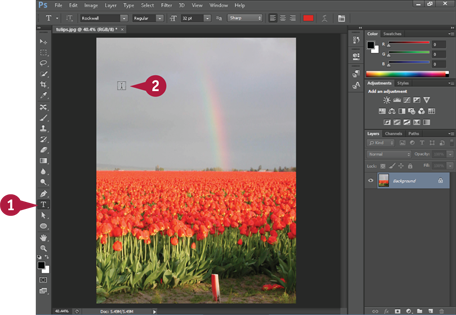
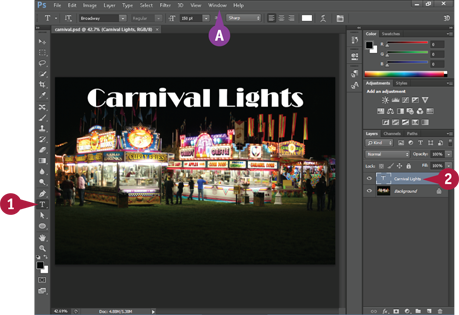
 Click the Type tool (
 ).
).
 Click where you want the new type to appear.
Note: You can also create a bounding box by drawing a shape. See the section Draw a Straight Line in Chapter 11 for more.
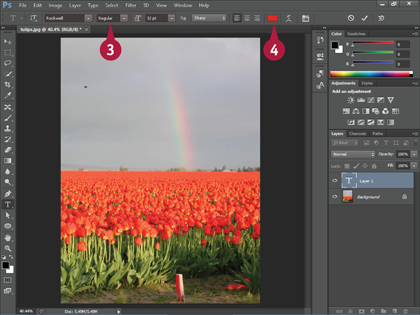
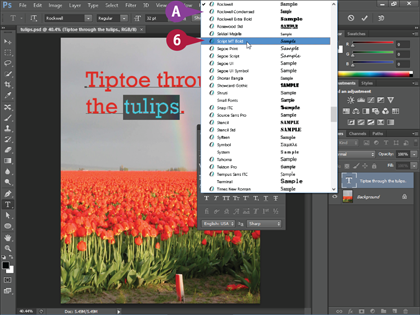
 Use these menus to choose a font, style, and size for your type.
Note: To apply a shape by using type, you can choose a symbol-oriented font, such as Wingdings.
 Click the Color box to select a color for your type.
Photoshop applies the foreground color by default.
Note: See Chapter 6 for more on selecting colors.

 Type your text.
To create a line break, press  (
( on a Mac).
 When you finish typing your text, click here (
 ) or press
  + (
+ ( + on a Mac). You can also click another tool in the Toolbox to complete your text entry.
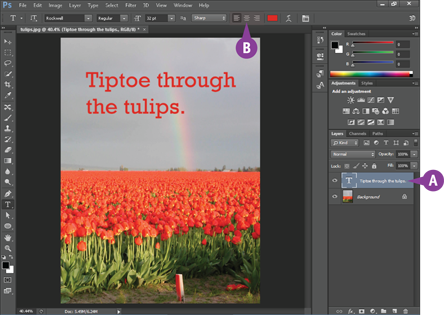
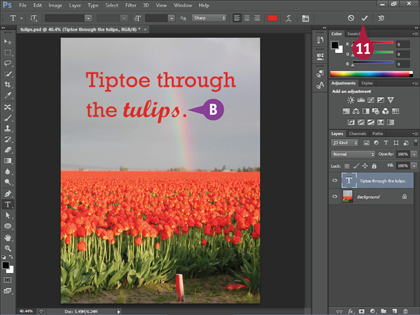
A Photoshop places the type on its own layer.
B You can click the alignment buttons to left-align ( ), center (
 ), or right-align (
 ) your type.
TIPs
How do I create vertical type?
If you right-click the Type tool (), a list that contains the Vertical Type tool ( ) appears. You can then use the tool to create up-and-down type. When using the regular Type tool, you can click the Change Orientation button (
 ) on the Options bar to change horizontal type to vertical — and vice versa. Note that with vertical type, lines go from right to left.
How do I reposition my type?
You can use the Move tool ( ) to move the layer that contains the type. Click the layer of type, click the Move tool, and then click and drag to reposition your type. For more on moving a layer, see Chapter 8.
Add Type in a Bounding Box
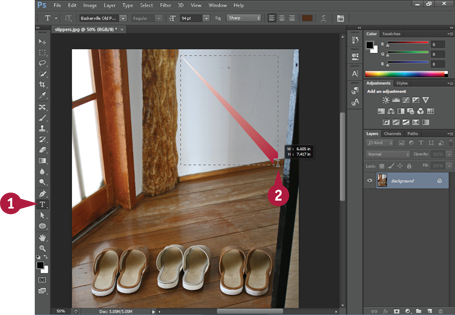
You can add type inside a bounding box, which is a rectangular container for text, to constrain where the type appears and how it wraps. Adding text in a bounding box is useful when you want to constrain where the text appears in your image and when line breaks occur. You can change the dimensions of the bounding box by clicking and dragging handles on the corners and edges.
The bounding box remains the same size if you change how your type is sized or styled. See the next section, “Change the Formatting of Type,” for details about changing how your type appears.
Add Type in a Bounding Box
Click the Type tool ().
Click and drag inside the image to define the bounding box.

Click and drag the handles ( ) of the bounding box to adjust its dimensions.
Click and drag the center point ( ) of the bounding box to move the box.
Use these menus to choose the formatting for the type.
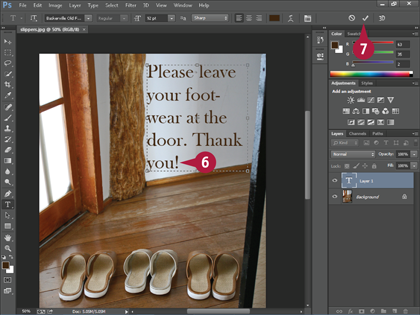
Type your text.
Your text appears inside the bounding box.
A line of text that hits the edge of the bounding box automatically wraps to the next line.
Photoshop also automatically adds hyphenation.
Note: You can turn off hyphenation in the Paragraph panel. See the tip for more.
 When you finish typing your text, click here () or press (+ on a Mac).
The bounding box disappears.

A The type is put on its own layer.
B To make the box reappear in order to change its dimensions, click the Type tool () and then click the text.
TIP
How do I format paragraph text inside a bounding box?
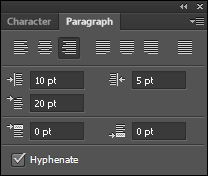
Click the Type tool () and then click the text inside the box. Click Window and then Paragraph to open the Paragraph panel. Type values or click the various tools to control the alignment, indenting, and hyphenation of the text inside the bounding box.
Change the Formatting of Type
You can change the font, style, size, and other characteristics of your text. This can help emphasize or de-emphasize your text. Photoshop has access to all the fonts on your computer’s operating system. A number of fonts are added when you install Photoshop.
Available styles for text include italic, bold, and other options that can vary depending on the font being used. The default size measurement is points, which are 1/72 of an inch. You can enter other units of measurement in the size field in the Options bar, such as “5 cm,” and Photoshop converts the value to points.
Change the Formatting of Type
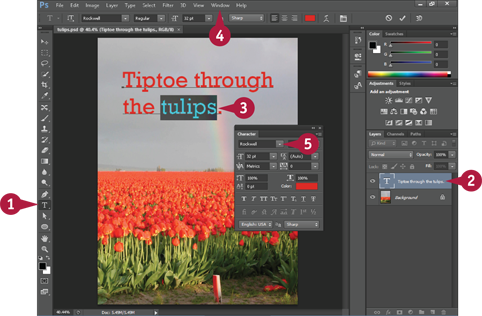
Click the Type tool ().
Click the type layer that you want to edit.
If the Layers panel is not visible, you can click Window and then Layers to view it.
Click and drag to select some type.
Click Window and then Character.
The Character panel opens.
You can also make many formatting changes on the Options bar.
Click here ( ) to open the font menu.
A Photoshop displays the names of available fonts.
You can turn on font previews in the Type preferences dialog box by clicking Edit (Photoshop on a Mac), Preferences, and then Type. Turning on font previews shows examples of each font in the font menu.
Choose a font.
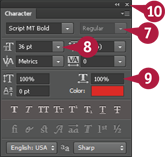
Click here () to choose the type’s style.
 Click here () to choose the type’s size.
 Type percentage values here to stretch or shrink your type.
You can click other options in the panel to add more formatting.
 Click here (
 ) to close the panel.
 When you finish formatting your text, click here () or press (+ on a Mac).
B Photoshop applies the formatting to your type.
TIPs
How do I edit the content of my type?
With the type’s layer selected in the Layers panel, you can click the Type tool () and then click inside the text. Press  to delete letters, or you can type new ones. You can press
  ,
,  ,
,  , or
, or  to move the cursor inside your type. To select all of the type in a layer, double-click the type icon (
 ) for that layer in the Layers panel.
How can I check the spelling of my text?
Select your type layer in the Layers panel, click Edit, and then click Check Spelling. Photoshop compares your text with the text in its dictionary. It flags words it does not recognize and suggests replacements.
Change the Color of Type
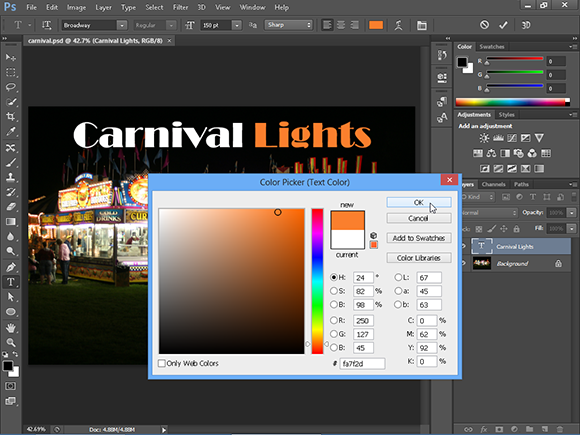
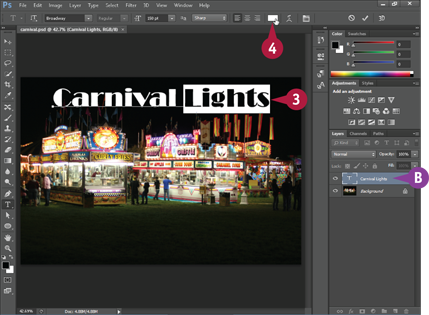
You can change the color of your text to make it blend or contrast with the rest of the image. You can change the color of all or just part of your text. By default, Photoshop colors your text the current foreground color. For more about setting the foreground color, see Chapter 6.
You can also change the color of your text by changing the opacity setting of a text layer. Lowering the opacity of a layer makes it more transparent, and therefore makes text in that layer lighter in color and see-through. For more about changing opacity of layers, see Chapter 8.
Change the Color of Type
Click the Type tool ().
Click the type layer that you want to edit.
A If the Layers panel is not visible, you can click Window and then Layers to view it.
Click and drag to select some text.
B You can double-click the layer thumbnail to select all the type.
Click the Color box on the Options bar.
The Color Picker dialog box opens.
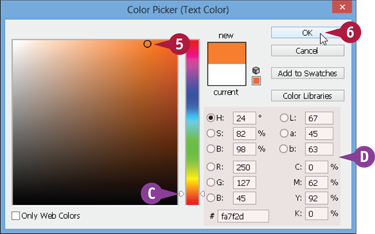
Click a color.
C You can click and drag the slider ( ) to change the colors that Photoshop displays in the selection box.
D You can also type values for the color you want.
Click OK.
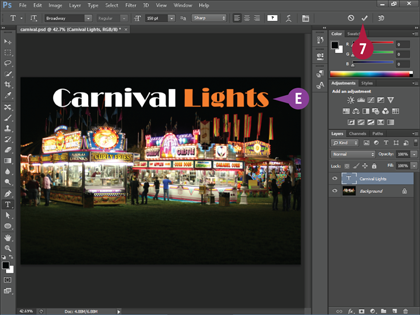
Click here () or press (+ on a Mac).
E Photoshop changes the text to the new color.
TIPs
What is anti-aliasing?
Anti-aliasing is the process of adding semitransparent pixels to curved edges in digital images to make the edges appear smoother. You can apply anti-aliasing to type to improve its appearance. Text that you do not anti-alias can sometimes look jagged. You can control the presence and style of your type’s anti-aliasing with the Anti-Aliasing Method ( ) menu on the Options bar.
How can I apply a color gradient to my type?
You can apply the Gradient Overlay style to your type. Click the type layer and then click Layer, Layer Style, and Gradient Overlay. A dialog box opens, allowing you to define the gradient settings. For more on styles, see Chapter 9.
Warp Type
You can easily bend and distort layers of text by using the Warp Text feature in Photoshop. This can help you stylize your text to match the theme of your image. For example, text in a sky can be distorted to appear windblown.
Style options include Arc and Arch, which curve text in one direction across the image, and Flag and Wave, which curve the text back and forth across the image. Which direction the warping occurs depends on whether the warp is set to horizontal or vertical.
Warp Type
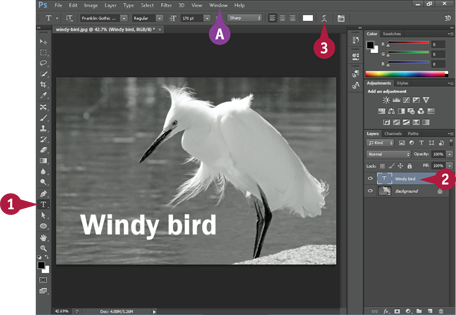
Click the Type tool ().
Click the type layer that you want to warp.
A If the Layers panel is not visible, you can click Window and then Layers to view it.
Click the Create Warped Text button ( ).
).
The Warp Text dialog box opens.

Click here ( ) to open the Style menu.
Click a warp style.
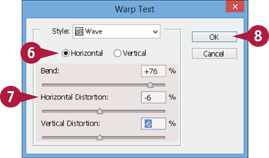
Click an orientation for the warp effect ( changes to
  ).
).
Adjust the Bend and Distortion values by clicking and dragging the sliders ( ).
).
The Bend and Distortion values determine the strength of the warp. At 0% for all values, no warp is applied.
Click OK.
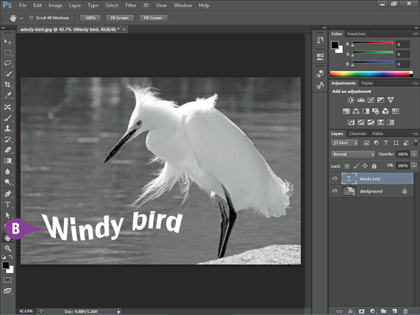
B Photoshop warps the text.
You can edit the format, color, and other characteristics of the type after you apply the warp.
TIP
How do I rotate text?
Select the type layer that you want to rotate in the Layers panel and then click Layer, Edit, and Free Transform. A bounding box with handles appears around the text. Click and drag outside of the bounding box to rotate the text
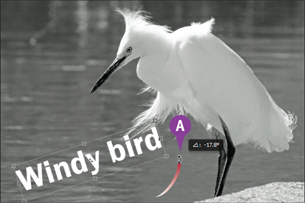
(A). Click or press (+ on a Mac) to complete the rotation.
Copy Type Styles to CSS
You can copy the font names, size, formatting, and positioning of your text from your Photoshop project as Cascading Style Sheet, or CSS, rules. You can then use those rules to style your type on web pages.
CSS is a language for adding stylistic touches to web pages, including how words are formatted on a page. New in Photoshop CC, the ability to copy type styles to CSS is convenient for users wanting to precisely replicate what they create in their image projects on the web.
Copy Type Styles to CSS
Copy the Styles
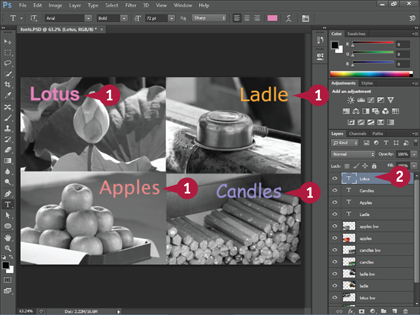
Add stylized type to your image.
See the other sections in this chapter for more information.
Click the type layer from which you want to copy. You can copy from only one layer at a time.

Click Layer.
Click Copy CSS.
Photoshop copies the type styles as CSS rules to your computer’s Clipboard. Styles can include font name, boldness, italics, color, positioning, and more.
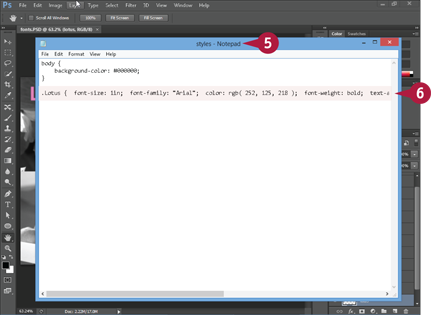
Open your CSS document in a text editor. In this example, the document is opened in Windows Notepad.
Paste the copied text into the document.
Repeat steps 2 to 6 for any other type you want copied.
Apply and View the Styles
Apply the CSS rules to type on a web page.
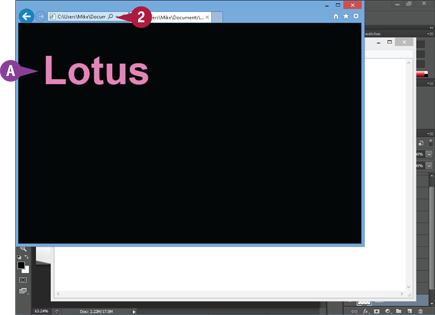
Open the page in a web browser.
A The type appears in the browser similar to how it appeared in Photoshop. It has the same font, color, and positioning.