Chapter 11
Drawing Shapes
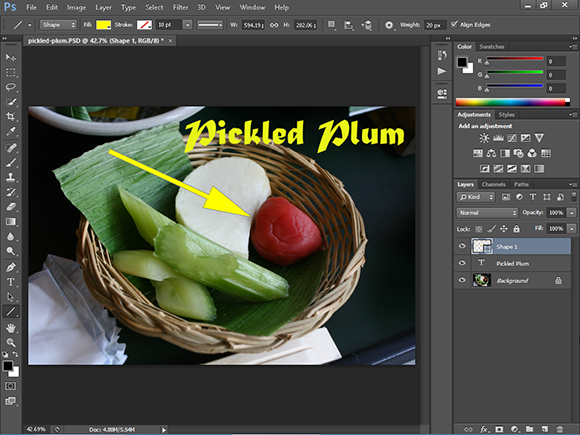
Photoshop offers a variety of tools for drawing geometric and abstract shapes. Other tools enable you to edit the lines that bound your shapes or change the colors with which the shapes are filled. You can also use the tools to draw lines that have arrowheads at their ends.
Draw a Shape
You can add solid shapes to your image by using Photoshop’s many shape tools. These tools make it easy to add whimsical objects, labels, or geometric decorations to an image. You can also place frames around your photos or create buttons for your website.
Photoshop’s shapes are vector-based, which means you can resize them without loss of quality. Shapes are usually placed in their own layer, and can be edited easily later on. See Chapter 8 for more on layers.
Draw a Shape
Draw a Solid Shape
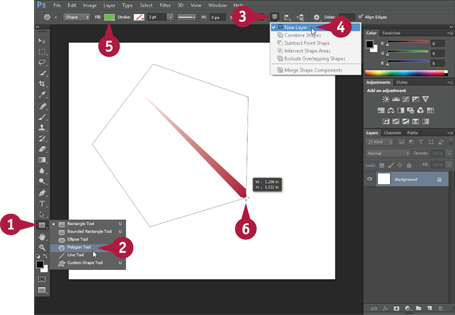
 Right-click the Shape tool (
 ).
).
Note: The tool icon may differ, depending on the type of shape you drew last.
 Click the shape you want to draw.
 Click the Shape Layers icon (
 ) on the Options bar.
 Click New Layer.
 Click the Fill box to select a fill color for the shape.
Note: For more on selecting colors, see Chapter 6.
 Click and drag to draw the shape.
Photoshop draws the shape and fills it with the specified color.
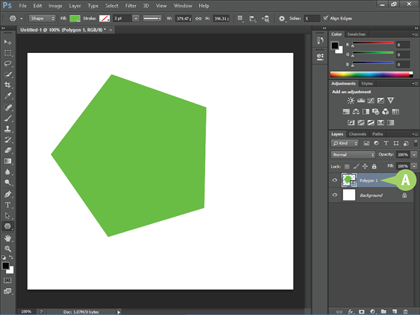
A The shape appears in a new layer in the Layers panel.
Note: For more on layers, see Chapter 8.
This example shows a shape being drawn on a new blank image.
Note: To create a new image, see Chapter 1.
Draw a Stylized Shape
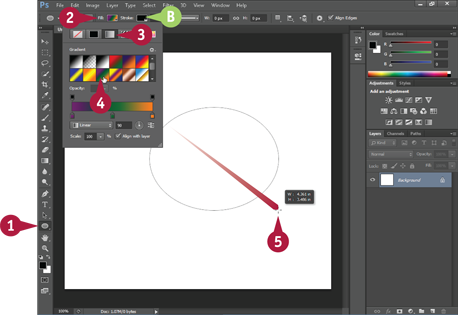
 Right-click the Shape tool (
 ) and select the shape you want to draw.
 Click the Fill box.
 Click the Gradient button (
 ).
).
 Click a gradient style.
B You can click the Stroke box to set an outline for your shape.
 Click and drag to draw the shape.
Photoshop draws the shape and applies the specified style.
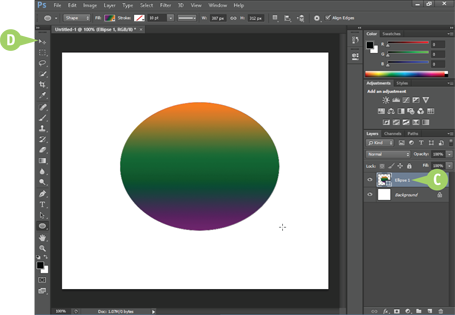
C The shape appears in a new layer in the Layers panel.
Note: For more on layers, see Chapter 8. For more on styles, see Chapter 9.
D You can move the shape by selecting its layer and then using the Move tool ( ).
).
Note: For more on the Move tool, see Chapter 5.
Draw a Custom Shape
You can use the Custom Shape tool to draw a variety of interesting predefined shapes, including animals, frames, and talk bubbles. Photoshop comes with a variety of shape categories accessible from the Options bar. Custom shapes can be helpful when creating signs, banners, and other informational material. You can also use custom shapes as decoration when creating collages of your photos.
You can also apply styles to your custom shapes. See the previous section, “Draw a Shape,” for details.
Draw a Custom Shape

 Right-click the Shape tool (
 ).
).
 Click the Custom Shape tool (
 ).
).
 Click here (
 ) to open the Shape menu.
 Click the Menu button (
 ).
).
 Click a shape category.
A dialog box opens to ask if you want to replace the current shapes.

A You can click Append to append the new shapes to the current shapes.
 Click OK.
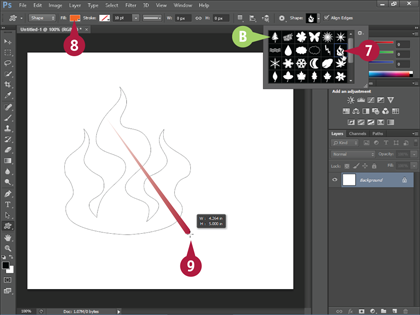
B Photoshop replaces the old shapes with your current shapes.
 Click a shape.
 Click the Fill box to select a color for the shape.
Note: For more on selecting colors, see Chapter 6.
 Click and drag to draw the shape.
Photoshop draws the shape and fills it with the specified color.

C The shape appears in a new layer in the Layers panel.
Note: For more on layers, see Chapter 8.
D You can move the shape by selecting its layer and then using the Move tool ( ).
).
Note: For more on the Move tool, see Chapter 5.
Draw a Straight Line
You can draw a straight line by using Photoshop’s Shape tool. You can point out elements in your image by customizing the line with arrowheads. If you press and hold  while using the Line tool, your line snaps to a perfectly horizontal or vertical plane, depending on which direction you drag the cursor. This can be a quick way to judge the layout of your image.
Lines can have arrowheads on one or both ends. You can customize the size of the arrowheads by specifying percentage values. The percentage values represent proportions of the line width.
Draw a Straight Line
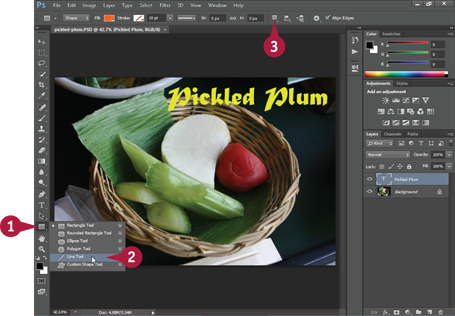
 Right-click the Shape tool (
 ).
).
 Click the Line tool (
 ).
).
Note: The tool icon may differ, depending on the type of shape you drew last.
 Click the Shape Layers icon (
 ) and make sure New Layer is selected.
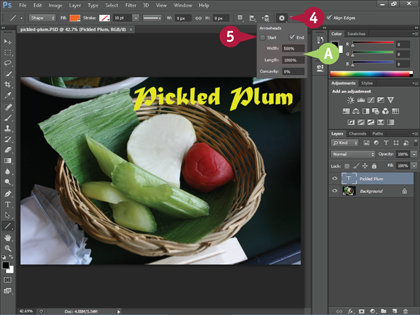
 Click the Menu button (
 ).
).
 Click Start and/or End (
 changes to
  ) to add arrowheads to your line.
A You can also specify the size and shape of the arrowheads by typing values here.
 Press
Press  (
( on a Mac) to close the menu.
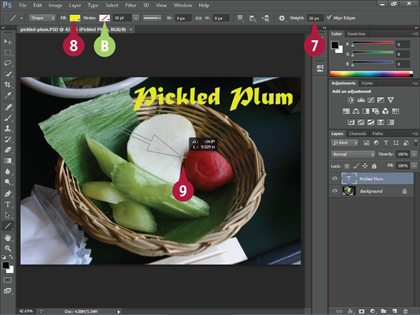
 Type a line weight.
You can use common units of measure, such as px (pixels), in (inches), or cm (centimeters).
 Click the Fill box to select a color for your line.
B You can click the Stroke box to define a line outline.
 Click and drag to draw the line.
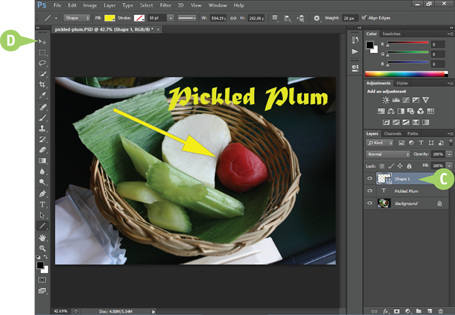
C Photoshop places the line in its own layer.
Note: For more on layers, see Chapter 8.
D You can move the shape by selecting its layer and then using the Move tool ( ).
).
Note: For more on the Move tool, see Chapter 5.
Draw a Shape with the Pen
With the Pen tool, you can create shapes by drawing the lines yourself. This enables you to make shapes not included in Photoshop’s predefined menus. The Pen tool may seem difficult to use accurately at first, but with practice it becomes more natural and your lines become smoother. The Pen tool is easier to use with a graphics tablet than with a mouse or a trackpad.
You can edit a pen-drawn shape just like you can a regular shape. See the next section, “Edit a Shape,” for details.
Draw a Shape with the Pen
Using the Regular Pen
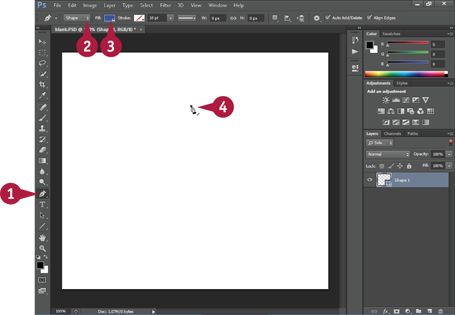
 Click the Pen tool (
 ).
).
 Click here (
 ) to select Shape.
 Click the Fill box to select an interior color for the shape.
Note: For more on selecting colors, see Chapter 6.
 Click inside your image to set an initial anchor point.

 Continue clicking to set additional anchor points and define the shape.
 Click the initial anchor point to close the shape.
Photoshop draws a straight-sided shape.
A Photoshop places the shape in its own layer.
You can create curved paths if you click and drag with the Pen tool ( ).
).
Using the Freeform Pen
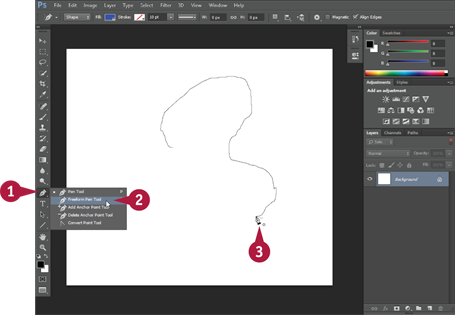
 Right-click the Pen tool (
 ).
).
 Click the Freeform Pen tool (
 ) in the list that appears.
 Click and drag inside your image.
Photoshop draws a free-form line.
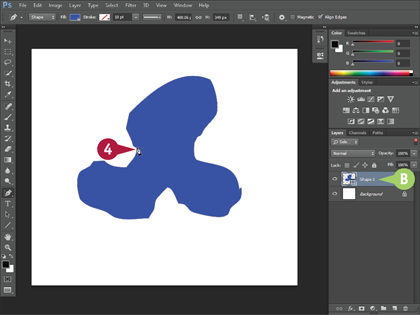
 Drag to the starting point of the line.
Photoshop completes the shape.
Alternatively, you can release the mouse, and Photoshop completes your shape with a straight line.
B Photoshop places the shape in its own layer.
Edit a Shape
You can edit shapes by manipulating their anchor points. Anchor points are the draggable elements that appear at the shape edges and vertices when you draw the shape. You can add new anchor points with the Add Anchor Point tool.
Editing shapes lets you fine-tune their geometries. You can edit shapes drawn with the predefined shape tools or the Pen tool. Because shapes drawn with a Shape tool are vector-based, they remain smooth when edited. For more shape-editing techniques, see Photoshop’s help documentation.
Edit a Shape
Move an Anchor Point
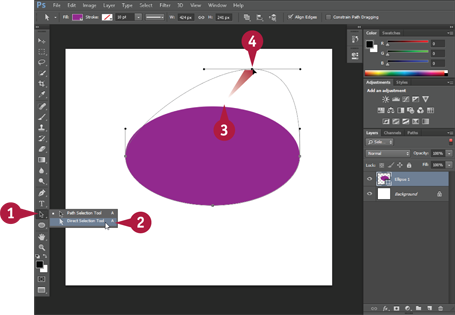
 Right-click the Path Selection tool (
 ).
).
 Click the Direct Selection tool (
 ) in the list that appears.
 Click the edge of a shape.
Photoshop shows the anchor points that make up the shape.
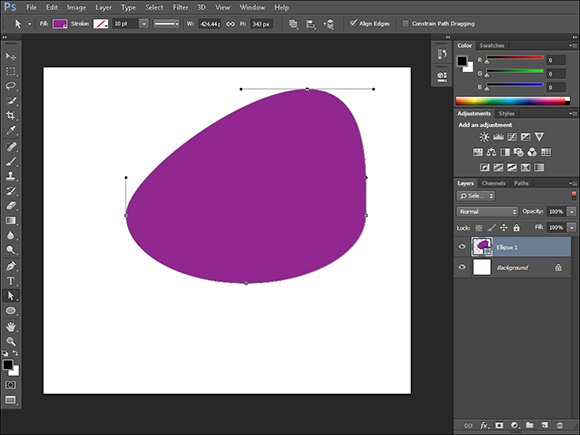
 Click and drag an anchor point.
Photoshop moves the anchor point, changing the geometry of the shape.
Bend a Straight Segment
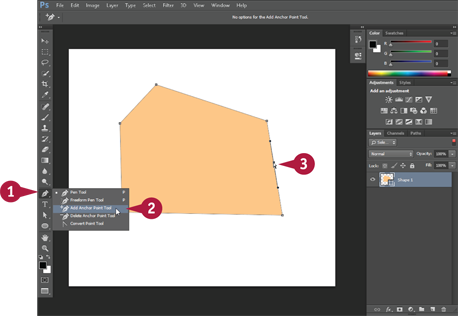
 Right-click the Pen tool (
 ).
).
 Click the Add Anchor Point tool (
 ) in the list that appears.
 Click a straight line between two anchor points.
Photoshop adds an anchor point to the line.
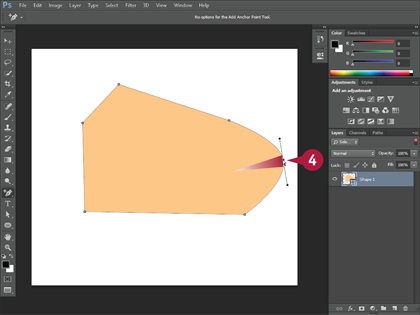
 Click the anchor point and then drag.
 Release the mouse.
Photoshop turns the straight line into a curved line.
You can use this technique to create a concave or convex curve.


