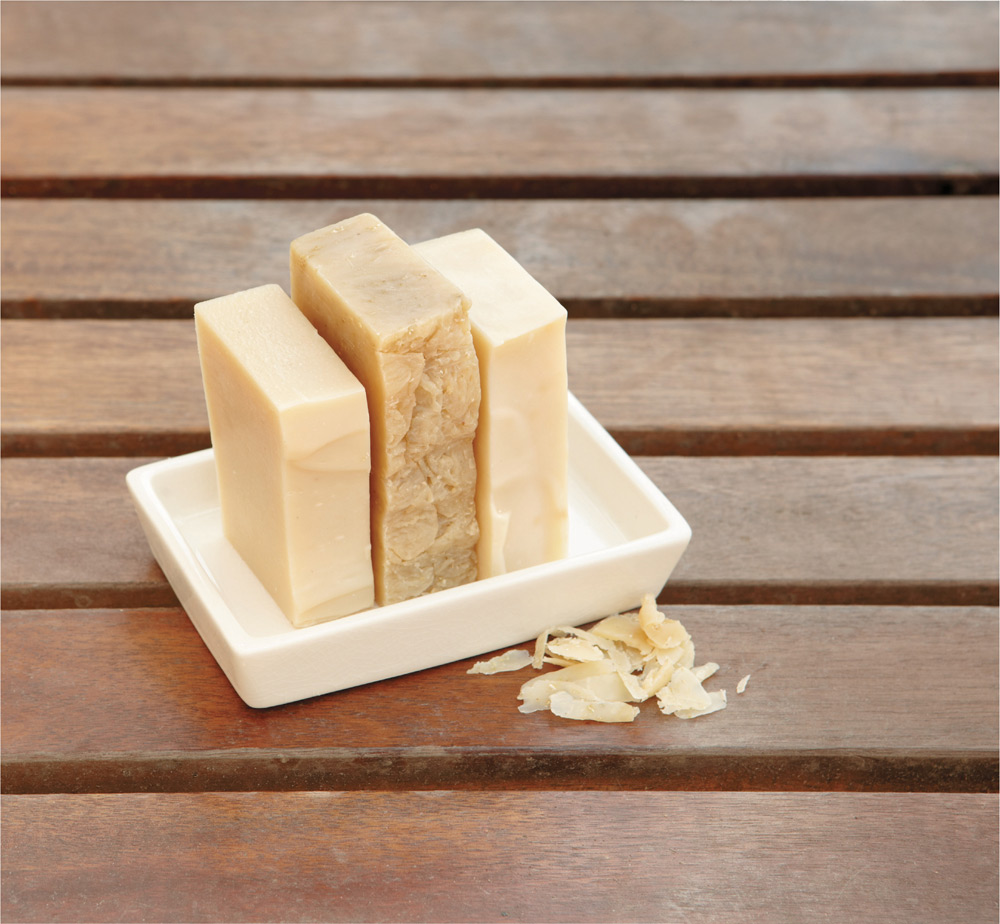

Soap, which has been around forever, is one of life’s basic necessities. While the actual origin of soap is unclear, we know that for the past 5,000 years, people have been combining alkaline salt with fats to make soap. The Sumerians created a slurry by combining animal and vegetable fats with ashes and boiling the mixture. Ancient Egyptians later wrote about soap recipes that called for mixtures of fats and alkaline salts. The Romans were using bar soap in their baths by 200 CE.
The main difference between the soaps we use today and what people used way back when is that our soaps are reliably gentle on the skin and consistent from one batch to the next. This is because now we know about the chemical reaction that takes place to create soap and we know how to create lye—a main ingredient in soap—that is of a known purity, which ensures results that can be easily predicted and duplicated. We also have modern tools such as digital scales and immersion blenders that help with the task, but the essentials have not changed for the past 5,000 years.
Without lye, there is no soap. Lye is required to create the chemical reaction that produces soap. When a soap recipe is calculated correctly, no lye remains in the final product. All the lye is converted to a salt.
Why put beeswax in soap? Beeswax helps make the soap emollient and creates a hard bar that lasts longer in the shower. The biggest mistake that most beginners make is adding too much beeswax, which creates a bar that feels rubbery and a bit gummy. But adding just a little bit of beeswax, say 1 to 2 percent of added oils, improves the bar considerably.
Since beeswax is not an oil, not all of the wax will react with the lye. Beeswax contains about 50 percent unsaponifiables. Unsaponifiables are the substances in beeswax that do not react with the lye. The unsaponifiables may be substances that help decrease the trace time in recipes using beeswax, but are also probably the substances that make a soap nice for the skin.
I consider using beeswax in soap to be an advanced soap-making technique. The main reason is that beeswax has a melting temperature of at least 145°F (63°C), while most soaps are made at a temperature that is quite a bit cooler than that, at say 100°F (38°C). The oils and lye need to be combined at a higher temperature to ensure that the beeswax remains melted. The higher temperatures will make the soap saponify more quickly, which could result in a failed batch if you’re not careful.
For beginning soap makers, I have included a beeswax-free starter recipe that can be made easily with oils found at most grocery stores. I strongly urge people who have not made soap before to make the starter recipe first—to become familiar with the process and gain an understanding of the different stages the soap goes through. Once the basic soap-making techniques are mastered, the cold process or hot process soap recipes that follow will be less daunting and you’re more likely to make a successful batch of soap.
Each oil used in soap making has a Saponification Ratio value, also known as the SAP value, which is the amount of lye needed to convert that oil into soap. Since each oil has a different value, do not make any oil substitutions without recalculating the amount of lye needed for the oil you are considering. The amount of lye needed can be calculated by hand or using an online calculator. I recommend running every recipe through a lye calculator, regardless of the source. The recipe could have inadvertent errors like transposed numbers or incorrect units. It is also nice to have a paper copy to check off ingredients as they are added and add notes on scent or color. Using the lye calculator also allows for resizing a recipe to fit a particular mold. There are free web-based lye calculators that will calculate the amount of lye needed and allow the user to print out the recipe. Some calculators have predictive values for hardness and lather that are useful when creating recipes from scratch or tweaking recipes to fit the ingredients on hand.
Although it is possible to make a soap with just one oil, there are reasons that most soap makers use more than one. Each oil has a different breakdown of essential fatty acids that bring different properties to the soap. Coconut oil is really high in lauric acid, yielding a soap that makes loads of bubbles, will dissolve really quickly, and is very cleansing (too harsh for most people if used in high proportion). Olive oil, on the other hand, which is loaded with oleic acid, makes a soap that has more of a creamy lather (that almost feels slimy if not properly aged), is super gentle on the skin and once fully cured, is hard as a brick. Most of the other oils will fall somewhere between coconut and olive oil. In the ingredient glossary, I have included profiles for all the oils I use in this book plus a couple more that might make nice substitutions.
Soap-making equipment only has a couple requirements. First, if using metal, ONLY use stainless steel. The lye will react with other metals. Second, never use glass to mix the lye. Over time, the lye will create minute cracks and scrapes in the glass, eventually causing it to shatter, potentially spilling hot, caustic lye water all over the place.
Use a disposable paper plate or bowl to measure the dry lye. This makes clean-up easy. Lye crystals can have quite a bit of static electricity and the individual beads can escape. Take care when measuring and give all surfaces a quick wipe down once the lye is in water.
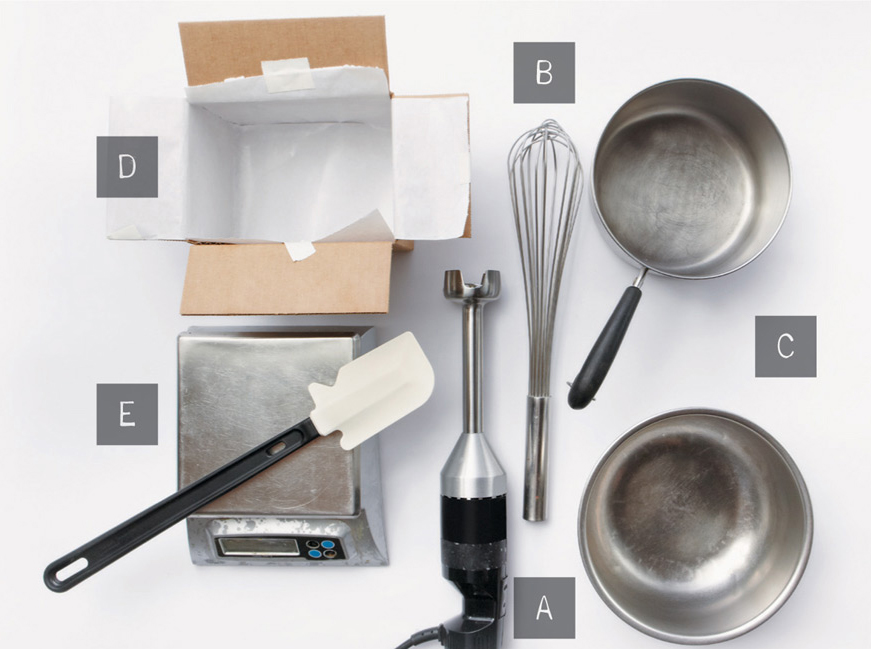
I recommend using an immersion blender (A) to mix the lye with the oils. Immersion blenders are available at big box stores at reasonable prices and they help to ensure that the soap batter is mixed properly. The immersion blender has a high shear blade that mixes the soap easily and reliably. A hand whisk (B) or spoon can also be used, but it will take quite a bit longer.
For mixing the soap, I like to use stainless steel stock pots, bowls (C) or plastic buckets. A small, flat-bottomed mop bucket works really well, since it is durable enough to withstand some warmer temperatures and is not too tall, allowing the soap maker to use an immersion blender or whisk with ease. A mop bucket also has a handle, which is useful for transferring the soap batter to the mold.
Soap molds can be as simple as a lined cardboard box (D) or as complicated as an ornate silicone mold, with everything in between. The recipes in this book are sized for a regular bread loaf pan (I like silicone, which doesn’t need to be lined), which yields approximately eight bars of soap. For lining soap molds, I prefer freezer paper. Line the molds with the shiny, coated side face up, resting against the soap. To line a mold or box, cut two pieces of freezer paper and lay them in the box in opposite directions, making a nice crisp corner where the bottom meets the sides and leaving the extra folded over the sides of the box. There will be a slight gap at the corners, where the two pieces of freezer paper meet, but I have not found that to be a problem as long as the soap is poured into the mold at the proper time.
A digital scale (E) is imperative for these recipes, as all ingredients are measured in grams. Reasonably priced scales can be found at any big-box store. Measure solid ingredients on a piece of freezer paper and liquid ingredients in plastic deli containers (always remember to zero out the weight of the container before adding ingredients).
INTERMEDIATE
The first thing I like to do when I make soap is to gather all my ingredients together and put them on my table in the order in which they appear in the recipe. I do this for two reasons. First, I can check to make sure that I have enough of all my ingredients to actually make the soap. It’s better to realize that there is no castor oil before making soap, rather than right in the middle of soap making. Secondly, I can grab the oils in order and check them off on my printed recipe. It helps to ensure that I measure out the correct amounts.
NOTE: I specifically call for Crisco instead of generic vegetable shortening, since Crisco’s Saponification Ratio (SAP) is known by the lye calculators and the proportions of oils in the vegetable shortening blend may be different with other brands. Also, Crisco changed their formula several years back and version commonly found on store shelves is made with palm oil. Check the ingredients listing on the Crisco package to make sure it includes palm oil.
1. Always make the lye solution first, as it requires cooling time. Measure the lye into a disposable paper bowl and set aside.
2. Measure out the correct amount of distilled water and pour into the lye-safe container. Place the container on a high heat-resistant surface and add the dry lye crystals to the water (never the other way around). Stir with a plastic cooking spoon until all the lye is completely dissolved. Set the lye mixture aside to cool.
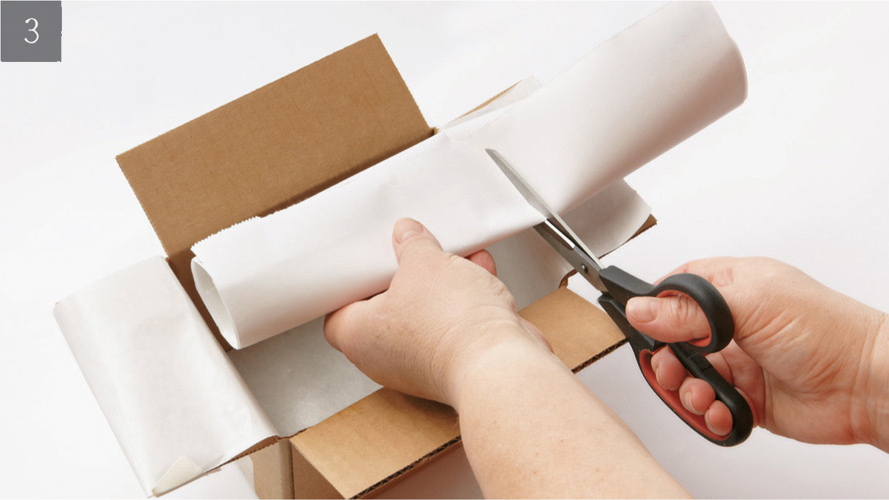
3. Prepare the mold, lining with freezer paper with the shiny side face up.
4. Heat all the solid oils in a stock pot on the stove top or in the microwave in a heat-safe container. Once melted, pour the oils into the mixing container, either a stock pot or a flat-bottomed mop bucket. Add the liquid oils and stir to mix.
5. Check the temperatures of the lye and the oils. Ideally, both should be around 100°F (38°C). If the temperatures are higher, let it cool down a bit more.
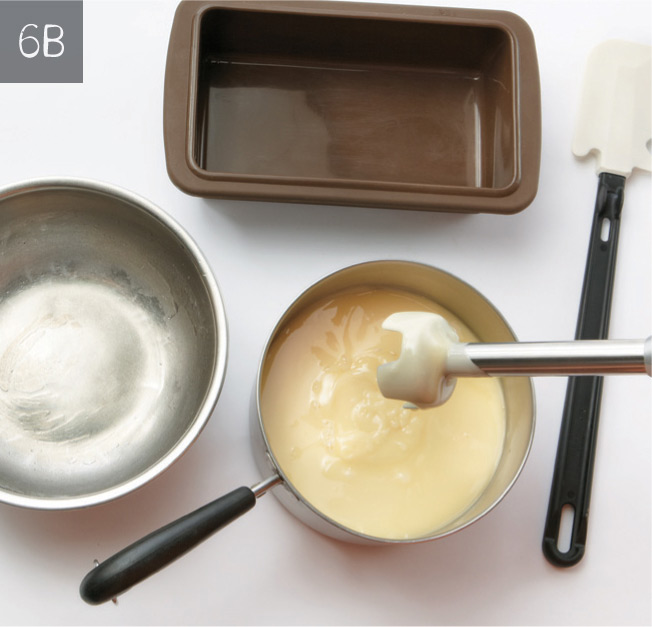
6. To make the soap, pour the lye water into the oils and mix with the immersion blender (A). Notice how the mixture changes from transparent to milky. Continue mixing until the soap reaches a stage called “trace.” You will know that you are at the trace stage when you pull the immersion blender out of the soap mixture and it leaves a visible trail in the top of the soap (B). I like to take my soap to a medium to heavy trace, which is almost the consistency of a soft pudding. Depending on the temperature of the oil and lye and the speed of the immersion blender, the actual mixing portion should not take that long, maybe five to ten minutes.

7. If this is your first time making soap, I recommend not adding any color or scent. But once the recipe is more familiar, this would be the time to add those ingredients.
8. Pour the soap batter into the prepared mold. Scrape out the soap pot and tap the soap mold on the counter a couple times to make sure there are no air pockets. Smooth out the top and cover the mold with a piece of cardboard to hold in some of the heat.
NOTE: When using honey, beeswax, or any kind of milk, those ingredients can cause the soap to get hotter than normal and it may not be necessary to cover the mold.
9. Allow the soap to sit for several hours. Since soap making is an exothermic chemical reaction, the soap will heat up in the next couple hours and go from what looks like a nice creamy soap into something resembling petroleum jelly and it will be HOT. That’s what is called the “gel” phase. While it’s not completely necessary for a batch of soap to go through gel, I think it makes for a better, more consistent end product.
10. After about twenty-four hours, the soap should be cool, relatively hard, and ready to unmold and slice. If it still seems a bit soft, leave it in the mold a bit longer and check it again after another day or so. Once it seems hard enough, use the chef’s knife to cut the soap into individual bars, keeping in mind that there is still quite a bit of water in the soap that will evaporate over time, causing the bar to shrink a bit. Set the cut bars on some freezer paper with a bit of air space between them and set them somewhere out of the way to dry and cure. Cure time is at least one month.
ADVANCED
Once the basic recipe has been mastered, it is time to add some goodies such as beeswax and honey. The beeswax will make a harder bar and the honey will boost lather and provide some moisturizing benefits.
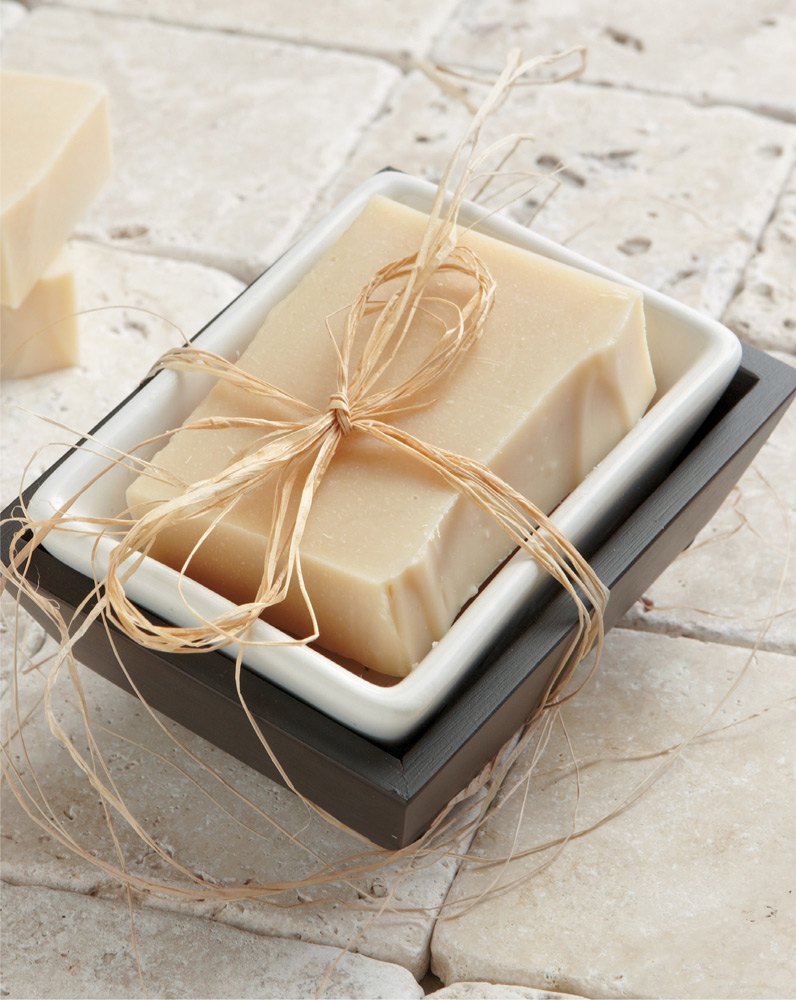
1. Gather all the ingredients together and arrange them on the table in the order in which they appear in the recipe.
2. Always make the lye solution first, as it requires cooling time. Measure the lye into a disposable paper bowl and set aside.
3. Measure out 5 oz (140 g) of distilled water and pour into the lye-safe container (see Soap-Making Equipment, page 73). Place the container on heat resistant surface and add the dry lye crystals to the water (never the other way around). Stir until all the lye is completely dissolved. Set the lye mixture aside to cool.
4. In a microwave-safe container, add the honey to the remaining 4 oz (115 g) of water and stir to incorporate. Microwave for a couple of seconds at a time until the honey is completely dissolved. Set aside.
5. Prepare the mold, lining with freezer paper with the shiny side face up.
6. Heat all of the solid oils and beeswax in a stainless steel pot on the stove top or in a microwave-safe container in the microwave. Once melted, pour the melted solid oils into the mixing container and add the liquid oils, stirring well to ensure it is all mixed.
7. Check the temperature of both the lye and the oils. To keep the beeswax from hardening, the ideal temperature of the oils will need to be around 120°F (49°C). The goal is to have the lye right around that temperature as well.
8. Add the reserved honey water to the lye water. It will probably turn colors; mine usually turns some sort of pinkish hue. That’s normal.
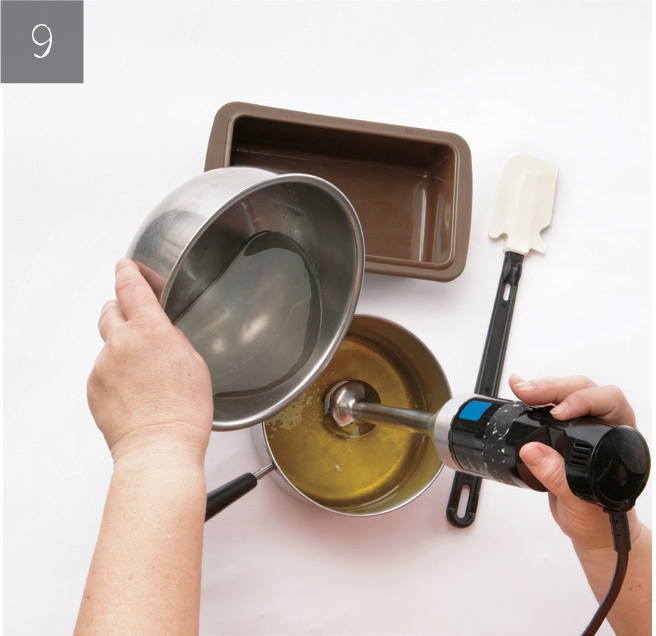
9. Pour the lye water into the oils and mix with the immersion blender. Once it is emulsified, but not yet at trace, add the fragrance if desired. Keep mixing until it gets to “trace.” For this soap, I recommend mixing until it is a light to medium trace. Once trace is achieved, work quickly to get the soap into the mold, as it may solidify quickly.
10. Pour the soap batter into the prepared mold, taking care to scrape all of the soap residue out of the pot. Tap the soap mold on the counter a couple of times to remove any air pockets. Smooth out the top and cover the mold with a piece of cardboard to hold in some of the heat.
NOTE: When using honey, beeswax, or any kind of milk, these ingredients can cause the soap to get hotter than normal and it may not be necessary to cover the mold.
11. After about twenty-four hours, the soap should be cool, relatively hard, and ready to unmold and slice. If it still seems a bit soft, leave it in the mold and check it again after another day or so. Once the soap seems hard enough, cut it into individual bars. Place the cut bars on freezer paper with space between them and set aside for about a month to dry and cure, rotating them occasionally so that all sides dry evenly.
12. I like to store my soaps in a cool dry place until needed. As they age, they will continue to lose water, making them longer lasting in the shower and more mild, so older soaps are a good thing to have around. If they are to be given as gifts, a paper cigar band, paper box, or muslin bag are best for packaging, since they allow the soap to breathe.
ADVANCED
Hot process soap is soap that is cooked through the saponification stage. I like to use a slow cooker with a “warm” setting for this recipe. Make sure that there is plenty of room, approximately double the size of the soap volume, since it may “fluff up” a bit during cooking. A 5–6 quart (5–6 L) slow cooker should be a good size. This recipe also has some oats for soothing and scrubbiness. I like to run mine through a coffee grinder or food processor first to chop the oats into smaller pieces.
1. Gather all the ingredients together and arrange them on the table in the order in which they appear in the recipe.
2. Prepare the mold, lining with freezer paper with the shiny side face up.
3. Measure the lye into a disposable paper bowl and set aside.
4. Measure out the distilled water and pour into the lye-safe container (see Soap-Making Equipment, page 73). Place the container on heat-resistant surface and add the dry lye crystals to the water (never the other way around). Stir until all the lye is completely dissolved. With hot process, there is no need to wait until the lye and the oils are the same temperature.
5. Melt the oils in the slow cooker on low. Once they are completely melted, add the lye mixture and blend with the immersion blender. Keep blending until it gets to “trace.”
6. With the heat on low, continue to stir occasionally using the whisk as the soap goes through various stages. Early on, it may separate. Later on it may bubble up and threaten to boil over. If that happens, turn off the heat temporarily and whisk a little harder to deflate the bubbles. Once it has settled down again, put it back on the heat and continue the cooking process. Once it is at a stage where it resembles petroleum jelly, which usually takes about 30–40 minutes of cooking time, it is almost done. Be careful not to overcook the soap. Take it to just the petroleum jelly stage and then remove from heat.
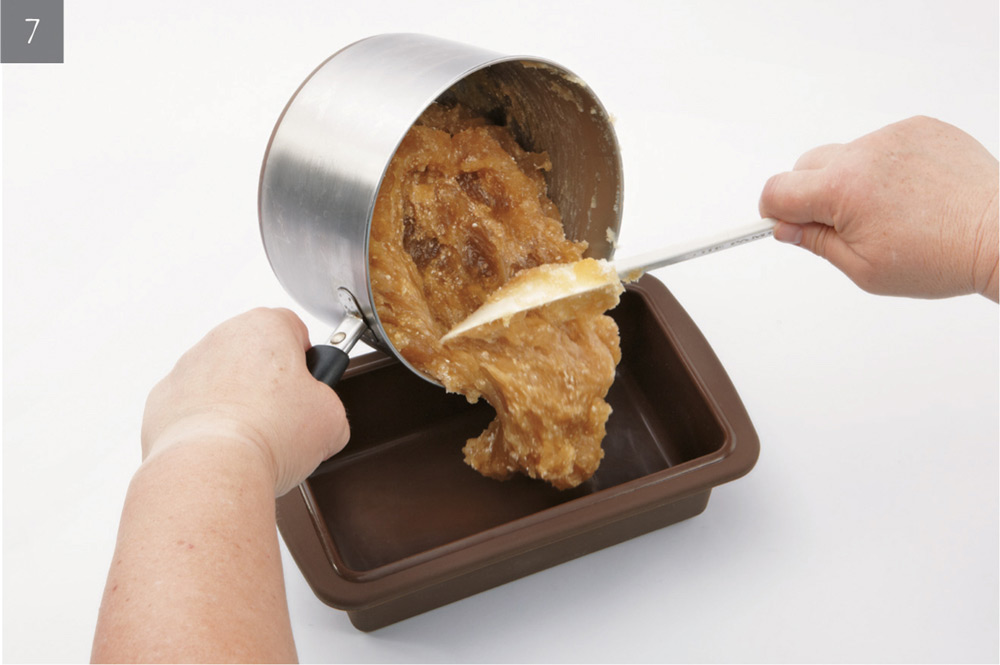
7. Add the honey, oats, and fragrance, if desired, and stir well before transferring the soap batter into the prepared mold. Tap the soap mold on the counter a couple times to make sure there are no air pockets. Smooth out the top and set aside to cool.
8. When completely cool, cut the soap into individual bars. Place the bars on freezer paper with space between them and set them aside to dry for at least two weeks. Although with the hot process soaps they are fully saponified and useable, there is still extra water in the bars that should be allowed to evaporate.