

This little bit of frilly joy seems to have been popular from the mid-1760s to the very early 1770s. Evidence of this headdress can be found in French and English fashion magazines, [3] many French and English portraits, and also appears in portraits of wealthy and fashionable women of America. [4] We call this little frippery the “proto-pouf,” a precursor to the fashionable madness that would top the tall coiffures of the 1770s. There is no right or wrong way to decorate this cap. The idea is to add different textures to the triangle. Don’t be afraid to really pile them on! We have used organza puffs, gathered lace and satin ribbon.
• ¼ yard (25 cm) stiff taffeta
• #50 silk thread
• 1 yard (1 m) 18-gauge millinery wire
• 1 yard (1 m) silk organza
• 3 yards (3 m) 1-inch (2.5-cm)-wide lace
• 1 yard (1 m) 2-inch (5-cm)-wide silk ribbon
• #30 silk thread


1. Cut out the triangle base with a ½-inch (1.2-cm) seam allowance, then turn up ¼ inch (6 mm) on each long edge and baste. Turn up these edges again and hem stitch, working the ends at the sharp point.

2. Cut the millinery wire to match the length of the long edges of the triangle, then insert into the casings.

3. Fold up the short side of the triangle ¼ inch (6 mm) and baste, then fold up again ¼ inch (6 mm) and hem stitch, leaving one end open. Cut the wire to length and insert it into the channel, then stitch the end closed to secure.
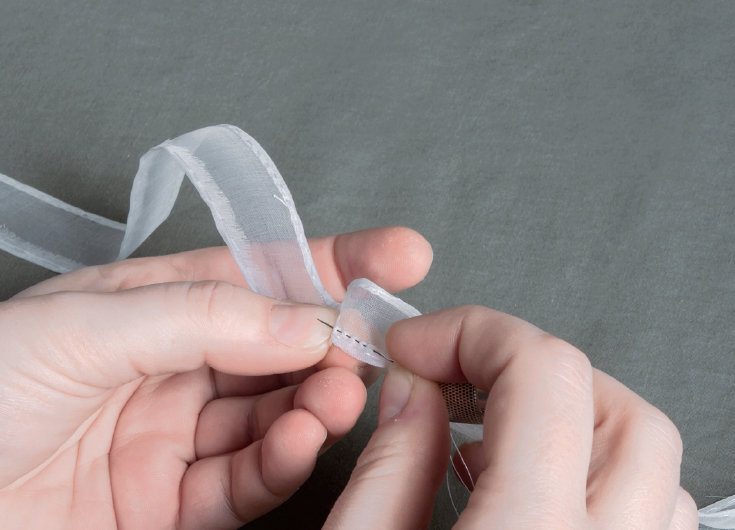
4. Cut and finely hem both sides of the frills. Then mark one long side of your organza frills at ½-inch (1.2-cm) intervals. These are the marks for your running stitches.

5. Run three lines of running stitches according to the ½-inch (1.2-cm) marks. These running stitches should be very close together, only $$ inch (1 mm) apart or so. Pull all three ends up together to gather the ruffle.
6. This next part is the trickiest. Arrange the gathered organza ruffle along one wired long edge of the triangle. Arrange the pleats evenly using small scissors or a similar tool to space the pleats. Pin as needed to hold it all in place.

7. Roll down the wire and ruffle together, exposing the base of the pleats where they touch the taffeta. Whipstitch the bottom “U” shape of the pleats to the taffeta using one to two stitches per each “U,” then fold the wired edge with the ruffle back up.
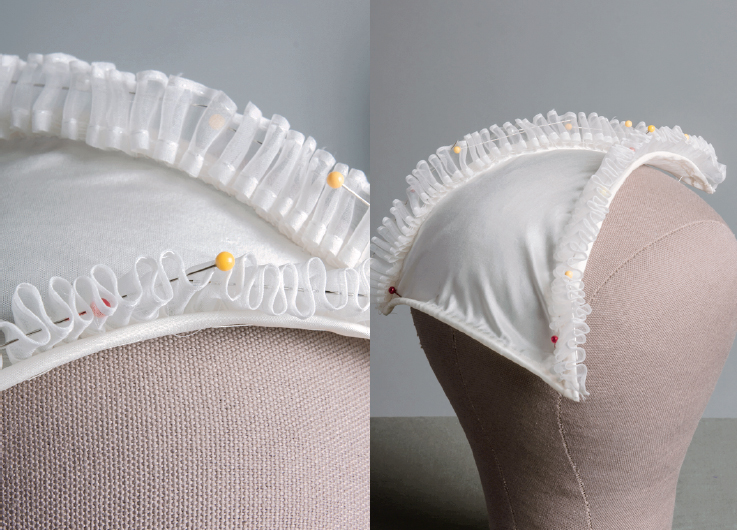
8. If you’d like to work your ruffle into figure eights, lightly pin through the middle of the pleats, arranging in even sets and shoot a little steam onto them with your iron. Futz until you’ve got them how you like, then gently pull the pins out.
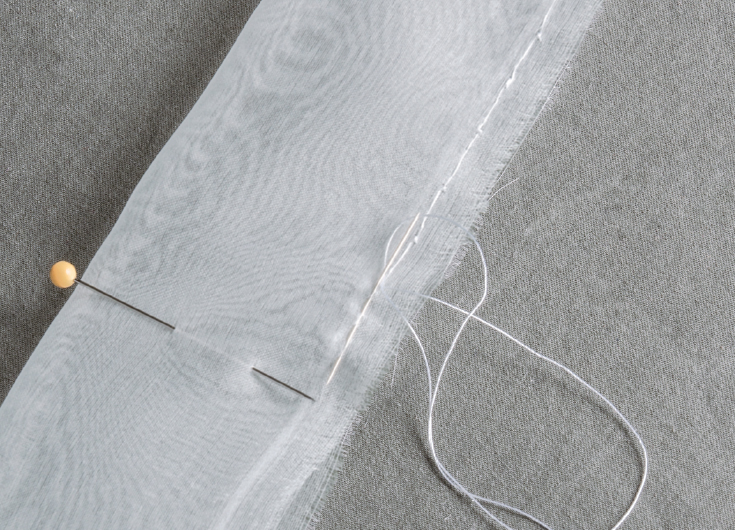
9. To create the organza puffs, seam a long strip of organza right sides together with a running backstitch. Turn right side out. Do not press.
10. Mark the gathering points, then gather across the width with a running stitch. Pull up the thread and knot at each point. Cut the thread and move to the next gathering point.
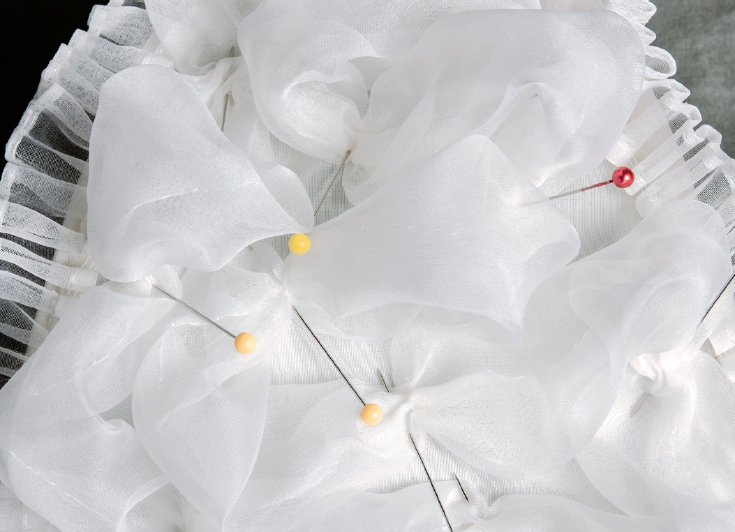
11. Once your puffs are complete, arrange in a pleasing way on the bare part of your triangle. There is no particular way to arrange—in a spiral or zigzag way is just fine. Pin at the gathering points, then stitch each of the points to the triangle.

12. Next, gather up one long edge of your lace at roughly 2.5x the length. We gathered 2¼ yards (2 m) down to about 2½ feet (76 cm).
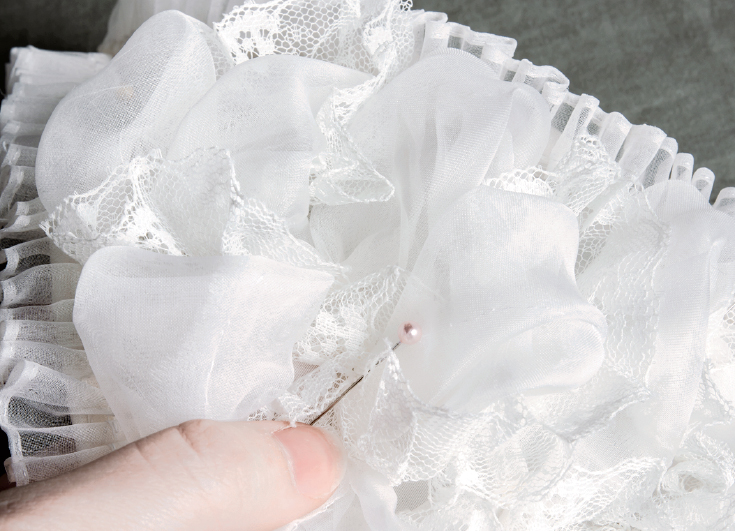
13. Pin one end of your gathered lace at the front of the triangle point, then weave it over and under the organza puffs, pinning where needed to hold it in place. Futz and arrange to your taste. Stitch at these pinned points.
14. For the top floof ribbon pile, cut a 24½-inch (62-cm) length of 2-inch (5-cm)-wide ribbon, and cut the ends of your ribbon into a zigzag to finish the edges in a fun, easy and period-correct way.
15. Next, mark the gathering points along the ribbons according to the pattern—every 4 inches (10 cm).

16. Gather across the width with a running stitch, pulling up the thread and knotting at each point.

17. Arrange the ribbon on the top of the cap close to the point, with the zigzag tails positioned at the back. The gathering points will be placed quite close to each other. Stitch through the gathering points to secure the bow to the taffeta triangle. If the puffs are a little unruly, pop them with a little steam from your iron and gently press with the palm of your hand.

18. For the short tails, cut 6½-inch (16.5-cm) lengths. Gather across the middle with a running stitch, pull and secure into place.

19. Fold over at the gathering points and place these Vs at the back corners of the triangle. Tack in place with a few stitches.
Your proto-pouf is now ready to wear, but if you feel you need even more decoration, add more ribbons, flowers, puffs and lace. This is also an excellent project with which to wear your lace lappets.