
This cap is based on several early 1770s prints and portraits [6] and reflects the very high hair fashionable in the early 1770s. We’ve made our version in cotton voile and trimmed the band with silk ribbon, but this cap may also be made in silk organza, cotton organdy or a fine linen for different looks.
The proportions of this cap are particularly important, with a very large caul and deep ruffles that cover the tops of the ears. It has been sized to work with the Giant Donut Hair Cushion. If you have elected to reduce the size of your donut hair cushion, we recommend shrinking the proportions of this cap as well. This cap made as-is will not work with low hair—it will swallow your head—so be sure to shrink it if you intend to use it for less voluminous styles!
• ½–1 yard (0.5–1 m) cotton voile
• #30 and #50 silk thread
• 18 inch (46 cm) cording or candlewicking
• 1–2 yards (1–2 m) 1–2-inch (2.5–5-cm)-wide silk ribbon

1. Baste the caul edges all the way around ⅛ to ¼ inch (3 to 6 mm), then baste up the bottom of the caul ¼ inch (6 mm).

2. Fold the caul in half, and, using an awl, poke a hole just above the basted edge. With heavy silk thread, whip the eyelet open, and poke the hole with the awl again to open it back up.

3. Backstitch the cord or candlewicking to each side of the bottom edges of the caul, and pull the tails through the hole.

4. Turn up the bottom edge of the caul over the cord and finely hem, making sure to not catch the cord.

5. Turn the remaining basted edges up again and finely hem.
6. On the band piece, baste ⅛ to ¼ inch (3 to 6 mm) and finely hem using running stitches on all sides.
7. For the ruffles, baste up ⅛ to ¼ inch (3 to 6 mm), then turn up again and finely hem all sides.
8. Mark the straight sides of the caul just where the sides begin to curve into the top of the caul. Reference the pattern for these points.
9. Fold the caul in half and pin to mark the halfway point at the top.

10. Whip gather over the hemmed edge of the caul from one side up to the center point at the top. Repeat with a new thread on the other side.

11. Working one side at a time, pull the thread to tightly gather up the caul, then match the tightly gathered edge to the straight edge of one half of the band. Arrange the gathers evenly and pin. Repeat for the other side of the caul and band.

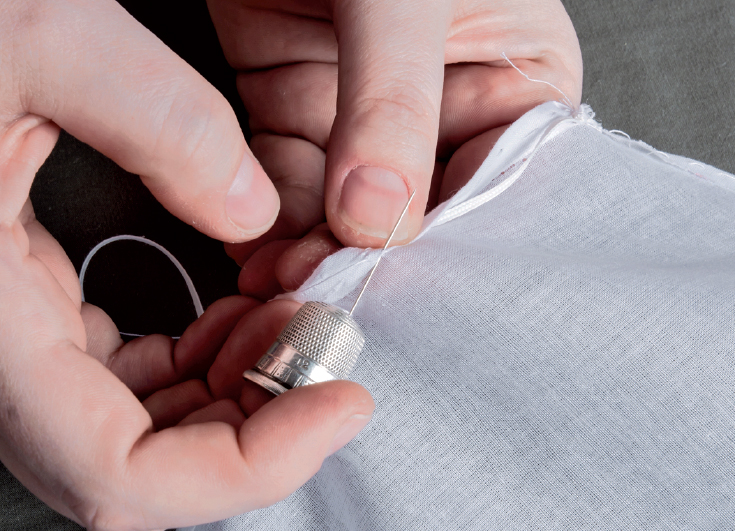
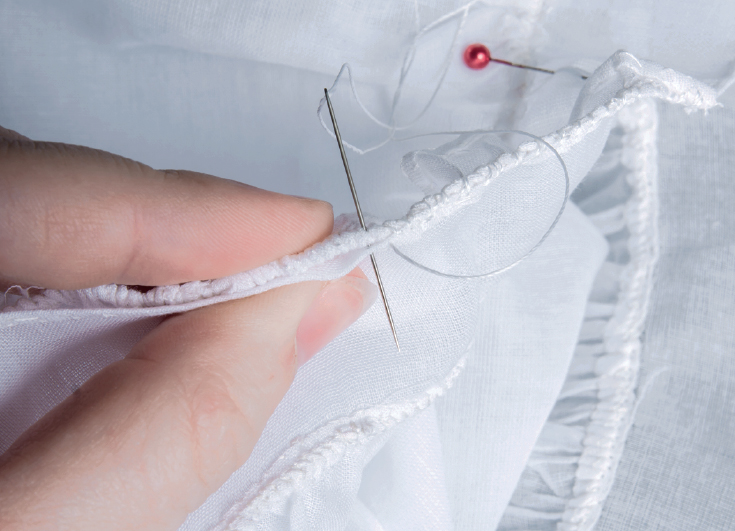
12. Starting from one end, tightly whipstitch the gathered caul and straight edge of the band together, catching every tiny little bump. This is super tedious, but the result will be splendid. When done, open the two pieces out and gently tug to “pop” the stitches into place. Press it all flat if needed.

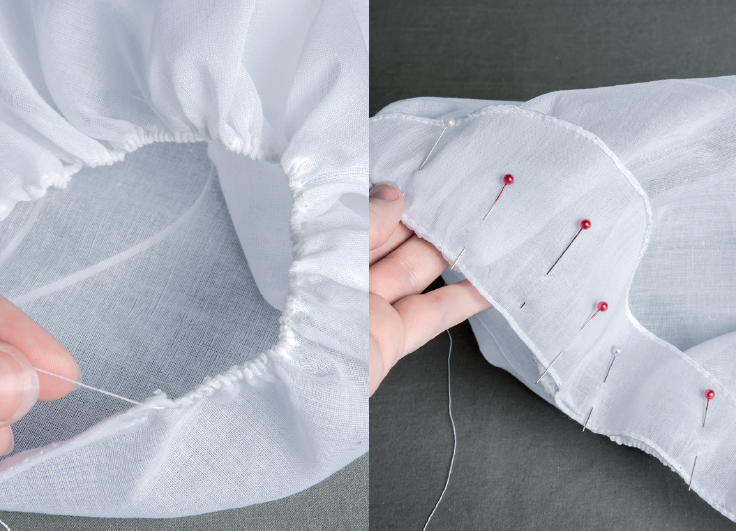
13. Run a whip-gathering stitch over the straight edge of each ruffle piece, spacing your stitches about ¼ inch (6 mm) apart.
14. Pull up the thread to gather the ruffles tightly. It will help to lightly press the ruffles with the iron to help them behave.
15. Working each side separately, pin the gathered edge of the ruffle to the curved edge of the band, right sides together.

16. Whipstitch the ruffle to the band, catching each bump of the gathers.
17. Open the ruffle and band out flat and gently tug the pieces apart to “pop” the stitches into place. Press the open pieces.

18. The last step, and possibly the most fun, is to trim your new gigantic early 1770s cap in ribbons to match your gown. We found it easiest to add the ribbon once the cap was already on the head. We used a simple 1-inch (2.5-cm)-wide silk ribbon and discreetly pinned it in place at the base of the cap in back.

19. Construct a simple 4-Loop Bow in the same ribbon, and pin it at the center front of your cap.
Woo! You’ve now completed one heck of a cap to adorn your gigantic hair. Remember, this cap is intentionally huge, but you can play around with the sizes and proportions of the caul, band and ruffles for different looks and uses.