

Our model, Zyna, has lovely 3B hair that does extremely well with a heat-set. We used historically accurate papillote curls in the front of Zyna’s hair and a curling iron to curl the toupee section. Both techniques are historically accurate, though we opted to use double-pronged curl clips to hold the un-papered curls in place while they cooled. This is a time-saving technique and yields the same results as papillote curling with papers. Feel free to try both methods.
DIFFICULTY: EASY
RECOMMENDED HAIR LENGTH: THIS STYLE IS RECOMMENDED FOR HAIR LENGTH ANYWHERE FROM THE TOP OF THE BROW TO THE TOP OF THE SHOULDER. THIS STYLE IS NOT RECOMMENDED FOR VERY LONG HAIR PAST THE SHOULDERS.
• Large powder brush
• Wide-tooth or rattail comb
• Hair clips
• Papillote papers
• Double-pronged curl clips
• Flat iron
• ¼-inch (6-mm) curling iron
• ½-inch (1.2-cm) curling iron
• Teasing comb with wire pick
• Hairpins (short or long)
• False hair for chignon
• Bobby pins
• Roller pins (optional)
THE CURLS

1. After pomading and powdering the hair, part the hair from ear to ear and clip the back of the hair out of the way.
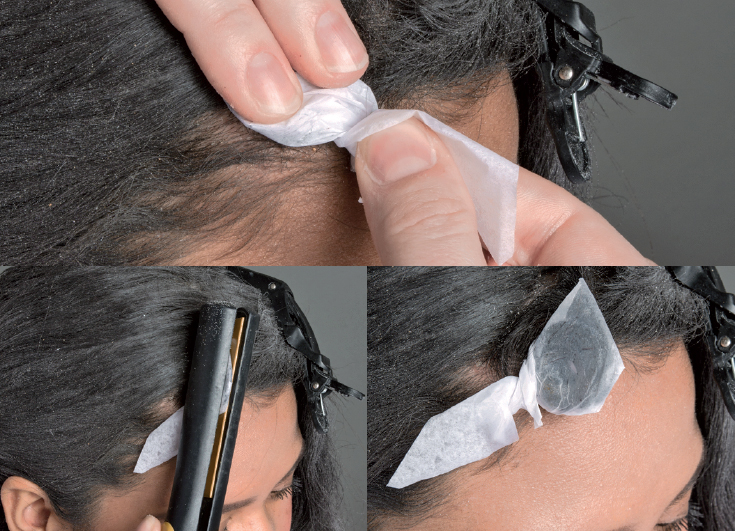
2. Starting at the very front of the head, papillote curl the hair in ½- to 1-inch (1.2- to 2.5-cm) sections, following the instructions here. Make sure you have random parting, so there will be no awkward breaks in the hair once it’s frizzed out.
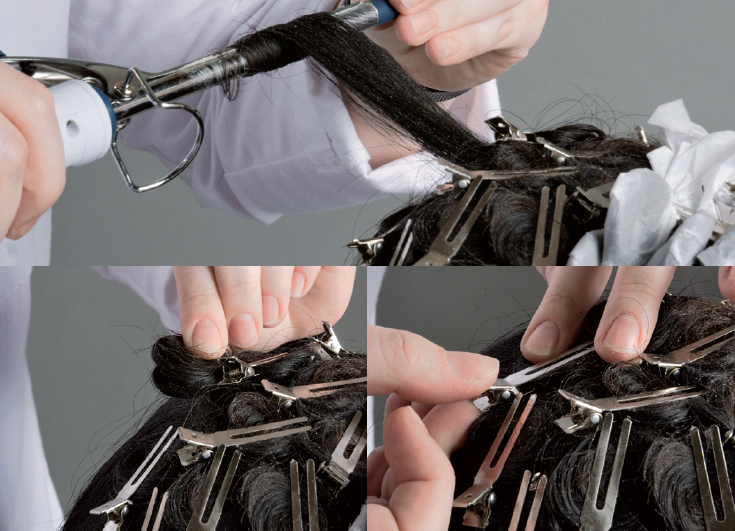
3. For the back of the hair, we used ¼- and ¼-inch (6-mm and 1.2-cm) curling irons, curling ½- to 1-inch (1.2- to 2.5-cm) sections of hair. Curl the entire section of hair in the curling iron, gently release from the iron, and immediately roll it back up into its pin-curl shape and pin to the scalp to cool.
4. Do this for the entire back of the head, using the smaller iron on top and the larger iron toward the bottom of the head.
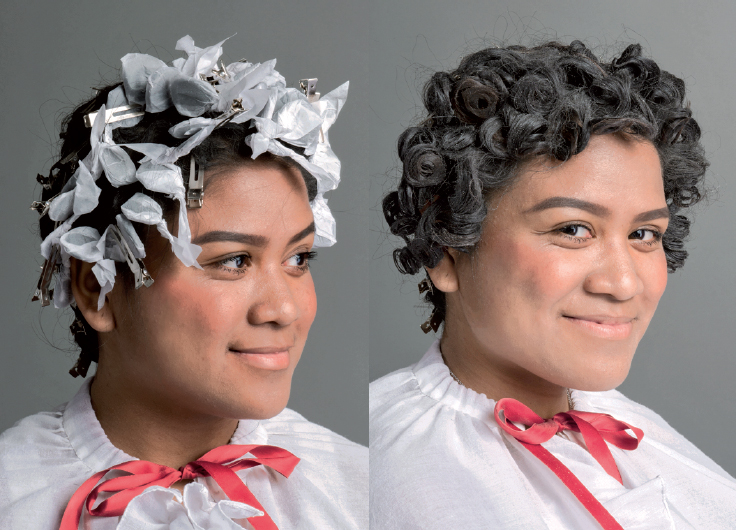
5. Allow the hair to cool completely and set into its new curls. The longer you can allow your hair to set, the better the curls will hold. After the hair has cooled, take all the curls out, working from the front to the back.
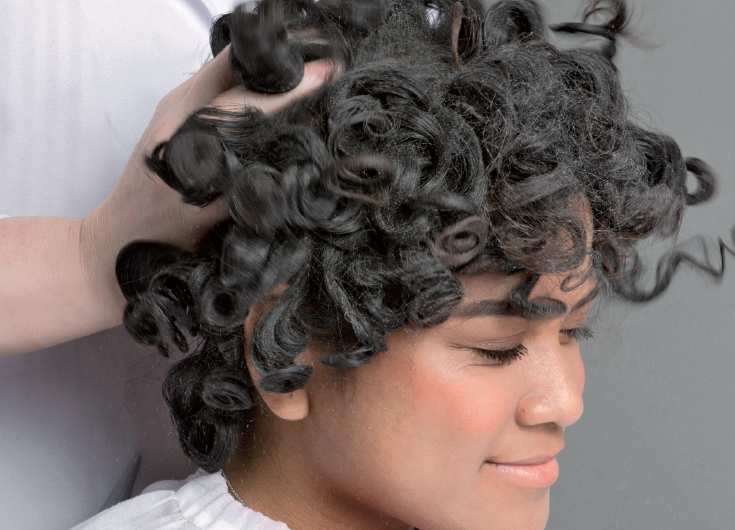
6. Now it’s time to have some fun! Shake out and work out all those curls with your fingers until you look like you stuck your finger in a light socket.
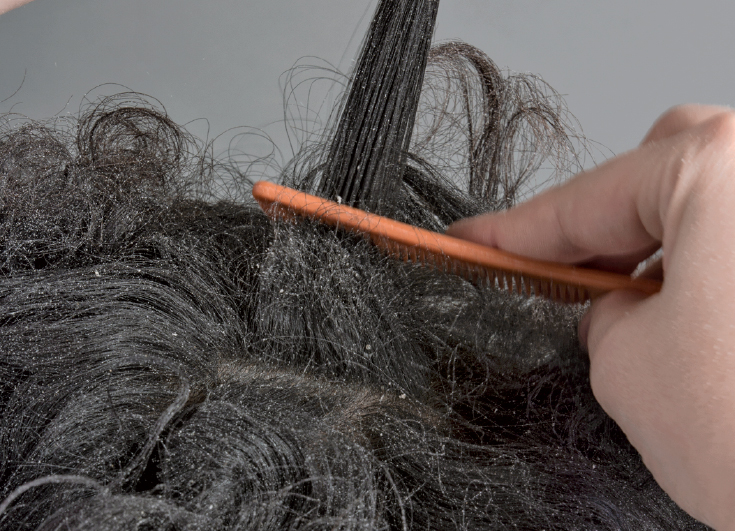
7. Unless your hair is pretty short in the front, you’re going to have to do some teasing to get it to stand up and not flop forward into your eyes. Use as much hard pomatum, powder and common pomatum as you need. For Zyna, we didn’t need to use much more than our comb, but that’s simply because of her hair texture. You need to do what’s best for your hair!
8. For the mid ’90s, you want to have some defined curls standing up and out, not just a ball of frizz on your head like in chapter 10. You can shape larger, more defined curls over a knitting needle to hang below the ears and down the back, or tease and roll the hair up into buckles using the methods in previous chapters.
THE CHIGNON

9. Part the hair horizontally across the scalp toward the top of the head.

10. Next, you’re going to part down from your first part to the nape of the neck. Secure each side of hair with bobby pins to keep it out of the way of the chignon. This also helps add extra fullness to the lower sides of the hairstyle.

11. Clip your extensions in place and comb out to make sure there are no tangles or knots. Add any extra powder or pomatum you might need to make sure that the fake hair matches the real hair.

12. Using large roller pins, secure the extension at the nape of the neck, making sure to cover any visible bobby pins.
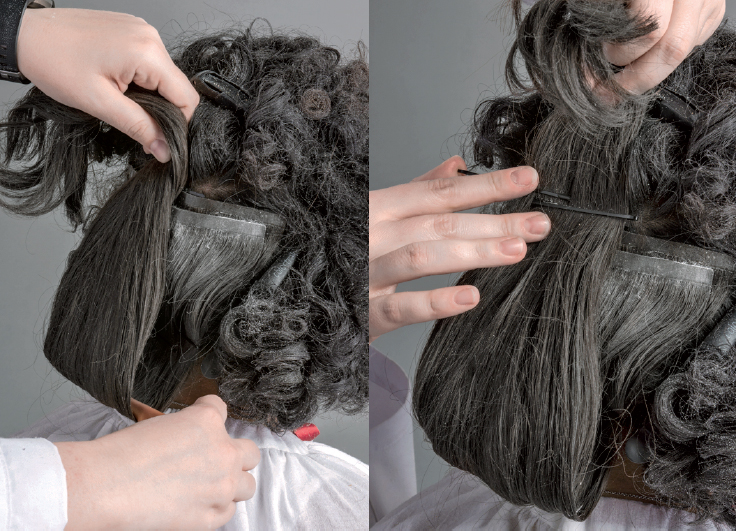
13. Rest the tail of your comb at that same part of the neck where the pins are, and holding the hair securely in your other hand, flip it up to where the chignon is attached. Pin the chignon into place.

14. Now curl the ends of the chignon with the curling iron. Allow them to cool.
15. Once cool, unclip the rest of the top of the hair, and blend the curls together so there is no visible hair break.
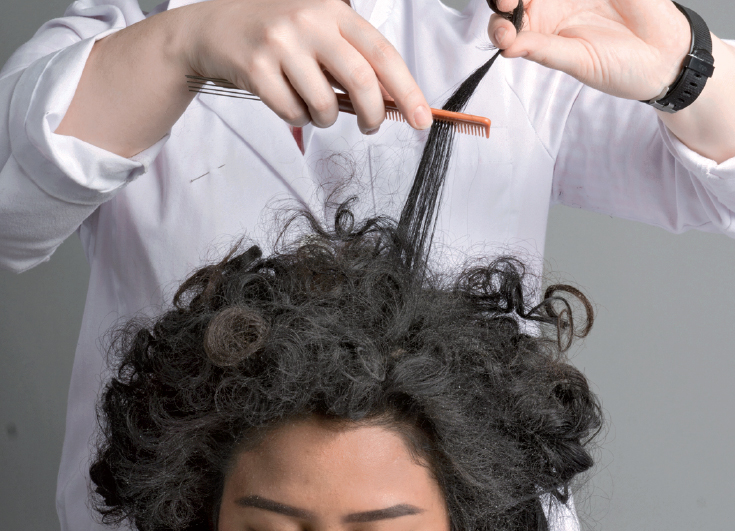
16. Continue to pin, tease, define and arrange until you are happy with your new 1790s ‘do.

17. Tie your chiffonet around your style, pulling a few curls through the wrap. Dang girl, now you’re ready to start a revolution!
(A fashion revolution, let’s not get too ahead of ourselves!) [5]