4. Light Control in the Studio
I have been teaching light control workshops for many years and, as such, have been forever linked to lighting education and light theory. When I am asked why I have chosen to stay focused on light, I respond that lighting education is one of the most overlooked and yet most important aspects of gaining a well-rounded knowledge of photography. There are factors that are present in lighting that can be subtle, artistic nuance—but there are others that are pure science and physics. Personally, I enjoy trying to find ways to master both. There are many who describe the practice of photographic lighting as engaging two sides of the brain: the left side of for analytical thought processes and the right side more for creative thinking. It is a great exercise to try to use both effectively.
![]()
Bright or subtle colors and geometric shapes can be added . . .
The Theory of Lighting Relativity
Dean Collins, one of my greatest friends and mentors, used to teach that almost everything in photography is based on relativity. Everything is relative to the next thing. With this in mind, think about the size of just about any given light source. Its physical size is obviously a fixed value, but its effective size actually varies relative to its distance from the subject. As a light source gets closer to a subject, it becomes larger relative to the subject. This seems pretty simple and makes sense, right? But what is important is how that change in distance affects the way the light looks on the subject.
There are three primary changes that occur whenever the relative size of the light changes. For the sake of this discussion, let’s assume we are using a standard medium-size softbox. As you move the softbox closer to the subject ( figures 4-1 through 4-3 ), three things happen:

Figure 4-1. A medium softbox placed far from the ball is small relative to the subject and creates a small, well-defined shadow.
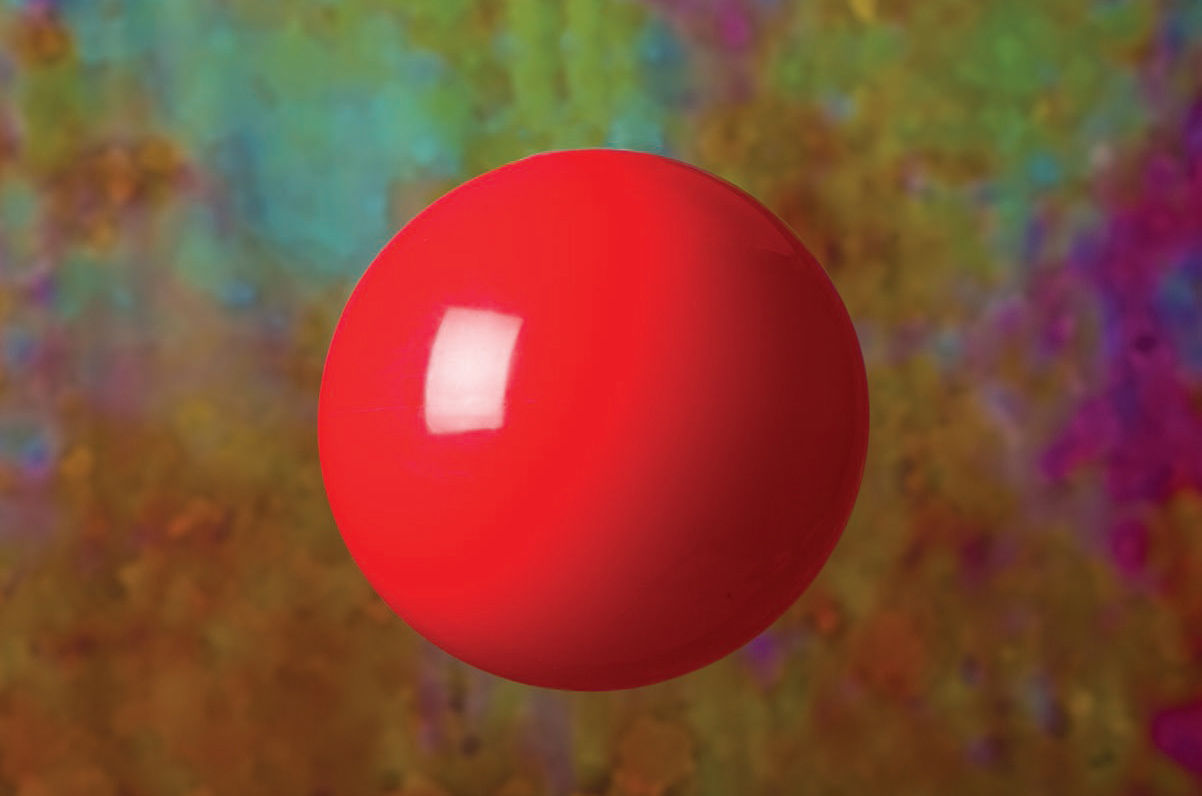
Figure 4-2. The same medium softbox is moved closer. It becomes larger relative to the subject and creates a larger, slightly softer shadow.
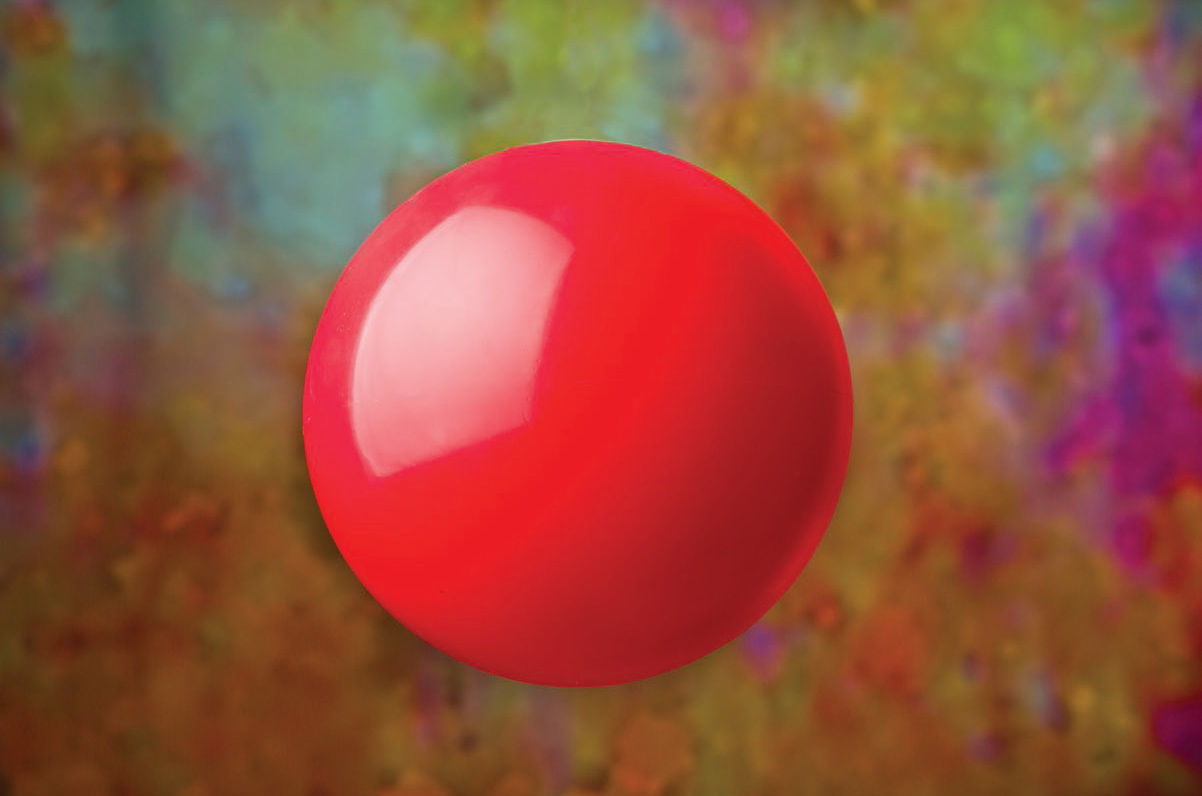
Figure 4-3. The same medium softbox is moved even closer. It becomes still larger relative to the subject and creates a big, relatively soft shadow.
1. The edge of the shadow becomes softer
2. The size of the actual highlight increases
3. The brightness of the actual highlight diminishes
Here’s the thing to consider with the above three actions. Physics plays such a big role in this area of control that it is fairly easy to understand once you know what is taking place. The good news is that it does exactly the same thing and reacts the same way each and every time you repeat an action. If there is something you want or need to do for a specific picture, this means it should be fairly easy to figure out what you need to do to achieve that look. You can also start with a specific look and then alter the shadow or the highlight with predictable results. In order to produce depth in your work, remember that both shadows and highlights must be present. In his writings, Leonardo DaVinci expressed that “the artist who avoids the shadows may be said to avoid the glory in art.” So, let’s first take a look at the shadow side of the equation.
![]()
It should be fairly easy to figure out what you need to do to achieve that look.
The only way you can effectively change the sharpness of the edge of a shadow is to change the effective size of the light source—either by selecting a physically larger/smaller source or by adjusting the distance of the light source relative to the subject. The light gets softer as the physical size increases or as the light gets closer to the subject. The shadow gets sharper and more crisp-looking when you diminish the physical size of the light source or move it further away from the subject. Think about the shadow from the direct sun on a clear day. Even though the sun in physically very large, its vast distance from a subject here on earth results in shadows that are extremely sharp and almost cutting. However, if a cloud makes its way in front of the sun, the shadow edge becomes instantly softer. The cloud is actually physically smaller than the sun, but it’s also much closer , so its effective size is much larger.
Hard, cutting-edge shadows look great with portrait subjects who have really smooth skin (when concealing blemishes or wrinkles is not a concern). Conversely, hard shadows can really make a fabulous look for an elderly person in terms of a character study portrait. Accentuating the skin texture can, in this case, help illustrate the long miles the person has traveled in their life. Understanding how to refine this look by making changes in the distance/size of your light source is a great tool to have at your disposal.
Shadows have dictated the subtleties of portrait lighting patterns on the face for many years. Most portrait photographers have been taught the four primary light patterns, which are all directly related to the shadow formed by the subject’s nose on their cheek or lip. In fact, their names are literally descriptions of the shape of that shadow.
![]()
Shadows have dictated the subtleties of portrait lighting patterns on the face for many years.
In split lighting, the face is literally lit on one side and not on the other. So half of the face is in shadow and the other is lit for a true exposure of the skin tone ( figure 4-4 ).
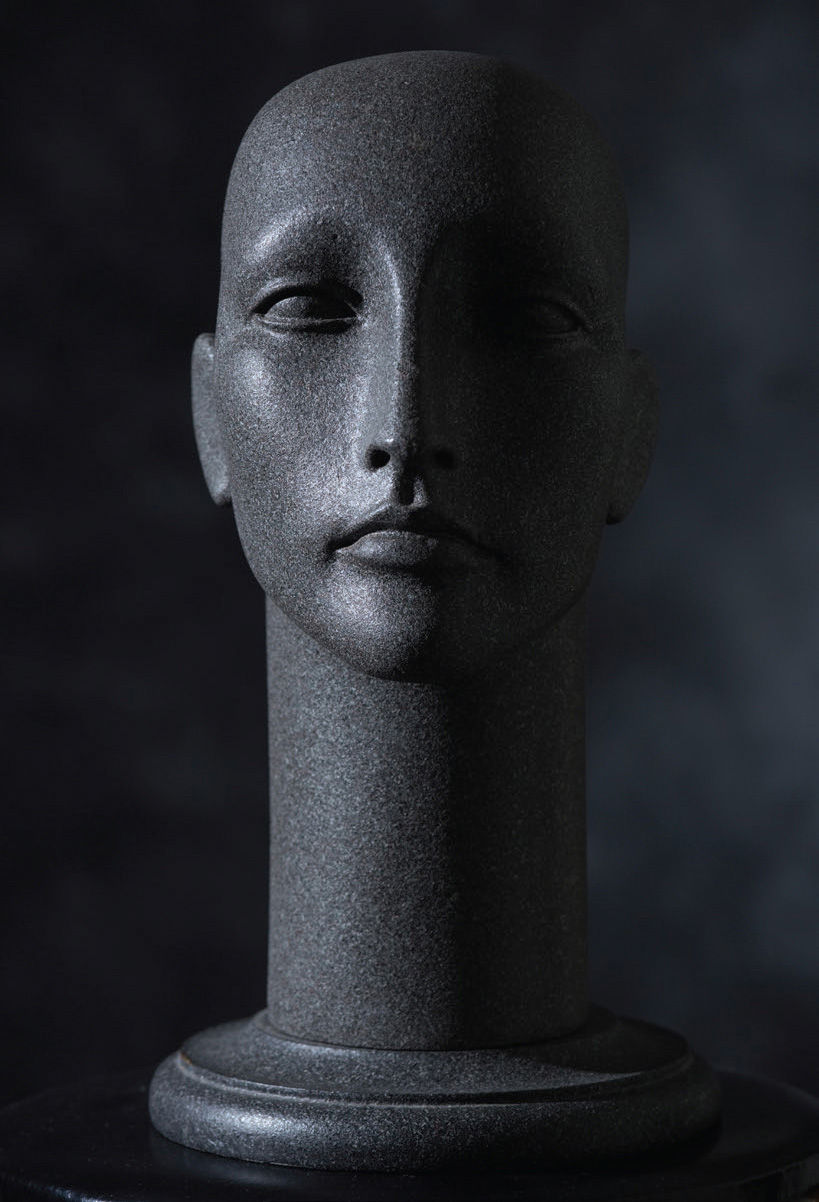
Figure 4-4. Split lighting.
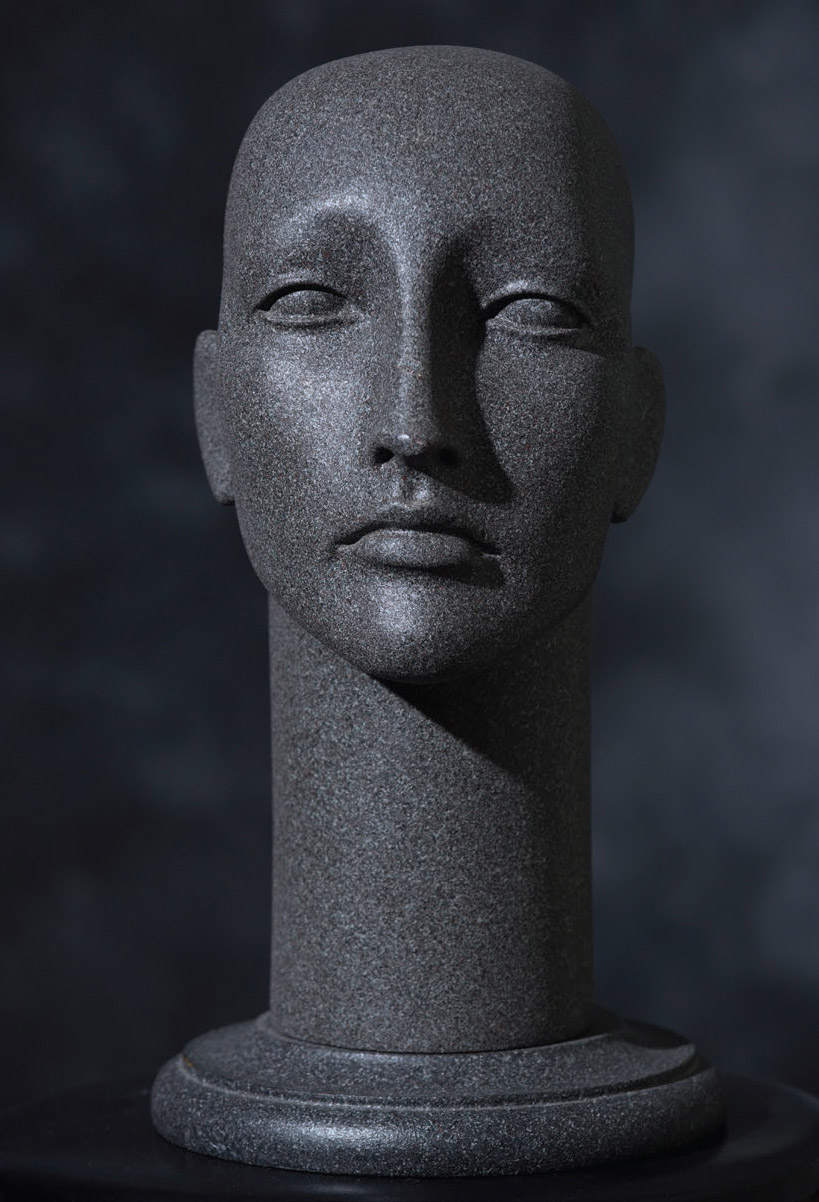
Figure 4-5. Loop lighting.
In loop lighting, the shadow from the nose makes a small loop of shadow from the nose onto the cheek, illustrating good depth ( figure 4-5 ).
The Rembrandt lighting pattern (also known as modified loop lighting) occurs when the shadow from the nose in the loop position is moved until it touches the shadow area on the cheek. This creates a small triangle of light on the cheek, surrounded by shadow ( figure 4-6 ).
In butterfly lighting (also known as Paramount lighting), the shadow from the nose is directly below the nose and the shadow on the lip has the shape of butterfly wings ( figure 4-7 ).
It is helpful to understand each of these four basic light patterns. Just keep in mind that they are based on shadows. When photographing a subject with a darker complexion, the shadows may be less obvious. Instead, you may want to conceptualize your lighting based on the highlights; these tend to be more useful sculpting elements when you are lighting to show the contours of a subject with darker skin tones.
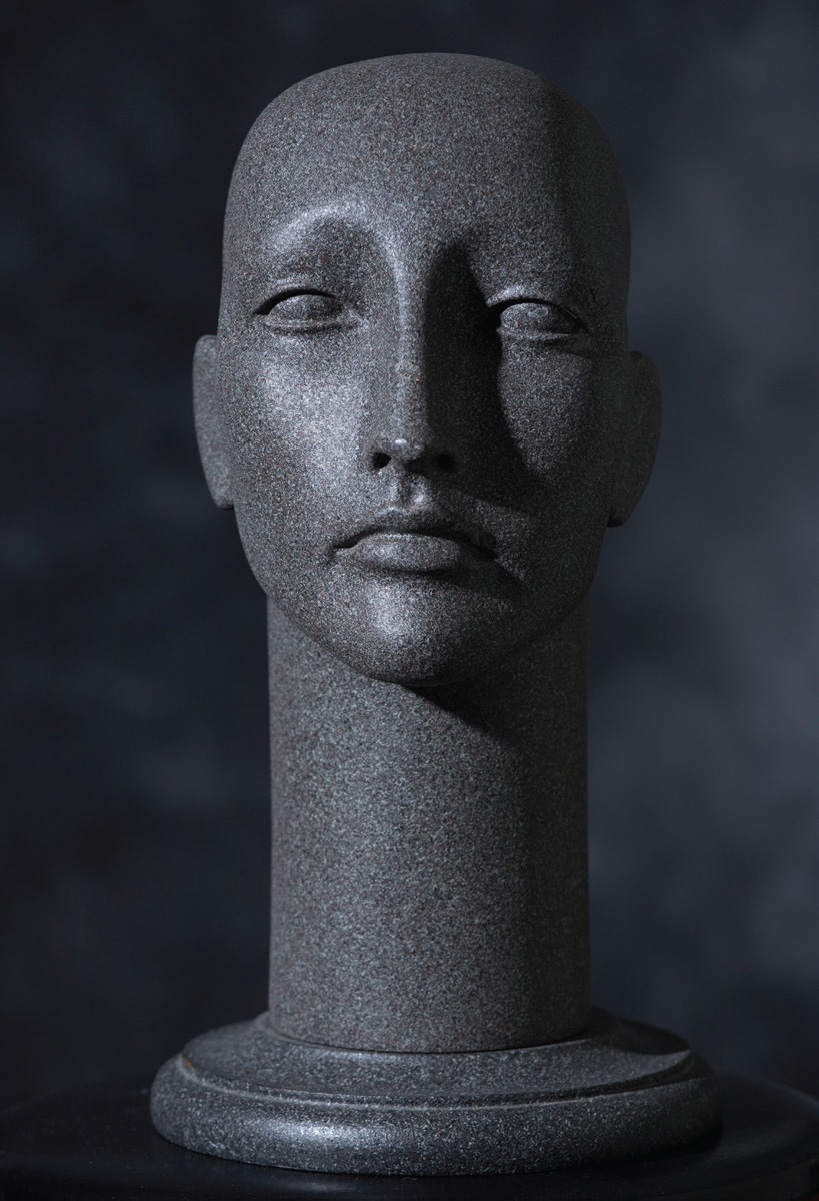
Figure 4-6. Rembrandt lighting.
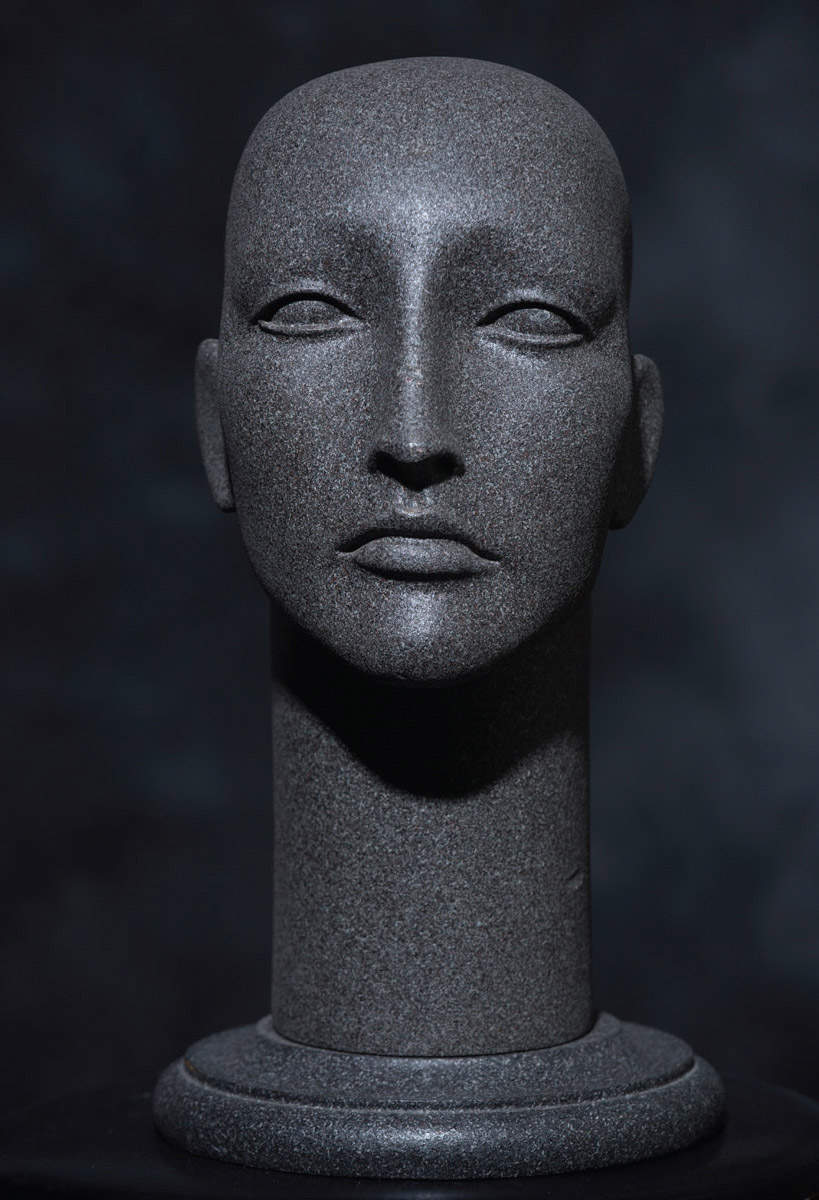
Figure 4-7. Butterfly lighting.
In portrait and commercial photography, the highlight can become an integral part of the image, illustrated as almost a design element. In a portrait, the catchlights in the eyes reflect the highlight created by the light source. As the light source gets larger or closer, the highlight becomes larger.
Oddly, as the highlight becomes larger it also becomes less bright at the same rate that the size increased. See if this makes sense. If (without changing the light’s physical size or output setting) you make the highlight it produces four times larger, the brightness of the highlight will also diminish to ¼ the original brightness. This is because the output of the light is the same, but now it is spread over a larger area. This is one of the single, most important lessons I learned about photography. It has made me better and more respected—and it has saved more pictures than I can remember! Try this and you will see how important the role of the relative size of the light is in the look of the highlights. In fact, at the end of this book you will be given a little homework to practice this.


Figures 4-8 and 4-9. On dark and/or shiny subjects, the highlights become an integral part of the image.
Imagine you are shooting a portrait and the subject is holding a glass of red wine. Now, the reflective value of the glass adds another element to the portrait and must be controlled ( figures 4-8 and 4-9 ). The size and shape of the softbox will now play a significant role in the lighting on the face but it will be especially obvious in the highlights on the glass. Paying great attention to details like this will improve your photography more than just about anything else you can do (with the exception of improving your client interaction).
![]()
This will improve your photography more than just about anything else you can do.
The Relationship Between Light and Shadow
The relationship between light and shadow is one of the most personal and subjective controls you have available. The brightness of the highlight side of the face, or the darkness of the shadow side, can be anything you want if it helps to tell the portrait story. There are instances where you will want more or less shadow depending on the client, the clothing, and how the image might be used ( figures 4-10 through 4-14 ). As you can see in these examples, lighting ratios that range from 1:2 (a 1-stop difference between the shadows and highlights) to 1:4 (2-stop difference) or even 1:8 (3-stop difference) are all good choices—but there will usually be one ratio that is just the right one in each portrait session.
Figures 4-10 and 4-11. What is the right balance between the shadows and the highlights? It depends on the story you are trying to tell in your image.


Figures 4-12, 4-13, and 4-14. What is the right balance between the shadows and the highlights? It depends on the story you are trying to tell in your image. More on these images in chapter 6 .
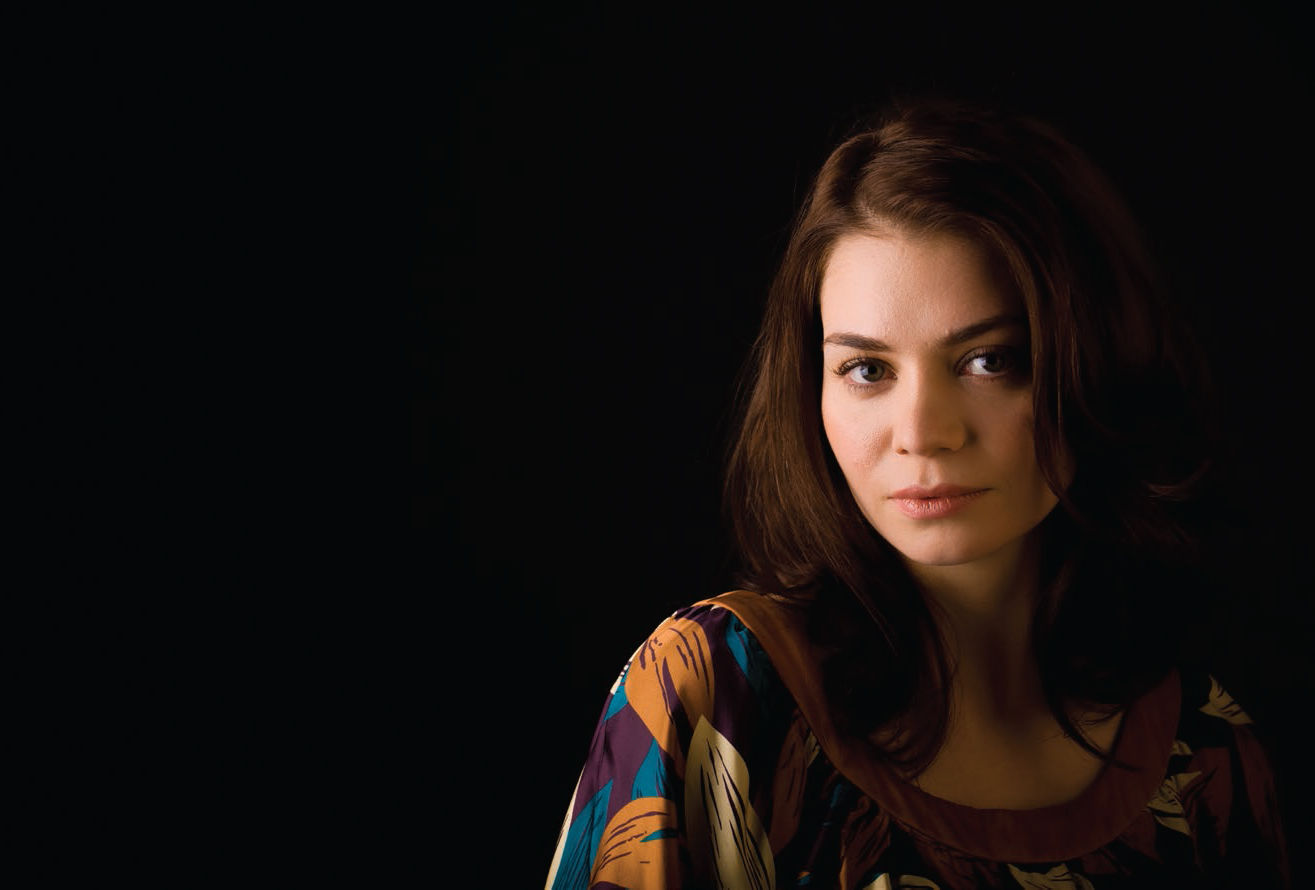
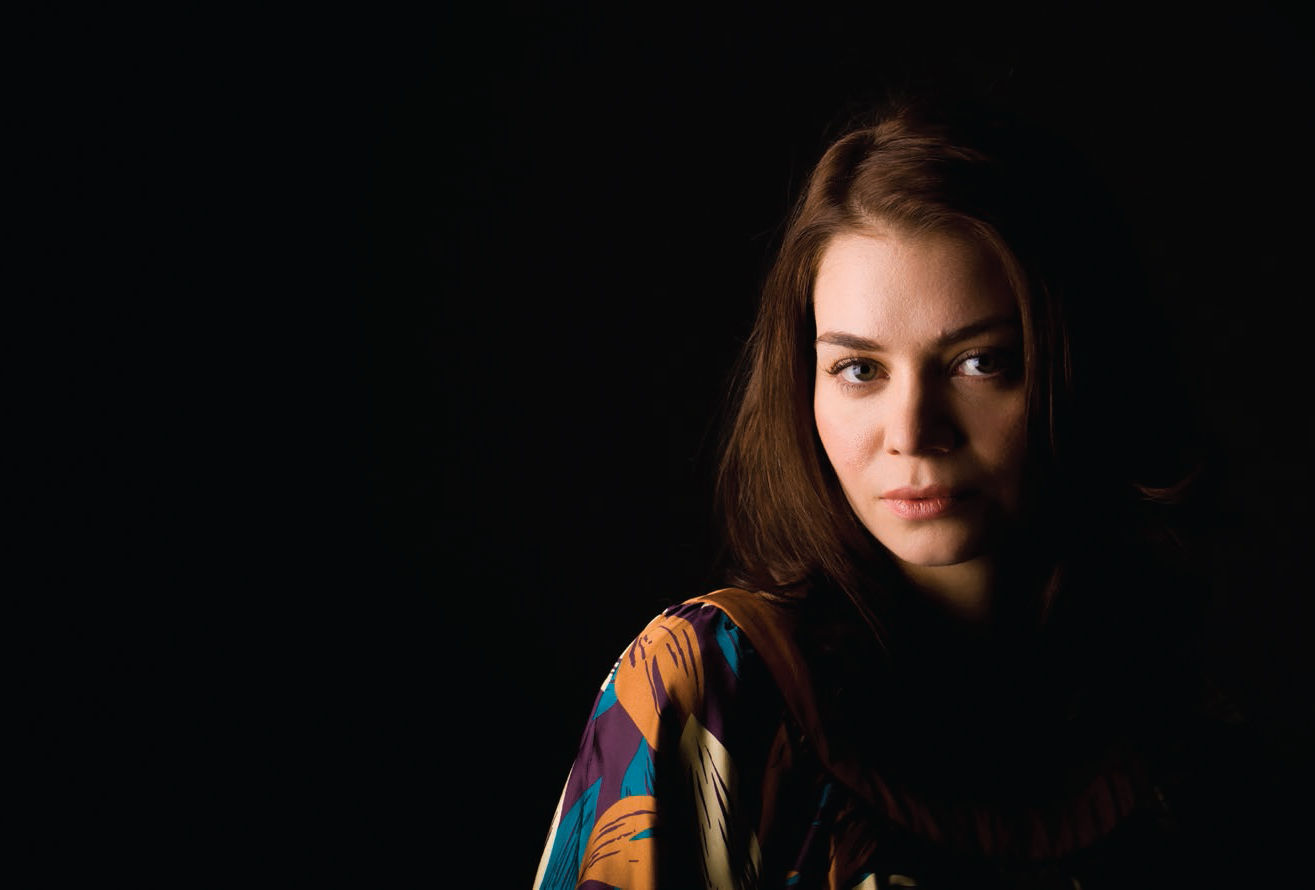
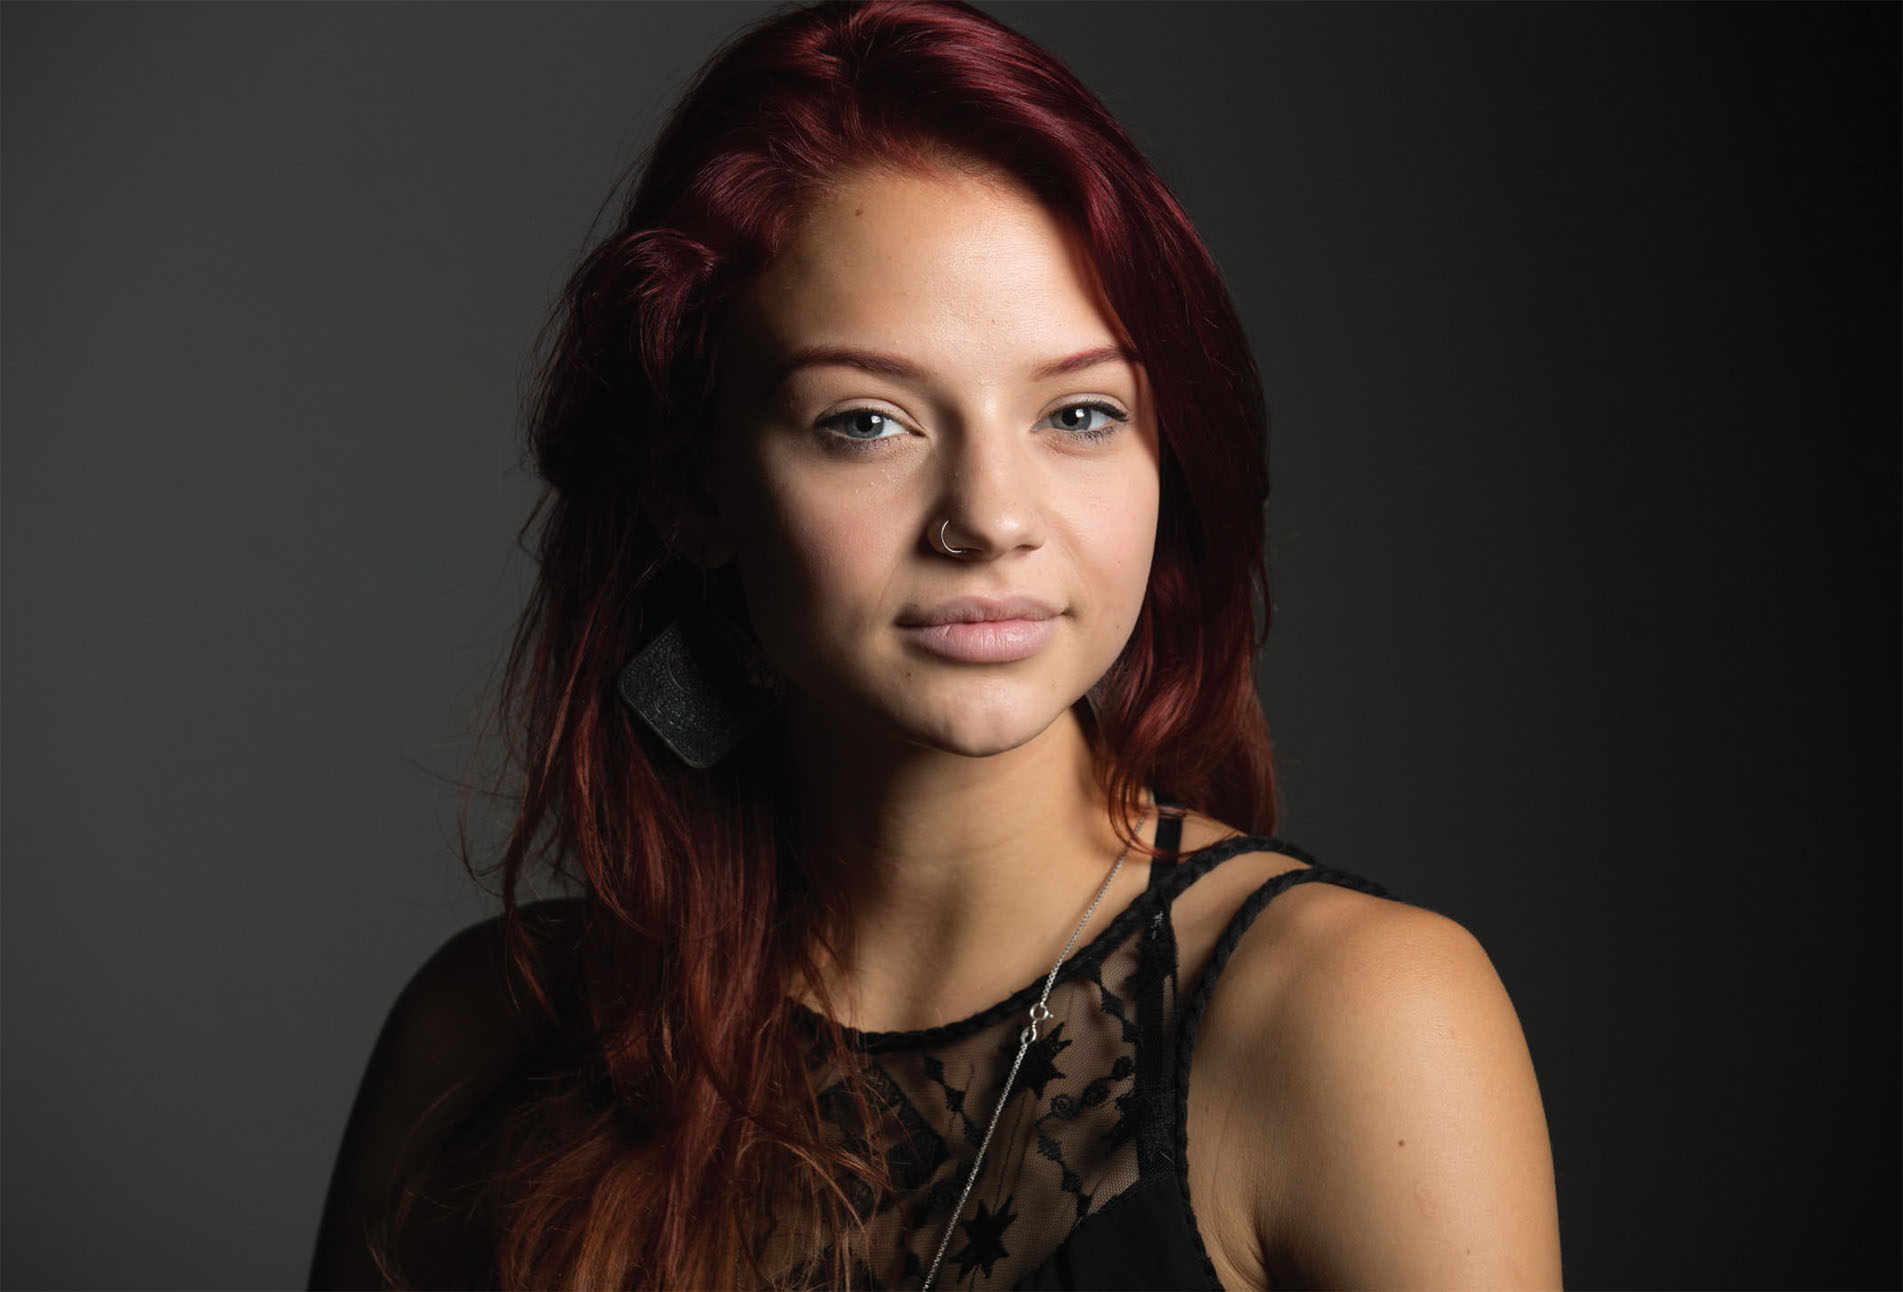
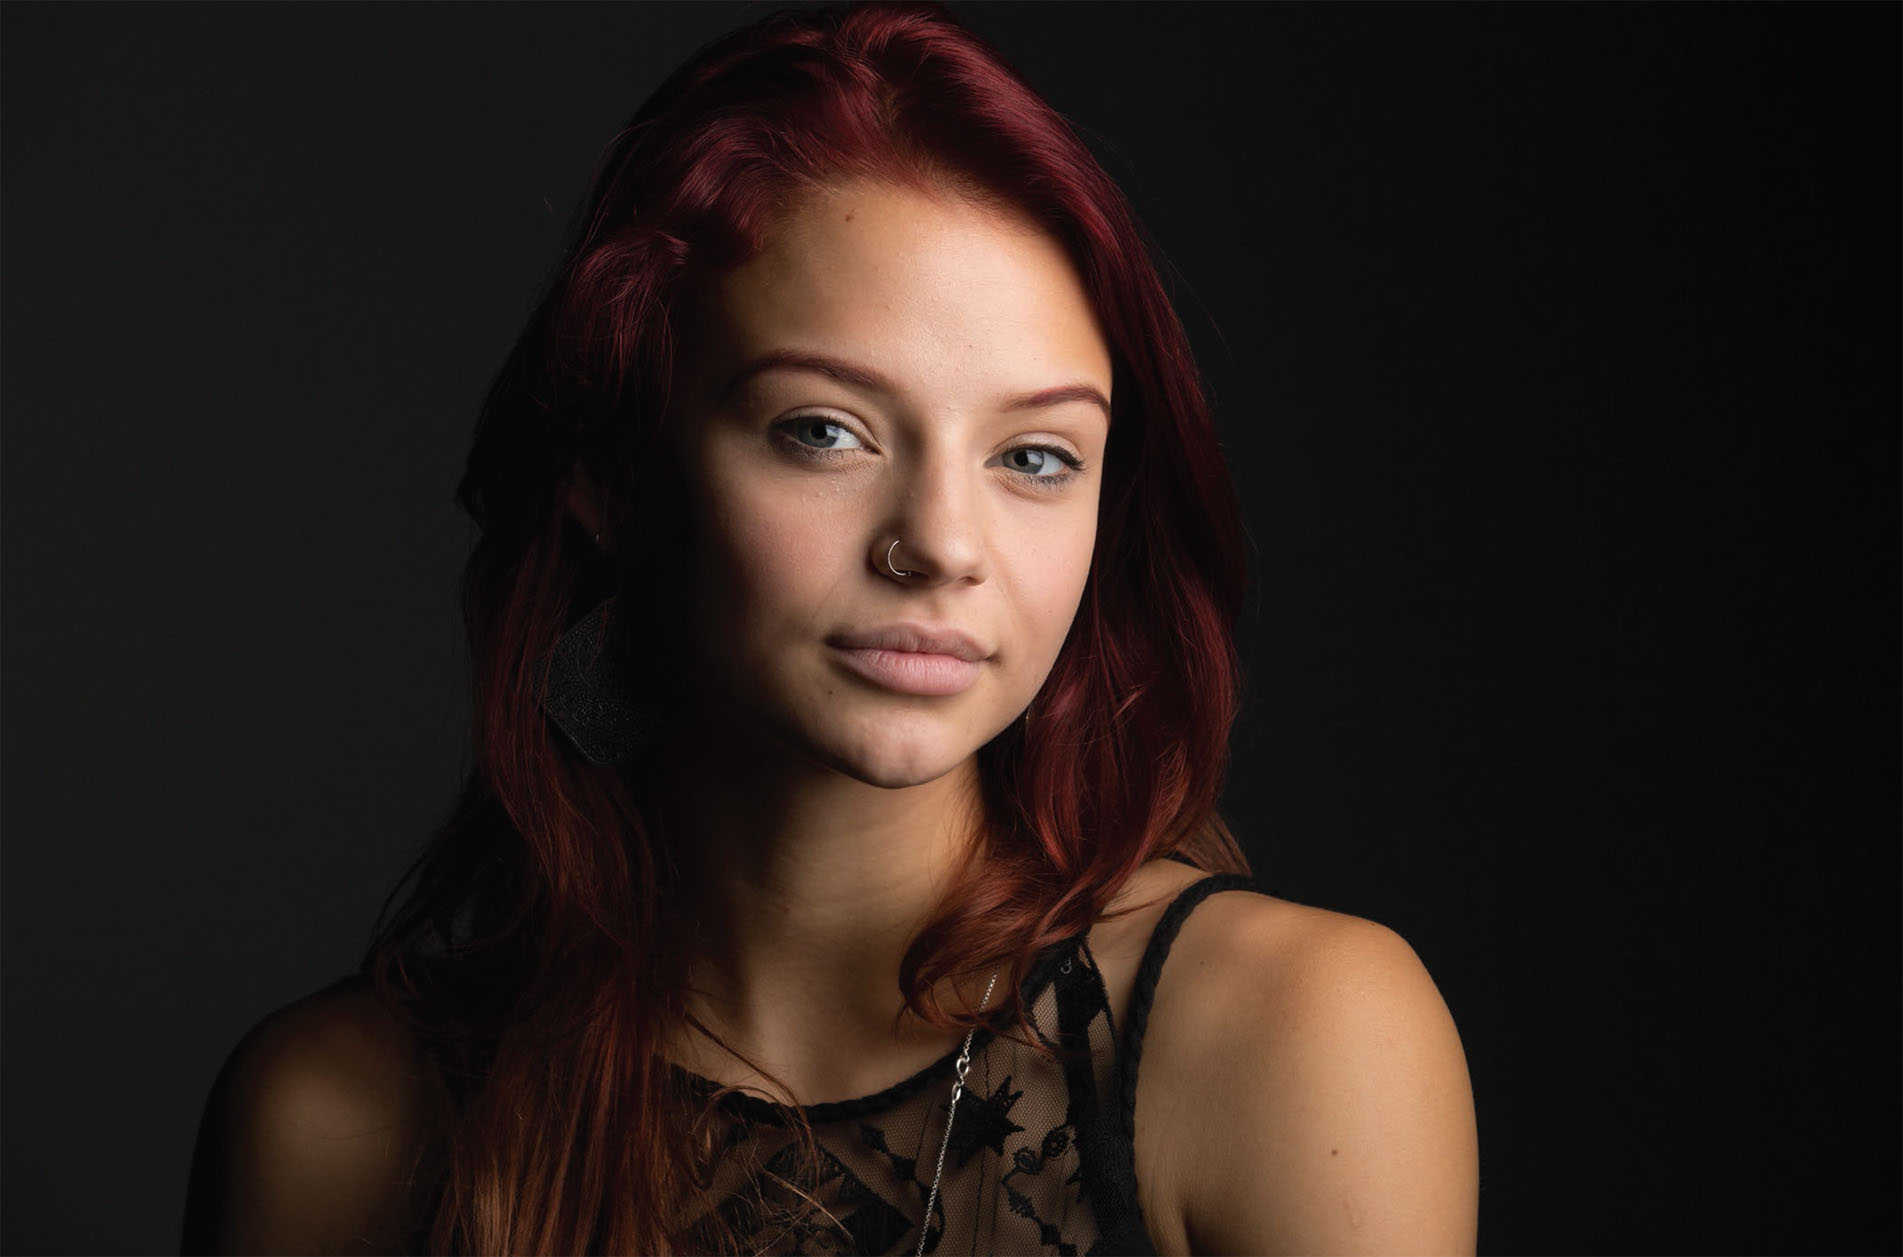
Now, let’s look at two pairs of images, figures 4-15 /4-16 and figures 4-17 /4-18 . In each of these examples, I used a simple white reflector to add a bit of fill light into the shadow side of the face. One thing to be very careful about is the placement of the reflector. Most photographers place the reflector much too far back. To optimize it, move the reflector forward. This will produce a much more flattering look on the face, especially along the bridge of the nose and in the eye on the shadow side of the face.


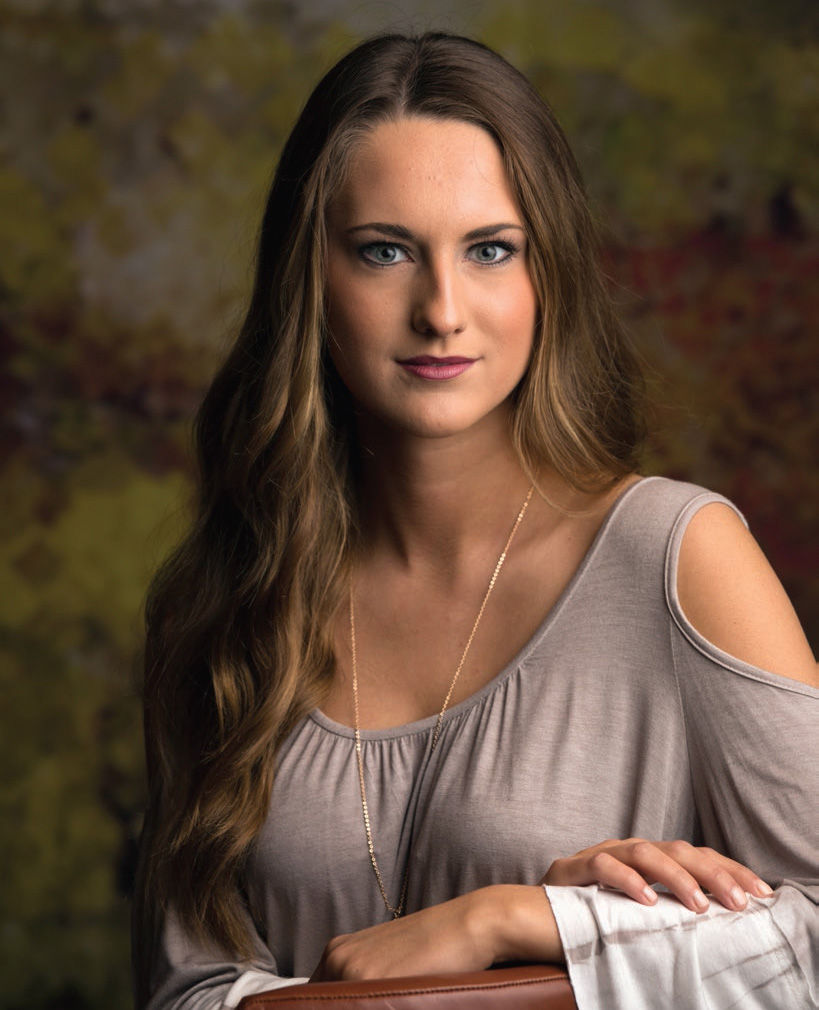
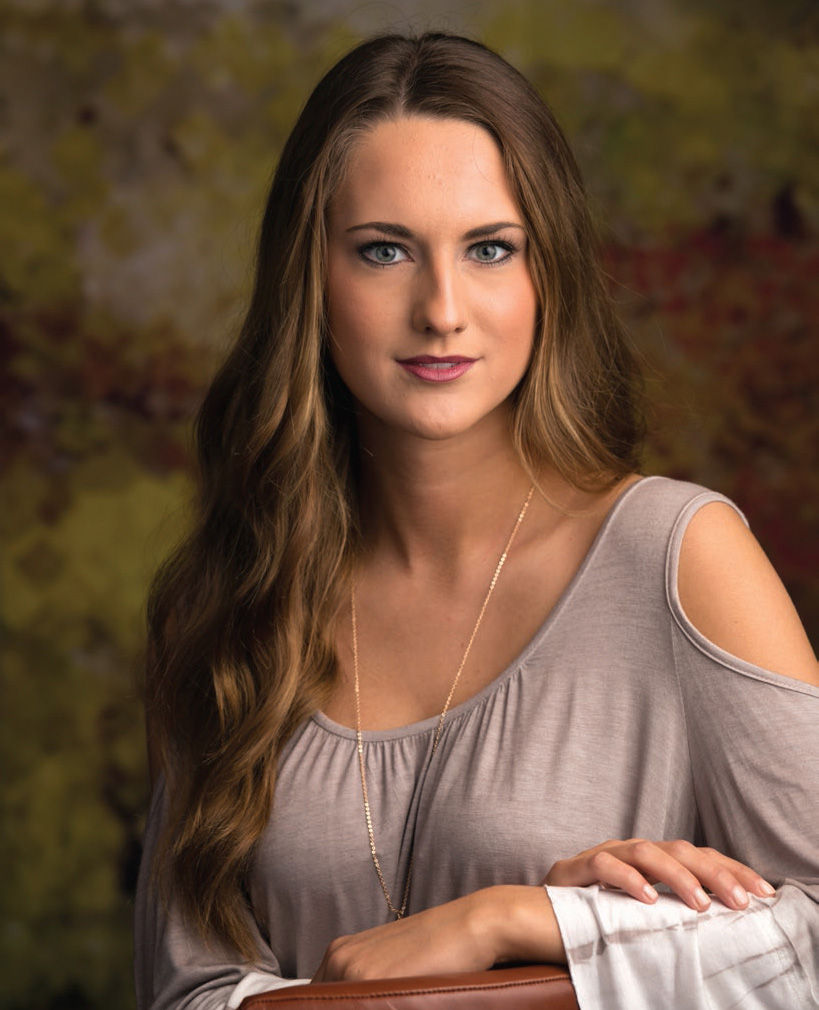
Figures 4-15/4-16 and 4-17/4-18. In the images on the left, you see the effect of the main light only. To reduce the shadow, I added a simple white reflector. This produced the effects seen on the right.
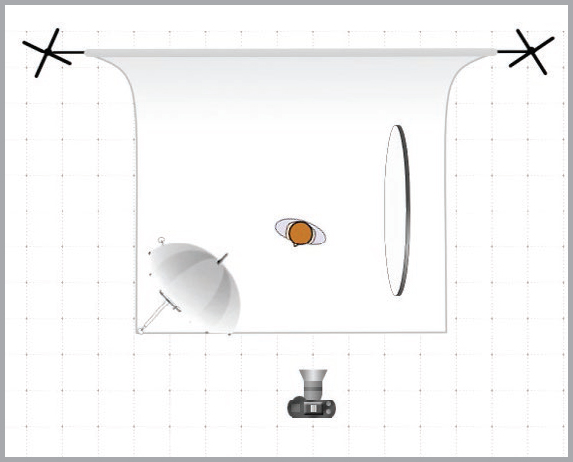

Figures 4-19 and 4-20. Don’t put the reflector too far back (top). Moving it forward (bottom) will produce a more flattering look.
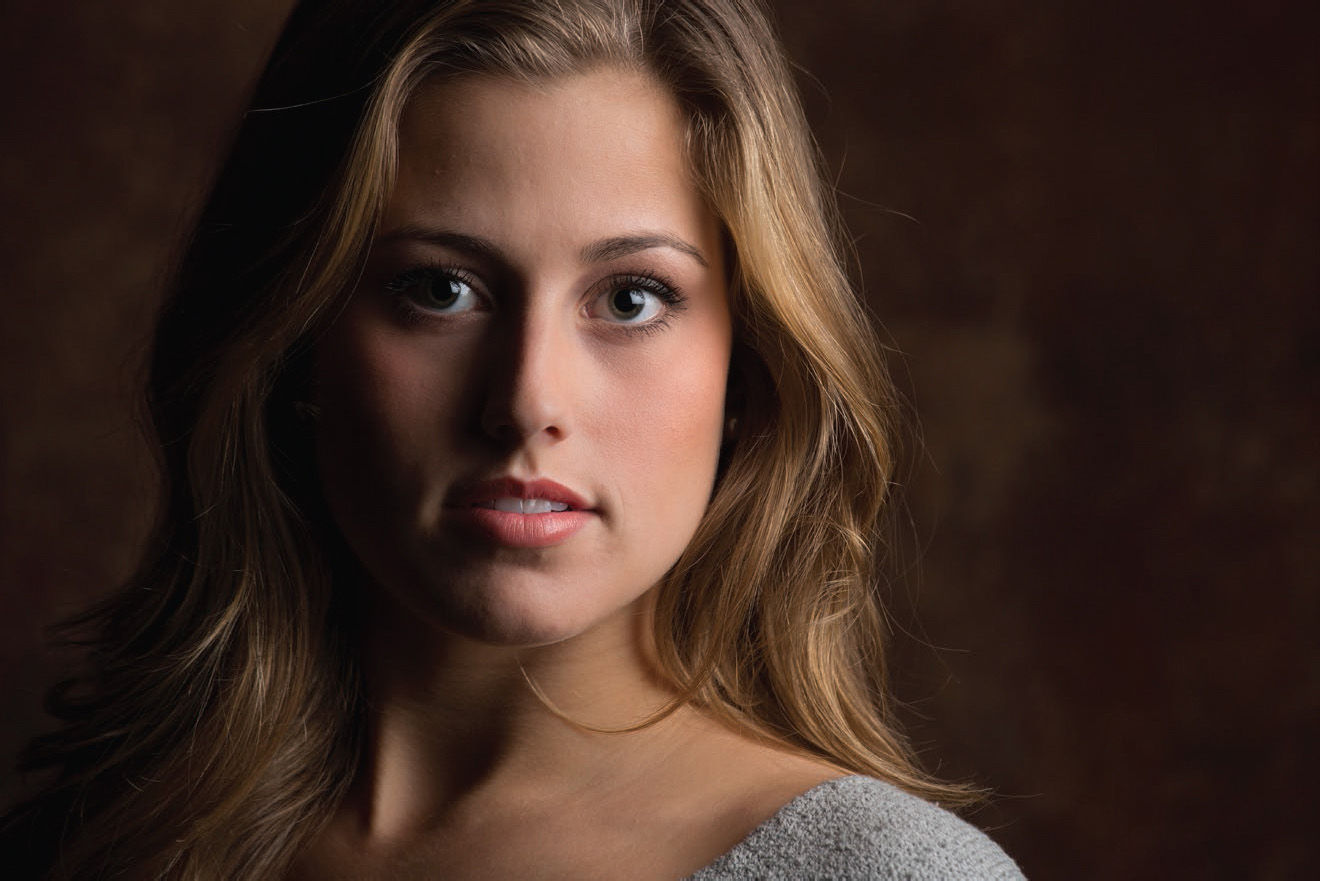
As we finish up this chapter please again notice how the size of the light source makes all of the difference in shadow edge, highlights in the eyes and the overall lower contrast look and feel of the image ( figures 4-21 and 4-22 ). Also, keep in mind that the success of an image is often not determined only by the contrast of your light; the direction of light will also play an important role. For example, for figure 4-23 the light was very high and almost behind the subject, aimed forward.
Figures 4-21 and 4-22. A relatively small light source (top) produces a very different look than one that is large relative to the subject (bottom).
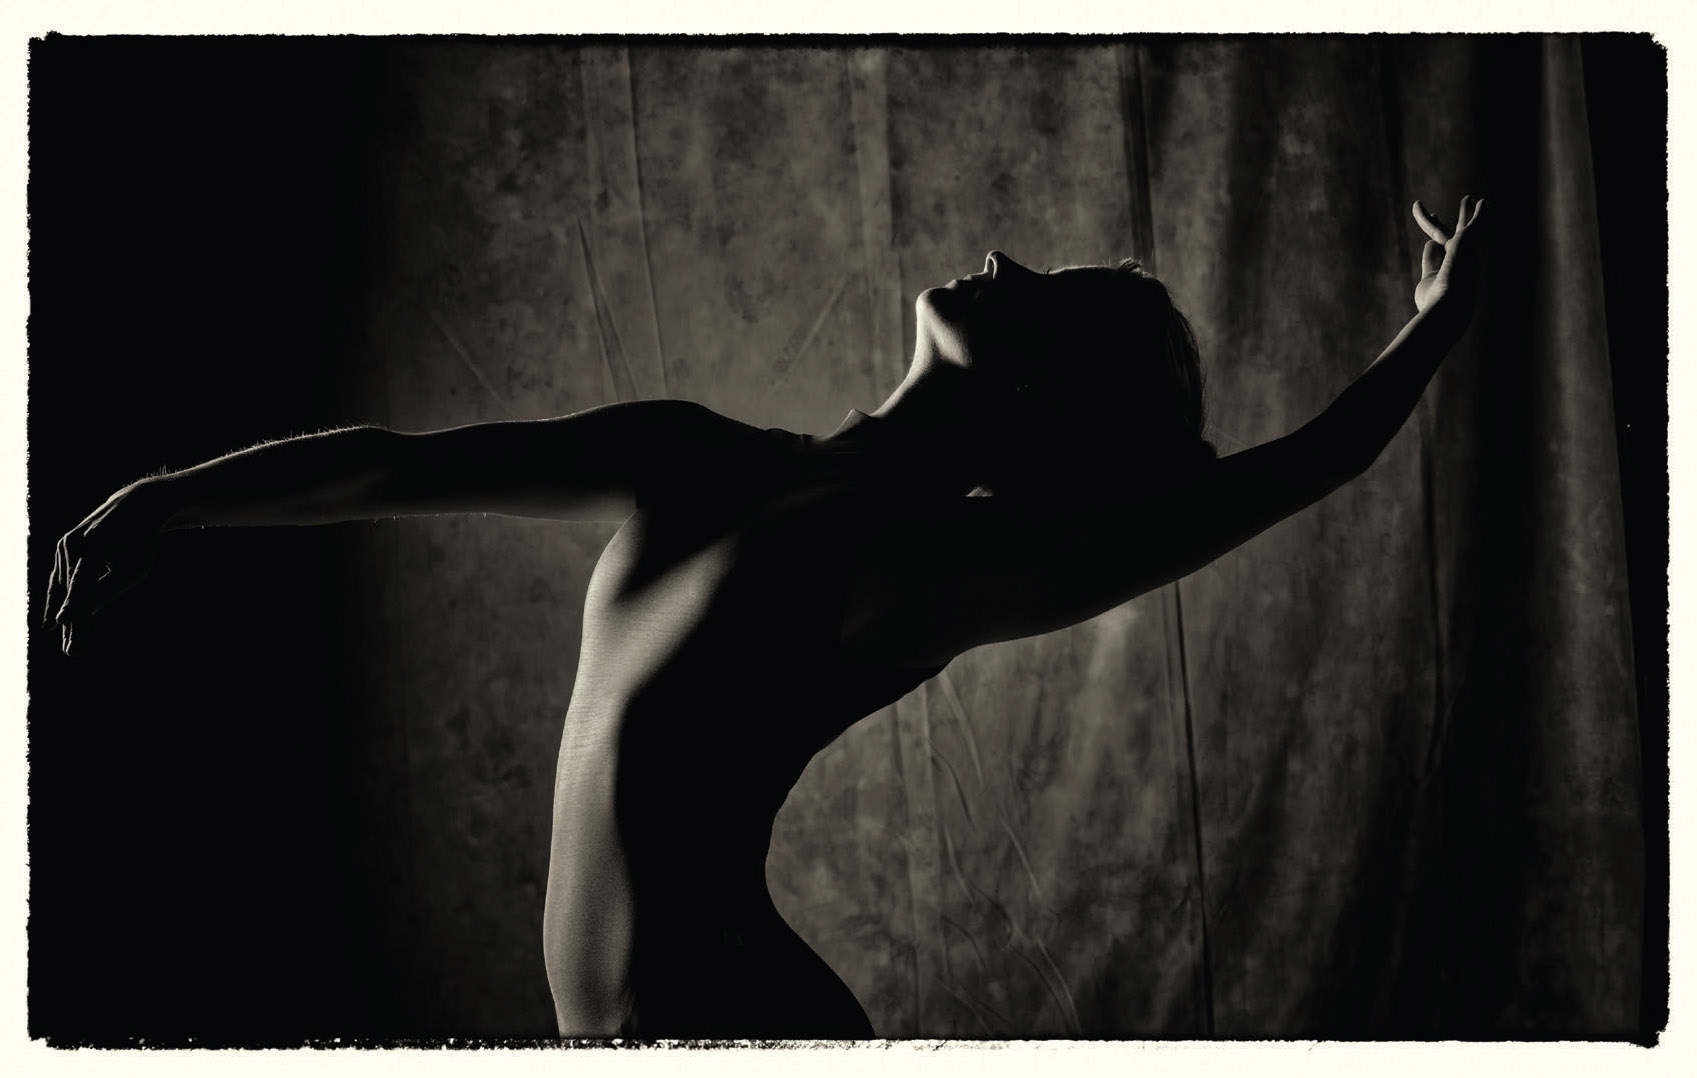
Figure 4-23. The direction of the light also plays an important role in the look of an image.