I AM ONE OF THE lowest-tech people that you will encounter. However, there is no denying that certain tools make baking much more enjoyable. I rely on a mix of the standard-issue, you-probably-have-it-in-your-kitchen tools and a few novelty items. Fortunately, much of the
equipment once found only in professional kitchens is now widely available for home cooks—at decent prices.
There are two types of bench scrapers, and I recommend owning both. The most invaluable bench scraper is so simple it looks like an afterthought. It is a thin, inexpensive flexible rectangular piece of plastic with one rounded side (and it is sometimes called a bowl scraper). I use it as an extension of my arm. When bringing cookie dough together by hand—a technique I use over and over again in this book—I use a plastic bench scraper. A rubber spatula isn’t nearly as effective for this kind of work.
Although a plastic bench scraper can cut through and portion dough, a metal bench scraper is better for this job. A metal bench scraper also can be used to square off dough and straighten sides. Some come with a ruler etched into the edge, which is handy.
As I worked on developing recipes for this book, I kept a stack of stainless steel, heatproof bowls under the worktable. This may sound obvious, but having bowls of various sizes is essential for working efficiently in a kitchen. A medium-size bowl is perfect for whisking together the “drys”—the flours, salts, and leavening agents that get mixed into the batter at the end. A medium bowl is also good for making an adhoc bain-marie for melting chocolate. And smaller bowl is useful for combining eggs and vanilla. If you don’t have any, do yourself a favor and get a set of bowls that nest inside each other. Having a couple of microwave-safe glass bowls is also useful for melting chocolate for dipping cookies. Avoid bowls that have rubberized bottoms—these cannot be used in bain-marie setups.
When I make caramel, I rely on color—not temperature—to know when the caramel is good to go. But in some recipes, such as
Marshmallows, it is necessary to be more precise with temperature. To use, clip the thermometer to the side of the pot, ensuring that the bulb is immersed but is not touching the bottom.
Candy thermometers usually do double-duty as deep-fry thermometers. They are not expensive, but they do get beat up over time and lose their calibration.
Replace old ones if you fear they are no longer accurate, or follow instructions on how to recalibrate them. Even when I have a few in rotation, I always keep new ones on hand to swap in.
If you want to give your cookies a chance at a shelf life, you need to store them correctly. I love any square or rectangular boxes that have lids that are easy to take off but also offer a tight seal. They stack and also make it easy to store cookies in the refrigerator.
This roll of spikes with a handle looks like a back scratcher (
see image), but it’s designed for pastry work. Roll it over pastry dough and it creates holes that allow air to circulate and prevent dough from puffing up and forming blisters as it bakes. (Pricking dough with a fork before baking creates a similar effect.) In this book, a dough docker is especially helpful for the shortbread and sandwich cookies. I roll it over some of the cookies to give them a classic look.
Dough dockers come in a range of models, but most are inexpensive and readily available at cookware stores and online.
I use a food processor frequently in my cookie recipes. It is great for pulverizing nuts into flour and making nut butters, but it’s capable of more than that. When I make
Ground Chocolate Spritz, for instance, I grind cold chocolate with flour to make a chocolate flour. At Hot Chocolate, I am fortunate to have an industrial-strength Robot Coupe. At home, a Cuisinart will do the job fine. If it is an older machine, have the blade sharpened. (The same people who sharpen knives will sharpen food processor blades.) Trying to blend up ingredients in a food processor with a dull blade makes me want to pull my hair out.
It’s no longer a professional secret that scooping drop cookies with an ice cream scoop makes for evenly sized, perfectly round cookies. Some companies now make ice cream scoops specifically for portioning cookies. The scoops come in various sizes and are easy to find at cookware stores, general stores like Target, and online. But it is not always easy to determine the size of the scoop by reading the label. I use a ¾-ounce, 1½-tablespoon scoop for many of the drop cookies in this book. If you are not sure about the size of the scoop, fill it with tablespoons of water to determine its capacity. The scoop will be approximately 1½ inches in diameter.
It’s not essential to have one, but these inexpensive blenders—also called stick blenders and burr
mixers—are handy for emulsifying sauces such as hot fudge and caramel sauce. You use one by submerging the blade end directly in the sauce. A few pulses are all you need to bring the sauce back together.
My kitchen has a motley assortment of measuring
cups and spoons that live in a plastic container within reach of the worktable. Some are missing handles, others have no indication of their size. But work in the same kitchen long enough and you know the cups and spoons by sight. For measuring the dry ingredients for this book, all you need is one good-quality set of each, preferably made of heavy-duty metal. (See instructions on how to
measure ingredients with the “dip and sweep” method.)
For measuring liquids, like heavy cream, a few glass Pyrex liquid measuring cups in 2- and 4-cup sizes will serve you well. Glass is preferable to plastic because it won’t crack in case you need to use it to measure hot liquids. Some Pyrex measuring cups come with a rubber lid, which makes them good for storing jam or hot fudge. If you don’t like measuring small quantities of liquid ingredients with measuring spoons, get a small liquid measuring cup that can measure up to 4 tablespoons (¼ cup).
Having a sturdy stand mixer is essential for creaming together butter and sugar in one lovely aerated mess. KitchenAid is what I grew up using, and it is what I still use today. Investing in a nice mixer will serve you well
for years. For cookies, I use the paddle attachment the most frequently; the whisk attachment is a distant second. I have a bin of extra mixing bowls that fit the mixer. It is not essential to have this at home, but it comes in handy when juggling multiple recipes at once.
Buying parchment paper already cut for the size of a sheet pan makes lining pans so much easier. I frequently use the dimensions of precut parchment paper as a guide when rolling out the dough for shortbread, rugelach, and kolachke cookies. If you bake often, it is much more economical to buy precut parchment paper for half sheet pans than it is to buy rolls of parchment paper at the grocery store. Restaurant supply stores sell precut sheets, as do King Arthur and Amazon. If the quantities are too large, split the haul with a baking buddy.
For frosting sandwich cookies, shaping spritz cookies, and producing a few other recipes in this book, you will need a pastry bag and a selection of tips.
• Pastry Bags: Most commercial kitchens stock rolls of plastic disposable pastry bags. They are easy to fit with metal tips; all you need to do is snip off the tip of the bag and fit the bag with the pastry tip needed for the job. They are also cleaner to use than cloth pastry bags, which are a pain to wash and can get smelly. At home, you can use reusable cloth pastry bags, but give them the sniff test first to make sure they are clean. Buy bags that are at least 14 inches long but preferably 16 inches and up.
•
Pastry Tips: I use tips from the Ateco brand, which come numbered. Some are star tips, some are round tips, and some are flat tips, and the larger the number, the larger the opening. In recipes that use pastry bags, I indicate the tip size ideal for the job. Tips are inexpensive. You can buy them separately online or in cookware shops that sell baking supplies, or get a set of various sizes. For this book, source these Ateco numbers: 32, 89 or 134, 804, 823, 826, and 895. If you are missing one but have another that is close in number (like an 803 instead of an 804 or an 823 versus an 826) your results will be comparable. Don’t sweat it.
• Couplers: Couplers are plastic bases and rings that fit on the inside and outside of the pastry tip and help secure the tip to the bag. Cake decorators use them when they want to switch out tips midway through the piping process. You can get by without, but they are helpful for securing smaller tips. I use them on Ateco tips 32, 89, and 134.
Skip the silicone brushes—natural bristle brushes work better. I prefer small brushes to large ones so I can brush egg white into all the nooks and crannies.
A pastry cutter resembles a pizza cutter, but it has a smaller wheel. For visual interest, I use
fluted pastry cutters to give my rugelach a pretty scalloped edge. When using, keep the blade clean by wiping away excess jam or dough from the blade with a kitchen towel.
Resembling a mini paint roller, this inexpensive tool will make rolling out even sheets of dough much easier. The rollers range from 2½ to 4 inches in length, but they all work the same. I use them to smooth out smaller areas of dough that can be tough to target with a rolling pin, such as a corner that’s becoming too thick. But sometimes when I’m in the mood, I roll the dough out entirely with the pastry roller. This tool is essential in my shortbread and sandwich cookie chapters, and it makes rolling out the dough for rugelach and kolachkes easy, too.
Found at craft stores and cookware shops, these inexpensive bottles make cookie decorating easy. I use 8-ounce bottles to portion hot fudge into the centers of
thumbprint cookies. They are also good for dabbing butterscotch or caramel onto cookies for a simple garnish. I buy cases of Wilton 4-ounce bottles at craft stores.
I like the straight-sided (not tapered) handle-free wooden French
rolling pins. Compared with a rolling pin with handles, a handle-free pin allows for better control over the dough. Invest in a 19-inch, straight-sided maple rolling pin approximately 2 inches or so in diameter and you’ll never need another. But if a classic American wooden rolling pin with handles is what you know and love, go with it. I use those, too. I also occasionally use vintage rolling pins with textured rollers to imprint shortbread cookies with patterns like I do for the
Goat Butter Shortbread.
Digital kitchen
scales are a great example of a piece of equipment that was once hard to find and expensive but is now cheap and easy to come by. Every kitchen should have one. Bakers and pastry chefs often measure the ingredients for entire recipes using an ounce-to-gram digital scale that runs on batteries. In this book, a scale is handy for weighing chocolate, nuts, butter, and fruit. To use one, put an empty bowl on the scale, press the “tare” button to bring the scale to zero, and fill the bowl with an ingredient.
All commercial kitchens use heavy-duty rimmed baking sheets called sheet pans for just about everything. Sheet pans come in multiple sizes. For the recipes in this book, I use what chefs call half sheet pans and quarter sheet pans. This means that it would take two or four pans, respectively, to make up the size of a full sheet pan. (A full sheet pan is too large for all but the largest home ovens.) Switching to rimmed sheet pans from flimsy baking sheets without rims is a no-brainer—you’ll never go back. Rimmed sheet pans are the best for toasting nuts, and rims also ensure a cookie will never slide off the edge when the tray is removed from the oven. If I don’t want a rim for some reason, I invert the sheet pan and use the bottom side. You can buy
parchment paper precut to fit sheet pans, which makes lining pans easy. I also use half sheet and quarter sheet pan measurements often when rolling out dough for shortbread and sandwich cookies and when baking bar cookies. Yet there are occasions when nonstick baking sheets work amazingly well too. I bake
egg white cookies on nonstick baking sheets because the cookies hold their shape while achieving a perfect, slightly cracked texture on the top.
For the recipes in this book, I encourage you to invest in at least a couple of heavy 13 by 18-inch half sheet pans, one or two 9 by 13-inch quarter sheet pans, and at least one nonstick pan. Restaurant supply stores, Williams-Sonoma, and Sur La Table are all reliable sources for these pans.
Although I use parchment paper most often when baking cookies, a Silpat—a silicone baking liner—is handy when making crunchy things, like toffee and honeycomb, or when making jimmies. For insurance, I lightly coat a Silpat with nonstick cooking spray to ensure nothing sticks, although if you have a new or relatively unused Silpat, you can skip this step.
I use a few types of spatulas in my kitchen:
• Heatproof rubber spatula: Not only does it take the place of wooden spoons when stirring hot fudge or preserves, but a heatproof rubber spatula is also essential for scraping down the sides of the mixing bowl in between ingredient additions. Although I call it a rubber spatula out of habit, the better ones are made with silicone these days. Get a few with sturdy-but-flexible heads.
• Metal spatula: I use a metal spatula to transfer cookies from sheet pans to wire cooling racks. It does not need to be fancy; any old-school spatula will do. For all you line cooks, go ahead and use your fish spatula. Although it’s narrower with a longer metal top, it gets the job done.
•
Offset spatula: Artists would recognize an “offset” as a palette knife for mixing paints. In a pastry kitchen, they are often used for frosting cakes, but they are capable of much more. I use small offset spatulas for transferring compact cookies, like rugelach, from hot sheet pans to cooling racks. I also use them for
spreading whipped egg whites across a pan, such as when I make
Dream Bars or
Marshmallows. A small offset spatula will serve you well in this book.
This is the same as a cheap coffee grinder. I use it when I want to grind toasted old-fashioned oats or infuse sugar with cocoa nibs. To clean a spice grinder in between uses, grind up some white rice in it.
For making sauces or jams, a 6-quart heavy pot or saucepan is essential. A thick (not flimsy) bottom ensures that the heat transfers evenly, allowing the sauce or jam to simmer without fear of burning. It’s important to use a pot with enough room to allow for ingredients, like heavy cream, to boil up without boiling over and making a mess of your stove top.
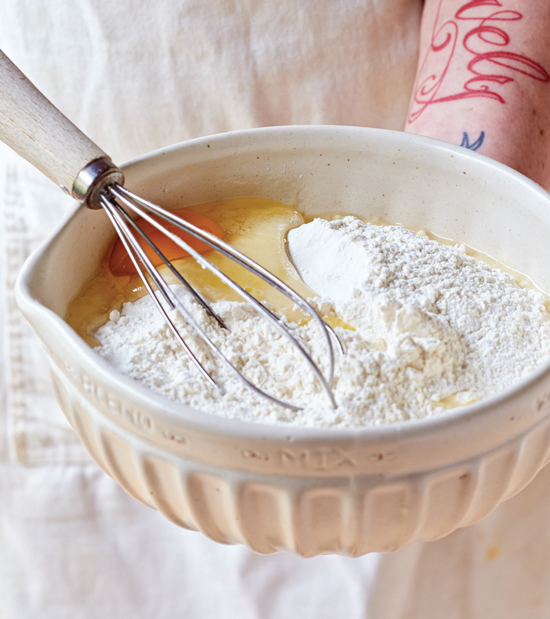
I use a regular-size, 12-inch whisk for combining dry ingredients in a bowl. In many cases, this allows me to skip sifting any of the ingredients beforehand. A small whisk is nice—though not essential—for breaking up small quantities of egg or egg whites or whisking together a small amount of dry ingredients.
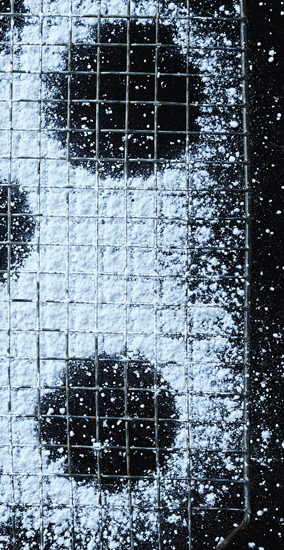
A wire cooling rack allows air to get under cookies and thus cool faster. The best kind are gridded; their closely set wires prevent small ingredients from falling through, and they cut down on having cookies sink into the rack while cooling. Acquire a wire rack the size of a half sheet pan and you will be all set.