Part Two
The Recipes
The vegan ice creams are divided into three sections based on the type of milk that the recipes call for. The soy milk and almond milk recipes are interchangeable, as the methods for making those two types of ice cream are very similar. The coconut milk recipes do not use a thickening agent, and you will get the best results from those recipes by sticking with coconut milk.
Soy Milk Ice Creams
Soy milk is the most common type of nondairy milk out there. It is made from dried soybeans that are ground together with water to form a creamy liquid that has a similar consistency to low-fat milk. Vanilla soy milk is lightly sweetened and has a distinct vanilla flavor to it, unlike plain soy milk, and it is the best choice for these recipes, where the extra vanilla only enhances the other ingredients in the finished ice cream.
Vanilla Bean
Makes about 1 quart
Vanilla is the most popular ice cream flavor, whether you opt for traditional ice creams or dairy-free ones. This soy milk–based recipe is sure to become a favorite in your home. It’s easy to make and has a lot of vanilla flavor to it. It is good on its own, and it pairs well with just about any dessert you might want to serve alongside it.
Ingredients
- 3 1⁄2 cups vanilla soy milk
- 2⁄3cup sugar
- 1 vanilla bean
- 2 tablespoons cornstarch
Instructions
- 1. Combine 3 cups of the soy milk and the sugar in a medium saucepan. Carefully slice the vanilla bean in half lengthwise and use the back of a knife or a spoon to gently scrape out the vanilla seeds. Add to milk and sugar mixture. Cook over medium heat, stirring occasionally, until mixture comes to a simmer and sugar is dissolved.
- 2. Whisk together the remaining 1⁄2 cup soy milk and cornstarch in a small bowl. Pour the cornstarch mixture into the simmering milk and sugar mixture, and whisk to combine. Stirring constantly, cook for 2 to 3 minutes, until mixture begins to thicken.
- 3. Remove from heat, transfer to a clean bowl, cover with plastic wrap, and allow to cool to room temperature. Chill in the refrigerator until cold, at least 2 to 3 hours.
- 4. Pour into an ice cream maker and prepare according to manufacturer’s directions. When the ice cream has churned, transfer it to a freezer-safe container and freeze until firm, at least 2 hours, before serving.
Chocolate
Makes about 1 quart
For every vanilla ice cream fan, there is someone who loves chocolate ice cream just as much. Chocoholics won’t be disappointed by this creamy ice cream, which delivers a surprisingly intense chocolate flavor.
Ingredients
- 3 1⁄2 cups vanilla soy milk
- 3⁄4 cup sugar
- 1⁄2 cup cocoa powder
- 1 tablespoon cornstarch
- 1⁄4 teaspoon salt
- 1 teaspoon vanilla extract
Instructions
- 1. Combine 3 cups of the soy milk, sugar, and cocoa powder in a medium saucepan. Cook over medium heat, whisking occasionally, until mixture comes to a simmer and both sugar and cocoa powder are dissolved.
- 2. Whisk together the remaining 1⁄2 cup milk and the cornstarch in a small bowl. Pour the cornstarch mixture into the simmering milk and sugar mixture, and whisk to combine. Stirring constantly, cook for 2 to 3 minutes, until mixture begins to thicken.
- 3. Remove from heat, and whisk in salt and vanilla extract. Transfer the mixture to a clean bowl, cover with plastic wrap, and allow to cool to room temperature. Chill the mixture in the refrigerator until cold, at least 2 to 3 hours.
- 4. Pour the mixture into an ice cream maker and prepare according to manufacturer’s directions. When the ice cream has churned, transfer it to a freezer-safe container, and freeze until firm, at least 2 hours, before serving.
Chocolate Chip
Makes about 1 quart
Chocolate chip ice cream is one flavor that I never get tired of! The trick to successful chocolate chip ice cream is making the chocolate chips. Chopped-up chocolate will become much too hard to chew when it is in ice cream. And since it won’t have time to melt in your mouth, you won’t be able to taste much of the chocolate flavor. But adding a little bit of coconut oil to the melted chocolate will give it just the right consistency when frozen.
Ingredients
- 3 1⁄2 cups vanilla soy milk
- 3⁄4cup sugar
- 2 tablespoons cornstarch
- 2 teaspoons vanilla extract
- 3 ounces dark or semisweet chocolate, coarsely chopped
- 2 teaspoons coconut oil
Instructions
- 1. Combine 3 cups of the soy milk and the sugar in a medium saucepan. Cook over medium heat, whisking occasionally, until mixture comes to a simmer and sugar is dissolved.
- 2. Whisk together the remaining 1⁄2 cup milk and cornstarch in a small bowl. Pour the cornstarch mixture into the simmering milk and sugar mixture, and whisk to combine. Stirring constantly, cook for 2 to 3 minutes, until mixture begins to thicken.
- 3. Remove from heat, and whisk in vanilla extract. Transfer to a clean bowl, cover with plastic wrap, and allow to cool to room temperature. Chill in the refrigerator until cold, at least 2 to 3 hours.
- 4. Pour chilled mixture into an ice cream maker and prepare according to manufacturer’s directions.
- 5. While the ice cream is freezing, combine the chocolate and coconut oil in a small microwave-safe bowl. Microwave on medium power in 30- to 40-second intervals, stirring regularly until chocolate is melted and mixture is smooth.
- 6. When the ice cream has churned, drizzle the chocolate mixture into the ice cream as you transfer it to a freezer-safe container, creating ribbons of chocolate that will break up as you stir it gently. Incorporate all of the chocolate mixture. Freeze until firm, at least 2 hours, before serving.
Coffee
Makes about 1 quart
You can get your lattes made with soy milk at the local coffee shop, so why not use soy milk as the base for a coffee ice cream? The coffee flavor comes from instant espresso powder, which has an intense coffee flavor that is strong enough to infuse the whole ice cream. It is available at many grocery stores, but instant coffee powder can be substituted by doubling the amount if instant espresso powder is unavailable.
Ingredients
- 3 1⁄2cups vanilla soy milk
- 3⁄4 cup sugar
- 2 tablespoons cornstarch
- 2 teaspoons vanilla extract
- 2 1⁄2 tablespoons instant espresso or 5 tablespoons coffee powder
Instructions
- 1. Combine 3 cups of the soy milk and sugar in a medium saucepan. Cook over medium heat, whisking occasionally, until mixture comes to a simmer and sugar is dissolved.
- 2. Whisk together remaining 1⁄2 cup milk and cornstarch in a small bowl. Pour the cornstarch mixture into the simmering milk and sugar mixture, and whisk to combine. Stirring constantly, cook for 2 to 3 minutes, until mixture begins to thicken.
- 3. Remove from heat, and whisk in vanilla and instant espresso powder. Transfer to a clean bowl, cover with plastic wrap, and allow to cool to room temperature. Chill in the refrigerator until cold, at least 2 to 3 hours.
- 4. Pour the chilled mixture into an ice cream maker and prepare according to manufacturer’s directions. When the ice cream has churned, transfer it to a freezer-safe container, and freeze until firm, at least 2 hours, before serving.
Chocolate Chip Cookie Dough
Makes about 1 quart
It’s hard to resist the temptation to taste a spoonful of raw cookie dough out of the bowl when you are making chocolate chip cookies. With this ice cream flavor there is no need to hold back because it is loaded with chunks of chocolate chip cookie dough and plenty of extra chocolate chips. You can make a double batch of the cookie dough chunks and sprinkle them on top when you serve it if you’re a real cookie dough fanatic.
Ingredients
- 3 1⁄2 cups vanilla soy milk
- 3⁄4 cup sugar
- 2 tablespoons cornstarch
- 2 teaspoons vanilla extract
- 1 batch Vegan Chocolate Chip Cookie Dough Chunks (recipe follows)
- 1⁄2cup mini chocolate chips
Instructions
- 1. Combine 3 cups of soy milk and the sugar in a medium saucepan. Cook over medium heat, whisking occasionally, until mixture comes to a simmer and sugar is dissolved.
- 2. Whisk together remaining 1⁄2 cup milk and cornstarch in a small bowl. Pour the cornstarch mixture into the simmering milk and sugar mixture, and whisk to combine. Stirring constantly, cook for 2 to 3 minutes, until mixture begins to thicken.
- 3. Remove from heat, and whisk in vanilla extract. Transfer to a clean bowl, cover with plastic wrap, and allow to cool to room temperature. Chill in the refrigerator until cold, at least 2 to 3 hours.
- 4. Pour chilled mixture into an ice cream maker and prepare according to manufacturer’s directions. When the ice cream has churned, fold in Vegan Chocolate Chip Cookie Dough Chunks and chocolate chips. Transfer the ice cream to a freezer-safe container and freeze until firm, at least 2 hours, before serving.
Vegan Chocolate Chip Cookie Dough Chunks
Makes about 1 cup
Ingredients
- 1⁄3 cup vegan margarine or shortening, room temperature
- 1⁄2 cup brown sugar, packed
- 1⁄2teaspoon vanilla extract
- 1⁄4 teaspoon salt
- 1 tablespoon soy milk
- 1⁄2cup all-purpose flour
- 1⁄2 cup miniature chocolate chips
Instructions
- 1. Cream together margarine and brown sugar until creamy. Blend in the vanilla extract, salt, and soy milk. Blend in the flour until dough comes together. Stir in chocolate chips.
- 2. Roll dough into small, almond-size balls. Refrigerate until ready to use.
Strawberry
Makes about 1 quart
Strawberry ice cream sounds simple, but its simplicity makes it one of the most popular ice cream flavors of all time. And it really is hard to find a dessert more delicious than fresh strawberry ice cream during the summer. Serve this with a slice of cake and some freshly chopped berries for a cool strawberry shortcake.
Ingredients
- 3 cups fresh strawberries
- 1 1⁄2cups vanilla soy milk
- 1⁄2 cup sugar
- 1⁄4 teaspoon almond extract
- 1⁄2 cup strawberries, finely chopped
Instructions
- 1. Combine whole strawberries, soy milk, sugar, and almond extract in a food processor or blender. Blend until mixture is very smooth and all the sugar has been dissolved.
- 2. Transfer to a large bowl and cover with plastic wrap. Refrigerate until cold, about 2 hours.
- 3. Pour the chilled mixture into an ice cream maker and prepare according to manufacturer’s directions. When the ice cream has churned, transfer it to a freezer-safe container and fold in the finely chopped strawberries. Freeze until firm, at least 2 hours, before serving.
Maple Syrup
Makes about 1 quart
The first time I had maple syrup ice cream, it was a revelation because maple syrup was not something that I associated with frozen desserts. The toffeelike flavor of the syrup was even more delicious cold than when poured over pancakes. You’ll get the best results by using dark amber or Grade B maple syrups, both of which have a much more intense maple flavor than lighter grades.
Ingredients
- 3 1⁄2 cups vanilla soy milk
- 1⁄2 cup Grade B or dark amber maple syrup
- 2 tablespoons cornstarch
- 1 teaspoon vanilla extract
Instructions
- 1. Combine 3 cups of the soy milk and the maple syrup in a medium saucepan. Cook over medium heat, stirring occasionally, until mixture comes to a simmer and maple syrup is dissolved.
- 2. Whisk together the remaining 1⁄2 cup milk and cornstarch in a small bowl. Pour the cornstarch mixture into the simmering milk and maple syrup mixture, and whisk to combine. Stirring constantly, cook for 2 to 3 minutes, until mixture begins to thicken. Whisk in vanilla extract.
- 3. Remove from heat, transfer to a clean bowl, cover with plastic wrap, and allow to cool to room temperature. Refrigerate until cold, at least 2 to 3 hours.
- 4. Pour the chilled mixture into an ice cream maker and prepare according to manufacturer’s directions. When the ice cream has churned, transfer it to a freezer-safe container and freeze until firm, at least 2 hours, before serving.
Chai Tea
Makes about 1 quart
This ice cream flavor, like the chai tea latte that inspired it, is sweet and spicy. It is best to start with a high-quality chai tea concentrate. These are specially designed to deliver the maximum amount of spice, and they are already sweetened. Most chai tea lattes don’t need much additional sugar, and this one is sweetened with only a touch of extra agave syrup.
Ingredients
- 1 1⁄2 cups chai tea concentrate
- 1 1⁄2 cups vanilla soy milk
- 1⁄4 cup agave syrup
- 1 teaspoon vanilla extract
Instructions
- 1. Combine chai tea, soy milk, agave, and vanilla in a large bowl, and whisk to combine. Add additional agave syrup, to taste, if necessary.
- 2. Cover bowl with plastic wrap and refrigerate until cold, about 1 hour.
- 3. Pour the chilled mixture into an ice cream maker and prepare according to manufacturer’s directions. When the ice cream has churned, transfer it to a freezer-safe container and freeze until firm, at least 2 hours, before serving.
Almond Milk Ice Creams
Almond milk is a popular alternative to soy milk for nondairy drinkers. It has a mild, nutty flavor that is much subtler than soy milk. Like soy milk, almond milk is available in both unsweetened and sweetened options. Lightly sweetened vanilla almond milk lends some extra flavor to these recipes and is a great staple to have in your pantry for last-minute ice cream making.
Cherry Chocolate Chip
Makes about 1 quart
This flavor reminds me of a popular cherry-studded ice cream produced by a well-known brand. The mild flavor of almond milk is a nice backdrop for the cherries. Frozen or jarred cherries are the easiest choices to use for this recipe. They’re available all year-round, and they are also slightly more tender than fresh cherries, so they’re easier to incorporate into the ice cream and will give off a little more juice to flavor the base.
Ingredients
- 3 1⁄2 cups vanilla almond milk
- 3⁄4 cup sugar
- 2 tablespoons cornstarch
- 1 teaspoon vanilla extract
- 1⁄2 teaspoon almond extract
- 3 ounces dark or semisweet chocolate, coarsely chopped
- 2 teaspoons coconut oil
- 1 1⁄2 cups dark cherries, jarred or frozen and defrosted
Instructions
- 1. Combine 3 cups of the almond milk and the sugar in a medium saucepan. Cook over medium heat, whisking occasionally, until mixture comes to a simmer and sugar is dissolved.
- 2. Whisk together the remaining 1⁄2 cup milk and cornstarch in a small bowl. Pour the cornstarch mixture into the simmering milk and sugar mixture, and whisk to combine. Stirring constantly, cook for 2 to 3 minutes, until mixture begins to thicken.
- 3. Remove from heat, and whisk in vanilla and almond extracts. Transfer to a clean bowl, cover with plastic wrap, and allow to cool to room temperature. Refrigerate until cold, at least 2 to 3 hours.
- 4. Pour chilled mixture into an ice cream maker and prepare according to manufacturer’s directions.
- 5. While the ice cream is freezing, combine the chocolate and coconut oil in a small microwave-safe bowl. Microwave on medium power in 30- to 40-second intervals, stirring regularly until chocolate is melted and mixture is smooth.
- 6. When the ice cream has churned, fold in cherries, then drizzle the chocolate mixture into the ice cream as you transfer it to a freezer-safe container, creating ribbons of chocolate that will break up as you stir it gently. Freeze until firm, at least 2 hours, before serving.
Peanut Butter and Banana
Makes about 1 quart
Salty peanut butter and sweet bananas are a great combination in a sandwich, so it makes sense that they would come together in a sweet and salty ice cream recipe, too. It’s simple and tastes quite indulgent, thanks to all that creamy peanut butter.
Ingredients
- 3 large, ripe bananas
- 1 cup vanilla almond milk
- 1 cup creamy peanut butter
- 1⁄2 cup agave syrup
- 2 teaspoons vanilla extract
- 1⁄4 teaspoon salt
Instructions
- 1. Combine bananas, almond milk, peanut butter, agave, vanilla, and salt in a blender or food processor, and process until mixture is very smooth. Transfer to a bowl, cover with plastic wrap, and refrigerate until cold, about 2 hours.
- 2. Pour chilled mixture into an ice cream maker and prepare according to manufacturer’s directions. When the ice cream has churned, transfer it to a freezer-safe container. Freeze until firm, at least 2 hours, before serving.
Mocha Almond Fudge
Makes about 1 quart
Coffee, chocolate, and almonds all come together in this ice cream, which is one of my dad’s favorite flavors. The first time he told me about this combination, which he had at a popular ice cream chain, it sounded like too many flavors might be at work. The reality is that they meld together perfectly and will have you coming back for a second scoop before long.
Ingredients
- 3 1⁄2 cups vanilla almond milk
- 3⁄4 cup sugar
- 2 tablespoons instant espresso powder
- 2 tablespoons cornstarch
- 2 teaspoons vanilla extract
- 3 ounces dark or semisweet chocolate, coarsely chopped
- 1⁄2 cup slivered almonds, toasted
- 3⁄4 cup Dark Chocolate Fudge Sauce
Instructions
- 1. Combine 3 cups of the almond milk, sugar, and espresso powder in a medium saucepan. Cook over medium heat, whisking occasionally, until mixture comes to a simmer and sugar is dissolved.
- 2. Whisk together the remaining 1⁄2 cup milk and cornstarch in a small bowl. When the milk/sugar mixture comes to a simmer, pour in the cornstarch mixture, and whisk to combine. Stirring constantly, cook for 2 to 3 minutes, until mixture begins to thicken.
- 3. Remove from heat, and whisk in vanilla extract and chocolate until chocolate is completely dissolved. Transfer to a clean bowl, cover with plastic wrap, and allow to cool to room temperature. Refrigerate until cold, at least 2 to 3 hours.
- 4. Pour chilled mixture into an ice cream maker and prepare according to manufacturer’s directions. When the ice cream has churned, stir in toasted almonds and drizzle the chocolate fudge sauce into the ice cream as you transfer it to a freezer-safe container, creating ribbons of chocolate. Freeze until firm, at least 2 hours, before serving.
Banana and Toasted Pecan
Makes about 1 quart
Banana bread is good when it is packed with toasted nuts, and the same is true of banana ice cream. Walnuts and pecans are frequently paired with banana, and you could use either, but the natural sweetness of the pecan blends seamlessly with the almond milk used here, and I prefer to use that in this breakfast pastry–inspired ice cream.
Ingredients
- 1 1⁄2 cups coarsely chopped pecans, untoasted
- 2 large ripe, medium bananas
- 1 1⁄2 cups vanilla almond milk
- 2⁄3 cup sugar
- 1 teaspoon vanilla extract
- 1⁄2 teaspoon ground cinnamon
Instructions
- 1. Put pecans in a large skillet, and cook over medium-low heat. When the pecans begin to take on a very light brown color, start stirring slowly but constantly, and continue to cook until they are an even golden brown. Remove from heat.
- 2. Combine bananas, almond milk, sugar, vanilla, cinnamon, and 1⁄2 cup of the toasted pecans in a blender or food processor, and process until mixture is very smooth and all the sugar is dissolved. Strain through a fine strainer into a large bowl to remove pieces of toasted pecan.
- 3. Cover with plastic wrap and refrigerate until cold, about 2 hours.
- 4. Pour chilled mixture into an ice cream maker and prepare according to manufacturer’s directions.
- 5. While the ice cream is churning, finely chop the remaining pecans.
- 6. When the ice cream has churned, fold in the rest of the toasted pecans as you transfer it to a freezer-safe container. Freeze until firm, at least 2 hours, before serving.
Horchata
Makes about 1 quart
Horchata is a type of sweetened, spiced drink that is popular in Spanish-speaking and Latin American countries. It can be made with many types of nuts and grains. Mexican horchata is often made with almonds and rice, and with a little creativity you can easily turn it from a drink into a dessert.
Ingredients
- 6 cups vanilla almond milk
- 1 cup basmati rice (or other short-grain rice)
- 3⁄4 cup sugar
- 1⁄2 teaspoon ground cinnamon
- 1 teaspoon vanilla extract
Instructions
- 1. Pour almond milk into a large bowl. Grind the basmati rice in a spice or coffee grinder until it is very fine and sandlike in consistency. Stir rice, sugar, cinnamon, and vanilla into the almond milk, cover, and let stand at room temperature overnight, or for 10 to 12 hours.
- 2. Place a layer of cheesecloth over a strainer, and strain milk mixture into a large pitcher or bowl to remove all the ground rice. Refrigerate for at least 1 hour, or until well chilled.
- 3. Pour chilled mixture into an ice cream maker and prepare according to manufacturer’s directions. When the ice cream has churned, transfer it to a freezer-safe container. Freeze until firm, at least 2 hours, before serving.
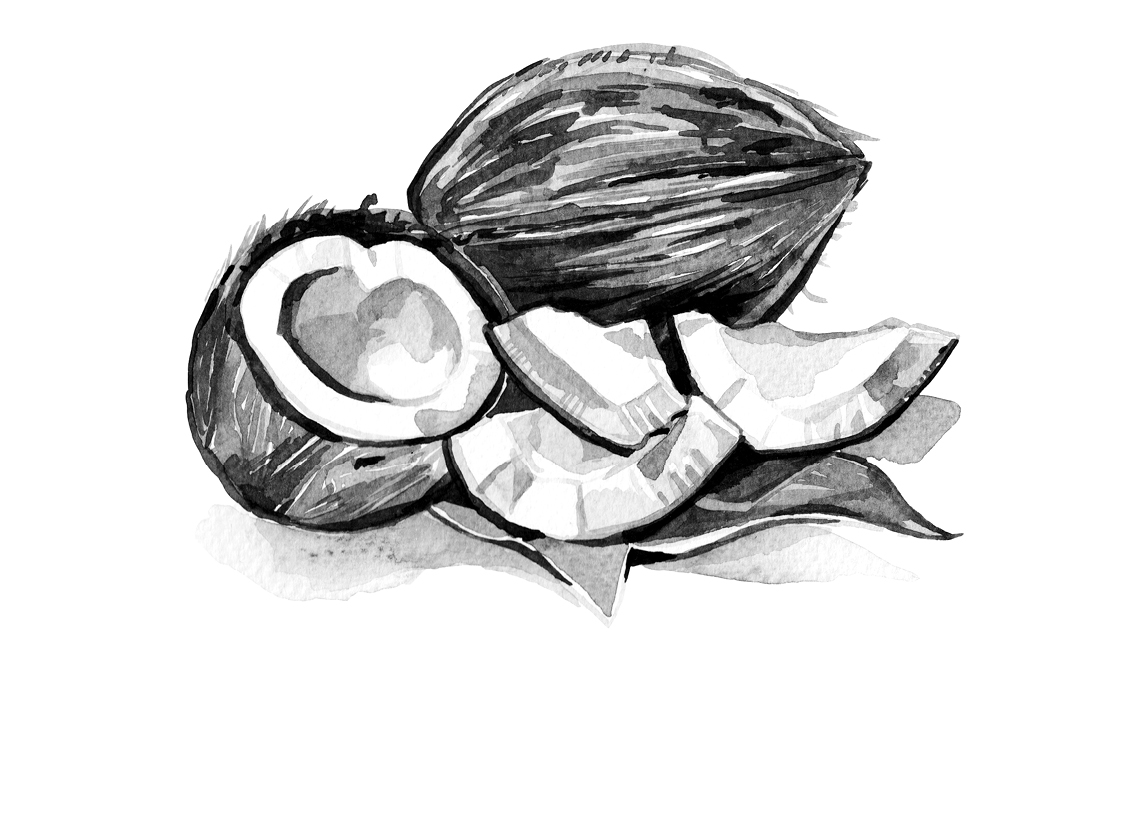
Coconut Milk Ice Creams
Coconut milk is a great nondairy milk to work with because it has a natural sweetness and a much richer texture than other nondairy milks. It is made by cooking fresh coconut with water, which extracts a lot of the natural fat and flavor from the coconut meat. Full-fat coconut milk is the best choice for an extra-creamy ice cream, but low-fat coconut milk can also be used for a lighter dessert.
Vanilla and Toasted Coconut
Makes about 1 quart
Vanilla and coconut are always a fantastic pairing — and if you haven’t put the two together before, this ice cream will surely win you over. It has a great vanilla flavor and is loaded with plenty of toasted coconut for texture and added coconut flavor. Sweetened or unsweetened shredded coconut will both give you good results, so use what is most easily available to you.
Ingredients
- 1 cup shredded coconut, sweetened or unsweetened
- 3 1⁄2 cups unsweetened coconut milk
- 3⁄4 cup sugar
- 1 tablespoon vanilla extract
Instructions
- 1. Finely chop the shredded coconut, and place in a large skillet. Cook over low heat until coconut begins to toast and turn a light golden color. Stirring slowly but constantly, continue to cook the coconut until it is all evenly golden brown. Set aside to cool.
- 2. Combine coconut milk, sugar, and vanilla in a food processor or blender. Blend until mixture is very smooth and all sugar has been dissolved.
- 3. Transfer to a large bowl and cover with plastic wrap. Refrigerate until cold, about 1 hour.
- 4. Pour into an ice cream maker and prepare according to manufacturer’s directions. When the ice cream has churned, transfer it to a freezer-safe container and fold in toasted coconut. Freeze until firm, at least 2 hours, before serving.
Cookies ’n’ Cream
Makes about 1 quart
Cookies ’n’ cream is always one of my favorite ice cream flavors, and it’s easy to make a vegan version because Oreos — and some look-alike brands — are actually vegan to begin with. I like to use part coconut milk and part soy milk in this recipe. The coconut gives the ice cream a little extra richness, while the soy milk tempers the coconut flavor and maintains a nice vanilla flavor in the background.
Ingredients
- 1 1⁄2cups unsweetened coconut milk
- 2 cups vanilla soy milk
- 2⁄3 cup sugar
- 2 teaspoons vanilla extract
- 1 1⁄2 cups Oreo cookies, crushed
Instructions
- 1. Combine coconut milk, soy milk, sugar, and vanilla in a food processor or blender. Blend until mixture is very smooth and all sugar has been dissolved.
- 2. Transfer to a large bowl and cover with plastic wrap. Refrigerate until cold, about 1 hour.
- 3. Pour into an ice cream maker and prepare according to manufacturer’s directions. When the ice cream has churned, transfer it to a freezer-safe container and fold in crushed Oreo cookies. Freeze until firm, at least 2 hours, before serving.
Coconut Mint Chocolate Chip
Makes about 1 quart
Mint chocolate chip is a refreshing ice cream flavor, but it also isn’t that exciting. While you don’t need to add shredded coconut to every ice cream that is made with coconut milk, adding coconut to this version of mint chocolate chip ice cream adds a whole new layer of flavor. For some, I know that mint chocolate chip ice cream just isn’t the same unless it has a light green hue to it. If you prefer yours this way, you can tint it with a few drops of green food coloring.
Ingredients
- 3 1⁄2 cups unsweetened coconut milk
- 3⁄4 cup sugar
- 2 teaspoons vanilla extract
- 1 1⁄2 teaspoons peppermint extract
- 1⁄4 teaspoon green food coloring, optional
- 3 ounces dark or semisweet chocolate, finely chopped
- 2 teaspoons coconut oil
- 1⁄2 cup shredded coconut, sweetened or unsweetened
Instructions
- 1. Combine coconut milk, sugar, vanilla, peppermint, and green food coloring, if using, in a food processor or blender. Blend until mixture is very smooth and all sugar has been dissolved.
- 2. Transfer to a large bowl and cover with plastic wrap. Refrigerate until cold, about 1 hour.
- 3. Pour into an ice cream maker and prepare according to manufacturer’s directions.
- 4. While ice cream is freezing, combine the chocolate and coconut oil in a small microwave-safe bowl. Microwave on medium power in 30- to 40-second intervals, stirring regularly until chocolate is melted and mixture is smooth.
- 5. When the ice cream has churned, drizzle the chocolate mixture into the ice cream as you transfer it to a freezer-safe container, creating ribbons of chocolate that will break up as you stir it gently. Incorporate all of the chocolate mixture, and stir in the shredded coconut. Freeze until firm, at least 2 hours, before serving.
Coconut Chocolate
Makes about 1 quart
A walk down the candy aisle will tell you that chocolate and coconut are a great combination. The natural sweetness of the coconut just blends beautifully with chocolate and gives dark chocolate a little extra creaminess. This ice cream uses a generous amount of cocoa powder, coupled with a small amount of instant coffee powder, for a strong chocolate flavor with just the right hint of coconut.
Ingredients
- 3 1⁄2 cups unsweetened coconut milk
- 3⁄4 cup sugar
- 1⁄2 cup cocoa powder
- 1 teaspoon instant coffee powder
- 1 teaspoon vanilla extract
Instructions
- 1. Combine coconut milk, sugar, cocoa powder, coffee powder, and vanilla in a food processor or blender. Blend until mixture is very smooth and all sugar has been dissolved.
- 2. Transfer to a large bowl and cover with plastic wrap. Refrigerate until cold, about 1 hour.
- 3. Pour into an ice cream maker and prepare according to manufacturer’s directions. When the ice cream has churned, transfer it to a freezer-safe container and fold in toasted coconut. Freeze until firm, at least 2 hours, before serving.
Coconut Pumpkin Spice
Makes about 1 quart
One year around Thanksgiving I was served a slice of coconut-and-pumpkin pie and realized what a great flavor combination it was. This ice cream gets a hint of that coconut flavor from the coconut milk but is dominated by pumpkin and the spices associated with pumpkin pie. It’s a tasty change of pace in fall and winter when you don’t feel like baking a traditional pie for dessert.
Ingredients
- 3 cups unsweetened coconut milk
- 1 cup pumpkin puree
- 1⁄3 cup maple syrup
- 2 tablespoons brown sugar
- 3 tablespoons molasses
- 1⁄2 teaspoon ground cinnamon
- 1⁄2 teaspoon ground ginger
- 1⁄4teaspoon ground cloves
- 1⁄4 teaspoon salt
- 1 teaspoon vanilla extract
Instructions
- 1. Combine coconut milk, pumpkin, maple syrup, sugar, molasses, cinnamon, ginger, cloves, salt, and vanilla in a food processor or blender. Blend until mixture is very smooth and all sugar has been dissolved.
- 2. Transfer to a large bowl and cover with plastic wrap. Refrigerate until cold, about 1 hour.
- 3. Pour into an ice cream maker and prepare according to manufacturer’s directions. When the ice cream has churned, transfer it to a freezer-safe container. Freeze until firm, at least 2 hours, before serving.
Coconut Mango Rice
Makes about 1 quart
This flavor was inspired by sticky rice with mango, one of my favorite desserts at Thai restaurants. The base is actually a coconut rice pudding that is delicious on its own. You might not expect rice pudding to turn into a good ice cream, but the tender rice gives it a great texture and flavor. Fold in the chopped mango after churning so that you get a little in every bite.
Ingredients
- 1⁄2 cup short-grain rice, uncooked
- 3⁄4 cup sugar
- 2 1⁄2 cups water
- 2 cups unsweetened coconut milk
- 2 teaspoons vanilla extract
- 1 large ripe mango, peeled and finely chopped
Instructions
- 1. Combine rice, sugar, and water in a medium saucepan. Bring mixture to a boil, stirring to dissolve the sugar, then reduce to a simmer and cook until all the liquid has been absorbed, about 45 minutes.
- 2. Stir in the coconut milk and, keeping rice over low heat, bring mixture back to a simmer. Cook for 20 to 30 minutes, until rice is very tender. Stir in vanilla. Transfer pudding to a large bowl, cover, and refrigerate at least 4 hours, or until cold.
- 3. Pour into an ice cream maker and prepare according to manufacturer’s directions. When the ice cream has churned, transfer it to a freezer-safe container and fold in the chopped mango. Freeze until firm, at least 2 hours, before serving.
Coconut, Raspberry, and Lime
Makes about 1 quart
The soft pink color of this ice cream is beautiful, and it makes the ice cream look very tantalizing, since you won’t be able to guess exactly what flavor it is before you take a bite. It’s sweet, with a hint of tartness, and uses three flavors that all work together extremely well. Unlike with dairy milk, adding fresh lime juice to coconut milk won’t curdle it, so you can whiz this ice cream base together in the blender easily without worrying that it will come out less smooth than it went in.
Ingredients
- 3 cups unsweetened coconut milk
- 3⁄4 cup sugar
- 2 cups fresh raspberries
- 1⁄2 cup freshly squeezed lime juice
- 1 tablespoon lime zest
- 1⁄2 cup toasted coconut
Instructions
- 1. Combine coconut milk, sugar, raspberries, lime juice, and lime zest in a food processor or blender. Blend until mixture is very smooth and all sugar has been dissolved.
- 2. Pour mixture through a strainer into a large bowl to remove raspberry seeds. Cover with plastic wrap. Refrigerate until cold, about 1 hour.
- 3. Pour into an ice cream maker and prepare according to manufacturer’s directions. When the ice cream has churned, transfer it to a freezer-safe container and fold in toasted coconut. Freeze until firm, at least 2 hours, before serving.
Sorbets and Granitas
Sorbets and granitas are both fruit-forward desserts that are perfect treats on a hot day. They’ll satisfy your sweet tooth just as easily as ice creams, but they’re a little bit more refreshing. Fresh, in-season fruits will make your sorbets and granitas even more delicious, but frozen fruits can be used to make your favorite flavors year-round.
Bittersweet Chocolate Sorbet
Makes about 1 quart
You don’t need milk — dairy or otherwise — to get a rich chocolate dessert with this dark chocolate sorbet. It is a rich, smooth, and dangerously addictive way to satisfy those chocolate cravings. You will get a lot of flavor from the dark chocolate in this recipe, so choose a good-quality chocolate for the best results.
Ingredients
- 3 1⁄2 cups water
- 1 1⁄2 cups sugar
- 1 cup unsweetened cocoa powder
- 1 teaspoon instant coffee powder
- 2 ounces dark chocolate, finely chopped
- 2 teaspoons vanilla extract
- 1⁄4 teaspoon salt
Instructions
- 1. Combine water, sugar, cocoa powder, and instant coffee in a medium saucepan. Cook over medium heat, whisking occasionally, until mixture comes to a simmer and both sugar and cocoa powder are completely dissolved.
- 2. Remove from heat, and stir in dark chocolate, vanilla, and salt. Stir slowly until all of the dark chocolate has melted completely.
- 3. Transfer to a clean bowl, cover with plastic wrap, and allow to cool to room temperature. Refrigerate until cold, at least 2 to 3 hours.
- 4. Pour the chilled mixture into an ice cream maker and prepare according to manufacturer’s directions. When the ice cream has churned, transfer it to a freezer-safe container and freeze until firm, at least 2 hours, before serving.
Blueberry Sorbet
Makes about 1 quart
Blueberries seem to get chosen for frozen desserts behind strawberries and raspberries, but they have a jammy quality that makes for a sweet, satisfying sorbet. This one is made with plenty of fresh blueberries and has a lovely magenta color when it has finished churning.
Ingredients
- 4 cups blueberries, fresh or frozen and defrosted
- 3⁄4 cup sugar
- 1 cup water
- 2 teaspoons vanilla extract
- 2 tablespoons Cointreau or other orange liqueur
Instructions
- 1. Combine blueberries, sugar, water, vanilla, and Cointreau in a food processor or blender. Blend until mixture is very smooth and all sugar has been dissolved.
- 2. Transfer to a large bowl and cover with plastic wrap. Refrigerate until cold, about 1 hour.
- 3. Pour the chilled mixture into an ice cream maker and prepare according to manufacturer’s directions. When the ice cream has churned, transfer it to a freezer-safe container. Freeze until firm, at least 2 hours, before serving.
Peach Melba Sorbet
Makes about 1 quart
A peach melba is a retro dessert that combines peaches, raspberries, and vanilla ice cream into a kind of ice cream sundae. Sweet peaches and tart raspberries are the star of the dish, and they are the stars of this fruity melba-inspired sorbet. I add a splash of vanilla extract to hint at the flavor of the vanilla ice cream that is usually at the base of a melba, as well as a little peach schnapps just to further highlight the flavor of the peaches.
Ingredients
- 5–6 large, ripe peaches
- 1 cup water
- 1 cup sugar
- 2 teaspoons vanilla extract
- 2 tablespoons peach schnapps, optional
- 2 cups fresh raspberries
Instructions
- 1. Peel and pit the peaches. Cut into medium chunks to make approximately 3 1⁄2 cups of peaches.
- 2. Combine water and sugar in a large saucepan. Cook over medium heat, stirring until the sugar dissolves. Add peaches and simmer, stirring occasionally, until peaches are tender. Remove from heat. Stir in vanilla and peach schnapps, if using.
- 3. Transfer to a large bowl and cover with plastic wrap. Refrigerate until cold, 2 to 3 hours.
- 4. Pour the chilled mixture into an ice cream maker and prepare according to manufacturer’s directions. When the sorbet has churned, fold in fresh raspberries until they are evenly distributed. Transfer to a freezer-safe container and freeze until firm, at least 2 hours, before serving.
Tangerine and Olive Oil Sorbet
Makes about 1 quart
This sorbet is a staple in my kitchen when I have a pile of tangerines waiting to be juiced. Oranges of any kind work well with olive oil in savory dishes, and the same is true for desserts. The oil is unexpected, but it adds a sophisticated note to the zesty tangerine base. Since the juice can be fairly tart, this sorbet works best with the bit of extra sugar that the recipe calls for.
Ingredients
- 3 1⁄2 cups freshly squeezed tangerine juice
- 1⁄3 cup freshly squeezed lemon juice
- 1 1⁄2 cups sugar
- 3 tablespoons good-quality olive oil
Instructions
- 1. Combine tangerine juice, lemon juice, and sugar in a medium saucepan. Bring to a simmer, stirring frequently to dissolve all of the sugar. Remove from heat, and whisk in olive oil.
- 2. Transfer to a large bowl and cover with plastic wrap. Refrigerate until cold, 2 to 3 hours.
- 3. Pour the chilled mixture into an ice cream maker and prepare according to manufacturer’s directions. When the sorbet has churned, transfer it to a freezer-safe container and freeze until firm, at least 2 hours, before serving.
Strawberry Watermelon Sorbet
Makes about 1 quart
I can’t think of a flavor combination that says “summer” more clearly than strawberries and watermelon. These two juicy fruits are both delicious on a summer day, and they’re even better when they’re blended together and frozen. I always add a splash of lemon juice to the sorbet just to keep the flavors bright. For a grown-up treat you could serve a scoop of this with champagne!
Ingredients
- 6 cups watermelon, cut into large chunks
- 2 cups strawberries, hulled
- 2⁄3 cup sugar
- 2 tablespoons lemon juice
Instructions
- 1. Combine watermelon, strawberries, sugar, and lemon juice in a food processor or blender. Blend until mixture is very smooth and all the sugar has been dissolved.
- 2. Transfer to a large bowl and cover with plastic wrap. Refrigerate until cold, about 1 hour.
- 3. Pour the chilled mixture into an ice cream maker and prepare according to manufacturer’s directions. When the sorbet has churned, transfer it to a freezer-safe container and freeze until firm, at least 2 hours, before serving.
Spiced Cranberry Sorbet
Makes about 1 quart
Sweet-tart cranberry juice is a refreshing drink to have on hand, and while I drink it year-round, I associate cranberries more strongly with the holidays because it is featured in holiday dishes so often. This spiced cranberry sorbet is reminiscent of mulled wine and laden with spices. I like to add a hint of orange, so I use orange zest and often stir in some Cointreau or other orange liqueur to add some extra dimension to the sorbet.
Ingredients
- 4 cups cranberry juice
- 1 tablespoon orange zest
- 1 tablespoon lemon zest
- 6 cinnamon sticks
- 12 whole cloves
- 1⁄2 teaspoon ground allspice
- 1 cup sugar
- 1⁄4 cup Cointreau or other orange liqueur (optional)
Instructions
- 1. Combine cranberry juice, orange and lemon zests, cinnamon sticks, cloves, allspice, and sugar in a large saucepan. Cook over medium heat, stirring until the sugar dissolves, then bring to a boil. Remove from heat, cover, and allow the mixture to steep for at least 1 hour.
- 2. Strain liquid to remove zest, spices, and cinnamon sticks. Stir in Cointreau, if using.
- 3. Transfer to a large bowl and cover with plastic wrap. Refrigerate until cold, 2 to 3 hours.
- 4. Pour the chilled mixture into an ice cream maker and prepare according to manufacturer’s directions. When the sorbet has churned, transfer it to a freezer-safe container and freeze until firm, at least 2 hours, before serving.
Meyer Lemon Granita
Makes about 1 quart
A Meyer lemon is a hybrid fruit that has all the flavor of a lemon without the acidity. Meyer lemons are perfect for making sorbets and granitas, and they don’t need as much sugar as would be required with regular lemon juice. If you can’t find Meyer lemons, you can make this recipe by using equal parts lemon juice and water and by increasing the sugar slightly.
Ingredients
- 1 cup water
- 3⁄4 cup sugar
- 3 cups Meyer lemon juice, freshly squeezed
- 1 tablespoon Meyer lemon zest
Instructions
- 1. Combine water and sugar in a small saucepan. Bring to a simmer, stirring until the sugar is completely dissolved. Remove from heat, and combine sugar syrup with Meyer lemon juice and zest.
- 2. Pour into a flat, shallow dish, such as a 9- by 9-inch baking or casserole dish, and place the dish flat in the freezer.
- 3. Stir granita once every 20 to 25 minutes to distribute the ice crystals. When granita is almost entirely frozen, 3 to 4 hours or overnight, it can be scraped out with a large spoon into serving dishes.
Coffee Granita
Makes about 1 quart
A bowl full of coffee granita is even better than an iced coffee on a hot day. This version has a strong coffee flavor and just the right amount of sweetness to it. For an easy variation you can stir a half teaspoon of cinnamon into the sugar syrup instead of making the granita with the coffee alone.
Ingredients
- 1 cup water
- 1 cup sugar
- 3 cups strong coffee
Instructions
- 1. Combine water and sugar in a small saucepan. Bring to a simmer, stirring until the sugar is completely dissolved. Remove from heat, and stir in the coffee.
- 2. Pour into a flat, shallow dish, such as a 9- by 9-inch baking or casserole dish, and place the dish flat in the freezer.
- 3. Stir granita once every 20 to 25 minutes to distribute the ice crystals. When granita is almost entirely frozen, 3 to 4 hours or overnight, it can be scraped out with a large spoon into serving dishes.
Blood Orange Granita
Makes about 1 quart
Blood oranges are known for their deep red color, as well as their signature sweetness. When they are used to make a granita, the dessert is both eye-catching and flavorful. Use freshly squeezed juice for the best results in this recipe. You’ll taste a real difference in the level of flavor in the granita.
Ingredients
- 1 cup water
- 3⁄4 cup sugar
- 3 cups blood orange juice, freshly squeezed
- 1 tablespoon blood orange zest
Instructions
- 1. Combine water and sugar in a small saucepan. Bring to a simmer, stirring until the sugar is completely dissolved. Remove from heat, and combine sugar syrup with blood orange juice and zest.
- 2. Pour into a flat, shallow dish, such as a 9- by 9-inch baking or casserole dish, and place the dish flat in the freezer.
- 3. Stir granita once every 20 to 25 minutes to distribute the ice crystals. When granita is almost entirely frozen, 3 to 4 hours or overnight, it can be scraped out with a large spoon into serving dishes.
Pineapple Granita
Makes about 1 quart
Pineapple granita reminds me of the shave ice that you find in Hawaii. That shave ice — not shaved ice — is made with extremely finely ground ice and doused with flavorful tropical syrups. This pineapple granita is sweet enough to capture that tropical spirit, and it is easier to make at home.
Ingredients
- 4 cups coarsely chopped pineapple
- 1 cup water
- 3⁄4 cup sugar
Instructions
- 1. Combine pineapple, water, and sugar in a food processor or blender. Blend until mixture is very smooth and all sugar has been dissolved.
- 2. Pour into a flat, shallow dish, such as a 9- by 9-inch baking or casserole dish, and place the dish flat in the freezer.
- 3. Stir granita once every 20 to 25 minutes to distribute the ice crystals. When granita is almost entirely frozen, 3 to 4 hours or overnight, it can be scraped out with a large spoon into serving dishes.
Tart Cherry Granita
Makes about 1 quart
Cherry popsicles were always a favorite of mine as a kid, but as I grew up I realized that cherry popsicles don’t taste that much like real cherries. This granita is made with real cherry juice and gets all of its bright red color from real cherries. It won’t leave your mouth and tongue dyed red like the popsicles you ate as a child, but it will satisfy your taste buds when you want a hint of real cherry flavor.
Ingredients
- 4 cups tart cherry juice
- 1 cup sugar
Instructions
- 1. Combine 2 cups of the cherry juice and the sugar in a small saucepan. Bring to a simmer, stirring until the sugar is completely dissolved. Remove from heat, and stir in the remaining 2 cups cherry juice.
- 2. Pour into a flat, shallow dish, such as a 9- by 9-inch baking or casserole dish, and place the dish flat in the freezer.
- 3. Stir granita once every 20 to 25 minutes to distribute the ice crystals. When granita is almost entirely frozen, 3 to 4 hours or overnight, it can be scraped out with a large spoon into serving dishes.
Honeydew and Mint Granita
Makes about 1 quart
Melons such as honeydew are mostly water, with a subtle natural sweetness, and that makes them an excellent base for granitas. This one highlights the honeyed flavor of honeydew with a little mint, which results in a refreshing granita that will still satisfy your sweet tooth.
Ingredients
- 8 cups honeydew, cut into large chunks
- 1⁄2 cup sugar
- 2 tablespoons lime juice
- 10–12 mint leaves
Instructions
- 1. Combine honeydew, sugar, lime juice, and mint in a food processor or blender. Blend until mixture is very smooth and all sugar has been dissolved.
- 2. Pour into a flat, shallow dish, such as a 9- by 9-inch baking or casserole dish, and place the dish flat in the freezer.
- 3. Stir granita once every 20 to 25 minutes to distribute the ice crystals. When granita is almost entirely frozen, 3 to 4 hours or overnight, it can be scraped out with a large spoon into serving dishes.
Pear and Cinnamon Granita
Makes about 1 quart
Granitas are most often served during the summer, when you’re craving a light and refreshing dessert. They’re also a light and refreshing way to end a big meal, so they’re a good choice during the holidays even when the weather is cold outside. This granita is made with pear juice and spiked with a hint of cinnamon, which captures the flavor of the holidays in a unique package.
Ingredients
- 4 cups pear juice
- 1 teaspoon ground cinnamon
- 1⁄4 teaspoon allspice
- 1 teaspoon vanilla extract
- 1 cup sugar
Instructions
- 1. Combine 2 cups of the pear juice and the cinnamon, allspice, vanilla, and sugar in a small saucepan. Bring to a simmer, stirring until the sugar is completely dissolved. Remove from heat, and stir in the remaining 2 cups pear juice.
- 2. Pour into a flat, shallow dish, such as a 9- by 9-inch baking or casserole dish, and place the dish flat in the freezer.
- 3. Stir granita once every 20 to 25 minutes to distribute the ice crystals. When granita is almost entirely frozen, 3 to 4 hours or overnight, it can be scraped out with a large spoon into serving dishes.
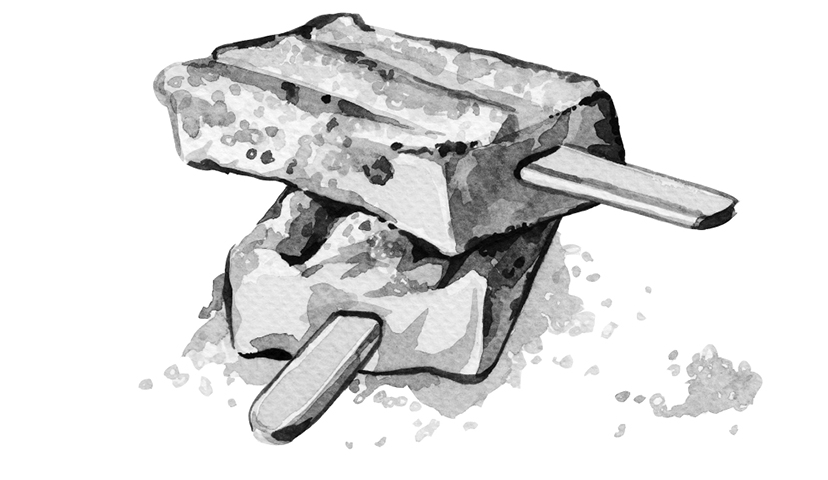
Popsicles
People of all ages love popsicles. These hand-held frozen treats are the perfect afternoon snack, whether you’re coming home from school or from work. A batch can be made well in advance so that you always have some on hand when you get a craving.
Dark Chocolate Pudding Pops
Makes 6–8 popsicles
For every kid who reached for the vanilla pudding pops, there were two that reached for the chocolate pops instead. With cocoa powder and dark chocolate, these pops pack a chocolaty punch that any chocolate lover can appreciate.
Ingredients
- 2 1⁄2 cups vanilla soy milk
- 2⁄3 cup sugar
- 3 tablespoons cocoa powder
- 3 tablespoons cornstarch
- 1⁄8 teaspoon salt
- 1 teaspoon vanilla extract
- 1 1⁄2 ounces dark chocolate, finely chopped
Instructions
- 1. Combine 2 cups of the soy milk, sugar, and cocoa powder in a medium saucepan. Cook over medium heat, stirring occasionally, until mixture comes to a simmer and sugar is dissolved.
- 2. Whisk together the remaining 1⁄2 cup soy milk, cornstarch, and salt in a small bowl. Pour the cornstarch mixture into the simmering milk and sugar mixture, and whisk to combine. Stirring constantly, cook for 2 to 3 minutes, until pudding begins to thicken.
- 3. Remove from heat, and stir in vanilla and chopped chocolate. Stir until chocolate has melted into the pudding.
- 4. Transfer to a clean bowl, cover with plastic wrap, and allow to cool to room temperature. Refrigerate until cold, then pour the chilled mixture into popsicle molds and freeze for at least 6 hours, or overnight, until solid.
Vanilla Pudding Pops
Makes 6–8 popsicles
This popsicle recipe is a throwback to a childhood favorite: pudding pops. It is made with a vegan vanilla pudding, which is similar to ice cream but contains quite a bit more cornstarch to thicken it up to the proper consistency for pudding. It’s tasty enough to eat right out of the pan, but it is even better when frozen.
Ingredients
- 2 1⁄2 cups vanilla soy milk
- 1⁄2 cup sugar
- 5 tablespoons cornstarch
- 1⁄8 teaspoon salt
- 1 teaspoon vanilla extract
Instructions
- 1. Combine 2 cups of the soy milk and the sugar in a medium saucepan. Cook over medium heat, stirring occasionally, until mixture comes to a simmer and sugar is dissolved.
- 2. Whisk together the remaining 1⁄2 cup milk, cornstarch, and salt in a small bowl. Pour the cornstarch mixture into the simmering milk and sugar mixture, and whisk to combine. Stirring constantly, cook for 2 to 3 minutes, until pudding begins to thicken.
- 3. Remove from heat, and stir in vanilla. Transfer to a clean bowl, cover with plastic wrap, and allow to cool to room temperature. Refrigerate until cold, then pour the chilled mixture into popsicle molds and freeze for at least 6 hours, or overnight, until solid.
Banana Pudding Pops
Makes 6–8 popsicles
These pops are inspired by banana cream pie and are made with a rich-tasting banana and vanilla base. To tie things back to the pie that inspired them, the popsicles are finished with a dusting of graham cracker crumbs at the base, to hint at a graham cracker crust.
Ingredients
- 2 ripe medium bananas
- 3⁄4 cup vanilla soy milk
- 1⁄3 cup sugar
- 1⁄2 teaspoon vanilla extract
- 2–3 tablespoons graham cracker crumbs
Instructions
- 1. Combine bananas, soy milk, sugar, and vanilla in a blender or food processor, and process until mixture is very smooth and all the sugar is dissolved.
- 2. Pour into popsicle molds, and sprinkle each with about a teaspoon of graham cracker crumbs. Freeze for at least 6 hours, or overnight, until solid.
Cherry Lemonade Pops
Makes 6–8 popsicles
These two-layer pops need to be frozen in two steps. First, the lemon layer is almost completely frozen at the bottom of the popsicle, then the stick is inserted and the cherry layer is added. You will need to stay near your freezer while you’re making them for the best results, but the finished product is worth it!
Ingredients
- 1 cup cherry juice
- 2⁄3 cup sugar
- 1⁄2 cup lemon juice
- 1⁄2 cup water
Instructions
- 1. Combine cherry juice and 1⁄4 cup sugar in a small saucepan. Cook over low heat, stirring occasionally, until the sugar is completely dissolved. Set aside to cool.
- 2. Combine lemon juice, water, and remaining sugar in another small saucepan. Cook over low heat, stirring occasionally, until the sugar is completely dissolved. Set aside to cool.
- 3. Divide lemon mixture evenly into popsicle molds, filling each about halfway up, and freeze until almost completely frozen, 3 to 4 hours. Fill the molds the rest of the way up with the cherry mixture and insert sticks and the lids to the molds. Freeze for at least 6 hours, or overnight, until solid.
Blueberry Balsamic Pops
Makes 6–8 popsicles
Balsamic vinegar doesn’t generally comes to mind when you think about dessert ingredients, but the thick, syrupy vinegar can actually be a wonderful addition to many berry recipes. It has an intense sweetness that blends well with the naturally sweet berries, and a high acidity, which helps that sweetness come forward and stand out. In short, it will make the delicious blueberries even more delicious, and it gives the pops a hint of sophistication beyond what you could buy from an ice cream truck.
Ingredients
- 12 ounces fresh blueberries
- 1⁄3 cup sugar
- 2 tablespoons water
- 2 tablespoons balsamic vinegar
Instructions
- 1. Combine blueberries, sugar, water, and vinegar in a blender or food processor, and process until mixture is very smooth and all the sugar is dissolved.
- 2. Pour into popsicle molds, and freeze for at least 6 hours, or overnight, until solid.
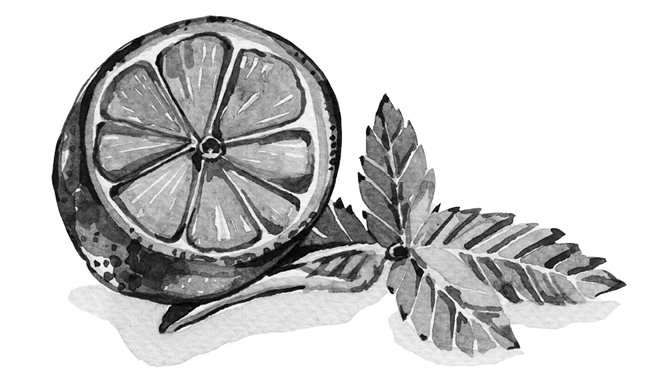
Mojito Pops
Makes 6–8 popsicles
Mojitos are a refreshing cocktail made with lime, mint, and rum. The popsicle version has a nod to the cocktail with a splash of rum in the recipe that makes this a great choice for grown-ups looking for a little treat on a hot summer day.
Ingredients
- 1 1⁄2cups water
- 1⁄2 cup freshly squeezed lime juice
- 1⁄2 cup sugar
- 1⁄4 cup fresh mint leaves
- 1⁄4 cup light rum
Instructions
- 1. Combine water, lime juice, sugar, mint, and rum in a blender or food processor, and process until mixture is very smooth and all the sugar is dissolved. Strain through a fine sieve to remove the mint leaves.
- 2. Pour into popsicle molds, and freeze for at least 6 hours, or overnight, until solid.
Root Beer Float Pops
Makes 6–8 popsicles
A root beer float tastes the best when the ice cream has melted into the root beer to lend some creaminess to that spicy soda. Here, the two elements are combined into a pop that is sweet, spicy, and perfectly creamy.
Ingredients
- 12 ounces root beer
- 1⁄2 cup coconut milk
- 1⁄2 teaspoon vanilla extract
Instructions
- 1. Whisk together root beer, coconut milk, and vanilla in a large bowl. Refrigerate for at least 30 minutes while the carbonation subsides.
- 2. Pour into popsicle molds, and freeze for at least 6 hours, or overnight, until solid.
Coconut and Orange Creamsicles
Makes 6–8 popsicles
Bright, zesty orange juice and creamy vanilla are a great combination, especially when they’re frozen into a tasty pop. This dairy-free creamsicle is made with fresh orange juice and coconut milk, with just a splash of vanilla. If you don’t have fresh orange juice, use orange juice concentrate for a more intense orange flavor than you can get from store-bought orange juice.
Ingredients
- 1 cup freshly squeezed orange juice
- 1 tablespoon Cointreau or other orange liqueur
- 1⁄3 cup sugar
- 1 cup coconut milk
- 1⁄4 teaspoon vanilla extract
Instructions
- 1. Combine orange juice, Cointreau, and sugar in a large bowl, and whisk vigorously until sugar is dissolved. Stir in coconut milk and vanilla.
- 2. Pour into popsicle molds, and freeze for at least 6 hours, or overnight, until solid.
Avocado and Lime Creamsicles
Makes 6–8 popsicles
Avocados are a naturally creamy fruit that is very high in fat. Although many people associate them with only savory dishes, in many countries they are mixed with sugar and eaten with dessert. Here, they turn into a surprisingly creamy — and very green — popsicle that just might turn you into an avocados-for-dessert convert.
Ingredients
- 2 ripe, medium Hass avocados
- 1⁄2 cup water
- 1⁄4 cup freshly squeezed lime juice
- 1⁄2 cup sugar
Instructions
- 1. Combine avocados, water, lime juice, and sugar in a blender or food processor, and process until mixture is very smooth and all the sugar is dissolved.
- 2. Pour into popsicle molds, and freeze for at least 6 hours, or overnight, until solid.
Ice Cream Sandwiches and Other Frozen Treats
As good as it is on its own, ice cream can sometimes be even better with a little something extra. From ice cream sandwiches to ice cream bonbons, these recipes will allow you to turn your favorite flavors into even more delicious desserts.
Double Chocolate Chip Cookies
Makes about 36 cookies
Sometimes the only thing better than a little chocolate is a lot of chocolate, and these cookies are full of it, with plenty of cocoa powder and chocolate chips. They spread more than some other cookies as they bake, which makes them ideal for ice cream sandwich making: not only can you fill them with quite a bit of ice cream, but you can still bite into the ice cream sandwich afterward!
Ingredients
- 2 cups all-purpose flour
- 1⁄2 teaspoon baking soda
- 1⁄2 teaspoon salt
- 1⁄2 cup shortening, vegan margarine, or coconut oil
- 3⁄4 cup cocoa powder
- 2 cups sugar
- 1 teaspoon vanilla extract
- 2⁄3 cup soy milk
- 2 teaspoons vinegar
- 2 cups chocolate chips
Instructions
- 1. Preheat the oven to 350°F. Line a baking sheet with parchment paper.
- 2. Whisk together flour, baking soda, and salt in a medium bowl.
- 3. Melt the shortening in a small, microwave-safe bowl.
- 4. Combine the melted shortening (still warm) and cocoa powder in a large bowl, and whisk until very smooth. Whisk in sugar, vanilla, soy milk, and vinegar. Gradually stir in the flour mixture, mixing until no streaks of flour remain. Stir in the chocolate chips.
- 5. Drop dough in 1-inch balls onto prepared baking sheet, leaving about 2 inches between cookies to allow for spread.
- 6. Bake for 10 to 12 minutes, until cookies are set around the edges.
- 7. Cool for 2 to 3 minutes on a baking sheet, then transfer to a wire rack with a spatula to cool completely.
Pair with Strawberry Ice Cream or Coconut Mint Chocolate Chip Ice Cream.
Maple Chocolate Chip Cookies
Makes about 20 cookies
You can never go wrong with chocolate chip cookies. They’re good with a glass of your favorite milk, they can be dipped in coffee, and they make fantastic ice cream sandwiches — especially cookies like these, which are slightly crisp on the edge and tender in the center.
Ingredients
- 2 cups all-purpose flour
- 1 1⁄2 teaspoons baking powder
- 1⁄2 teaspoon baking soda
- 1⁄2 teaspoon salt
- 1⁄2 cup sugar
- 1⁄2 cup vegetable oil
- 2⁄3 cup maple syrup
- 1 teaspoon vanilla extract
- 2⁄3 cup chocolate chips
Instructions
- 1. Preheat the oven to 350°F. Line a baking sheet with parchment paper.
- 2. Whisk together flour, baking powder, baking soda, salt, and sugar in a large bowl.
- 3. Whisk together oil, maple syrup, and vanilla in a small bowl. Pour into flour mixture, and stir until almost combined. Add the chocolate chips and mix just until no streaks of flour remain.
- 4. Shape into 1-inch rounded balls, and place on prepared baking sheet, leaving about 2 inches between cookies to allow for spread.
- 5. Bake for 10 to 12 minutes, until cookies are set and just firm around the edges. Allow to cool on the baking sheet for 2 to 3 minutes, then transfer to a wire rack to cool completely.
Pair with Vanilla Bean Ice Cream or Coconut Chocolate Ice Cream.
Chewy Gingersnap Cookies
Makes about 36 cookies
Chewy cookies are great for ice cream sandwiches because they keep their texture in the freezer better than crispy cookies, which can get so hard that they’re difficult to bite into. These cookies are perfect for the end-of-the-year holidays, but they’re also delicious year-round — especially when filled with ice cream.
Ingredients
- 2 cups all-purpose flour
- 2 tablespoons cornstarch
- 2 teaspoons baking soda
- 1⁄4 teaspoon salt
- 2 teaspoons ground ginger
- 1 teaspoon ground cinnamon
- 1⁄4 teaspoon ground cloves
- 1⁄4 teaspoon ground black pepper
- 1 cup sugar
- 2⁄3 cup vegetable oil
- 1⁄3 cup molasses
- 1 1⁄2 tablespoons orange juice
- 1 tablespoon orange zest
- 1 teaspoon vanilla extract
- 2⁄3 cup sugar, for rolling
Instructions
- 1. Preheat the oven to 350°F. Line a baking sheet with parchment paper.
- 2. Whisk together flour, cornstarch, baking soda, salt, ginger, cinnamon, cloves, and pepper in a large bowl.
- 3. Whisk together sugar, oil, molasses, orange juice, orange zest, and vanilla in a medium bowl. Pour into flour mixture, and stir until no streaks of dry ingredients remain.
- 4. Shape dough into 1-inch balls, roll in sugar, and place on the prepared baking sheet. Leave about 2 inches between cookies to allow for spread.
- 5. Bake for 7 to 9 minutes, until the outside edges of the cookies are set. Do not overbake.
- 6. Let cookies cool for 3 to 5 minutes on the baking sheet, then transfer them to a wire rack to cool completely.
Pair with Coconut Pumpkin Spice Ice Cream or Tangerine and Olive Oil Sorbet.
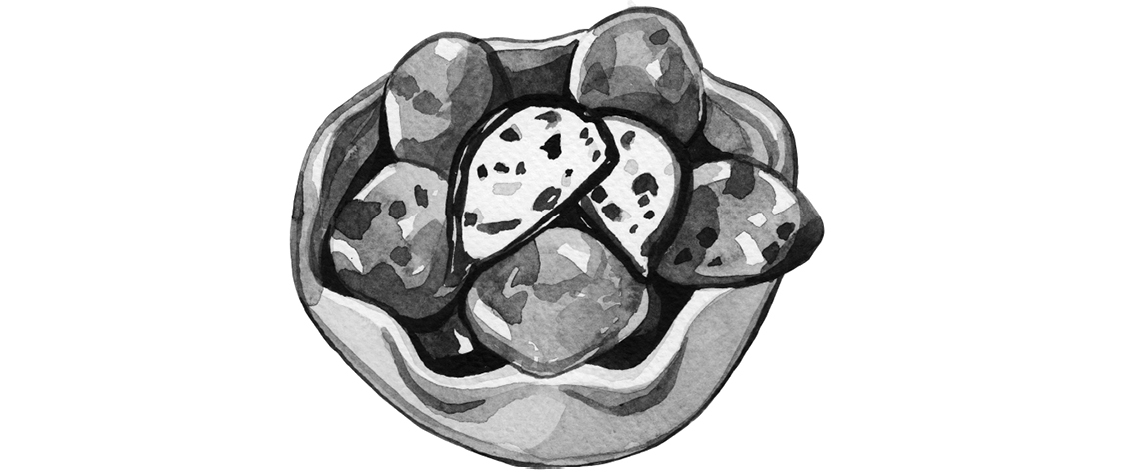
Ice Cream Bonbons
Makes 12 bonbons
Ice cream bonbons are a frozen treat that is just as indulgent as any truffle that you can buy. They’re made by dipping balls of ice cream into a melted chocolate mixture to give them a smooth candy shell. You can use any flavor of ice cream that you like, but chocolate and vanilla are classics that never go out of style. These tend to get eaten very quickly but will keep for several weeks in the freezer if they are hidden behind the frozen peas.
Ingredients
- 1 1⁄3 cups ice cream of choice
- 8 ounces dark or semisweet chocolate
- 2 tablespoons coconut oil
Instructions
- 1. Scoop ice cream into 12 balls of slightly less than 1 inch in diameter. Place ice cream balls on a parchment-lined baking sheet, and chill in the freezer for 30 to 60 minutes.
- 2. Combine the chocolate and coconut oil in a medium microwave-safe bowl. Microwave in 30- to 40-second intervals, stirring with a spatula in between, until chocolate is completely melted and the mixture is smooth. Allow to cool slightly.
- 3. Using two forks, dip the frozen ice cream balls into the melted chocolate, turn to coat completely, and transfer back to the parchment-lined baking sheet. The chocolate mixture can be reheated and restirred if it becomes too thick as you work. Repeat until all ice cream balls are covered, and store in the freezer.
Chocolate Affogato
Serves 1
An affogato is an Italian dessert that translates to “drowned” — as in a scoop of ice cream that is drowned in coffee or espresso. It’s an easy, elegant after-dinner drink, especially when it is made with a scoop of chocolate ice cream or sorbet because they go so well with strong coffee.
Ingredients
Instructions
- 1. Place a scoop of ice cream into a small cup or dessert bowl. Pour hot espresso over the top, and serve immediately.
Sauces and Toppings
A bowl of ice cream is always a welcome treat, but it is even more delicious when you top it off with something decadent. Build your dream sundae with a combination of your favorite ice cream and topping flavors!
Quick-Set Chocolate Sauce
Makes about 1 cup
This easy-to-make chocolate sauce sets up almost immediately when you pour it on top of a scoop of ice cream, creating a thin chocolate layer that you can crack through with your spoon. It adds both flavor and texture to a scoop of your favorite ice cream!
Ingredients
- 6 ounces semisweet or dark chocolate, finely chopped
- 2 1⁄2 tablespoons coconut oil
Instructions
- 1. Combine chocolate and coconut oil in a medium microwave-safe bowl. Microwave in 30- to 40-second intervals, stirring with a spatula in between, until chocolate is completely melted and mixture is smooth.
- 2. Drizzle or pour the sauce over ice cream to serve. Leftovers can be stored in an airtight container in the refrigerator and reheated as necessary.
Dark Chocolate Fudge Sauce
Makes about 1 cup
This chocolate sauce delivers a lot of flavor and is perfect for chocoholics. It is made with both cocoa powder and dark chocolate, and it pairs well with both ice cream and cake. You can also stir it into hot chocolate or dip fruit in it!
Ingredients
- 1⁄2 cup cocoa powder
- 3⁄4 cup sugar
- 3⁄4 cup hot water
- 1 teaspoon vanilla extract
- 4 ounces dark chocolate, coarsely chopped
Instructions
- 1. Combine cocoa powder, sugar, and hot water in a small saucepan, and whisk to combine. Bring to a simmer over medium heat, stirring until all the sugar is dissolved and the mixture is smooth.
- 2. Remove from heat, and whisk in vanilla extract and dark chocolate, stirring until the chocolate is completely incorporated.
- 3. Drizzle or pour the sauce over ice cream to serve. Leftovers can be stored in an airtight container in the refrigerator and reheated as necessary.
Quick and Easy Raspberry Sauce
Makes about 1 cup
A bright, fruity raspberry sauce can be a nice contrast to a rich ice cream. This sauce is particularly easy to make and can be whipped up on the stovetop or in the microwave. I prefer to use frozen berries since I always have them on hand, but fresh berries will work just as well.
Ingredients
- 1 cup frozen raspberries
- 1⁄4 raspberry or strawberry jam
- 2 tablespoons sugar
- 1 teaspoon lemon juice
Instructions
- 1. Combine raspberries, jam, sugar, and lemon juice in a medium microwave-safe bowl. Cook on high for 1 minute, then stir and cook for an additional 60 to 90 seconds, until syrup is bubbling and slightly thickened. (Alternatively, combine raspberries, jam, sugar, and lemon juice in a small saucepan, and cook over medium heat, stirring regularly, until mixture comes to a boil and begins to thicken.)
- 2. Allow mixture to cool before covering or serving. Leftovers can be stored in an airtight container in the refrigerator.
Vegan Salted Caramel Sauce
Makes about 11⁄2 cups
Salted caramel has just the right combination of salty and sweet to make it very addictive. This is a sauce that is perfect for pouring over an ice cream sundae. For a more intense caramel flavor, simply cook the syrup until it is a dark brown before adding the coconut milk, and be sure to use full-fat coconut milk for the best results.
Ingredients
- 1⁄3 cup water
- 1 cup sugar
- 3⁄4 cup coconut milk
- 1⁄2 teaspoon salt
- 1 teaspoon vanilla extract
Instructions
- 1. Combine water and sugar in a medium saucepan, and cook over medium heat, stirring with a spatula just until the sugar dissolves. Bring the syrup to a boil, and cook until it turns a dark amber color, 3 to 5 minutes.
- 2. Pour the coconut milk into the hot caramel. Mixture will bubble vigorously. Add salt and vanilla, and stir until sauce is smooth. Remove from heat, and transfer to a separate container.
- 3. Allow caramel sauce to cool before covering or serving. Leftovers can be stored in an airtight container in the refrigerator and reheated as necessary.
Coconut Cream Whipped Cream
Makes about 2 cups
This vegan version of whipped cream is made with coconut cream and whips up to be light and fluffy. The trick is having the coconut cream extremely cold before you start. Storing a can in the refrigerator will ensure that you always have some on hand.
Ingredients
- 1 can (15 ounces) coconut cream, cold
- 3 tablespoons confectioners’ sugar
- 1⁄2 teaspoon vanilla extract (optional)
Instructions
- 1. Pour the coconut cream into a large bowl. Beat cream until it reaches soft peaks by hand or with an electric mixer on medium speed, 3 to 5 minutes.
- 2. Sift in confectioners’ sugar, using more or less to taste, and beat in. Briefly beat in vanilla extract, if using. Serve immediately.