
 rs. Roper, Homer Simpson, Erykah Badu: What do these folks have in common? They’ve all famously rocked a muumuu at some point. I’m all about vegging out in this shapeless robe/nightgown/cloth dress in the privacy of my apartment, but I won’t leave the house in one unless I’ve done a little bit of mending first. Scratch that, a lot of mending.
To ring in my thirtieth birthday, I transformed my first frockish muumuu from drab to fab. The celebratory outfit kicked off my year of new pieces, and I pulled it off with little more than a pair of scissors and some cinching!

The main essence of this remake was going from long to short, a totally easy fix on a too-long garment or a muumuu plucked from an estate sale at an Edie Beale look-alike’s home.
This is an easy starting point for all levels, so all you non-sewers out there, get ready for your mind to be blown because you’ll be able to nail this in a jiffy too!
1. Decide how short to go. Pick your desired length and, using chalk, a pencil, or a fabric crayon, mark the muumuu where you want it to end. Remember to use your ruler or phone book, or other straight marking device to create a straight line. This line will be your guide as you snip, snip, snip across the fabric.


2. Cut about 1 to 2 inches below your marked line. This will be the excess material to assist with your hem. Also, keep those trimmings because you’ll use them later.

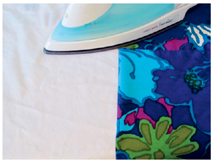
3. Now that the piece has been cut, plug in an iron. Fold the piece under at the chalk line and use the iron to press down, making a crease along the line. Continue ironing the fabric along the chalk line, making your way around the piece.

4. Now it’s time to do it all again!
I know, I know, we had so much fun the first time.
Fold the raw edge in half (raw edge is folded under, touching the wrong side of the fabric) all the way around the dress, and again, use the iron to press down on the new crease, getting it super flat.

5. As you iron, pin the folded fabric in place. This will keep everything you’ve pressed from moving or coming undone.

6. Once the garment is pressed and pinned, a sewing machine makes creating a hem super easy. Pick your thread and use it to wind a bobbin (see “Wind That Bobbin”). Lace up your sewing machine with that same thread and put in your bobbin!

7. Adjust your machine to the appropriate stitch setting. With a cotton muumuu like this, a medium stitch, 2.5 mm to 3 mm, will work the best (see “Machine Stitch Lengths”).
8. Lift the presser foot and slide the bottom of your garment (where the hem is pinned) underneath the presser foot of the sewing machine, right side up.

9. Align the garment with the 5/8 mark on the throat plate, which is a good hem allotment. Feel free to choose whatever amount you’re happy with, as there is no right or wrong, and put the presser foot back down.
10. Use the handwheel to stitch forward 3 or 4 stitches.

11. Then press down the reverse lever and go backward a few stitches, directly on top of what you just stitched. This backward and forward action reinforces your stitches so that everything stays in place before you get farther along. After sewing forward, then backward, begin stitching forward again and continue stitching along. You can do this once more for extra security—there is no right or wrong.

12. After your first stitches are secure, slowly slide the rest of your fabric along the throat plate, using the 5⁄8 seam allotment mark (or whichever seam measurement you chose) as a guide.

13. As you reach the place where you began your stitches, repeat Steps 11 and 12, going backward and forward over your last stitches to keep them in place.

14. Use the reserved material you cut in Step 2 and trim it more if desired to use as a belt, gathering your muumuu at the waist. (At least 1-inch wide will cinch the waist without being obvious, and a wider piece will make the fabric more beltish-looking.)
You now have a gorgeous hem and matching cinch-erific belt, and your muumuu transformation is complete!

 Non-sewers, you’ve got a few options to create the same look without using a machine.
If you’re working with a polyester blend, leaving the edges raw is a perfectly fine option. Just make sure your snips are straight.
Leave the jagged edges to Glenn Close and Jeff Bridges.
1. Follow Step 1 to mark your desired length.

2. Use scissors to cut your piece along the marked line. Straight snips = fab post-cut muumuu!

3. Using the leftover material, cut another strip (at least 1-inch wide), and you’ve got an insta-belt!
Fastest. Dress. Ever.
![]()
Nothing beats a quick hem with the use of some mailing, painter’s, or duct tape to secure the ends.
1. Follow Steps 1 and 2 from Machine It Muumuu to mark your desired length plus about 1 to 2 inches for a hem fold.

2. Post-trim, if you’ve got a bit of fraying, turn to that “everything drawer” in the kitchen that’s filled with spare keys, tape, and take-out menus from Baja Fresh, and go for that tape.
3. Fold your garment, and using a hot iron to press down on the fold, make your way around the piece.
4. Grab your tape and place it evenly over the frayed ends, securing it to the underside of the dress.

Easy, breezy!

![]()
If you are flying around the world on work trips, here’s where that travel sewing kit in the Marriott bathroom finally comes in handy! Using a needle from the kit as well as one of the threads that matches the color of your piece, a basic running stitch will do the trick.
1. Follow Steps 1 and 2 from Machine It Muumuu to mark your desired length plus about 1 to 2 inches for a hem fold.

2. Grab a piece of thread. Estimating thread length is always a bit tricky. I always eyeball it depending on the length of the piece I’m working with, and, of course, no two dresses are ever the same. Because you don’t want to have a piece of thread that runs out, overestimate it. Tie a knot at one end and push the other end through the eye of a medium-size needle.

3. Bring the needle up through the underside of the fabric (the knot will let you know when to stop). Bring the needle back down about 1⁄8 inch away from your first point.

4. Begin stitching from right to left, with evenly spaced stitches. The spacing between these stitches should be small, technically, but you can eyeball about 1⁄8 inch between each one—do what works for you and the piece.

5. When you get back to the starting point, knot the thread several times at the end to keep it in place.
Shortened muumuu/house dress is dunzo!
TYPICAL HEM ALLOTMENTS
I don’t use set measurements for everything—I think it all depends on the fabric. For a thicker fabric, I would use a 5⁄8- or 3⁄4-inch; however, with thinner fabrics, like cotton, it can be much less, like 1⁄4 inch. There are easy lines to follow on the throat plate of the sewing machine (underneath the presser foot); just follow the lines on your machine to your liking and you’ll be fine.


If you are using a sewing machine, continue the steps below. If you are hand sewing, skip to this page.