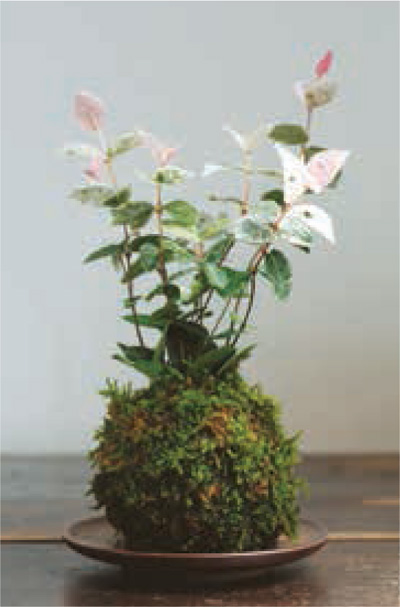
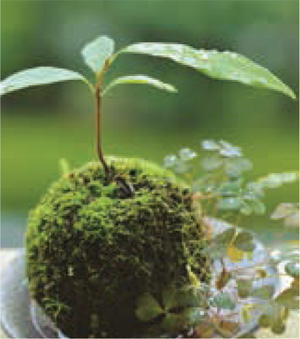
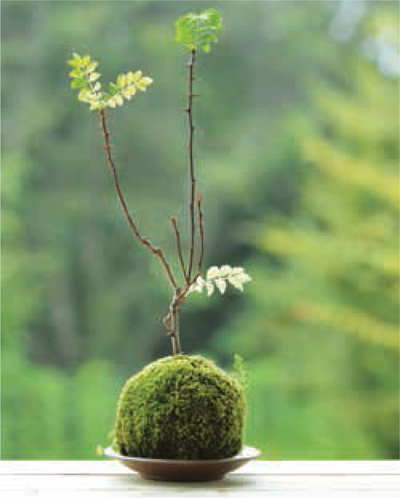
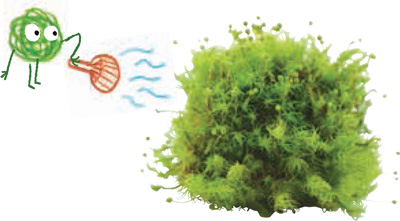
Having Fun with Moss Balls

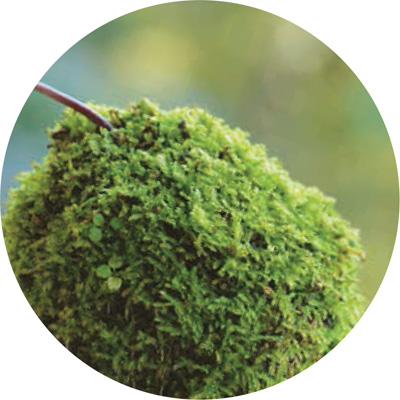
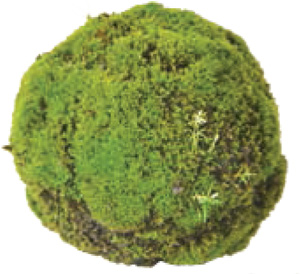
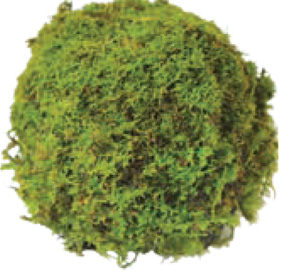
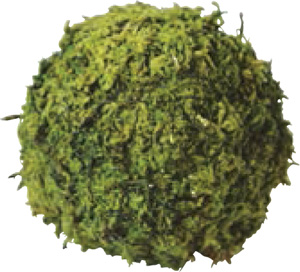
Haigoke moss ball
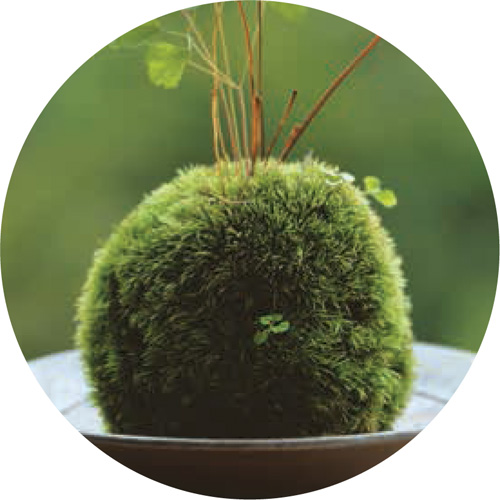
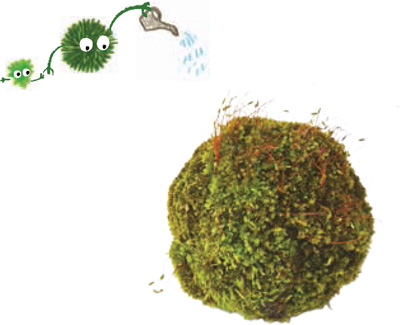
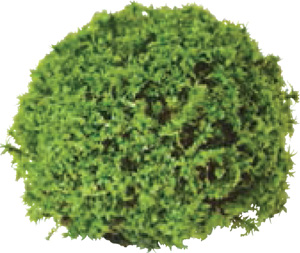
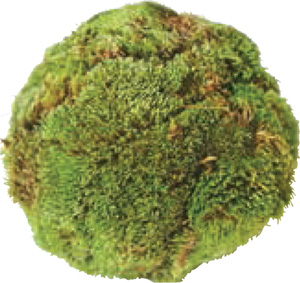
Yamagoke moss ball
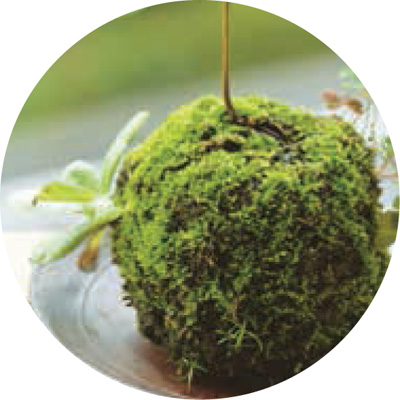
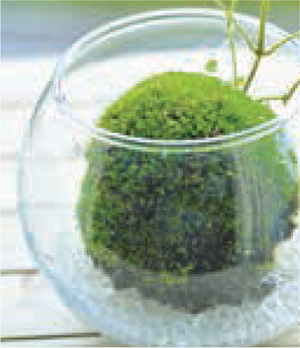
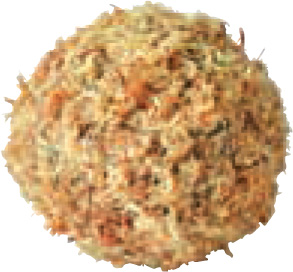
Brachythecium Moss moss ball
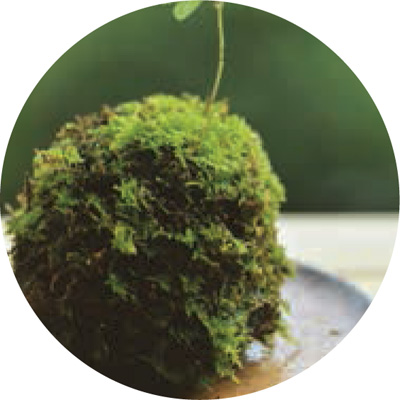
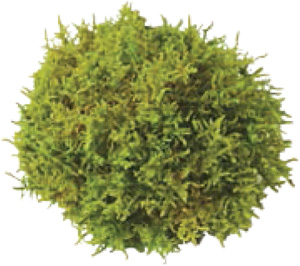
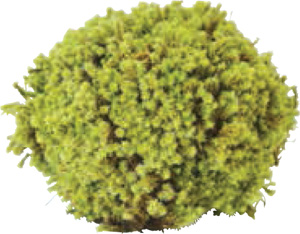
Shinobu Goke moss ball


What Kinds of Moss are Suitable for Making Moss Balls?
Sphagnum works well for most kinds of moss balls. For a more authentic bonsai/Japanese moss garden feel, specialty mosses that grow in different parts of Japan are available in bonsai shops and online.
➀ Haigoke is probably the most popular option. Because of its matte texture it is easy to form a ball and is relatively resistant to dryness. ➁ Yamagoke moss (Japanese mountain moss) is a bonsai favorite, used as topdressing for plants that like a bit of acidic soil (like azaleas). Like Haigoke, it is also resistant to dryness. ➂ Others… Thuidium faces the shade, and requires humidity, but the moss holds together well so it’s easy to form a ball. Brachythecium is a moss that grows on soil, rock and bark. The matte texture makes it easy to work with.
Where to Get Mosses for Kokedama?
Haigoke and Yamagoke moss can sometimes be found at bonsai specialty stores or from online retailers. Online vendors that specialize in moss are a good source.
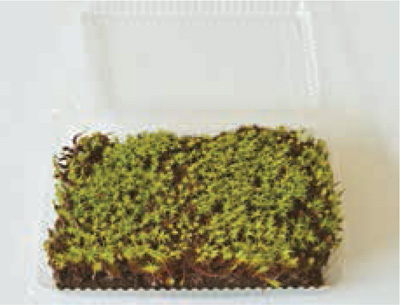
Moss can be purchased in various forms, from kits that will provide enough moss for a couple of kokedama, to moss plant starters, to sheets of 5 pounds (2.5 k) or more.
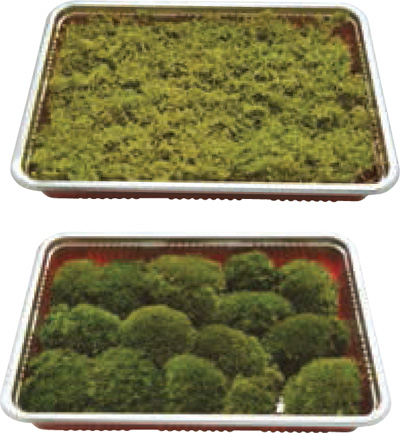
Pack size of Haigoke and yamagoke.
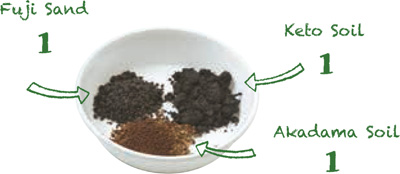
| Property of Soil | When using “Musou” | Without “Musou” |
|---|---|---|
| Soil with good drainage and proper humidity | Just Musou | Keto Soil 1: Fuji Sand 1 |
| Soil with good drainage | Musou 1: Fuji Sand 1 (or pebbles) | Akadama soil 1: Fuji Sand 1 |
What Kinds of Soil Should be Used for Moss Balls?
In general, keto soil is good for moss balls because its clay-like properties allow the soil to hold together. On the other hand, keto soil tends to dry up quickly and doesn’t absorb moisture as well, so it usually doesn’t perform well on its own.
In this book, we will mostly recommend using a combination of pebbles and soil. For some bonsai we have used a soil called Musou, a Japanese product formulated specifically for moss ball gardening. Musou has the ability to conserve moisture while providing good drainage, and so can be used on is own. If you cannot yet find Musou in your region or online, you can combine keto soil as a connecting base with akadama soil and Fuji sand.
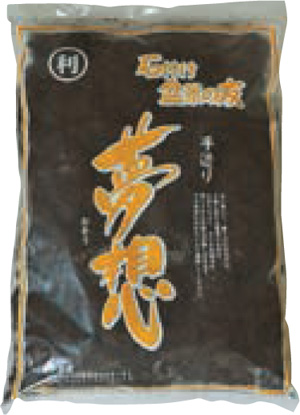
Musou soil designed for moss ball gardening.
Here we will use Haigoke moss to form a moss ball. Once you learn the basics, you should be able to get creative with other projects.
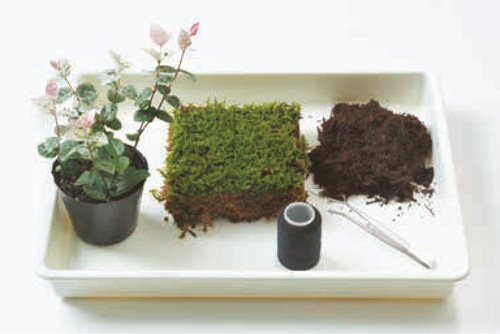
WHAT TO PREPARE
Plant (here we are using Hatsuyukikazura), Haigoke, soil (here we are using Musou), a roll of string, tweezers.
Preparation
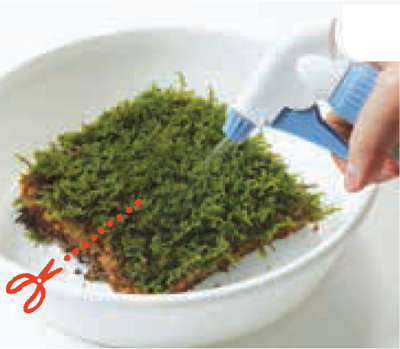
1 Moisten the moss. To help ensure it holds together later on, make a cut into the center.
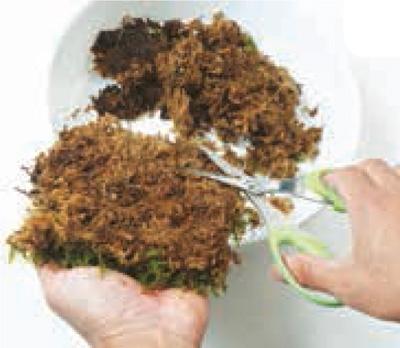
2 Cut off any dried up bits from the moss.

3 Wet the soil you’ve prepared and knead the soil well.
Start
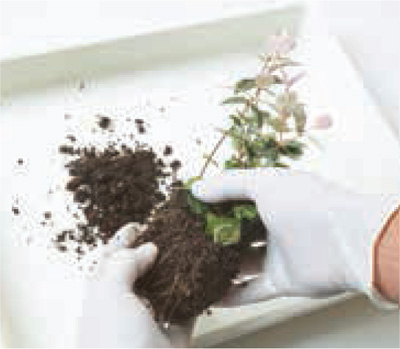
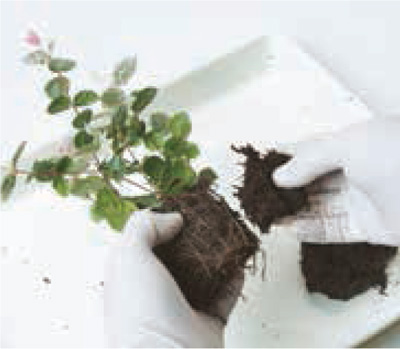
1. Take the plant out of the pot, and massage the root ball to remove excess soil and free up the root.
2. With the wet soil you’ve prepared, evenly form a layer of soil around the roots. While kneading out the air pockets, use both hands to squeeze the soil to form a tight ball.

3. Without burying the stem, shape the soil into a nice round shape. Make sure the ball can be set to stand up straight. Shape the base accordingly.
4. Cover the soil ball with the moss sheet you’ve prepared. If possible, arrange the moss so that ends don’t overlap. If they do overlap, cut off the excess portion.
5. Shape the ball with both hands.
6. Use the string to reinforce the ball from different angles.

7. After wrapping the string around about 10 times, leave 4” (10 cm) of string, and cut. You can use the pliers to pin the string to the bottom of the ball with a U-shape wire.
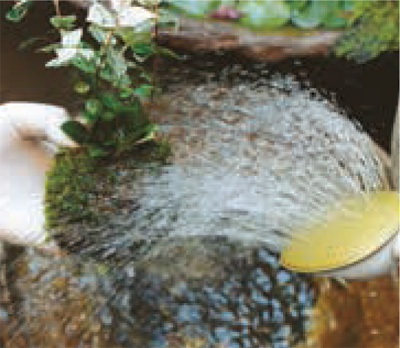
8. Once you’re done securing the ball, water it! In addition to providing needed moisture, watering clears away unwanted debris. You can also soak the ball in water.
And it’s done!
When the Plant Requires Good Drainage
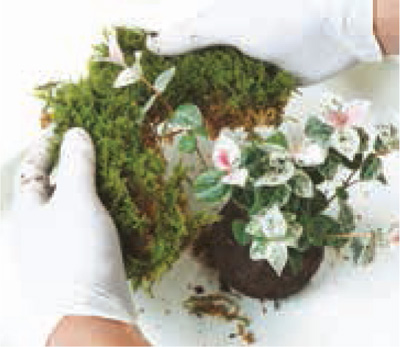
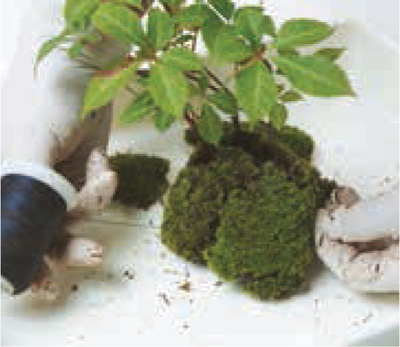
Plants such as succulents require soil with good drainage. It is difficult to form a ball if the soil contains just Fuji sand and light pebbles. You can mix in some Musou to help with cohesion. If you don’t have Musou, you can form a ball with gauze and tie it with string. Then cover the gauze-formed ball with moss (refer to images 1–4).
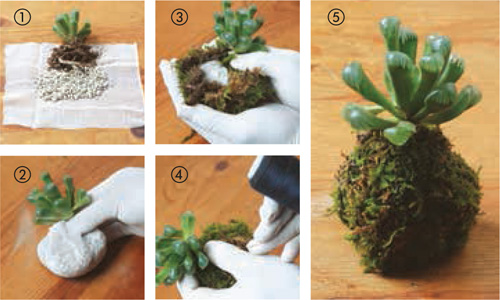
★ When making a succulent moss ball, it’s fine to use just small pebbles in your gauze wrap.
Making a Moss Ball with Yamagoke Moss
Using Yamagoke moss requires a bit of know-how. First of all, you must wet the moss with plenty of water, otherwise the moss will immediately peel off. The moisture also allows the string to wrap around much easier, keeping it all together. Keeping this in mind will help prevent failed attempts.
Start
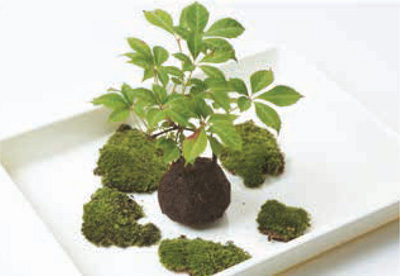
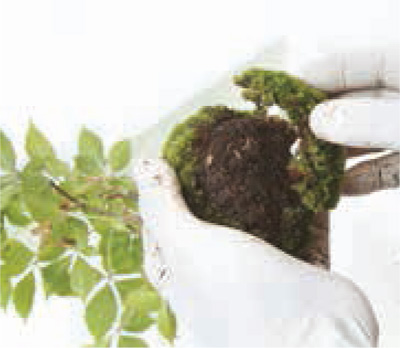
1 Wrap soil around the roots of the plant, and shape it into a ball (as shown in the steps on p. 18). This plant is Chinese Virginia Creeper.

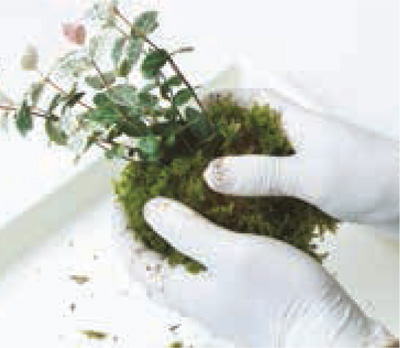
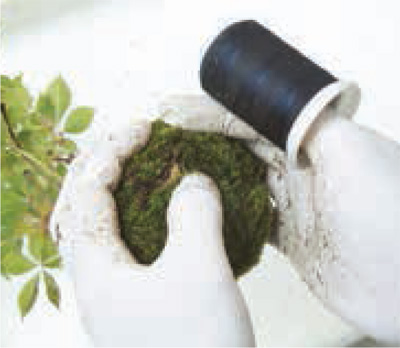
2 Wet the moss and start laying it on the soil.
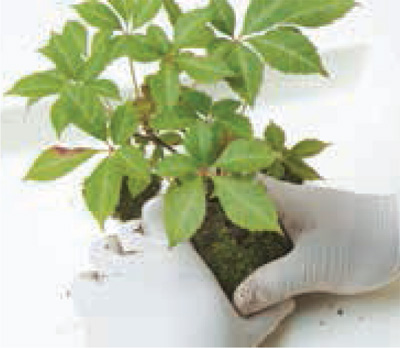
3 Add moss to all parts but the bottom. Press on firmly, so there are no gaps, and until the ball is firm.
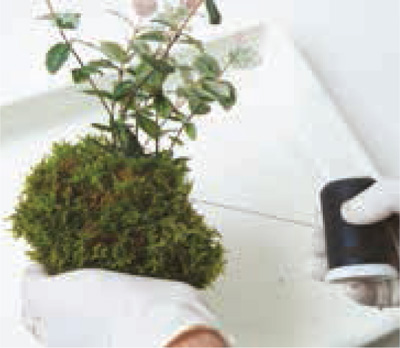
4 Wrap some string around 2–3 times until the moss is fastened to the ball of soil.
5 Add moss to the bottom of the ball.
6 Fasten the added moss with some string. Then continue from step 7 shown on p. 19.
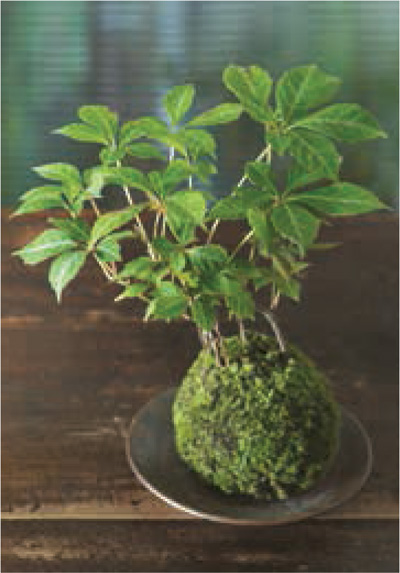
And it’s done!
You can enjoy a more complex and colorful moss ball by adding flowering and non-flowering plants together. Before making your first one, read through the following steps to see how easy it is to do.
Start
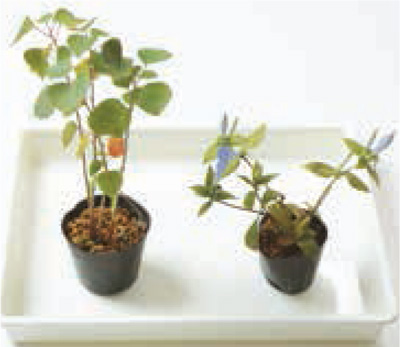
1 This example combines Chinese Tallow and Asamarindou. Moss and soil preparation is on p. 16.
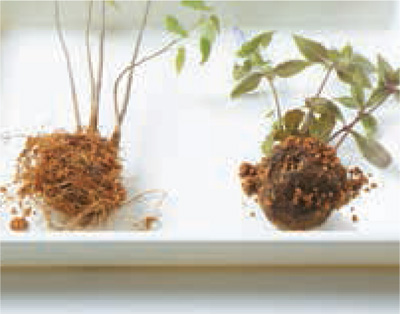
2 Take both the plants out of the original pot, and gently remove soil off the roots.

3 Decide how you would like to arrange the plants. The recommended rule is to have the shorter plant in front of the taller one.

4 Start pressing the two plants together.
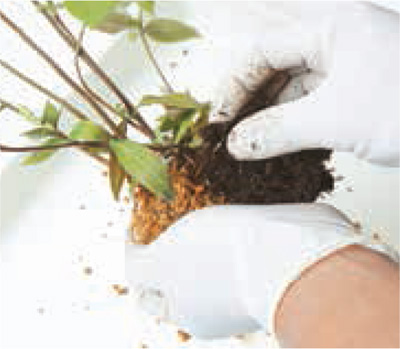
5 Then start adding soil around the roots to create a ball.

6 Press the soil into a tight ball.
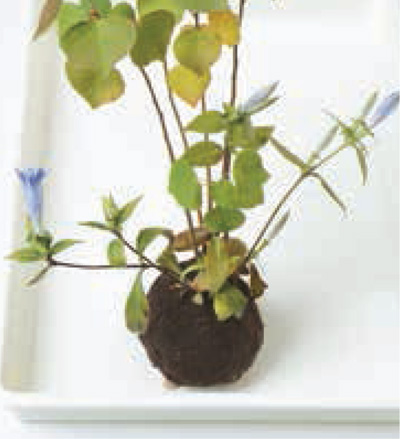
7 Make sure the bottom of the ball is flat enough so the ball can be set upright. Then continue from step 4 shown on p. 19.
And it’s done!
Enjoying Growth
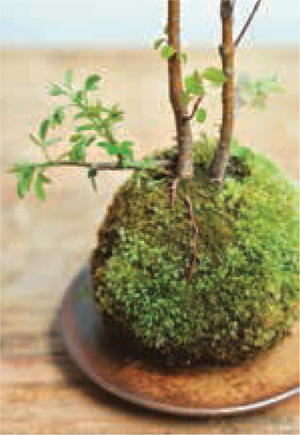
When the moss ball is newly formed, the string is quite visible. Over time, the string becomes less and less visible as new moss grows over it. You’ll also notice that whereas the dried moss you started out with would have been somewhat brownish, your moss ball becomes beautifully green when the new moss grows in.
Newly made moss ball: the wrapping string is visible.
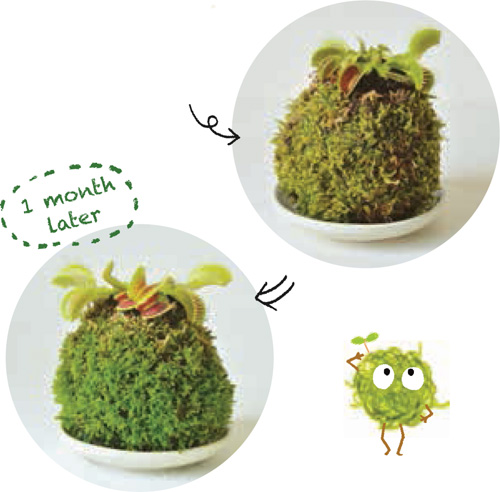
One month later: the wrapping string is no longer visible, as beautiful new greenery grows over it.
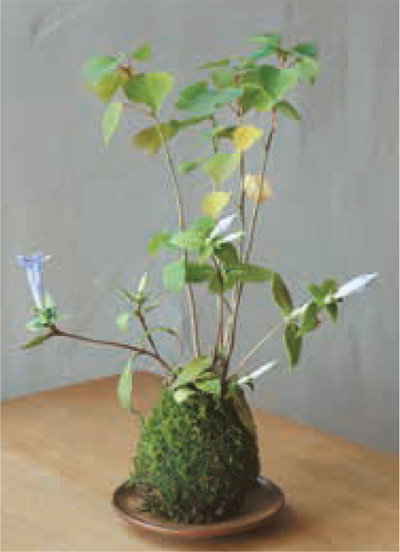
Enjoy Transformation After Bloom
For moss balls with flowers as a center, once the flower wilts, the joy shouldn’t just stop there. The flower once in bloom will transition into its next form. It is as the moss ball has transformed. You can also try striking (cloning) the plant (p. 34), or combine with other plants.
Once the Jeffersonia Dubia flower is has withered, you can still enjoy the green that follows.

Once the Red Spider Lily has bloomed, the stem wilts, and the leaves sprout.
Enjoying the Weeds
As you grow your moss ball, weeds will sprout here and there. Seeds of weeds could have snuck into your moss or your plant from the beginning. If your plant came from out of doors, the inclusion of weeds would be natural and normal. You can let weeds serve as a feature in your moss ball. If you don’t care for weeds, you can always trim them off.
Water Willow sprouted, adding little flowers to the moss ball.
Creeping Woodsorrow sprouting from the side, adding some accent.
The Mushrooms on Your Moss Ball
During the more humid seasons, mushrooms tend to appear. It would be nice if these were something like Shiitakes, but the mushrooms growing from moss balls are usually tiny ones. After just a few days, the mushrooms will disappear, so keep an eye out.
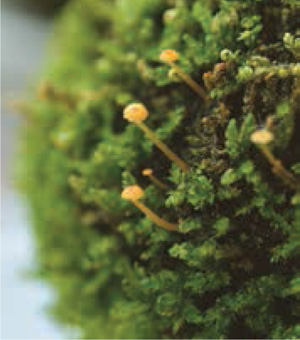
A colony of orange mushrooms sprouting from a moss ball.
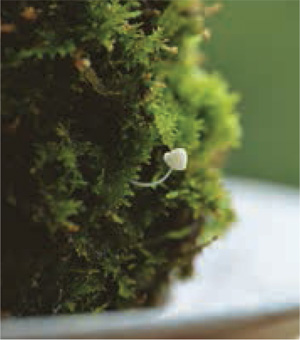
White mushroom sprouting from a moss ball.
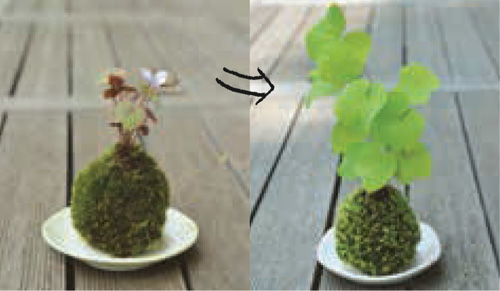
Go by the Seasons
Depending on the plants you grow, your collection, or even just one moss ball, can give you something to enjoy year round. Flowers in spring, fresh green leaves in summer, red leaves in the fall, and so on.
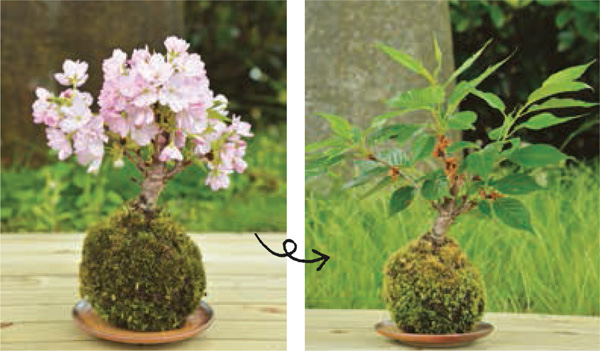
Cherry Blossom moss ball in April, and then fresh new leaves two months later.
Hazelnut in August, then in late fall.

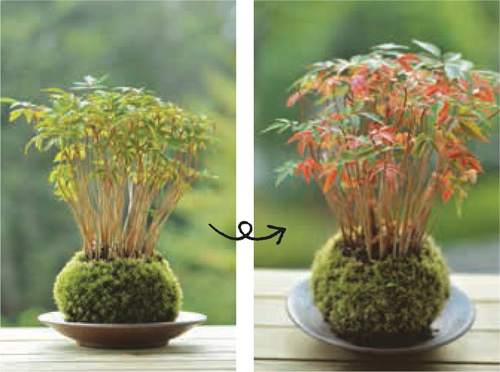
Kuranperi- and Giboushi combo moss ball in later June. Then in early November it sports a fruity red color.
Placement and Lighting

The best place to keep your moss ball is outdoors on a porch or in a garden. Make sure to not place it near any sort of exhaust fan, such as an air conditioning window unit, since the wind from the fan will weaken the moss. In fact, avoid strong wind altogether. Don’t place the moss directly on concrete and so on. These substances absorb summer heat that could kill the moss. Moss is happy with about half a day’s worth of sunlight, and plenty of time in the shade as well.
That said, you must also consider the needs of the plants contained in the moss ball. Plants that require a lot of light can be placed out in the light for most of the day. In spring and fall when the moss is at its optimal growth, plants that prefer less light can take indirect sunlight. Summer is when moss balls endure the most. Placing the moss ball in a spot with some good ventilation and shade is a good idea.
It is not impossible to raise moss balls indoors. You can leave moss balls by the window for weeks, as long as there is good lighting, and occasionally allow some contact with strong breezes. However, it is best to avoid an air conditioned room. The plant might not cope well with drastic and sudden changes in environment. You can bring the plant indoors to decorate your room during the day and take it out at night, or make similar accommodations, while monitoring its wellness.
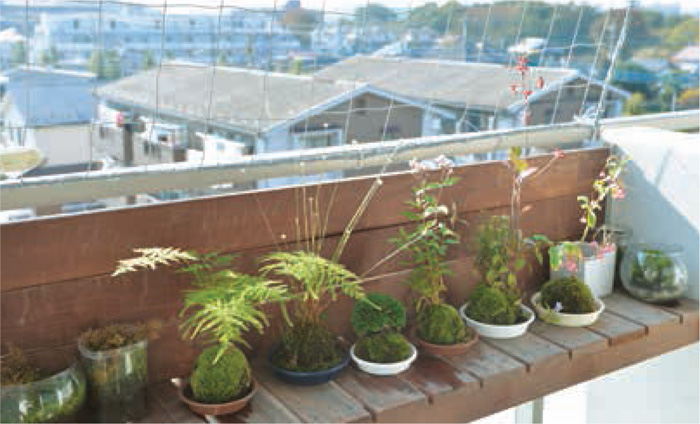

Out on the porch, not placing the plants directly on the ground.

You may raise the moss balls indoors to a certain point, while being mindful of ventilation.
The basic way to give water is to submerge the moss ball, and once air bubbles stop coming out, you’re done. You can use a watering can, but keep in mind that a watering can might not reach every nook and cranny, so be extra careful with this method. That said, you want to avoid flooding the moss ball.
When it comes to water, it’s important to consider compatibility of your moss and plant combination from the outset. The best combination consists of moss and plants with similar needs.
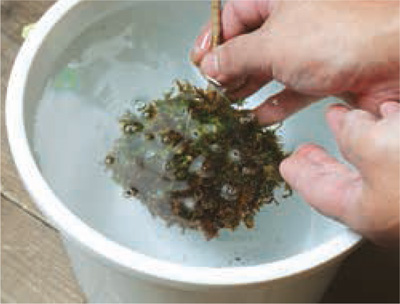
When submerging the moss ball in water, air bubbles will come out. Make sure to not steep leaves or flowers in the water.
Managing in Summer and Winter
Depending on where you place your moss in summer, the amount of watering will differ. This should be done early in the morning or during sunset. If you water during high temperatures, a lot of the water will evaporate and create a steamy environment, and this could possibly weaken the moss and plant.
Snow and freezing temperatures aren’t a real problem for moss, but it could be a problem for the plant, so it is best to avoid placing the moss ball in a very cold spot. During winter, you just need to water the moss ball when the soil is dry.

Mizugoke helps maintain humidity. This moss can take in a lot of water, and retain moisture.
No Need for Fertilizer
At a certain level, moss can survive by just having light and water, so there’s no need for fertilizer. Fertilizer could actually be harmful to moss. Since we’re not aiming to enlarge the roots, the plants basically don’t need fertilizer either. If you want to give your plant some boost, you can add a very minimal amount of liquid fertilizer.
Even if it Looks Like it’s Wilting…
When growing moss balls, you will surely encounter your plants wilting at some point. Don’t give up when you see that happening. A plant might not adapt well to its new environment, which could cause discoloration. Once the plant adapts to its new home, new leaves will sprout, and your hard work will be rewarded. So give your moss ball some time, and take good care of it, and you will see great results.
A Japanese Pepper plant that lost all its leaves has grown new ones.

Q: Any pests or disease we need to worry about?
A: Moss by comparison is resilient to diseases, so there isn’t much to worry about. However, moss has a risk of moldering, so it is best to not overwater.
Q: My moss has gotten moldy. What should I do?
A: During the rainy or humid season, if you leave your moss ball in a place where there’s no ventilation, or in a place with high humidity, mold is bound to appear. To counter this, you can rinse the moldy parts with water and use some tissue to gently take off the mold. Leave the moss ball in a well-ventilated place, and it should be OK. The mold will naturally dissipate.
Q: What kind of string should we use for the moss ball?
A: The color should be black or dark green, something that would not stand out. Cotton is fine, but after a while, the string might break, and the moss ball might fall apart. A sturdy nylon string could last longer.
Q: Should my moss turn red?
A: In general, moss doesn’t change color. Even in winter, most moss remains green. When the moss dries up, it turns white or brown.
Q: The plant I used in my moss ball is still pretty young and small. What should I do when it gets bigger?
A: You can control growth by the amount of soil you use. Your plant should overgrow the moss ball. Roots that start coming out of the moss ball can be put back into the soil, or can just naturally wilt away. A plant with stems underground like Sasa (broadleaf bamboo), could possibly extend its parts to a neighboring moss ball. You could make a group (try to shape it upwards) or you can also just cut it off the extending parts.
Q: There are little needles sprouting out of my moss ball. What is this?
A: It’s called sporophyte. The thick part is called moss sporangium (refer to p. 56).

Sasa underground stem extending out.
Katsura roots growing out of the soil, but that have been tucked back in.

Sporophyte sprouting.

Q: What is the life expectancy of the moss ball?
A: If the moss ball is raised in good conditions, it can live a good three years. When the moss gets old, or the plant doesn’t seem to be doing well, you could always change the soil, or renew the moss. When it reaches its end you can just plant the whole ball in the ground.
Q: Is there a moss that shouldn’t be used to make a moss ball?
A: Large moss such as Sugigoke isn’t suitable to make moss balls. Moss that doesn’t stick together well, also would be hard to handle. It is fun to experiment with different kinds of moss, but for starters, its a good idea to stick with simple mosses (refer to p. 16).
Sugigoke is a large moss, more suitable for outdoor gardening.
Q: No many how many moss balls I make, I always have one spot that dies off. Why does this happen?
A: It’s possible that the soil that came with your plant had some fertilizer in it. The fertilizer could be causing the some of your moss to die. As mentioned in the care section of the book, moss doesn’t mix well with fertilizer. This is why you would want to clear out as much of the original soil as much as possible.
Q: Can you make Goblin’s Gold moss into a moss ball?
A: Using Goblin’s Gold moss (Schistostega) alone or with luminescent plants in a moss ball sounds like a something out of a fantasy. Realistically speaking, it is difficult to use for a moss ball. Goblin’s Gold moss is rare and isn’t usually used in gardening, and to begin with it isn’t suitable to make into a ball. It might be best to admire the fantasy-like moss in it’s original habitat, and stick to mosses that are suitable to gardening.
Q: When I was making a moss ball, I ended up with leftover moss. What should I do?
A: There are ways to preserve the moss so you can use it for your next project. Here are a couple of tips to keep your moss green: ➀ Keep the moss moist. ➁ Keep moss in shade to partial shade, no direct sunlight. In order to keep the moss moist, keep in tight container or in a spot without too much air passage, so the moss doesn’t dry out.
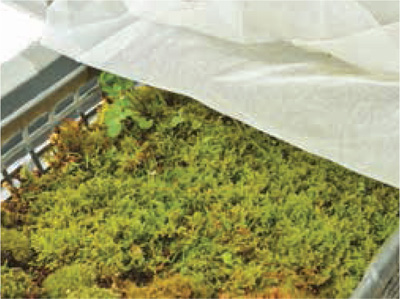
Haigoke being preserved out on the porch. This is the tray in it came in, covered with a mesh cloth to let some light through. The bottom is covered with plastic to keep moss from drying out.
A moss orb is just moss wrapped around a ball of soil, held together with a string. The steps in making a moss orb are pretty much the same as for making a full-on moss ball.
The main difference is that without the addition of a plant, caring for a moss orb is much easier. Moss orbs are a great way to try out and learn the characteristics of different types of moss.

Leucobryum juniperoideum
This is a gapless bundle of moss. It is neat and simple-looking. Best to always keep moist, and keep in indirect sunlight.

Hosourigoke
Brachymenium exile (Dozy et Molk.)
This is the moss you often see growing between the cracks of concrete. The secret to making this into a packed bundle lies in the way you get the bits to adhere together. Keep moist, and keep in indirect sunlight.
Bryum
Family Bryaceae
Just like Hosobaokinagoke, this is a gapless bunch of moss. Keep moist, and keep in indirect sunlight. The image below is 5 months after assembled.
Haigoke
Hypnum plumaeforme
Wrap this ball in between leaves, to allow the leaves to grow into its natural shape. It has a mat-like quality, so it is easy to work with. Keep moist, and keep in indirect sunlight.
Brachythecium
Family Brachytheciaceae
This moss can be found on rocks, bark, and soil. It has a rather matte texture, is easy to deal with, but after about a month it sprouts weeds. Keep moist, and keep in indirect sunlight.


Thuidium
Family Thuidiaceae
The delicate detail of the leaves gives a calming feel. This is also a mat-like moss, which makes it easy to put together. This moss is really weak to dryness, so spread some Mizugoke at the bottom to help keep moist at all times (refer to p. 25). Keep in brighter shades.
★ Mosses introduced in p. 28–30 are the most common mosses used in Japanese gardening.
Pyrrhobryum dozyanum
Also called Japanese Cypress. The leaves of this moss are bushy and soft. The moss has a large body mass, so gather each bundle together and wrap firmly to keep in place. Keep in partial shade, and water by misting heavily. This might be a tough one to raise.

Kotsubogoke
Plagiomnium acutum
Its smallness and roundness makes this moss cute. This can be kept together well with mindful wrapping. Keep moist, and keep in brighter shades.
Mizugoke
Sphagnum moss
Make from dry moss, and add water while keeping in the shade. After you leave it for a while, you will get a green moss orb like the one on the right.
Sunagoke
Racomitrium canescens
It is also called Hoary Fringe-moss. This moss crumbles apart easily, so raising this moss might be difficult. Wrap string around this orb a good 5–6 times. If you spray to give water, it will grow leaves that bloom like flowers. Spray to give water, and keep in indirect sunlight.
Apple Moss
Bartramiaceae
The pearls growing out of this moss will capture your heart. It’s relatively difficult to make this into a ball, so it might require a lot of binding. It loves high humidity and a lot of light, but still requires shade. Spray to water. This one might be tough for beginners.

Silvery Bryum
Bryum argenteum
Another moss you often see on the streets. While this moss grows in groups, it is somehow unexpectedly hard to keep together as a ball. Keep under indirect sunlight, and be careful to not overwater.
The Different Shapes of Moss Ball Gardens
Moss ball gardening doesn’t restrict you to the spherical form. You can make other shapes, like a donut, or cylinder. Take up the challenge on some of these shapes.
When arranging the roots and soil, you form the different shapes. You just have to bind the moss with string to the soil. There’s lots of fun you can have with this.
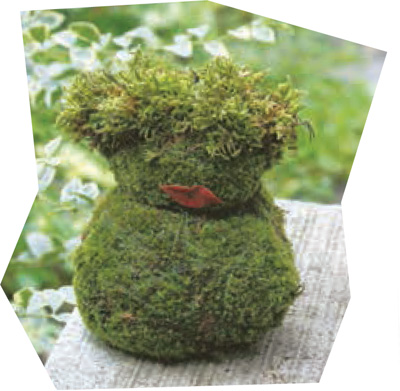
Yamagoke and Haigoke (the hair portion) shaped into a doll. There’s a mix of moss on the head portion.
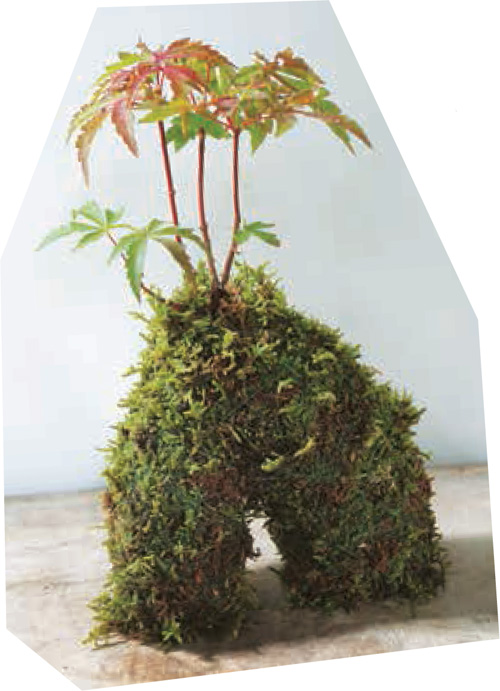
Haigoke and Hazelnut form an archway. With just a little bit of tweaking, you get an alternative style of moss gardening.
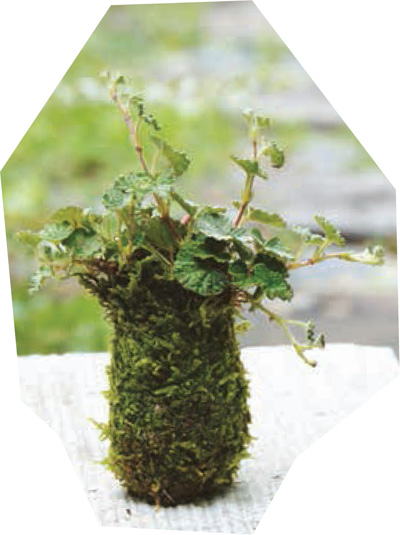
Haigoke and Rubus shaped into a cylinder, like a vase.
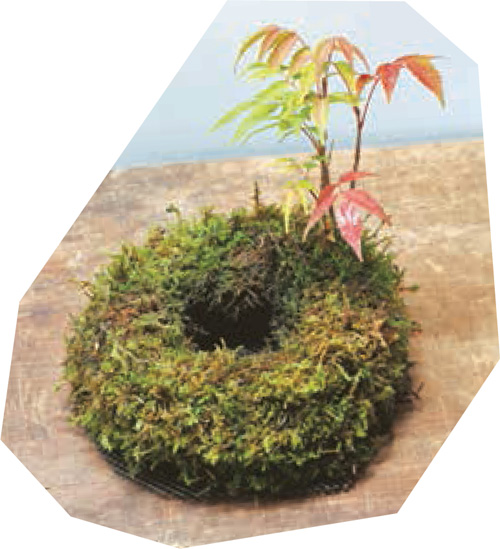
Haigoke and Hazelnut again, shaped into a donut. This couldn’t really be called a moss ball—could it?
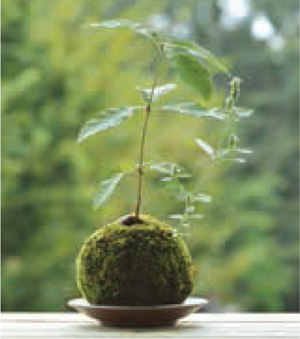
Growing a Chestnut in a Moss Ball
When you see chestnuts that have fallen from a tree, don’t you feel like picking them up and doing something with them? Find a newly dropped chestnut in the fall, and plant it in your moss ball. This way your chestnut has a good chance of sprouting by springtime. But that doesn’t mean you can’t try planting the springtime nuts. We will show you how to raise nuts you picked in spring.
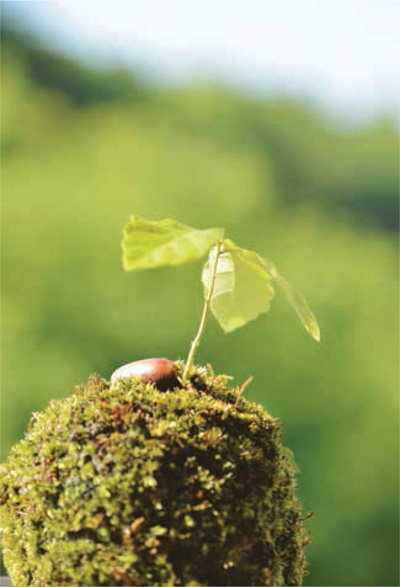
Stem sprouting out of planted chestnut. The root is steadily contained in the moss ball. Leave outside in the shade. You don’t really need to worry about how big it will get. Surprisingly, it doesn’t grow beyond the bounds of the moss ball it’s planted in.
How to Raise a Chestnut
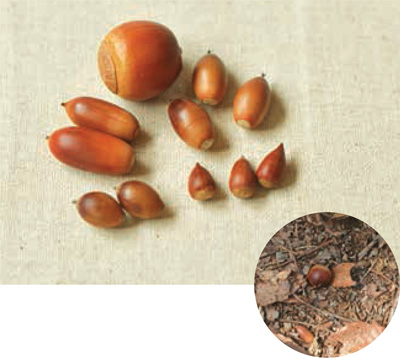
1. There are many kinds of chestnuts out there. Gather as many as you can, avoiding the ones with holes.
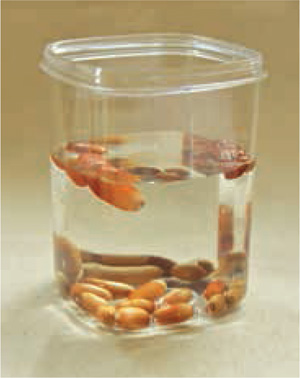
2. Leave in water overnight. Discard the ones that float—those have likely been hollowed out by insects.
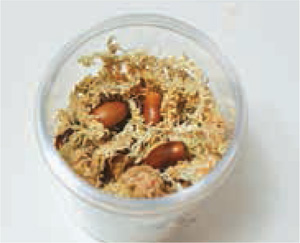
3. Place the nuts with moistened Mizugoke in a container and close the lid. To increase the chances of sprouting, place in low temperatures. Keep in the refrigerator for three weeks or so.

4. The first one to sprout amongst our batch was the Japanese (Kunigi) chestnut.
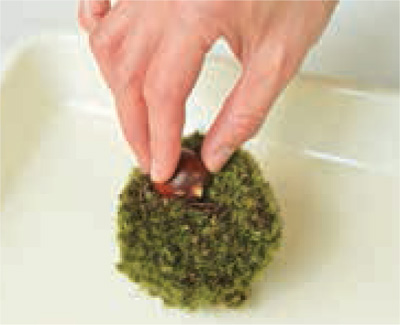
5. The first sprout can finally be planted in the moss ball. You can even just place it in halfway.
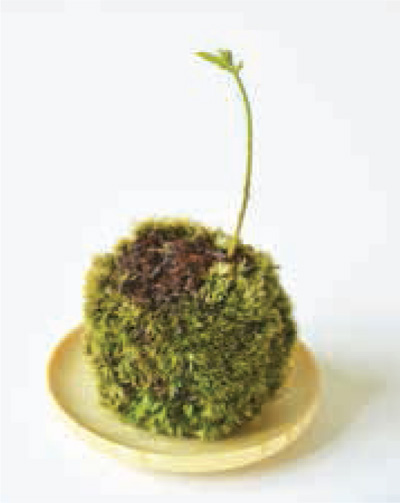
6. About a month later, the stem starts to grow. It takes a while for the stem to sprout, but once the stem grows out enough, the growth accelerates.
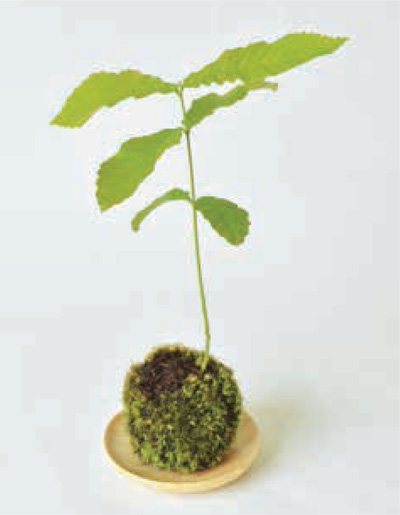
7. After a couple of weeks, the leaves pop out. The fresh green leaves will take you by surprise. The moss ball may dry out faster at this stage, and needs water daily.
Other Chestnuts from the Batch is Sprouting!

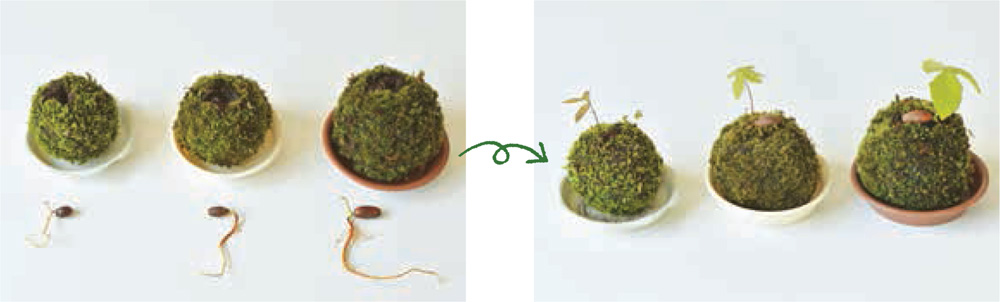
After a month, some of the other nuts start to pop out some roots and stems.
Once the stem grows out a bit, plant the nut in the moss ball. You may get leaves within 2 weeks.
When the plants in your moss ball begin to wilt, you can take out healthy parts to replant. Instead of taking your moss ball apart, you can cut and divide the stems to replant.
Start
How to Divide in 7 Steps
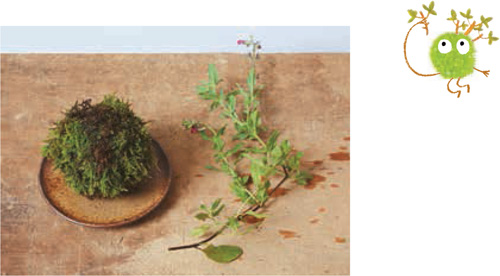
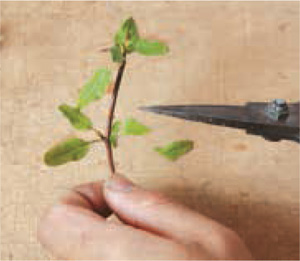
1. Cherry Sage is one plant that is easy to divide. Cut this off from the moss ball.
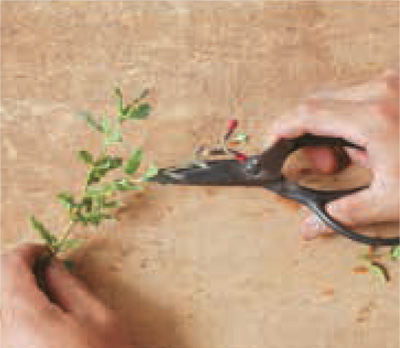
2. Cut off flowers and buds with scissors.
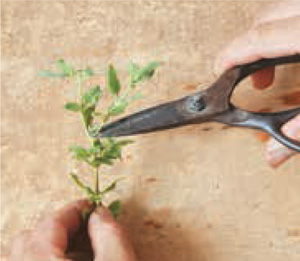
3. Cut out the young tips. Cut in angles.
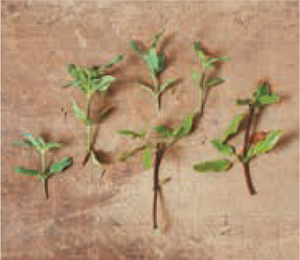
4. Soak the tips you plan to use in water for around an hour.
5. Cut off any leaves at the bottom.

6. Insert stems into the moss ball.
7. While the stems are growing roots, keep in indirect sunlight and away from strong wind or rain. Make sure it doesn’t dry up.
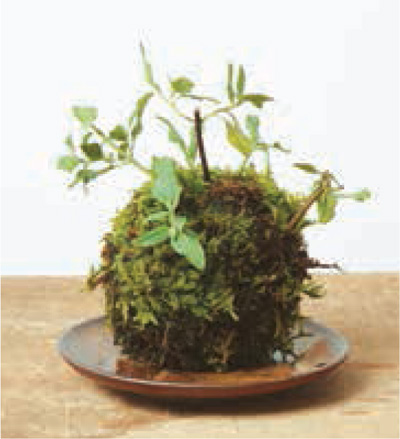
And it’s done!