
Even if you weren’t familiar with sous vide before picking up this book, chances are you’ve eaten food prepared this way. In the past decade, this method—cooking food in a precisely controlled water bath—has trickled its way down from Michelin-star restaurants such as Alinea in Chicago and Per Se in New York to chains including Chipotle, Panera, and Starbucks. And now it has entered the home kitchen.
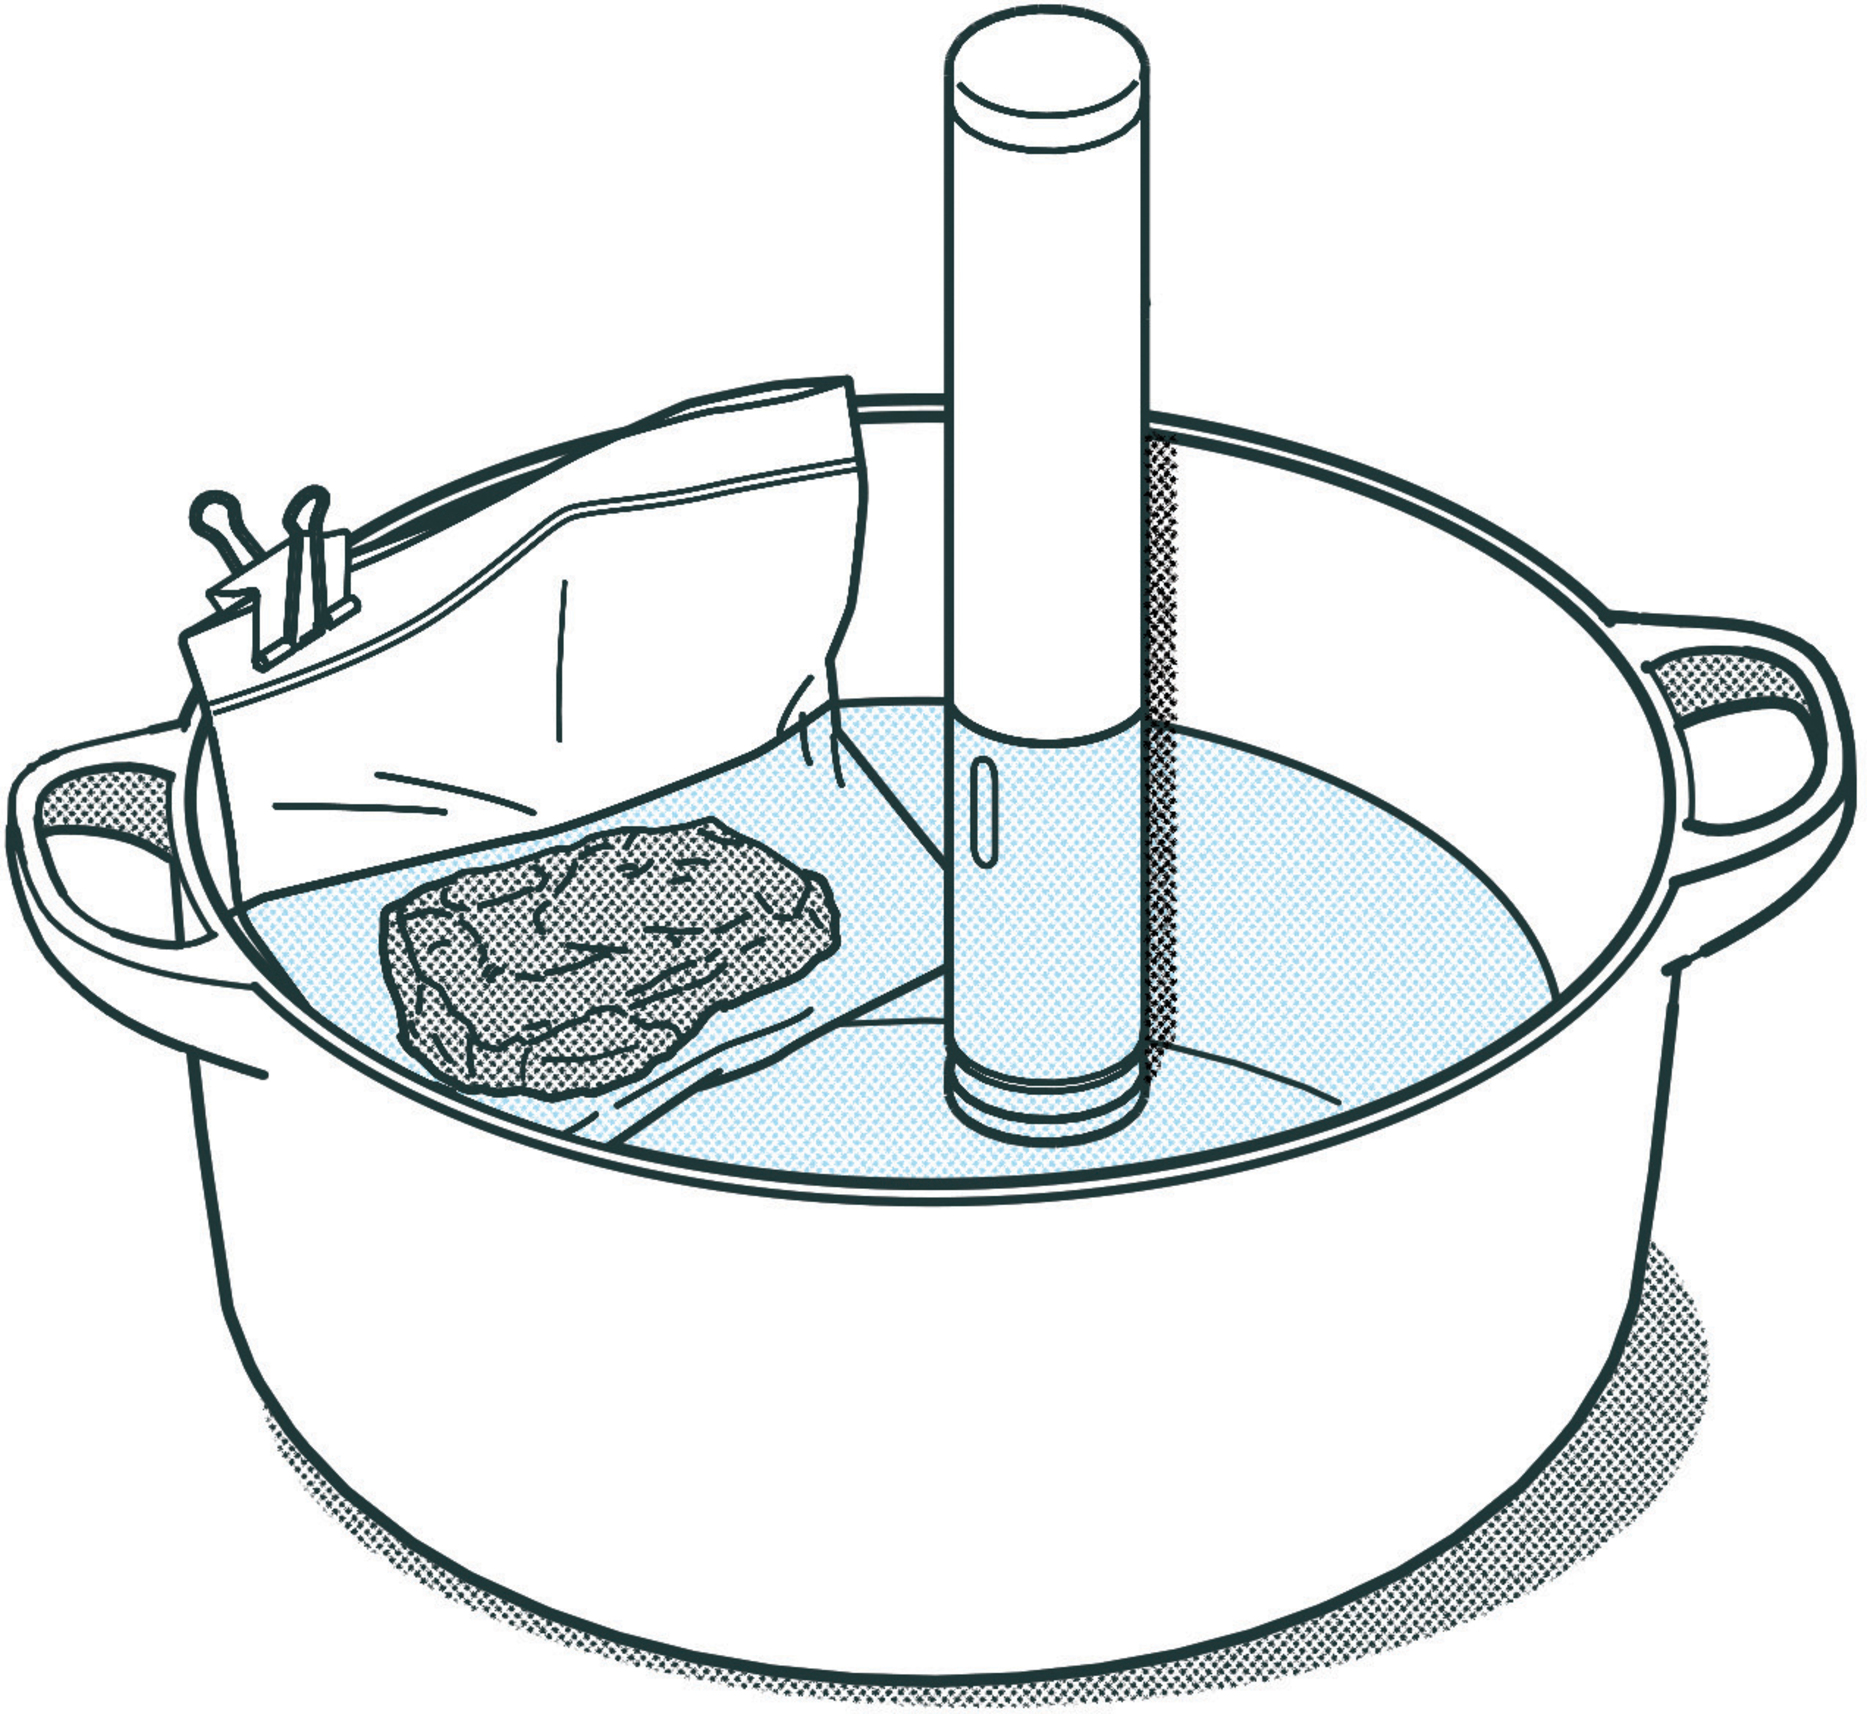
Here’s how it works A sous vide machine (also called an immersion circulator) is used to preheat a water bath to a precise temperature. Food is sealed in plastic bags (though not always; you can also sous vide in glass jars, and eggs can be cooked right in their shells) and immersed in the bath. The food eventually reaches the same temperature as the water, which is often set to the ideal serving temperature of the final dish. For meat, poultry, and fish, there is usually a quick searing step before serving. This differs from conventional stovetop and oven methods, in which the heat used is much higher than the serving temperature of the food, making it imperative to remove the food at just the right moment, when it’s done but not overcooked.
But with sous vide there’s usually no risk of overcooking, making it a game-changing technique—especially for temperature-sensitive (and often expensive) foods such as fish or steak. The low cooking temperature ensures meat remains juicy; it’s never dry. And dialing in the precise temperature creates exceptionally consistent results that can’t be achieved with traditional methods. Long, slow cooking breaks down collagen to render even tough cuts such as chuck or pork shoulder extremely tender. It also eases the daunting task of cooking for a holiday meal or dinner party since large quantities of food can be prepped hours in advance and held at the perfect temperature until serving time.
“The single biggest advantage sous vide has for a person is emotional,” says Scott Heimendinger, cofounder of the sous-vide company Sansaire and technical director of the cookbook publishers Modernist Cuisine. “It alleviates anxiety.” Whether you’re cooking for one on a weeknight or throwing a dinner party for people you want to impress, your anxieties can be alleviated because with the precision of sous vide, a great meal is virtually guaranteed. “Plus you don’t have to be stuck in the kitchen,” he adds. “You can be with your guests because your food is not going to overcook as it sits in the bath.”

Immersion circulators did not enter the market as a way to cook. Instead, they were first used as equipment in scientific laboratories. Precisely heated water baths are perfect for incubating live cell cultures and testing materials—and basically anything else you’d use a Bunsen burner for.
When sous vide arrived in the food world, the technique wasn’t initially used to make food taste better. In the late 1960s, when food-grade plastic films and vacuum packing were mastered by French and American engineers, sous vide was used as a safety measure: The ability to keep packaged foods in a water bath at a certain temperature made pasteurizing and sterilizing easier for labs, hospitals, and large-scale commercial food companies. Originally, vacuum packing and cooking foods sous vide was used to seal and pasteurize industrially prepared foods so that they would have a longer shelf life.
But then in 1974, sous vide made its way into the restaurant scene. (Well, kind of.) French chef Pierre Troisgros wanted to develop a new way to cook foie gras, and he hired Georges Pralus, another chef, to help. The goal? To lose as little fat as possible when cooking. After all, fat is flavor, and foie gras is all about fatty flavor. Through experimentation, Pralus found that the liver lost the least amount of fat when poached at a precise temperature, sealed in plastic.
Around the same time, Bruno Goussault—an economist, inventor, and chef—made similar discoveries for commercial food operations and hospitals. In the 1980s, he teamed up with Chef Joël Robuchon to create a sous vide dining program for the French railroad. This paved the way for Goussault’s next career move: He has been the chief scientist at Cuisine Solutions, an American company that specializes in sous vide food preparation and packaging, since 1989.
The technique slowly spread to chefs in the U.S.— largely thanks to the Internet. Chefs began to acquire sous vide circulators for their kitchens in the early 2000s. (Thomas Keller was one of the first.) The only problem: No one really knew how to use them. None of these chefs had come up in the kitchen world using them. No one had spent time experimenting with them. Enter: the website eGullet. The forums on this culinary-minded site were a place for people to geek out on food-related issues, and sous vide was a perfect subject.
On eGullet, explained Boston chef Tony Maws, people like Grant Achatz, Sean Brock, Wyliê Dufresne, and many others “would talk about what they were playing with, and [how they used] different times and temperatures for different proteins. There was a lot of sharing of knowledge, and over time we figured out this technique.”
In 2005, sous vide started to really pick up. Joan Roca, a chef in Spain, wrote a book about sous vide that arrived in the U.S. that year (with a slightly rocky translation). Chef Grant Achatz’s restaurant, Alinea, also opened—sous vide circulators included. Chef and inventor Dave Arnold began to teach low-temperature cooking classes at the French Culinary Institute.
“Cryovacking, which is more often called sous vide (French for “under vacuum”), is poised to change the way restaurant chefs cook,” wrote Amanda Hesser for the New York Times in a 2005 story called “Under Pressure.” “And like the Wolf stove and the immersion blender, it will probably trickle down to the home kitchen someday.”
In 2006, Dufresne battled Mario Batali on Iron Chef America; it was the first time sous vide circulators were seen on TV. The demand only grew from there.
The move into home kitchens has also been slow, and largely due to the influx of sous vide circulators with a lower price point, as professional devices cost over $1,000. In 2009, Sous Vide Supreme debuted as the first circulator for less than $500. In 2012, another sous vide circulator company called Nomiku launched, and they started selling machines for $359. In 2016, ChefSteps released their own circulator, called the Joule, for just $199. (In 2017, we named the Joule our top pick for the home cook.)
Pick a Sous Vide Device
Sous vide machines are sleeker, cheaper, and smarter than ever before. We tested seven immersion circulators priced from $129.99 to $274.95. We used each to prepare eggs, salmon, flank steak, pork loin, and beef short ribs. We evaluated accuracy and speed by tracking the water temperature as we programmed each machine to heat and maintain water baths at 149°F/65°C and 190°F/88°C for 3 hours. We also measured weight, height, distance between minimum and maximum water levels, and footprint. All products were purchased online and appear below in order of preference.
KEY GOOD ★★★ FAIR ★★ POOR ★
HIGHLY RECOMMENDED

Joule
Price $199
Height 11 in
Weight 1 lb, 5 oz
Footprint 1.8-in diameter
Time To Heat Bath To 190°F 22 min
Average Difference From Target Temperature 0.2°
Distance Between Minimum And Maximum Water Levels 6.5 in
Model Number Stainless Steel
PERFORMANCE
COMMENTS
This slim, lightweight machine heated water almost as fast as the biggest circulators and was the most accurate in our lineup. Though it doesn’t have a display and requires a smartphone to work, its app was intuitive and simple, and its enclosed electronics meant we didn’t have to worry about getting any part of the circulator wet. Testers loved its magnetic bottom, which allowed it to stand stably in the center of metal pots. It also had the largest distance between water lines, so we could forgo refilling even during longer cooking projects, and it was small enough to store in a drawer.
RECOMMENDED
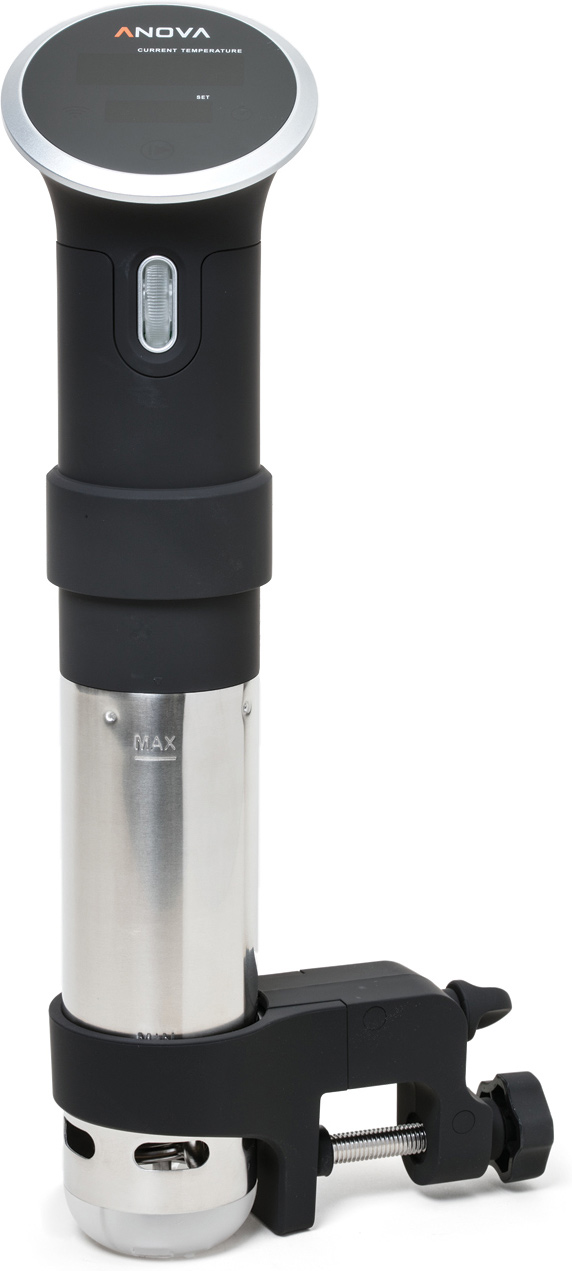
Anova Precision Cooker WI-FI
Price $199
Height 15 in
Weight 2 lb, 6 oz
Footprint 2.3-in diameter
Time To Heat Bath To 190°F 30 min
Average Difference From Target Temperature 1.2°
Distance Between Minimum And Maximum Water Levels 3.6 in
Model Number A3.2
PERFORMANCE
COMMENTS
A Wi-Fi enabled update of our former winning circulator, this version has many of the same features that we liked in the old model: a sturdy screw-in clamp that can be raised or lowered depending on the vessel height; an adjustable heating port; and easy-to-use, intuitive controls. We liked that its temperature and time could be set either directly on the circulator or in the app. However, it lagged behind our top-ranked model on heating speed and accuracy (it overcooked eggs in multiple tests) and was a little too bulky to be stored in a standard drawer.
RECOMMENDED
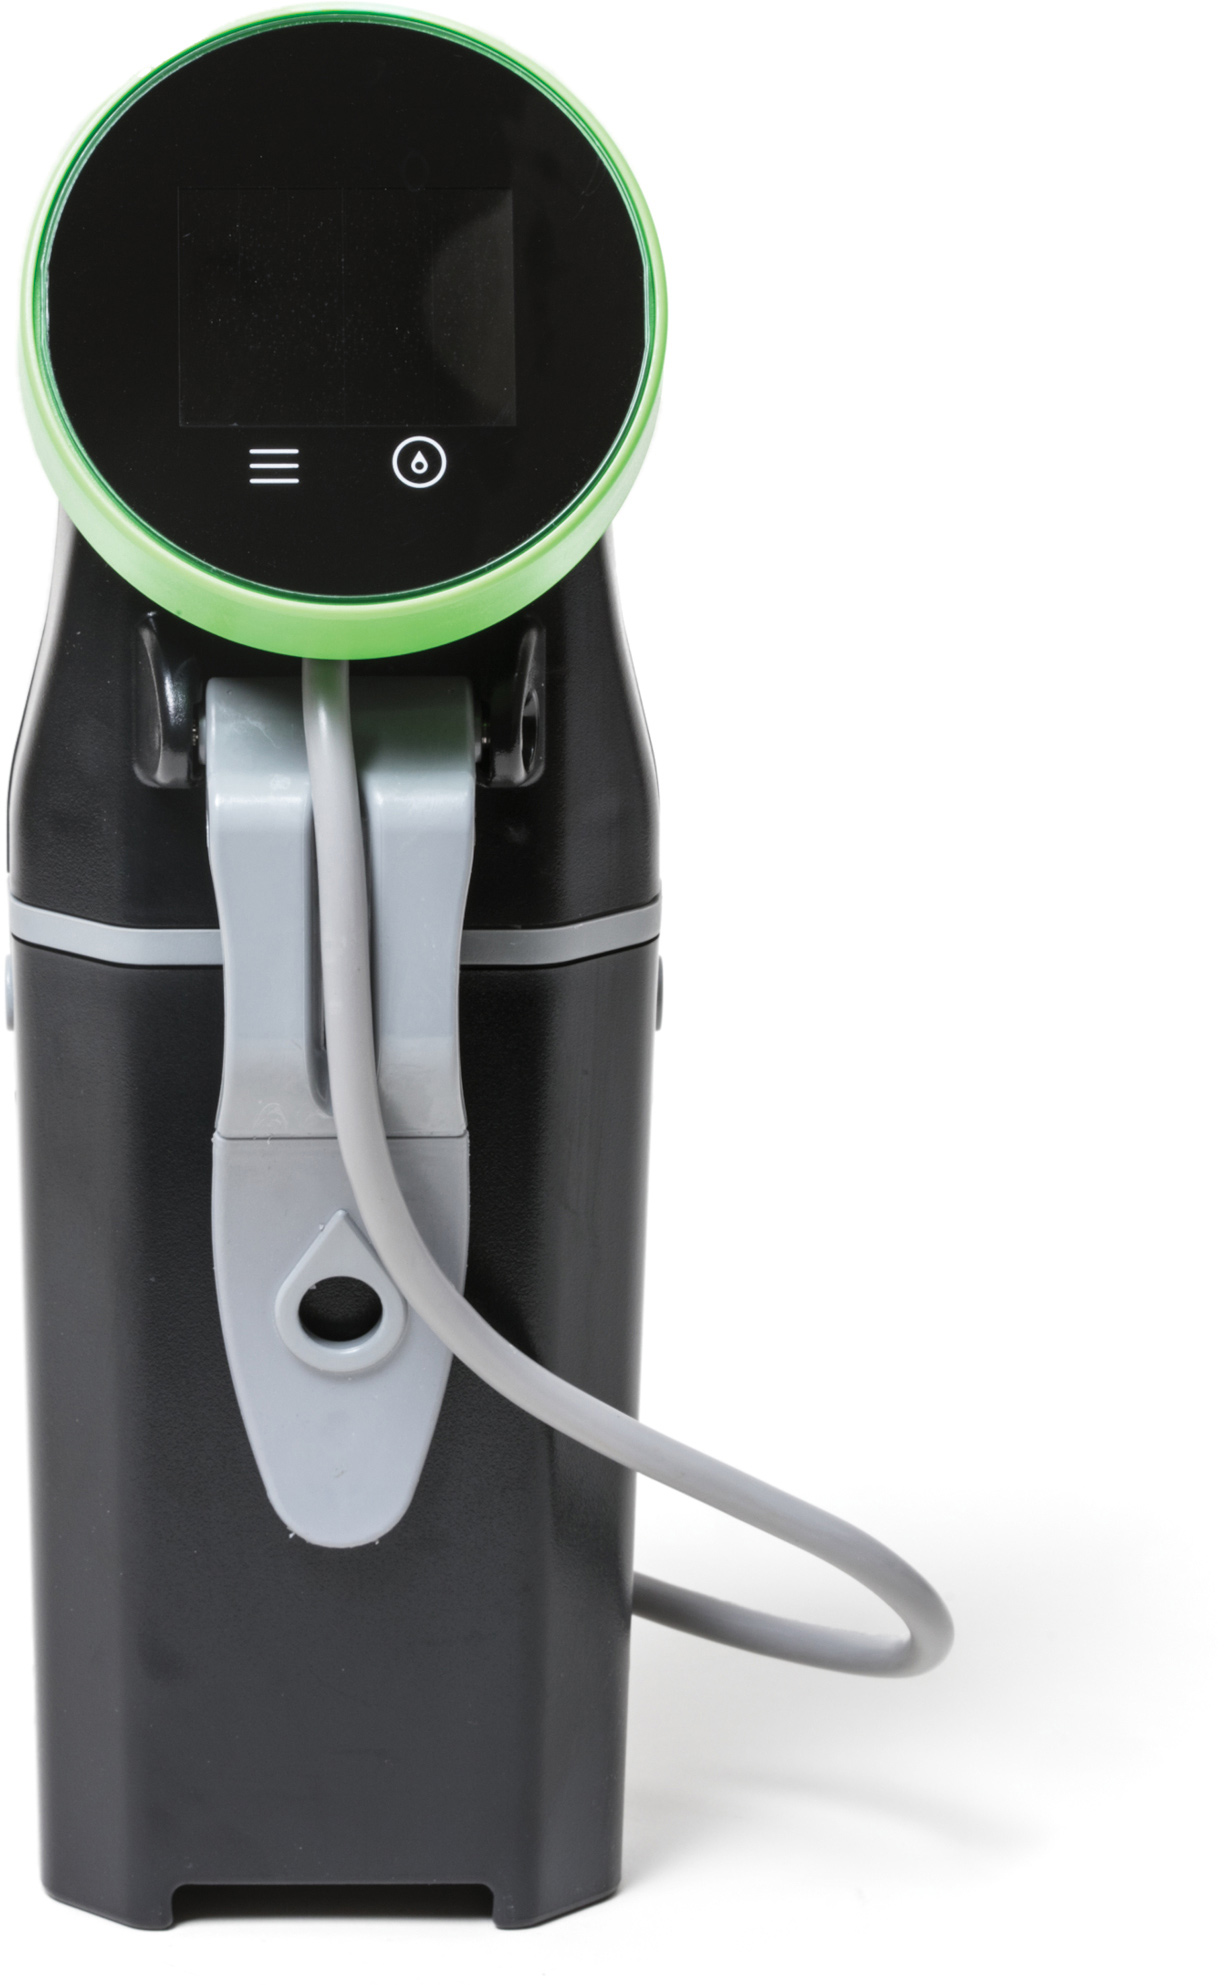
Nomiku Sous Vide
Price $174.95
Height 12 in
Weight 3 lb, 2 oz
Footprint 3.6 in × 2.4 in
Time To Heat Bath To 190°F 45 min
Average Difference From Target Temperature 0.4°
Distance Between Minimum And Maximum Water Levels 3.5 in
Model Number Nom1US
PERFORMANCE
COMMENTS
Testers loved this circulator’s big, bright display, which allowed us to check the temperature of the bath from across the room. Though it took 45 minutes just to preheat the bath to 190°F/88°C, its motors were silent and gentle, barely rocking eggs and delicate fillets. We tried the companion smartphone app, but it frequently crashed; it was easier to just set the temperature and timer using the dial on the circulator. Its paper clip–style clamp was easy to attach.
RECOMMENDED
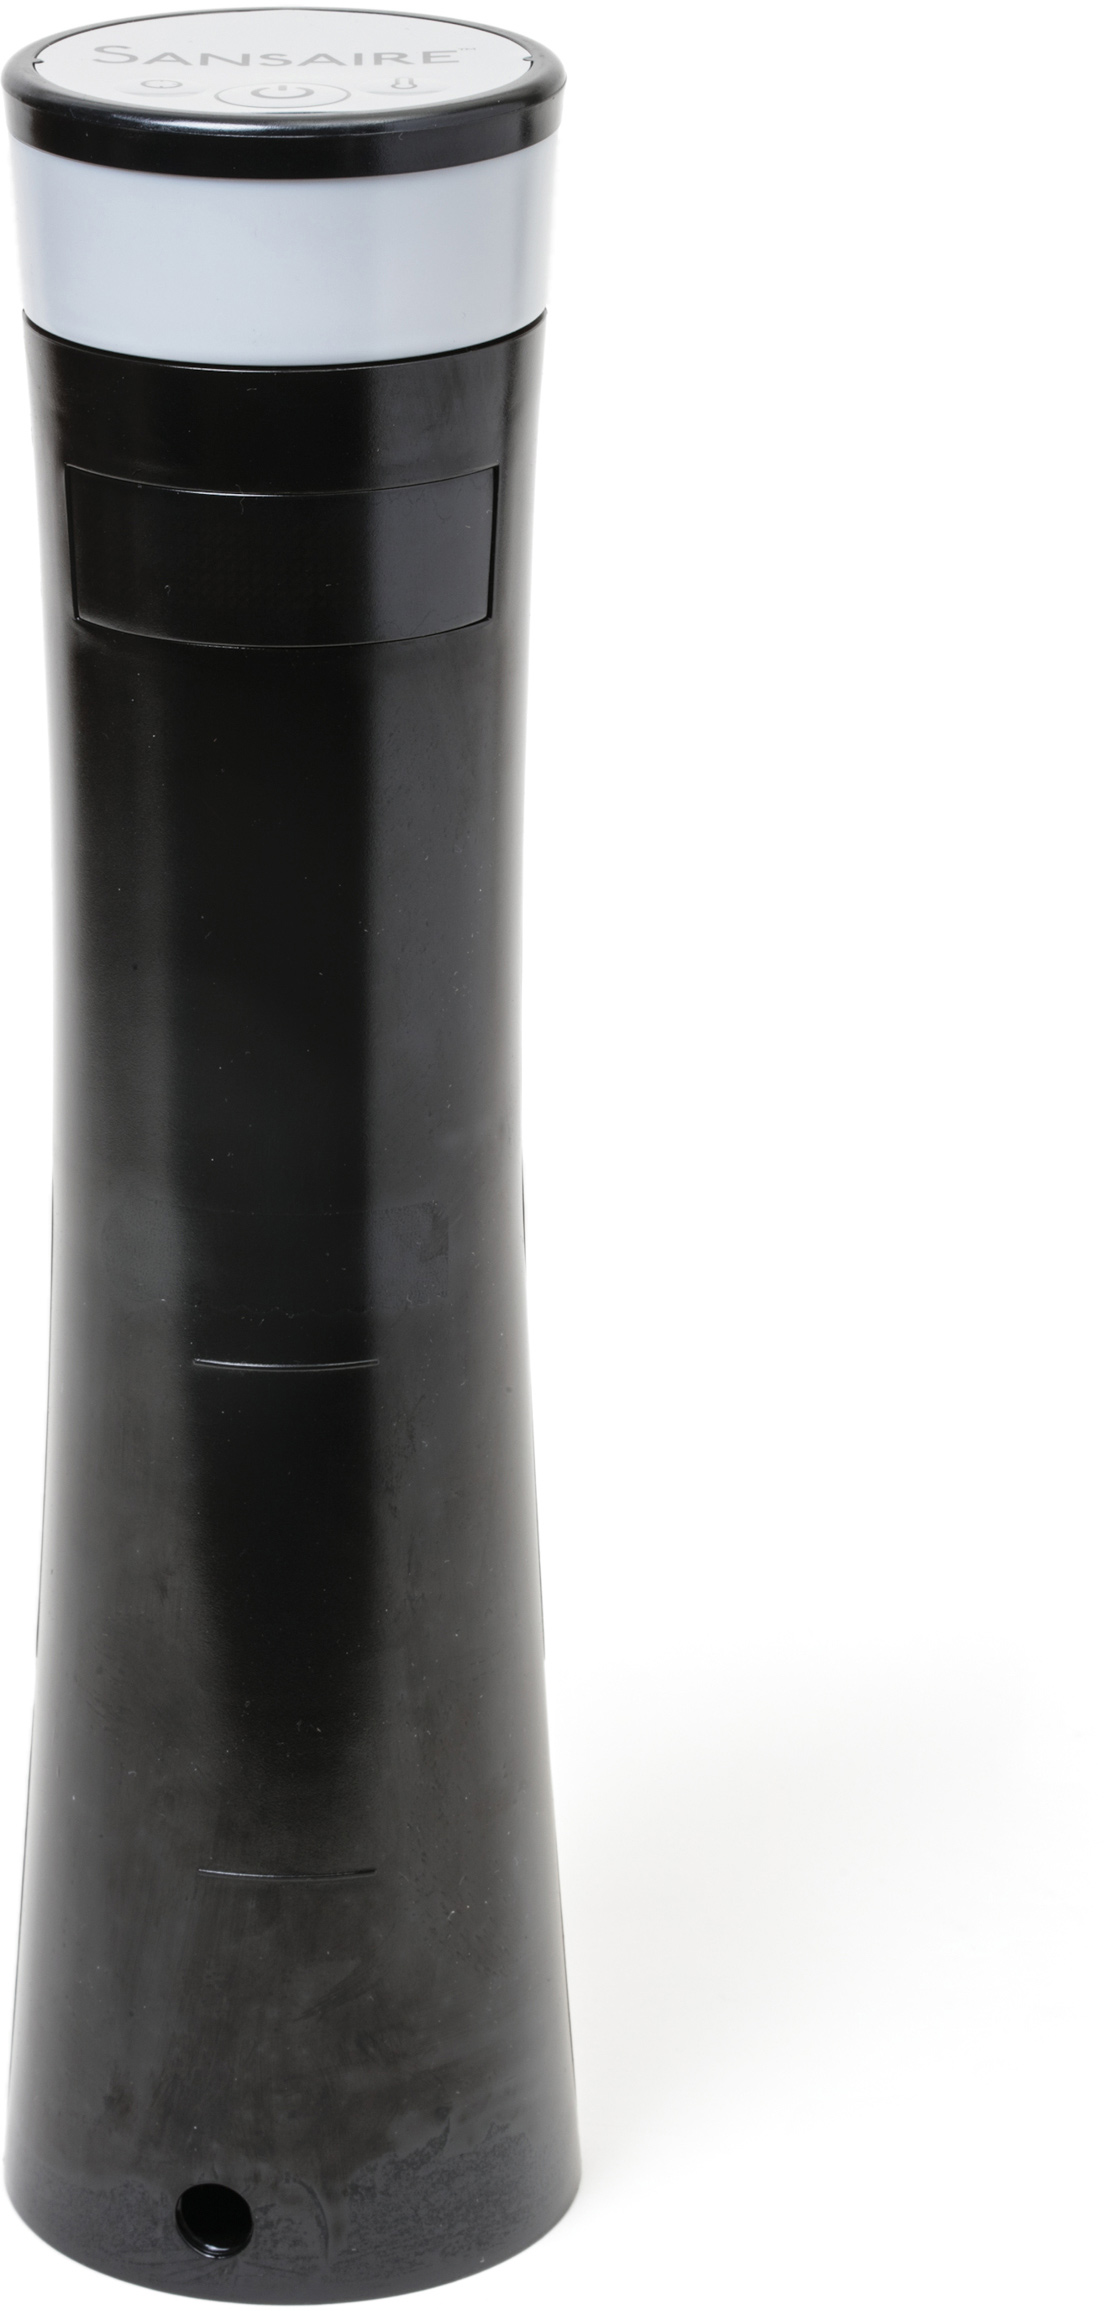
Sansaire Sous Vide Machine
Price $195.90
Height 14.5 in
Weight 3 lb, 12 oz
Footprint 4-in diameter
Time To Heat Bath To 190°F 22 min
Average Difference From Target Temperature 0.7°
Distance Between Minimum And Maximum Water Levels 3.5 in
Model Number N/A
PERFORMANCE
COMMENTS
This large circulator has no app, no timer, no fancy display, but it was quick to heat and easy to set, and it could stand on its own in the middle of any vessel because of its wide, flat base. It didn’t require refilling during a 72-hour cooking project, and food emerged juicy and tender. Its clamp attached quickly and securely to pots of all sizes. Some testers lamented the absence of a timer function. It fluctuated a bit more than its competitors during cooking, dipping lower and rising higher than other models. This resulted in a moderate 0.7-degree average fluctuation from the target temperature over the course of 3 hours; delicate ingredients like eggs sometimes emerged over- or undercooked.
RECOMMENDED WITH RESERVATIONS
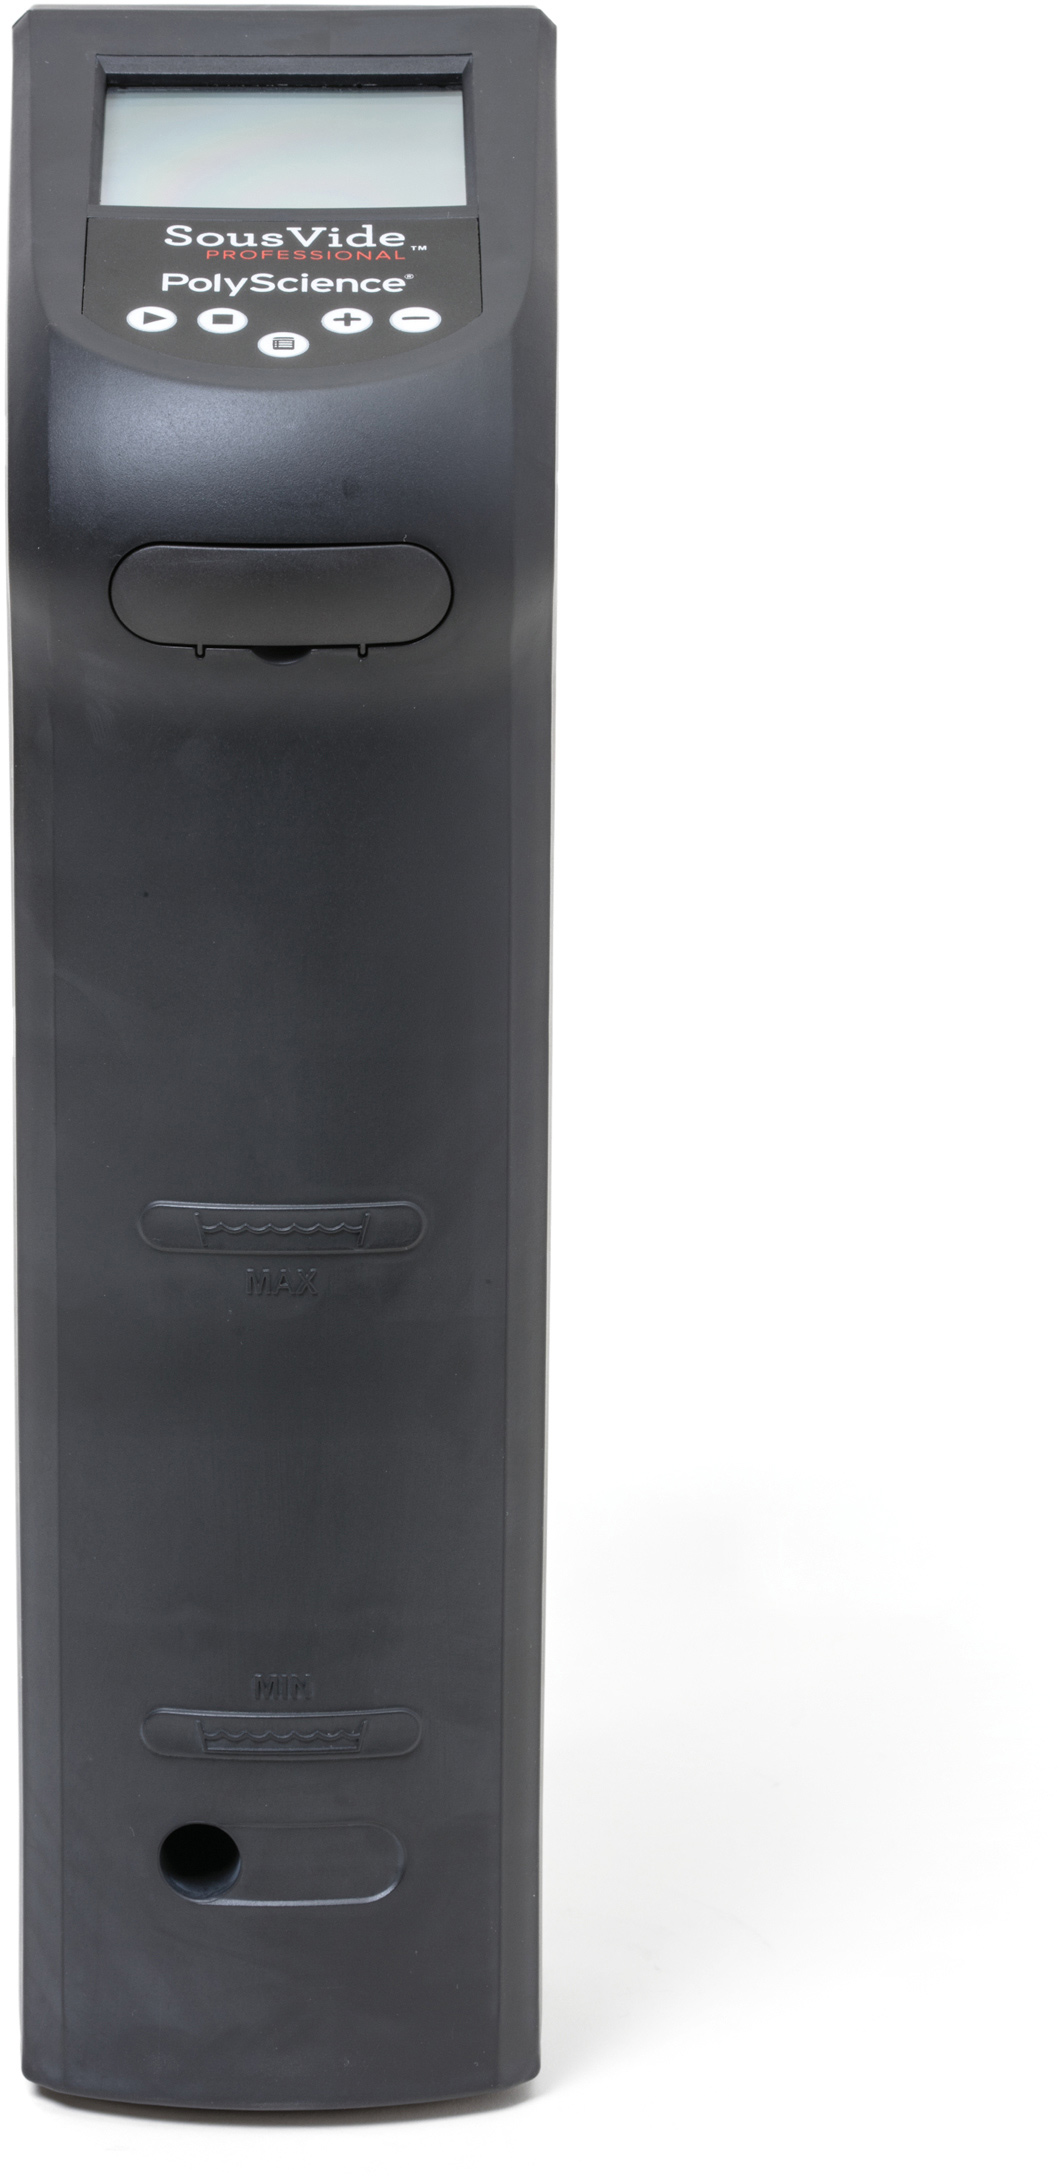
PolyScience Culinary Creative Series Sous Vide Immersion Circulator
Price $249.95
Height 14 in
Weight 4 lb, 14 oz
Footprint 3.4 in × 3.3 in
Time To Heat Bath To 190°F 20 min
Average Difference From Target Temperature 1.4°
Distance Between Minimum And Maximum Water Levels 3.5 in
Model Number CRC-5AC1B
PERFORMANCE
COMMENTS
Though this brand makes circulators for labs and restaurant kitchens, this model wasn’t as accurate or reliable as we expected. The unit wouldn’t heat the water until after we set the timer, and it beeped incessantly once up to temperature. It was also large and bulky, so it felt slightly cramped and unsteady in smaller vessels. Plus, testers were perplexed by a plastic piece on the front of the unit, which was meant to be a cover for the reset button, that repeatedly fell into the bath.
You can sous vide in a Dutch oven, a large saucepan, a stockpot, or a large plastic container. We call for a 7-quart container in most of our recipes. In some of our recipes, we cook large cuts of meat, like our Peppercorn-Crusted Roast Beef. For these recipes, we recommend investing in a 12-quart container. (Cambro containers are inexpensive and easy to use, and we recommend buying one for your larger-scale sous vide cooking.)
DUTCH OVEN
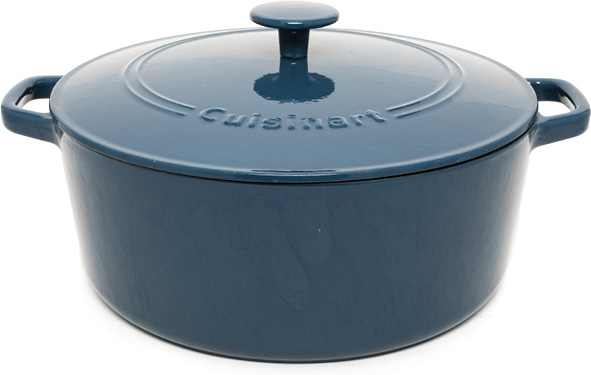
Cuisinart Chef’s Classic Enameled Cast Iron Covered Casserole
Price $87.25
Materials Enameled cast iron
Weight 16.8 lbs
Interior Height 4⅜ in
Cooking Surface Diameter 97/16 in
Interior Color Light
Model Number CI670-30CR
PERFORMANCE
COMMENTS
With an exceptionally broad cooking surface and low, straight sides, this 7-quart pot was substantial enough to hold and distribute heat evenly, without being unbearably heavy. The looped handles were comfortable to hold, though slightly smaller than ideal. The rim and lid chipped cosmetically when we repeatedly slammed the lid onto the pot.
STOCK POT
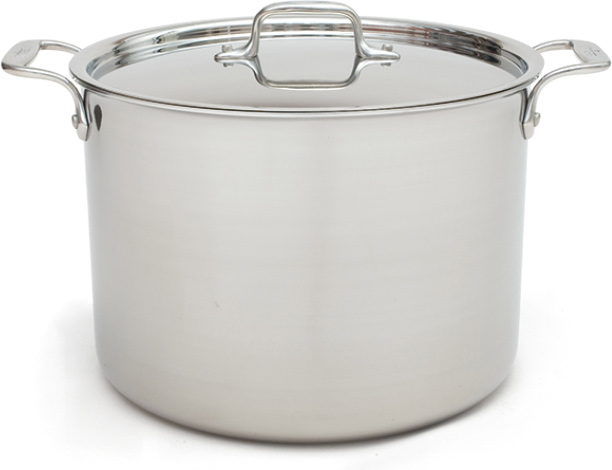
All-Clad Stainless 12-Quart Stock Pot
Price $389.95
Weight 5.5 lb
Material Stainless steel with aluminum core
Model Number 4512
COMMENTS
This pot was lauded for being “nice and heavy,” with “easy-to-grip” handles that “didn’t get too hot” (although we still needed potholders). The aluminum core runs up the side of the pot—other pots have aluminum cores only in the bottom, if anywhere—which ensures more even heating than most of us will ever need.
PLASTIC CONTAINER
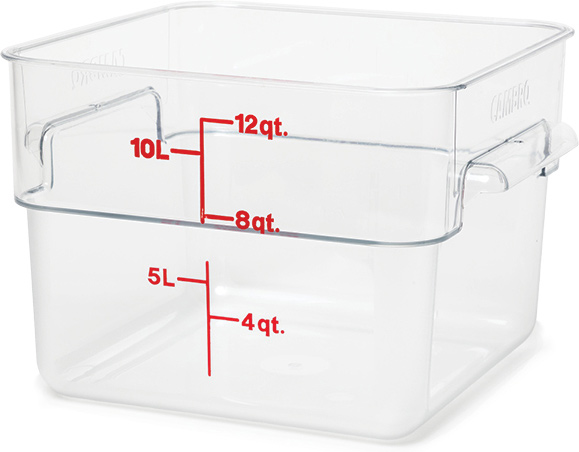
Cambro 12-Quart Square Storage Container
Price $22.99
Dishwasher-Safe Yes
Model Number 12SFSCW135
PERFORMANCE
COMMENTS
There’s a reason that food service professionals use these storage containers. They’re sturdy, spacious, and dead simple to use and clean, with no pointless bells or whistles. While they come in a range of sizes, the 12-quart size is necessary to fit most foods we circulate in a water bath.
Originally, sous vide was done with vacuum-sealed foods—after all the name sous vide is French for “under vacuum.” But buying a vacuum sealer and special vacuum bags are not a necessity when it comes to sous vide. In fact, we recommend you use zipper-lock freezer bags instead. It’s important to use high-quality freezer bags, as low quality bags can contain BPA, which is not safe for cooking (see this page). Most of our recipes call for 1-gallon bags; some larger cuts of meat call for 2-gallon bags.
Also needed: binder clips (to clip your bags of food to the side of the water bath container), plastic wrap (for covering your water bath), and Mason jars (for making yogurt, pudding, cheesecake, or other custardy recipes).
RECOMMENDED
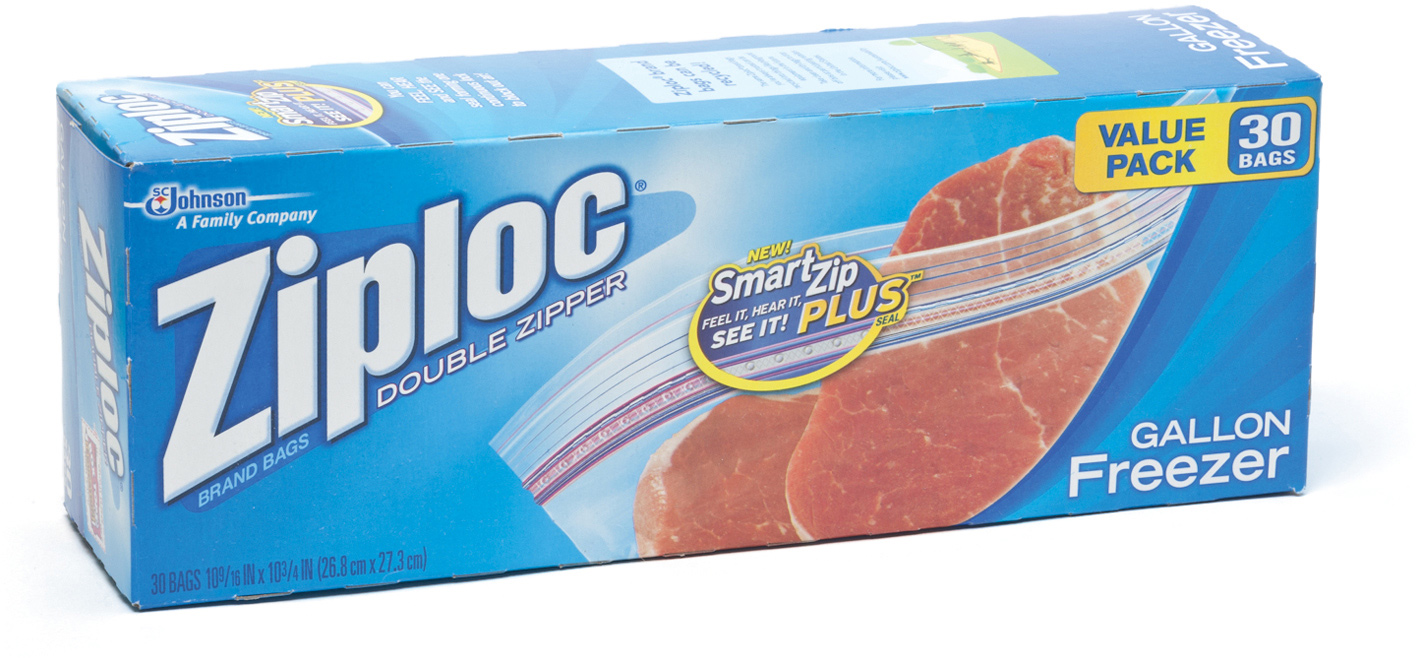
Ziploc Brand Freezer Bags with Easy Open Tabs
Price $5.37 for 28 bags ($0.19 per bag)
Thickness 2.2 mil
Model Number UPC #0-25700-00382-3
PERFORMANCE
COMMENTS
For general use, this bag protected food from freezer burn and ice crystals for more than two months, and it stayed intact when filled with tomato sauce and dropped. For sous vide applications, it rarely leaked and sealed snugly. Ziploc publishes its ingredients; the bags are made of cook-safe polyethylene and are without additives.
Though they aren’t necessary for sous vide cooking, vacuum sealers are useful and are great for storing food. We use them at the test kitchen to help store hundreds of pounds of food weekly. They work by pulling air away and creating a tight seal around the food, blocking it from elements that hasten deterioration. Using a vacuum sealer eliminates the need to carefully remove air from a zipper-lock bag as you prepare your food to cook in a water bath.
HIGHLY RECOMMENDED
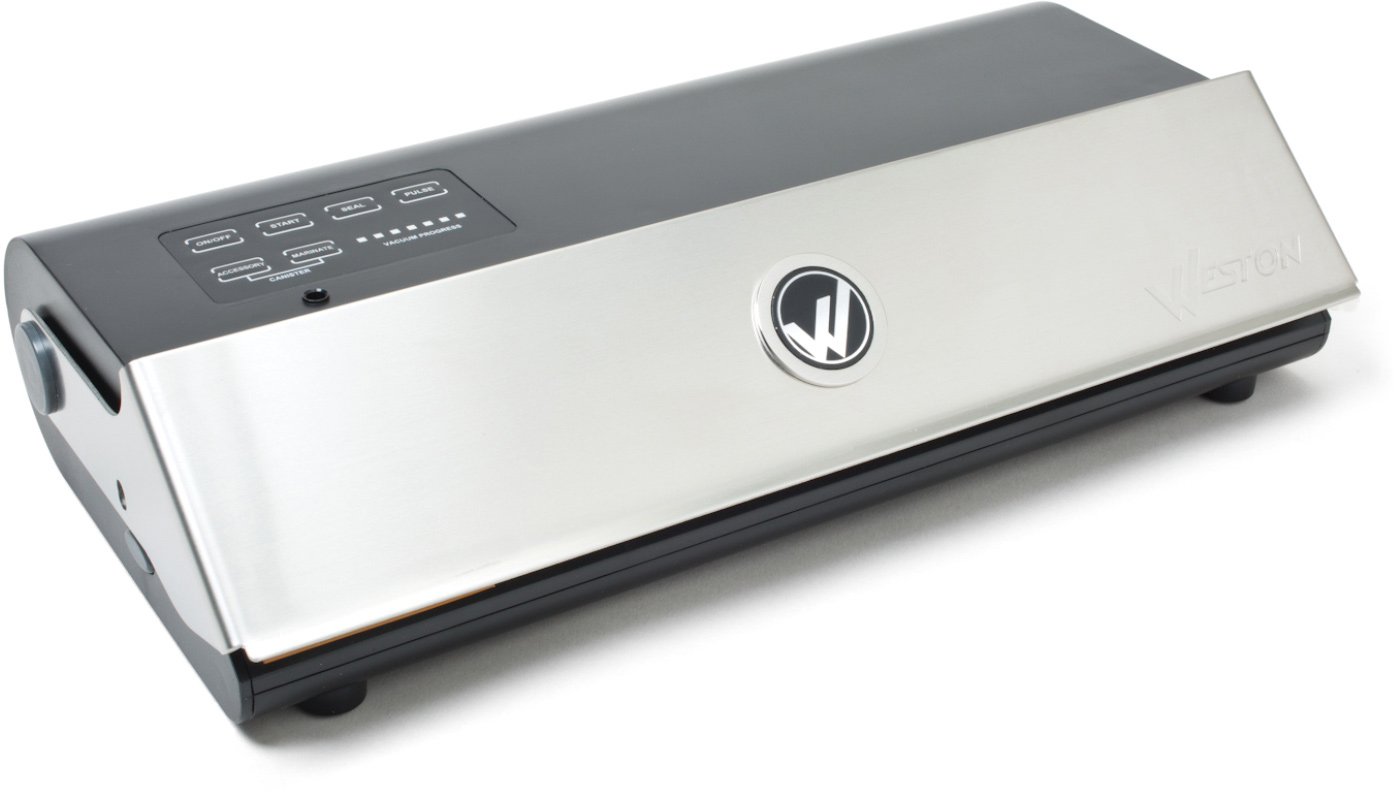
Weston Professional Advantage Vacuum Sealer
Price $189.99
Style Heat
Vacuum Strength 23 inHg
Model Number 65-0501-W
PERFORMANCE
COMMENTS
This compact, powerful heat-sealing model kept food fresh for three months. Its intuitive interface has a responsive pulse mode and bright blue lights that indicate its progress. It works with a wide variety of bags, canisters, and rolls.

Sous vide cooking allows you to achieve perfect results with eggs, poultry, meat, and more. But how do you do it? You’ll find detailed recipes throughout the book. But here let’s start with the basics.

1 Set up your rig
Attach your immersion circulator to a heat-safe container—either a Dutch oven, a stockpot, or a large plastic container like a Cambro. Our recipes require either a 7-quart or 12-quart container. Fill it with water to about 1 inch above the machine’s minimum water level line. Since the food will raise the water level once added, avoid filling to the maximum water line.
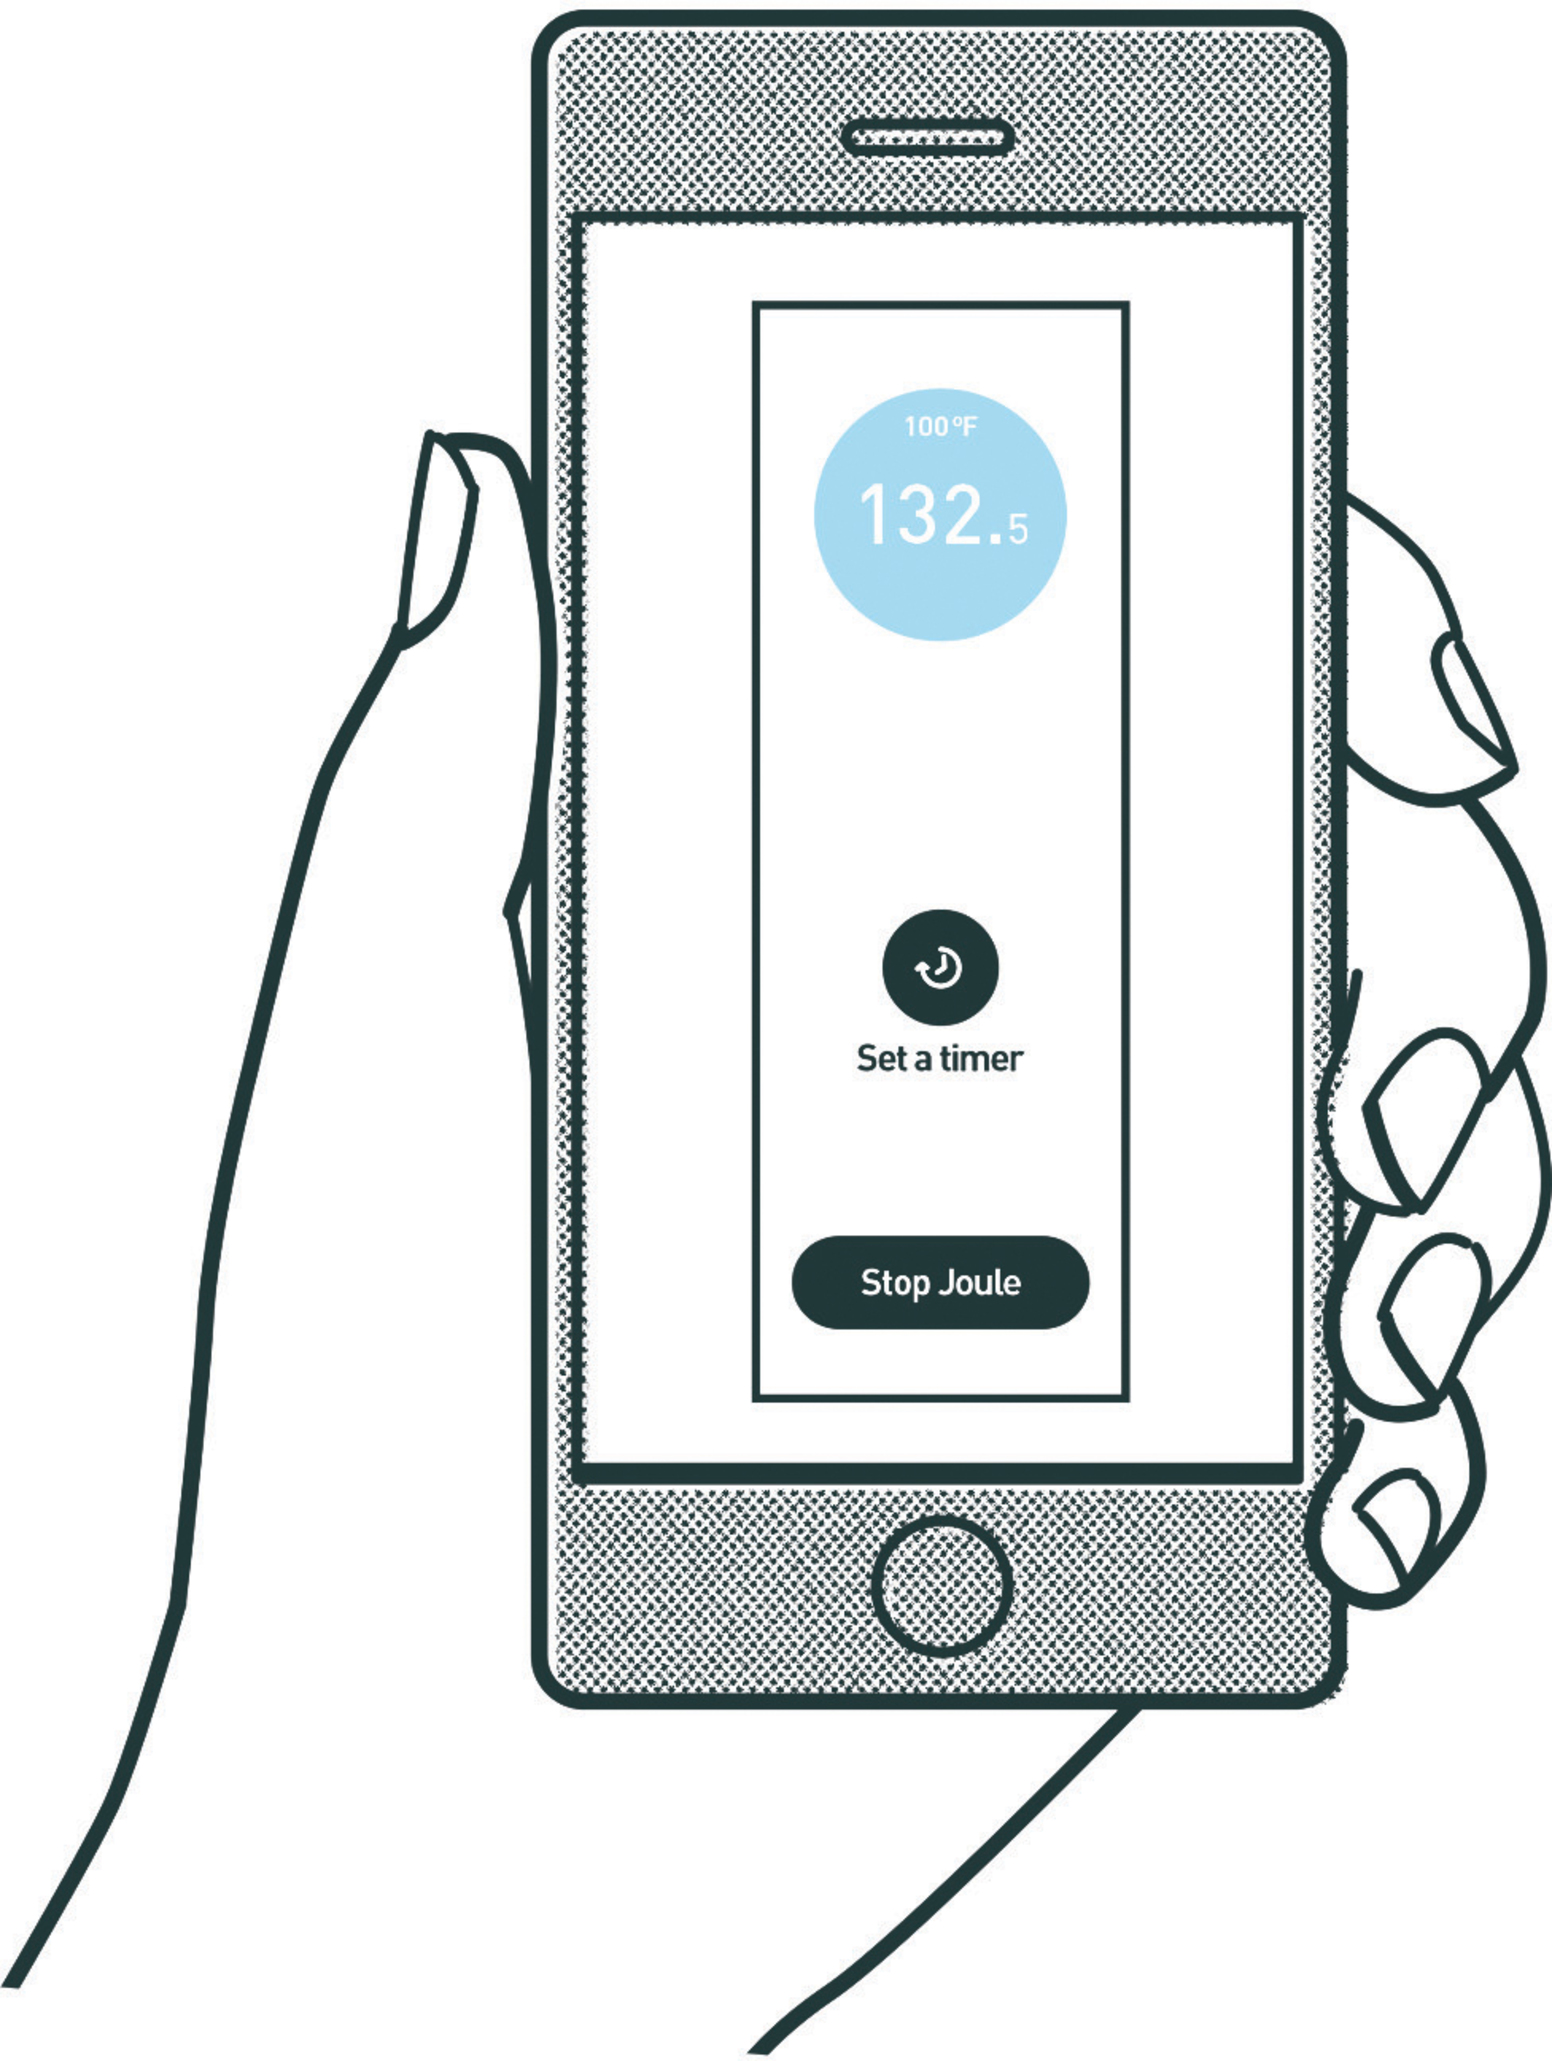
2 Choose your temp and preheat water
Turn on the machine. Set the machine’s temperature to your desired cooking temperature. With sous vide cooking, you typically set the bath to the final internal temperature of the food. The food sits in the bath and slowly comes up to its ideal temperature without any danger of overcooking. Choose a cooking temperature that matches your ideal serving temperature. (There are some exceptions: Eggs and delicate fish fillets are often cooked for a comparatively short amount of time at a temperature that is a higher-than-desired internal temperature to better control the final texture of the cooked food.) Letting the bath preheat helps ensure even cooking. Depending on your machine and target temperature, preheating will take 20 to 30 minutes. Cover the bath with plastic wrap to speed up the preheating process. (Worried about safety? See this page for more on pasteurization.)

3 Seal food in a bag
Season your food with salt, pepper, and any other aromatics as per the recipe. Place your food in a zipper-lock freezer bag. We recommend adding a small amount of olive or vegetable oil to the bag for meats and fish. To ensure that all food finishes at the same time, make sure the pieces are cut to about the same size and thickness, and lay the food as flat as possible in the bag. Once your food is in the bag, press out as much air as you can, and seal the bag. If cooking above 158°F/70°C, we recommend double bagging your food in order to prevent any water leakage, as high temperatures can weaken the plastic.

4 Submerge the bag
Once the bath is up to temperature, gently lower the bag into the bath. If the ingredients in the bag have a tendency to float, weight the bag down (see this page for weight options).

5 Clip bag to container
Clip the corner of the bag to the side of the container with a binder clip, allowing remaining air bubbles to rise to the top of the bag. This step is important because air is a poor conductor of heat and too much of it insulates the food from the hot water bath. Removing air gives the food better contact with the heated water, so it cooks more quickly and evenly.
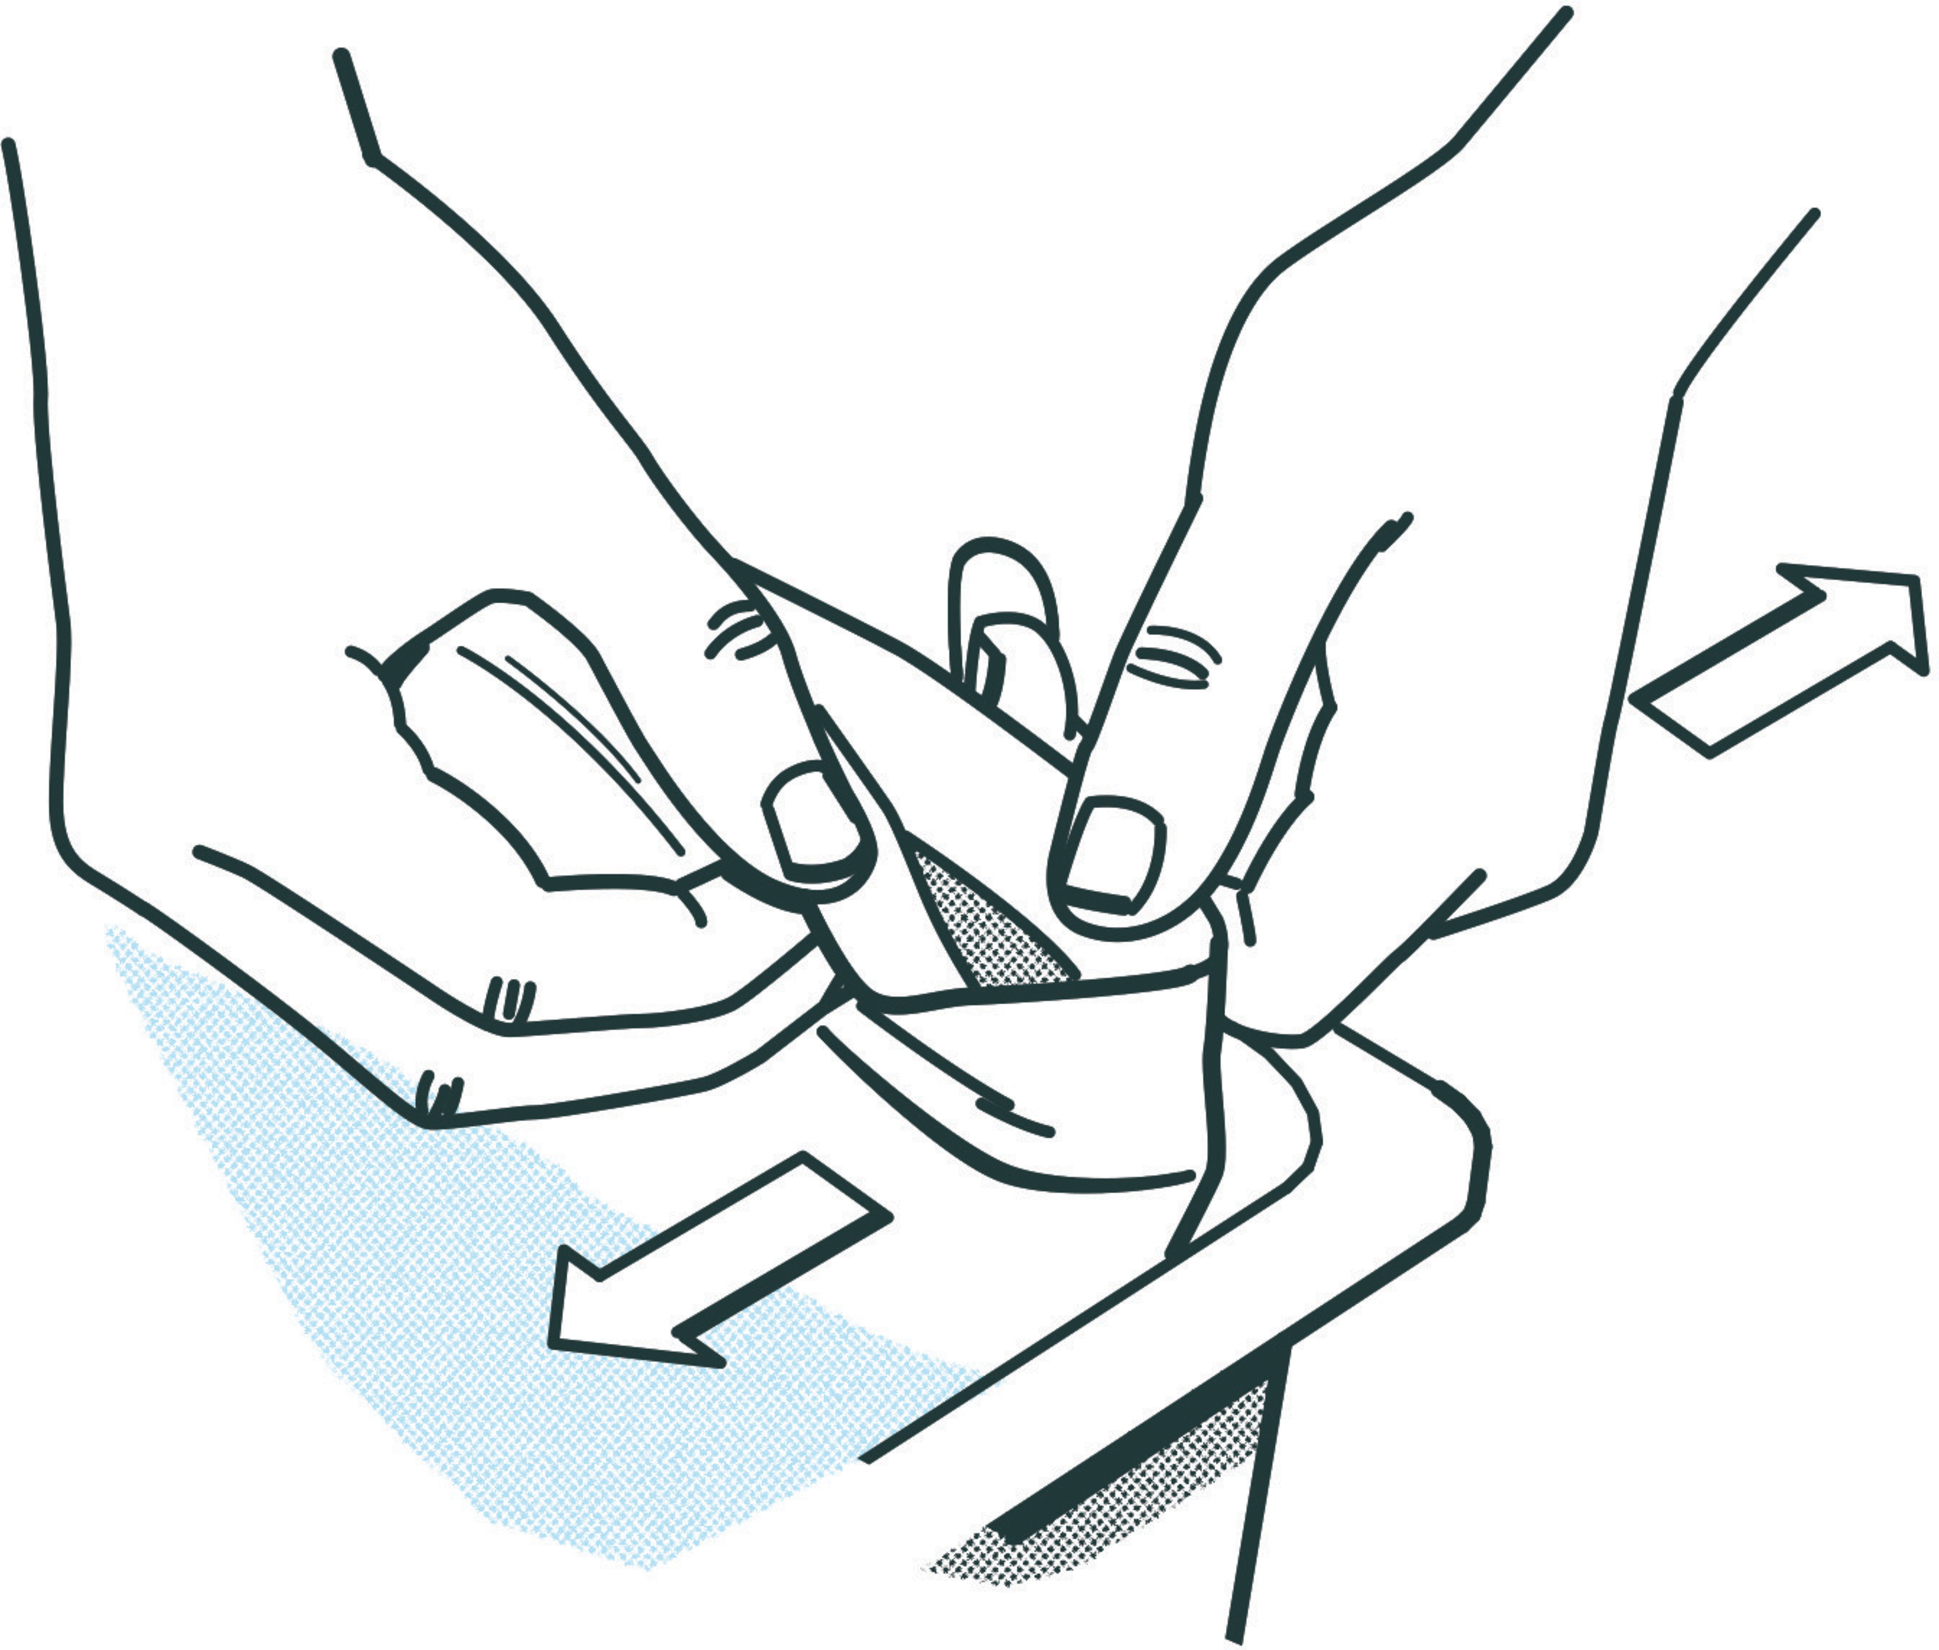
6 Remove last air bubbles
Open one corner of the zipper and release any remaining air, and then reseal the bag. To prevent cold spots on the food, make sure the bag isn’t touching the sous vide machine or cooking vessel. If cooking with multiple bags, make sure they aren’t pressing up against each other.

7 Cook your food
It’s important to cover the water bath with plastic wrap (or a sous vide–specific lid for your large plastic container) during cooking. For long cook times (from a couple hours to a full day), the cover helps to minimize evaporation (and the need to add more water). For short cook times (less than an hour), the cover helps to keep the temperature as static as possible after adding ingredients to the bath.

8 Relax until time is up
The biggest benefit of sous vide? You don’t need to do anything once the food is in the water bath (except read a book, play video games, or hang out with family). Note that timing isn’t as important for sous vide as it is with traditional cooking methods, but it’s still important to keep a passive eye on the time, since the texture of many foods can suffer if they spend too much time in the bath. Most tender cuts of pork, beef, and poultry will be fully cooked in about 1 hour, but they can stay in the bath for about 3 hours without much change to texture. When cooking delicate foods such as eggs or fish, which are often cooked at higher temperatures for less time, you’ll want to be extra-vigilant. Too much time for a poached egg can spell disaster.

9 Finishing touches
Remove your food from the bath. Though some foods, such as fish fillets, eggs, vegetables, and pulled pork are ready to enjoy straight out of the bath, most cuts of meat benefit from a quick sear to give the food a crisp crust. How you sear depends on the size and cut of the meat, but whatever method you choose, the goal is to get the searing done as quickly as possible to avoid raising the temperature of the meat further. Make sure you use high heat and dry the food as much as possible before searing.

10 If you’re saving for later
If you’re not serving the food right away, it’s important to rapidly chill the food before storage. Why? Food safety. (See this page for more.) Plunge the still-sealed bags into a large ice bath to stop the cooking, let sit until chilled, and then refrigerate it for later.
Q Is sous vide cooking safe?
A Short answer: Yes. Take a look at our essays on temperature safety (this page) and plastics (this page) for more detail.
Q What should I do if I accidentally get raw chicken juice in my sous vide bath?
A Don’t freak out! Dispose of the water. Thoroughly wash your water bath container. You can gently clean your sous vide device with a no-suds dishwashing detergent (do not submerge the device in soapy water). We also recommend cleaning your device periodically in a vinegar bath. Combine equal parts water and distilled white vinegar in a small pot. Use your sous vide circulator to bring vinegar solution to 140°F/60°C. Once the bath reaches that temperature, the cleaning is complete. This cleaning method also helps remove mineral buildup inside the circulator.
Q What should I do if my zipper-lock freezer bag springs a leak?
A Take it out of the bath, and place it in a second bag. Remove as much air as possible, make sure both bags are sealed, and place it gently back in the bath. Follow our air-displacement method on this page to remove the rest of the air bubbles.

Q Is there any way to sous vide if I don’t have a sous vide circulator?
A Not really. Precision and hands-off ease-of-use are two of the most attractive qualities of sous vide for the home cook. Trying to cook sous vide without an immersion circulator forces you to sacrifice both of these attributes. The most effective “hack” for cooking sous vide without a device is to set up a large pot of water on your stovetop, fit it with a thermometer, and fiddle with your burner until you reach your target cooking temperature. But this method is imprecise and requires a lot of babysitting. An immersion circulator accurately controls and maintains the temperature of your water bath so that you don’t have to. Long story short: If you want to cook sous vide, get a device.
Q What if my plastic bag begins to float? What’s a good way to weigh it down?
A We have a “use whatever sinks your boat” policy when it comes to dealing with floating sous vide bags, but here are a few of our favorite methods:
Clip a large binder clip to the bottom of the sous vide bag, and then fit a heavy spoon into the mouth of the clip.
For recipes that call for double bagging, pop a couple of heavy spoons into the outer bag.
Fill a Mason jar or zipper-lock freezer bag with pie weights, and place it on top of the floating bag.
Place an inverted steamer basket on top of the offending floating bag. Then place additional weights, like heavy spoons or pie weights, on top of the basket.
Q Do I need to buy a vacuum sealer?
A No. Vacuum sealers are helpful tools (see this page), but not necessary for sous vide. A high-quality zipper-lock plastic bag (see this page) does just fine.

Q Why do I need to cover my pot when I’m cooking sous vide?
A Covering your water bath container with plastic wrap or a sous vide–specific lid helps to prevent evaporation (and therefore the need to refill the water bath over the course of long cook times). It also helps bring the water back up to temperature quickly after adding ingredients to the bath, which is especially important when cooking delicate foods like Soft-Poached Eggs.
Q Why does my sous vide steak not look super red when I first slice into it? But then it becomes red?
A Myoglobin, an oxygen-storing protein and the main pigment in meat, is responsible for the color of your steak. Myoglobin changes hues depending on its chemical environment. Without oxygen, myoglobin is dark purple (think of a raw vacuum-sealed steak). When heated, myoglobin loses an electron and turns brown (think of a cooked sous vide steak). And finally, when exposed to oxygen, that myoglobin turns red (sliced steak).
Q How do I pronounce sous vide?
A Say it ten times fast: soo veed.
Q How do I know how much is the right amount of water in my bath?
A You always need enough water to completely immerse the item that you will be cooking sous vide. Keep in mind the principles of displacement—if you are going to be cooking a whole prime rib roast, you don’t want to fill your water bath to the brim. Sous vide devices will either have a minimum water fill-line marked on the device itself or will display an error message if the water level gets too low.
Q Do you have a trick for removing air bubbles that doesn’t involve my hands touching hot water?
A First, it’s usually not that hot. But if you’re looking to avoid the heat, fill a separate container with cold water and carry out the sealing steps (this page) there, and then transfer your bag to the prepared heated water bath. No poached digits!
Q How do I get the air out of a bag that’s filled with liquid, like for making broth?
A Our displacement method for removing air bubbles (see this page) is just as effective with liquid. Just be careful not to spill the contents of the bag before you get it in the water!
Q What’s the deal with the time ranges in these recipes?
A We love that sous vide allows for a bigger time window for perfectly cooked food compared to most traditional methods. You will notice a lot of the recipes in this book have ranges for the sous vide cooking time. The idea is that any time within a recipe’s range will yield a great result. The low end of the range gives the ideal result in the least amount of time, and the upper end of the time range is the limit to which that food can be cooked without any negative impact. If a recipe does not have a range, it’s important to hit the exact target time.
10 Recipes for the Sous Vide Newbie

10 Recipes for Weeknight Dinners
Spanish-Style Shrimp with Olive Oil and Garlic
10 Recipes to Cook When You Want to Impress
Fruit-on-the-Bottom Yogurt Cups
Sichuan Twice-Cooked Pork Belly
Spanish Grilled Octopus Salad with Orange and Bell Pepper


9 Things You Should Never Sous Vide
Popcorn
Fried Rice
Nachos
Pepperoni Pizza
Brioche
Vegetable Lasagna
Twice-Baked Potatoes
Chocolate Souffle
Your Grandmother’s Famous Apple Pie