Chapter 16. Mini-Rockets
Model rockets come in all sizes, from the common 12–24"-tall rockets to impressive 6-foot Goliaths. Some of my favorites go in the other direction, though. We’re going to take a look at two mini-rockets in this chapter. These rockets use the undersized T motors, which measure only 1 3/4” long and 1/2” in diameter. They are fast, easy builds, and look like they won’t do much—but don’t let the size fool you. These rockets can easily exceed altitudes of 1,000 feet!
Along the way, we’ll also explore two new recovery techniques: featherweight recovery and nose-blow recovery.
Toutatis: The Powerful Midget Rocket
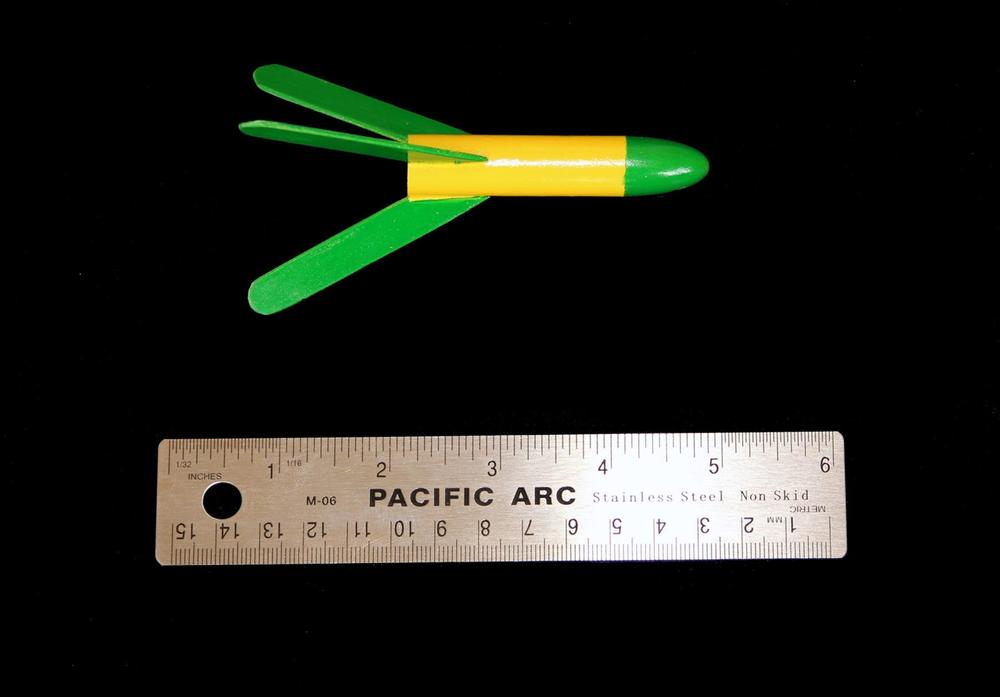
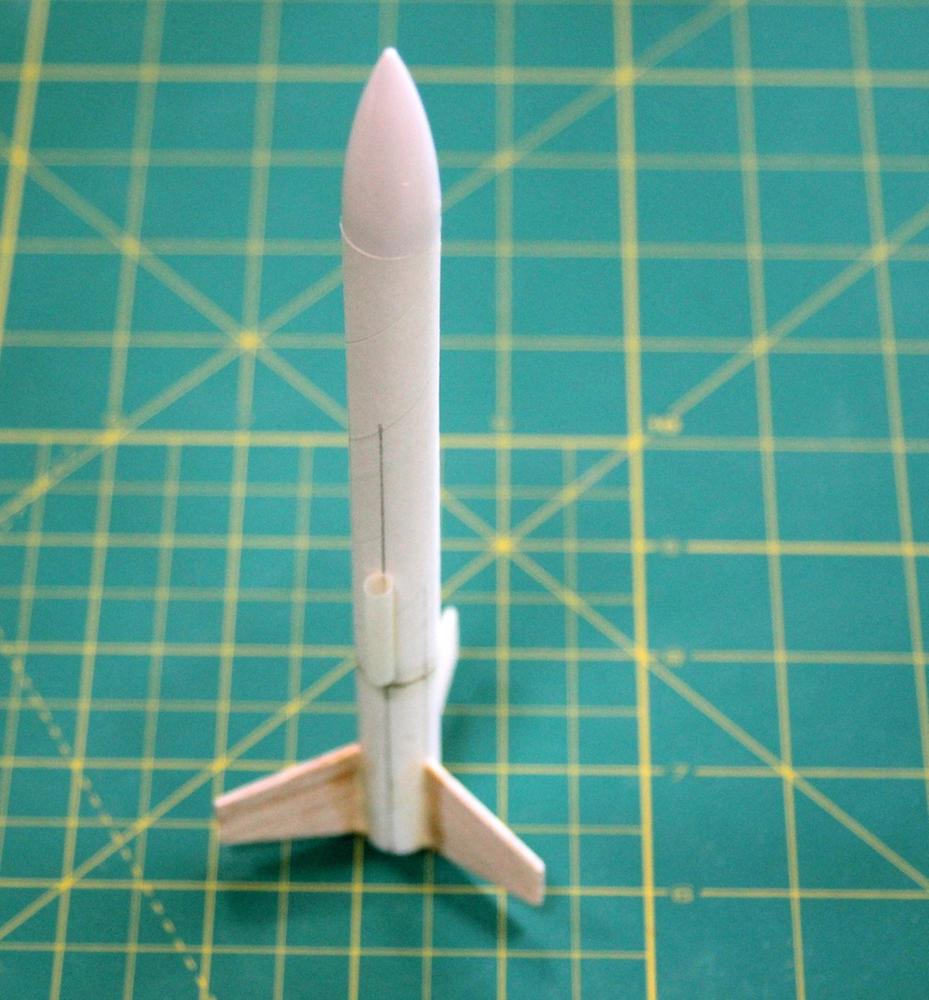
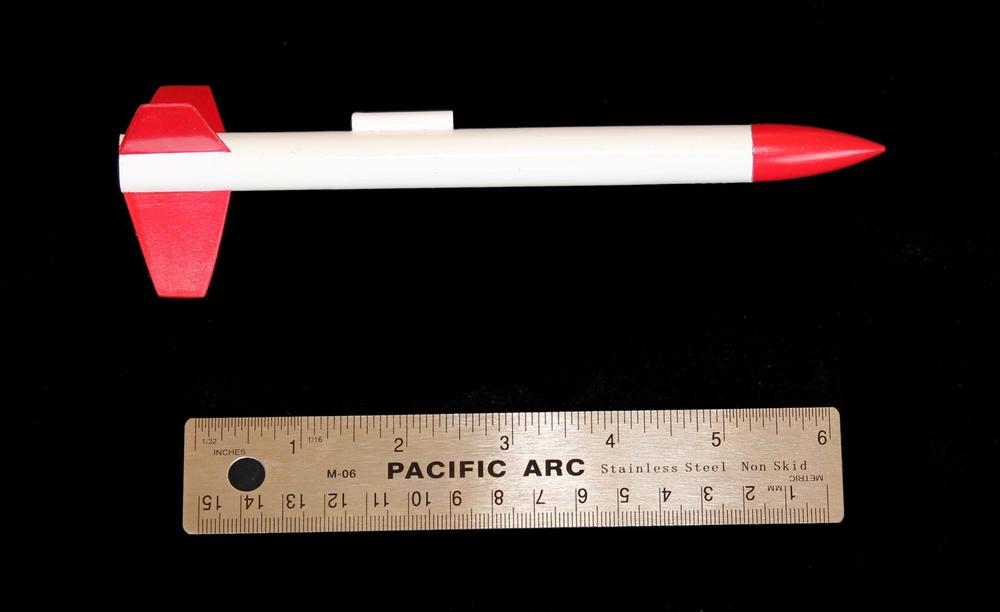
We’ll start with the 4” Toutatis. Don’t let its size fool you! This tiny titan is so small and light that the T-series motors can loft it quite high (see Table 16-1 for a list of recommended motors and expected altitudes). In fact, I don’t recommend using the larger motors except in wide-open fields and perfect flying conditions. The rocket is small and hard to track visually; without a parachute to make it more visible during descent, it’s very easy to lose.
| Motor | Approximate altitude |
1/4A3-3T | 460 ft |
1/2A3-4T | 800 ft |
A3-4T | 1,370 ft |
A10-3T | 1,000 ft |
Table 16-2 lists the parts required to build our first mini-rocket.
| Part | Description |
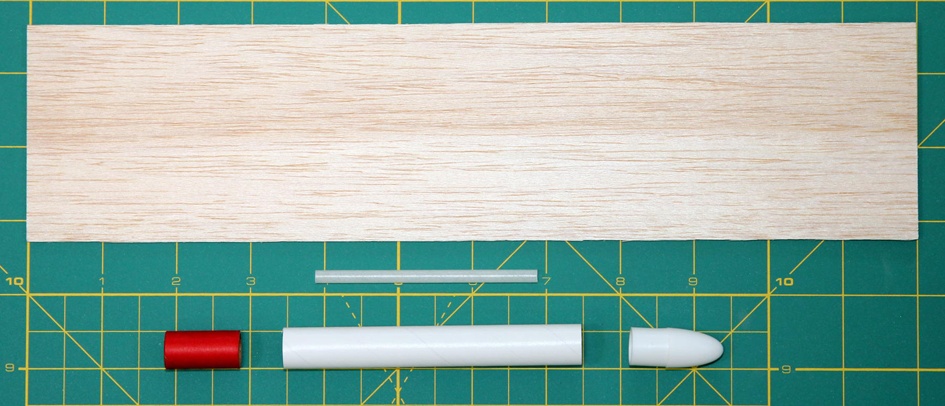
BT-5 body tube, 2” | The main body tube for the rocket. This will be cut from a longer tube. There is a 4” long BT-5 tube in the Estes Designer’s Special, or you can order an 18” tube. |
BT-5 size nose cone, 3/4” | Any BT-5 nose cone of balsa or plastic will do. The nose cone shown is from the Estes Designer’s Special; similar nose cones are available from many sources. A blunt nose cone is best; see the flying instructions for an explanation. |
1/16” balsa fin stock; about 1 1/3” x 2 1/2” | This is for the fins. |
1/8” launch lug | Use about 1”, cutting it from a longer piece if needed. |
Construction
Refer back to Chapter 3 for basic construction techniques, tools, and supplies.
The exact length of the body tube will depend a bit on the nose cone you select. That’s because the nose cone also functions as the engine block in this rocket. We want the motor to stick out the back by about 1/4”. Most BT-5 nose cones have a shoulder length (the length of the nose cone that sticks into the rocket) of 1/2”, and the motors are 1 3/4” long. A little quick arithmetic or laying the parts out next to a ruler will show that you want a 2” body tube. If you end up with a nose cone with a 3/4” shoulder, increase the body tube length to 2 1/4”, and so on.
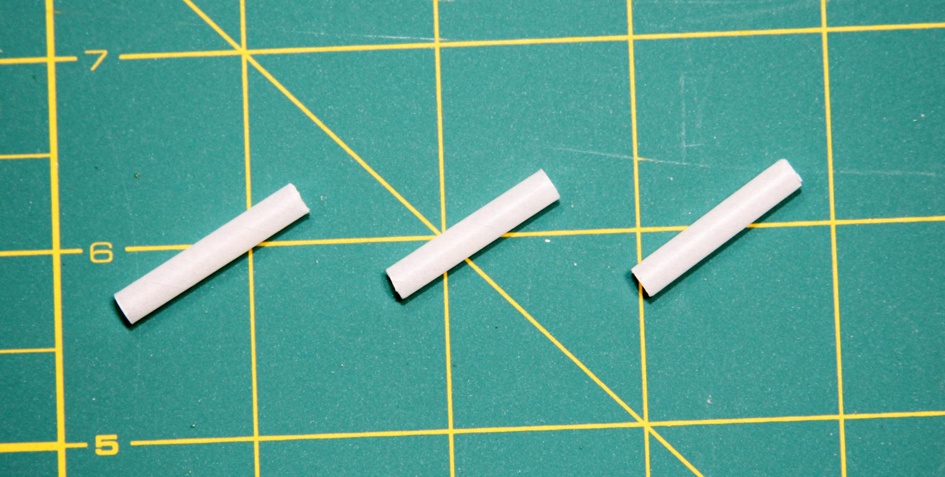
The Estes Designer’s Special comes with two 4"-long BT-5 body tubes. These are the white tubes that are about 1/2” in diameter. If you are buying parts à la carte, the BT-5 body tube will probably be 18” long. Either way, you will need to cut the body tube to size. Save the extra piece—we’ll use it to build Eros later in this chapter.
Launch lugs come in a variety of sizes. The ones in the Estes Designer’s Special are 3” long. Cut a 1” piece from a longer length of launch lug.
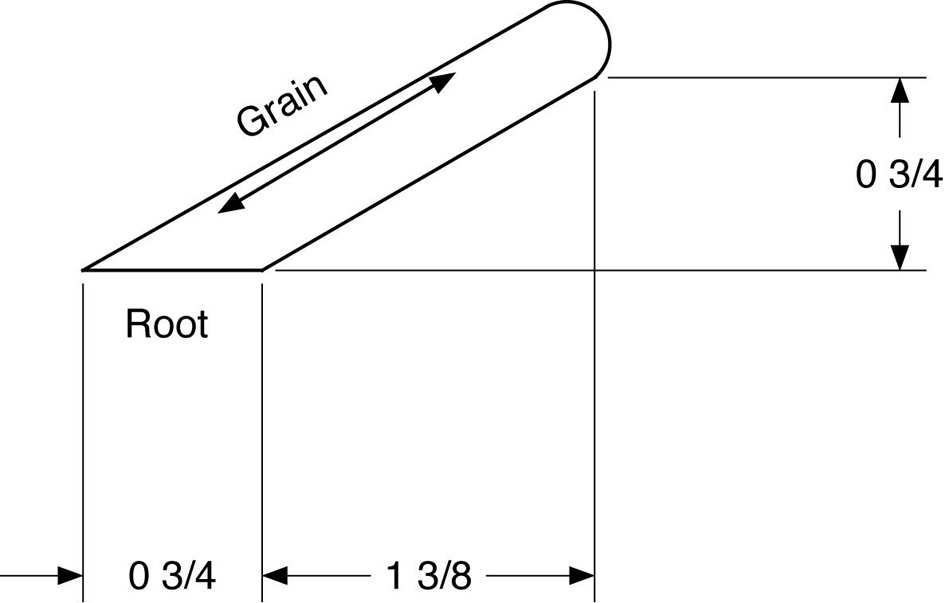
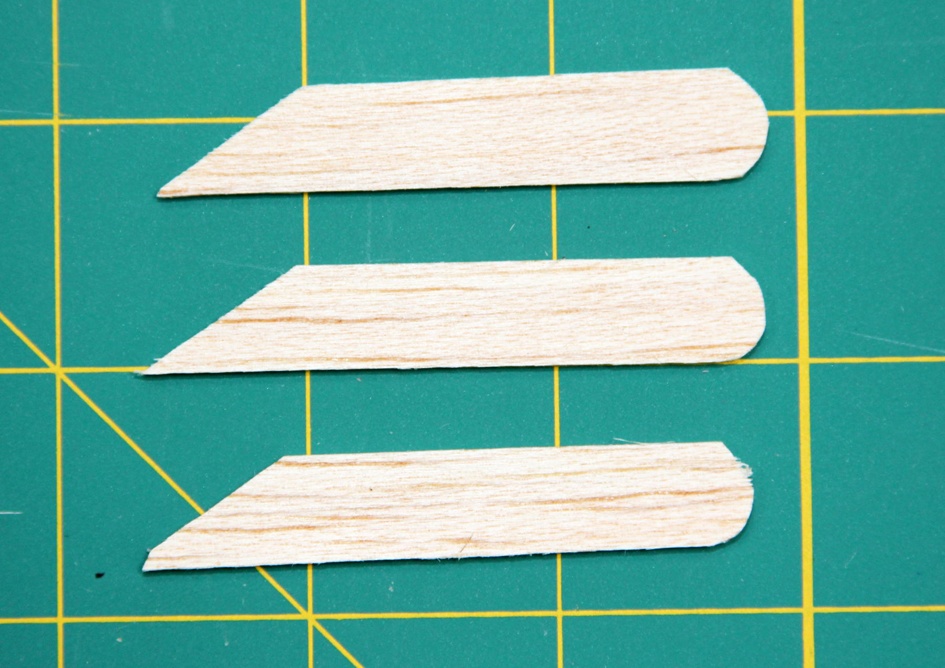
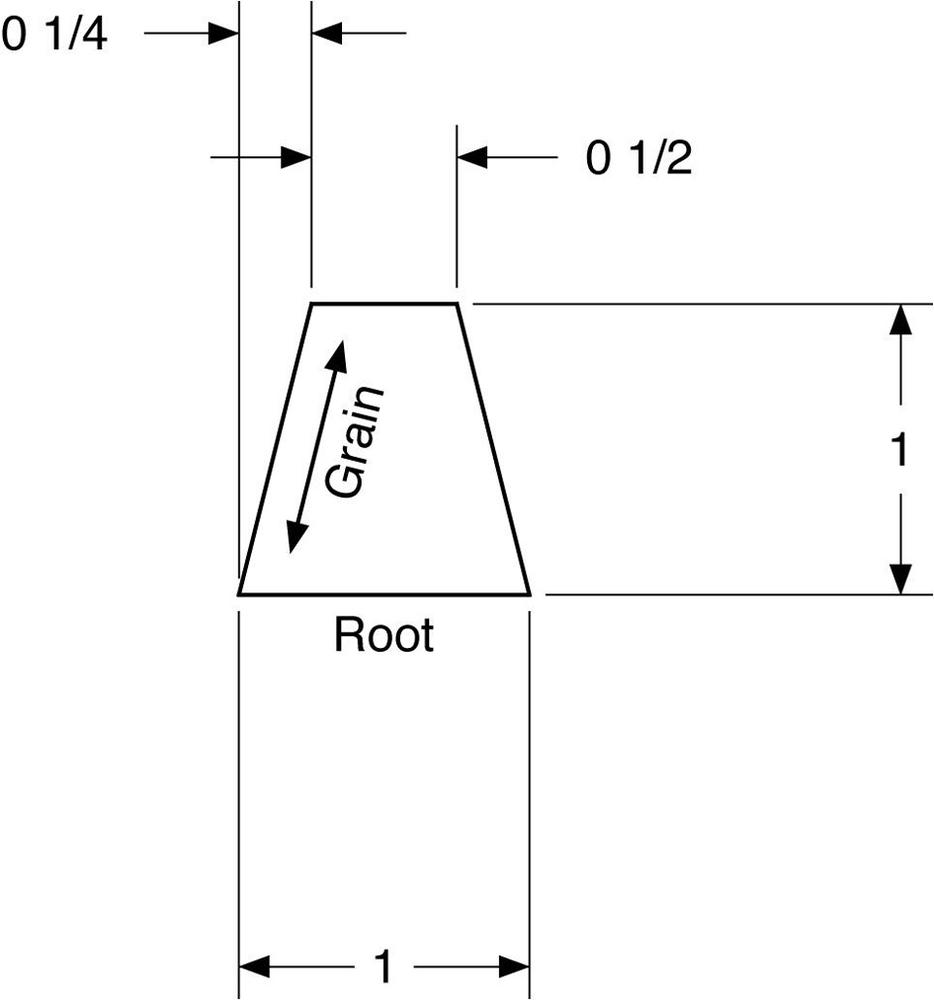
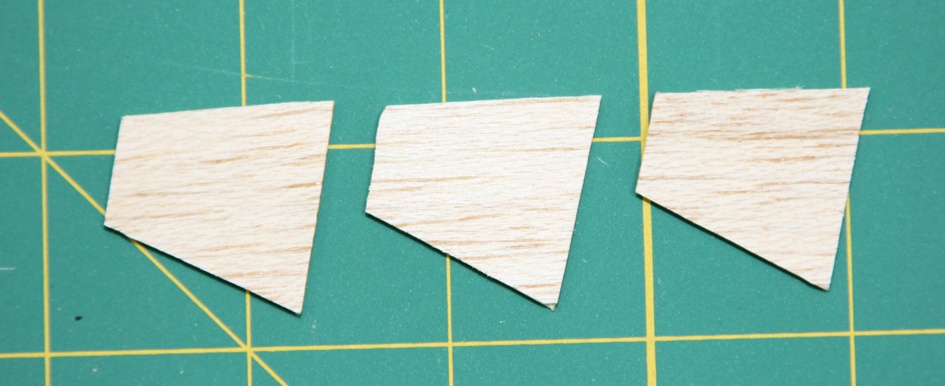
Cut three fins from 1/16"-thick balsa using the fin pattern in Figure 16-5. The grain direction is critical. The wood grain must run along the length of the fin, parallel to the leading edge.
Round all edges except the root edge, which will be glued to the body tube. Sand the fins smooth using medium grit sandpaper.
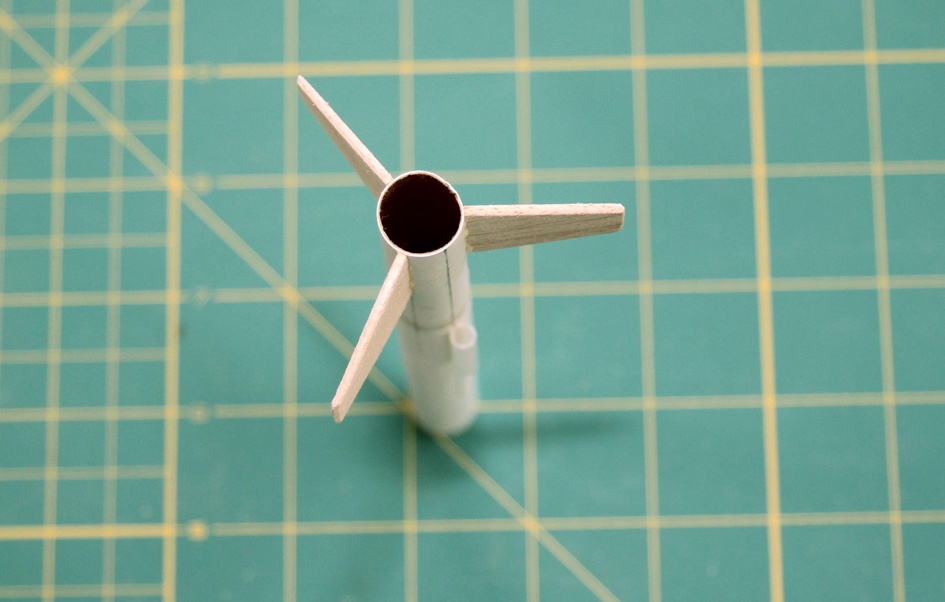
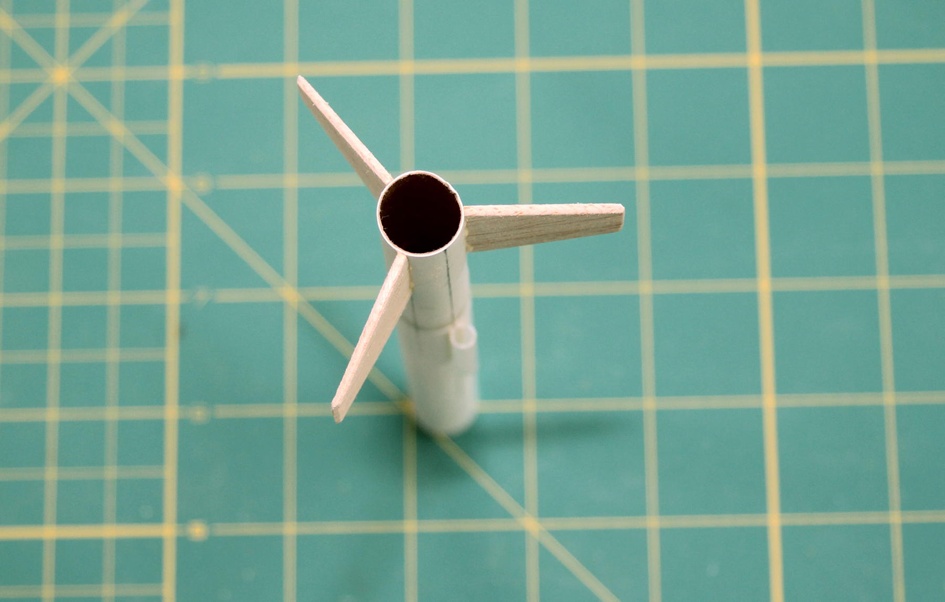
Use the fin marking guide from Figure 3-24 in Chapter 3 to mark the locations for the three fins and the launch lug. Glue on the fins and launch lug, checking the alignment from above to make sure they are straight.
The fins are at the base of the body tube. Position the launch lug 1/4” from the base of the body tube.
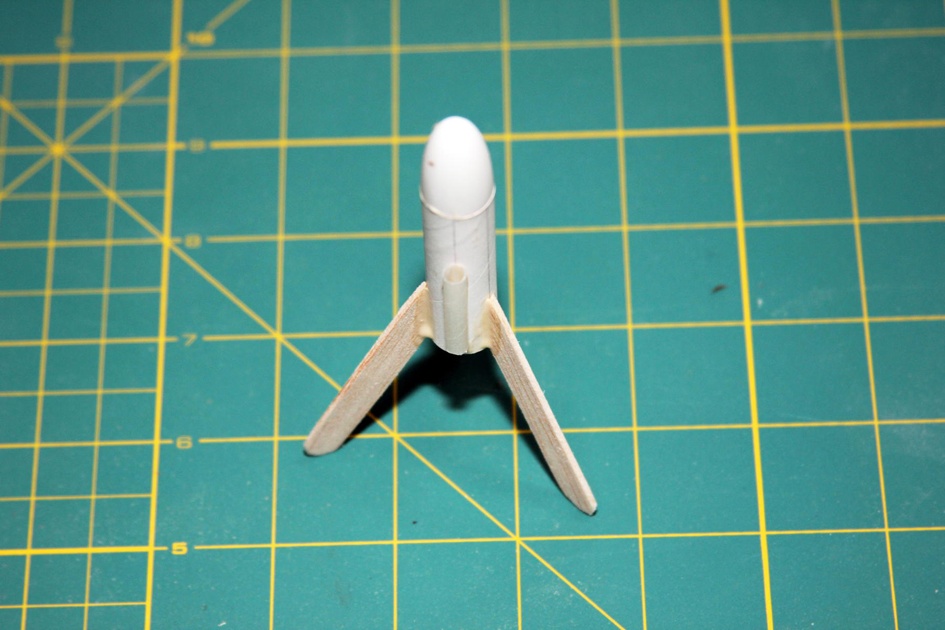
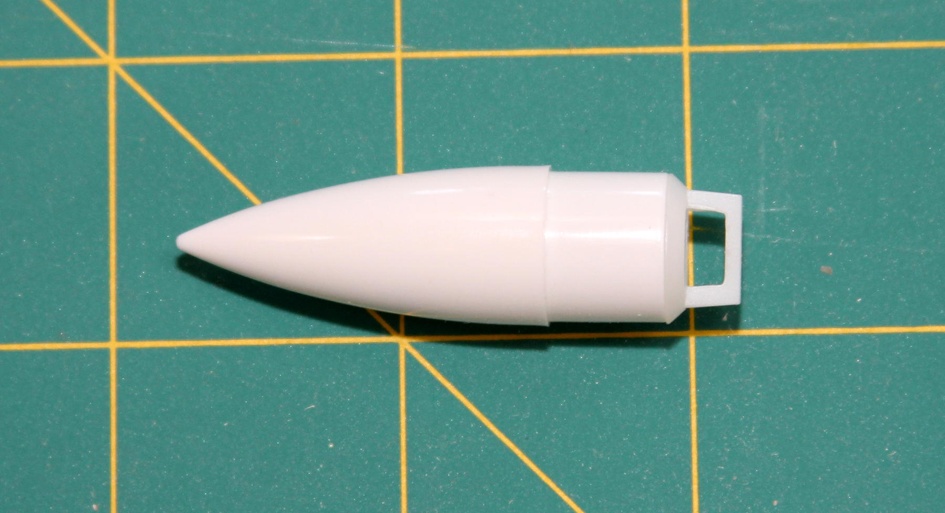
Once the fins are dry, glue the nose cone in the top of the body tube. The nose cone comes as two pieces. The base of the nose cone provides the attachment point for the parachute and shock cord. We don’t need it in this rocket, so discard that piece, leaving just the top portion shown in Figure 16-2.
Apply fillets to the fins for extra strength. You can see one of the fins starting to sag in Figure 16-8; a quick swipe with a carefully designed fillet tool (my finger) fixed that issue.
After the glue dries, the rocket is ready for priming and final painting.
Flying Toutatis
This rocket is as easy to fly as it was to build. It uses a recovery technique called featherweight recovery. Basically, that means the rocket is so light for its size that you can let it fall without any recovery system. Let’s see how that works.
Insert the motor. Like with Hebe in Chapter 15, this is a minimum-diameter rocket, so we’ve wrapped tape around the back of the motor to make sure it fits snugly in the body tube. Unlike with Hebe, though, the motor won’t stay in the rocket. This time, we actually want to motor to pop out and fall separately to the ground when the ejection charge fires. Apply enough tape to make sure the motor doesn’t fall out of the rocket before it fires, but don’t go for a really tight fit.
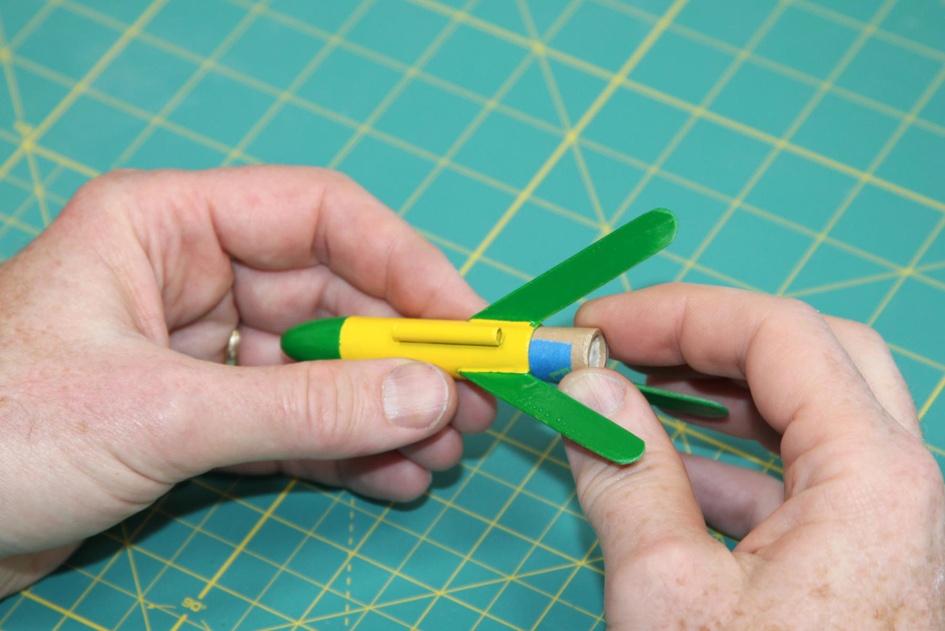
There is no parachute or other recovery mechanism to prepare. Install the igniter, slip the rocket onto the launch rod, and launch in the normal way. Toutatis will launch and fly very quickly, easily flying out of sight (even for someone with 20/20 vision!) on an A motor. The ejection charge will pop the motor out of the rocket, and both will fall separately to earth. They are light enough compared to their size that they will not do any damage.
Now, being lightweight does not mean the rocket is unstable. In fact, it’s still very stable after the motor is ejected. The rocket will continue in a ballistic trajectory, rising to its apogee, then turning over and coming right back down. That’s why the parts list recommends a blunt nose cone. That’s also why the motor must have an ejection charge—an A3-0T, for example, is not suitable. The extra weight of the motor on a very stable ballistic rocket makes the combination heavy enough to do a little damage if it hits something delicate (you, for example).
All rockets should be flown on a small engine for their maiden flight. That’s especially true for Toutatis. By now, you’ve built and flown a few rockets, and you know it’s the parachute you usually see as the rocket descends. Toutatis doesn’t have a parachute, and is very difficult to spot. Use smaller motors until you are used to spotting the rocket—or searching for it on the ground!
So what about the motor? It too will fall to the ground, but lacking fins, it is unstable. It will tumble, and probably take a little longer to get to the ground than the rocket. You may not find the motor, but if you do, be sure to collect it and place it in the garbage.
Eros: A Small Rocket That Flies High
Our second mini-rocket is called Eros. Table 16-3 lists the recommended motors for this rocket, and the expected altitudes.
| Motor | Approximate altitude |
1/4A3-3T | 250 ft |
1/2A3-4T | 580 ft |
A3-4T | 1,190 ft |
A10-3T | 1,090 ft |
Eros uses a recovery system that is very similar to the featherweight recovery used by Toutatis, but there is a key difference. While there is no streamer or parachute, the nose cone does pop off when the ejection charge fires. This makes the rocket unstable, so it will tumble down more slowly than if it remained streamlined. Preparation and launch of Eros is almost as easy as with Toutatis, yet this rocket flies just like the larger cousins you’ve built up to this point.
Table 16-4 lists the parts you’ll need to build Eros.
| Part | Description |
BT-5 body tube, 4” and 2” | The main body tube for the rocket. The instructions here use the 4” BT-5 body tubes from the Estes Designer’s Special, but it works even better to cut a single 6” piece from a stock 18” BT-5 body tube. |
BT-5 tube coupler | This is used as an engine block and to join the two smaller tubes together. |
BT-5 size nose cone, 1 1/4” | Any BT-5 nose cone of balsa or plastic will do. The nose cone shown is from the Estes Designer’s Special; similar nose cones are available from many sources. |
1/16” balsa fin stock; about 1.3” x 3” | This will be used for the fins. |
1/8” launch lug | Use about 1”, cutting it from a longer piece if needed. |
1/8” shock cord | You’ll need 12” of shock cord, which you can cut from a longer piece. Elastic from the fabric store works fine, too. |
Construction
Refer back to Chapter 3 for basic construction techniques, tools, and supplies.
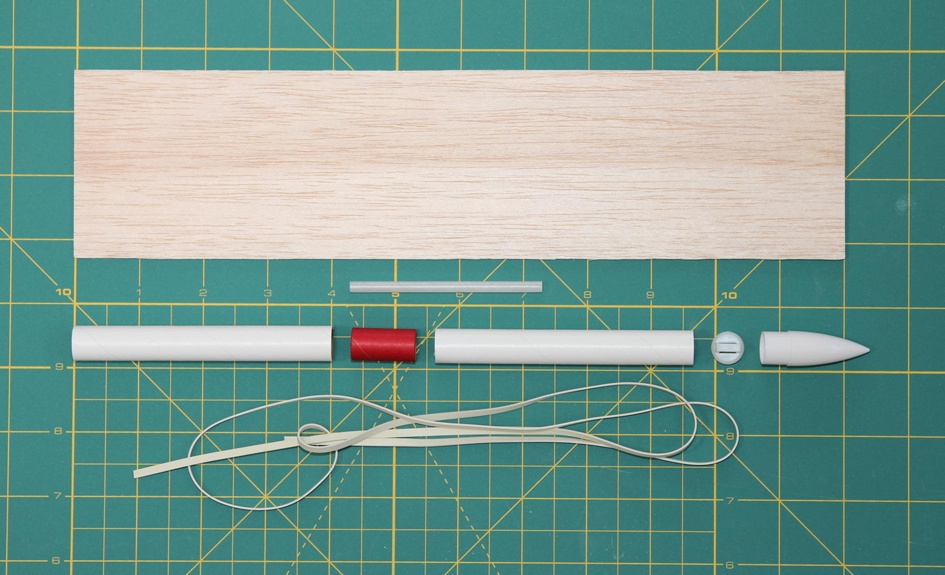
Eros is built around a 6” BT-5 body tube. The Estes Designer’s Special doesn’t actually come with a 6” or longer BT-5, so we’ll need to build one up from shorter pieces. These instructions assume you will use the 2” section of body tube left over from building Toutatis, and the remaining 4” tube. Even better, of course, is to cut a single 6” tube from an 18” tube purchased from a hobby store or online store.
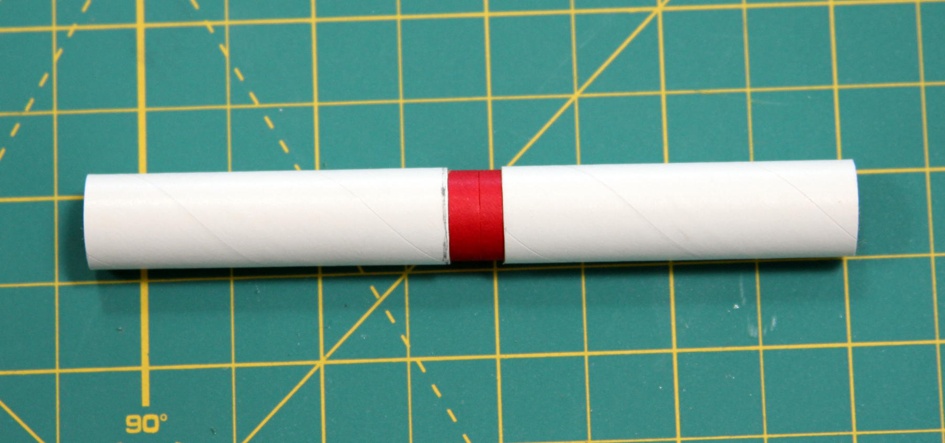
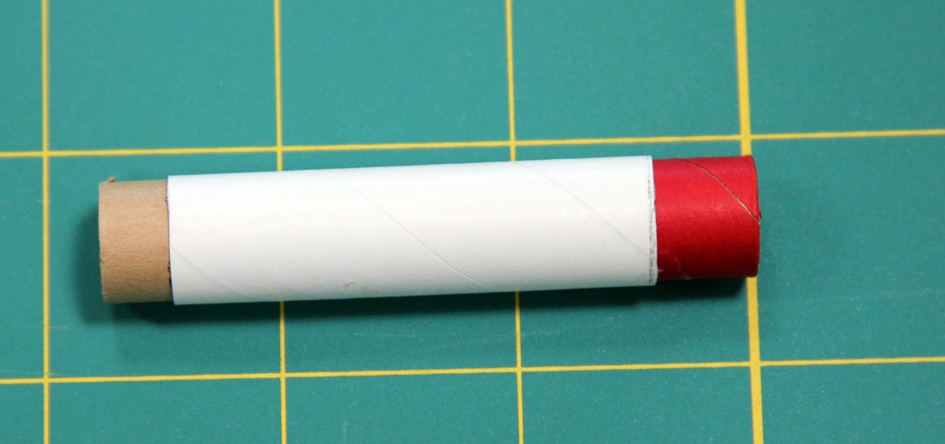
The red tube coupler will do double-duty. Not only does it hold the two shorter pieces of body tube together, but it also serves as an engine block, just like the one we used on Hebe in Chapter 15. That means the position of the tube coupler is rather important. As with all of our rockets, we want the motor to stick out of the back of the rocket by 1/4” so the exhaust doesn’t scorch the rocket. The tube coupler should sit exactly at the end of the motor.
As shown in Figure 16-13, use a motor to help position the tube coupler. Slide the motor in until 1/4” is left sticking out the back. Test fit the tube coupler. It’s 1” long, the motor is 1 3/4” long, and the body tube section is 2” long. If 1/4” of the motor sticks out one end of the tube, 1/2” of the tube coupler should stick out the other end when the motor and tube coupler sit against each other. Use a ruler during the test fit to make sure the parts fit together as expected.
Use wood glue to glue the tube coupler into the body tube. You can leave the motor in while the tube coupler is positioned in the tube, but pull the motor out as soon as you are sure the tube coupler is in the right spot. You don’t want to glue the motor permanently into the body tube!
You can wait until the glue dries from the previous step, or take extra care to make sure you don’t move the tube coupler while performing the next step. Apply wood glue to the inside of the 4” section of body tube and insert the tube coupler to permanently join the two tubes into a single 6” body tube. If no glue squirted out through the crack between the body tubes, apply a small fillet of glue to fill in the crack. Wipe away any excess glue. If you do this before letting the glue dry on the 2” section, be sure to slide the motor in and right back out to check the fit.

Cut three fins from 1/16” balsa using the fin pattern in Figure 16-15. Follow the techniques introduced in Figure 3-38 to make sure they are all the same size. Round the forward, trailing, and outer edges of the fins, but not the fin root. Sand the fins smooth with medium grit sandpaper.
Use the fin guide from Figure 3-24 in Chapter 3 to locate the correct positions for the three fins and the launch lug, and then glue them in place. The fins should be right against the trailing edge of the body tube, while the launch lug should be 2 1/4” from the bottom of the rocket.
Remember, the 2” section of body tube goes at the bottom of the rocket so the motor can rest against it during powered flight!
Plastic nose cones come in two pieces. Use plastic model cement or some other glue that works on plastic to attach the base to the nose cone. You won’t need to glue parts together if you are using a balsa nose cone, but you will need to add a screw eye to serve as an attachment point.
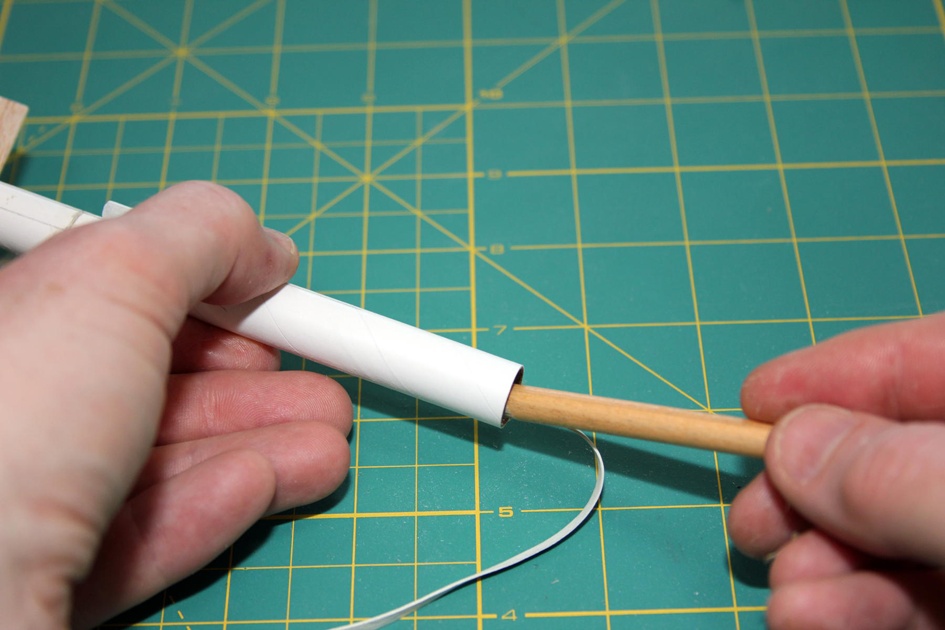
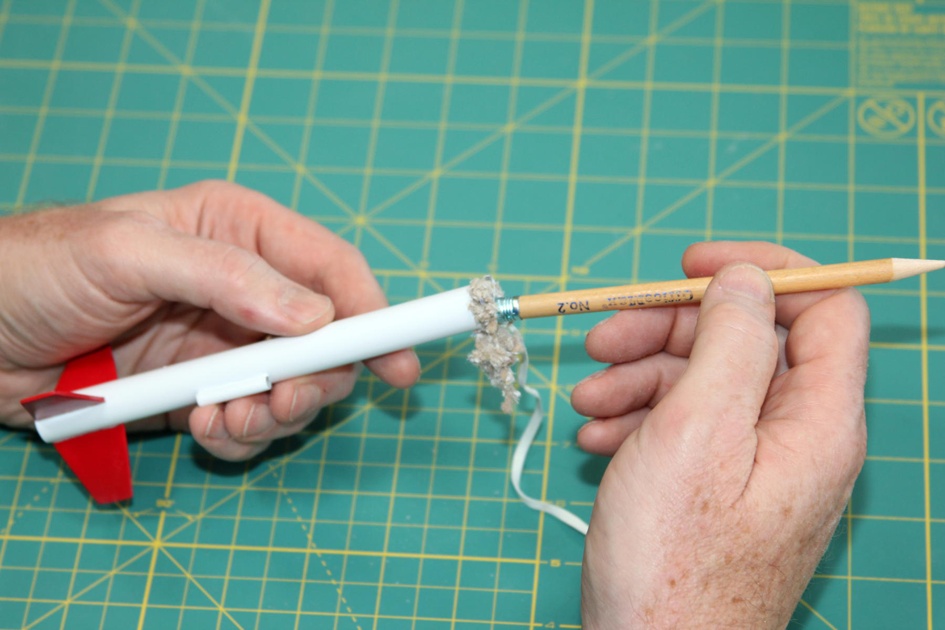
Shock cord installation is pretty routine, except for one minor point. I don’t know about you, but my fingers are too big to position the shock cord in a 1/2"-diameter body tube. I used a pencil to do the job.
Tie the other end of the shock cord to the nose cone using a buntline knot. Apply a small dab of glue to keep the knot from coming undone.
Once all of the glue dries, Eros is ready for primer and paint.
Flying Eros
Flying Eros is very similar to flying Hebe from Chapter 15. The only difference is the streamer—there isn’t one. Eros is so light that the nose cone and body act as a streamer, as long as the rocket parts are flopping around and not forming a streamlined body. This recovery method is called nose-blow recovery, since the nose cone is blown off by the ejection charge. Nose-blow recovery is a kind of tumble recovery, where something changes the geometry of the rocket so it tumbles rather than returning to earth ballistically.
Start by packing 1” of recovery wadding into the body tube. There is no streamer to protect from hot gases, but the shock cord still needs some protection. Pile the shock cord on top, and then insert the nose cone.
The motor is friction mounted, just like the motors for Hebe and Toutatis. Wrap tape around the motor to get a nice, snug fit. Unlike with Toutatis, we don’t want the motor to pop out when the ejection charge fires, so the fit does need to be tight—significantly tighter than the nose cone. The nose cone should be snug enough to not fall out if you turn the rocket over and shake it, but not much tighter. Use sandpaper to reduce the size of the nose cone if it is too tight, or wrap it in tape if it is too loose.
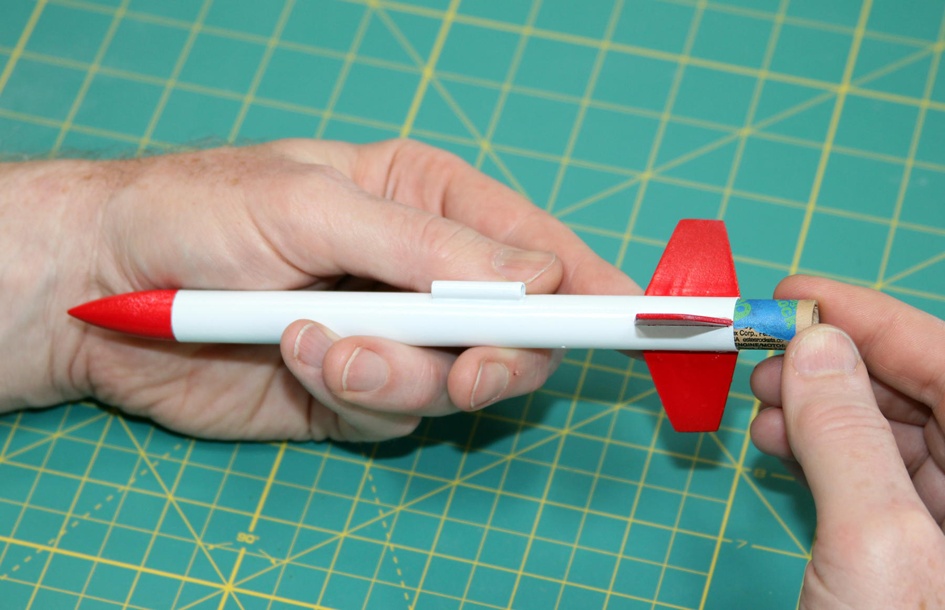
With the motor in place, install the igniter, slide the rocket onto the launch rail, and lift off!
You might be wondering about the lack of a streamer or parachute. In very light rockets like Eros, you can get away with leaving them off. With the nose cone flopping around in the wind, the rocket is unstable. It will fall fairly slowly.
On the other hand, there is nothing wrong with using a streamer with Eros. It will work quite well, and will make the rocket a little easier to see as it descends. If you used a snap swivel on the streamer for Hebe, you can swap it out and give it a try with Eros.
