Bounce Flash and Catchlights in the Eyes
When working indoors with surfaces that I can easily bounce my flash off, I always ask myself this question: If this were a studio shoot, where would I place my softbox? In a studio-type setup, you’d rarely place a softbox directly over someone’s head as a single light source. Instead, you’d place it slightly above the subject and to their left or right—a decision quite often dictated by how the subject is positioned. The simplest and most effective approach is to place the main light so that it falls onto your subject’s face from the side opposite to the camera’s view. In other words, the “short” side of the face. (For more on short lighting, refer back to chapter 3.)
With image 8-1, the lighting was pretty much just bounce flash with a touch of available light registering. The boy was standing in front of someone wearing a very dark dress, hence the “black background.” Looking at that photo, the large catchlights in his eyes should grab your attention immediately. How did I get those catchlights? I did it the same way you would in a studio: by the way I placed the main light. In a studio image, that might be a softbox; for this image, that main light was the bounce surface. These catchlights in your subject’s eyes are very predictable if you bounce your flash with that studio softbox idea in mind.
Once again, I used the BFT to shield any direct flash from falling on him. I want indirect flash, and I want it directional and soft. Hence, I bounce my flash toward the area I want my light to come from. That is how I place my “softbox.” The key here is not to think of your flash as being your light source any more; instead, the area that you’re bouncing your flash off becomes your light source. If you place that hypothetical softbox correctly, you will get catchlights in the eyes!

Image 8-1—I “placed” the main light (the bounce flash surface) to produce good catchlights in the boy’s eyes. (1/250 second at f/4 and 1250 ISO; Lens: 70–200mm f/2.8; On-camera TTL bounce flash with FEC at –1EV; Modifier: BFT)
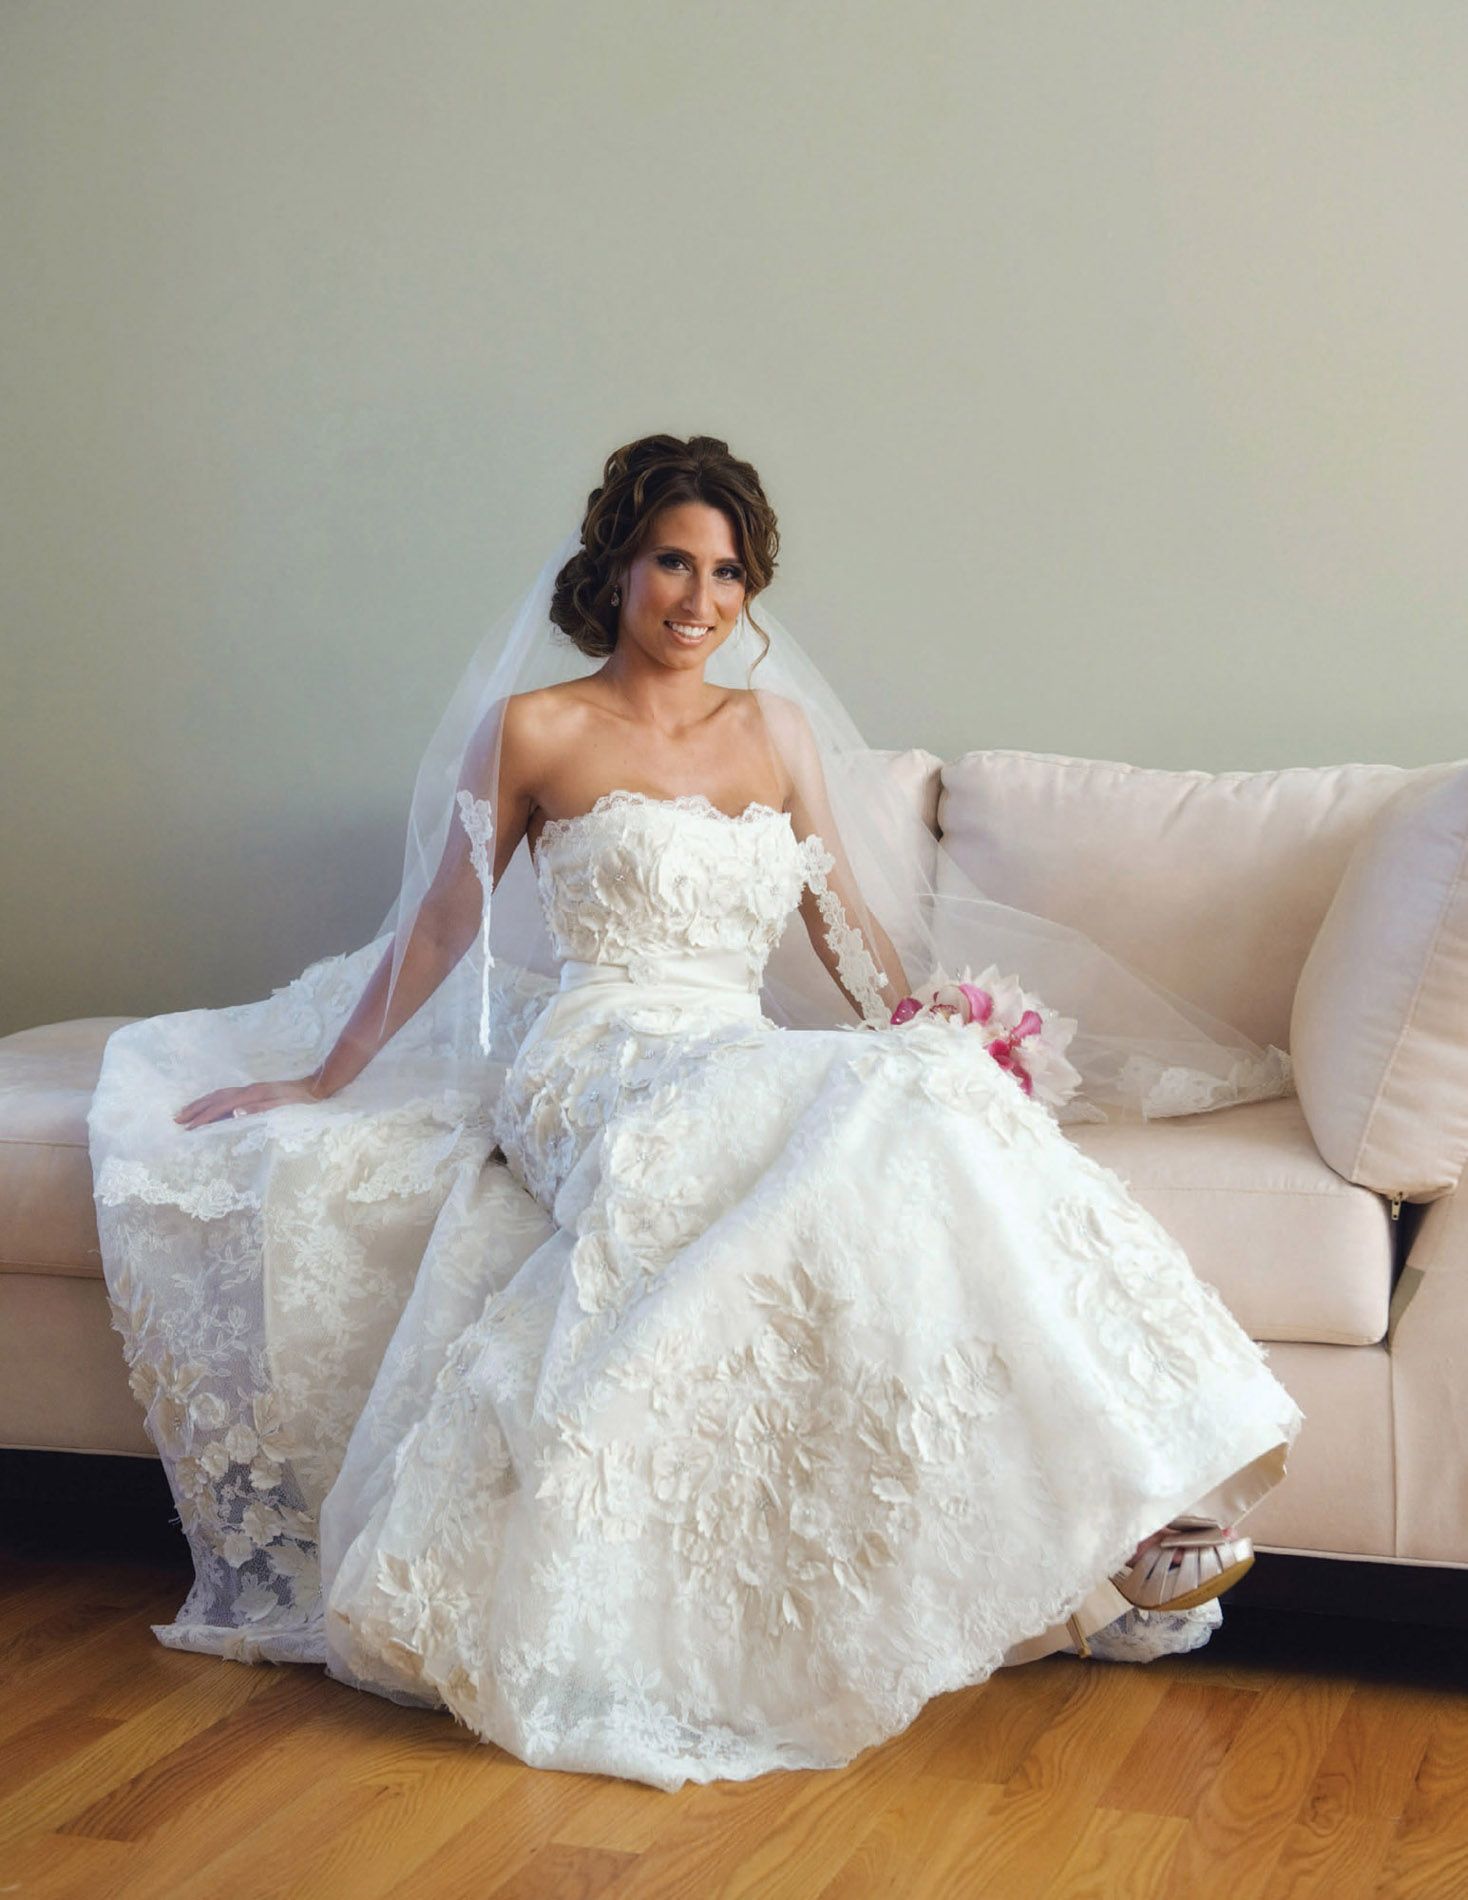
Image 8-2—I bounced TTL flash to my right (and slightly toward the bride) to augment the ambient light from a window to camera left. (1/160 second at f/4 and 800 ISO; Lens: 24–70mm f/2.8 at 50mm; On-camera TTL bounce flash; Modifier: BFT)
Bounce Flash Portraits of a Bride
As you move a subject from setting to setting, you have to be prepared to adapt your lighting approach to the pose, the ambient light, and the available bounce surfaces. Let’s look at a series of three bridal portraits and see how this plays out.
Denise easily fell into the classically elegant pose seen in image 8-2. The lighting was then up to me. The only available light was some daylight coming from camera left through the window, so I needed to bring in additional lighting. I bounced TTL flash to my right and slightly toward the bride. The flash was flagged to avoid putting direct light on her.
Image 8-3 shows a similar pose, made later in the day at the reception venue. It was an entirely different setting with different lighting. Here, I needed to counteract the bright sunlight—as much as I could with a mere speedlight that I bounced into the large room. Immediately, I went to the maximum flash-sync speed and set my flash to full power. These settings guaranteed me the most output from my flashgun, because I was using it at its best efficiency.
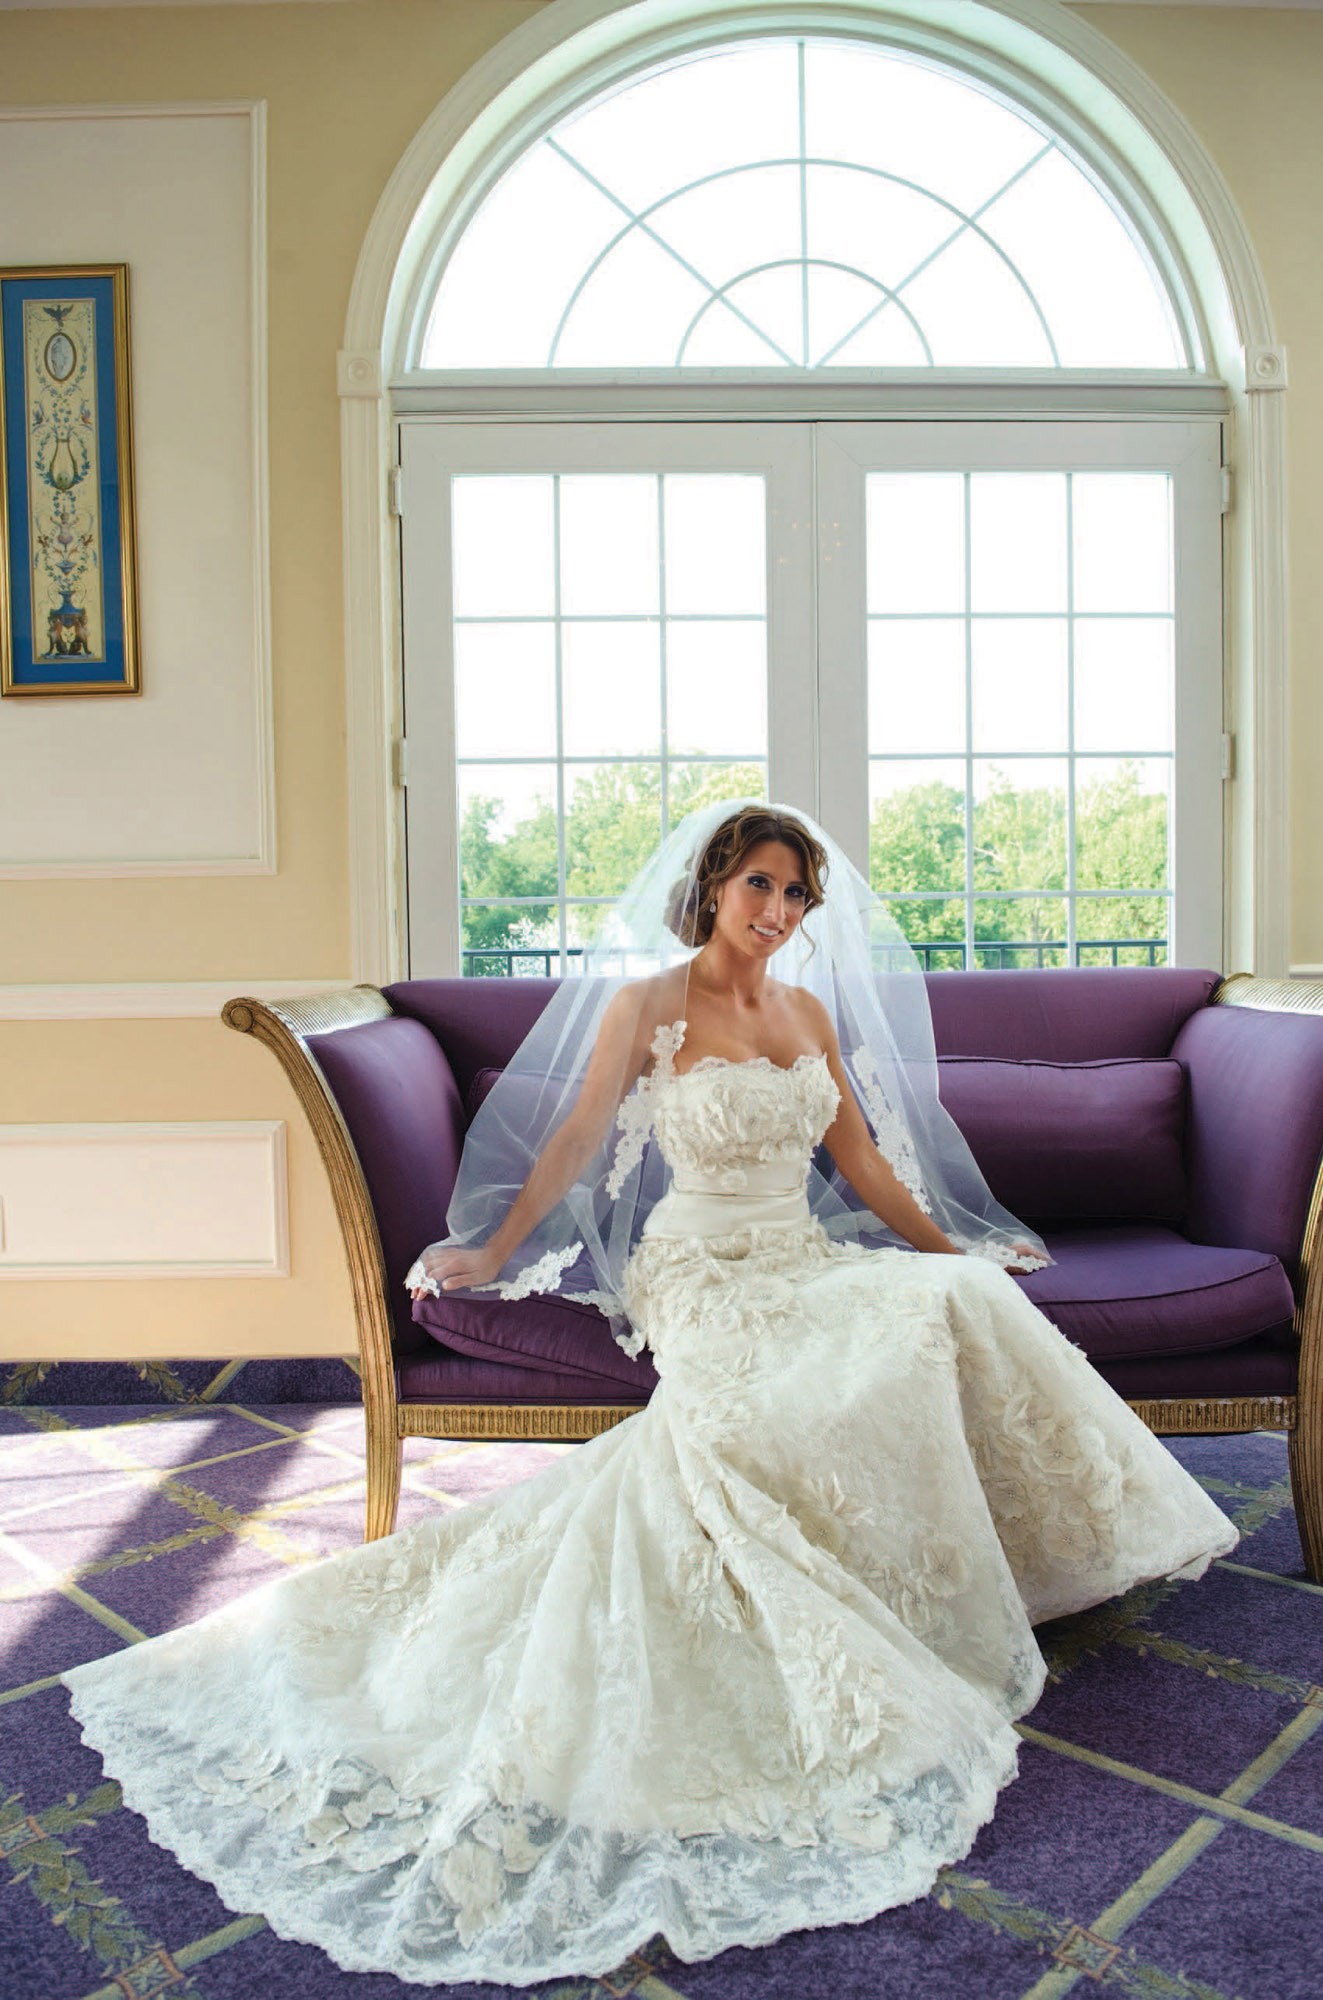
Image 8-3—Shooting at the maximum flash-sync speed and with my flash set to full power helped balance the bride against the bright light behind her. (1/250 second at f/4.5 and 200 ISO; Lens: 24–70mm f/2.8 at 24mm; On-camera manual bounce flash at full-power)
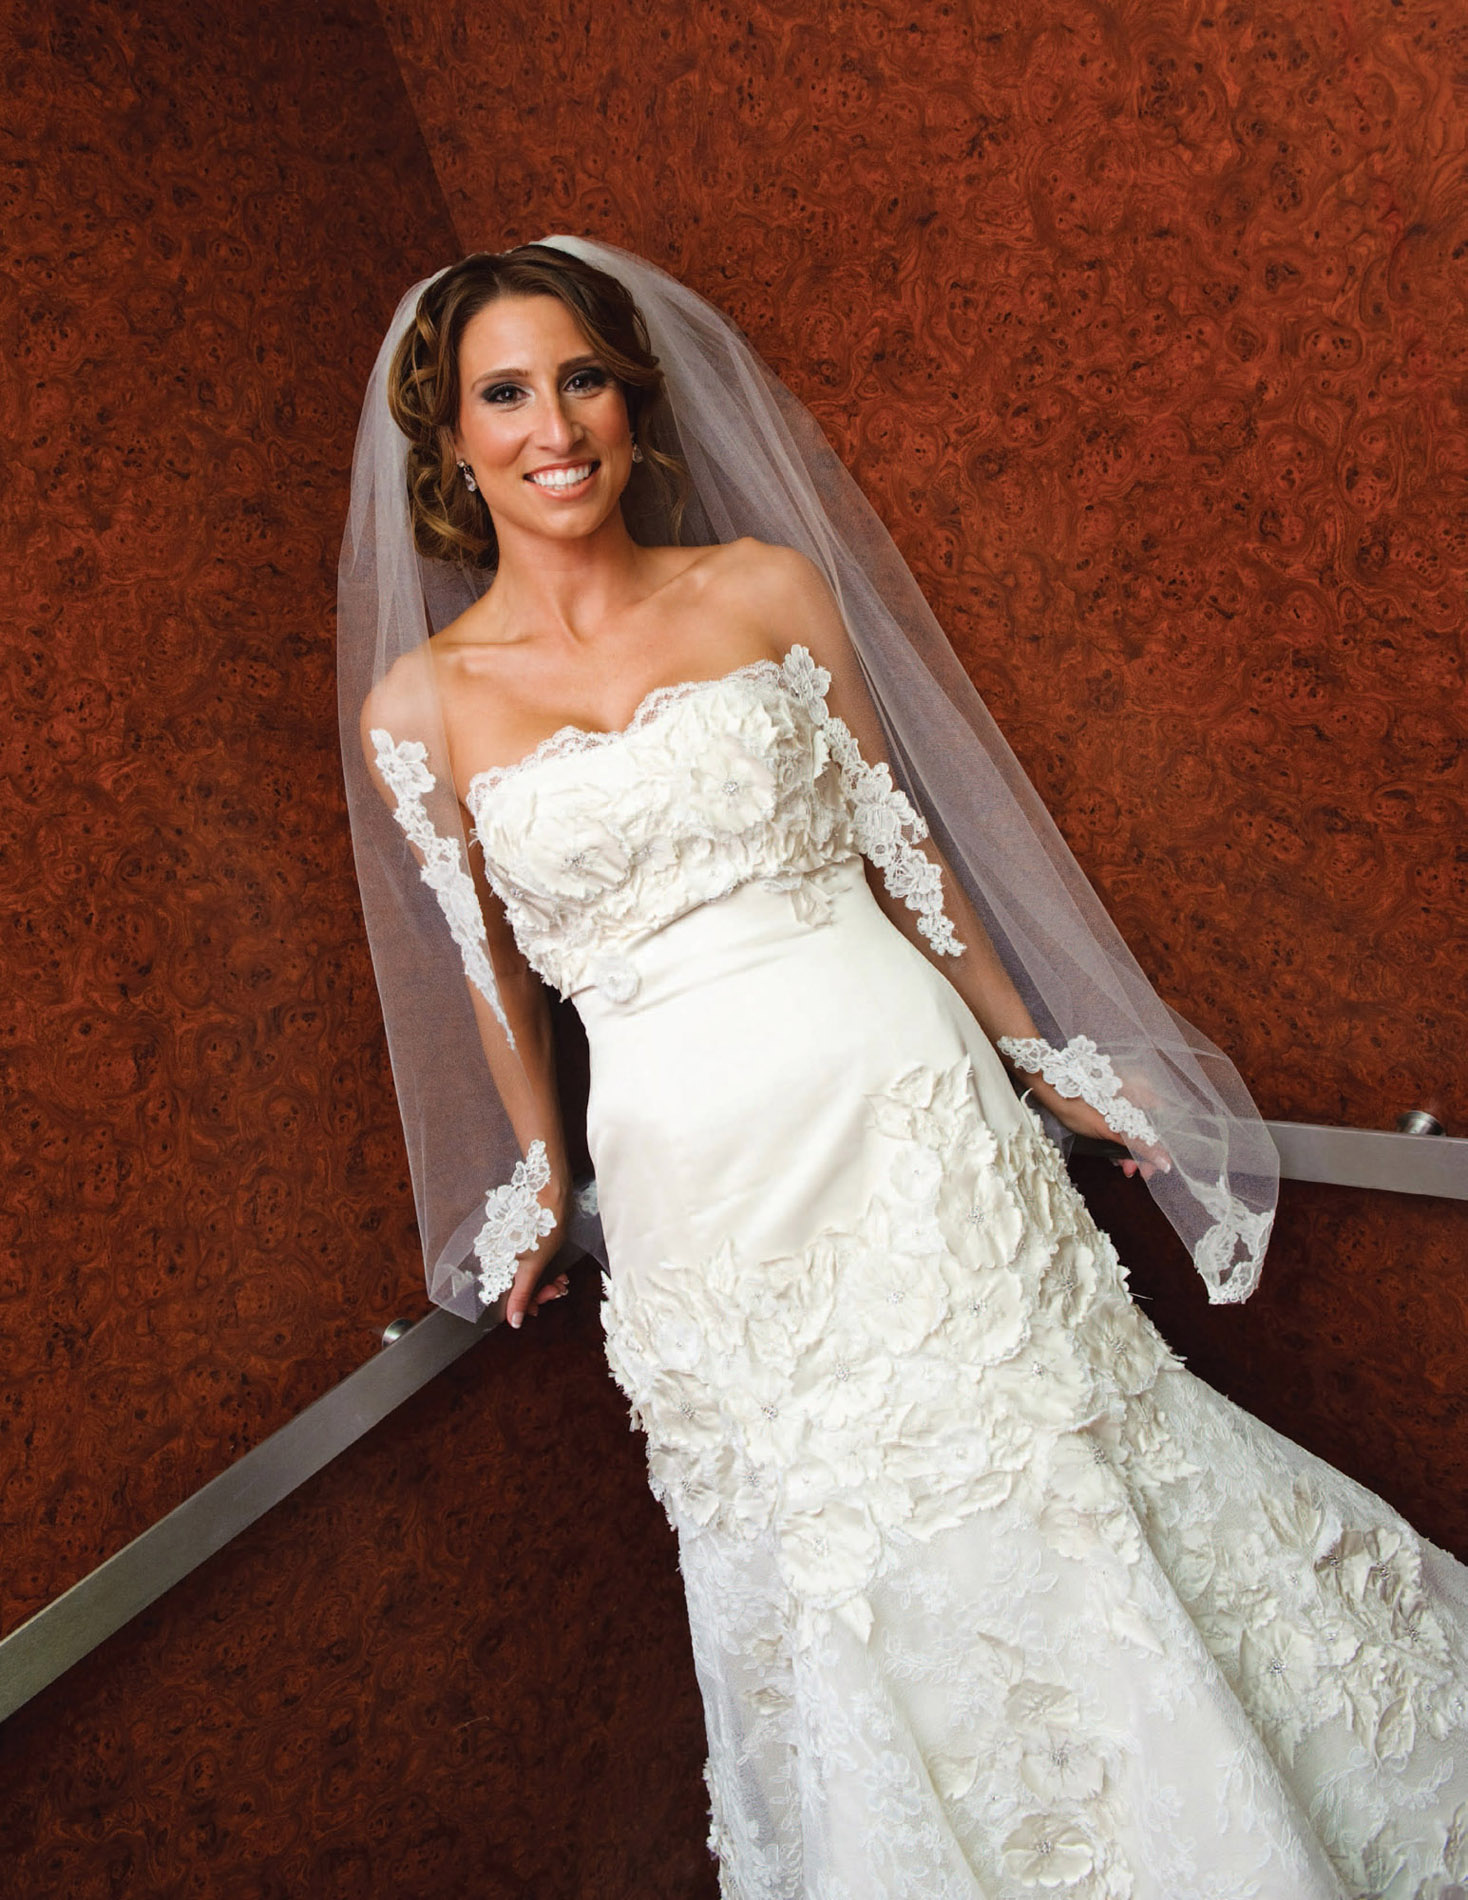
Image 8-4—I bounced TTL flash into the elevator above and behind me for this impromptu shot of Denise. (1/160 second at f/4.5 and 1000 ISO; Lens: 24–70mm f/2.8 at 28mm; On-camera TTL bounce flash)
Finally, image 8-4 shows an impromptu photo of Denise that was shot as we were riding the elevator. I turned my flash around and bounced it into the elevator above and behind me. I asked her to lean back into the corner of the elevator. The composition was purposely diagonal to make use of the strong lines in the frame.
For image 8-3, where Denise was backlit, I based my camera settings on the background, trying to retain as much detail as possible. For images 8-2 and 8-4, the on-camera flash did most or all of the work in lighting the entire scene. Because I used TTL flash there, my camera settings could have varied and I would have attained the same results. This is a key element to keep in mind: when your flash is the sole source of light, you are allowed a fairly wide range of camera settings. TTL flash will pick up the difference and give you correct overall exposure.
Controlling Light Falloff with Equidistant Bounce Flash
The light from your speedlight diminishes over greater distances, which is easily observed in photographs. We’ve all seen how people in the foreground are brighter than people in the background. This phenomenon is called light falloff. It’s one of those things that just makes sense when you think about it—the farther you move from a light source, the dimmer the light will be. When using an on-camera flash as a direct light source, this means the background will become progressively darker as it recedes into the distance.
With directional bounce flash, we can overcome this light falloff. Bouncing your flash off various surfaces will give you a larger light source—and, hence, softer light. Bouncing it at a sideways angle relative to your subject will also give you directional lighting. Better yet, it will give you equidistant lighting, meaning that your foreground and background could be equally well lit.
This is another big advantage of moving away from the idea of bouncing flash directly toward the subject (or group of subjects) with a bounce card or a generic plastic modifier on your flash. In a group portrait, doing so would mean that the people in the frame would be unevenly exposed. For example, the person closest to you might be overexposed compared to the other people in the frame. A more even exposure can be obtained by bouncing your flash so that it emanates from a surface that is equidistant to your subjects.
Image 8-5 clearly explains the idea behind equidistant bounce flash. I bounced my flash to the left of me, off the wall parallel to this row of musicians. That wall consisted of wooden paneling and brick work. It wasn’t a very reflective surface, but at 2000 ISO and a wide-open aperture, enough light returned to evenly light up the entire scene in front of the camera. Notice how the people in the background are at about the same exposure level as the musician right in front of me. When post-processing my RAW file, all it needed was a slight correction to the color balance. I didn’t need to do any dodging or burning to even out the exposure. This is because the light source (the wall opposite them) was equidistant to both my foreground and background.

Image 8-5—Bouncing my flash off a wall that was equidistant to all the subjects produced an even exposure all the way down the line of musicians. (1/60 second at f/2.8 and 2000 ISO; Lens: 24–70mm f/2.8; On-camera manual bounce flash at full power; Modifier: BFT)


Image 8-6—Bouncing off a surface that was equidistant to the subjects produced even lighting across the group. (1/80 second at f/2.8 and 2000 ISO; Lens: 70-200mm f/2.8; On-camera TTL bounce flash; Modifier: BFT)
If you have a scenario like the one in image 8-6, where the bridesmaids were watching the bride and groom’s first dance, you can use this technique to get a nearly equal amount of light on the whole row of people. Bouncing your flash off a surface that is equidistant to them means that they will all be lit about the same amount. This translates into less dodging and burning in post-processing.
This technique is also very useful when photographing corporate events, where you will inevitably have someone closer to the camera—possibly with his back to you. The way to get everyone equally well exposed is to bounce your flash off a wall or the ceiling to the side of everyone, in such a way that there is an equal amount of light on everyone.
To reiterate: this even lighting was achieved by not bouncing the flash off the ceiling and toward my subjects. Instead, I flagged my flash so that there was no direct flash falling on my subjects. Then, I bounced my flash off some point that was equidistant to everyone. Because the light had the same distance to travel to everyone, everyone was evenly illuminated by the flash. There was no need to call up the local correction brush in Adobe Camera Raw or Lightroom. It was all done in the camera!
Many of the bounce flash techniques described in this book are heavily dependent on shooting indoors, where there are places to bounce flash off. Therefore, it might not seem possible to use these techniques outdoors—after all, you can’t bounce flash off the clouds. Quite often, the simplest solution is just to have someone help you by holding up a reflector behind you as you bounce your flash into it. Other times, nearby surfaces (buildings, etc.) can be used to bounce flash.
While there are obvious limitations in applying bounce-flash techniques outdoors, there are times when they can still be quite effective. Do keep in mind that it isn’t possible to match bright daylight with bounce flash outdoors—you need the ambient levels to be appropriately low enough that the outdoors bounce flash can have an effect on the final image.
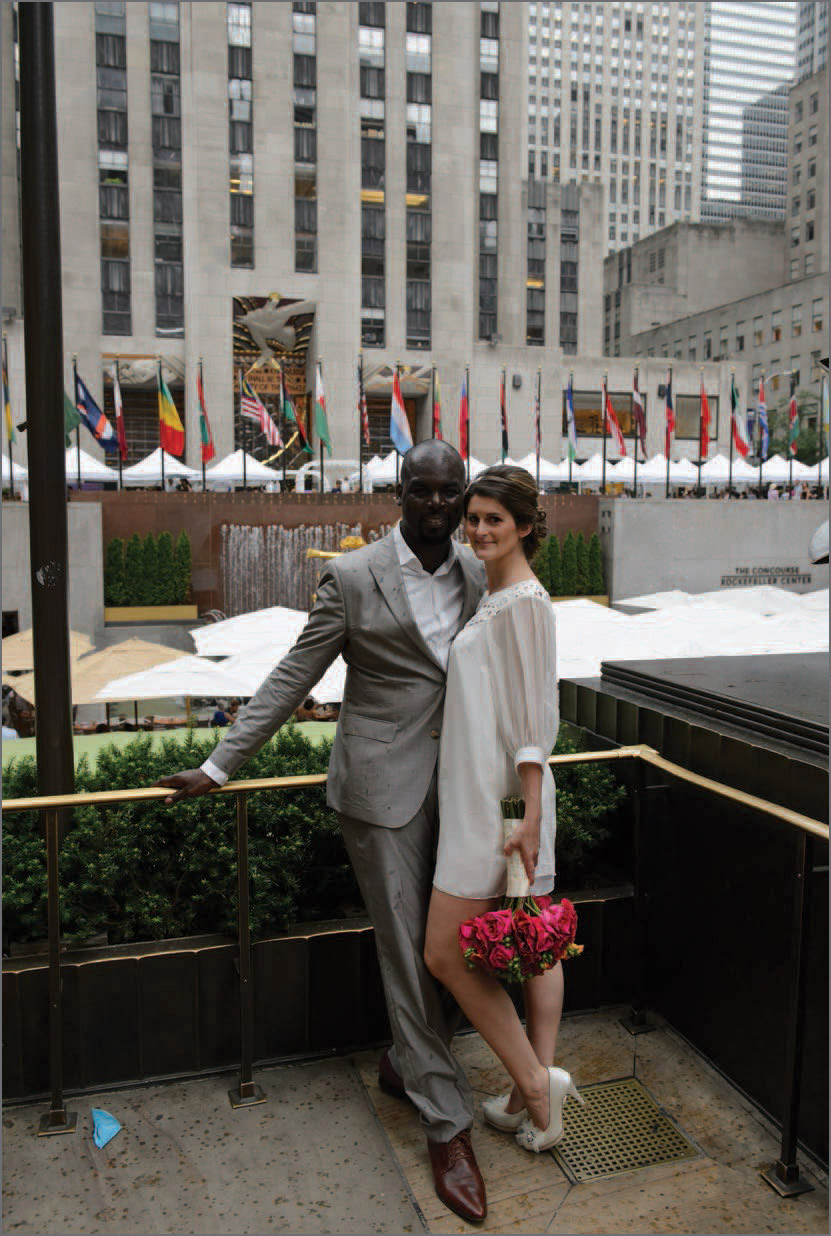
Image 8-7—Lucia and Alvin photographed with just the ambient light.
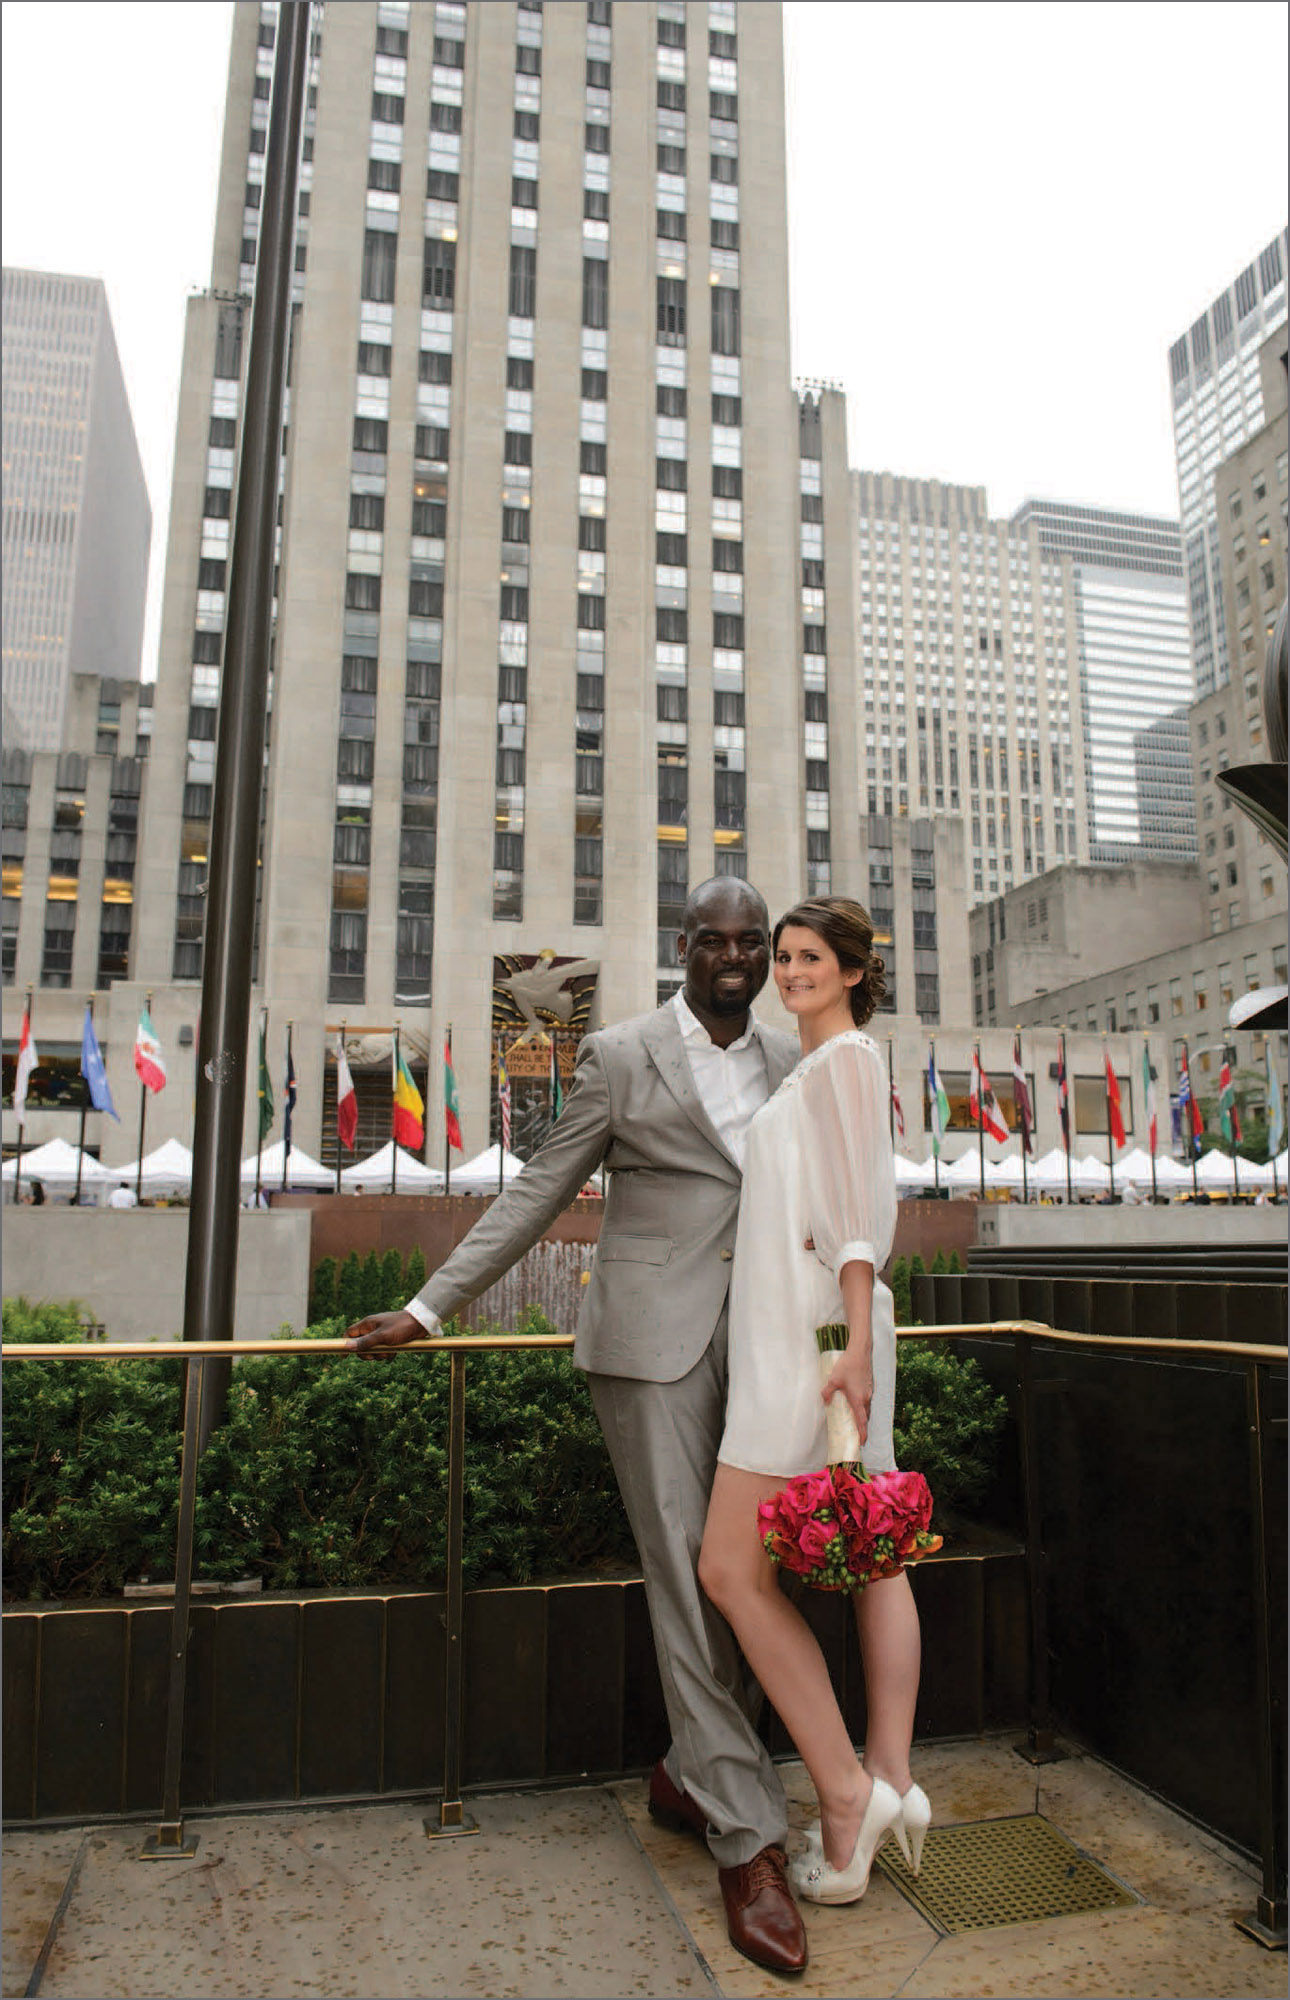
Image 8-8—Flash bounced off the building facade behind me opened up the shadows for happier lighting. (1/250 second at f/4.5 and 800 ISO; Lens: 24–70mm f/2.8 at 24mm; On-camera TTL bounce flash)
Let’s look at how bounce flash was used outdoors in some examples from a photo session I did with Lucia and Alvin, after their wedding in New York City’s Central Park.
One of our stops was at the iconic Rockefeller Plaza. I had an attractive couple and a nice setting, but image 8-7 shows that the ambient light on this gray day wasn’t going to cut it. I knew that the plaza’s security personnel would be on top of us immediately if I used an off-camera flash with a softbox. So the softbox was folded away and I just used on-camera bounce flash to shoot image 8-8. Bouncing my flash off the building facade directly behind me filled in the shadows nicely for happier lighting on the newlyweds.
By the time we got to Times Square, the rain wasn’t just a drizzle anymore, so I set Alvin and Lucia up under a building overhang (image 8-9). Working with such a tight space, and with that many people scurrying around, a softbox would not have been practical. So I simply bounced my flash off the metallic pillar behind me. Images 8-10 and 8-11 give you a behind-the-scenes look and a peek at how the ambient light alone looked on the couple.

Image 8-9—In this tight space, with people all around, on-camera bounce flash was a far more practical solution than off-camera lighting on the newlyweds. (1/250 second at f/4.5 and 800 ISO; Lens: 24–70mm f/2.8 at 30mm; On-camera TTL bounce flash)

Image 8-10—A comparison image without flash. As you can clearly see, the bounce flash definitely had an effect on the final image.

Image 8-11—Here’s an iPhone shot of where I positioned myself.


Image 8-12—Adding bounce flash yielded soft, flattering light on my subject. (1/100 second at f/3.2 and 800 ISO; Lens: 24–-70mm f/2.8; On-camera bounce flash; Modifier: BFT)

Image 8-13—At the same camera settings as the flash image, the ambient-only image shows her eyes in shade. Even with the correct exposure settings for the ambient light, the unattractive shadow patterns would have persisted.
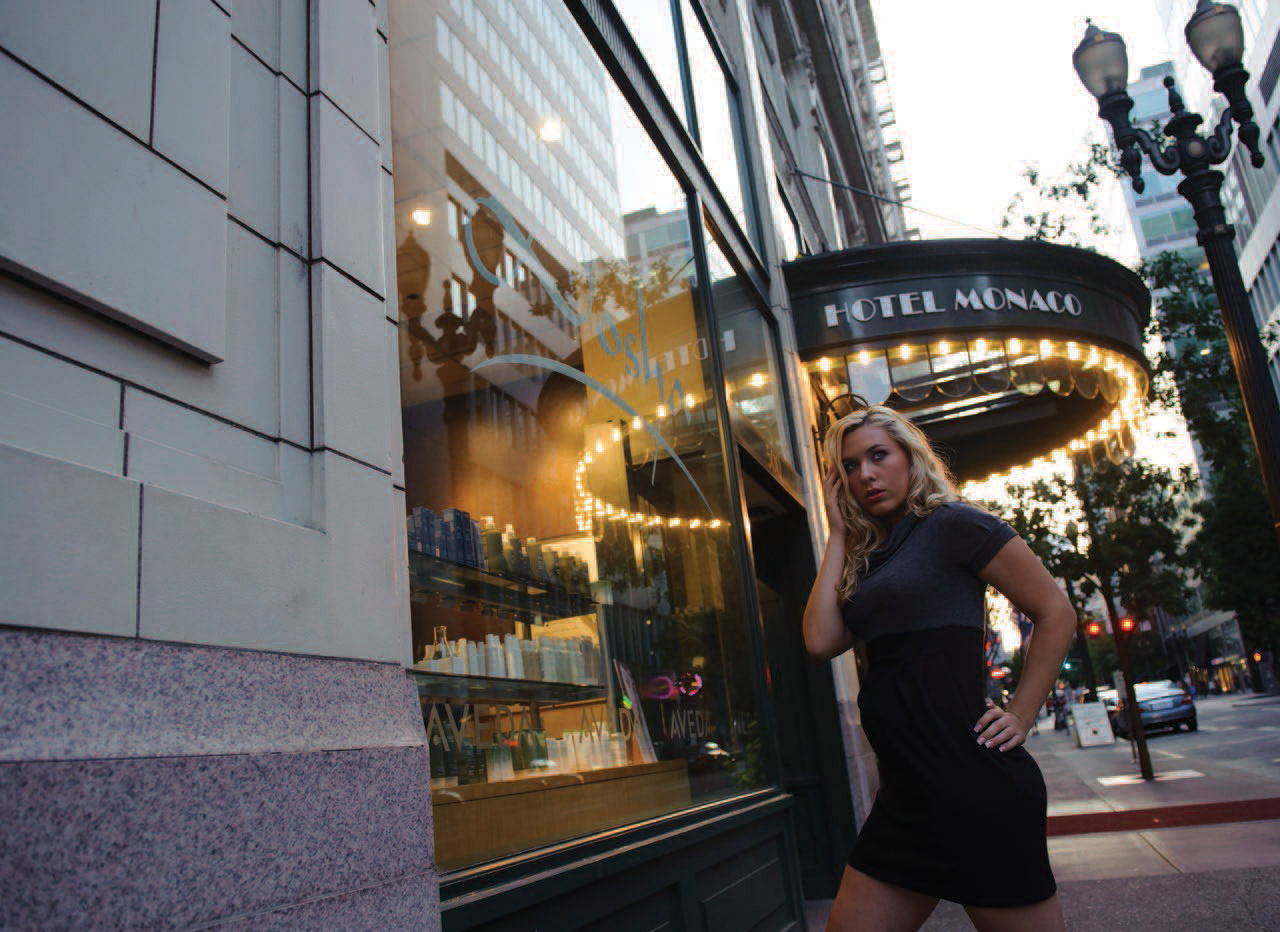
Image 8-14—The pull-back shot shows the surface I bounced the flash off—to camera left.
Our next image sequence features Crystal, a model who was photographed on a city street during the early evening. In image 8-12, the soft, flattering light on her is from the flash, which was bounced off a surface outside. Image 8-13 shows how the same shot looked without flash. It was taken at the same settings as the flash image, so it’s underexposed—but even if I had exposed correctly, you can see that her eyes would still have been shrouded in shadow. I want a sparkle in my subject’s eyes, and I want flattering light on her features. Your subject’s nose definitely shouldn’t cast a strange shadow across their cheek or mouth.
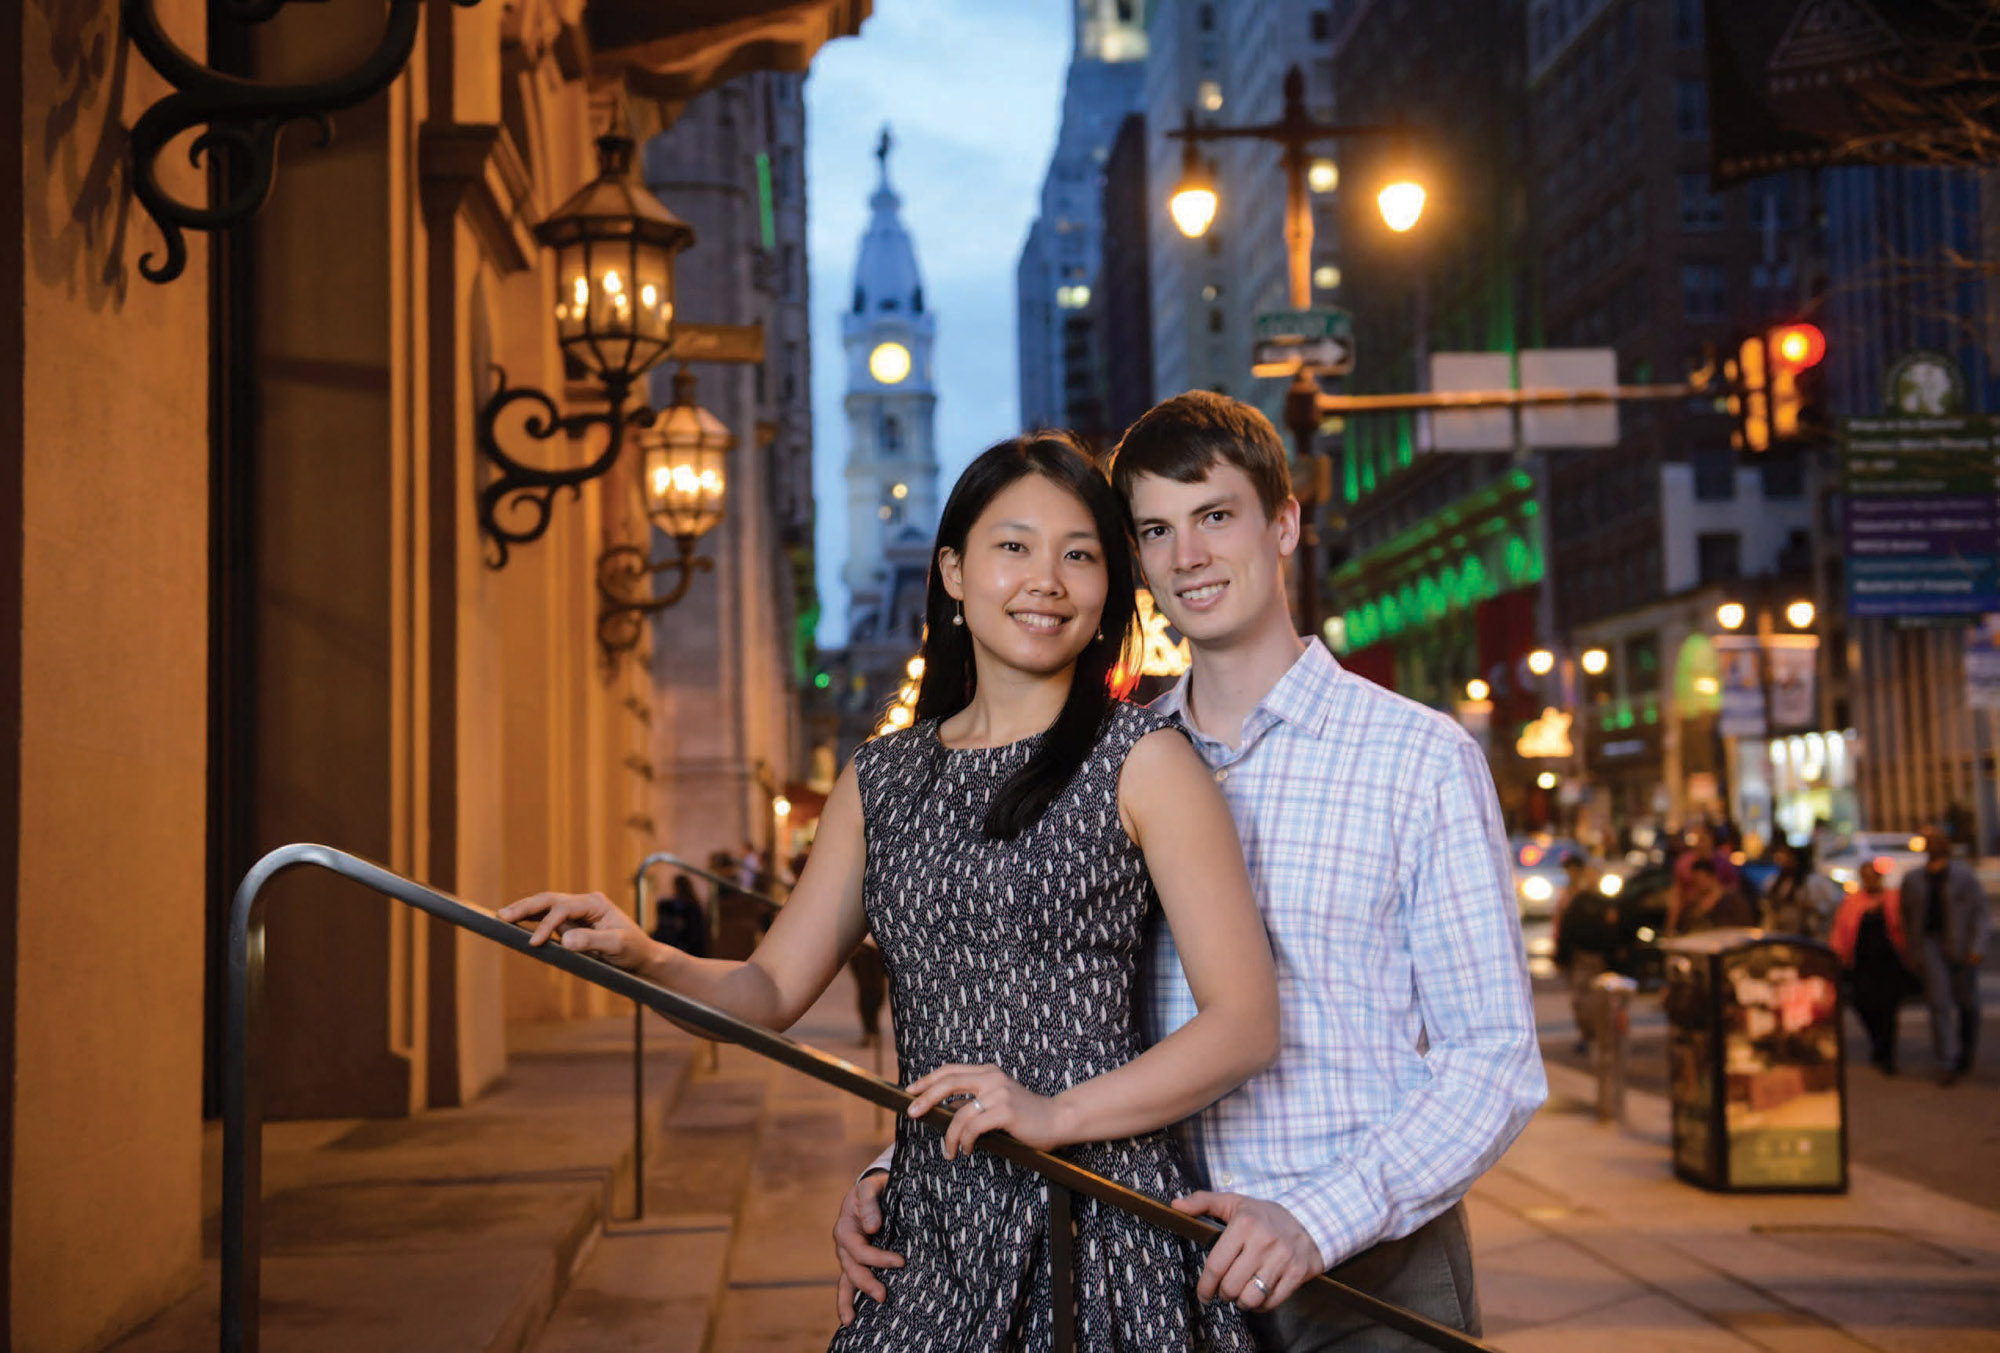

Image 8-15—The couple photographed with the ambient light only.

Image 8-16—On-camera bounce flash made shooting convenient and produced appealing results. (1/60 second at f/3.2 and 1600 ISO; Lens: 24–70mm f/2.8; On-camera bounce flash.
Images 8-15 and 8-16 show another example of using on-camera bounce flash to light up the couple—this time against the evening city lights in Philadelphia. I had been using off-camera flash for most of this photo session, but at some point it was just faster to use on-camera bounce flash instead of positioning the off-camera lighting. Notice the high ISO here; it was necessary in order to ensure that the background city scene and lights registered in the frame. At the same time, it allowed enough light from my flash to reach the couple. I didn’t use a gel here because the flash picked up a warm color cast from the building facade—enough to mute the cold tones from the speedlight.
How Far Can You Bounce Your Flash?
The question might now come up: How far can you bounce your flash? The answer is quite straightforward: It depends on the power of your flash, the bounce distance (and surfaces), plus the ISO and aperture settings on your camera. Remember that handy mnemonic device (PAID) we learned back at the start of chapter 5? PAID stands for power, aperture, ISO, and distance—the four things that control flash exposure. Yup, we can’t really escape this.
So how far can you bounce your flash? It depends on how far (and reflective) the surfaces are that you are bouncing your flash off—as well as how high you’re willing to take your ISO, and how wide you can take your aperture. And, obviously, it depends on how powerful your flash is—which is why I would always recommend that you get the most powerful speedlight you can afford.
Let’s analyze an image from a wedding, and see what went into creating it. The initial shot (image 8-17) shows the scene and couple with the ambient light only; we can do better than this. Producing the final shot (image 8-18) required more than just adding a bit of TTL flash. It came together through a combination of choices and controlling the situation—the setting, the composition, the use of flash to augment the lighting, and my directions to the couple.

Image 8-17—Here is one of the test shots to show what the image looked like with the ambient light only.
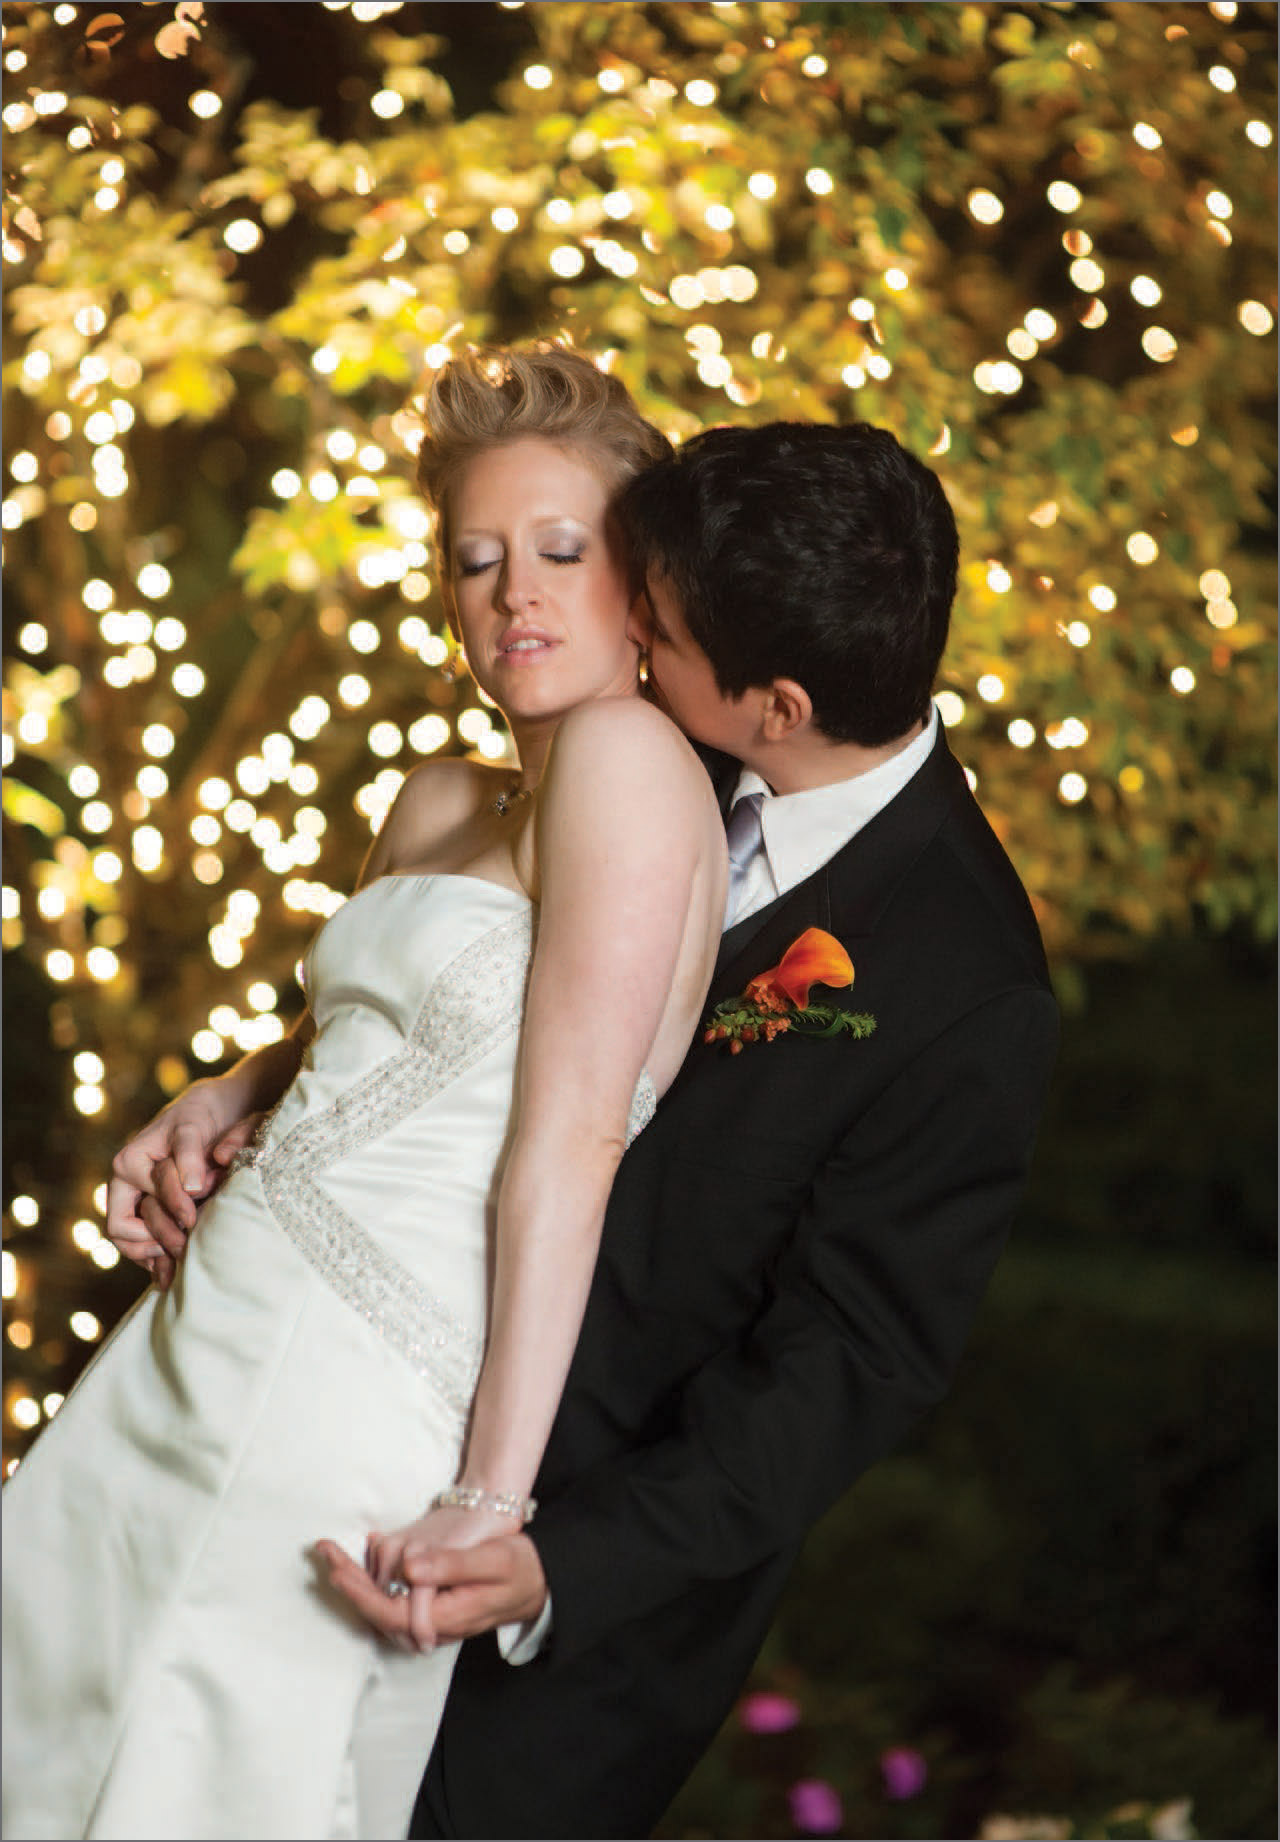
Image 8-18—Bouncing flash off the exterior wall of the venue let me create soft, directional light on the couple and make use of a scene where the ambient light on them was unappealing. (1/60 second at f/2.0 and 1600 ISO; Lens: 85mm f/1.4; TTL bounce flash)
I knew how I wanted to position the couple, but I also knew the light on them wasn’t ideal. Since I was working alone, I couldn’t rely on an assistant to hold a reflector or an umbrella/softbox. I knew I would have to add on-camera flash as a quick fix for the lighting, so I looked for something to bounce my flash off—and I figured that the exterior walls of the venue would work. The wall I chose was about 20 to 30 feet behind me, outdoors. Even then, I bounced my flash at an angle so that I could still have a measure of directional lighting on them. These are the two things that combined to make this the spot I chose to use: an interesting background and an area I could bounce flash off.
Detail Shots of the Wedding Rings
In photographing the detail images of the wedding rings, you obviously have to take care of the depth of field and the tricky focusing. But there are a few additional things to aim for:
• A context within which to place the rings,
• A few images with different angles, and
• Great lighting that is easily achievable.
Since I am usually pointing my camera and lens down at the rings, my flash is in an upright or nearly upright position so that it points toward the wall ahead of me. I want the light to come in at an angle nearly parallel to the table or object that the rings are on. I don’t bounce up into the ceiling, since that would give me very flat lighting. I want the light to come in from “ahead” of me—from a position forward of me, so that the light skims the surfaces and the rings (image 8-19). Adding a BFT to the setup blocks any direct light from hitting the scene.
Image 8-20 shows another case where I used bounce flash. Here, I had the light come from the opposite side from where I was shooting. Doing so creates a kind of wrap-around light as the bounce flash spills all around, but with the shadowed areas toward the camera. In other words, it looks nothing like you’d expect flash to look. Notice that I shot this at f/5.6; it’s unusual for me to shoot macro at this medium aperture. And as you can see from the photo, the depth of field is already quite shallow. The pull-back shot (image 8-21) shows how I bounced my flash off the glass doors and the wall above them.


Image 8-19—Detail shots like this can be beautifully lit with bounce flash. (1/160 second at f/9 and 1250 ISO; Lens: 105mm f/2.8 macro; On-camera TTL bounce flash; Modifier: BFT)

Image 8-20—I pointed my lens at an angle down toward the rings, then bent my flash head forward so that it pointed toward a wall in front of me. The BFT stopped any direct flash from hitting the scene. (1/250 second at f/5.6 and 1600 ISO; 105mm f/2.8 macro; On-camera TTL bounce flash; Modifier: BFT)
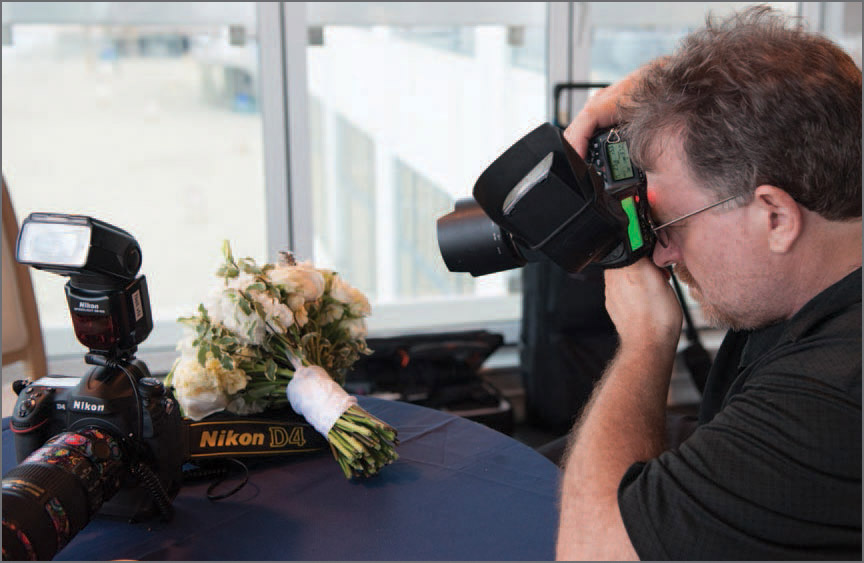
Image 8-21—I really did bounce my flash forward from me, with the BFT blocking any direct flash from the rings.

Image 8-22—This comparison photos shows the image without flash at the same camera settings.

Image 8-23—The image looked quite different when the flash was bounced behind me. While the light is still soft, it’s just not as interesting as the light direction in image 8-20.
Bounce Flash During the Church Ceremony
I don’t often use flash during the ceremony. I prefer the less noticeable option of just using the available light. But this church (images 8-24 and 8-25) was particularly dark, so I did some test shots early on—before anyone walked down the aisle—to determine the range of settings for proper exposure. I used my 50mm f/1.4 lens for some available light ceremony photos, but I had to rely on on-camera bounce flash for a large part of the event. With this, I had more control over the depth of field and the quality of the light.
For these images of Patrick and Alesha jumping the broom, I bounced my flash off the church wall to my right—higher up, so I wouldn’t blitz anyone in the face. (I also tend to crouch lower down in the aisle to remain as unnoticeable as possible.) Adding my BFT to the flash cut any direct light from falling on the couple.
“For these images of Patrick and Alesha jumping the broom, I bounced my flash off the church wall to my right—higher up, so I wouldn’t blitz anyone in the face.”


Images 8-24 and 8-25—Jumping the broom is an interesting part of wedding ceremonies in some cultures. As Patrick placed the broom for him and Alesha to jump over, I prefocused—so I was ready for the shot. (1/125 second at f/3.2 and 2000 ISO; Lens: 24–70mm f/2.8; On-camera manual bounce flash at full power; Modifier: BFT)
I had my flash in manual mode and set to full output because I remained in a fairly static position in the center of the aisle. In other words, I set my flash to full output, bounced it, and then changed my camera settings until I had a correct exposure. Using the flash in manual mode at full (1/1) power ensured that I was using every bit of light the flash could generate. From there, I could drop down to a lower ISO and/or a smaller aperture to optimize the images. As long as my distance remained fixed, my exposures remained consistent from shot to shot, given a fixed ISO, aperture, and flash power combination.
“I had my flash in manual mode and set to full output because I remained in a fairly static position in the center of the aisle.”
Bouncing Flash Forward—Without That Direct Flash Look
When bouncing my on-camera flash, I rarely point the flash straight up. Most often, the flash is pointed behind me or to the side—at least to some extent. This way, I get directional light and that off-camera, softbox effect. However there are times when that just isn’t very practical.
Let’s look at an example. The large room shown in image 8-26 was the site of an indoor wedding ceremony. As you can see, the ceiling was light brown with wooden beams. These thick crossbeams had the effect of blocking the flash when bounced; they contained the spread of light. As a result, bouncing the flash behind me just about killed the light from my flash—very little of it returned to light my subjects.
I had to get flattering light onto the bride and groom during the ceremony. The most logical way to do this, and still get soft light on the couple, was to kneel down in the center aisle and point my light forward at an angle. But I still needed to block any direct flash from hitting them. To do this, I kept the BFT rotated so that the open side was at the top; the BFT was closed on the underside of the speedlight (image 8-27). This way I could point my flash forward at an angle, but flag the light to keep direct flash off my subjects. Since the light was coming from the same axis as the lens, it was even and quite flat—but lacking the unattractive harsh shadows of direct flash. Image 8-28 is an example of the altar shots from this wedding.


Image 8-28—Flagged and bounced forward, the light from the flash is a bit flat—but still far superior to the light from a direct on-camera flash. (1/100 second at f/2.8 and 2000 ISO; Lens: 70–200mm f/2.8 at 200mm; on-camera manual flash at full power and zoomed to max; Modifier: BFT)
How did I get to the correct exposure? Here’s the thought process. My distance was relatively fixed (since I didn’t want to be too intrusive), so I set the flash on manual at full power to give myself the most light output. Then, I selected the widest aperture available on the lens (f/2.8). That took care of three out of the four flash controls (power, aperture, and distance), leaving me one variable: the ISO setting. I adjusted my ISO up until I got to the correct exposure; this is how I ended up using 2000 ISO.
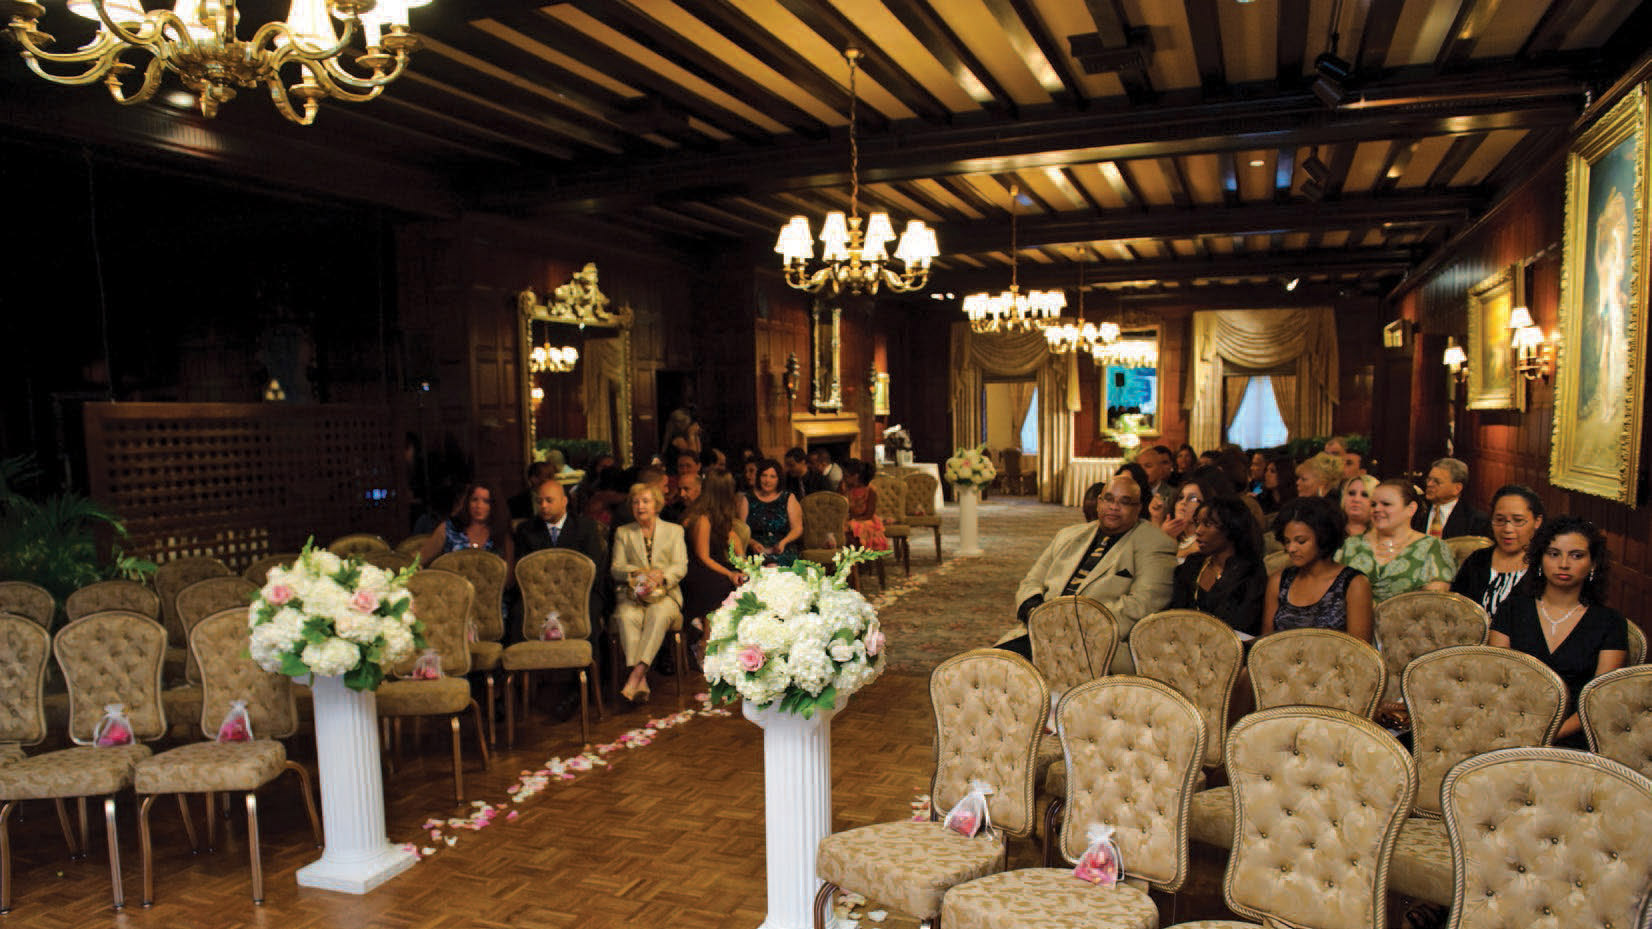
Image 8-26—Bouncing the flash off this ceiling was impractical; it contained the spread of light and returned very little to the subjects.

Image 8-27—From my position in the center aisle, I bounced the flash forward—keeping the BFT rotated to the bottom of the flash to block direct light from hitting the subjects at the altar.
Wedding Portraits on the Run: Finding a Bounce Surface
When I photograph the formals of the bride and groom and their families, it is easier to set up proper off-camera lighting. I usually aim to photograph the formals outside somewhere—but quite often the couple wants a few quick photos inside the church. Sometimes, these interior shots are a spur-of-the-moment decision, so instead of running to my car to fetch my lighting gear and taking the time to set it up, I rely on what I have on hand: on-camera flash.
Inside a church, though, it is often tough to get a decent ISO and aperture for formal portraits if you’re relying solely on bounce flash. Churches are usually just too large for that—and they often have walls and ceilings that aren’t white. When that’s the case, it’s time to adapt. Instead of photographing them right there up at the altar, I’ll move the couple all the way down the aisle toward the main door, until I have a wall behind me that I can use for bounce flash. Then I use TTL flash bounced off the wall up and behind me to get enough light on them. It’s a simple, elegant solution—and the results look great.
With this photo of Karla and Ken (image 8-29), I could have used a lower ISO because the wall behind me was fairly close—but I was limited by the available light that I was exposing for in the background. I wanted detail in the background, but dragging the shutter to 
![]() second was as slow as I wanted to risk it. The couple was quite underlit by the ambient light, so the flash was able to freeze any camera shake.
second was as slow as I wanted to risk it. The couple was quite underlit by the ambient light, so the flash was able to freeze any camera shake.
Similarly, with Jennifer and Craig (image 8-30) the formal photos were to be taken at the reception venue, but they still wanted a few images in the church. In this case, I bounced the flash off a white wall to the side of the camera. This church was small enough inside that I could get great results with simple on-camera bounce flash, flagging the light with the BFT.

Image 8-29—Moving closer to the doors (away from the altar) let me bounce flash off the back wall of the church for soft lighting on the couple. (1/40 second at f/3.5 and 800 ISO; Lens: 24–70mm f/2.8; On-camera TTL bounce flash)

Image 8-30—This church was smaller, so I was able to bounce light off the side wall with the couple closer to the altar. (1/50 second at f/4 and 800 ISO; Lens: 24–70mm f/2.8; On-camera TTL bounce flash; Modifier: BFT)
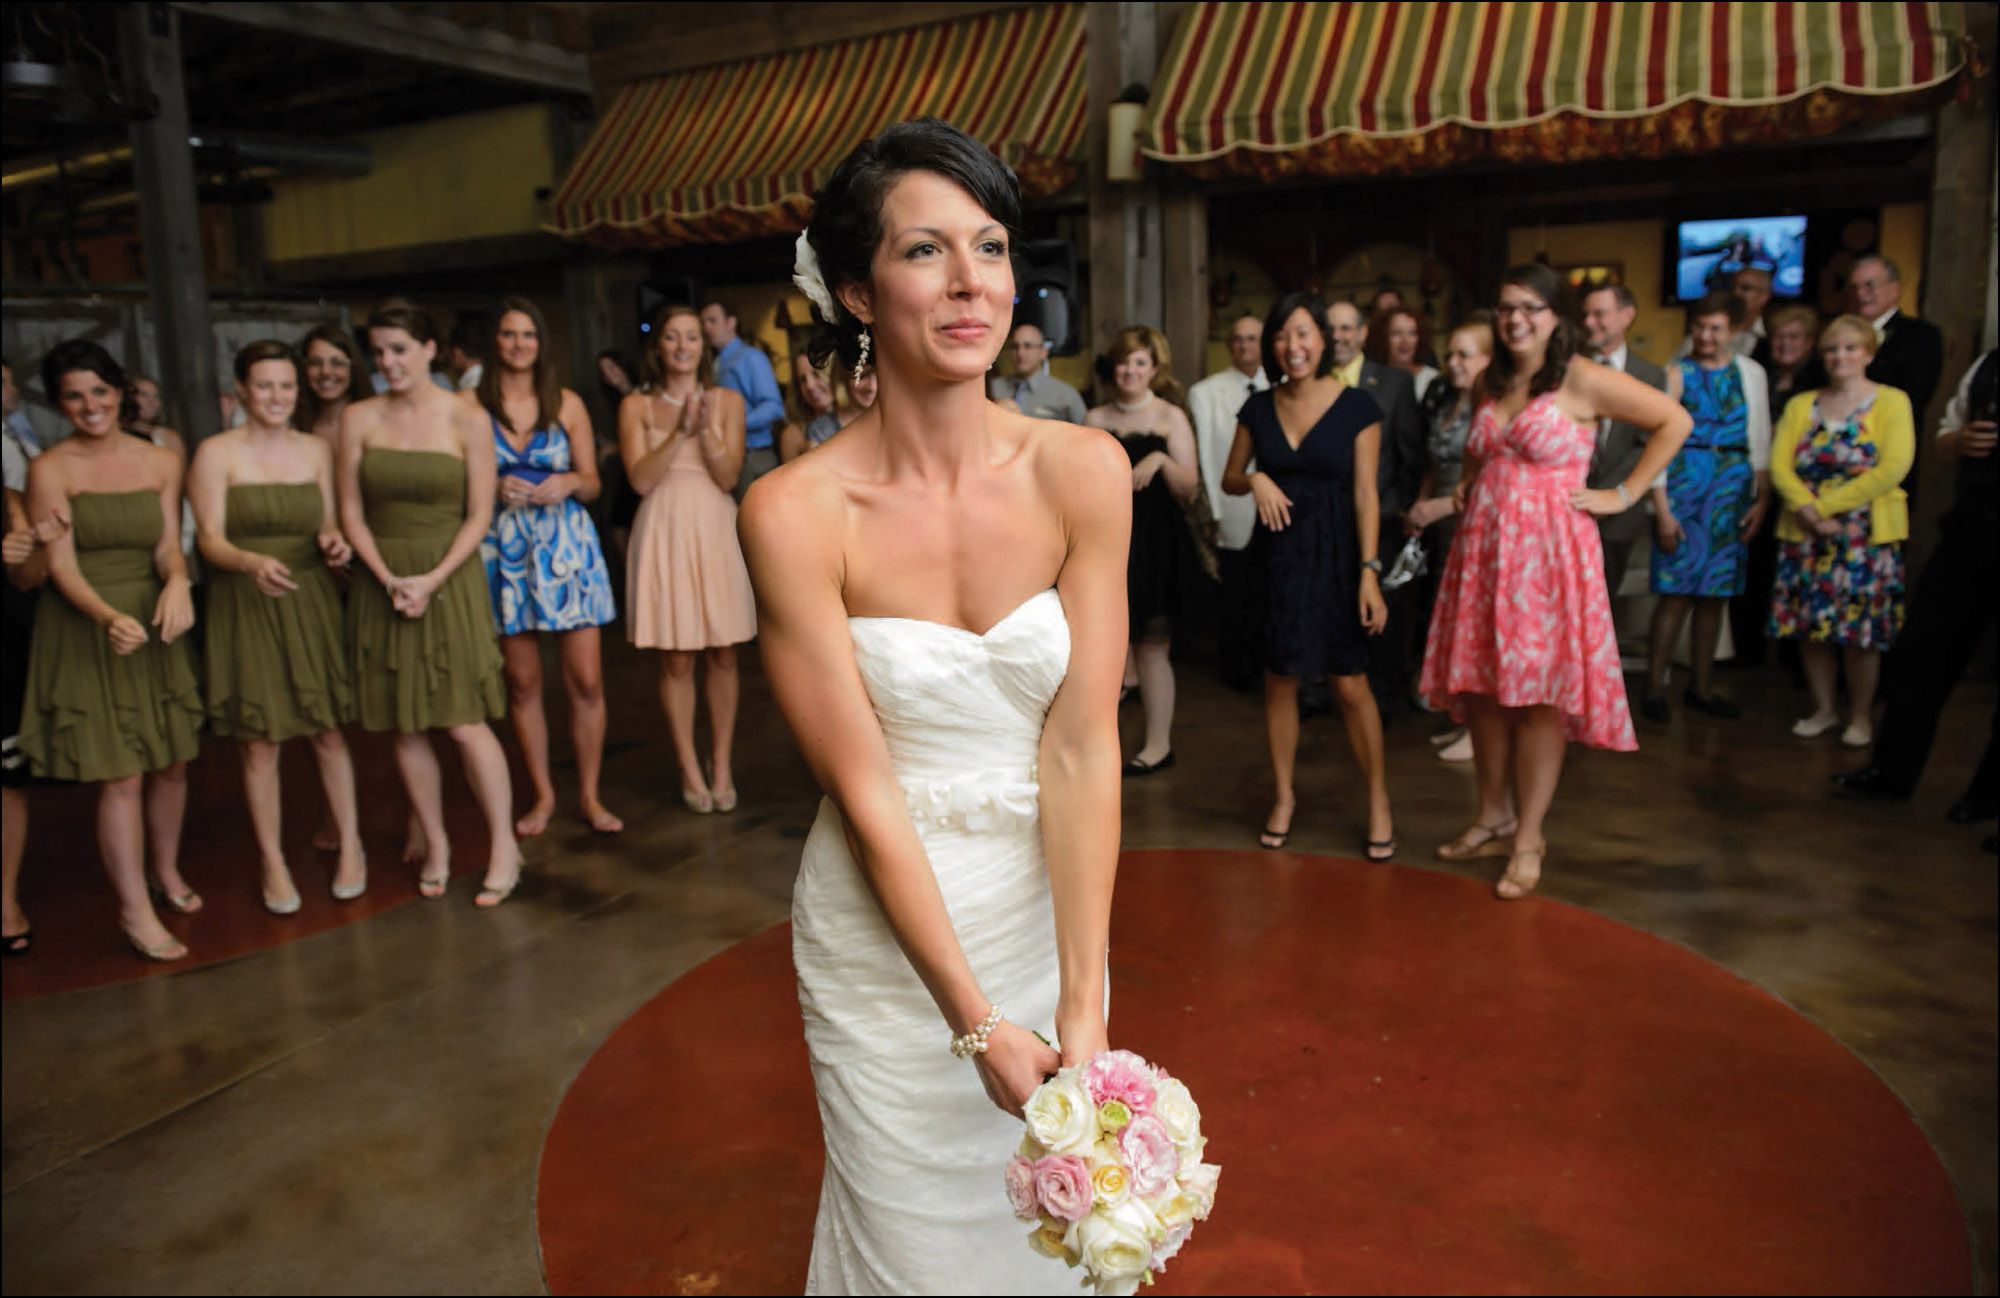
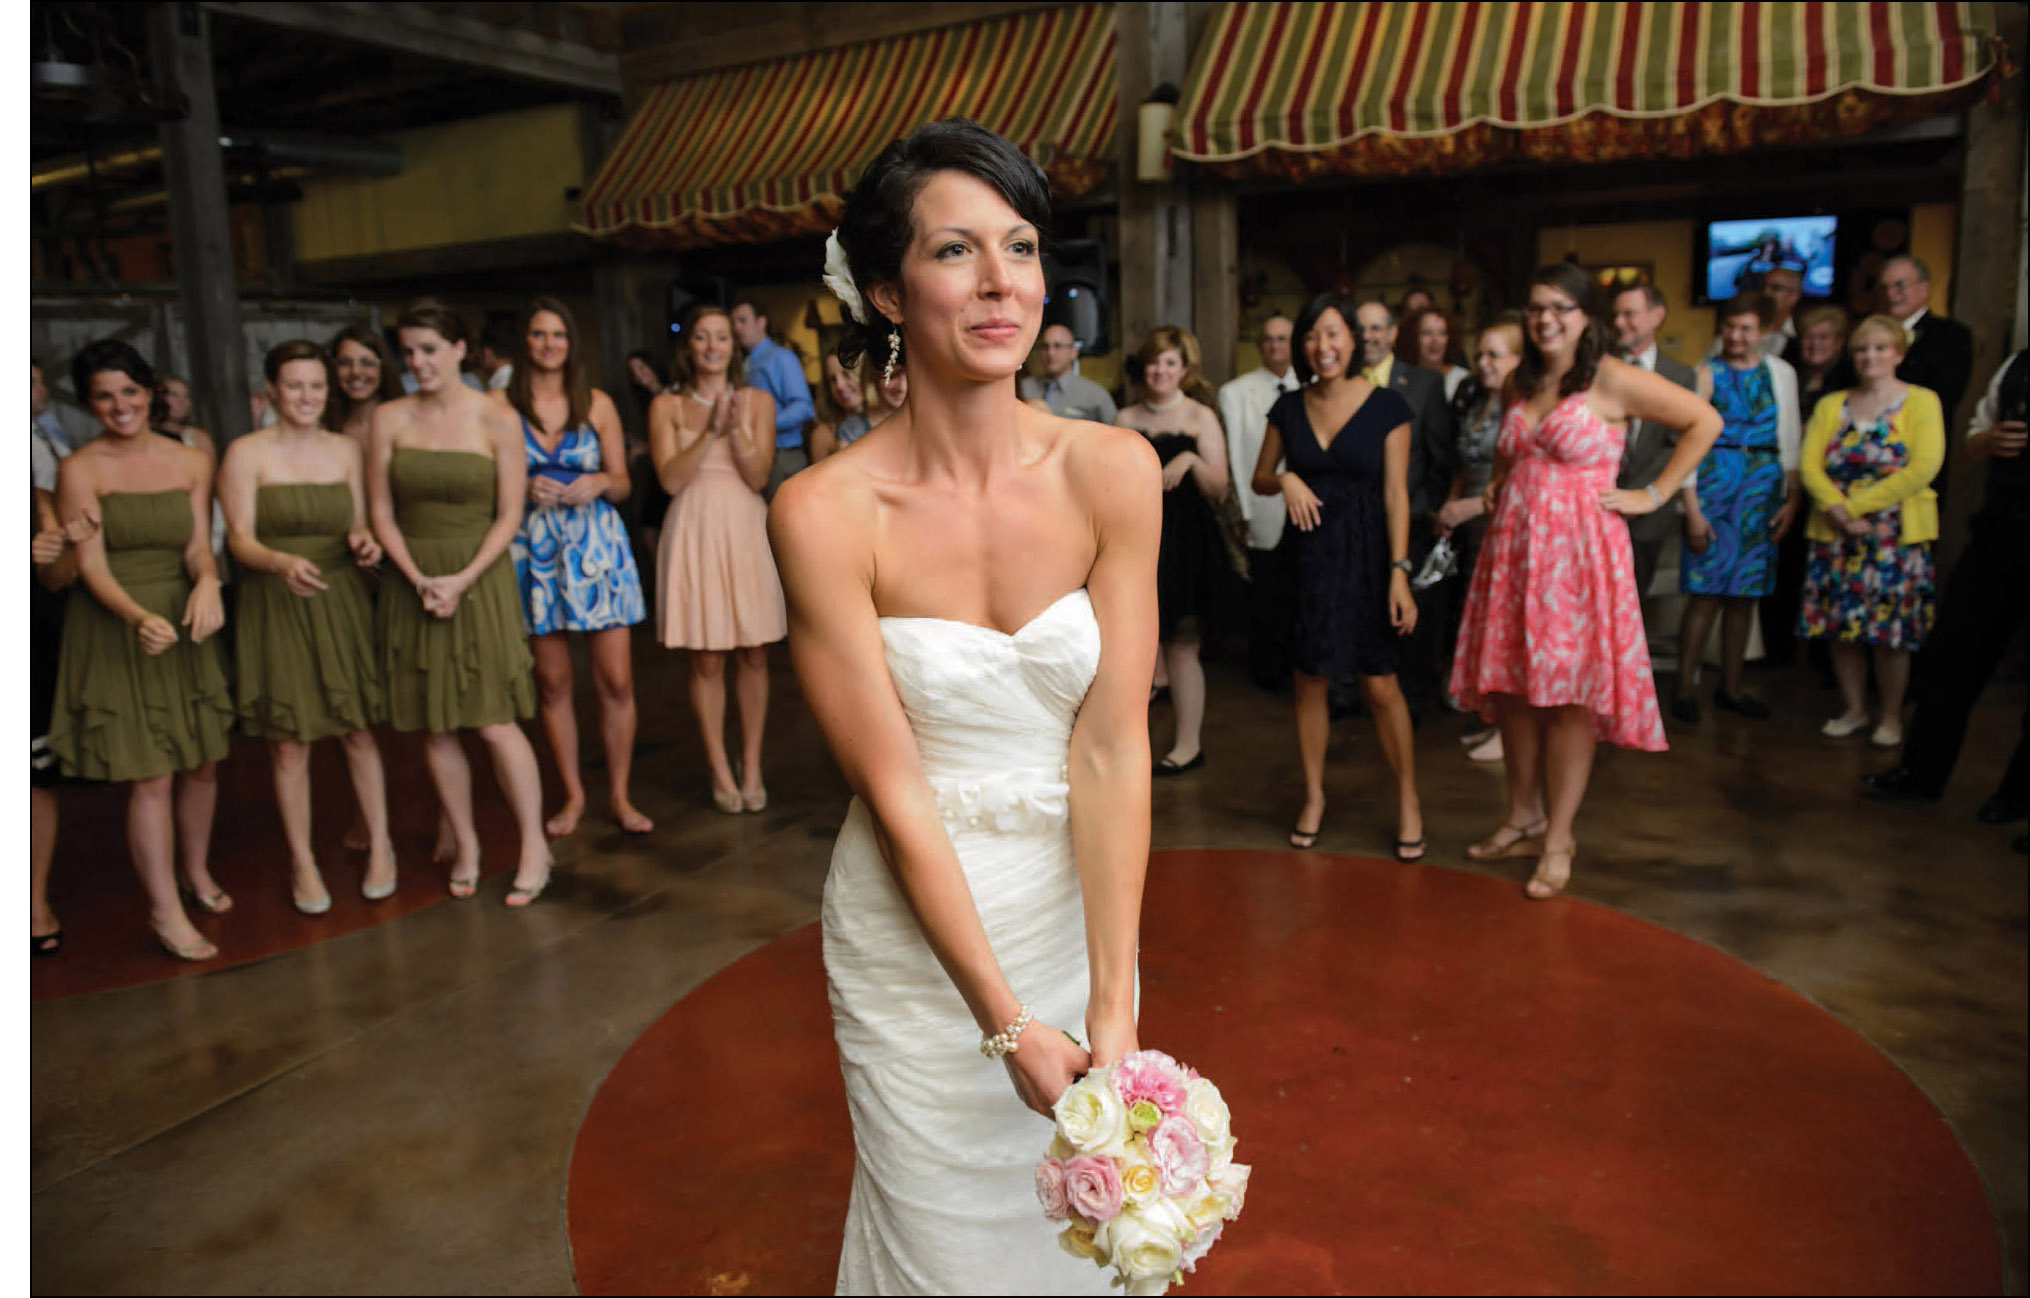
Image 8-31—I bounced the light behind me, over my shoulder, at an appropriate angle to place that hypothetical “softbox” behind me at a safe 30–45 degree angle. It gave me clean, open lighting on my subjects’ faces. (1/60 second at f/3.5 and 3200 ISO; Lens: 24–70mm f/2.8; On-camera manual bounce flash at full power)
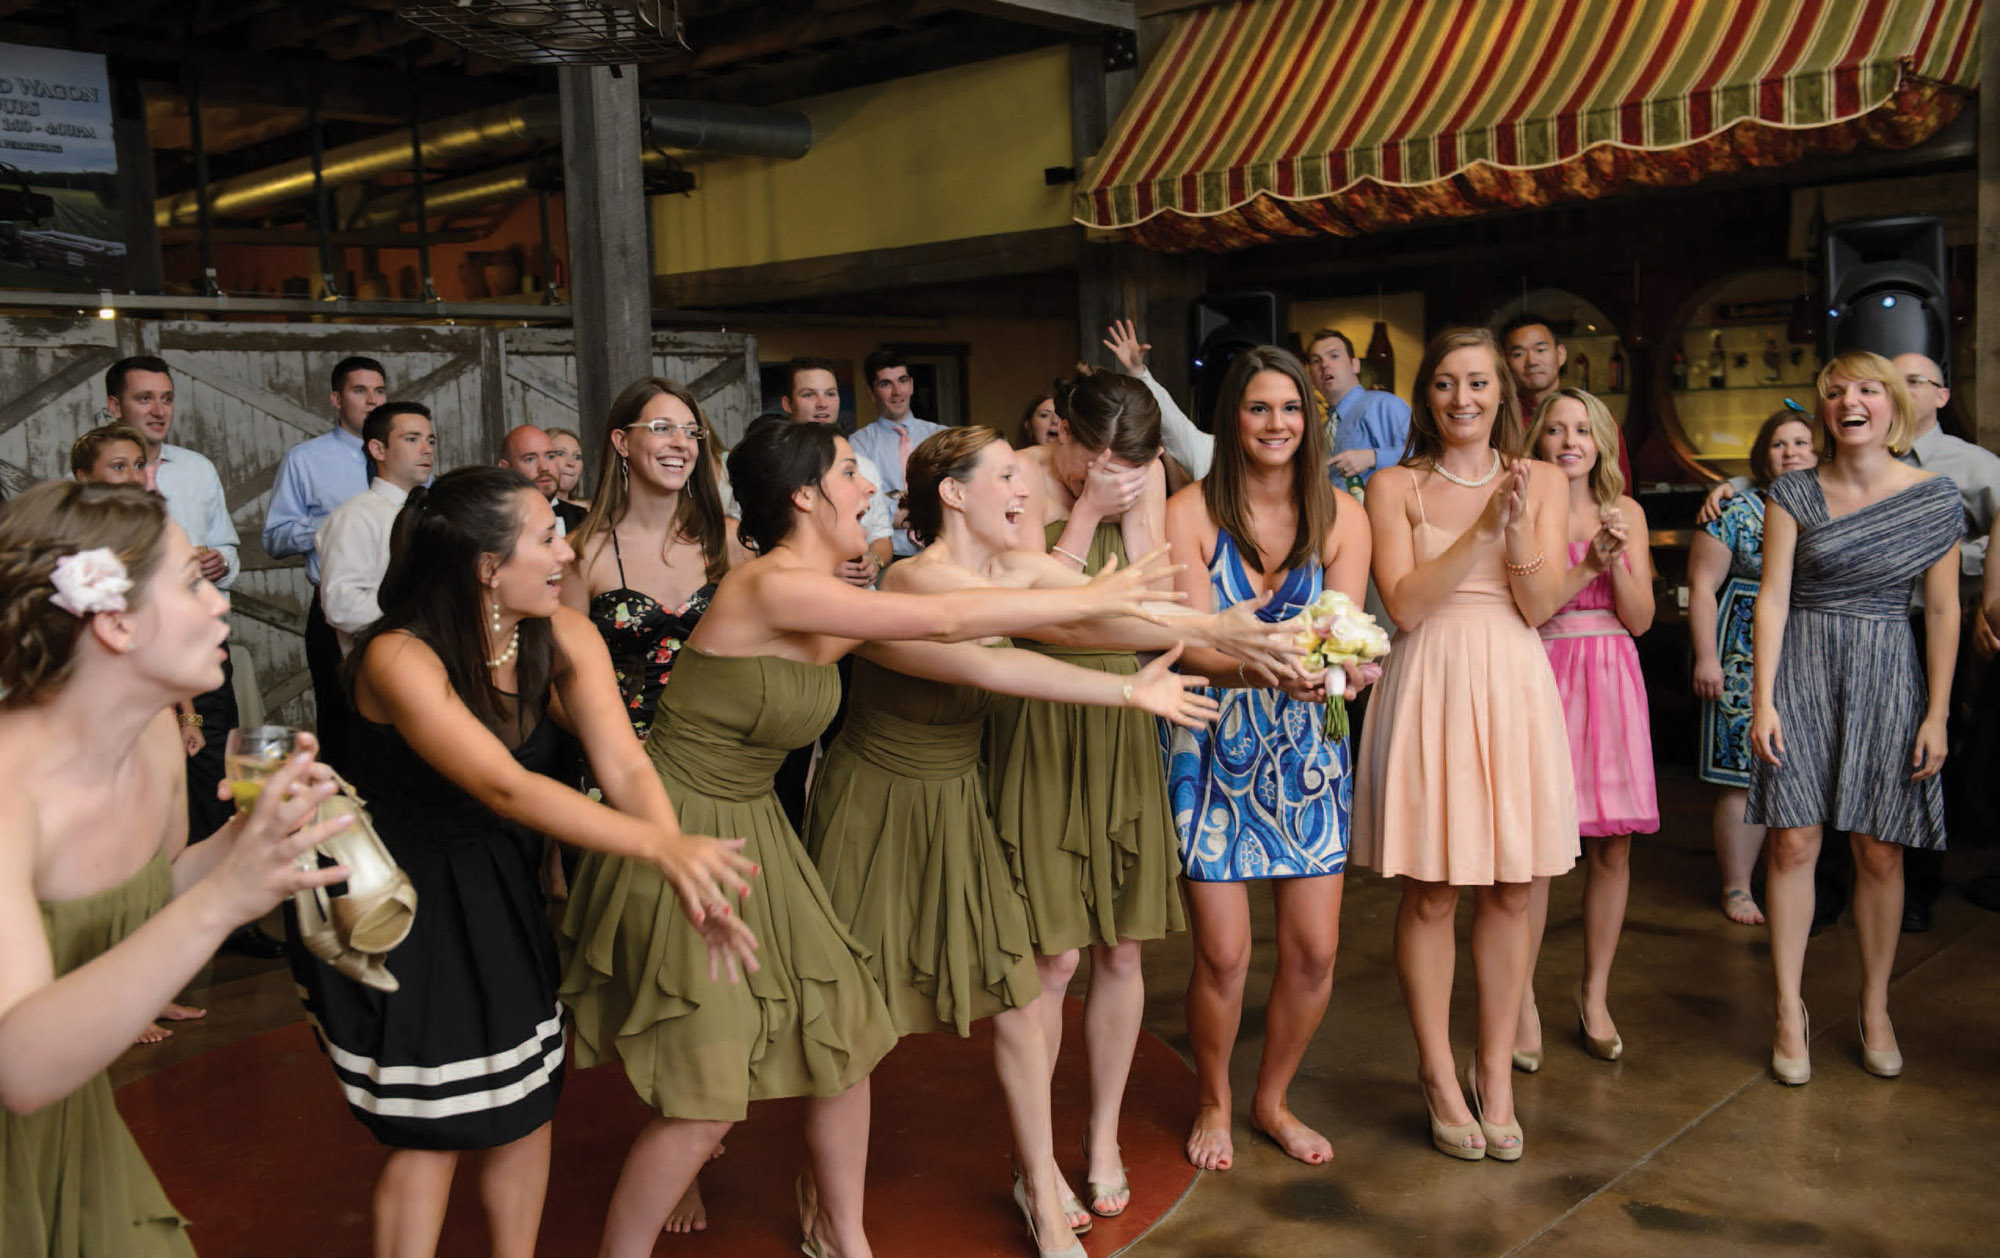

Image 8-32—Yes, the one bridesmaid actually ducked her head so that she wouldn’t catch the bouquet. (1/60 second at f/4 and 3200 ISO; Lens: 24–70mm f/2.8; On-camera manual bounce flash at full power)


Image 8-33—Bounce flash off a wall lit the couple and the guests encircling them. (1/60 second at f/3.2 and 3200 ISO; Lens: 24–70mm f/2.8; On-camera manual bounce flash at full power)
While I prefer TTL flash when I use bounce flash, there are times when I do use my flash in manual exposure mode. You’ve already seen this in a few previous examples, but let’s look at another context. Julie and Kenny held their wedding at a winery. The reception area had a beautiful wooden interior with canopies and other decorations, but no white surfaces (images 8-31 through 8-33). That made using bounce flash a touch more difficult. When I did a few test shots in this area (before the guests entered), I found that my TTL flash exposures weren’t as consistent as I needed them to be, so I decided to switch over to using manual flash.
Since the flash was in manual output for consistent exposures, I also had to figure out a few set ranges within which I’d get good results. No underexposure! I was shooting at a high ISO (3200), so noise was already a minor concern—and underexposure tends to exacerbate the problem. I figured out which areas I could successfully bounce my flash off, three of the walls of the reception room, and limited my movement accordingly.
I also did a few tests to see what the typical apertures would be, depending on how “deep” someone was standing into the space. At 3200 ISO, I found that I could use apertures from f/2.8 to f/4, depending on how far my subject was from me. If you look through the camera settings accompanying the images, you can see how I tweaked the aperture setting from shot to shot.


Image 8-34—I bounced my flash off the wood paneling and brick walls in this large, enclosed entrance area of a restaurant. (1/100 second at f/1.8 and 1000 ISO; Lens: 85m f/1.8; On-camera bounce flash)
Color Balance and Postproduction
While the approach here is to “get it right in the camera,” much of the photography we do will be on location and in less-than-perfectly-controlled situations. There is simply no photographer good enough to be able to set the exact exposure, correct white balance, and proper contrast and saturation for every image while busily shooting in constantly changing lighting conditions. Also, using TTL flash can necessitate postproduction adjustments for exposure inconsistencies. Hence, it makes sense to shoot in RAW, the file format that allows for the most flexibility to correct these issues. With a RAW workflow, simultaneously changing the white-balance setting on multiple images is easy, so this need not be a time-consuming process.
The simplest approach to getting a pleasant color balance is to set the camera to the closest appropriate white-balance setting (daylight, cloudy, etc.), then touch up this aspect of the image as part of your regular postproduction workflow. Using a calibrated monitor will give you a neutral reference point. Finessing the white balance in postprocessing is easier than finding an exact setting while out shooting.
Bouncing Flash Off Non-White Surfaces
One specific color-balance issue that will occur with bounce flash is that the bounce surfaces may well vary in color from shot to shot. You could be bouncing your flash off painted walls or wood paneling. This will introduce color casts to the images. Again, these white-balance inaccuracies are easily corrected as part of a normal RAW workflow.
As shown in other examples in this book, when I am stuck in an area where there aren’t any white or near-white surfaces to bounce my flash off, I will look around for alternate areas. While you can correct for warmer color casts (like those from wood or bricks, as seen in image 8-34), when the bounce surface area is painted green or blue—especially a darker hue of those colors—then you will have difficulty getting a good skin tone. This is because the resultant color change will very likely have a discontinuous spectrum. With blue and green light, you tend to miss out on the warm colors that make up skin tones. With any kind of color change to the light from your flash, it is best that you shoot in RAW to maximize the image data available for the needed manipulation of your image.
The lighting on Roz in image 8-35 is simplicity itself: on-camera bounce flash with the BFT as a flag to block the direct light from the flash. Of course, the ambient light coming in through the window acted as a secondary light, helping with a bit of rim light and background lighting (image 8-36). To get the light from my on-camera flash to come in from a pleasing angle (for short lighting), I had to bounce it off the room’s wooden paneling. This, of course, made for a far-too-warm white balance. Knowing this would be the case, I guessed at a 3700K white-balance setting. It turned out to be fairly okay, but I still needed to fine-tune the white balance as part of my normal RAW workflow to achieve pleasant skin tones. The color of the background shifted accordingly, but this wasn’t of any concern to me.
My advice about off-color surfaces and bounce flash is to try to get the white balance as close as you can (it does help in judging the image’s exposure from the camera’s preview). Don’t sweat it too much, though. Shoot in RAW and concentrate on getting great lighting—and on maintaining the momentum and flow of the photo shoot.

Image 8-35—Bounce flash off the wood paneling produced warm light. This was partially balanced with a 3700K white-balance setting on the camera. I fine-tuned the results in postproduction. (1/125 second at f/3.5 and 1000 ISO; Lens: 70–200mm f/2.8; On-camera TTL bounce flash; Modifier: BFT)

Image 8-36—In this pull-back shot, you can see what the room looked like with just the ambient light.
Bounce Flash and the Inverse Square Law
After you’re done noticing the decorated candles that the bride is holding while dancing with the groom (a tradition in Palestinian weddings), you may well notice how evenly lit image 8-37 is—from the foreground to the background. The people visible in the background between the bride and groom are nearly as well lit as the couple. It is counterintuitive, but bouncing on-camera flash into the large room behind me made the background appear brighter. This is the Inverse Square Law at work. If I had used direct flash, or flash with a diffuser cup or bounce card, my background would have been much darker.
For comparison, take a look at image 8-38, which was taken shortly before image 8-37. I happened to be shooting too quickly for the on-camera flash to keep up, so this misfire will give you an idea of the effect the single bounce flash had in the main photograph. The camera settings were such that image 8-38 was ⅔ stop darker than image 8-37. Even though this reception venue is quite large, the on-camera bounce flash made a big difference. I simply bounced it over my shoulder, using a BFT to flag it so I didn’t hurt people behind me with the blindingly powerful flash.
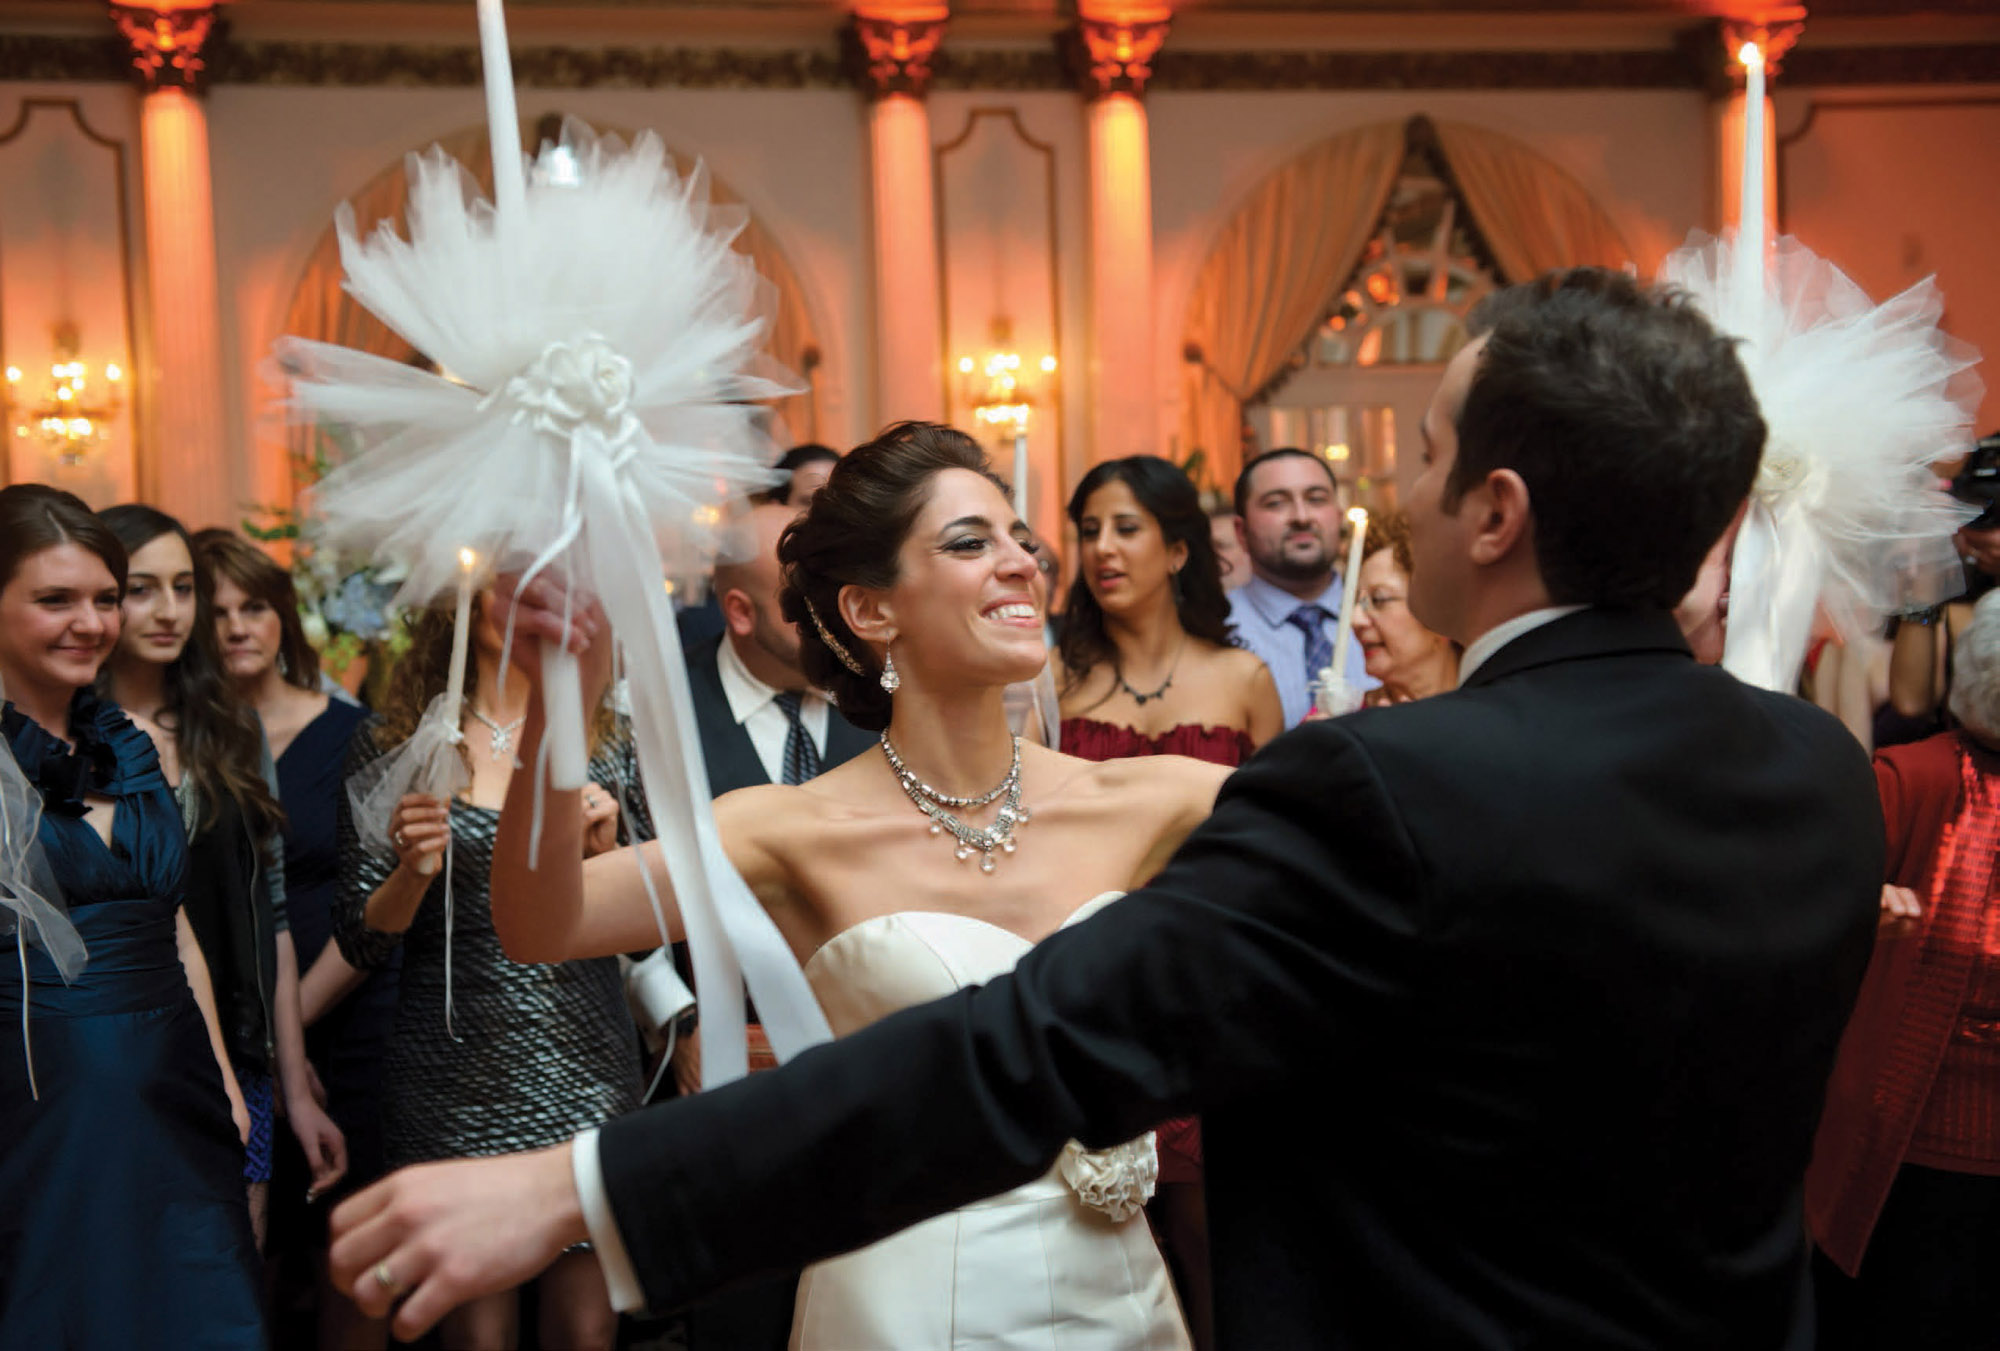

Image 8-37—Bouncing flash into the room behind me created even lighting on the couple and the people in the background. (1/80 second at f/3.2 and 3200 ISO; Lens: 24–700mm f/2.8; On-camera TTL bounce flash; Modifier: BFT)
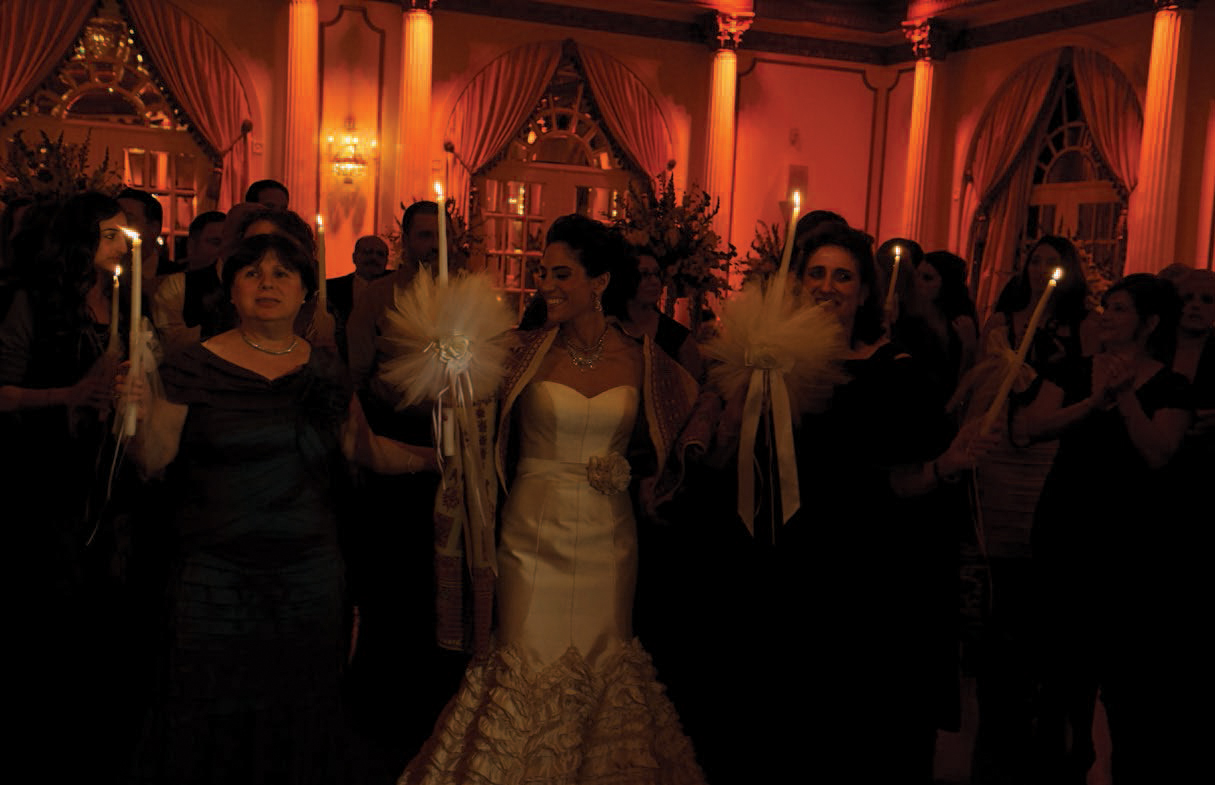
Image 8-38—Here, the flash misfired, revealing how the scene looked without the bounce flash.
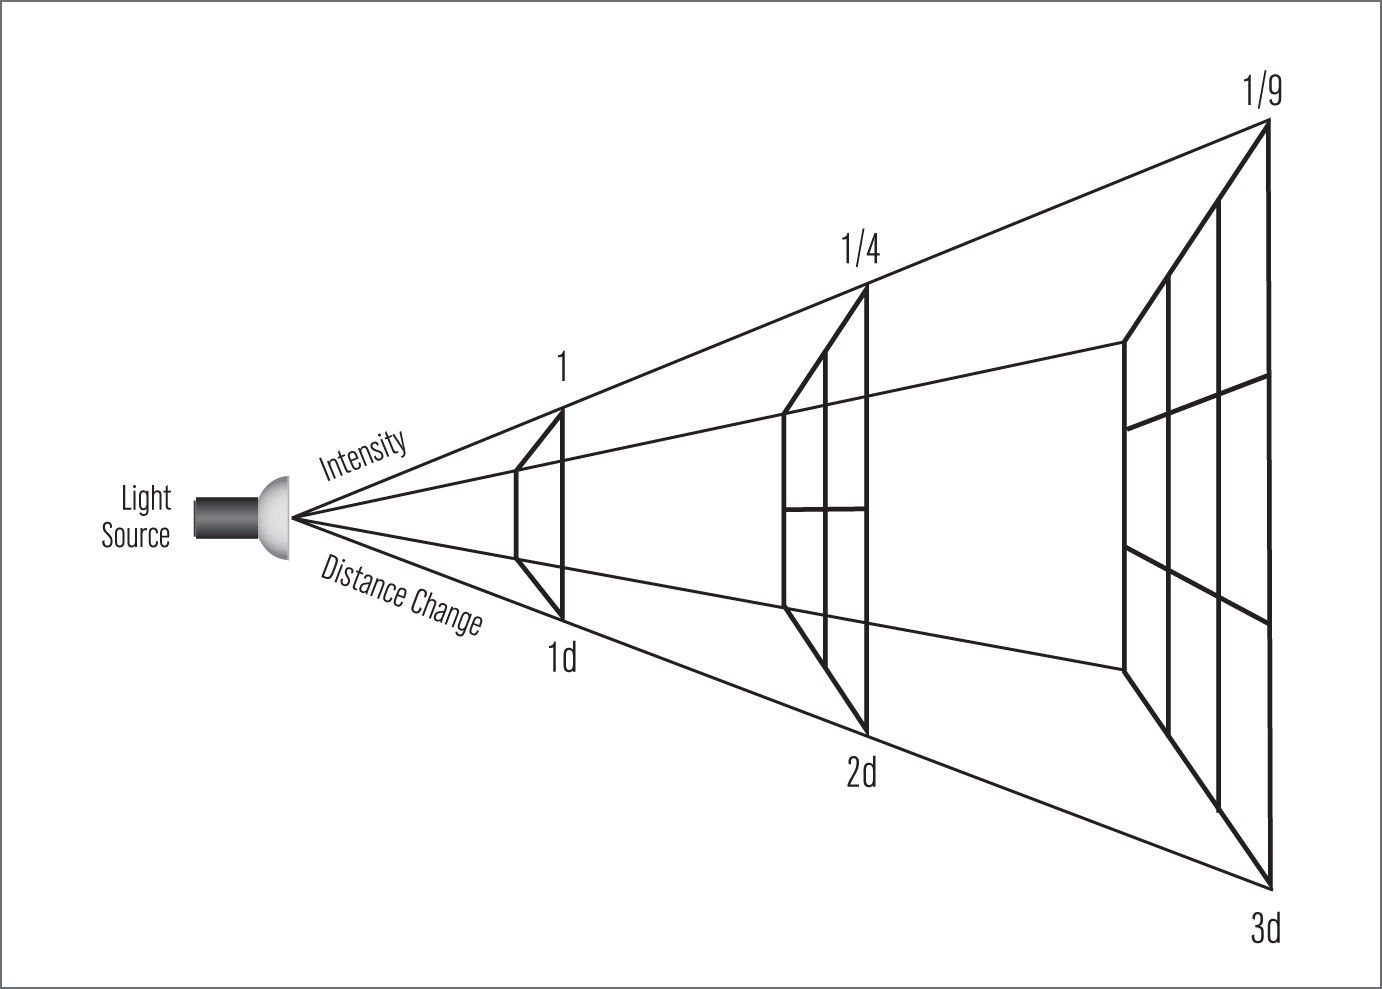
Image 8-39—The light becomes progressively less intense in proportion to the square of the change in its distance to the subject.
So, why does this approach make the lighting more even? When you bounce flash like this (without a plastic diffuser or bounce card) you don’t think of your flash as the light source anymore. Instead, the surface that the flash bounces off becomes the light source. In this case, it was the ceiling and walls above and behind me. The walls behind me were about as far away as the walls you see in this photograph. In other words, the de facto light source was quite some distance away. This is where the Inverse Square Law kicks in to help explain why the background is relatively bright in comparison to the foreground subject. This gets interesting, but hopefully we can make it less complicated than the topic often appears. So hang in there . . .
The Inverse Square Law Explained
The Inverse Square Law states that as you move away from a light source, the light becomes progressively less bright in proportion to the square of the change in distance. It’s not a linear diminishing of light intensity, but a logarithmic one. Basically, as the light is propagated further, it spreads wider and, hence, becomes less bright. This is an essential element to understanding light. Let’s look at an example.
Let’s say you have a manual flash placed 12 feet from the subject and metered at f/8. The Inverse Square Law tells you that if you move that flash so it’s 24 feet from the subject (i.e., you double the distance between the flash and the subject) then the light on your subject will be reduced to ¼ of its original intensity—that’s the change in distance squared (in this case, 22). Since each 1 stop change reflects a halving/doubling of light, this means you’ll lose 2 stops of light every time you double the distance between the light and the subject (or, conversely, that you’ll gain 2 stops every time you move the light closer and halve the distance). So if the light read f/8 at 12 feet, it will read f/4 at 24 feet. If you doubled the distance again, you’d lose another 2 stops of light; moving the same light to a position 48 feet from the subject would leave you with an f/2 reading.
This is where the gradient of light fall-off becomes important. If you moved the light from 6 feet (which would measure f/16 in this scenario) to only 12 feet away (where we measured f/8), that mere 6-foot change in distance resulted a massive 2-stop drop in light. But moving from 24 feet to 48 feet, a huge jump in distance, would also mean the same drop in light levels: 2 stops. As you get further from the source, the light falls off more gradually, and substantial changes in distance don’t make as much of a difference in the exposure level.
Those are the numbers—and the theory works in practice, too. This is hugely important!
What This Means for Bounce Flash
Of course, in a real-world shooting situation, we might not get as technical as that. We just need an innate understanding of what is going on. Here’s the critical point: the farther our subject and background are from the light source (the bounce surface), the brighter our background will appear. At a distance, the light falloff is so gradual that the difference in distance between the foreground and background won’t cause a huge change in the exposure level. If our subject and background are quite close to the light (as with direct on-camera flash), even small changes in distance will create substantial exposure shifts—yielding very dark backgrounds behind brightly lit subjects.
Let’s look at a few examples in the next section.
High-ISO Bounce Flash Photography
One of the common misconceptions about bounce flash photography is that you absolutely need a white wall or ceiling near you. While it does help, this shouldn’t stop you from trying to be a little adventurous with on-camera bounce flash to see if it gets you the results you want.
The venue in image 8-40 was a hotel reception room with massively high ceilings, but the walls to the side were closer by—easy enough to bounce on-camera flash off. The one challenge here was that there were huge mirrors along those walls. This caused unpredictable reflections. It also flattened the light too much when shooting toward the shorter width of the room. So I ended up shooting as much as I could toward the longer end of the reception room.


Image 8-40—Yes, this photo was lit with a single on-camera bounce flash, shooting at a high ISO. (1/125 at f/3.5 and 2500 ISO; Lens: 14–24mm f/2.8; On camera manual bounce flash; Modifier: BFT)

Image 8-41—This photo shows the ambient light levels at the same settings used in the flash photo. There was no chance of consistently pulling something coherent out of that with just the ambient light. Additional lighting of some kind was required.


Image 8-42—The adorable flower girl just had to stop and check in with Dad halfway down the aisle. (1/80 second at f4 and 1600 ISO; Lens: 24–70mm f/2.8; On-camera TTL bounce flash; Modifier: BFT)
In this case, I had the BFT on my flash, but it didn’t make a difference in terms of getting directional bounce flash in my portraits. (It doesn’t really do much for scenarios like this one, where I’m bouncing my flash upward behind me.) What it does help with though, is preventing the people behind me from being blasted with full-power flash. The BFT shields onlookers from some of the light when my flash is 30 degrees or 45 degrees up from horizontal.
When shooting in a difficult place, like this wedding venue with mirrored walls, I accept that I have to shoot more and rely on the latitude of the RAW file format to adjust any essential images that have exposure problems or weird lighting. I accept that not everything is going to work. And that, ultimately, the client needs a great selection of images. That’s the goal I’m aiming for.
Photographing the Wedding Processional
The processional is probably the most technically difficult part of a wedding to shoot and get right. The light levels are low in cavernous churches, and your subjects are walking toward you. Getting enough light on them, having that light look good, and getting the image sharp . . . that’s a tall order. Adding flash to this is a reliable way to get clean, open light on your subjects (image 8-42), but adding bounce flash can be a bit of a challenge.
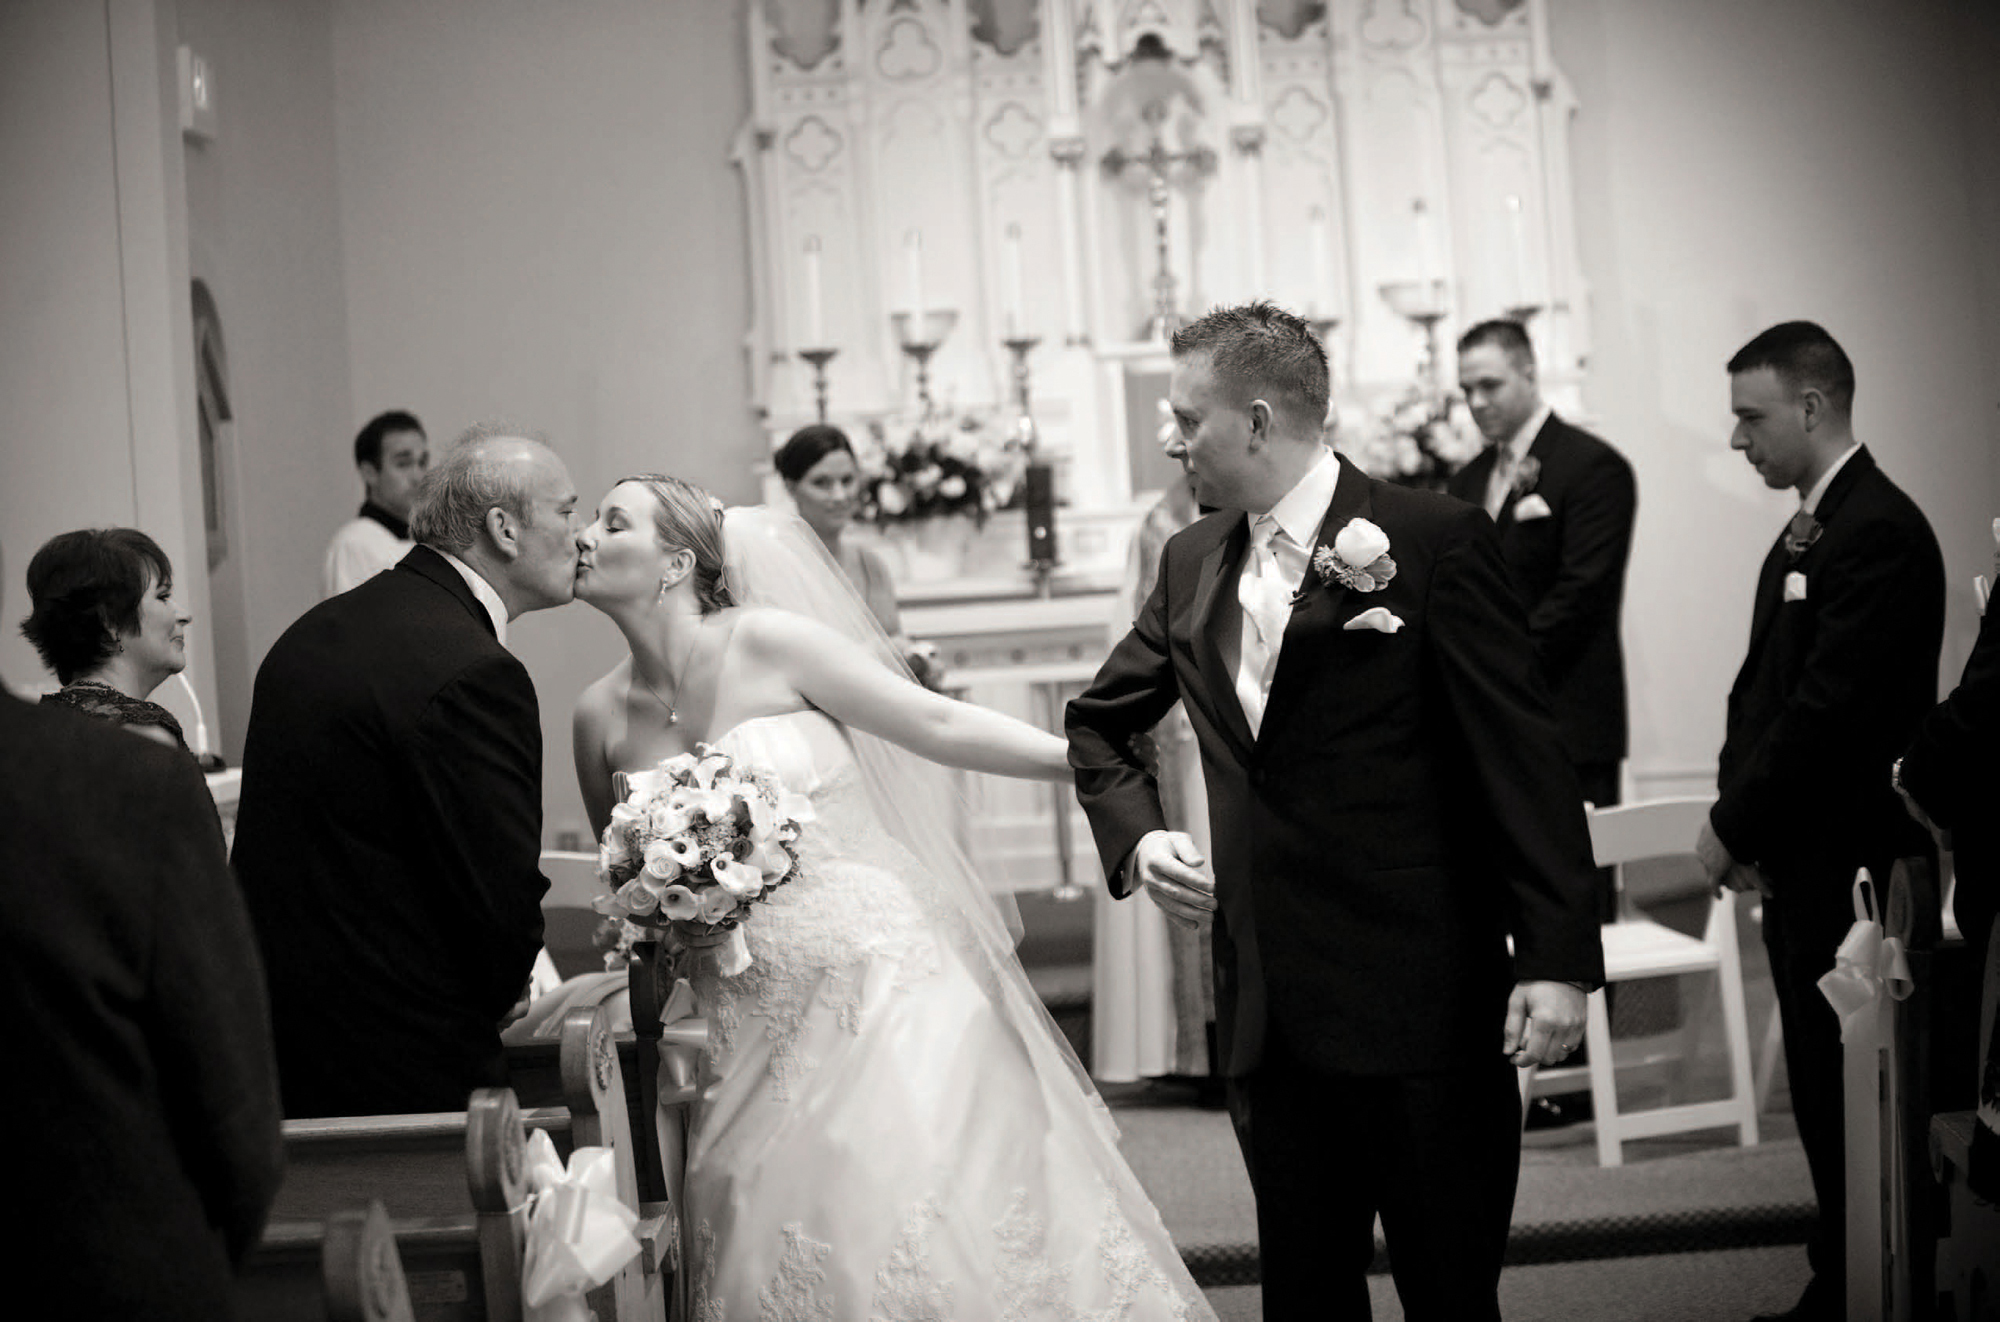

Image 8-43—The same technique would obviously apply to the recessional, when the newly married couple leave the altar and walk back up the aisle together. (1/250 second at f/2.8 and 2000 ISO; Lens: 70–200mm f/2.8; On-camera TTL bounce flash; Modifier: BFT)
I’ll walk you through my preferred approach to photographing the processional. First, my camera settings are such that the available light is about 1 stop (or maybe more) underexposed. I make sure I have a shutter speed that gets enough ambient light in but doesn’t risk subject movement and camera shake spoiling the photo. Even at wide apertures, this does mean cranking up the ISO considerably; I’m often shooting at somewhere between 1600 and 3200 ISO.
Then, if possible, I bounce my on-camera flash behind me into the church. I nearly always gel my flash for tungsten, so that the flash blends more easily with the prevailing light in the space. Gelling my flash with a ½ or full CTS gel means I am adding tungsten-balanced light (from my flash) to the tungsten light in the room.
I really try my best to stay away from using a diffuser cup of any kind, since this most often just makes for photos where the flash is an intrusive element. However, sometimes the church is simply too large or has dark wooden paneling that makes bounce flash too inefficient. In that case, I am forced to accept the compromise of using an on-camera light modifier.
“I make sure I have a shutter speed that gets enough ambient light in but doesn’t risk subject movement and camera shake spoiling the photo.”
Extreme Bounce Flash with the Wedding Processional
Image 8-44 shows another example of a wedding where the light levels were really low and the ceremony venue was cavernously huge. Yet, a few test shots showed that I could still get the kind of light that I like using on-camera bounce flash at a very high ISO. My test shots showed that I would get the most consistent results by going to manual flash. I also had to go to full power to get enough light, since bouncing off those non-white surfaces killed some of the bounced light.
If I hadn’t been able to rely on the camera to give me excellent results at this high ISO, I would have had to change how I used my flash. At a lower ISO, that would have meant using a plastic diffuser on the flash to throw some light forward—or just shooting with the flash pointed straight ahead. That would have completely changed the look of the images, though. The way the bounce flash looks is, to my eye, more natural; there is no giveaway that additional light was used.


Image 8-44-Full-power manual flash, a wide aperture, and a high ISO setting allowed me to create appealing bounce lighting—even in a large church with low ambient light levels. (1/800 second at f/3.2 and 3200 ISO; Lens: 24–70mm f/2.8; On-camera manual bounce flash at full power)

Image 8-45—This photo shows roughly where I bounced my flash (the circle) for the processional.


Image 8-46—After the ceremony, the flash was bounced in the same way—but off the opposite wall, where I had now positioned myself.
Because I remained standing in the same spot and bounced the manual flash off the same area, everything looked consistently lit from frame to frame. Even if the couples aren’t in exactly the same position, the light levels look the same because the Inverse Square Law (covered earlier in this chapter) worked in my favor with this bounce flash setup. After the ceremony, I photographed the recessional (image 8-46) by bouncing the flash in the same way as before—but off the opposite wall, where I had now positioned myself.
“Because I remained standing in the same spot and bounced the manual flash off the same area, everything looked consistently lit from frame to frame.”