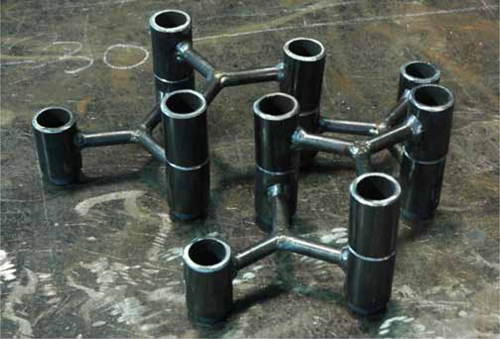
This project was inspired by 1960’s cast-brass candelabras I discovered recently in an antique store. The stacking three-candle stands were cast from brass, but this version you can make yourself. In this project, you’ll get a little more precise with your layout and build a simple wooden jig that helps you to “mass produce” multiples of the same idea. Figure 17.1 shows a finished arrangement of stackable candelabras.

FIGURE 17.1 Candelabras.
NOTE: Taper candles come in a variety of widths between ½ in. and  in. Using material you’ve already purchased for this book you’ll build candelabras that can accept candles up to ¾ in.
•  -in round stock
• ¾-in pipe, Schedule 40
• ¾-in round stock
• Scrap plywood or Medium-Density Fibreboard (MDF),  or ¼ in thick
• Hand tools
• A drill press
• A bench grinder
• A metal–inert gas (MIG) welder
1. First, cut all the material you need using a chop saw, or if that’s not available, you can use an angle grinder. To make five candelabras, cut 15 pieces of each of these:
a. ¾-in inside-diameter (ID) pipe at 1¼ in long
b. ¾-in round stock at 1 in
c.  -in round stock at 1
 in
in
d. Figure 17.2 shows all the cut pieces ready to go.

FIGURE 17.2 Completed cut list.
2. Chamfer all the cut edges on your material, and deburr the inside of the cut tube.
3. On the  -in round stock, put an extra deep chamfer on one end, as shown in Figure 17.3.

FIGURE 17.3 Chamfered  -in stock.
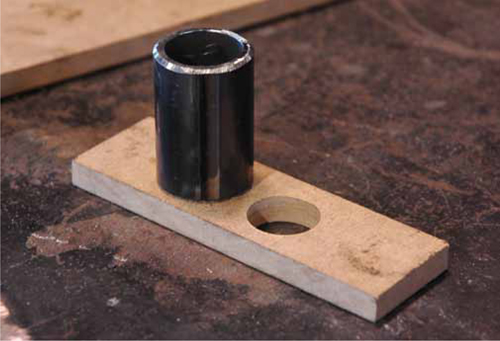
4. With the material ready, lay out a jig onto  -in plywood or MDF. Draw a circle with three evenly spaced points around it where you will locate the ¾-in rod and pipe. Using the drill press, put a ¾-in hole at each of these points, as in Figure 17.4.

FIGURE 17.4 Creating the jig.
5. You also want to make a jig that allows you to stand the pipe  in off the ¾-in solid stock, so drill some more holes in a few scrap pieces of plywood or MDF to give the result shown in Figure 17.5.

FIGURE 17.5 Standoff jig.
6. Drill a  -in hole centered about ½ in from the edge on all your pipe, as shown in Figure 17.6. These holes will let you plug weld the ¾-in solid stock to the pipe that fits around it.

FIGURE 17.6 Drilling the hole to be plug-welded.
7. Slide the ¾-in stock into the jig, and place a piece of pipe over it as shown in Figure 17.5. Fill all the holes you just drilled with a hot plug weld.
8. Now back to the layout jig. Use some scrap wood to space the  -in rod off the surface of the jig, as shown in Figure 17.3.
9. Put a tack weld at each of the connection points, and slide the candelabra out of the jig.
10. Flip it over, and weld around each seam on the backside of the piece.
11. Flip it over again, and finish welding the top of each seam as shown in Figure 17.7. Try putting the candelabra back into the jig at different spots to see how accurate your work is. If needed, alter the jig to make it more consistent.

FIGURE 17.7 Finished unit.
12. Repeat these steps until you have completed all five candelabras, as shown in Figure 17.8.
FIGURE 17.8 Completed candelabras.