
The barbecue you will build in this project, based on a 55-gallon drum (Figure 21.1), is one of those quintessential do-it-yourself (DIY) projects that I thought had to be featured in this book. I used to be reluctant to use 55-gallon drums for much of anything because the thin-wall sheet metal it’s made out of can be difficult to weld to, and when it is left outside, it can rust pretty quickly. The combination of elements from being left outside and frequent temperature changes when using a barbecue means that the drums frequently give way to rust rather quickly. I made a few alterations to my 55-gallon barbecue design that I think will help to make this project one that lasts quite a while.

FIGURE 21.1 Barbecue.
• 55-gallon drum (clean interior)
• 1- × 1- ×  -in angle stock
•  - × 1-in flat stock
• ¾-in pipe
• ½-in round stock
•  -in round stock
• ¼-in round stock
• 10-gauge sheet metal
• Chain
• Assorted ¼-in hardware
• Steel hinges
• Hand tools
• A grinder
• A plasma cutter
• A metal–inert gas (MIG) welder
1. The first step is to cut the 55-gallon drum in half.
CAUTION: Make sure that nothing flammable is inside the drum before making contact with the angle grinder or plasma cutter.
2. Draw a box equal to the diameter of the drum (usually 22.5 in) on the worktable, and draw diagonals across each corner. Place the drum on the box with its seam lined up with one of the diagonals, as shown in Figure 21.2.

FIGURE 21.2 Lining up the barrel to cut.
3. You’ll use this seam as one of the cut lines and mark the other side of the barrel along the same diagonal line. Flip the drum over and repeat.
4. Using a straight edge, mark a line along the side of the marks you made in step 3, as shown in Figure 21.3, and along the barrel’s seam. This is your cut line, and the straighter it is, the easier time you’ll have welding the barrel to the frame.

FIGURE 21.3 Cut line.
5. Connect the lines on either side across the top and bottom of the barrel, and prepare to cut.
6. Figure 21.4 shows me using a cutoff disk on the barrel to make a nice clean cut. Make sure to wear a respirator if you are grinding through paint.

FIGURE 21.4 Cutting the barrel.
7. After cutting both sides and the top and bottom, you should have a barrel like mine, as shown in Figure 21.5.
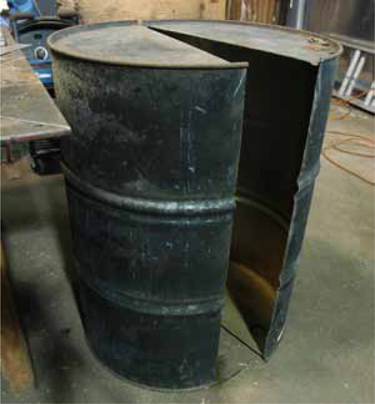
FIGURE 21.5 Neatly sliced barrel.
8. To prepare to weld the barrel to the frame, use a grinding wheel or flap disk to clean the inside edge of the bottom half (Figure 21.6) and the outside edge of the top half of the barrel.

FIGURE 21.6 Cleaning the inside edge.
9. Cut lengths of 1-in angle stock with a 45-degree miter on both ends to fit around the outside of the barrel bottom. Lengths for these sections are 34¾ and 23¼ in, but they may vary depending on your barrel. Figure 21.7 shows me tacking these sections using the barrel as my guide.

FIGURE 21.7 Tacking the frame for the bottom barrel.
10. Before you weld the frame to the barrel, weld the inside and outside of each seam along the angle iron, and grind them smooth.
11. Lower the voltage on your welder for around 22-gauge sheet metal. Put a series of tack welds along the inside of your frame where it meets the barrel, as shown in Figure 21.8. These welds will be mostly hidden from sight, but try to make them as strong as possible without burning away the sheet metal.

FIGURE 21.8 Welding the inside of the barrel.
12. I want my grilling height to be 36 in from the ground, so I’ll cut four lengths of angle stock to 35 in. Using a square, tack the legs to the frame as in Figure 21.9, checking for plumb before every tack.
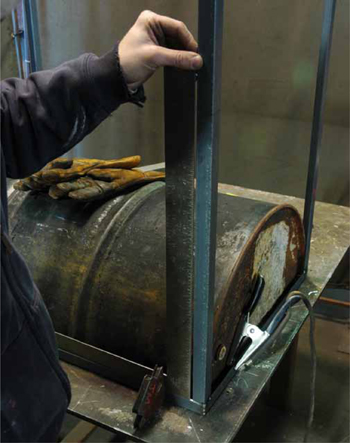
FIGURE 21.9 Attaching the legs.
13. To add reinforcement and take some of the weight off the drum, add two supporting members that rest on the bottom of the drum. A cool connection is the detail shown in Figure 21.10 to weld angle to angle by using a cutoff disk to remove one of the faces from a piece of angle. With the grill upside down, rest the length of angle on the bottom of the barrel, and weld it to the legs. The inside of the weld is shown in Figure 21.11.
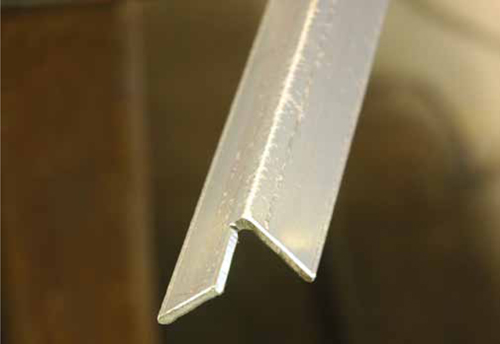
FIGURE 21.10 A nice way to join the angle stock.
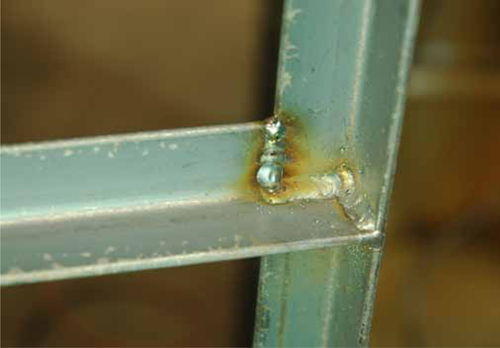
FIGURE 21.11 A view of the welded connection.
14. For added rigidity, add diagonal bracing on the legs on the back of the barbecue, as shown in Figure 21.12. The piece of flat stock at the top of the photo is holding the legs in place while I mark, cut, and weld the flat stock for the bracing.

FIGURE 21.12 Bracing.
15. Connect the rear legs to the front legs using a length of flat stock about 6 in from the ground and welded perpendicular to both legs.
16. Weld a piece of ¾-in pipe between these two lengths of flat stock to help tie each side together. This also makes a great foot rest when you are grilling.
17. Now you can make the angle frame for the top of the grill to match the dimensions of the bottom frame. For this part I suggest turning the angle iron around to avoid creating a place where water can collect and freeze or cause rust. Figure 21.13 shows the material tacked together and in place on top of the lower frame.
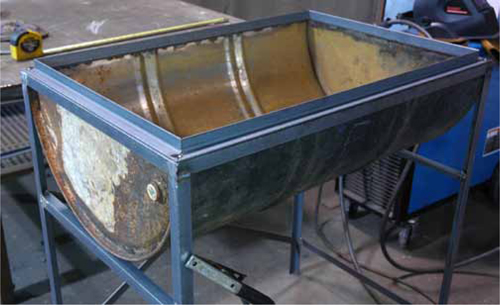
FIGURE 21.13 Top frame tacked together.
18. A number of steel hinges are available that would work with this project. Figure 21.14 shows slip hinges and fixed hinges, both designed to fold at least 90 degrees. For security purposes, I’m going with the fixed hinges, but if you want to be able to remove the lid at any time, slip hinges would be a good choice.

FIGURE 21.14 Steel hinges.
19. Line up your hinges about 4 in from each corner, and tack weld them in place, as shown in Figure 21.15. Test them by opening the lid a few times to check for smoothness. If they open smoothly, weld each side on permanently.

FIGURE 21.15 Tack welding the hinges.
20. Before welding the other half of the barrel to the top, you now should make a handle for the lid. Roll a short length of ½-in round stock, and cut the ends to make a truncated curve such as that shown in Figure 21.16.
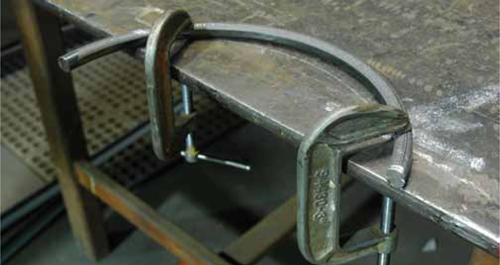
FIGURE 21.16 Handle in progress.
21. Center it on the front of the lid as in Figure 21.17, and weld it to the top frame.

FIGURE 21.17 Ready to weld the handle in place.
22. Rest the top half of the barrel on the grill, and mark the locations that need to be cut away for both hinges and the handle on the front, as shown in Figure 21.18. Use an angle grinder or plasma cutter to remove this material.

FIGURE 21.18 Marking material to cut away.
23. With the top of the barrel sitting flush against the frame, start tack welding the barrel in place. Go all the way around using short tack welds until the whole thing has been welded.
24. At this point, you’ll add handles to the sides of the grill to make it easier to move around.
25. Just like the handle on the front, roll two short lengths of ½-in round stock, and trim them using an angle grinder. Weld these onto each side of the grill, as shown in Figure 21.19, making sure that they are centered and level.
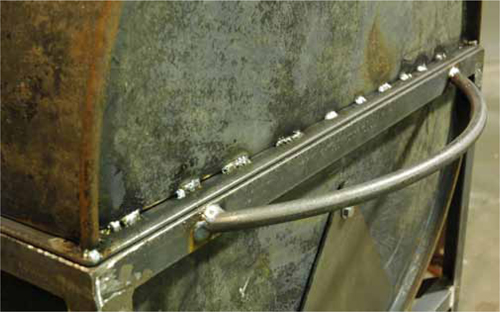
FIGURE 21.19 Handle in place.
26. Mark a series of round holes on each side of the grill that will allow air into the fire chamber, as shown in Figure 21.20.
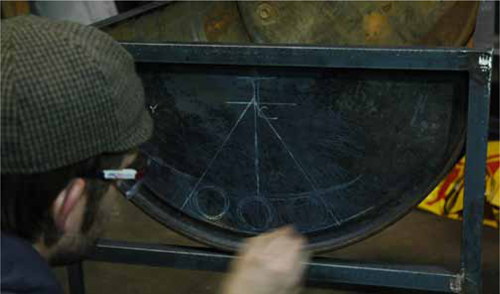
FIGURE 21.20 Air holes.
27. Plasma cut these holes, and cut one hole on top for a pivot, as shown in Figure 21.21, where you can attach the air damper.

FIGURE 21.21 Cutting.
28. Using the series of holes you laid out as a guide, mark out a wedge shape that will act as the damper. Plasma cut the wedge, including a hole through which to bolt it to the grill. Also weld on a handle of some sort, such as a short piece of round stock, to help move the damper when it’s hot. Figure 21.22 shows an example. You can bolt the wedge to the side of the grill using hardware and washers to keep it from coming loose.
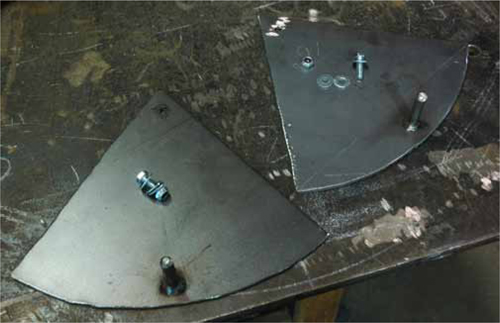
FIGURE 21.22 Damper and hardware.
29. Now you want to build a heavy-duty ashtray that will help to keep the inside of the grill from decaying. Lay a large piece of 10-gauge steel on your worktable, and draw a 24- × 30-in rectangle. Divide the 24-in dimension into three pieces 6, 12, and then 6 in wide, as shown in Figure 21.23. Plasma cut the whole rectangle out, and make a series of plasma cuts along the secondary lines you drew to help make bends as you did earlier in this book. Make sure that the cuts are roughly 6 in long with a 1-in connection between them.

FIGURE 21.23 Laying out the ashtray.
30. Clamp the ashtray to the table, and bend each side up to about 45 degrees, as shown in Figure 21.24. If you have trouble with the bends, try using an adjustable wrench to give you extra leverage.

FIGURE 21.24 Bent ashtray.
31. Cut two lengths of ½-in round stock to make handles and 1-in flat stock to close in the ends, as shown in Figure 21.25. Weld these in place.

FIGURE 21.25 Ends welded and handles in place.
32. Cut the excess flat stock off using a cutoff disk, as shown in Figure 21.26.

FIGURE 21.26 Removing excess fat stock.
33. Mark a series of X shapes on the bottom of the ashtray. These will help to let air into the fire area and let any barbecue drippings fall out of the pan. Plasma cut these using the plunge technique you learned earlier until you have something like that shown in Figure 21.27.
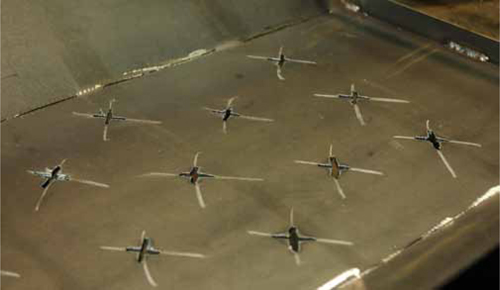
FIGURE 21.27 Plasma-cut X’s.
34. Now it’s onto the grate. If you are going to have a heavy-duty barbecue, it might as well have a heavy-duty grate. To support this grate, cut short lengths of ¾-in pipe in half, as shown in Figure 21.28.

FIGURE 21.28 Cutting short lengths of pipe in half.
35. Weld these sections to the underside of the frame on the lower half of the 55-gallon drum. If any previous weld bead interferes, grind it away. Figure 21.29 shows a short section of pipe being positioned for a weld. For this grill, I used three supports on each side.

FIGURE 21.29 Grate support ready to be welded.
36. Cut three lengths of  -in round stock that fit into these support pieces. Measure across the inside of the grill to figure out how wide to make the rails. The measurement should be around 20½ in, leaving a little bit of room on either side.
37. Cut and weld the first 20½-in grate section out of ¼-in round stock onto the three supports to keep them aligned, as shown in Figure 21.30.
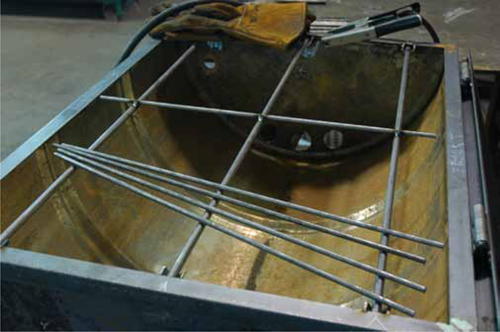
FIGURE 21.30 Grate under construction.
TIP: For this grate, you’re going to need nearly 60 lengths of ¼-in stock cut to length. Figure 21.31 shows a simple stop-style arrangement you can make with scrap material and a few C-clamps so that your cuts are always on the mark without measuring every time. Just prepare your first piece, slide the stop into place and clamp it, and you’re on your way.

FIGURE 21.31 Simple stop setup with a chop saw.
38. Remove the grate from the barbecue, and turn it upside down on your worktable. Using short lengths of  -in round stock, space each ¼-in section apart, and weld it to the
  -in support section of the grate. After doing this 48 times, you should have a grill that looks something like the one in Figure 21.32. The reason I did this upside down is to keep the topside looking nice and neat.

FIGURE 21.32 Upside-down welded grate.
39. Now you want to make another handle for the grate just as you did the other handles earlier. For this, I suggest matching the  -in round stock used for its supports and rolling two short sections as shown in Figure 21.33.
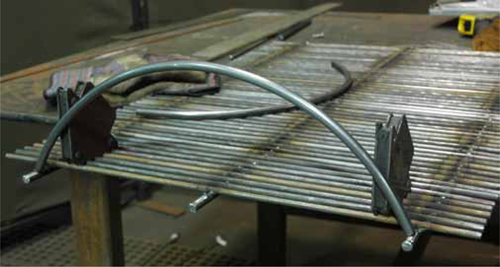
FIGURE 21.33 Handles welded to the grate.
40. On one side of the barbecue, weld a length of chain so that when the lid is open just around 90 degrees, the chain keeps it from falling too far back.
41. Figure 21.34 shows the completed barbecue, ashtray, and grate.

FIGURE 21.34 Completed grill components.
42. Get ready to clean, paint, and grill (Figure 21.35)!

FIGURE 21.35 Completed grill ready for finishing.
Before using or finishing this barbecue, you need to give it a thorough “burn” to remove any leftover finishes or contaminates. Do this by building a hot fire in the ash pan until no paint remains on the outside of the barrel. Use hardwood such as oak or cherry for the fire rather than pine, and make sure not to use any wood with adhesives or resins.
You don’t want to finish anything on the inside of the barbecue. Let the smoke and grease take care of that, but a high-temperature finish on the whole exterior is a must to keep the grill in working order for years to come. Many paint manufacturers make high-temperature paint for barbecues or automotive engines. You should be able to find something at your local paint store. Before painting, follow all the prefinishing steps listed in Chapter 12, and remove the hardware-fastened parts such as the chain and dampers to finish separately.