Basic Pasta Recipe
Basic Egg Pasta
(green • tomato • beet • golden • basil •
whole-wheat • buckwheat • Parmesan)
French Noodles
Egg-White Noodles
Barbara Kafka’s Buckwheat Noodles
Udon Noodles
Bread Noodles
Bulgarian Shredded Noodles
Spätzle
Spatzen
Nockerli
Potato Gnocchi
(basil and chive • Gruyère and mace • tomato and Parmesan)
Gnocchi Verdi
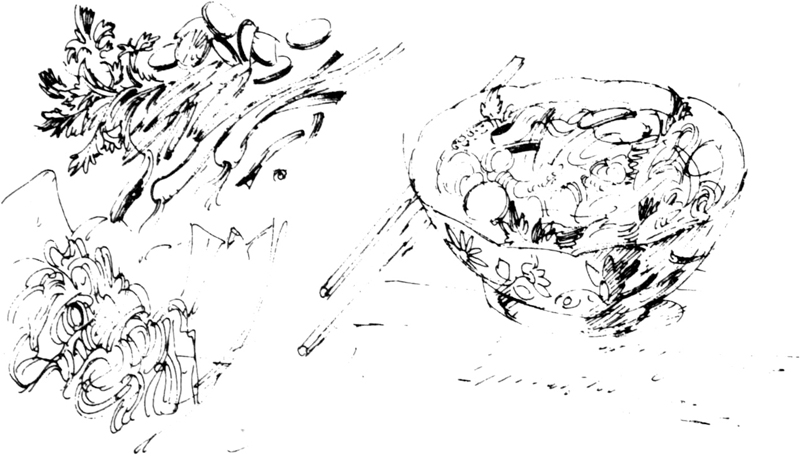
This is the pasta I’ve been making for years. The recipe makes pale golden noodles with a wheaten taste and a nice resistance to the bite. They are simple enough to enjoy with only a nugget of un-salted butter and some grated cheese, but good enough to be the start of a complicated dish. Once you’ve learned the basic way, you’ll vary the dough according to your imagination, maybe with spinach, maybe with tomato, or maybe beets.

The ingredients are just flour, eggs, and salt. If you mix the dough in the food processor or electric mixer, you will add a tablespoon of oil to the mixture just to get the machine going.
There are several ways to mix the dough and roll it out. By the old-fashioned method—and remember that pasta has been made since the beginning of civilization—the dough is mixed on a wooden board kneaded by hand, rolled and stretched paper-thin with a long wooden pin, folded, cut, and dried on a rack.
There are people who still swear that this method makes the best noodles. But now that there are so many mechanical aids available to us it would be foolish not to give them a try. I have had many splendid and quick meals of noodles that I made in the food processor and a pasta machine. I can start a tomato sauce cooking on the stove, toss flour, eggs, and oil into the processor, and sit down, well within an hour, to a supper of freshly made linguine with a fiery shrimp and tomato sauce.
I’m going to tell you how to mix pasta dough by hand, in the electric mixer, and in the food processor. Then I’ll describe rolling it out with a rolling pin and feeding it through the pasta machine. You will learn to cut noodles with a sharp knife, with a rolling pastry cutter, and with the cutting attachment of the machine. Finally, I will lead you through some of the new machines that promise to mix and extrude noodles all in one process.
My suggestion is that you try all the methods, and then choose the ones that work best for you. One person will enjoy getting his fingertips into the flour and egg, while another prefers the speed and manageability of the food processor. One finds hand rolling a great waste of effort, and another loves the feeling of mastery and control he gets from it. There’s no way to know until you’ve tried them all. You may waste a dozen eggs along the way but, by the time you’re done, you’ll be a practiced pasta maker.
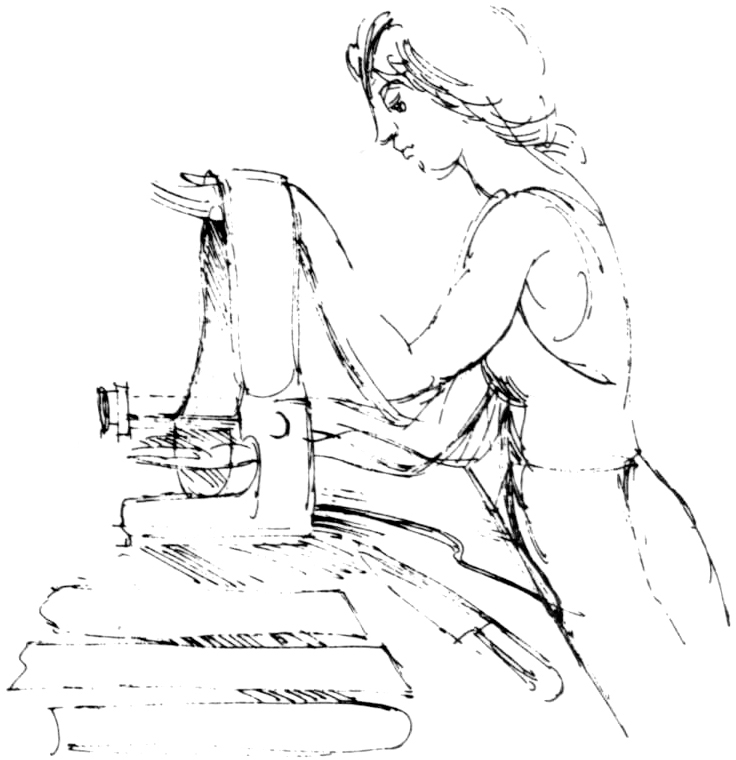
If, however, you want to increase your chance of success the first time around, I suggest that you mix the dough in the electric mixer and roll it by machine. Dough that is blended in the mixer falls halfway between ultrastiff handmade dough and the slightly overheated mixture that comes out of the processor. And nothing will build your confidence like watching perfectly cut noodles falling out of the rollers of the pasta machine.
Another way to increase your chance of success is to learn the way pasta dough should feel. Having this recognition in your hands is as important as measuring properly. That’s because you will be working with ingredients that change from day to day and from batch to batch. Some flours are drier than others; eggs vary in size; the air in your kitchen ranges from arid to muggy. A dough that works on a dry November day may refuse to roll out on a steamy August afternoon.
But, once your hands know how the dough should feel, it’s easy to adapt the recipe to achieve that feeling. If it’s too dry, you will sprinkle on some water or add a teaspoon of beaten egg. If it’s too damp, you can knead in extra flour. It’s not unusual for me to add as much as an eighth of a cup of flour to the amount called for in the recipe.
The ideal, of course, would be to visit an experienced pasta maker and work under his supervision. Some Italians go so far as to say that no one can learn to make pasta who didn’t start as a child in his mother’s kitchen.
But, since that chance is long gone for most of us, we’ll have to rely on the trial-and-error method. It just requires some time and imagination.
To get an idea of what you’re aiming for, think of the way that perfectly kneaded bread dough feels: plump, smooth, and resilient under your palm. Then imagine a dough that’s half as stiff, and you’ll have a pasta dough. It feels moist but not sticky when you poke a finger into it. And, when you knead it, it fights back more than bread dough does.
Basic Egg Pasta
This makes enough pasta to serve 4 as an appetizer or 3 as a main course.
1½ cups all-purpose flour
½ teaspoon salt
2 large eggs
1 tablespoon oil, if using the electric mixer or food processor
By Hand
Put the flour mixed with the salt on a wooden board or a counter top. Make a well in the center of the mound, and break the eggs into the well. Beat the eggs with a fork, slowly incorporating the flour from the sides of the well. As you beat the eggs with one hand, your other hand should be shoring up the sides of the mound.
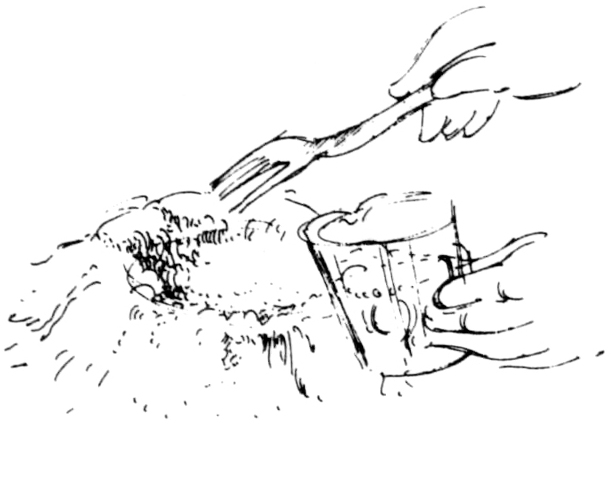
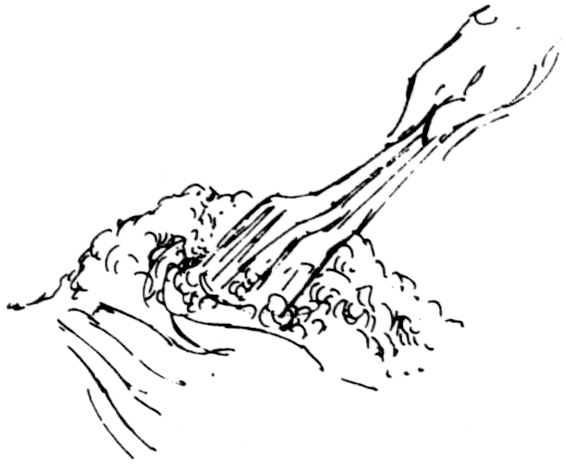
After a while, the paste will begin to clog the tines of the fork. Clean it off and continue to mix the flour into the egg mixture with your fingertips, just as you would in making any paste. When the flour and egg are all mixed, press the dough into a ball. It will seem to be composed of flakes of dough. Set it aside to rest for a minute while you wash your hands, scrape and clean the board, and dust it with flour. If there are dry flakes that obstinately refuse to become part of the mass, get rid of them now.
Now begin to knead the dough. Push the heel of your hand down hard, stretching the dough firmly away from you. Fold the flap back toward you and give the lump of dough a quarter-turn. Press down on another section of the dough.
Hand-mixed dough isn’t easy to work with. It is stiff-textured and requires a lot of hard pummeling. At first it may seem that the ball of dough won’t hold together, but the act of kneading will distribute the moisture evenly through it, and, after a few minutes, it should begin to form a ball.
Knead for a full ten minutes, pushing, folding, and turning until the dough is smooth. The thing to remember is that this is supposed to be harder than kneading bread, so don’t despair. When you are done, pat the dough into a neat ball and cover it with a dish towel or a sheet of plastic wrap. Let it rest for at least 30 minutes. Two hours’ rest is even better.


By Electric Mixer
Fit the paddle into your electric mixer. Put the flour and salt into the bowl, and give it a quick whirl to mix them. Add the eggs and oil and turn on the beater. Let it go for half a minute, until you have coarse grains of dough in the bowl, something like the consistency of piecrust before it is gathered into a ball.
Replace the paddle with the dough hook and knead in the bowl for 5 minutes. Or take the dough from the bowl, dust a wooden surface with flour, pat the dough into a ball, and knead it for 10 minutes. You will find that this dough is much easier to work with than the hand-mixed dough. After 10 minutes, you should have a firm, smooth, pale yellow ball of dough. Put it to rest under a dish towel or in plastic wrap.
By Food Processor
Put the metal blade into the food processor. Measure in the flour and salt, and process briefly to blend them. Drop the eggs and oil through the feeding tube, and let the machine run until the dough begins to form a ball; around 15 seconds should do it. Once you’ve become familiar with the method, you’ll be able to correct the recipe at this point. If the dough seems too sticky, add a tablespoon or two more flour. If it’s too dry, add a few drops of water or part of an egg. Process again briefly.

Turn out the dough onto a floured surface. You will notice that this method results in the yellowest and stickiest dough of all. That’s because it’s already half-kneaded. Dust your hands with flour and continue the kneading. Work for 3 to 5 minutes, adding more flour if necessary, until you have a smooth ball of dough. Set it to rest under a dish towel or in plastic wrap.
RESTING 1
I cannot emphasize too strongly the importance of letting the dough rest between the kneading and the rolling. During this period, which should last at least 30 minutes and can continue in the refrigerator for days, the gluten in the flour relaxes and the dough becomes soft, well blended, and easy to work. I’ve put many a worrisome dough to rest under a dish towel, only to retrieve it 2 hours later, in perfect condition for rolling.
ROLLING
By Hand
There are two stages in rolling pasta by hand. In the first, the dough is worked just as it is when you are making piecrust, pressing down and out from the center of the disk. This usually presents no problem for the American cook.
The second stage is harder to learn, because you have to be able to do two things at once. It’s a little like learning to pat your head and rub your stomach at the same time: once you get it, it’s easy; but the first few times you try to do it, it seems impossible.
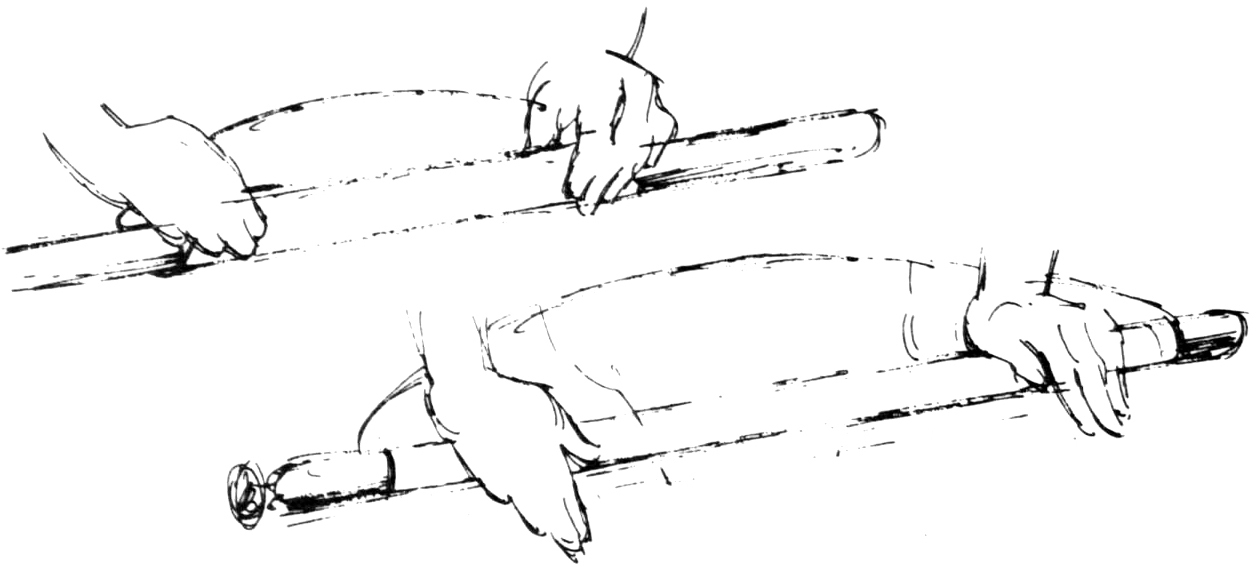
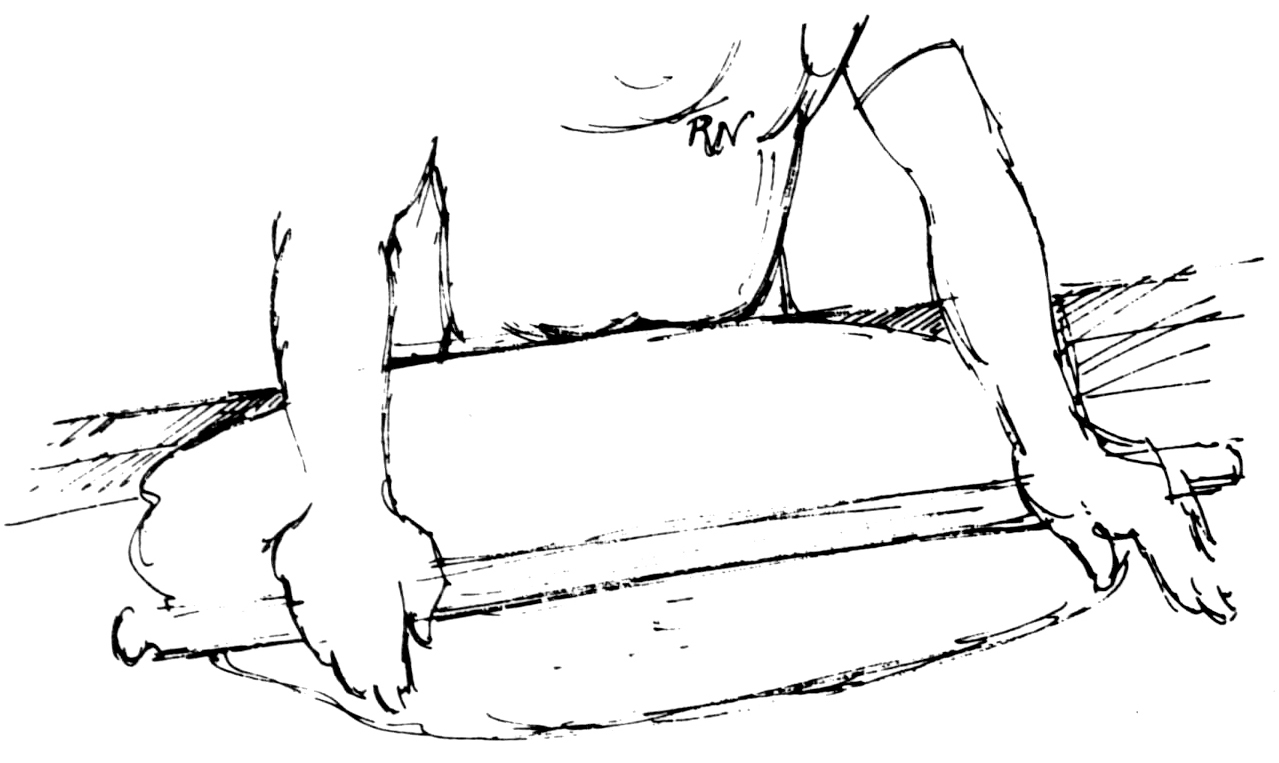
To begin, place the ball of dough on a floured surface. Pat it into a flat disk, and start to roll it with your rolling pin. Move always from the center to the edges of the circle, giving the dough a quarter-turn after each roll to keep the circular shape. Keep checking to be sure that the dough isn’t sticking to the board. If it is, loosen with a dough scraper and dust with flour. When the dough is about ¼-inch thick, the first stage is finished.
During the second stage, you will be pulling and stretching the dough instead of rolling it. Very often, I’ve seen experienced pasta rollers hang one end of the sheet over the edge of the table and lean their tummies against it as they roll. That way, they get a three-way action, pulling, rolling, and stretching!
Curl the far edge of the circle around the center of your rolling pin. Then roll the pin back toward you, wrapping some of the dough around it. Push and stretch it away from you as you unroll the dough. At the same time, slide your hands lightly out and in on the pin, stretching the sheet sideways. Don’t press down. Pull out.
Turn the circle slightly after each stretch. You are trying to make a very thin sheet of dough, something like the thickness of good writing paper. It will be slightly transparent. You won’t be able to read through it, but if you’re rolling on a wooden surface, you should be able to see the grain of wood through the dough.
One way to be sure that you’re rolling the dough evenly and that it isn’t sticking to the board is to check its color. If the color is more intense at the center of the circle than at the edges, it means that the dough is thicker there. That often happens when it has stuck to the board. Roll it up onto the pin (a dough scraper will be helpful). Dust the board with flour. Turn the dough facedown and flour its top side. Rub some flour onto the rolling pin.
If the business of stretching and pulling and sliding your hands in and out seems too much for you to master, you can roll out the dough as you might a very thin piecrust. It takes a lot of work, because you’ll be fighting the gluten’s elasticity, but it can definitely be done.
By Machine
There are two kinds of wringer-style pasta machines—one that is turned by hand, and one that is operated by a motor. Each has its advantages and its fans.
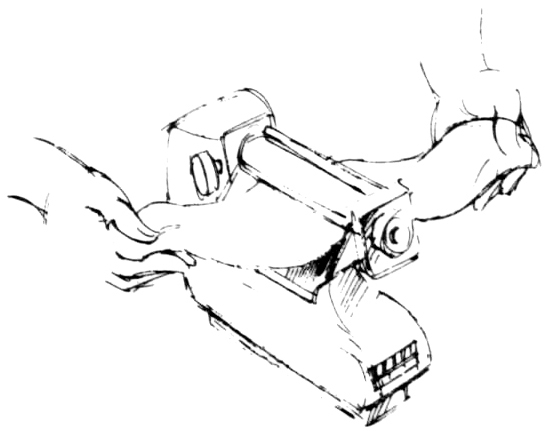
The hand-cranked model is considerably cheaper than the motorized machine. And it is my opinion that many people are intimidated by the speed with which the motor-driven machine processes the dough. They like the feeling of being in control that they get from turning the handle themselves.
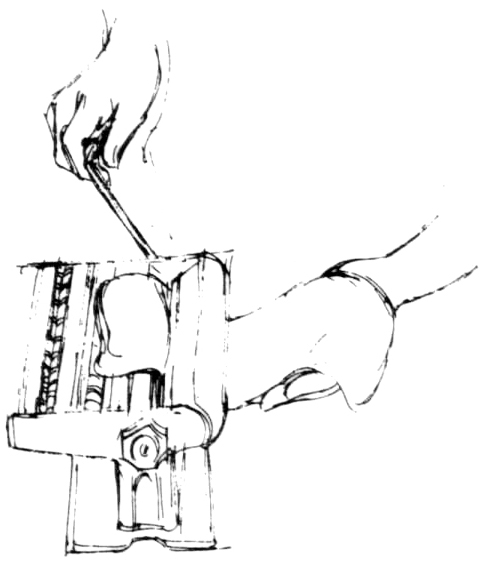
Other people prefer the speed and efficiency of the motorized machine. They feel that there are never enough hands around to do everything that has to be done with a hand-cranked machine.
All of the machines work on the same principle. The dough is fed through a set of cylindrical rollers, which knead it, flatten it, and, when the rollers have been changed, cut it into noodles.
After the ball of dough has rested for a few hours, cut it into four pieces. Put three of them back under the dish towel, and flatten the fourth with a rolling pin or with your palm. Set the machine so that the rollers are at their widest opening.
If you are using the electric model, turn on the machine (it will make an infernal racket); otherwise start cranking. Feed the flattened ball of dough through the rollers four or five times, folding it in half each time before it goes back through the rollers. This will further knead and smooth the dough.
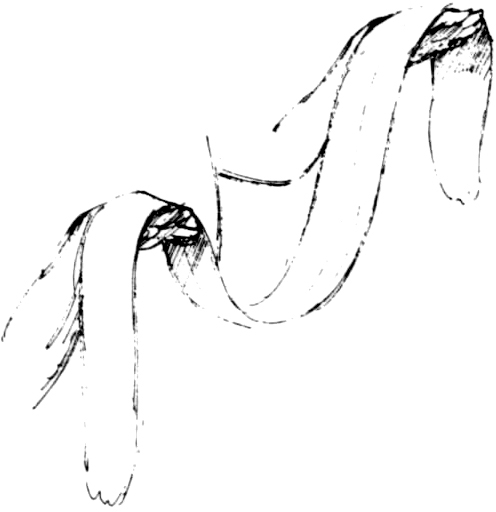
It may come out with ragged edges or with holes torn in it. This often happens when the dough hasn’t been kneaded enough. Don’t worry. Patch the holes with bits torn from the end, and feed the dough back through the rollers. If the edges are ragged, fold the ribbon in half lengthwise. If the dough comes out in a distorted shape, just fold it up into a flat square and roll it through again. You’ll know when it’s rolled enough, because the dough will become smooth and satiny. The nice thing about pasta dough is that it isn’t one of those delicate mixtures that shouldn’t be overhandled. Go ahead and work with it. It thrives on the human touch.
Now begin to narrow the opening between the rollers by turning the dial one mark each time the dough goes through. Keep going until you reach the thickness you want. Then make a note of the number on the dial, and you’ll have something to aim for the next time you roll out pasta.
Lay the ribbon of pasta on a dish towel while you roll out the other three pieces of dough.
RESTING II
Once the dough has been rolled out, it should lie on kitchen towels for around 5 minutes to give it a chance to dry. Machine-rolled dough dries faster than hand-rolled, so the first ribbons will probably be ready to cut by the time the last ones are rolled. Don’t let it get too dry, however. The dough should be pliable, neither brittle nor moist and sticky. If it just doesn’t dry, dust it with some more flour and no harm will be done.
CUTTING
By Hand
There are two ways to cut simple noodles by hand. The easier is to fold the dough and cut it into slices with a sharp knife. It’s very important that the dough should be well dried if you use this method, or it will stick to itself when it is folded.
Take one edge of the dough and fold it over loosely into a flat roll around 3 inches wide. Continue to fold until the whole strip or circle of dough is folded. Then take a sharp knife or cleaver and cut ¼- to ½-inch slices from the rolled dough. Don’t saw. Press down evenly, trying to make the slices even in width. As soon as the whole roll has been cut, open up the noodles so they can dry further.
You can also cut noodles with a rolling pastry cutter. I have one that George Lang gave me that cuts four noodles at a time. Most pastry wheels are single, however, and the problem with using them is that you have to have a very steady hand and a good eye to make the noodles come out even in width.
By Machine
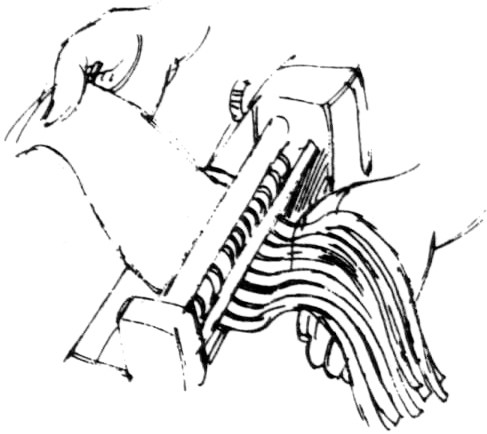
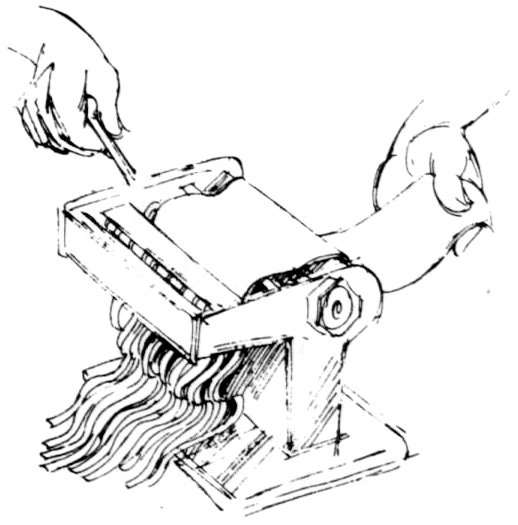
You can use the pasta machine to cut both the hand-rolled and the machine-rolled dough. If you have a circle of hand-rolled dough, just cut the circle into 4½-inch strips that will fit through the machine.
If you are using the electric model, remove the smooth rollers from the machine and fit one of the cutting attachments into place. For the hand-cranked model, insert the handle into one of the cutting slots. Turn on the motor or begin to turn the handle, and feed the ribbons of dough into the right side of the machine. They will come out on the left side in nicely cut strands. If the machine doesn’t cut them all the way through, your dough is probably too sticky, and you should set it aside to dry out a little longer.
DRYING
At this point you can simply drop the freshly cut noodles into boiling water. But it is probably more convenient to get the work of making pasta out of the way a little while before mealtime. And many Italians, I ought to mention, feel that drying is an essential step in the making of pasta; that omitting it changes the quality of the noodles. I can’t say that I agree, but it is certainly more convenient to make your noodles early in the day and dry them out.
Take up strands of pasta and loop them loosely around your fingers, forming nests. Let them dry on a cloth towel or on a cookie rack. Or else dry the pasta on a rack. You can use anything—a broomstick, the back of a chair, a clothesline. I’ve been in Italian kitchens where the fettucine hung like a curtain from a clothesline—strung across the corner of the kitchen. You might want to use one of those two- or three-tiered clothes racks that were designed to stand in the bathtub. I happen to have a marvelous pasta rack that was made for me by a friend. Unfortunately, it isn’t available commercially. It’s an upright pole with a disk on the top. Three wooden rods fit into holes on the disk. I drape the pasta over the rods. Then, when I want to cook it, I simply pull off one of the rods, carry it to the stove, and push the pasta into the boiling water.
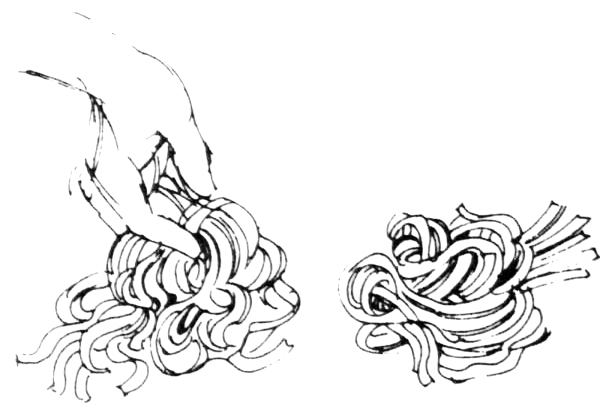
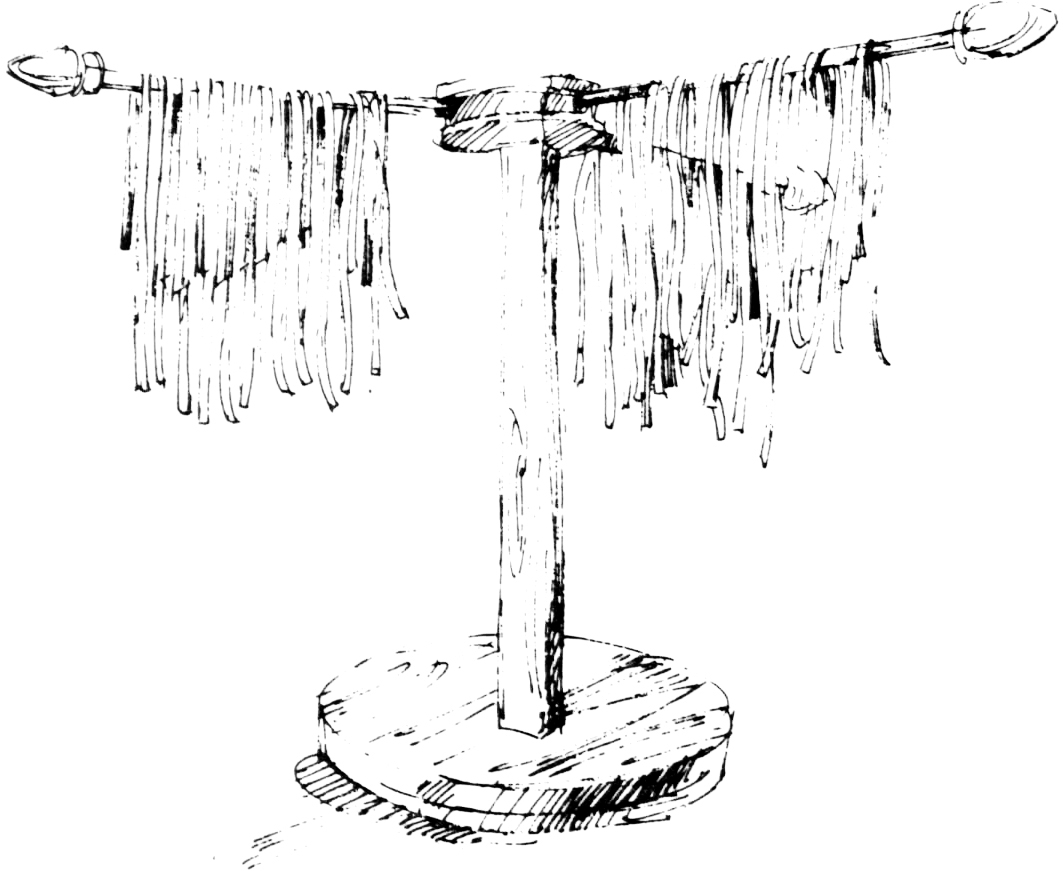
Once the pasta is really dry, you can put it in a tin and store it in the pantry, just as though it were commercial spaghetti. Be careful when you handle it: it will be very brittle. Or you can put the rolled-up nests into plastic bags and stick them in the freezer. But, once you’ve gone to all the trouble of making it, you will probably just want to cook it.
COOKING
The point to remember about homemade pasta is that it cooks in no time at all. Dried homemade pasta takes a little longer than the truly freshly made, but even so it will be done practically as soon as the water returns to the boil. Have your sauce ready before you put the noodles anywhere near the water. And don’t pay attention to any recipe that tells you to cook noodles for 8 to 10 minutes. This is too long, even for most commercial brands.
(Although I have to say that cooking is the one inexplicable art in pasta making. I find that there is absolutely no way to figure it out when you use commercial pastas. You put it in the pot, and you taste it after 4 minutes, and then after 8 minutes, and finally in desperation after 12 minutes, and it still has the crunch in the middle. I remember cooking some commercial whole-wheat pasta and it seemed that it was never going to become soft.)
Have lots of water boiling furiously. I don’t add any salt, because I think that your sauce and cheese will provide enough seasoning. But it’s a good idea to add a splash of oil to keep the strands from sticking together.
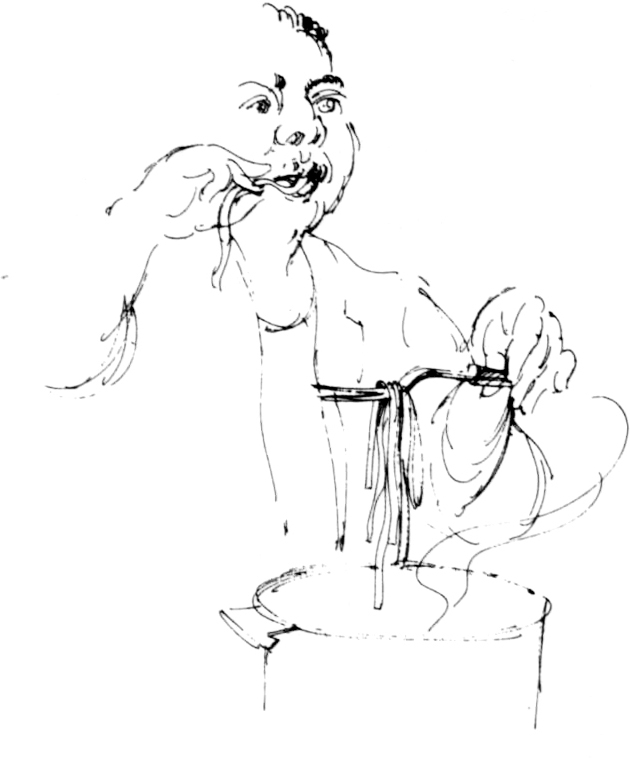
Drop the homemade pasta into the boiling water. Start testing it as soon as it returns to the boil. I’ve heard all kinds of methods for testing pasta, but the best one is just to fish out a strand and bite into it. If the noodle is beautifully pliable, with no hard core to it, then your pasta is done. Pour the contents of the pot into a colander in the sink, and get ready to mix in your sauce.
The same recipe can be used to make different-colored pastas and to incorporate different grains and flavors.
Green Pasta: Add ½ pound fresh spinach, wilted and squeezed dry, or half of a 10-ounce package frozen spinach, defrosted and squeezed dry, to the flour, salt, and olive oil. Use only 1 egg.
Tomato Pasta: Add 2 tablespoons tomato paste to the flour, salt, and olive oil. Use 1½ eggs. Add one to the flour, beat the second in a measuring cup, and pour half of it into the flour mixture.
Beet Pasta: This makes a beautiful scarlet dough. The amount of grated beets you add depends on the richness of color you desire. Start by adding 2 tablespoons grated cooked or canned beets to the basic recipe.
Golden Pasta: This comes from my friend Jim Nassikas, the director of the Stanford Court Hotel in San Francisco. Using the basic recipe, add 7 egg yolks instead of the 2 eggs. If you have trouble making the dough hold together, add an eighth egg yolk.
Basil Pasta: To the basic recipe add 3 tablespoons of a simple Pesto (see page 66).
Whole-Wheat Pasta: I like this whole-wheat pasta. It’s very rich tasting. Instead of 1½ cups flour, use 1 cup whole-wheat flour and ¼ cup white flour. Have on hand another ¼ cup white flour to knead in as necessary.
Buckwheat Pasta: Instead of 1½ cups flour, use ¾ cup buck wheat flour and ½ cup white flour. Have on hand another ¼ cup white flour to knead in as necessary.
Carl Sontheimer’s Parmesan Pasta: To the basic recipe add 3 ounces grated Parmesan cheese.
Nine egg yolks make this dough so rich that in order to knead it you first have to do a fraisage, a special method of blending butter-rich pâte brisée. Once this is done, the noodles are kneaded like any other pasta dough. It makes noodles that are very delicate, although extremely rich in ingredients. I think this is one of the best pastas I have ever tasted.
6 to 8 servings
4 cups flour, preferably durum or semolina
1 teaspoon salt
3 eggs
6 egg yolks
2 tablespoons water
Mix the dough as you did in the basic recipe. Make a mound of flour and salt, open a hollow in its center, break in the eggs, yolks, and water, and then combine with a fork until you are forced to continue mixing by hand.

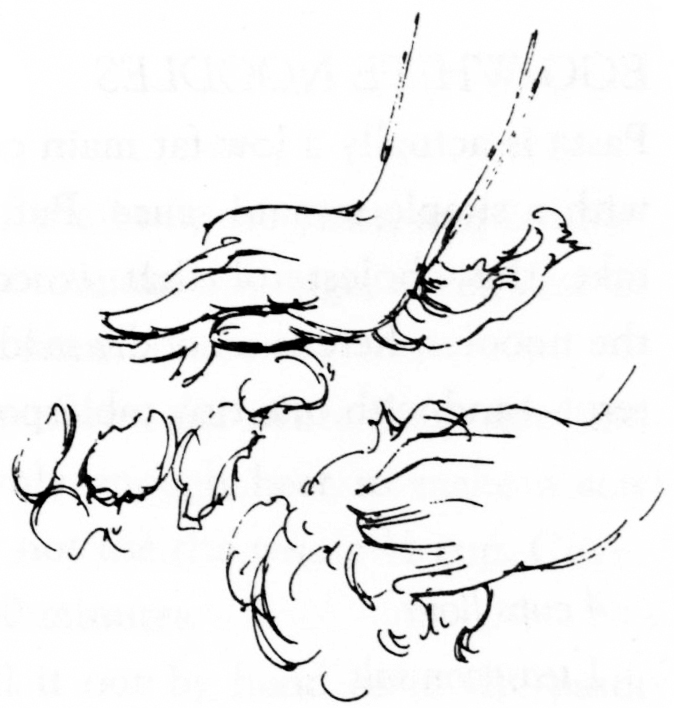
When you have formed the dough into a rough ball and cleaned off the table you begin the fraisage. Pull off walnut-sized pieces of dough, and push them away from you under the heel of your hand, smearing them on the board one at a time. When all the dough has been worked this way, gather the bits back into a ball, using the pastry scraper to help. The fraisage will have blended the fat and flour so that the dough can be kneaded. Knead well, and let rest 1 to 2 hours before you roll it out.
This dough keeps very well so if you don’t want to use all of it right away, just refrigerate it, wrapped in plastic, and tear off a piece as wanted; it will keep for several days.

EGG-WHITE NOODLES
Pasta is actually a low-fat main course, especially when it is served with a simple tomato sauce. But, for those people who can’t even take the cholesterol that is contributed by the egg yolks in the noodles, here is a noodle made with no yolks—ergo, no cholesterol—and with one tiny tablespoonful of olive oil.
6 to 8 servings
4 cups flour
1 teaspoon salt
1 tablespoon olive oil
7 to 8 egg whites
Put the metal chopping blade in place in the bowl of the food processor. Add the flour, salt, and oil, and process for 8 to 10 seconds. Add the egg whites and process about 15 seconds, until the dough is pliable, but not damp or sticky. Knead by hand for a few minutes, then let rest and roll out by hand or in the pasta machine.

BARBARA KAFKA’S BUCKWHEAT NOODLES
This recipe was given to me by Barbara Kafka, an imaginative and creative cook. It’s different from my own method (see page 44) of making buckwheat noodles because it has no eggs, and because the presence of beer and yeast makes the noodles very light.
3 or 4 servings
½ cup beer, at room temperature
1 teaspoon dry yeast
¼ cup buckwheat flour
1 cup white flour
¼ teaspoon coarse salt
In a small bowl, combine half the beer, the yeast, and 2 tablespoons of the buckwheat flour. Stir to make a sponge, cover, and let rise in a warm place for at least an hour.
Stir in the rest of the buckwheat flour, the white flour, salt, and 2 tablespoons of the beer. Use only enough beer to make a soft but firm dough. You will probably not use the whole ½ cup. Cover again, and let the dough rest for 30 minutes.
Divide it into quarters and roll it out by hand or in the pasta machine. Don’t hesitate to flour the dough if it seems sticky as you work it. Cut into medium-width noodles.
I am indebted to Elizabeth Andoh’s Japanese mother-in-law for this recipe. Because the dough is made without eggs or oil, it is very stiff, and the best way to knead it is to wrap it in a few layers of plastic bags and then tread on it. It’s great fun to make, and produces thick snow-white noodles that are traditionally used in soup.
4 servings
1 tablespoon salt
⅔ cup water
3 cups udon flour*
Add the salt to the water and stir until it is dissolved. Put the flour in a bowl and pour in the salt water. Stir lightly until the mixture is crumbly. Form it into a ball (this will not be easy). Put it in a plastic bag to rest for 30 minutes, or refrigerate for several hours.
Now the fun begins. Put the plastic-wrapped dough into a very sturdy plastic bag. In Mrs. Andoh’s book, At Home with Japanese Cooking, she recommends stamping on the dough with the whole of your foot. We found that the best method was to tiptoe with the ball of the foot in what seemed a very Japanese manner. When the dough becomes flat, open up the bags and fold it into a ball again. Repeat until the dough is smooth and satiny: at least 5 minutes. Finally, stamp the dough into an oval about ¼ inch in thickness.
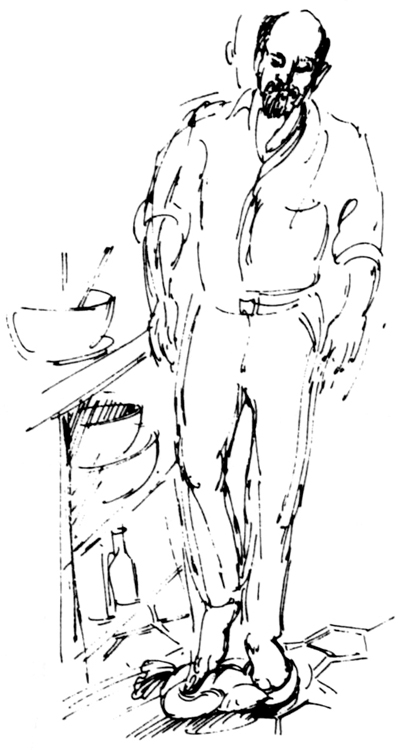
(If the whole process seems silly to you, you can knead the dough by hand for 10 to 15 minutes if you have the strength, or process it with a dough hook. But I do hope you’ll try the stepping technique.)
Roll out the dough on a floured board, stretching it into a large oval. Make 4 or 5 pleated folds, and cut the dough into ¼-inch-wide ribbons with a cleaver or a sharp knife.
*A combination of unbleached flours available at Asian groceries, if you can get it.
BREAD NOODLES
These are fun, an unusual noodle made of yeast-rising bread dough. It’s a good, solid accompaniment to any sauced meat, nice with Irish stew, even better with the Instant Beef Bourguignon you’ll find on page 370 of The New James Beard. The recipe makes enough dough so that half of it can be used for noodles and the other half for crunchy bread sticks.
4 servings
2½ cups flour
½ teaspoon salt
¾ teaspoon dry yeast
1 cup warm water
1 egg white beaten with 1 tablespoon water and ½ teaspoon salt
Sesame seeds
In a mixing bowl, blend the flour, salt, yeast, and warm water. Turn out the dough onto a lightly floured board and knead it for 15 minutes. You may have to add extra flour to make a stiff but supple dough. Put it into an oiled mixing bowl, turning so that it is coated with the oil. Cover with plastic wrap and allow to rise in a warm place until it has doubled in bulk, about 1 hour.

Punch down the dough. Return half to the bowl and take the other half to make into bread sticks. With a knife, cut the dough into 8 equal pieces. Using your palms, roll each piece into a thin cylinder about 8 inches long. Cut each one in half and place them, 1 inch apart, on an oiled baking sheet. Let them sit for 20 minutes, until they just begin to soften in contour. Brush with the egg glaze, sprinkle with sesame seeds, and bake for 20 to 25 minutes at 300°. The longer they cook, the crisper they will become.
Meanwhile, punch down the rest of the dough again. Run it through the pasta machine several times, dusting it with flour if it feels sticky. Begin to narrow the opening of the machine and continue until the dough is quite thin. Change the rollers and cut the dough into noodles. Lay them on a wooden board or dish towel to rise slightly while you bring a pot of water to the boil. Drop the noodles into the boiling water. Test for doneness as soon as the water returns to the boil. Drain in a colander and serve with a hearty meat-based sauce and a basket of sesame-studded bread sticks.
This unusual recipe may well be the oldest form of pasta we have. It comes from Bulgaria, but there are noodles like it in modern Hungarian cooking, where they are called trahana. I think that these balls of dough were once carried in the saddlebags of nomadic horsemen, then grated into pots of water when they made camp for the night. I make them with a strong, salty caciocavallo cheese that’s similar to the Bulgarian kashkaval.
4 to 6 servings
2 eggs
1 teaspoon salt
1¾ cups flour
1 cup water
1 cup milk
2 tablespoons butter
1 cup loosely packed grated cheese
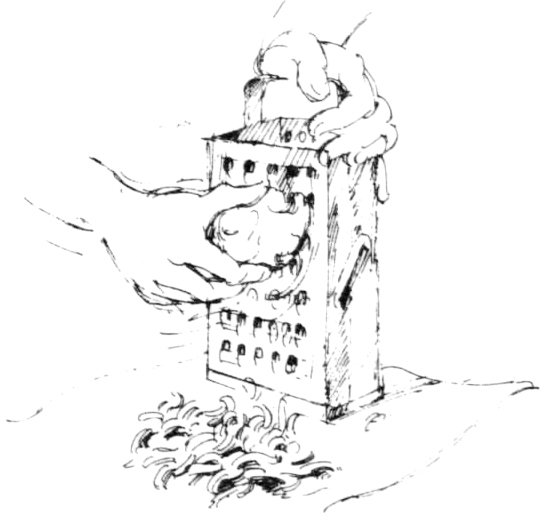
Beat the eggs and ½ teaspoon of the salt in a bowl. Add the flour, mixing with a wooden spoon until it is incorporated. Begin to knead in the bowl, and, when all the flour has been mixed in, turn the dough out onto a flat surface. Knead for 3 to 4 minutes more, until the dough is firm, stiff, and very smooth. Form it into a ball, wrap it in plastic, and freeze. This should take at least half a day, but it can, of course, then remain in the freezer for weeks.
When the ball of dough is frozen hard, cover a large area of your kitchen counter or table with sheets of wax paper. Holding a grater over the paper, shred the dough through its largest holes, moving the grater back and forth so that the shreds don’t fall on top of each other. When you’re done, scatter and separate the bits of pasta so that they won’t stick together. Let the shreds dry out on the paper. Once they’re completely dry, you can gather them onto a single sheet of paper and store as you would any pasta.
To cook the shreds: Heat the water, milk, remaining salt, and 1 tablespoon of butter in a saucepan. Bring to a boil and sprinkle in the pasta slowly so that the liquid remains at the boil. Lower the heat and simmer for a few minutes, uncovered, until the pasta is firmly cooked and all the liquid is absorbed. Turn it into a baking dish and dot with the remaining butter. Dry out in a 225° oven for 10 to 15 minutes. Just before serving, toss it with lots of grated cheese.
SPÄTZLE
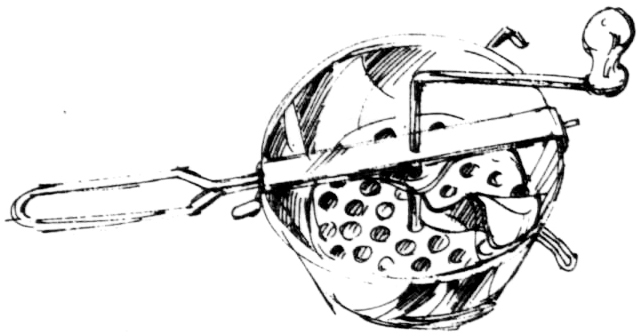
Spätzle are tiny dumplings, bits of dough that are never rolled out but are simply dropped into boiling water, and keep whatever shape they happen into when the water hits them. I’ve tried two kinds of spätzle makers. One looks rather like a food mill: a circular metal bowl with a flat perforated base and a blade that goes around and around over the base. The other is a rectangular sieve, something like a grater, with a bowl that slides back and forth over it. In both cases, the dough is spooned into the bowl and falls through the large holes on the bottom, being cut off either by the turn of the blade or by the movement over the grater.
But the fact is that you don’t need either of these contraptions to make spätzle. I suspect that the original spätzle makers just dropped bits of dough off the tip of a spoon into boiling water or chopped bits off a damp board with a wet knife.
The most elegant spätzle I’ve ever had was at the Four Seasons Restaurant in New York, where it came with a rabbit paprikash. Use them with beef stew or veal goulash. Or go mad and have them with chili. They’d be wonderful, just the right combination of blandness, starchiness, and chew.
4 servings
⅔ cup hard-wheat flour or semolina
1 egg
¼ cup warm water or milk
Measure the flour into a bowl. Add the egg and beat it with a wooden spoon, incorporating the flour. Add the liquid and continue to stir briskly until you have a stiff batter. Put it aside to rest for 15 minutes. It will become even stiffer.
Get your cooking liquid to a rapid boil. If you have a spätzle maker, place it over the boiling liquid, spoon in the batter, and turn the crank or slide the carriage back and forth. Pear-shaped drops of batter will fall into the liquid, rising to the surface as they cook. Skim them off with a slotted spoon, and put them in a warm bowl with a lump of unsalted butter. If you don’t have a spätzle maker, pick up bits of batter on the tip of a teaspoon and flick them off into the boiling water with a second spoon.
I’m not sure why this dish is called spatzen and the other is called spätzle. I suspect that it depends on what side of the street or what district of Vienna you lived in. The ingredients are slightly different, but the technique remains the same.
4 servings
¾ cup flour
Pinch baking powder
Pinch salt
1 egg
⅓ cup water, approximately
Combine the flour, baking powder, and salt in a bowl. Stir in the egg with a wooden spoon, and add enough of the water to make a stiff batter. Set it aside to rest for 15 minutes. Then cook the spatzen by dropping bits of batter into boiling liquid through a spätzle maker or from the tip of a spoon. Drain, mix with unsalted butter, and serve either with gravy or with grated cheese.
NOCKERLI
Nockerli are tiny dumplings made by pinching off bits of dough and rolling them into tiny balls. They are nice cooked in a rich beef broth, or mixed with a hearty vegetable, as in the Noodles with Cabbage on page 81.
8 servings
2 eggs
3 cups flour
1 teaspoon salt
1 tablespoon butter, melted
¾ cup water

In a large bowl, mix the eggs, flour, and salt. Add the melted butter and water and beat with a wooden spoon for 4 minutes. Let sit for at least 20 minutes. Then, using your lightly floured hands, pinch off bits of dough, roll them gently between your palms, and drop them into boiling water or broth. They are done when they float to the top.
POTATO GNOCCHI
I love gnocchi. To me, they’re sort of magic. They have that soul-satisfying potatoey, floury quality, and with a sauce they are just wonderful.
6 to 8 servings
2 pounds potatoes (3 large potatoes)
2 cups flour
2 eggs
2 tablespoons butter
½ teaspoon salt
¾ teaspoon freshly ground black pepper
⅓ cup butter, melted
Grated Parmesan or caciocavallo cheese
Peel and quarter the potatoes. Boil them in salted water until they can be pierced with a fork. Drain, return to the pan, and mash with a fork. Set the pan over a very low flame, and dry out the potatoes, stirring occasionally, until they are no longer gummy. This may take as long as 10 minutes. (You can also bake the potatoes in a 450° oven until they are done, then cut them in half lengthwise and put them back into the turned-off oven to dry for 10 minutes. Remove the insides and mash them with a fork. If you use this method, I need hardly mention, you get to eat all the crisp potato skins.)
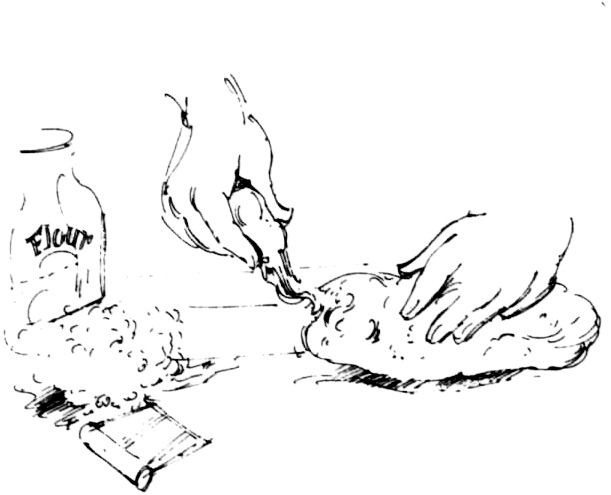
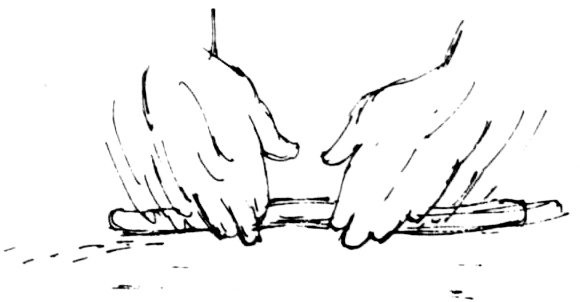
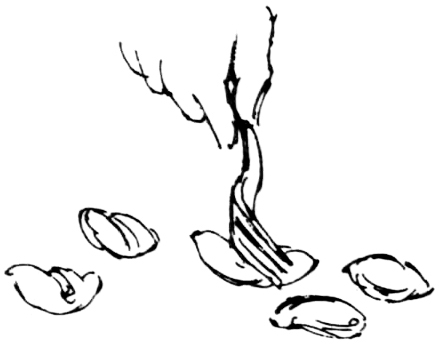
Put the mashed potatoes in a mixing bowl and beat in the flour, eggs, butter, salt, and pepper. When all the ingredients are incorporated, turn the dough out onto a work surface and knead it gently for 3 minutes. It will be very soft. Spill a pile of flour onto the work surface, and use it to coat your hands while you work with the gnocchi. Pull off a lump of dough the size of a lemon and roll it into a long sausage as wide as your finger. Work from the center out, trying to make the roll even in width. Continue until you have rolled all the dough. Then, using a knife or your dough scraper, cut the dough into pieces ¾ inch long. With the back of a knife or fork, make a slight diagonal indentation and fold it in toward the dent. Roll the gnocchi gently under the tines of a fork so that they are ridged.
Bring a large pot of water to the boil. Drop the gnocchi into the water about 8 at a time, and cook them for 3 to 4 minutes, until they float to the top. Remove with a slotted spoon, and arrange in a buttered baking dish. Pour on the melted butter and sprinkle with grated cheese. Heat in a 350° oven for 15 to 20 minutes. If you make the gnocchi early in the day, you can get them ready in the pan and then reheat them for 30 minutes in the oven.

To the basic dough add ⅓ cup chopped fresh basil and ⅓ cup chopped fresh chives.
To the basic dough add ½ cup grated Gruyère cheese and a large pinch of mace.
Spread about 2 cups Light Tomato Sauce (page 67) over the cooked gnocchi arranged in the baking dish and sprinkle liberally with Parmesan cheese, then bake as above.
GNOCCHI VERDI
These are sometimes called malfatti, which means “badly made,” because they are so delicate that when they are cooked they are quite uneven in shape. You have to skim them out of the water very, very carefully because of their fragility, but they well repay the care: they just melt on your tongue when you eat them.
6 servings
12 ounces cooked spinach, drained and chopped (approximately 1 pound fresh spinach, or two 10-ounce packages frozen spinach)
½ teaspoon salt
Freshly ground black pepper
⅛ teaspoon nutmeg
1 tablespoon butter
8 ounces ricotta cheese
2 eggs
1½ ounces Parmesan cheese, grated
3 tablespoons flour
SAUCE:
½ cup butter, melted
½ cup grated Parmesan cheese
Put the spinach in a saucepan with the salt, pepper, nutmeg, butter, and ricotta. Stir it over low heat for about 5 minutes to dry it out. Remove from the heat and beat in the eggs, 1½ ounces Parmesan, and the flour. Set the mixture aside to cool for 2 hours.
Dust a wooden board and your hands with flour. Pull off walnut-sized pieces of the spinach mixture, and form croquettes the shape of a cork. Roll them in the flour and, when they are all ready, drop them carefully into a large pot of very gently simmering water. Don’t let the water boil, or the action may cause the gnocchi to disintegrate. If the mixture seems too soft, don’t worry, because the eggs and flour will hold the gnocchi together when they come in contact with the simmering water.
When the gnocchi rise to the surface of the water, they are finished cooking. Skim them off with a slotted spoon, drain them well, and place them in an ovenproof baking dish lightly coated with butter. Pour the melted butter over then, sprinkle with the ½ cup Parmesan cheese, and heat in a 350° oven for 20 to 30 minutes.
