
Whether your schedule demands a speedy meal or allows you to go low and slow, modern multipot technology can be your helping hand with dinner. I’ve learned that sauces, stews, and even risotto are a walk in the park for a multipot. Spoiler alert: You’re going to have a new favorite way to make prime rib!
LENTIL STEW WITH SWEET POTATOES AND KALE
KOREAN BRAISED SHORT RIBS (GALBIJJIM)
FRENCH ONION RISOTTO
SERVES 3 or 4 as a main dish or 6 to 8 as a side dish TIME 1 hour
Let’s combine the best parts of French onion soup and risotto into one recipe! Both would usually take hours to cook separately, but I like to let my multipot get it done in record time. What appears down inside the pot, after the steam escapes, is a luscious, creamy risotto tinged with a deep caramelized onion sweetness. Pair with a light green salad and a glass of pinot noir for a luxurious meal. Bon appétit!
2 tablespoons unsalted butter
2 large yellow onions, halved and cut into ¼-inch-thick slices (about 4 cups)
2 teaspoons kosher salt, plus more for seasoning
1 teaspoon sugar
1 cup Arborio rice
1 teaspoon dried thyme
2 garlic cloves, minced
2¼ cups low-sodium beef stock or broth (or vegetable broth)
⅓ cup mascarpone cheese
½ cup grated Gruyère cheese, plus more for serving
Freshly ground black pepper (optional)
-
Press the “sauté” button on the multipot and let the insert pot get hot. Add the butter. When the butter has melted and begins to bubble, add the onions, salt, and sugar. Let the onions cook, stirring occasionally, until they start to soften and release their liquid, about 3 minutes. Then, cook until the onions caramelize and get good and brown, another 12 to 16 minutes, stirring occasionally only when you see the onions start to brown. (It’s okay to walk away for a minute or two here.)
-
When the bottom of the pot has an even brown layer and the onions have all turned brown, add the Arborio rice, thyme, and garlic. Stir to coat all the rice, then add the broth, stirring and scraping the pot to release any browned bits from the bottom. Cancel the “sauté” function.
-
Attach the lid of the multipot and turn the steam release handle to “sealing.” Press the “pressure cook/manual” button, select high pressure, and set the cooking time for 10 minutes.
-
When the time is up, turn the steam release handle to “venting” to quick-release the pressure.
-
Open the pot, add the mascarpone and Gruyère cheeses, stirring until the mascarpone has melted and incorporating any delicious browned bits from the bottom of the pot. Season with salt and pepper (if using) to taste. Divide among bowls (or transfer to one big serving bowl), top with more shaved Gruyère, and enjoy!
LENTIL STEW with SWEET POTATOES AND KALE
SERVES 4 TIME 50 minutes
Convert the health-food skeptics in your life with this nutty and hearty veggie stew. It’s a nutritional powerhouse that’s creamy and satisfying enough to be an indulgent meal, especially when paired with a crusty slice of country bread or naan.
1 tablespoon extra-virgin olive oil
1 onion, chopped
1 large sweet potato (12 ounces), peeled and cut into ½-inch pieces (about 2 cups)
2 large stalks celery, cut into ½-inch pieces (about 1 cup)
3 garlic cloves, minced
2 teaspoons ground cumin
1 teaspoon ground turmeric
1 teaspoon dried thyme
½ teaspoon ground ginger
¼ teaspoon ground coriander
3 teaspoons kosher salt
4 cups vegetable broth
½ cup split red lentils
½ cup French green lentils
½ cup canned crushed tomatoes
2 cups packed chopped kale
¼ cup chopped fresh flat-leaf parsley, plus more for garnish
Juice of ½ lemon
-
Press the “sauté” button on the multipot and let the insert pot get hot. Add the olive oil, then add the onion and cook, stirring occasionally, until the onion is translucent, about 3 minutes. Add the sweet potato, celery, garlic, cumin, turmeric, thyme, ginger, coriander, and 2 teaspoons of the salt. Sauté until the celery is soft and the spices become super fragrant, another 3 minutes. Stir in the vegetable broth and 2 cups water. Add the red lentils, French green lentils, and crushed tomatoes. Cancel the “sauté” function.
-
Attach the lid to the multipot and turn the steam release handle to “sealing.” Press the “pressure cook/manual” button, select high pressure, and set the cooking time for 13 minutes.
-
When the time is up, turn the steam release handle to “venting” to quick-release the pressure.
-
Open the pan and, with an immersion blender, give the stew a few quick pulses to puree just a bit of it—you want the sweet potatoes to be chunky, so just two or three pulses should do it. (You can also carefully transfer about 1 cup of the stew to a stand blender, blend until smooth, then return that portion to the pot.)
-
Stir in the kale, parsley, and lemon juice. Close the lid again and press the “pressure cook/manual” button. Select high pressure and set the cooking time for just 2 minutes.
-
When the time is up, turn the steam release handle to “venting” to quick-release the pressure.
-
Open and season with the remaining 1 teaspoon salt (or to taste). Serve topped with parsley. (The stew can also be cooled and refrigerated for up to 3 days and reheated.) Enjoy!
TAKE IT FROM ME Getting to Know Your Multipot
It’s worth taking the time to get to know your multipot. Read the directions to learn what all the buttons and knobs do and, most importantly, how to be safe when you’re pressure cooking. (True story: I burned my chin on the steam from the venting valve on one of my mother’s machines when I was younger. I thought I was giving myself a “steam facial.” Don’t do this.) Here are a few crucial tips:
• Don’t forget the liquid! One common mistake people make when cooking with a multipot is not adding enough liquid to bring to pressure.
• Multipots are very talkative. Learn what the beeps mean—like when the machine has come up to pressure and is starting the actual cooking time.
• There are two ways to let the steam out of the multipot when the cooking is finished. “Natural release” means letting the machine slowly release pressure on its own. “Quick release” means turning the steam release handle or venting knob to “vent” so that all the steam pressure releases immediately. (The food inside cooks longer if you allow the pressure to release naturally.) Many recipes call for a few minutes of natural release, followed by quick release.

VIETNAMESE CHICKEN CURRY

SERVES 6 TIME 40 minutes, plus marinating time
This Vietnamese chicken curry is near and dear to my heart. It was a dish that my parents made for almost every ancestral celebration. It’s often served with white rice or a light, crunchy Vietnamese baguette. My dad and my brother-in-law, Jason, bonded over this curry (and a couple beers). It’s also Jason’s favorite Vietnamese dish to order whenever we go out.
I’d describe Vietnamese curry as being slightly lighter and simpler than the rich Thai and Indian ones. It’s seasoned with fish sauce, ginger, and garlic and finished with a light coconut creaminess.
FOR THE CHICKEN
1 tablespoon Madras curry powder
1 teaspoon onion powder
1 teaspoon garlic powder
1 teaspoon kosher salt
Freshly ground black pepper
1 pound boneless, skinless chicken thighs
1 pound chicken drumsticks
FOR THE CURRY
2 tablespoons extra-virgin olive oil
1 yellow onion, chopped
3 or 4 garlic cloves, minced, to taste
1 tablespoon minced peeled fresh ginger
1 (14-ounce) can full-fat coconut milk (stirred if separated)
1 cup low-sodium chicken broth
1¾ pounds Yukon Gold potatoes (4 or 5), peeled and cut into 1-inch chunks
3 carrots, cut into 1-inch chunks
2 stalks fresh lemongrass (tender white inside parts only), cut into 2-inch pieces
2 tablespoons Madras curry powder
2 tablespoons fish sauce
1 tablespoon sugar
Kosher salt
-
PREPARE THE CHICKEN: In a large bowl, combine the curry powder, onion powder, garlic powder, salt, and pepper to taste. Add all the chicken and stir until completely coated. Let sit for at least 15 minutes while preparing the rest of the ingredients.
-
MAKE THE CURRY: Press the “sauté” button on the multipot and let the insert pot get hot. Add the olive oil and then the onion and cook, stirring frequently, until the onion begins to brown, 6 to 8 minutes. Add the garlic, ginger, and the chicken. Mix well. Add half the coconut milk, the broth, potatoes, carrots, lemongrass, curry powder, fish sauce, and sugar and mix gently to combine.
-
Attach the lid to the multipot and turn the steam release handle to “sealing.” Press the “meat/stew” button and set the cooking time for 12 minutes.
-
When the time is up, turn the steam release handle to “venting” to quick-release the pressure. When you’re ready to eat, pour in the rest of the coconut milk. Stir gently and season with salt to taste. (The curry can also be cooled and refrigerated, covered, for up to 3 days and reheated.) Enjoy!
TIPS FOR BUZY LIVES Sounds Appealing
Short on time? Don’t peel the potatoes and carrots. The skins are perfectly edible, and there’s no compromise in flavor or texture.
SERVES 2 to 4 TIME 1 hour
Nate has always been “creative” in the kitchen. The first time he cooked for me, on our second or third date, I was served a burrito stuffed with boxed mac and cheese and hot dogs. There was also a bonus side of store-bought frozen party meatballs. I did my best to appear to enjoy his meal as he watched excitedly. Being in a new relationship, I didn’t want to offend him, so I said, “Mmmmm!” while inside, I was secretly wondering how it would ever work. Fast-forward ten years and he’s come a long way. His “advanced” version of meatballs is now made from scratch with ground turkey thigh meat, oats, herbs, and a splash of fish sauce, which is the secret ingredient here and a trick picked up from my dad. Our go-to marinara is Rao’s Homemade, which Nate enhances with a hint of sriracha. Serve with pasta, zoodles, or spaghetti squash, or with my Cheesy Garlic Bread (this page).
This recipe makes about 12 meatballs the size of golf balls.
1 pound ground turkey (thigh meat preferred, if available)
½ cup finely grated Parmesan cheese
¼ cup quick-cooking oats
1 large egg
1 tablespoon chopped fresh flat-leaf parsley
1 tablespoon chopped fresh basil
1 teaspoon fish sauce
1 teaspoon garlic powder
1 teaspoon dried oregano
1 teaspoon kosher salt
½ teaspoon onion powder
⅛ teaspoon red pepper flakes (optional)
4 tablespoons extra-virgin olive oil
1 (24-ounce) jar marinara sauce
12 ounces spaghetti or other pasta
-
In a large bowl, combine the turkey, Parmesan, oats, egg, parsley, basil, fish sauce, garlic powder, oregano, salt, onion powder, and red pepper flakes (if using) by hand until thoroughly blended. Using a 1½- or 2-inch cookie scoop, form the mixture into meatballs and transfer to a plate. (They’ll cook through at any size, so make the size you want.)
-
Press the “sauté” button on the multipot and let the insert pot get hot. Drizzle in 2 tablespoons of the olive oil. When the oil shimmers, add about 6 meatballs to the pan and brown them for 2 to 3 minutes per side, turning them only when they release easily from the pan. (These meatballs are super tender but also a little fragile, so don’t pull on them if they don’t want to move yet.) Gently transfer the meatballs to a plate. Add another 1 tablespoon of the oil to the pan and repeat with more meatballs. Repeat again with the remaining meatballs, adding the last tablespoon of the oil before browning. (You might not need the third batch if you made larger meatballs.) Cancel the “sauté” function.
-
Pour 2 cups of the marinara sauce into the insert pot, scraping up any browned bits off the bottom of the pot as you add the sauce, then gently add the meatballs to the pot, making sure not to squish them too much.
-
Attach the lid to the multipot and turn the steam release handle to “sealing.” Press the “pressure cook/manual” button, select high pressure, and set the cooking time for 7 minutes.
-
When the time is up, let the pressure release naturally for 7 minutes, then turn the steam release handle to “venting” to quick-release the remaining pressure. (The meatballs can also be cooled and refrigerated for up to 3 days and reheated.)
-
Meanwhile, cook the pasta according to package directions. Drain and toss with the remaining marinara sauce.
-
Open the multipot and serve the meatballs over the hot spaghetti.
TIPS FOR BUZY LIVES Skip a Step!
These meatballs are also delicious without the browning step—so if you’d like to save time or just make things a little easier, simply add the sauce to the olive oil in the insert pot and nestle the meatballs into the sauce!
SERVES 4 to 6 TIME 1 hour 30 minutes
This is another one of Nate’s originals that I’ve since made my own. He used to work as a freelance photographer and would start some mornings by piling pork shoulder into a pot and simmering it all day on the stove. A delicious waft of slow-cooked meat would hit me as I walked in after spending all day in the office. Now I use the more efficient multipot to get results that are just as aromatic. I’ll braise the pork until extremely tender, then shred it into chunky bits and crisp them up under the broiler. Pile the meat into tacos with Cotija cheese, cilantro, and my Quick Pickled Red Onions (this page); or layer it in a bowl of rice, beans, avocado, corn, and my Quick Chipotle Salsa (this page). Or come to think of it, make nachos or sliders. However you end up eating the carnitas, they will be something to tacobout.
2 tablespoons extra-virgin olive oil
2 pounds boneless pork butt or pork shoulder, cut into 3-inch chunks
½ yellow onion, diced
5 garlic cloves, roughly chopped
2 teaspoons kosher salt
1 teaspoon ground cumin
1 teaspoon dried Mexican oregano
1 bay leaf
½ lemon, seeded
½ orange, seeded
¼ cup fresh cilantro, chopped
Freshly ground black pepper
1 cup low-sodium chicken broth
-
Press the “sauté” button on the multipot and let the insert pot get hot. Drizzle in the olive oil. Working in batches, sear 4 pieces of pork at a time, cooking about 3 minutes per side, or until all the pork is golden brown all over. Transfer seared pork to a plate and set aside. Repeat the process until all the pieces are seared. (You don’t want to crowd them in the pot, so be patient here.) Cancel the “sauté” function.
-
Return all the pork to the pot, then add the onion, garlic, 1 teaspoon of the salt, the cumin, oregano, and bay leaf. Juice the lemon and orange over the meat, then drop the squeezed citrus shells in also. Add the cilantro and a generous grind of black pepper, then pour the broth all over everything to distribute the spices.
-
Attach the lid to the multipot and turn the steam release handle to “sealing.” Press the “meat/stew” button on high pressure and set the cooking time to 35 minutes.
-
When the time is up, let the pressure release naturally for 15 minutes, then turn the steam release handle to “venting” to quick-release any remaining pressure.
-
Position a rack 4 inches from the broiling unit and preheat the broiler. Line a rimmed baking sheet with foil.
-
Transfer the meat from the multipot to a bowl, drizzle with ½ cup of the juices from the pot, and season with the remaining 1 teaspoon salt. Shred the meat, mixing it with the juices as you go and adding a little more juice, if your meat looks dry. Spread the meat on the foil-lined baking sheet and broil for 3 to 4 minutes, until the top of the pork dries out and gets browned and crisp. (Watch carefully so it doesn’t burn!) Enjoy!
TIPS FOR BUZY LIVES Carnitas for Later
Broiling the carnitas gives them the beautiful crunchy bits you love—but the effect doesn’t really last in the fridge. If you’d like to make the carnitas a day or two ahead, allow the shredded, seasoned meat to cool in a bowl. Transfer to a sealed container and refrigerate up to 3 days. Right before you serve, spread the meat out on a foil-lined baking sheet and broil as directed.
TAKE IT FROM ME Worth the Search
Mexican oregano is a little more potent and flavorful than regular oregano, so look for it in the Hispanic foods section of a large grocery store, or even on Amazon.

KOREAN BRAISED SHORT RIBS (GALBIJJIM)

SERVES 4 TIME 1 hour 30 minutes
In LA’s Koreatown there’s always a long line flowing out the door of Sun Nong Dan, a 24-hour, cultlike, sweat-inducing cornerstone of the area. They’re known for their galbijjim, a cauldron of spicy hot Korean braised short ribs, bubbling with potatoes, carrots, and onions (and a layer of melted cheese on top if you want). When I told my sister about my experience eating there, she couldn’t wait to come visit. In the meantime, I sent her this recipe (after rounds of testing and enjoying it at home), and once she made it herself, she understood what I meant.
The cut of meat you choose to use is dependent on taste. Short ribs are fattier and more flavorful, boneless short ribs are meaty and convenient, and chuck roast is leaner but also winds up very tender! Also, the meat from these ribs is used in the amazing Korean Beef Hash (this page).
4 pounds beef short ribs, boneless short ribs, or chuck roast, cut into 3- to 4-inch pieces
1 large yellow onion, quartered
½ Korean pear, other Asian pear, or Red Delicious apple, chopped
7 garlic cloves, peeled
2 tablespoons minced fresh ginger
½ cup soy sauce
1 tablespoon kosher salt
2 tablespoons honey
2 tablespoons gochujang
½ cup kimchi (with juices)
¼ cup soju or sake
1 to 3 tablespoons gochugaru (or ¼ to ¾ teaspoon red pepper flakes), to taste
2 large carrots (about ¾ pound total), cut into 1-inch pieces
1 small daikon or Korean radish (about ¾ pound), peeled and cut into 1-inch chunks
1 russet or 2 Yukon Gold potatoes (about ¾ pound total), peeled and cut into 2-inch chunks
¼ cup thickly sliced scallions (green parts only)
1 tablespoon sesame oil
Toasted sesame seeds, for garnish
-
Put the meat in a large bowl, add cold water to cover, and soak for 30 minutes. (This draws out impurities in the meat and loosens extra shards in the bone so they can be rinsed off.) Rinse and drain the meat and pat dry.
-
In a blender, combine the onion, pear, garlic, ginger, soy sauce, salt, honey, gochujang, kimchi and its juices, soju, and gochugaru. Blend until smooth.
-
In the insert pot of a multipot, stir together the meat and the sauce mixture until the meat is coated. Attach the lid to the multipot and turn the steam release handle to “sealing.” Press the “meat/stew” on high pressure and set the cooking time for 30 minutes.
-
When the time is up, turn the steam release handle to “venting” to quick-release the pressure. Open and add the carrots, radish, and potato(es). Secure the lid again and turn the steam release handle to “sealing.” Press the “meat/stew” on high pressure button again and set the cooking time for 8 minutes.
-
When the time is up, turn the steam release handle to “venting” to quick-release the pressure. Scoop the stew into a serving bowl. (You can also braise the ribs up to 3 days ahead and reheat in a pot over low heat on the stove before serving.) Garnish with scallions, a drizzle of sesame oil, and a sprinkling of sesame seeds.
SLOW-COOKED PORK FOR BÁNH MÌ SANDWICHES

SERVES 6 TIME 45 minutes, plus 8 hours slow cooking
Many of my friends growing up had taco Tuesdays or Friday night pizzas every week. We had bánh mì Fridays! My parents worked long hours and my sister and I had piano lessons every Friday evening in downtown San Jose, California. Since they didn’t have time to cook, my parents would stop by a tiny shack for a quick dinner before we faced our teacher. It was the best bánh mì in town. I always asked for the classic ham and pâté, while my sister went for the Vietnamese grilled pork. And back then a sub was only 75¢! I remember being shocked a few years later to see the price had been increased to $5.
Bánh mì are now everywhere. Besides pork and pâté, you can find them in many incredible Asian-inspired variations. Here I start by rubbing a pork shoulder with five-spice, caramelizing it, then cooking it until it becomes fall-apart tender. You have the option of cooking it fast or slow in the multipot. If you can’t find the light Vietnamese baguettes, use a French baquette or ciabatta rolls. You could also pile the pork into sliders with the usual spicy sriracha aioli, cilantro, sliced jalapeños, onions, and pickles.
FOR THE PORK
1 tablespoon Chinese five-spice powder
1 tablespoon dark brown sugar
1 tablespoon kosher salt
1½ teaspoons freshly ground black pepper
2 pounds boneless pork shoulder or pork butt
3 tablespoons neutral-tasting oil (such as avocado oil)
½ cup soy sauce
2 tablespoons hoisin sauce
1 tablespoon minced fresh ginger
1 teaspoon sesame oil
6 garlic cloves, minced
FOR THE SANDWICHES
1 cup mayonnaise (preferably Kewpie)
¼ cup sriracha
2 small or 1 large baguette, sliced for 6 sandwiches, or similar hearty 6-inch rolls
Pickled Carrots and Daikon (this page)
½ white onion, very thinly sliced
½ English cucumber, halved lengthwise, then cut on the diagonal into ¼-inch-thick slices
12 sprigs fresh cilantro
1 or 2 jalapeños, thinly sliced (optional)
-
PREPARE THE PORK: In a small bowl, mix together the five-spice powder, brown sugar, salt, and black pepper. Generously rub the mixture all over the pork.
-
Press the “sauté” button on the multipot and let the insert pot get hot. Add the neutral oil, then sear the pork on all four sides until the pork has a nice brown crust and releases easily from the pan when you turn it with tongs, 3 to 5 minutes per side. (It’s okay if the sugar burns a little in the pan.)
-
In another bowl, stir together the soy sauce, hoisin, ginger, sesame oil, and garlic. Pour the sauce into the insert pot of a multipot (or into a slow cooker) and place the pork on top.
-
Cover the multipot with a glass lid (or if using the regular lid, be sure to set the steam release handle to “venting”). Press the “slow cook” button, set to low pressure, and set the cooking time for 8 hours.
-
When the time is up, shred the pork directly in the liquid in the pot, so the pork absorbs the juices. It should be fall-apart tender. (If you’re saving the pork for later, refrigerate the shredded meat up to 3 days, then reheat it in a skillet over medium heat, until it’s heated through completely, before serving.)
-
TO ASSEMBLE SANDWICHES: In a small bowl, stir together the mayonnaise and sriracha. Spread about 2 tablespoons of the mayonnaise on each side of the baguettes (or to taste), then add a generous helping of shredded pork with all the juices to the bottom side of each sandwich. Top with pickled carrots and daikon, onion, cucumber, cilantro, and jalapeños, and serve immediately.
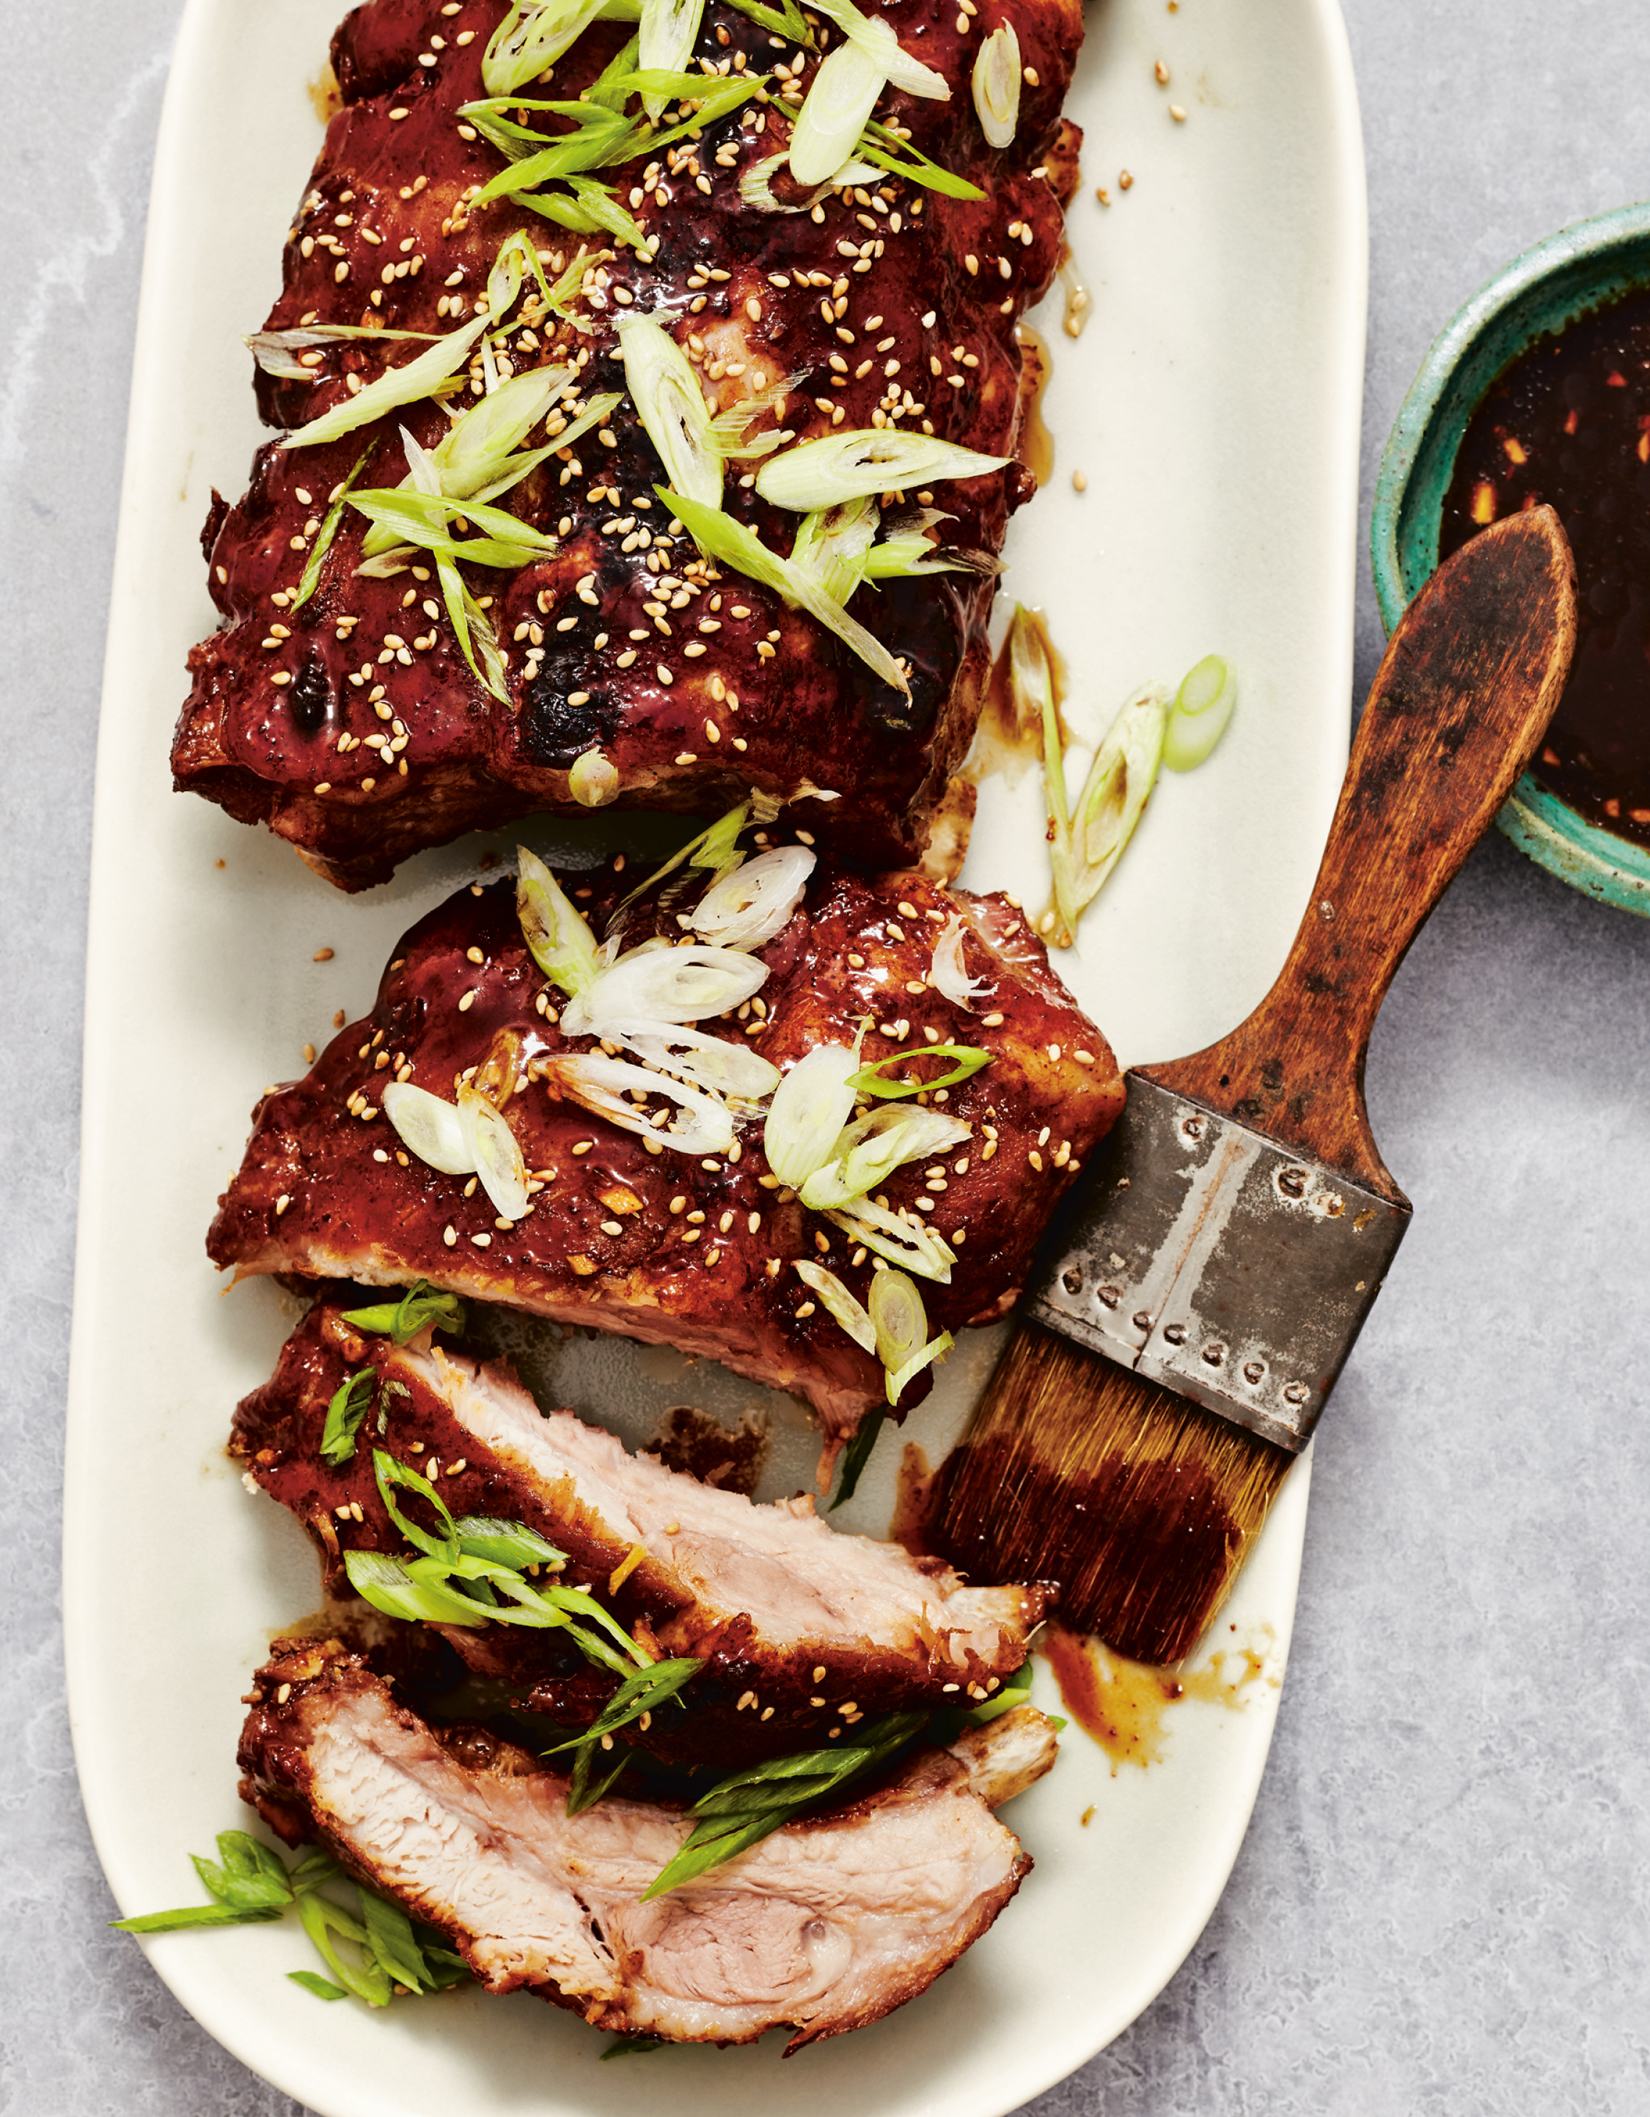
SERVES 4 to 8 TIME 50 minutes, plus marinating time
Like many trendy restaurants, my ribs are fused with Asian elements. I start with a dry spice rub to lock in the ribs’ flavor and to help retain their moisture. Then I lather them with a thick honey-soy glaze to make them finger lickin’ good.
FOR THE RIBS
2 racks baby back ribs (3 to 4 pounds each)
2 tablespoons dark brown sugar
1 tablespoon kosher salt
1 tablespoon garlic powder
1 teaspoon freshly cracked black pepper
1 teaspoon Chinese five-spice powder
1 teaspoon smoked paprika
1 teaspoon ground ginger
FOR THE HONEY-SOY GLAZE
½ cup soy sauce
½ cup hoisin sauce
½ cup honey
2 tablespoons lime juice
2 teaspoons kosher salt
2 teaspoons sesame oil
2 teaspoons finely grated peeled fresh ginger
4 garlic cloves, finely minced
½ teaspoon Chinese five-spice powder
2 scallions (green parts only), finely chopped, for garnish
Toasted sesame seeds, for garnish
-
PREPARE THE RIBS: Rinse the ribs and remove the membrane, which is the thin layer of clear tissue that runs along the bony side of the ribs. (You can slide a small knife underneath it at one end and then just pull the membrane off—but note that some ribs may already have it removed.) Place the ribs on a baking sheet.
-
In a small bowl, mix together the brown sugar, salt, garlic powder, pepper, five-spice, paprika, and ginger. Sprinkle the rub onto the meat and rub it in on all sides. Set the ribs aside to sit for 1 hour at room temperature, or if you have time, for maximum flavor, cover the ribs and refrigerate them overnight.
-
Add ½ cup water to the insert pot of the multipot and place the trivet rack (that comes with each machine) inside. Cut each rib in half or in thirds, so that all the ribs fit sideways (with the bones vertical) inside the pot.
-
Attach the lid to the multipot and turn the steam release handle to “sealing.” Press the “pressure cook/manual” button, select high pressure, and set the cooking time to 25 minutes. (If the ribs seem extra thick and meaty, set the timer for 30 minutes.)
-
MEANWHILE, MAKE THE HONEY-SOY GLAZE: In a saucepan, stir together the soy sauce, hoisin, honey, lime juice, salt, sesame oil, ginger, garlic, and five-spice. Whisk until smooth, then bring the mixture to a boil over high heat. Reduce the heat to medium and let simmer for a few minutes to thicken to the consistency of ketchup.
-
When the rib cooking time is up, turn the steam release handle to “venting” to quick-release the pressure.
-
Transfer the ribs to a foil-lined baking sheet, meat-side up. (If you want to make the ribs a day ahead, you can let them cool on the baking sheet, then refrigerate overnight, covered. Let the ribs come to room temperature and proceed to the broiling step the next day.)
-
Position a rack in the center of the oven and preheat the oven’s broiler. Transfer about ¼ cup of the honey-soy glaze to a bowl and brush the ribs on both sides with the sauce. Broil the ribs for about 5 minutes, rearranging the ribs if they’re not browning evenly, until all the ribs are nice and browned and the sauce is bubbling.
-
Remove the ribs from the oven and brush on another layer of the honey-soy glaze. Garnish with scallions and sesame seeds, and serve with the remaining glaze for dipping.

SERVES 4 to 6 TIME 30 minutes, plus 6 hours slow cooking or 1 hour pressure cooking
Porchetta is a beautifully bound and rolled Italian pork roast that’s shockingly tender after a pressure cooker session. I’m shaking things up by swapping the pork for lamb and coloring it with a smattering of pungent herbs and squeezes of citrus, which will dial down the more gamey lamb flavor. This lambchetta melts in your mouth whether cooked fast (in a pressure cooker) or slow (in a slow cooker). Pair this with Quinoa Pilaf with Curry Miso Dressing (this page) and the Spring Farro and Veggie Salad (this page) for a special holiday meal.
¼ cup fresh flat-leaf parsley leaves
¼ cup fresh rosemary leaves
¼ cup fresh sage leaves
¼ cup fresh basil leaves
4 tablespoons extra-virgin olive oil
1 tablespoon fresh thyme leaves
4 garlic cloves, peeled
Grated zest and juice of 1 lemon (reserve the lemon “shells”)
1 tablespoon kosher salt, plus more for seasoning
2 teaspoons fennel seeds
½ teaspoon red pepper flakes
2½ pounds boneless lamb shoulder roast, butterflied (see Note)
Freshly ground black pepper
½ cup low-sodium chicken broth
-
In a food processor, blend together the parsley, rosemary, sage, basil, 2 tablespoons of the olive oil, the thyme, garlic, lemon zest, lemon juice, salt, fennel seeds, and red pepper flakes until it becomes a paste.
-
Butterfly the lamb and lay it flat on a cutting board, fat-side down. (The bottom portion may not be entirely covered in fat, but you want the red meat side facing up.) Evenly distribute the paste on top of the lamb and then roll it up, starting from a short end, so that the fattiest side of the lamb winds up on the outside of the roll. Using kitchen twine, tie the lamb at four or five evenly spaced intervals. Season the roll with salt and pepper.
-
TO SLOW-COOK: Heat a large cast-iron pan over high heat. Add the remaining 2 tablespoons olive oil. When the oil begins to smoke, sear the meat on all sides until golden brown, 3 to 4 minutes per side. Transfer the lamb and the juices to a slow cooker. Add the chicken broth and the reserved lemon shells.
-
Cover the slow cooker with a glass lid. Cook on low heat for 6 hours. When the cooking has finished, slice and serve the lamb.
-
TO COOK IN A MULTIPOT: Press the “sauté” button on the multipot and let the insert pot get hot. Add the remaining 2 tablespoons olive oil. When the oil begins to smoke, sear the meat on all sides until golden brown, about 5 minutes per side. Cancel the “sauté” function. Add the chicken broth and the reserved lemon shells to the insert pot.
-
Attach the lid to the multipot and turn the steam release handle to “sealing.” Press the “pressure cook/manual” button, select high pressure, and set the cooking time for 45 minutes. When the time is up, turn the steam release handle to “venting” to quick-release the pressure. Let the lamb rest for 15 minutes, then slice and serve.
Note Butterflying is simply the process of cutting and flattening a large piece of meat so it can be rolled up around a filling. Ask your butcher to butterfly the lamb for you if you don’t want to do it yourself.
SERVES 3 or 4 TIME 1 hour 10 minutes
In college I loved those boxed Japanese curry squares where you just add water and whatever fresh ingredients you wanted. It was such a great semi-homemade shortcut that I didn’t bother to find out how easy a made-from-scratch curry was until much later. But now, I never go back! With just a few simple ingredients, the curry paste is easy to make in your multipot. This curry features beef, carrots, potatoes, and onions, so it’s hearty enough as its own meal. But add a side of rice and pickled ginger, or some Gochujang Bok Choy with Shiitake Mushrooms (this page) to fill it out.
Look for S&B curry powder, a Japanese product, and garam masala, which is an Indian spice blend, in the spice section of an Asian market.
4 tablespoons (½ stick) unsalted butter
¼ cup all-purpose flour
2 tablespoons S&B curry powder
1½ teaspoons garam masala
1 tablespoon extra-virgin olive oil
1½ pounds beef stew meat, patted dry with paper towels
1 medium onion, quartered and sliced into ½-inch-thick pieces
2 cups low-sodium chicken broth
1 tablespoon soy sauce
1 tablespoon ketchup
1 tablespoon Worcestershire sauce
1 tablespoon honey
2 garlic cloves, minced
1 teaspoon minced peeled fresh ginger
1 teaspoon kosher salt
2 carrots, cut into ¾-inch chunks
3 medium Yukon Gold potatoes (about 1 pound), peeled and cut into 1-inch pieces
-
Press the “sauté” button on the multipot and let the insert pot get hot. Add the butter to the pot. When the butter has melted, sprinkle in the flour and cook for 1 minute, stirring constantly, then add the curry powder and garam masala. Stir until the mixture becomes a thick paste or roux, then transfer the paste to a bowl and set aside.
-
Add the olive oil to the pot, then about half the beef, and cook until the meat is browned on all sides, turning occasionally, about 5 minutes. Transfer the beef to a plate and repeat with the remaining beef. Add the onion, return all the beef to the pan, and cook until the onion is soft and beginning to brown, about 5 minutes more. Cancel the “sauté” function.
-
Add the chicken broth, soy sauce, ketchup, Worcestershire sauce, honey, garlic, ginger, salt, and reserved curry roux to the pot and stir to mix everything well with the meat. Attach the lid to the multipot and turn the steam release handle to “sealing.” Press the “meat/stew” button and set the cooking time to 18 minutes.
-
When the time is up, turn the steam release handle to “venting” to quick-release the pressure. Open and stir in the carrots and potatoes, scraping the bottom of the pot to make sure nothing is sticking. Reattach the lid and set to “venting.” Press the “meat/stew” button again and set the cooking time to 6 minutes.
-
When the time is up, turn the steam release handle to “venting” to quick-release the pressure. When you’re ready to eat, remove the lid. (The curry can also be cooled and refrigerated for up to 3 days and reheated.) Enjoy!
SMOKY SLOW-COOKER CHILI
SERVES 4 TIME 15 minutes, plus slow cooking time
Who doesn’t love a hearty chili, especially in the fall during football season? Yay, go sports! Whatever your favorite game to watch, I think we can all agree that adding smoked paprika and a hoppy IPA heightens standard game-day chili into the champion of spicy national stews. Serve straight out of the slow cooker with corn chips or corn bread.
FOR THE CHILI
1 tablespoon extra-virgin olive oil
1 yellow onion, diced
1 pound ground beef (85 to 90% lean)
Kosher salt
1 cup low-sodium beef broth
1 (15-ounce) can diced fire-roasted tomatoes
1 (15-ounce) can tomato sauce
1 (12-ounce) bottle dark hoppy beer (such as a Double IPA)
3 tablespoons chili powder
2 teaspoons garlic powder
2 teaspoons ground cumin
2 teaspoons smoked paprika
2 teaspoons Worcestershire sauce
1 teaspoon cayenne pepper
2 (15-ounce) cans dark kidney beans, rinsed and drained
FOR SERVING
Sour cream
Chopped scallions (green parts only)
Red onions, diced
Shredded cheddar cheese
-
MAKE THE CHILI: Press the “sauté” button on the multipot and let the insert pot get hot. Add the olive oil and heat until it glistens. Add the onion and cook, stirring, until translucent, about 3 minutes. Add the ground beef and a pinch of kosher salt and cook, stirring occasionally, until browned, 5 to 7 minutes. Cancel the “sauté” function. (If you’re using a regular slow cooker, cook the onion and beef in a large cast-iron pot over medium-high heat, then transfer the beef and onions to the cooker.)
-
Add the beef broth, fire-roasted tomatoes, tomato sauce, beer, chili powder, garlic powder, cumin, smoked paprika, Worcestershire sauce, cayenne, and 1 teaspoon salt and stir to mix. Cover the multipot with a glass lid (or if using the regular lid, be sure to set the steam release handle to “venting”). Cook on the “slow cook” setting on low heat for 6 hours. (You can proceed, or let the multipot or regular slow cooker keep the chili warm for a few hours here.)
-
Ten minutes before serving, stir in the beans and let the chili sit to warm the beans through. (If you want to make the chili ahead, you can let it cool to room temperature here and then reheat before serving, or refrigerate the chili for up to 3 days before reheating.) Serve topped with sour cream, scallions, red onions, and cheddar.

SERVES 8 to 10 TIME 1 hour 30 minutes
Prime rib is the star of our Christmas table every year. When we first began this tradition, more than a decade ago, it wasn’t a meal I necessarily looked forward to making because it can be complicated to plan everything around its lengthy, oven-hogging cook time. Never again though, now that I have my trusty pressure cooker! The only thing I do is assemble the rub and let the multipot handle the big job, leaving the oven available for amazing sides like Tartiflette (this page) or Crispy Brussels Sprouts with Chile-Lime-Garlic Sauce (this page). Expect a juicy, tender showstopper every time. Save the leftover juices in the pot for making a rich gravy to serve over the beef.
Ask your butcher to trim and tie the meat for you. And if you don’t see a boneless prime rib in the case, just ask—they can usually cut one for you on the spot!
2 tablespoons kosher salt
1 tablespoon garlic powder
1 tablespoon onion powder
1 tablespoon freshly ground black pepper
1 teaspoon sugar
½ teaspoon dried oregano
¼ teaspoon cayenne pepper
¼ teaspoon dried sage
1 (5-pound) boneless prime rib roast, tied, left at room temperature for 1 hour before cooking
1 cup low-sodium beef broth
2 tablespoons neutral-tasting oil (such as avocado oil)
1 tablespoon all-purpose flour
-
In a small bowl, stir together the salt, garlic powder, onion powder, black pepper, sugar, oregano, cayenne, and sage. Generously rub the seasoning all over the meat, patting it into the cracks and onto the ends well.
-
Pour the beef broth into the multipot’s insert pot. Place the trivet rack into the pot and put the roast on top, fat-side up. Attach the lid to the multipot and turn the knob to “sealing.” Press the “pressure cook/manual” button, select high pressure, and set the cooking time for 6 minutes for a rare roast. (Set it for 7 minutes for medium-rare as shown here, or 8 minutes for medium.)
-
When the time is up, do not vent the steam knob. Let the pressure release naturally for 35 minutes.
-
Use the rack to transfer the meat to a platter, then pour the cooking liquid (about 1¼ cups) from the insert pot into a bowl and set aside.
-
Press the “sauté” button on the multipot and let the insert pot get hot. Add the oil to the pot, then sear the roast on each side for about 5 minutes, until nicely browned on all sides, about 20 minutes total. Remove the roast and let rest for 10 minutes.
-
While the roast rests, make the jus: Sprinkle the flour into the pot and stir to mix with the remaining fat in the bottom of the pot. Add the reserved cooking liquid and whisk until the mixture bubbles and thickens. Add 1 cup water and whisk until smooth. (You can strain the sauce if you prefer it to be completely smooth.) Serve the roast immediately, carved as desired, with the sauce on the side.
