
Face mapping from a photo is a great way to strengthen your portrait skills. I love this photo of Virginia Woolf, especially her hair, and I wanted to play around using it for inspiration. I first used the photo to make a face map to sketch from, and then I decided to paint her as well. The important thing to remember with this kind of portrait is that it doesn’t have to look exactly like the photo; use the photo for inspiration. You can see how I changed her nose to look more like the images I draw, but I loved her hair and dress, so I kept those the same. In the painting I took more liberties and added stenciled images as well.
blending stump
copy paper
drawing paper
glue
kneaded eraser
lightbox
paints of your choice
pencils, assorted
printer
red pencil
reference photo
Print the photo out in black and white on regular copy paper.
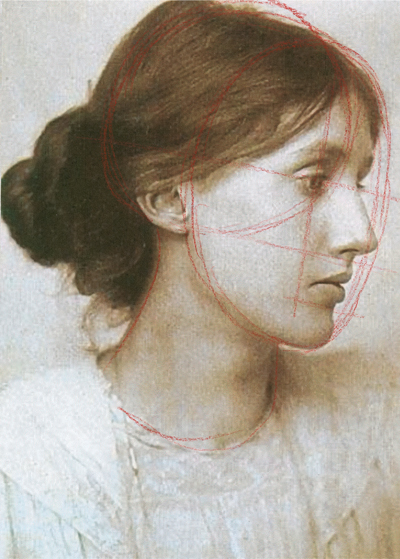
Use a red pencil to draw a map on top of the photocopy of the face.
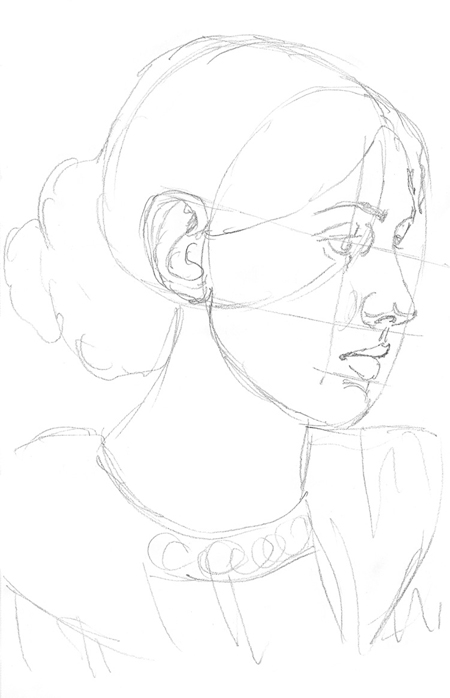
Place a piece of drawing paper over the face map on top of a lightbox. Trace the map lightly onto the drawing paper. Sketch the face details using the photo as a reference. Don’t be worried if it doesn’t look exactly like the photo. You’re just using it for inspiration.

Shade the drawing using the photo as a guide. Use light crosshatching to establish the shaded areas first, then move to darker pencil leads and a blending stump to further add tonal values to the sketch.
Work the hair by adding sketchy lines to give it shape, then fill in with dark graphite. Use a kneaded eraser to lift the highlights in the hair and to give it movement. Add additional pencil strokes to create wisps of hair and individual strands.
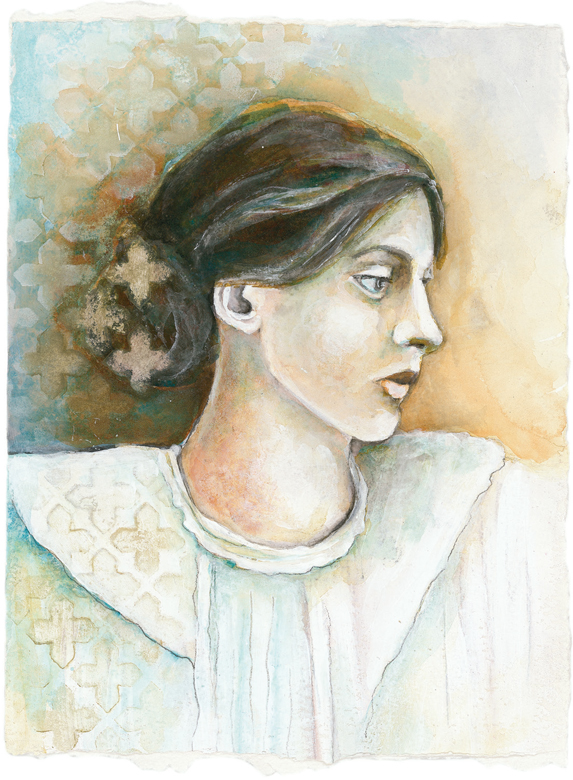
Use a copy of the sketch to create a mixed-media painting. Adhere it to a substrate and paint directly on top of it, or try using one of the techniques from Chapter 5 to create a mixed-media portrait. Here I used acrylic paint techniques from “The Real Hue” (Project 4 in Chapter 5).