Vegetables & Sides
Applesauce with Peppered Honey
MAKES 6 SERVINGS
This intriguing applesauce includes enough spice to remind you of chutney, but you can still taste the apples. When you’re not sure which type of apple to choose, select a mixture. Their combined flavors, textures, and attributes tend to outweigh any shortcomings of a single variety. Some apple varieties collapse into soft pulp when cooked, while others hold their shape, so a mixture of apples means that this applesauce turns out a little chunky. You can add a few pears or quince to the mix, if you like, just to change things up and be fancy.

2 to 2½ pounds apples, peeled, cored, and quartered
½ cup apple cider, preferably unfiltered
2 tablespoons unsalted butter
½ teaspoon ground ginger
½ teaspoon mustard powder
3 tablespoons honey, or to taste
2 tablespoons sherry vinegar or fresh lemon juice
Kosher salt and ground black pepper
-
Place the apples in the pot. Add the cider, butter, ginger, and mustard and stir to coat. Cover and cook on LOW PRESSURE for 3 minutes. Let stand for NATURAL RELEASE of the pressure.
-
Stir in the honey and vinegar. Season with salt and more pepper than you might think. The sauce should be a balanced combination of sweet, tangy, and savory.
-
Serve warm, at room temperature, or lightly chilled.
Boiled Peanuts for Snacking
MAKES ABOUT 3 CUPS SHELLED PEANUTS
The best boiled peanuts are made with green, freshly dug peanuts during the fall harvest season, but the next best choice is raw peanuts that are common in grocery stores and roadside markets year-round. Don’t attempt to boil peanuts that have already been roasted in the shell.

1 pound green or raw peanuts in the shell, washed
3 tablespoons kosher salt
1 tablespoon regular or hot Old Bay seasoning or Cajun seasoning
-
Place the peanuts in the pot and add water to cover by 1 inch. Place a plate or something similar over them to keep them submerged. Cover and cook on HIGH PRESSURE for 60 minutes for green peanuts and 90 minutes for raw peanuts. Let stand for NATURAL RELEASE of the pressure. The doneness of boiled peanuts is personal, from al dente to quite soft. If they are too firm for your liking, cover and cook on HIGH PRESSURE for another 15 to 30 minutes, then let stand for NATURAL RELEASE of the pressure.
-
Drain and serve warm, at room temperature, or lightly chilled.
VARIATION: Boiled Peanut Hummus
MAKES ABOUT 1¼ CUPS
1 cup shelled Boiled Peanuts (previous)
¼ cup well-stirred tahini or smooth all-natural peanut butter
2 tablespoons fresh lemon juice
1 garlic clove, chopped
½ teaspoon ground coriander or cumin
Pinch of cayenne pepper
⅓ cup extra-virgin olive oil
Kosher salt (optional)
1 tablespoon sesame seeds or benne seeds
If you’re willing to give up a few of your boiled peanuts, they make excellent hummus. Pulse the peanuts, tahini, lemon juice, garlic, coriander, and cayenne in a food processor until finely chopped. With the processor running, add enough oil to form a thick, smooth paste. Add salt, if needed, and then stir in the sesame seeds. Serve at room temperature or chilled.
Broccoli Pasta Salad with Poppy Seed Dressing

MAKES 6 TO 8 SERVINGS
This recipe brings together the flavors and fond memories of several classic Southern recipes made popular at potlucks and tailgates: creamy broccoli salad, pasta salad, and sweet poppy seed dressing. It’s still quite good even without the bacon if you want to keep it meatless. Pasta cooks in less than half the time in a multicooker and the hot water quickly blanches the broccoli, turning it crisp-tender and bright green.

4 ounces thick-cut smoky bacon (about 4 slices), diced
8 ounces farfalle pasta
3 cups fresh broccoli florets cut into bite-size pieces (8 ounces)
½ cup mayonnaise
¼ cup sugar
3 tablespoons sherry vinegar
1 teaspoon mustard powder
1 teaspoon poppy seeds
1 teaspoon kosher salt
½ teaspoon ground black pepper
1 cup seedless grapes, halved
¼ cup thinly sliced shallots
½ cup pecan pieces, toasted if you like
-
Cook the bacon in the pot on SAUTÉ MEDIUM until crisp and rendered, about 8 minutes, stirring often. Use a slotted spoon to transfer the bacon to paper towels to drain. Pour the fat into a small jar to save for another recipe. (For goodness’ sake, don’t waste it.)
-
Place the pasta in the pot and add water to cover, about 4 cups. Cover and cook on HIGH PRESSURE for 4 minutes. QUICK RELEASE the pressure.
-
Add the broccoli and let it blanch in the hot water until it turns bright green and crisp-tender, about 1 minute, stirring slowly and constantly. Drain both the pasta and broccoli in a sieve and transfer to a large bowl.
-
Whisk together the mayonnaise, sugar, vinegar, mustard powder, poppy seeds, salt, and pepper in a small bowl. Add to the warm pasta mixture and stir to coat. Let stand until cooled to room temperature, stirring occasionally.
-
Stir in the grapes. Cover and refrigerate until lightly chilled, about 1 hour or up to 1 day. Just before serving, stir in the reserved bacon, the shallots, and pecans. Taste and adjust the seasoning, if desired.
Corn on the Cob with Cotija-Ancho Mayonnaise

MAKES 4 SERVINGS
Vegetables steamed in a multicooker are not submerged in water, so nothing dilutes their flavor. If anything, the pressure-cooking enhances the corn flavor, so the freshness and quality of the freshly shucked ears is paramount. The zesty chile and cheese mixture that goes onto the cooked corn is inspired by elote, the Mexican-style corn served on sticks by street vendors. However, the cooking method is a great way to prepare corn to use in other recipes or to serve with other seasonings, such as good old butter.
½ cup mayonnaise
1 cup grated Cotija cheese or finely crumbled feta cheese, plus more for serving
½ teaspoon ground ancho chiles or chili powder, plus more for serving
4 ears corn, husks and silks removed
Lime wedges, for serving
-
Stir together the mayonnaise, Cotija, and ancho in a small bowl until well blended. Set aside.
-
Pour 1 cup water into the pot. Place the corn in a steamer basket and lower them into the pot. Cover and cook on HIGH PRESSURE for 2 minutes. QUICK RELEASE the pressure. Remove the corn from the pot and blot it dry with paper towels.
-
Coat the corn with the mayonnaise mixture. Sprinkle with a little more cheese and a dusting of ancho powder. Serve at once with lime wedges.

SHUCKING CORN
Although it can be messy to shuck corn at home, it’s best to purchase ears still in their husks and remove them just before cooking. The freshest corn will have tassels that are dry, pale, straw-colored, and silky instead of dark and wet. Wipe away any silks clinging to the corn with a damp paper towel before cooking.
Fresh Cottage Cheese

MAKES 6 TO 8 SERVINGS
Homemade cottage cheese is less creamy and has smaller curds than most store-bought varieties, and its incomparable flavor is a real treat. Many Southerners serve cottage cheese as a side dish, either solo or as part of a fruit or vegetable plate, or with a salad alongside, as I do here. I remember my grandmother making cottage cheese—she would have been awestruck to see a multicooker turn out a perfect version with little more than the press of a button. This recipe requires a multicooker with a YOGURT setting.
COTTAGE CHEESE
1 gallon 2% milk
¾ cup distilled white vinegar
1 teaspoon kosher salt
½ cup half-and-half or heavy cream
SALAD
¼ cup mayonnaise
2 tablespoons finely chopped red onion
4 teaspoons apple cider vinegar
½ teaspoon sugar
1 English cucumber, peeled and cut into ½-inch dice
2 large tomatoes, cut into ½-inch dice
Kosher salt and ground black pepper
-
For the cottage cheese Line a large, fine-mesh sieve with a double thickness of dampened cheesecloth and set aside.
-
Pour the milk into the pot. Cover, select the YOGURT function, and adjust to the BOIL setting. When the cooking time is complete (usually 45 to 60 minutes), turn off the pot. Let stand, covered, for 1 hour.
-
Add the vinegar in a slow, steady stream while stirring gently. Let stand 20 minutes. Strain the mixture through the prepared sieve. Gently rinse the cottage cheese curds under cold running water. Transfer it to a bowl and stir in the half-and-half and salt. Cover and refrigerate until chilled, at least 1 hour or for up to 4 days. Taste and adjust the salt, if desired.
-
For the salad Whisk together the mayonnaise, onion, vinegar, and sugar in a large bowl. Add the cucumber and tomato and stir gently to coat. Season with salt and pepper to taste. Cover and refrigerate for at least 30 minutes and up to 1 hour. Just before serving, stir the salad gently. Taste and adjust the seasoning, if desired.
-
To serve, spoon the cottage cheese onto serving plates and top with the salad.
A Deviled Egg Plate of Deviled Eggs

MAKES 2 DOZEN
You know a dish is beloved when it warrants its own serving vessel. Many Southern households can lay claim to at least one deviled egg plate (with small egg-shaped divots to perfectly cradle each halved egg), perhaps a family heirloom. If you don’t have one, you can get those slippery eggs to sit upright on a flat tray by shaving a thin slice off the rounded bottom of the halved eggs to make them sit level—but it’s more fun to have a deviled egg plate. Use this recipe as a guideline for making deviled eggs the way that you like them. There are many ways and traditions, and families can be particular.
1 dozen large eggs
¼ cup very finely chopped scallions (white and tender green parts only)
2 tablespoons fresh lemon juice or pickle, olive, or caper brine
1 tablespoon yellow or Dijon mustard
1 teaspoon hot sauce
4 tablespoons unsalted butter, at room temperature
4 to 6 tablespoons mayonnaise
Kosher salt and ground black pepper
Paprika, for dusting (optional)
-
Have ready a large bowl of ice water. Pour 2 cups water into the pot. Arrange 7 of the eggs on an egg rack and lower it into the pot. Stack a second rack atop the first, and arrange the remaining 5 eggs on it. Cover and cook on LOW PRESSURE for 8 minutes. QUICK RELEASE the pressure.
-
Immediately transfer the eggs to the ice water and let stand until cool enough to handle. Peel the eggs and blot them dry.
-
Halve the eggs lengthwise and drop the yolks into a bowl. Arrange the whites on a serving platter.
-
Mash the yolks with a fork. (For silky smooth filling, pass the yolks through a fine-mesh sieve into the bowl, using a spatula to push them through the mesh.) Stir in the scallions, brine, mustard, and hot sauce. Work in the butter. Add enough mayonnaise to make a thick, creamy filling that will hold its shape in the eggs. Season with salt and pepper. Taste and adjust the seasoning, if desired. Be sure to season the filling boldly; the flavor dulls a little when chilled.
-
Spoon the filling into the whites, mounding it slightly on top. (Alternatively, use a pastry bag fitted with a large tip or a zip-top bag with one corner snipped open to pipe the filling into the whites.) Sprinkle with more salt and pepper, plus paprika if that’s your thing.
-
Serve soon or cover and refrigerate until lightly chilled. Deviled eggs taste best when not served stone cold straight from the fridge, so let them sit out at room temperature for a few minutes before serving.
HINT
Most recipes for deviled eggs start with mayonnaise, but in this recipe it goes into the filling last, after the other ingredients are mixed into the yolks to ensure they have plenty of flavor and seasoning, and then only enough mayonnaise to bind the filling without making it runny. The butter also helps keep the filling firm when the eggs are lightly chilled.
COOKING TIMES FOR EGGS IN THEIR SHELLS, FROM POACHED TO FIRM
I am impressed by the range of foods that I can prepare in a multicooker, but I’d even buy one if the only thing it did was cook eggs in their shells. (Never again must I try to corral trailing egg whites when trying to poach eggs in a saucepan of water. Never again will I be abashed by ragged whites on my deviled eggs.) No matter the preferred cooking time, the eggs cook evenly and peel easily, so long as they go immediately from the multicooker to a bowl of ice water.
A metal egg rack that sits inside the multicooker is a great investment because it holds the eggs upright and in place so that they don’t collide as they cook. When stacked, a set of two egg racks can hold up to a dozen eggs at once. Without a rack, cook no more eggs at once than can fit in a single layer in a steamer basket. For best results, don’t attempt to cook fewer than 3 eggs at once, whether in a rack or a basket. The only time I’ve had eggs blow out when cooked with LOW PRESSURE is when there were hairline cracks in the shells that I didn’t notice before putting them into the pot.
Before you begin prepare a bowl of ice water to hold the cooked eggs. Cook the eggs on LOW PRESSURE for the desired time and then QUICK RELEASE the pressure. Immediately transfer them to the ice water. Leave the eggs submerged until they are cool enough to handle and peel, but no longer than 2 minutes when you want to serve them warm.
I use the times listed below to prepare large organic chicken eggs from the grocery store or farmers’ market. Be aware that there can be slight variations in time depending on the size and freshness of the eggs, so experiment until you find the time that’s perfectly suited to your eggs and doneness preference.
• 3 minutes: poached eggs with warm, liquid centers
• 4 to 5 minutes: soft-cooked eggs with barely set centers
• 6 to 7 minutes: medium eggs with firm, moist centers
• 8 minutes: hard-cooked eggs with powdery centers
Corn Pudding
MAKES 6 TO 8 SERVINGS
This corn pudding is so light and fluffy that it’s more like soufflé than a casserole. When cutting fresh corn off the cob, be sure to scrape all of the milky liquid from the cobs with a spoon or the back of the knife. The corn milk adds flavor and the natural starch helps thicken the pudding. If using frozen corn, be sure the kernels are fully thawed and blot them dry.

Unsalted butter and all-purpose flour for the baking dish
4 cups fresh or thawed corn kernels
3 large eggs
¾ cup heavy cream
½ cup whole milk
¼ cup sugar
2 tablespoons unsalted butter, melted and slightly cooled
2 tablespoons all-purpose flour
2 teaspoons baking powder
1 teaspoon kosher salt
½ teaspoon ground black pepper
2 tablespoons finely chopped tender herbs, such as chervil, chives, parsley, and/or tarragon (optional)
-
Butter and flour a 1½-quart round baking dish.
-
Puree 2 cups of the corn, the eggs, cream, milk, sugar, melted butter, flour, baking powder, salt, and pepper in a blender. Pour into the prepared dish. Fold in the remaining corn kernels. Cover the dish tightly with aluminum foil.
-
Pour 1½ cups water into the pot. Set the covered dish on a metal trivet with handles and lower them into the pot. Cover and cook on LOW PRESSURE for 50 minutes. Let stand for NATURAL RELEASE of the pressure.
-
Remove the dish from the pot and uncover. Let stand for at least 15 minutes before serving barely warm, which is how this corn pudding tastes best. Garnish with herbs, if desired.
HINT
Compared to oven-baked corn pudding, this one will be pale on top when it emerges from the multicooker, despite being fully cooked. You can add color by garnishing the top with chopped fresh herbs or by placing the pudding under a hot broiler until the top turns golden brown in spots. Don’t leave the dish under the broiler longer than necessary lest the pudding overcook.
Family Reunion Potato Salad
MAKES 6 TO 8 SERVINGS
I call this recipe Family Reunion Potato Salad because it’s a slightly updated classic recipe that meets a range of potato salad expectations and suits most people, even across generations (even in my family). Like many potato salads, this one is best made a day ahead and it travels well, which makes it a great potluck contribution.
To keep the potato salad chunky, use small waxy yellow or red potatoes that hold their shape when cooked, such as Dutch Baby, Red Bliss, or fingerlings. Another secret to great potatoes in this recipe (beyond cooking them under pressure, which enhances their flavor instead of diluting it) is to season them with plenty of salt and something acidic (vinegar, in this case) while they are still hot so that they can absorb the seasoning as they cool. High pressure is usually too strong for hard-cooking eggs in their shells, but the potatoes shield them in the steamer basket, so they can cook together.
2½ pounds small waxy yellow and/or red potatoes, scrubbed
2 large eggs
¼ cup unseasoned rice vinegar or white wine vinegar
Kosher salt
½ cup mayonnaise
2 tablespoons yellow mustard
1 tablespoon Texas Pete or Crystal hot sauce
1 teaspoon celery seeds
1 small green bell pepper, diced (about 1 cup)
½ cup thinly sliced scallions (white and tender green parts only)
¼ cup diced pimientos, drained
¼ cup sweet-hot or dill pickle relish, drained
¼ cup coarsely chopped fresh flat-leaf parsley
Ground black pepper
-
Pour 1½ cups water into the pot. Have ready a bowl of ice water for the eggs.
-
Quarter any potatoes larger than a golf ball and halve the rest. Place the potatoes in a steam basket. Lower the basket into the pot. Rest the eggs atop the potatoes. Cover and cook on HIGH PRESSURE for 5 minutes. QUICK RELEASE the pressure. Transfer the eggs to the ice water to cool.
-
Transfer the potatoes to a large, shallow bowl and let them stand until they steam dry, about 3 minutes. Drizzle the vinegar over the potatoes and sprinkle them with 2 teaspoons salt. Let stand until cool, tossing occasionally.
-
Stir in the mayonnaise, mustard, hot sauce, and celery seeds.
-
Peel and chop the eggs. Fold the eggs, bell pepper, scallions, pimientos, pickle relish, and parsley into the potato mixture. Season generously with salt and pepper.
-
For best flavor, cover and refrigerate until deeply chilled, preferably overnight. Stir well and then taste and adjust the seasoning, if desired.
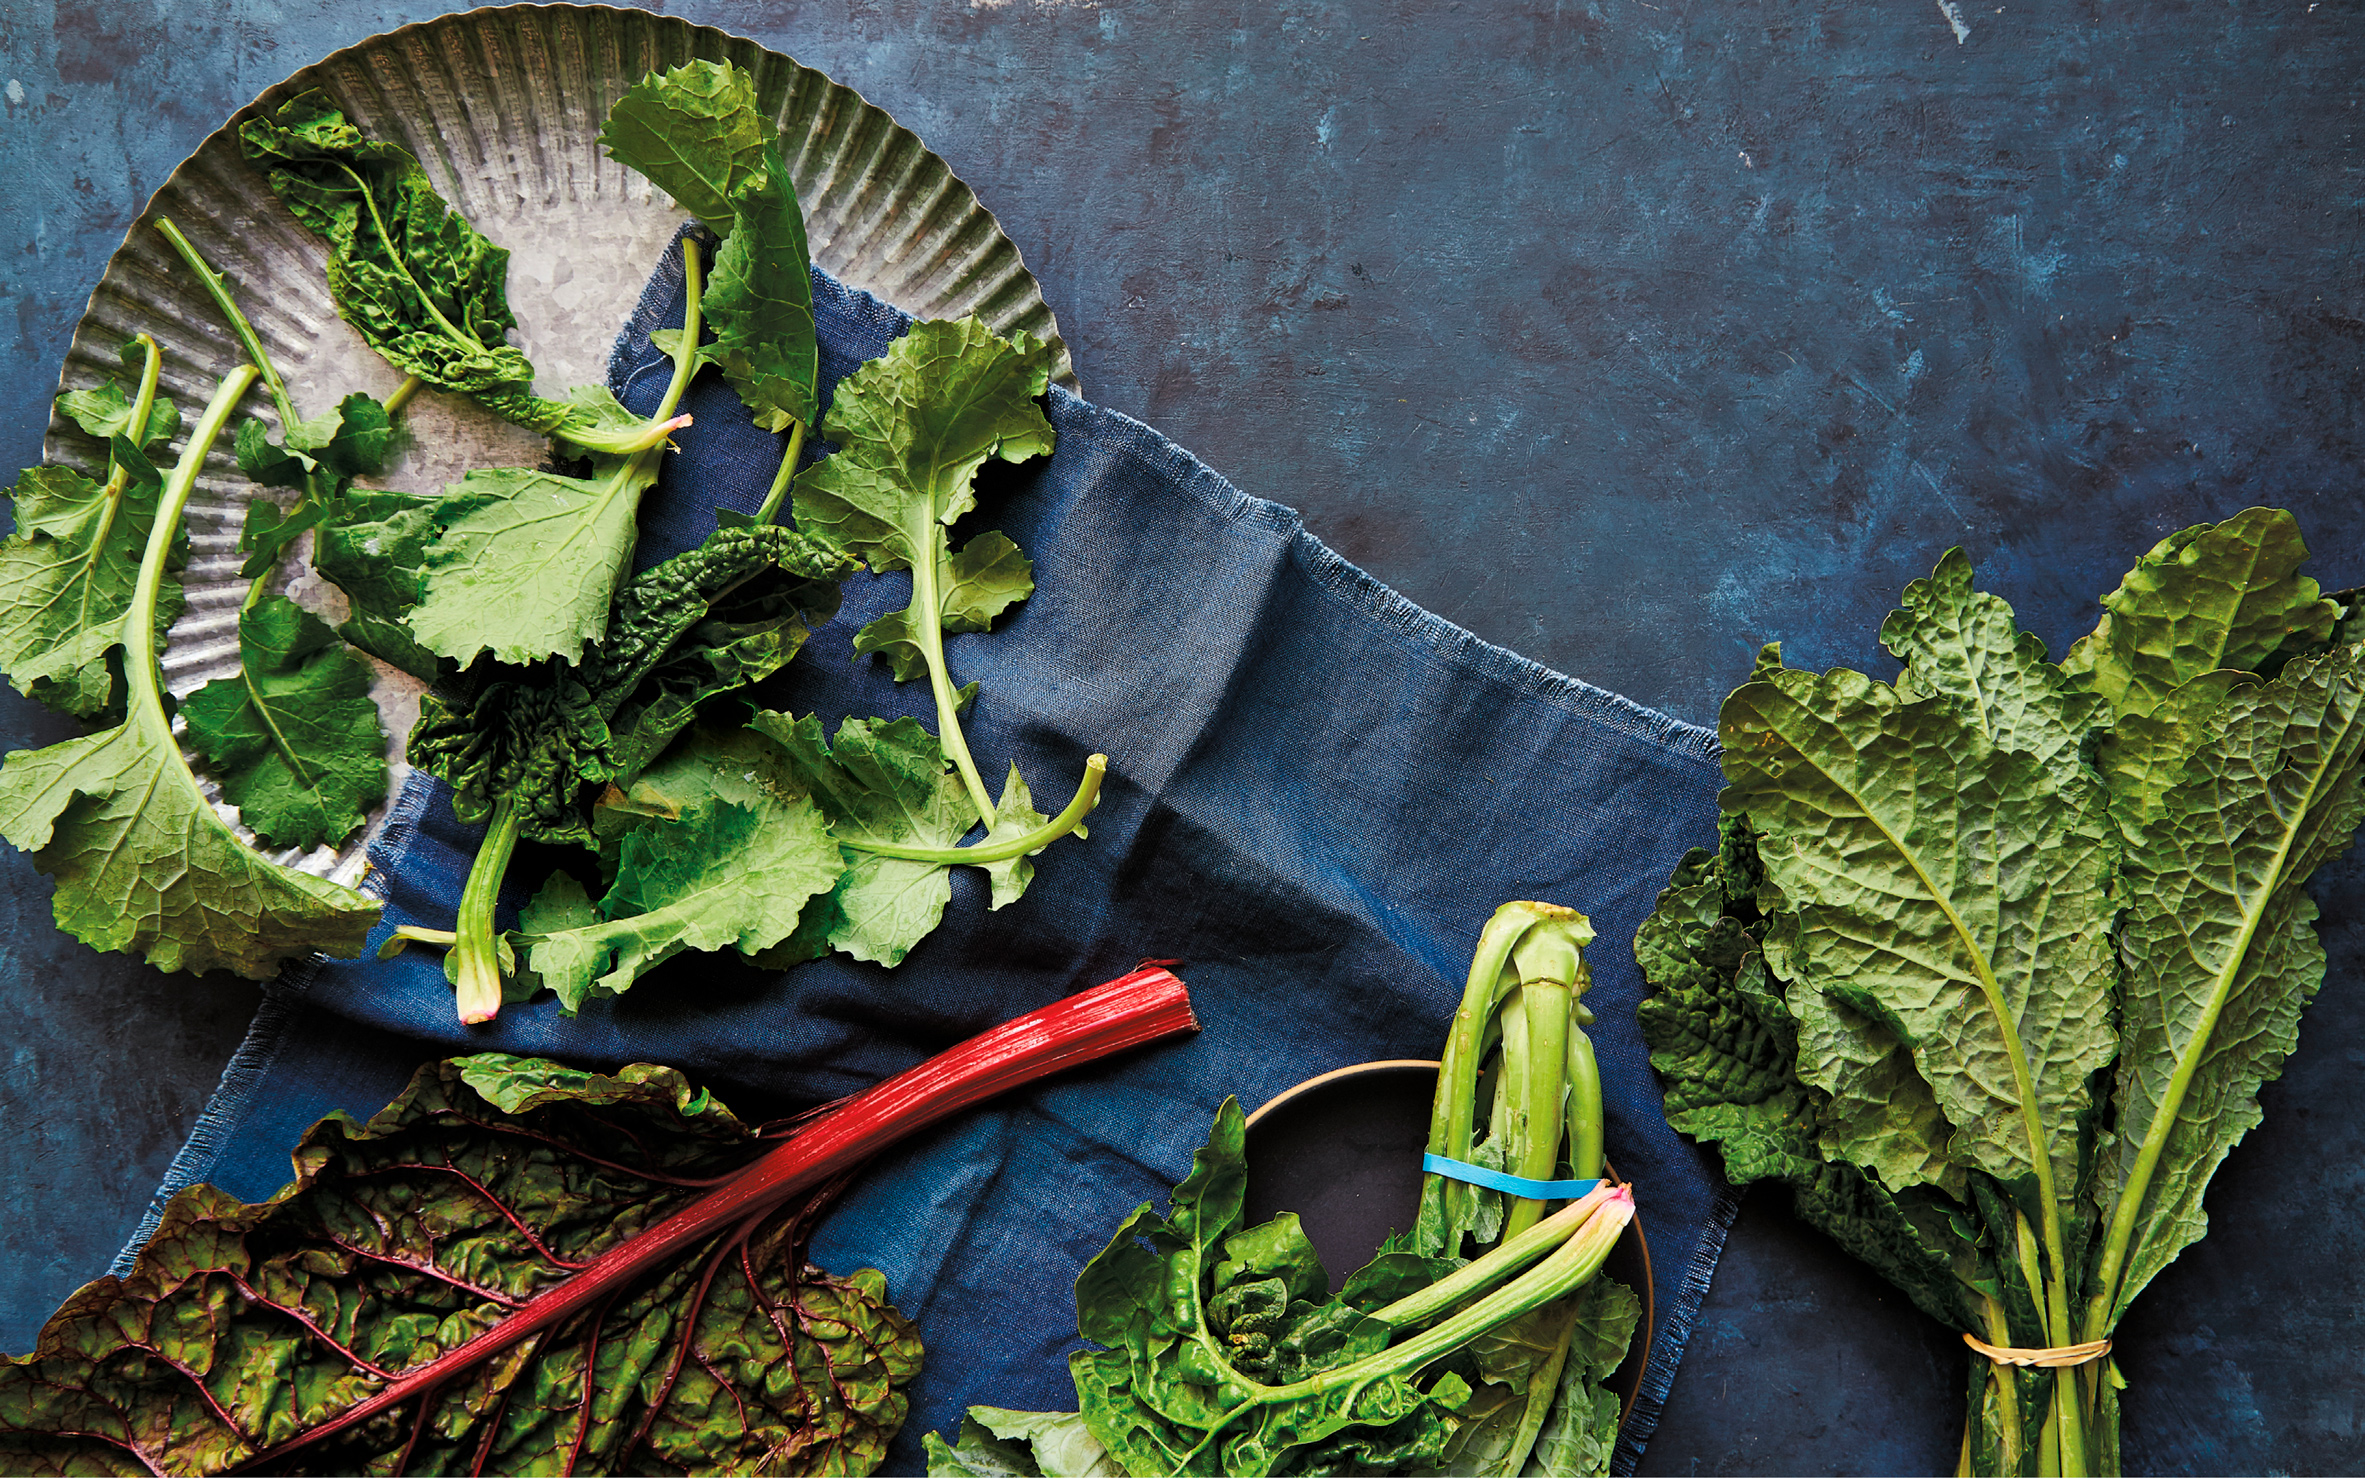
Quick Greens, Three Ways
MAKES 6 TO 8 SERVINGS
I could barely contain my delight the first time I cooked leafy greens in a multicooker. After only 2 minutes, they emerged bright green, pliant, and just tender enough. Unlike greens sautéed in a skillet on the stovetop, they don’t lose their volume and shrink away to nothing. This technique works best for leafy greens of medium sturdiness, such as kale, mustard, turnip, chard, mixed braising greens, very young collards, and the like. The leaves should be sturdy enough to not dissolve or turn slick when cooked (as spinach does), and yet tender enough for quick cooking to be sufficient.
Quick greens are plenty delicious served as a warm salad with nothing more than a drizzle of olive oil and a little salt and pepper, but when you want something a bit more elaborate as a finishing touch, turn to one of the recipes that follow.
12 ounces leafy greens, tough center ribs and stems discarded and leaves cut into bite-size pieces (about 10 lightly packed cups)
Extra-virgin olive oil
Kosher salt and ground black pepper
-
Pour 1½ cups water into the pot. Place the greens in a deep steamer basket and lower it into the pot.
-
Cover and cook on LOW PRESSURE for 2 minutes. QUICK RELEASE the pressure. Lift the basket out of the pot and shake gently to remove any clinging water.
-
If using the greens in one of the following recipes, set them aside until needed.
-
If serving them now, pour into a bowl and season with oil, salt, and pepper. Serve warm or at room temperature.
A HANDY STEAMER BASKET
A steamer basket is necessary for some multicooker recipes. They come in all sorts of shapes and sizes, but a tall mesh basket that nearly fills the pot is my pick. The basket’s large capacity means it can hold the most food without any of it tumbling into the water, and a sturdy hinged handle makes it easiest to move in and out of the pot.

MEDITERRANEAN-STYLE QUICK GREENS

The greens are enhanced by the sweetness of raisins, the crunch of pine nuts, and the acidic tang of good vinegar. Each element should be perceptible, and none should outshine the greens.
Quick Greens (this page), prepared through step 2
¼ cup golden raisins
3 tablespoons sherry vinegar
¼ cup extra-virgin olive oil
4 garlic cloves, thinly sliced
¼ cup pine nuts
Big pinch of red pepper flakes
Kosher salt and ground black pepper
-
Set the greens aside in the steamer basket until needed. Empty and dry the pot.
-
Stir together the raisins and vinegar in a small bowl. Set aside so that the raisins plump in the vinegar. (To speed up the absorption, microwave for 30 seconds.)
-
Warm the oil in the pot on SAUTÉ LOW. Stir in the garlic, pine nuts, and pepper flakes and cook until the garlic and nuts are golden and sizzling, about 3 minutes, stirring often. Do not let the garlic burn.
-
Add the greens in large handfuls, tossing with tongs to coat. Mix in the raisins and vinegar. Season with salt and black pepper. Serve warm or pour onto a serving platter and let cool to room temperature.
SOUTHERN-STYLE QUICK GREENS
You can add a thinly sliced apple or finely chopped tomato to this recipe when you add the onion. The recipe is amiable and adaptable.
Quick Greens (this page), prepared through step 2
4 ounces thick-cut smoky bacon (about 4 slices), diced
½ small red onion, thinly sliced (about ½ cup)
3 tablespoons apple cider vinegar, preferably unfiltered
2 tablespoons packed light brown sugar
Big pinch of red pepper flakes
Kosher salt and ground black pepper
-
Set the greens aside in the steamer basket until needed. Empty and dry the pot.
-
Cook the bacon on SAUTÉ MEDIUM until crisp and rendered, about 8 minutes. Use a slotted spoon to transfer it to a bowl, leaving the fat in the pot.
-
Stir in the onion and cook until wilted, about 2 minutes, stirring often. Stir in the vinegar, brown sugar, and pepper flakes.
-
Add the greens in large handfuls, tossing with tongs to coat. Stir in the reserved bacon. Season with salt and black pepper. Serve warm or pour onto a serving platter and let cool to room temperature.
Height of Summer Ratatouille

MAKES 4 TO 6 MAIN DISH SERVINGS OR 6 TO 8 SIDE DISH SERVINGS
Come July and August when garden-fresh vegetables pour in at a rate that can feel almost overwhelming, my solution is to make lots of ratatouille. It’s a delicious side dish to grilled meat and seafood, but it is robust enough to serve as a meatless entrée, perhaps atop pasta or cheese grits (this page), or with a hunk of crunchy garlic bread. It’s also good served at room temperature. Crumble a little goat cheese or shave a little Parmesan on top, if you like.
1 pound very ripe tomatoes (see Hint, this page), or 1 (28-ounce) can whole peeled tomatoes, chopped with their juices (about 4 cups)
2 teaspoons kosher salt
1 teaspoon ground black pepper
¼ cup extra-virgin olive oil, plus more for drizzling
1 medium yellow onion, chopped (about 2 cups)
6 garlic cloves, thinly sliced
1 teaspoon herbes de Provence or Italian seasoning
2 small zucchini (about 10 ounces), cut into 2-inch chunks (about 2 cups)
2 small yellow squash (about 10 ounces), cut into 2-inch chunks (about 2 cups)
1 small eggplant (about 10 ounces), cut into 2-inch chunks (about 2 cups)
2 medium red, orange, or yellow bell peppers, cut into 1-inch pieces (about 2 cups)
2 tablespoons sherry vinegar
1 tablespoon sugar
½ cup thinly sliced fresh basil leaves
-
Stir together the tomatoes, salt, and black pepper in a medium bowl and let stand while preparing the other ingredients, stirring occasionally to encourage them to release their juices. When you are ready to cook the ratatouille, tilt the bowl to pond the juice in one corner. The multicooker needs at least ½ cup of liquid inside to come up to pressure, so if there is less than ½ cup of tomato juice, add water to make up the difference.
-
Warm the oil in the pot on SAUTÉ MEDIUM. Stir in the onion and cook until it begins to soften, about 3 minutes. Stir in the garlic and dried herbs and cook until fragrant, about 30 seconds, stirring often.
-
Stir in the tomatoes and their liquid, the zucchini, squash, eggplant, and bell peppers. Cover and cook on LOW PRESSURE for 3 minutes. QUICK RELEASE the pressure. Use a spider or slotted spoon to transfer the vegetables to a serving bowl.
-
Simmer the cooking liquid on SAUTÉ MEDIUM until reduced to the consistency of sauce, about 5 minutes.
-
Stir in the vinegar and sugar, and stir into the vegetables. Taste and adjust the seasoning, if desired.
-
Serve warm or at room temperature. Just before serving, stir in the basil and drizzle with more olive oil.
HINT
Peel the squash and zucchini only if the skins are so tough that you cannot nick them with a fingernail. Likewise, if they are so big that they are full of large, tough, gloppy seeds, scoop them out with a spoon and use only the firm flesh. All in all, smaller vegetables taste best and require less prep work.
HINT
The tomatoes in this recipe must be flavorful and provide adequate liquid. If your fresh tomatoes are not juicy and brimming with flavor, use canned whole tomatoes instead. There needs to be at least ½ cup of liquid inside a multicooker for it to reach pressure, so whether fresh or canned, if your chopped tomatoes yield too little juice, add water to make up the difference. You can always reduce the cooking liquid at the end to ensure the dish doesn’t turn out too soupy.
Really Good Mashed Potatoes
MAKES 8 SERVINGS
Because potatoes steamed in a multicooker are never submerged in water, none of their pure flavor is diluted, making them notably potato-y potatoes. I remain convinced that russet potatoes make the best mashed potatoes, and I prefer small potatoes over huge baking potatoes because I think they have superior texture when mashed. You can use another potato if you like, so long as it is a starchy variety (such as Yukon Gold) that will collapse and turn fluffy when cooked. For perfectly smooth puree, pass the cooked potatoes through a food mill. Hand-mashed potatoes turn out a bit rustic, albeit tasty.
Kosher salt
3 pounds small russet potatoes, peeled and cut into 3-inch chunks
½ cup cream cheese, at room temperature (4 ounces)
½ cup sour cream or crème fraîche (homemade, this page, or store-bought)
3 tablespoons unsalted butter, at room temperature
¼ cup whole milk or buttermilk, plus more as needed
-
Pour 1½ cups water and 1 tablespoon salt into the pot. Place the potatoes in a steamer basket and lower into the pot. Cover and cook on HIGH PRESSURE for 10 minutes. Let stand for NATURAL RELEASE for 10 minutes, then QUICK RELEASE the remaining pressure.
-
Lift the basket out of the pot and let stand until any water clinging to the potatoes steams away and their edges look chalky, about 3 minutes. Empty and dry the pot and return it to the multicooker set to WARM MEDIUM. Pass the hot potatoes through a food mill into the pot. (Alternatively, pour the potatoes into the pot, crush them with a hand-held masher, and then beat them as smooth as possible with a wooden spoon.) Do not mash potatoes with anything that has to be plugged in. It turns them gluey and you’ll be sorry.
-
Add the cream cheese, sour cream, and butter to the warm potatoes and stir until melted and smooth. Stir in enough milk to make a thick puree.
-
Season generously with salt and serve warm.
HINT
To make these potatoes up to 2 days ahead, leave them in the removable inner pot until cool, then cover and refrigerate. Wipe away any moisture on the inner pot before replacing in the machine, and reheat on WARM HIGH, stirring often. (Alternatively, transfer the potatoes to a buttered 2½-quart baking dish, cover, and refrigerate. Bake uncovered in a 350°F oven until hot and lightly browned on top, about 45 minutes. Or, reheat them in a microwave, stirring often.
Summer Squash Casserole
MAKES 8 SERVINGS
For the best flavor and texture, look beyond the common yellow crookneck and try Zephyr, cousa, and patty pan. Select small, young, and tender squash that don't need to be peeled and aren’t loaded with large seeds.
CASSEROLE

Unsalted butter and all-purpose flour for the baking dish
1½ pounds mixed summer squashes, cut into ½-inch pieces (about 6 cups)
1 small yellow onion, finely chopped (about 1 cup)
2 garlic cloves, finely chopped
1 cup sour cream
2 large eggs, beaten
2 teaspoons chopped fresh thyme
1½ teaspoons Old Bay seasoning
½ teaspoon ground black pepper
1 cup soft fresh breadcrumbs
½ cup shredded Gruyère cheese (2 ounces)
CRUMB TOPPING
1 cup soft fresh breadcrumbs
½ cup shredded Gruyère cheese (2 ounces)
2 tablespoons unsalted butter, melted
-
For the casserole: Butter and flour a 1½-quart round baking dish. Pour 1½ cups water into the pot. Place the squash in a steamer basket and lower it into the pot. Cover and cook on LOW PRESSURE STEAM for 2 minutes. Let stand for NATURAL RELEASE for 5 minutes, then QUICK RELEASE the remaining pressure. Drain the squash well in a fine-mesh sieve, pressing to remove as much liquid as possible.
-
Transfer the squash to a medium bowl. Stir in the onion, garlic, sour cream, eggs, thyme, Old Bay, pepper, breadcrumbs, and Gruyère.Pour the mixture into the prepared baking dish and cover it tightly with aluminum foil.
-
Set the dish on a metal trivet with handles and lower them into the pot. Cover and cook on LOW PRESSURE for 12 minutes. Let stand for NATURAL RELEASE for 5 minutes, then QUICK RELEASE the remaining pressure. Remove the dish from the pot, uncover, and let stand while preparing the topping and heating the broiler.
-
For the crumb topping: Position an oven rack so that the baking dish will be about 5 inches from the heat source and heat the broiler. Toss together the breadcrumbs, Gruyère, and the melted butter in a small bowl. Sprinkle over the top of the casserole. Broil the casserole until the crumb topping is golden brown, 2 to 3 minutes. Let stand for 10 minutes and serve warm.
HINT
You can toast the breadcrumbs in the pot while the casserole cools. After you remove the casserole, empty and dry the pot and return it to the multicooker. Warm the butter on SAUTÉ LOW, stir in the crumbs, and cook until golden, stirring often. Pour into a bowl, toss with the Gruyère, and sprinkle on the casserole.
Summer Beans in Fresh Tomato Sauce

MAKES 4 TO 6 SERVINGS
This dish is stunning when made with a medley of yellow wax beans and emerald haricots verts bathed in golden tomato sauce, but feel free to use any type of fresh beans, including reliable everyday green beans. The key is to use tender, stringless beans that can be served whole with only their tips trimmed. Similarly, you can replace the yellow tomatoes with another variety, so long as the tomatoes are dripping with juice and flavor. The technique of creating a quick tomato sauce by rubbing halved, dead-ripe tomatoes on a box grater is a keeper, especially when you need to use up tomatoes that are too soft to slice, even the ones that burst on your way home from the farmers’ market. The empty tomato skins wind up in your hand after all of the pulp passes through the grater, like magic.
3 medium very ripe tomatoes (about 1 pound), preferably yellow
Kosher salt
1 teaspoon sugar
3 tablespoons unsalted butter
1 medium yellow onion, very finely chopped (about 1½ cups)
2 garlic cloves, finely chopped
8 ounces fresh wax beans, ends trimmed
8 ounces fresh haricots verts or slender green beans, ends trimmed
2 tablespoons fresh lemon juice
1 tablespoon fresh thyme or lemon thyme leaves
Ground black pepper
-
Halve the tomatoes. Grate the cut-side of the tomatoes on the large holes of a box grater into a bowl. Discard the tomato skins. Stir 1 teaspoon salt and the sugar into the tomato pulp. Set aside until needed.
-
Warm 1 tablespoon of the butter in the pot on SAUTÉ MEDIUM. Stir in the onion and cook until beginning to soften, about 3 minutes. Stir in the garlic and cook until fragrant, about 1 minute.
-
Stir in the reserved tomato mixture and the beans. Cover and cook on LOW PRESSURE for 5 minutes. QUICK RELEASE the pressure.
-
Stir in the remaining 2 tablespoons butter, the lemon juice, thyme, and black pepper to taste. Simmer on SAUTÉ MEDIUM until the tomato mixture thickens enough to coat the beans, 2 to 3 minutes. Taste and adjust the seasoning, if desired. Serve warm or at room temperature.
THE STRING THEORY OF BEANS
There are two broad categories of beans: stringless (with strings tender enough to be eaten or no strings at all) and string beans (with ropey, inedible strings that must be pulled from the pods, such as Greasy Beans, Half-Runners, Pole beans, and Romano.) Because string beans are allowed to grow until they are full of mature beans, their pods are tougher and must be cooked long enough for both the pods and the beans inside to turn tender. To use true string beans in this recipe, remove the strings, break the pods into bite-size pieces, cover, and cook on HIGH PRESSURE for 5 minutes in step 3.
Mashed Sweet Potatoes with Browned Butter and Lemon
MAKES 6 SERVINGS
Sweet potatoes are a top crop in the South, and there are more varieties than you might think, with flesh ranging from white to vermilion to deep purple, although orange tends to be the familiar favorite. For the best flavor and texture, choose small sweet potatoes that weigh no more than 8 ounces each. Large, football-shaped sweet potatoes tend to be watery and stringy.
6 small sweet potatoes (each about 6 to 8 ounces)
4 tablespoons unsalted butter
½ teaspoon kosher salt, or to taste
½ teaspoon ground ginger
½ teaspoon freshly grated nutmeg
⅓ cup peach preserves
2 tablespoons dry sherry or bourbon
Finely grated zest and juice of 1 lemon (about ¼ cup)
-
Peel the sweet potatoes and cut them into 1-inch chunks.
-
Melt the butter in the pot on SAUTÉ MEDIUM. Cook until the butter is dark golden brown and smells nutty, about 4 minutes, stirring occasionally. Immediately add the sweet potatoes and stir to coat. Stir in ½ cup water, the salt, ginger, and nutmeg.
-
Cover and cook on LOW PRESSURE for 4 minutes. Let stand for NATURAL RELEASE for 4 minutes, then QUICK RELEASE the remaining pressure.
-
Stir the potatoes vigorously to mash them as smooth as possible. (For a silky smooth puree, use an immersion blender.) Stir in the preserves, sherry, lemon zest, and lemon juice. Taste and adjust the seasoning, if desired. Serve warm.
HINT
Though browning butter is easy, it can quickly turn from perfect to burned in seconds. If you see black flecks floating in the butter, accept that it burned and begin again.

HOMEMADE SWEET POTATO PUREE
To use the puree in other recipes (such as pie or casseroles), cook only the potatoes, water, and salt, omitting the butter, ginger, and nutmeg. Pass the cooked potatoes through a food mill or mash by hand. The puree must have the consistency of canned pumpkin. If necessary, drain the puree in a fine-mesh sieve set over a bowl, and refrigerate until thick, at least 3 hours and up to overnight. Store in an airtight container in the refrigerator for up to 3 days or frozen for up to 3 months.

Homemade Crème Fraîche
MAKES 2 CUPS
Crème fraîche is what Southern cooks once called clabber or clabbered cream. In the days before ubiquitous refrigeration, resourceful cooks had to figure out how to make the most of fresh cream that had to sit at room temperature for a while. During this time, natural good-for-us cultures in the milk began to grow and ferment, causing the milk to thicken and develop a subtle tang. (Crème fraîche tastes like a dreamy mixture of heavy cream and sour cream.) Traditional instructions for making homemade crème fraîche call for letting it sit on the countertop until it thickens, which can take from a few hours to a couple of days depending on the temperature of the room. The moist, steady heat of the YOGURT setting on a multicooker eliminates the guesswork.
The beauty of crème fraîche—beyond its flavor and consistency—is that it doesn’t separate when added to warm foods, such as soups and sauces: See Winter Squash Soup with Apple Butter Cream (this page), Velvety Potato and Leek Soup (this page), or Succotash with Herbed Cream Sauce (this page). Crème fraîche can also be used in desserts, such as Quick Lemon Cream with Fresh Berries (this page).
1½ cups heavy cream
½ cup plain yogurt with live, active cultures (see Hint)
-
Stir together the cream and yogurt in a small glass bowl or jar that will fit inside the multicooker. Place the bowl in the multicooker, cover, select the YOGURT function, and adjust the time to 6 hours. (There is no need to use a trivet or add water to the pot, since this process does not require pressure.) At the completion of the YOGURT cycle, the multicooker will go into KEEP WARM mode. The crème fraîche can stay in the multicooker on KEEP WARM for up to 12 hours.
-
Cover and refrigerate until chilled, at least 2 hours. Crème fraîche keeps in the refrigerator for up to 8 weeks.
HINT
The key to homemade crème fraîche is to use another cultured dairy product as the starter, such as plain yogurt, skyr, cultured sour cream, or kefir. Read the label to make sure the ingredient list specifies live, active cultures. After you make your first batch, you can use some of your homemade crème fraîche as the starter in subsequent batches. When stored in a jar with a tight-fitting lid, crème fraîche keeps in the refrigerator for up to 8 weeks.
Succotash with Herbed Cream Sauce

MAKES 4 TO 6 MAIN DISH SERVINGS OR 6 TO 8 SIDE DISH SERVING; 6 TO 8 SERVINGS
Succotash is sublime when made with fresh beans and peak-of-season sweet corn, although this recipe still holds its own when made with frozen vegetables. A little bubbling cream sauce lightly coats the vegetables, made with fresh herbs and a big spoonful of naturally thick crème fraîche instead of flour or cornstarch. This side dish is hearty enough to serve as an entrée, especially when spooned over hot cornbread or biscuits. To make this dish meatless, omit the bacon and replace the bacon fat with 2 tablespoons salted butter.
Butter beans are the term that some Southerners (including me) use to describe pale green or speckled brown lima beans that are eaten while still small and tender, which is why the frozen versions found in grocery stores are often called baby lima beans. When cutting fresh corn off the cobs, be sure to scrape every drop of sweet corn milk from the cobs, because the starch helps thicken the sauce.
2 ounces thick-cut smoky bacon (about 2 slices), diced
2 cups fresh or thawed butter beans or baby lima beans
1 teaspoon kosher salt
½ teaspoon ground black pepper
2 fresh thyme sprigs
2 cups fresh or thawed corn kernels
1 small red onion, finely diced (about 1 cup)
½ cup crème fraîche, homemade (this page) or store-bought
2 tablespoons tomato paste
¼ cup lightly packed fresh basil leaves, thinly sliced
1 tablespoon fresh thyme leaves
-
Cook the bacon in the pot on SAUTÉ MEDIUM until crisp and rendered, about 8 minutes. Use a slotted spoon to transfer the bacon to a bowl, leaving the fat in the pot.
-
Stir in the butter beans and ¾ cup water, stirring to loosen every speck of the browned glaze from the bottom of the pot. (Multicookers might issue the burn warning message if there are solids stuck to the bottom of the pot during pressure-cooking.) Stir in the salt, pepper, and thyme sprigs. Cover and cook on LOW PRESSURE for 3 minutes. QUICK RELEASE the pressure.
-
Stir in the corn, onion, ¼ cup of the crème fraîche, and the tomato paste. Cover and cook on LOW PRESSURE for 3 minutes. Let stand for NATURAL RELEASE for 2 minutes, then QUICK RELEASE the remaining pressure.
-
Discard the thyme stems. Stir in the basil, thyme leaves, the reserved bacon, and the remaining ¼ cup crème fraîche. Taste and adjust the seasoning, if desired. Serve warm.