Grow Your Own

My attitude to venturing into the world of grow your own is to keep it simple. I go mostly for produce that is difficult or expensive to buy, but reasonably easy to grow. The plants have to be tolerant of pests, poor soil and challenging weather and to yield repeatedly through the growing season in a manageable amount of space. Sorrel is the perfect example: birds and slugs seem to dislike its acidic leaves, and no matter how harsh the winter it always faithfully reappears, year upon year.
In a really small space, grow bags and and tubs offer a great alternative to the open ground. Herbs and ‘cut and come again’ lettuce leaves thrive in window boxes, with the added benefit of a picturesque display.
A grow your own must-have. Rhubarb thrives even in the darkest corner of the garden, it takes care of itself and a mature plant will faithfully produce beautiful pink stems full of goodness year after year from early spring onwards.
Tart and clean-tasting, it works well in both sweet and savoury dishes. Poach with a slit vanilla pod and sugar to taste, to accompany milky puddings, or roast with a drizzle of honey, orange zest and grated ginger root and serve with oily fish, duck or home-cooked ham. Bake in a crumble or simmer with strawberries until soft and combine in a trifle.
Carefully twist the stem from the plant and discard the leaf (sadly, it’s only good for the compost heap). To peel, trim both ends, insert the blade of a small knife just under the skin and gently pull the skin away, repeating until all the skin is removed. Rhubarb contains a lot of water, so only a splash of water is necessary when cooking. It’s very acidic, so always use a stainless steel or non-reactive saucepan.
At the height of the rhubarb season, freeze excess fruit in prepared chunks or transform into jam or chutney (see recipe for gooseberry chutney, page 111).
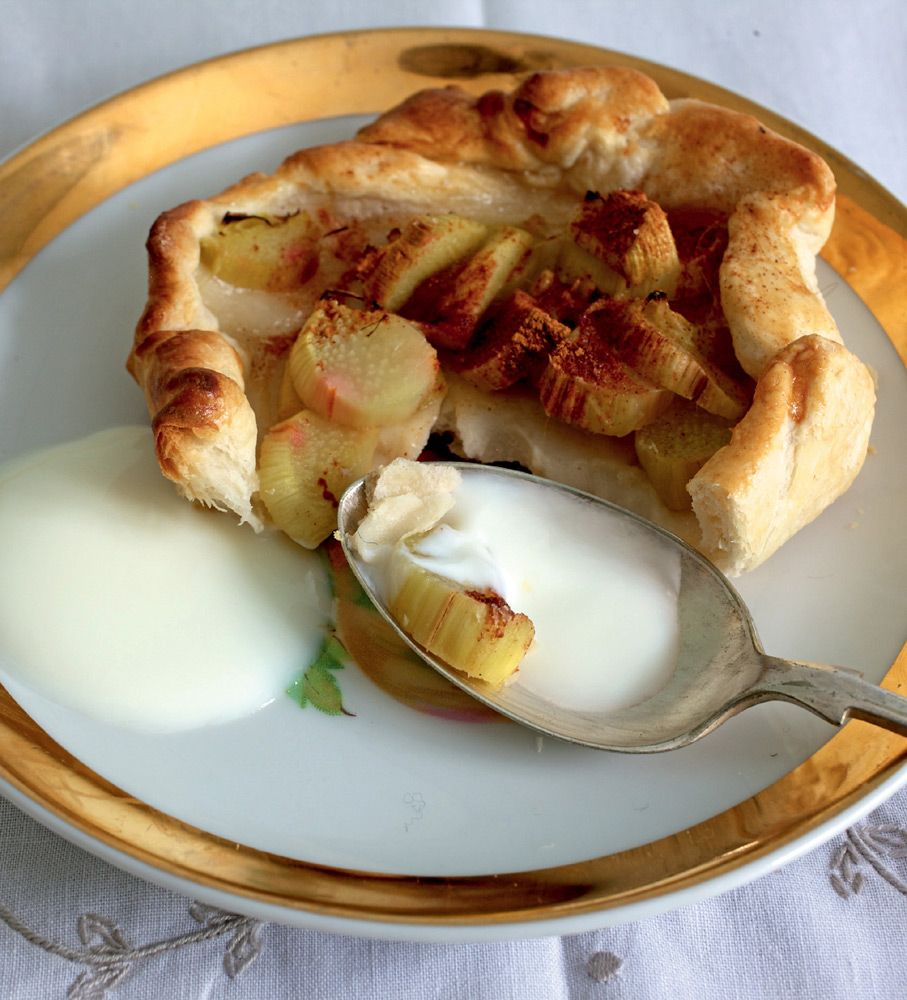
Free-form individual puff pastry tarts are so easy to make. Serve hot from the oven with cream.
MAKES 6 TARTS
5 peeled rhubarb stems
275g/10oz ready-rolled puff pastry
runny honey or agave syrup
ground cinnamon
brown sugar
a little whole milk
Preheat the oven to 200°C/400°F/gas mark 6.
Cut the prepared rhubarb into 5mm/1/4 inch slices.
Cut the ready-rolled pastry into 6 portions and place on a baking tray, leaving enough room for the pastry to spread.
Divide the rhubarb equally between the pastry portions. Fold the edges of the pastry up over the rhubarb, leaving the centre uncovered. Pinch the pastry together at regular intervals to keep it in place.
Drizzle the rhubarb with honey or agave syrup to taste, and sprinkle with a little ground cinnamon and brown sugar.
Brush the pastry with milk and bake in a preheated oven for 20-25 minutes, until golden brown.
 RHUBARB, GINGER AND CARDAMOM JAM
A heady, slightly sloppy jam, simple and rewarding to make. Spoon on to ice cream, natural yoghurt or warm buttered scones. Rhubarb is low in pectin: the jam sugar and lemon in this recipe help the setting process. If you prefer your jam tart you can reduce the amount of added sugar a little, but the jam will need to be cooked for longer.
MAKES ABOUT 4 X 450G/1LB JARS
1kg/2 1/4lb rhubarb, peeled and chopped into 2.5cm/1inch chunks
900g/4 1/2 cups sugar
juice and zest of a lemon
a thumb-sized piece of ginger root, peeled and grated
8 cardamom pods, seeds removed and crushed
Place the prepared rhubarb in a large heavy-bottomed stainless steel saucepan and combine with the sugar, lemon, grated ginger and cardamom. Leave to stand for a couple of hours (you can leave this stage out if you are in a hurry, but it does draw out the juice from the rhubarb).
Put the pan on the stove and bring the rhubarb mixture to the boil, stirring regularly to prevent it sticking. Boil for 20 minutes or so, until the setting point is reached (see page 9).
Pour the hot jam into sterilized jars, top with a waxed jam disc and seal immediately.

This prolific lemony garden herb has been cultivated for centuries, but is still relatively rare in shops. It adds a pleasing distinctively fresh flavour to a meal. The long broad-leafed variety, similar in appearance to spinach, is my choice for cooking, whereas delicate heart shaped buckler sorrel is perfect for salads. Both varieties are easy to grow and are pretty much pest-free; they reappear in spring without fail and by midsummer would happily take over the herb garden. Sadly they die back as winter starts to bite.
Sorrel is particularly good with eggs and fish: a finely chopped handful transforms an omelette batter or a buttery hollandaise sauce. Add a couple of handfuls to a leek and potato soup just before liquidizing or thinly slice and stir into a fish pie filling or (my favourite) wilt a little chopped sorrel in hot seasoned melted butter and coat baby new potatoes, carrots or broad beans.
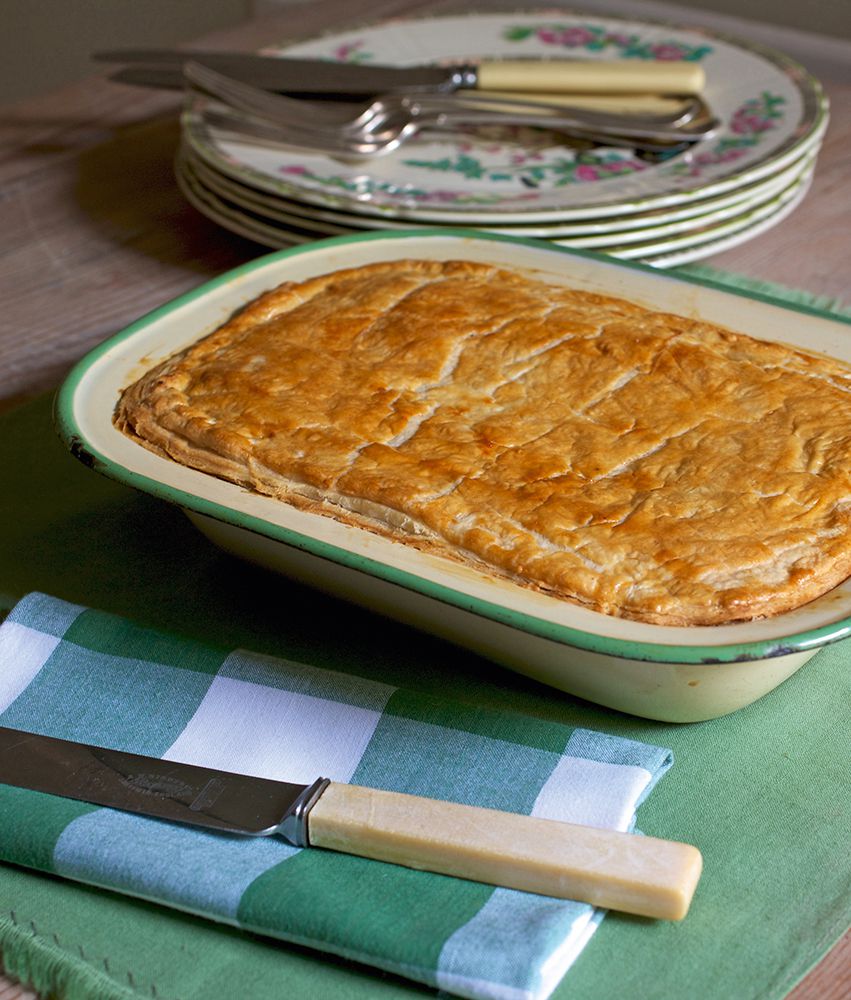
SORREL, CHARD AND RICOTTA CHEESE PUFF PASTRY PIE
Who can ever resist puff pastry?
2 large handfuls of sorrel leaves
275g/10oz trimmed chard leaves
1 tablespoon salted butter
2 tablespoons olive oil
1 medium onion, diced
2 garlic cloves, finely chopped salt and black pepper
375g/13oz ready-rolled puff pastry
250g/9oz ricotta cheese
1 small handful of chopped dill leaves
1 small free-range egg, beaten
Preheat the oven to 200°C/400°F/ gas mark 6.
Thinly slice the sorrel and chard leaves and set to one side. Heat the butter and olive oil in a large saucepan. When the butter has melted add the onion and garlic and sauté until soft.
Add the sliced chard and sorrel leaves and stir together over a low heat until the leaves have wilted to half their original volume. Season to taste.
Grease a medium pie dish with butter and line with ready-rolled pastry. Roughly cut a lid from the remaining pastry.
Spoon the chard mixture into the prepared pie dish, sprinkle chopped dill over the top and cover with ricotta cheese.
Brush the pie edges with beaten egg and carefully place the puff pastry lid on top. Cut away any excess pastry and firmly crimp the edges together. Brush the pie with beaten egg and bake in a preheated oven for 20-25 minutes, until it is golden.
Dollop thick buttery hollandaise sauce seasoned with lemony sorrel on to fish, poached eggs or plump spears of asparagus. Hollandaise has a reputation for being temperamental, but stick to this failsafe recipe and you will make perfect sauce every time.
3 large free-range egg yolks
200g/2 sticks melted salted butter
1 tablespoon cold water
1 dessertspoon lemon juice
a handful of thinly sliced sorrel leaves
salt and black pepper
A third fill a smallish saucepan with water and bring the water to a gentle simmer. Select a heatproof bowl that sits comfortably in the pan without touching the simmering water. It is important that the sauce doesn’t get too hot or the eggs will curdle, so ensure the water never boils.
Place the egg yolks in the heat-proof bowl with 1 tablespoon of cold water and whisk until frothy. Place the bowl over the simmering water and whisk continuously until the eggs thicken. Whisk in the melted butter a little at a time until all the butter has been incorporated and the sauce is thick and creamy. It is really important never to stop whisking when adding the butter. If, despite all your precautions, the sauce curdles, whisk in a tablespoon of cold water.
Remove the bowl from the pan and whisk in the lemon juice and sliced sorrel. Season to taste and serve as soon as possible.
A little packet of seeds goes a long way, producing a prolific ‘cut and come again’ crop that continues to grow right up to the cold winter months.
Rocket certainly packs a punch for such a small leaf, bursting with hot peppery flavour. The whole plant is edible, flowers and all, so nothing is wasted. I always grow wild rocket as it seems less susceptible to bugs and it comes back bigger and better the following year.
Though rocket tends to wilt quite quickly once picked, soaking in cold water soon perks up the leaves. Store the drained rocket leaves in the fridge in a self-sealing plastic bag.
We all know a handful of rocket leaves livens any salad but how about adding finely chopped rocket to soft cream cheese, mayonnaise or creamy mashed potato? Wilt into hot pasta coated with garlic and chilli butter, fill a cheese omelette with a generous handful just before folding, or use it to top toasted crusty bread rubbed with a peeled garlic clove, drizzled with olive oil and layered with ripe tomato slices. Rocket loses its pungency when cooked. If you want a a stronger flavour, you should barely cook the leaves; or if you have to cook them for longer, use larger quantities.
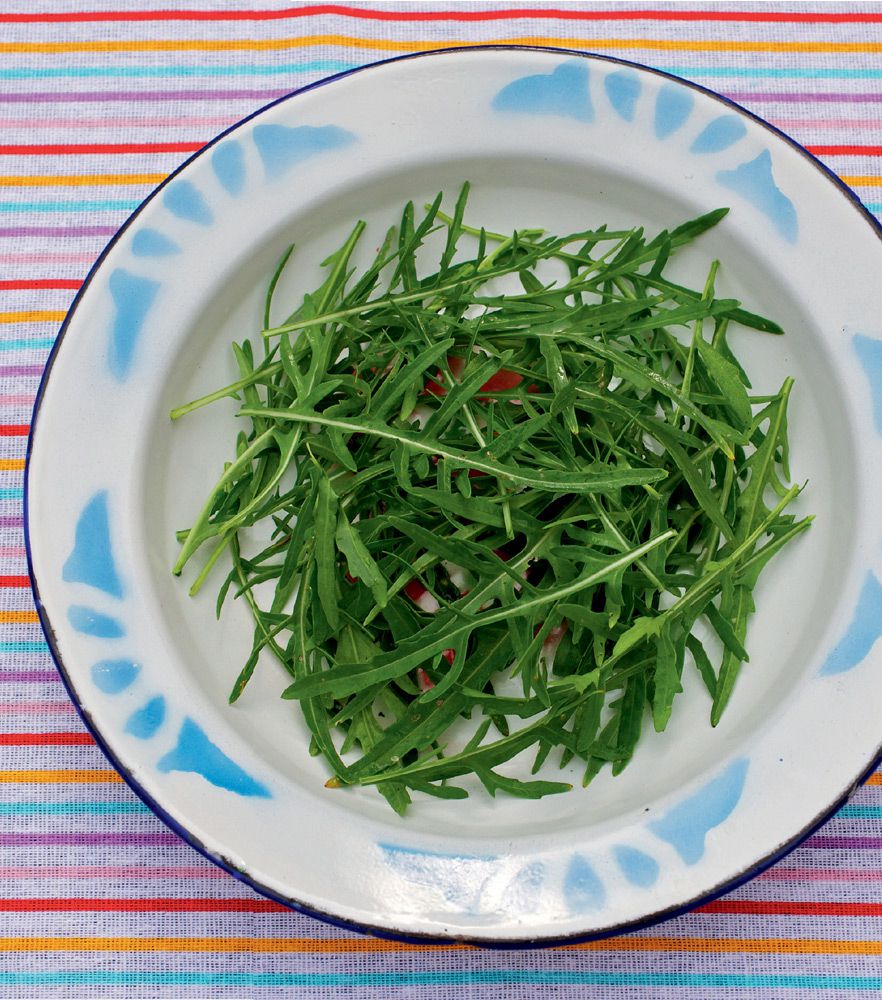
 ROCKET, MUSHROOM AND FETA FILO PASTRY ROLLS
A movable feast, perfect for picnics.
MAKES 6
150g/5oz rocket leaves
2 tablespoons olive oil
1 medium onion, diced
1 garlic clove, crushed
175g/6oz finely diced chestnut mushrooms
175g/1 1/2 cups crumbled feta cheese sesame seeds
a handful of pine nuts salt and black pepper ready-made filo pastry
sheets a little melted butter beaten egg
Preheat the oven to 190°C/375°F/gas mark 5.
Finely chop the rocket leaves and set to one side.
Heat the olive oil in a frying pan. Add the onion and garlic and sauté until soft. Add the diced mushrooms and continue to cook until soft. Allow the mixture to cool a little, then combine with the crumbled feta cheese, pine nuts, rocket and seasoning to taste.
Unroll the filo pastry on a large wooden board and carefully brush the top sheet with the melted butter. Spoon a sixth of the mushroom mixture in a fat sausage shape in the middle of the nearest short end of the filo, fold in the sides and tightly roll.
Brush the filo roll with beaten egg, using a little to seal the roll, and sprinkle with sesame seeds.
Place the completed rolls on a greased non-stick baking tray and bake in the preheated oven for 20 minutes.
ROCKET VICHYSSOISE
A cooling peppery soup for a hot summer’s day.
110g/4oz rocket leaves 3 medium leeks
2 medium potatoes 1 plump garlic clove
3 tablespoons olive oil 1 litre/4 cups stock salt and black pepper 75ml/1/4 cup double cream
a little extra chopped rocket and cream to garnish the soup
Thinly slice the rocket (there is no need to cut away the stalks as the soup will be liquidized).
Slit the leeks lengthwise and wash away any mud or grit; trim each end and thinly slice. Peel and dice the potatoes and crush the garlic clove.
Heat the olive oil in a heavy-bottomed saucepan. Add the leeks, potatoes and crushed garlic, stir until coated with oil, cover the pan and gently sweat the vegetables over a low heat until soft but not brown.
Pour in the stock and simmer together until the potatoes are soft. Turn off the heat and allow the soup to cool until hand temperature. Add the chopped rocket and blend the soup in batches in a liquidizer until smooth. Season to taste.
Pour the soup into a tub and when cold chill in the fridge. Combine with the cream just before serving. Garnish with a swirl of extra cream and chopped rocket.
If you have any space on a sunny windowsill, make room for a handsome chilli plant. Nothing beats picking a home-grown chilli.
At chilli festivals I am often overwhelmed by the variety of plants available, the versatility of the beautiful fruit and the passion it inspires. Chillies don’t have to be burning hot, they can also be mellow and full of flavour. Choose a variety that suites your taste.
A chilli perks up a simple curry but, stuffed with grated mature cheddar cheese mixed with chopped coriander and grilled until blackened, chillis are sublime. A little chopped chilli transforms mussels, prawns or even oysters. For a chocolate bar with a fiery kick, stir chopped chilli into melted dark chocolate, spread on a tray and allow to cool; or add to ice cream for a hot but cool creamy sensation.
Thread excess harvested chillies on cotton and hang until dry; or add to a bottle of olive oil along with a few coriander seeds, peppercorns and a couple of bay leaves. Whole chillies also freeze remarkably well.

CHILLI AND LIME ICE CREAM
Strangely – lip-smackingly good!
grated zest and juice of 2 limes
2 largish red chillies, finely chopped
200g/1 cup caster sugar
600ml/2 1/2 cups double cream, lightly whipped (still slightly sloppy)
Place the lime zest and juice, chopped chilli and castor sugar with a splash of water in a small pan and stir together over a low heat until the sugar has dissolved.
When the chilli syrup has cooled, combine with the cream and spoon into a freezer-proof plastic container. Place in the freezer.
After 2 hours, remove the tub and break up any icy bits with a fork (this prevents the ice cream freezing into a solid block). Repeat the process 2 or 3 times, until the cream has frozen through.
A steaming bowl of spiced mussels, ready in minutes. Mop up the sauce with thick slices of buttered crusty bread. To avoid overcooking the mussels, have all the ingredients ready at hand, to add in quick succession.
2.5kg/5 1/2lb mussels
2 tablespoons olive oil
1 generous tablespoon butter 1 medium shallot, diced
3 garlic cloves, crushed
3 finely sliced red chillies
200ml/3/4 cup dry cider, preferably still scrumpy
110ml/1/2 cup hot vegetable stock
a large handful of finely chopped flat-leaf parsley
salt
Tip the mussels into a large bowl of water, remove any beards and scrape any barnacles from the shells. Wash the mussels a couple of times.
Heat the olive oil and butter in a large saucepan. When the butter melts, add the diced shallot, garlic and chilli and sauté until soft but not brown.
Add the mussels, cider, stock, parsley and seasoning to taste. Cover the pan, turn up the heat and rapid cook the mussels, shaking the pan, for 3-4 minutes. When the mussels are open they are ready to eat. Serve immediately, discarding any mussels that have not opened.

I am breaking my own rule a little here, as mature Jerusalem artichoke plants are very tall and spread like wildfire. However, on a positive note, they require hardly any tending (apart from tying up a rogue shoot or two) and thrive in poor soil even in low light conditions. A member of the sunflower family, they also provide a display of bright sunshine yellow flowers at the end of the summer, when everything is looking a little tired.
You can start harvesting the tubers in the autumn: just dig the light brown knobbly tubers up. But the best way to store Jerusalem artichokes is in the ground (just like buried treasure). They are fine left in the soil through the winter months; in fact it is considered best to harvest the tubers after the first frost. Cut back the stems as they die back and simply dig up when needed. By springtime any tubers left in the ground will start to sprout and multiply to provide next year’s crop.
The nutty sweet tubers can be cut into matchsticks and eaten raw in salads, roasted with butter and thyme, pan-fried with chopped garlic and olive oil, mashed or added to soups. Once they are peeled, immerse the tubers in cold water with an added squeeze of lemon juice to avoid the tubers discolouring.
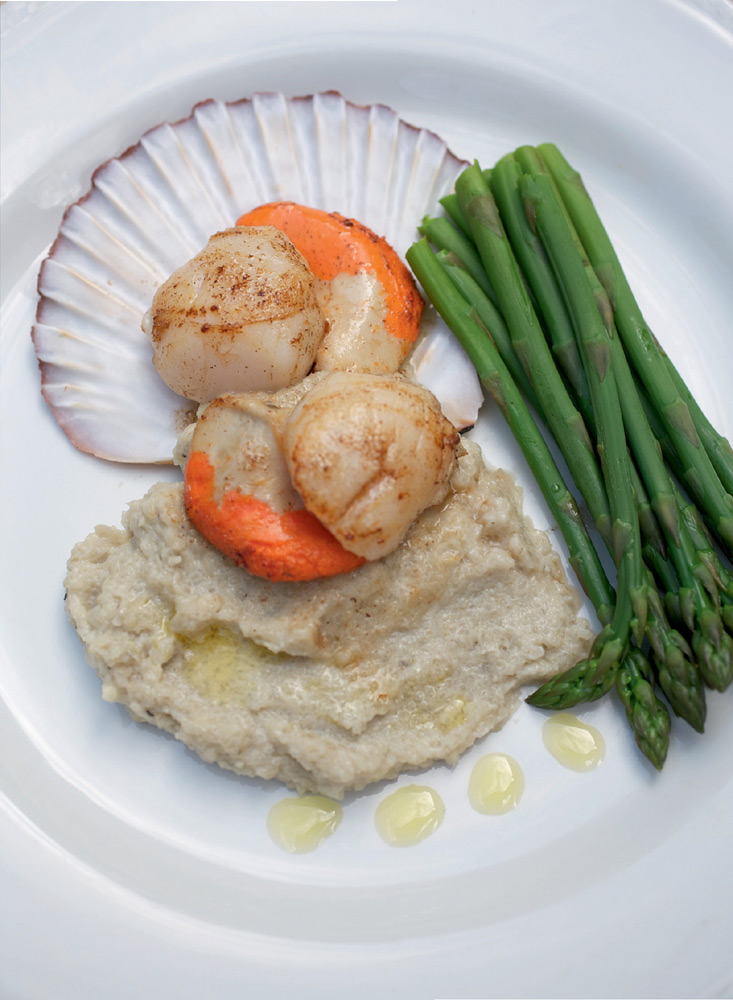
JERUSALEM ARTICHOKE AND TRUFFLE OIL PURÉE
Earthy truffle oil works just brilliantly with Jerusalem artichokes. Truffle oil varies in strength depending on brand, so I suggest adding the oil to taste. Smear the purée artistically on a plate and top with scallops or white fish pan-fried in butter.
600g/1lb 5oz Jerusalem artichokes
a squeeze of lemon juice
a good knob of butter
2 crushed garlic cloves
a few sprigs of thyme vegetable stock
110ml/1/2 cup crème fraîche
salt and black pepper
truffle oil
Peel and dice the Jerusalem artichokes and drop into a bowl of water with a squeeze of lemon juice until ready to use.
Melt a knob of butter in a saucepan, add the garlic and sauté until soft.
Add the drained artichokes, the thyme sprigs and enough vegetable stock to barely cover the vegetables. Cover the pan and simmer until the stock has reduced and the artichokes are soft, adding a little extra water if necessary.
Place the cooked artichokes, thyme and crème fraîche in a food processor and blend until smooth. Season the purée and stir in the truffle oil, starting with half a capful and adding extra to taste.
Drizzle over a little extra oil to serve.
WARM JERUSALEM ARTICHOKE AND OYSTER MUSHROOM SALAD
Walnut oil and oyster mushrooms complement the nutty flavour of Jerusalem artichokes. Pile this warm salad on to bitter leaves and top with crispy fried Parma ham.
600g/1lb 5oz Jerusalem artichokes
6 slices Parma ham
olive oil
a good knob of butter
2 shallots, diced
2 crushed garlic cloves
175g/6oz oyster mushrooms, sliced
2 tablespoons olive oil
1 tablespoon walnut oil
1 tablespoon lemon juice
1 teaspoon grainy mustard
1 dessertspoon finely chopped rosemary leaves
salt and black pepper
bitter leaves, such as radicchio or endive mixed with green salad leaves
Peel the artichokes and simmer in salted boiling water until soft. Drain and return the artichokes to the warm pan until ready to combine with the dressing.
Fry the Parma ham slices in a little olive oil until crispy and set to one side. Add the butter to the same frying pan. Add the shallots and garlic and sauté until soft. Add the sliced oyster mushrooms and lightly fry until just cooked.
Whisk the olive oil, walnut oil, lemon juice, mustard and rosemary together and season to taste.
Cut the cooked artichokes into thickish slices and combine with the mushrooms and dressing. Pile the salad on to the bitter leaves and top with the crispy fried Parma ham.

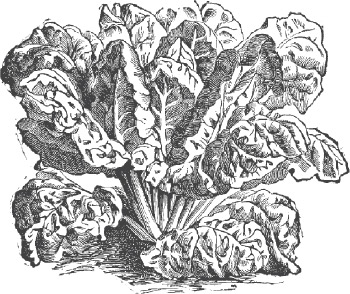
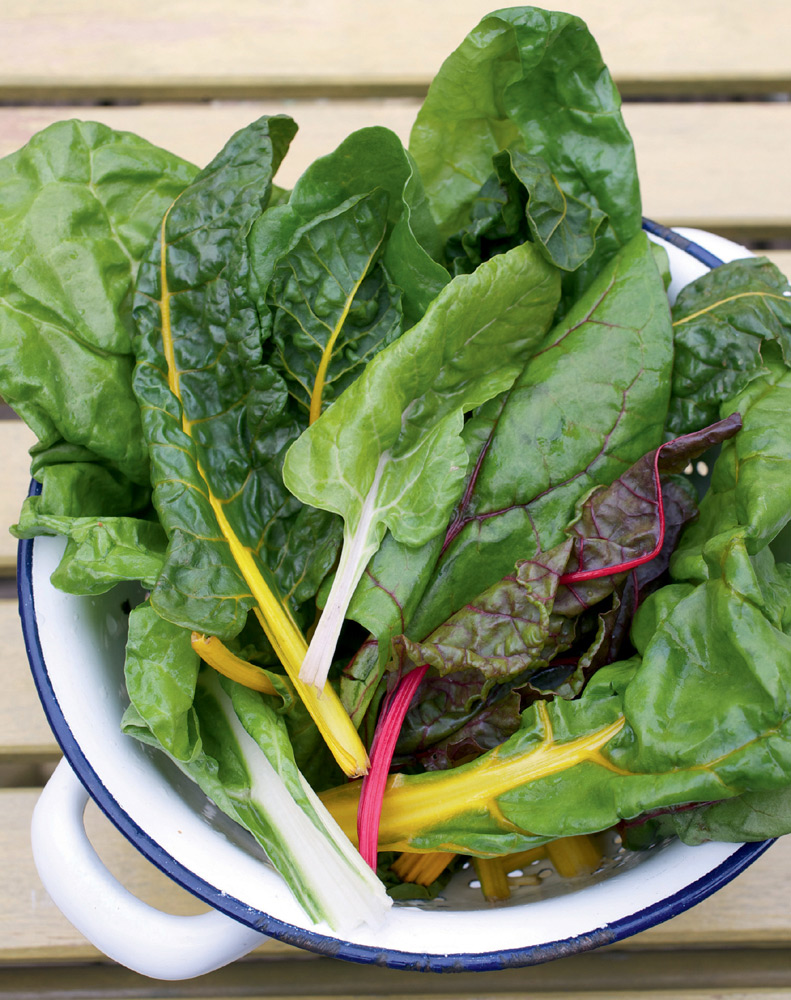
Not only is chard officially one of the most nutritious vegetables around, it is also easy to grow and very productive. The more you pick, the more it grows. Deep green and leafy, with striking white, yellow, fuchsia pink or ruby red stems, it makes a beautiful addition to any garden. Chard has an enviably long season and even tolerates a cold winter. As a biennial plant, if it does die back, new leaves will miraculously reappear in early spring to produce a second crop.
Tiny raw young leaves are perfect to toss with a green salad and when mature the leaves still only require a short cooking time. The stems do take a little longer to cook: cut away and cook for a few minutes first before adding the leaves. Plunge into boiling water until the leaves wilt, or – even better – steam, dress with a glug of olive oil whisked with a little balsamic vinegar or (take the uncomplicated route) a large knob of butter and a sprinkling of sea salt or a coating of cream. Chard can be used in a similar way to spinach, with the added bonus of a slightly more robust leaf that doesn’t shrink quite so much when cooked, making it a versatile ingredient in pies (see page 53), stir-fries and hearty stews. To maintain chard’s optimum nutrition, take care not to overcook the leaves.
The following recipes also work well with kale.
CHARD WITH SAGE, CREAM AND NUTMEG
Creamy chard, seasoned with sage and nutmeg, makes a delicious side dish to any fish or meat; or try combined with pasta (especially tagliatelle).
700g/1 1/2lb chard
2 large knobs of butter
3 garlic cloves, finely chopped
a modest handful of sage leaves, finely chopped
300ml/1 1/4 cups crème fraîche nutmeg
salt and black pepper
Cut the chard stems and leaves into thickish strips, taking care to keep the stems separate.
Steam or blanch the chard until wilted, cooking the stems for a couple of minutes before adding the leaves.
Melt a good knob of butter in a largish pan and sauté the garlic until golden brown. Add the shredded sage and cook for a minute or so. Add the steamed chard and stir until coated in the flavoured butter.
Spoon in the crème fraîche, add a good grate of nutmeg and season to taste. Gently simmer until the cream has reduced a little to make a sauce.
Serve with new potatoes or rice or just pile on buttered toast and top with a poached or fried egg. A side of thick-sliced spicy chorizo sausage sautéed until crunchy also enhances the smoky flavours of this dish.
400g/14oz chard
400g/14oz tin chickpeas
4 tablespoons olive oil
1 medium red onion, diced
2 garlic cloves, finely chopped
1 red pepper, diced
2 medium courgettes, cubed a pinch of chilli flakes
1 teaspoon ground coriander
1 scant teaspoon pimentón (smoked paprika)
2 plum tomatoes, diced
a handful of chopped coriander leaves
salt and black pepper
Thinly slice the chard stems and leaves, taking care to keep the sliced stems separate.
Drain and rinse the chickpeas.
Heat the olive oil in a wok, add the onion, garlic and red pepper and stir-fry until they start to soften. Add the cubed courgettes and the sliced chard stems and continue to stir-fry until soft.
Add the spices and stir-fry for a minute or so.
Add the diced tomatoes, the chickpeas and the sliced chard leaves. Continue to cook until the chard has wilted and any juice from the tomatoes has reduced. Stir in the chopped coriander and season to taste.