5 Organizing Content
Lesson overview
In this lesson, you’ll learn how to do the following:
Arrange content.
Work with the Layers panel.
Create and edit groups.
Align content and artboards.
Position objects precisely.

This lesson will take about 45 minutes to complete. To get the lesson files used in this chapter, download them from the web page for this book at www.adobepress.com/XDCIB2020. For more information, see “Accessing the lesson files and Web Edition” in the Getting Started section at the beginning of this book.

Using the Layers panel, you can organize artboards and control how content is exported, displayed, organized, selected, and edited. Within each artboard, you’ll use arranging, grouping, positioning, and aligning to ensure that individual assets are organized and easy to access.
Starting the lesson
In this lesson, you’ll learn ways to organize the design content in your app design. To start, you’ll open a final lesson file to get an idea for what you will create in this lesson.
Start Adobe XD, if it’s not already open.
On macOS, choose File > Open From Your Computer. On Windows, click the menu icon (
 ) in the upper-left corner of the application window and choose Open From Your Computer. Open the file named L5_end.xd, which is in the Lessons > Lesson05 folder that you copied onto your hard disk.
 Note
NoteIf you have not already downloaded the project files for this lesson to your computer from your Account page, make sure to do so now. See the “Getting Started” section at the beginning of the book.
NoteFor either macOS or Windows, if the Home screen is showing with no files open, click Your Computer in the Home screen. Open the file named L5_end.xd, which is in the Lessons > Lesson05 folder that you copied onto your hard disk.
If the Assets panel opens on the left and you see a Missing Fonts message, close the panel by clicking Assets panel icon (
 ) in the lower left. Note
The screen shots for this lesson were taken on macOS. On Windows, the menus can be accessed by clicking the hamburger menu.
Press Command+0 (macOS) or Ctrl+0 (Windows) to see all of the content.

This file shows you what you will create by the end of the lesson.
Leave the file open for reference, or choose File > Close (macOS) or click the X in the upper-right corner of the open window (Windows) to close the file.
Arranging objects
As you add content to artboards, each new object goes on top of the previous object. This ordering of objects, called stacking order, determines how objects are displayed when they overlap. You can change the stacking order of objects in your artwork at any time, using either the Layers panel or arrange commands.
In the first part of the following figure, the red square was created first, the blue second, and the orange object last. An arrange command has been applied to the orange object for each example from left to right. Arrange commands (Send To Back, for instance) are found in the Object menu (macOS) or by right-clicking the object to be arranged (macOS or Windows).
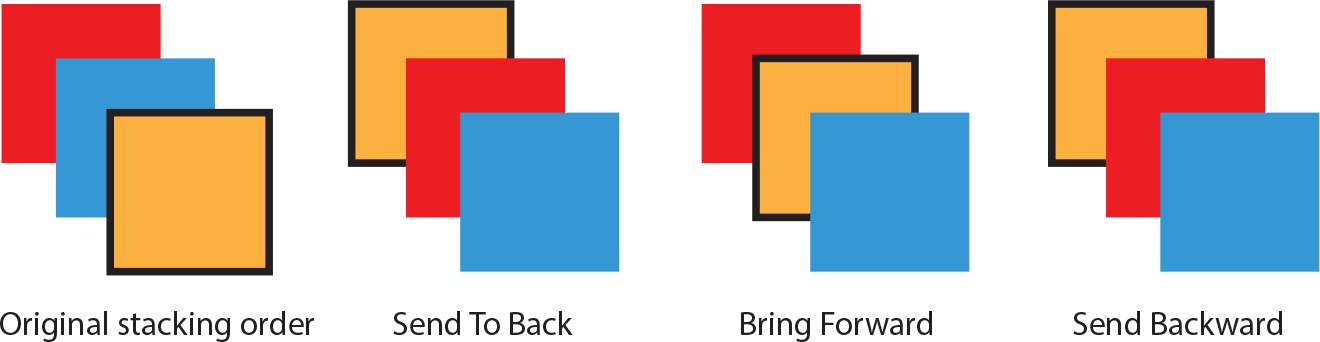
The Send To Back command sends selected content behind all other artwork. The Bring To Front command brings the selected content on top of all other artwork. The Bring Forward and Send Backward commands bring the object forward one object and backward one object, respectively. Next, you’ll work with the arrange commands to change the stacking order of content.
Choose File > Open From Your Computer (macOS) or click the menu icon (
) in the upper-left corner of the application window and choose Open From Your Computer (Windows). Open the Travel_Design.xd document from the Lessons folder (or where you saved it). NoteIf you are starting from scratch using the jumpstart method described in the section “Getting Started,” open L5_start.xd from the Lessons > Lesson05 folder.
Press Command+0 (macOS) or Ctrl+0 (Windows) to see all of the content.
Zoom in to the image at the top of the Hike Detail artboard using any zoom method, including Option/Ctrl-scroll wheel, Option-swipe (Magic Mouse), or pinch (trackpad).
Select the Rectangle tool (
 ), and in the lower half of the artboard, draw a rectangle that spans the full width of the artboard and covers the text. Make sure it has a height of approximately 220 in the Property Inspector.
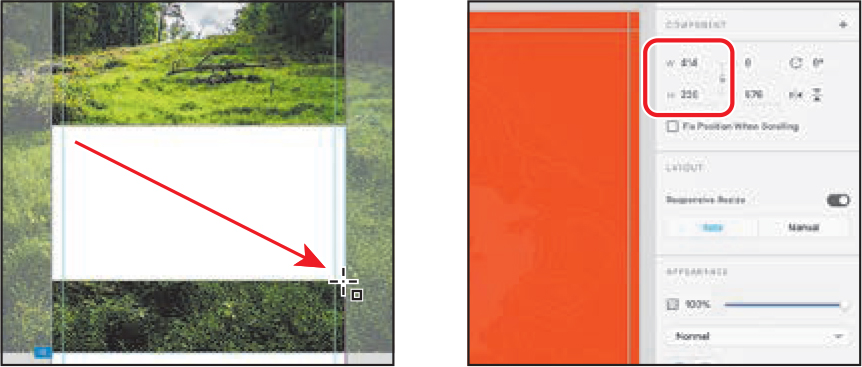
Click the Fill color in the Property Inspector and, in the color picker that appears, choose HSB from the color mode menu so you can enter values in Hue, Saturation, and Brightness. Change the color values to H=180, S=54, B=33 and the A (Alpha or transparency) value to 90 to apply a green color to the rectangle. Press Return or Enter after the last value is entered.

Select the Select tool (
 ) in the toolbar.
Choose Object > Arrange > Send Backward (macOS), or right-click the rectangle directly and choose Send Backward (macOS) or Arrange > Send Backward (Windows). Leave the rectangle selected.
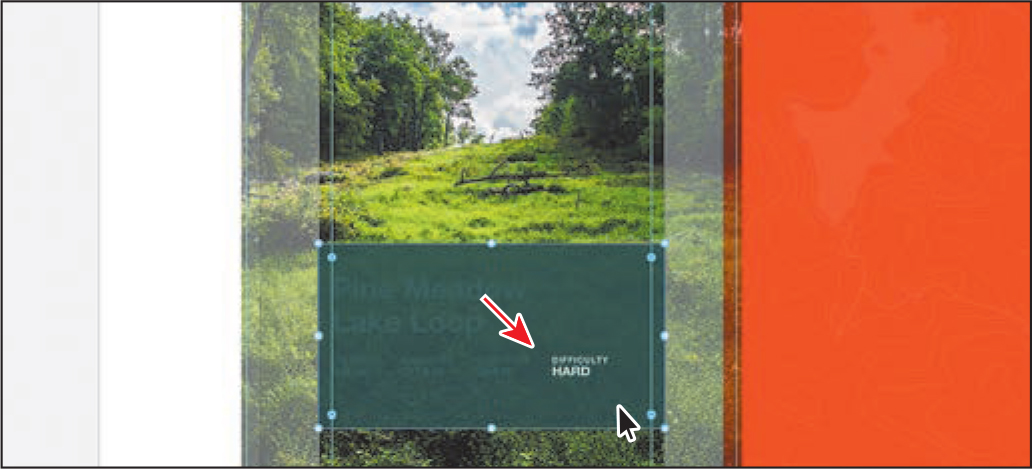
The rectangle is sent behind the previously last object created on that artboard, which is some of the text. In Adobe XD, each artboard has its own stacking order. In the next section, you’ll explore working with the Layers panel, which offers another way to arrange and organize content. You’ll also finish arranging the green rectangle.
Working with the Layers panel
The Layers panel in Adobe XD is optimized for UX design. In Adobe XD, we don’t create layers or sublayers—instead, objects (individual objects, groups, etc.) found on a specific artboard are listed in the Layers panel. When you select content on an artboard, only the objects that are associated with the artboard are shown, so your Layers panel stays clean and uncluttered. In addition to organizing content, the Layers panel lists the artboards found in your document when nothing is selected, and it offers an easy way to select, hide, and lock content, and much more.
Up to this point you’ve been navigating artboards using the Layers panel. In this section, you’ll see how the Layers panel can be used for arranging, organization, naming, and selection.
Reordering artboards and layer content
At the beginning of this lesson, you explored stacking order and arranging content. In this section, you’ll work with the Layers panel to change the ordering of content on artboards and the ordering of the artboards. Changing the ordering of artboards may be useful for organizing your designs, whereas changing the ordering of content within an artboard in the Layers panel has the same effect as using arrange commands. Next, you’ll use the Layers panel to arrange the green rectangle so it’s where it needs to be in your design.
With the Select tool (
) selected and the green rectangle still selected, look in the Layers panel. Note
NoteYour rectangle may have a different name, and that’s okay.
In the Layers panel, you will see all of the objects that are on the artboard, including the green rectangle, which is selected in the Layers panel. All of the text that is currently beneath the green rectangle needs to be on top so you can read it.
In the Layers panel, drag the selected rectangle (named Rectangle 69, or something similar) down below the bottom text object. When a line appears, release the mouse button.
NoteYou may need to drag the green rectangle so that the text is within the bounds of the box.

In the Layers panel, every object has an icon to the left of the name, indicating what type of object it is. For instance, the “T” means text, the image icon (
 ) means image, a pen icon (
 ) to the left of an object’s name indicates that it’s vector artwork, and so on.
In the document, click in the gray pasteboard to deselect the green rectangle.
Remember that with nothing selected, you see a listing of all artboards in the Layers panel.
Drag the “Journal ver2” artboard down in the Layers panel list, below the “Journal” artboard. When a line appears, release the mouse button. Make sure the order of the artboards you see matches the figure.

 Tip
TipThere are two ways to select multiple artboards in the Layers panel. If the artboards you want to select are next to each other in the Layers panel, hold Shift and click the first and last artboards in the list. To select artboards from various places in the list, hold Command (macOS) or Ctrl (Windows) while you click each one.
If you look at the artboards in your design, nothing seems to have changed. As I mentioned in a previous lesson, that’s because reordering artboards in the Layers panel affects how the artboards are stacked, if they overlap in the design, but not their position (X and Y coordinates). I tend to drag artboards into an order that makes sense to me. For instance, in a design where I include both the app design and the web design, I like to keep the artboards for the app together and the artboards for the web design together.
Selecting content using the Layers panel
There will be times when you have a lot of content in an area of your design and selection is more difficult. In that case, you can also make selections using the Layers panel. Next, you’ll select the text on the Hike Detail artboard in the Layers panel to group all of it together.
In the Layers panel, double-click the artboard icon (
 ) to the left of the Hike Detail artboard name to center the artboard in the document window and show the content of the artboard in the Layers panel.
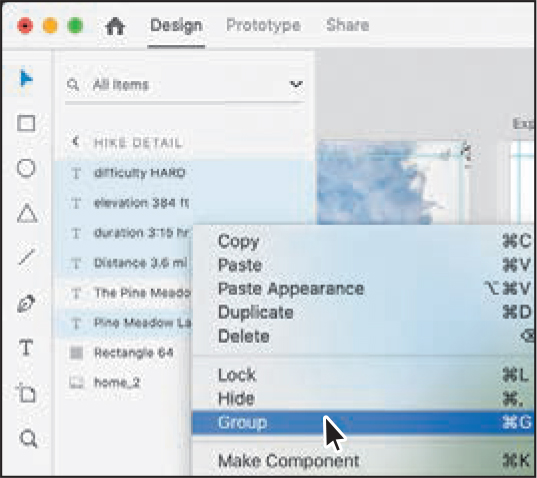
In the Layers panel, click the difficulty HARD text object and Shift-click the bottom-most Pine Meadow Lake Loop text object to select all of the text objects on the artboard.

With the text selected, you could change formatting options like font family, size, and color.
To deselect the paragraph of text toward the bottom of the artboard, Command-click (macOS) or Ctrl-click (Windows) the text object in the Layers panel whose name starts with “The Pine Meadow Lake Loop....”

Now you’ll group the selected text.
Right-click one of the selected objects in the Layers panel and choose Group to create a group of the text.
Anytime you group content using the group command or bring in content that is grouped, the group icon (
 ) in the Layers panel, along with the object name, indicates that it’s a group. In the section “Working with groups,” later in this lesson, you’ll learn more about working with groups.
Press the Esc key to deselect the group.
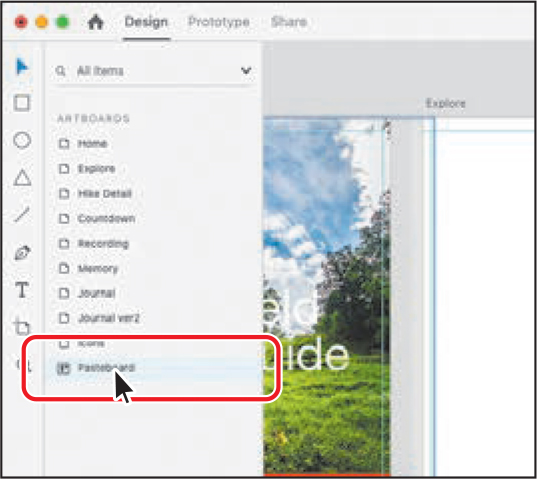
With nothing selected, you should see “Pasteboard” in the Layers panel along with all of the artboards in the document. When you have design content that’s not on an artboard (it’s on the gray pasteboard instead), “Pasteboard” appears in the Layers panel.
Double-click the name Pasteboard in the Layers panel to show the content.
 Note
NoteYou can also select content in your document that’s not on an artboard (it’s on the gray pasteboard) to show the pasteboard content in the Layers panel.
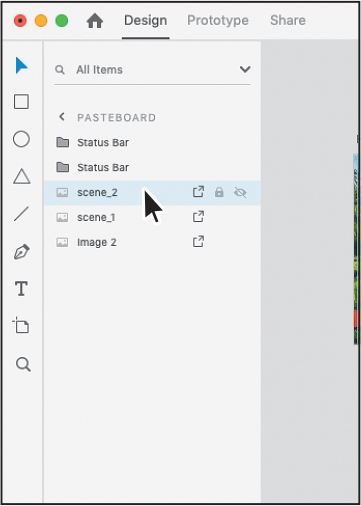
All of the content that is in the gray pasteboard is now listed in the Layers panel. The ordering of the Pasteboard content in the Layers panel, by default, follows the order in which you added that content to the pasteboard. The topmost object in the Layers panel list is the last object added.
Press Command+0 (macOS) or Ctrl+0 (Windows) to see all of the content.
Click the image named “scene_2” in the Layers panel to select that content. To cut the content, so you can paste it on another artboard, press Command+X (macOS) or Ctrl+X (Windows).
 Note
NoteYour image may be named something different, and that’s okay. You can also select the image on the pasteboard to highlight the name of the image in the Layers panel.
Selecting content this way is sometimes easier when there is a lot of content in your document.
Click the arrow to the left of the word PASTEBOARD at the top of the Layers panel to go back and show the listing of artboards again.
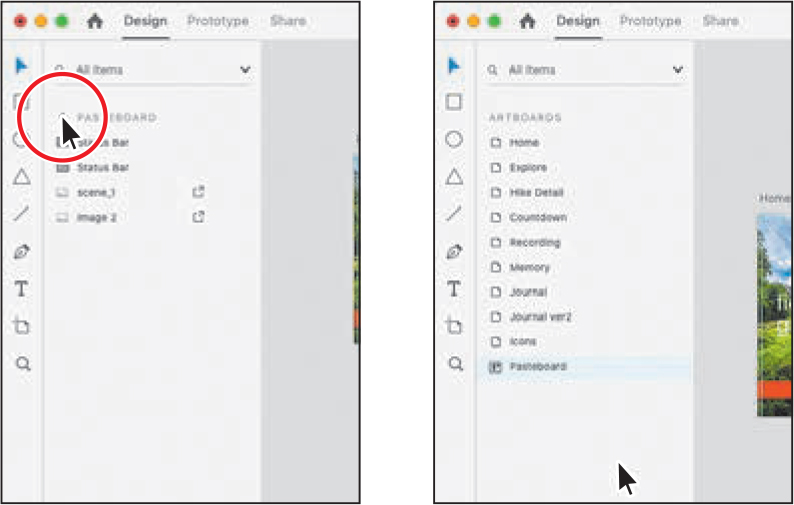
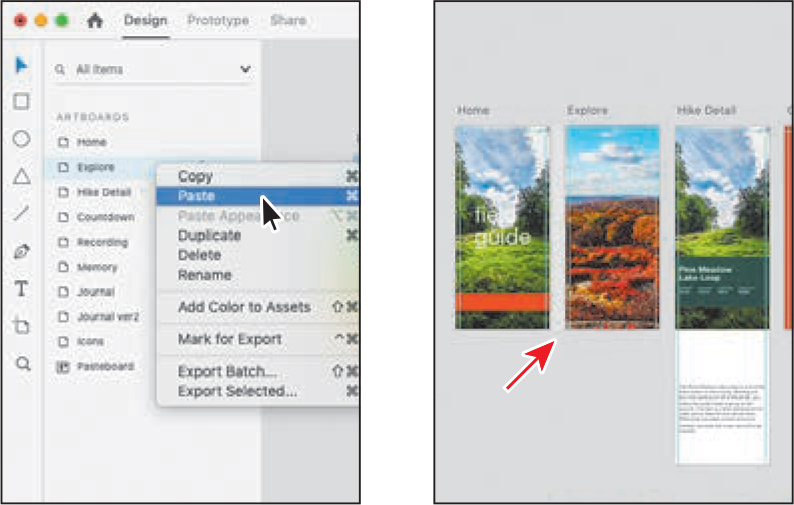
Right-click the Explore artboard name and choose Paste to paste the image onto the artboard. You’ll resize and position the image in a later lesson.
Press the Esc key to deselect the image and show the artboards in the Layers panel again.
Choose File > Save (macOS) or click the menu icon (
) in the upper-left corner of the application window and choose Save (Windows).
Locking and hiding content
From time to time you may need to lock and hide content to make selecting easier, hide versions, and more. In this section, you’ll see how to lock and hide content in the document and in the Layers panel.
With the Select tool (
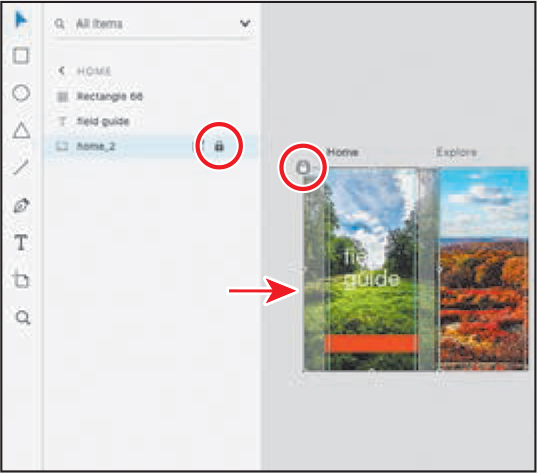
) selected, click the image in the background of the Home artboard.You’ll see the Home artboard content appear in the Layers panel and the home_2 image selected in the list of layers.
Press Command+L (macOS) or Ctrl+L (Windows) to lock the image.
 Tip
TipYou can also choose Object > Lock (macOS) or right-click the content and choose Lock (macOS and Windows) to lock the content. You can select a series of objects and lock them all at once using this method.
A small lock icon appears in the upper-left corner of the image, and its bounding box is now gray. If you look in the Layers panel, a lock icon appears to the right of the object name, also indicating that the object is locked. When an object is locked, it cannot be moved, deleted, or edited. If you wanted to unlock the image, you could press Command+L (macOS) or Ctrl+L (Windows) or click the lock icon to the right of the object name in the Layers panel or in the upper-left corner of the image on the artboard.
Next, you’ll lock and hide content from the Layers panel.
Click in a blank area of the document window, away from artboards and content, to deselect everything.
Double-click the artboard icon (
) to the left of the Explore artboard.Right-click the image on the Explore artboard and choose Hide in the menu that appears.
 Tip
TipYou can also press Command+; (macOS) or Ctrl+; (Windows), choose Object > Hide (macOS), or click the eye icon (
 ) in the Layers panel to the right of the object name to hide the content.
When you right-click content, such as an image, you will see a lot of commands that you’ve already worked with, like the lock and arrange commands. As with locking, you can also hide content using a variety of methods. If you look in the Layers panel right now, you will see that the image object name is dimmed and the eye icon looks like this (
 ).
).Move the pointer over the eye icon (
) in the Layers panel and click several times to show and then temporarily hide the image. Make sure it’s hidden. You will show it again in a later lesson.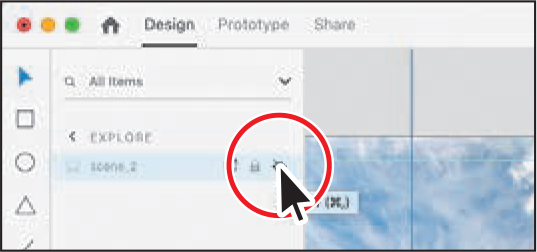
Searching and filtering in the Layers panel
You can search the Layers panel to show only relevant layers and artboards containing the keyword, or you can filter layers shown in the panel by text, shapes, and image categories. In this section, you’ll briefly explore filtering and understand why it might be useful.
Press the Esc key to see all of the artboards in the Layers panel.
At the top of the Layers panel, click in the search field and type home.
As you type, the list of objects and artboards is filtered.
Click the lock icon (
 ) in the Layers panel to unlock the image on the Home artboard.
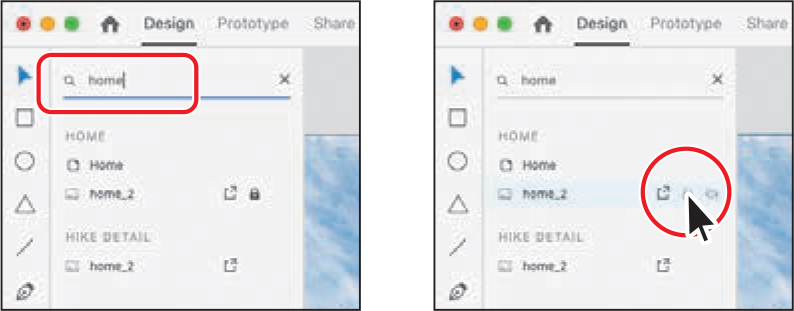
To clear the Layers panel filtering, click the X to the right of the field at the top of the Layers panel.
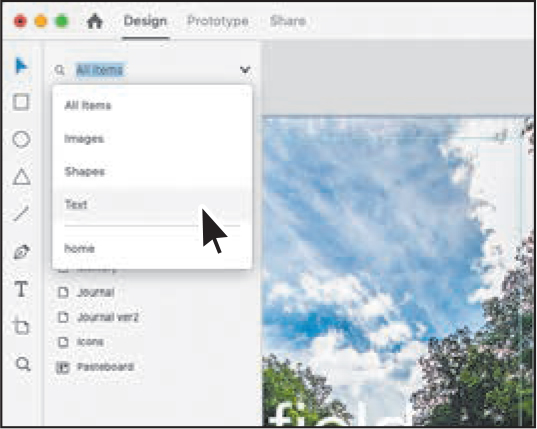
In addition to searching and filtering the Layers panel list, you can filter what appears based on object type, such as text objects, images, and so on.
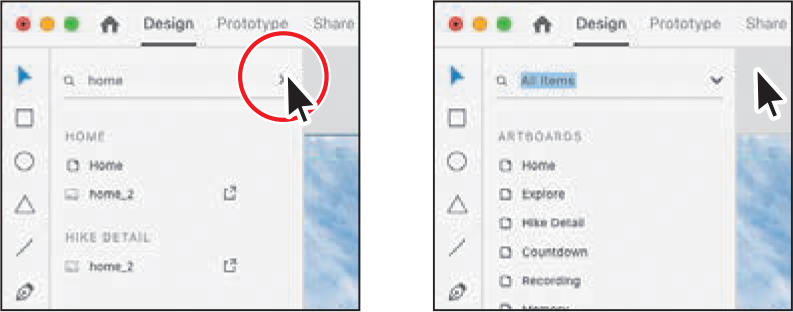
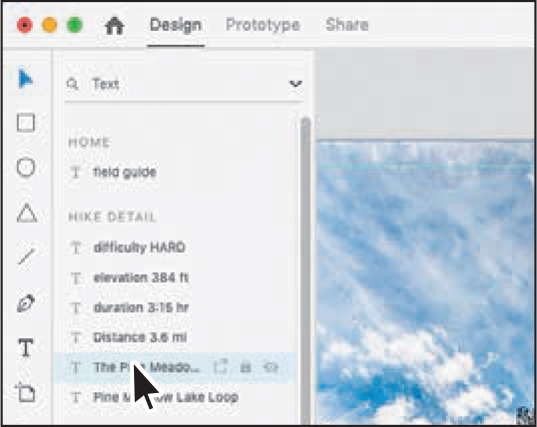
Click the arrow to the right of the search field and choose Text. All of the text objects in the document appear in the Layers panel, grouped according to the artboard they are on.
You may have noticed that what you typed (“home”) appeared at the bottom of the menu. Recent search terms are temporarily saved in the filter menu for easy access. The recent search listing is reset when the file is closed.
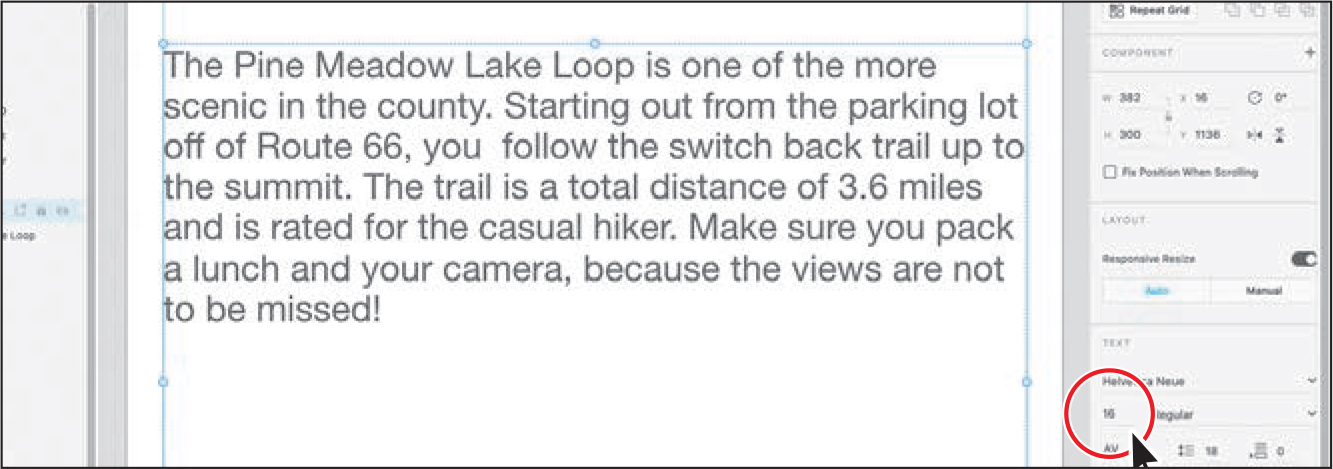
Click the text object that starts with “The Pine Meadow Lake....” The text object with the paragraph of text is selected on the Hike Detail artboard.
Press Command+3 (macOS) or Ctrl+3 (Windows) to zoom in to the text.
Change the font size in the Property Inspector to 16 to make the text smaller.
Click the arrow to the right of the search field and choose All Items to see all of the content on the Hike Detail artboard in the Layers panel.

Press the Esc key to deselect the text object and see the list of artboards in the Layers panel.
Working with groups
Objects in your design can be combined into a group so that those objects are treated as a single unit. You can then move or transform a group without affecting the attributes of the individual objects or positions relative to each other. Grouping content can also make selection of artwork easier later and help you keep your content organized in the Layers panel. Grouping in XD is similar to other Adobe applications, like Illustrator or InDesign, with a few differences.
Creating a group
In this first part, you’ll explore a few ways to create a group of content.
Double-click the artboard icon (
) to the left of the Hike Detail name in the Layers panel to fit the artboard in the document window.With the Select tool (
) selected, drag across the green rectangle and the Pine Meadow Lake Loop text group.
In the Layers panel (where you could have also selected the content), you will see three objects selected.
Shift-click the image in the background of the same artboard to deselect it.
Press Command+G (macOS) or Ctrl+G (Windows) to group the selected content together.
NoteGrouping content on different artboards is possible, but the grouped content will be moved to the topmost or leftmost artboard.
Double-click the new group name in the Layers panel. Change the name to Pine Meadow detail and press Return or Enter.
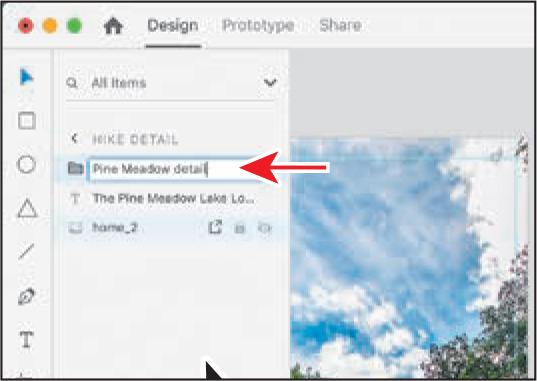
You don’t have to rename a group, but doing so can make it easier to find content in the Layers panel later. Also, when you export assets, the name of the content in the Layers panel will become the name of the asset.
Click the group icon (
) to the left of the Pine Meadow detail name in the Layers panel to reveal the content of the group. Tip
TipIf the content for a group is collapsed in the Layers panel, the icon looks like this:
 . If the content for a group is open in the Layers panel, the group icon looks like this:
  .
.You’ll see that the text objects are already grouped (you can tell because of the group icon [
]). By grouping the text group and the green rectangle, you created a nested group. Next, you’ll add content to an existing group using the Layers panel.Press the Esc key to deselect the group and show all of the artboards in the Layers panel.
Double-click the artboard icon (
) to the left of the Journal name in the Layers panel to fit the artboard in the window.In the Layers panel, you should see a group named “Hike info” or something similar, the journal header image, and the image of Meng.
In the Layers panel, drag the meng image object onto the “Hike info” group name. When the “Hike info” group shows a highlight, release the mouse button to add the image of Meng to the group. Click the group icon (
 ) to collapse the Hike info group, if necessary.
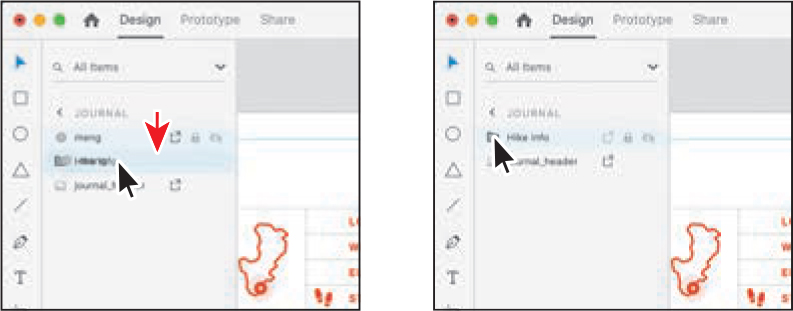
Choose File > Save (macOS), or click the menu icon (
) in the upper-left corner of the application window and choose Save (Windows).
Editing content within a group
There are several methods for editing content within a group. You can ungroup the grouped content, select the individual content by double-clicking the group, use a keyboard modifier to select content within a group, or select content within a group from the Layers panel. Double-clicking a group can save you a lot of time when making edits. Next, you’ll make an edit to one of the grouped objects.
Press the Esc key twice to deselect the Meng image and then the group.
Click the image of Meng on the artboard once to select the group. Looking in the Layers panel, you can see that the group is selected. Then, double-click the image of Meng to select it within the group.
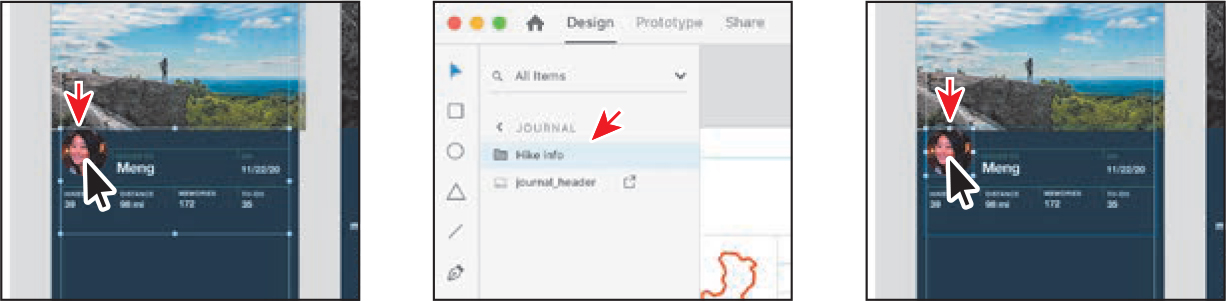
The image should be selected, with a blue border showing around the group that the image is in. The content for the entire group should be showing in the Layers panel.
Click away from the content, in the gray pasteboard, to deselect all.
Press Command (macOS) or Ctrl (Windows) and move the pointer over the content in the group on the artboard.
As you move across the different objects in the group, each will highlight. Whichever object is highlighted when you click will become selected.

With the key still held down, move the pointer over the 11/22/20 text. When you see a blue highlight around it, click to select the text object.
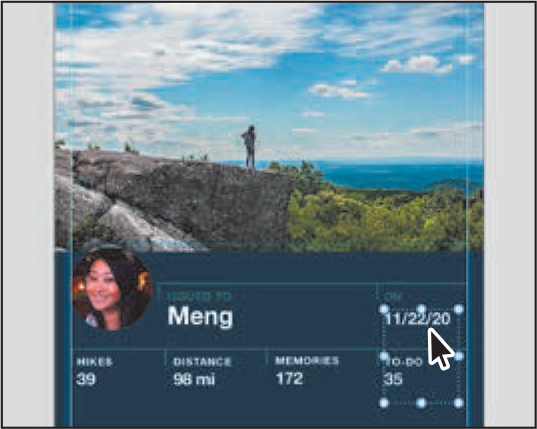
That text is now selected, and you could edit the properties in the Property Inspector. By Command-clicking or Ctrl-clicking, you are able to select any individual object in the group—even if it’s a nested group. The blue border around the entire group means it is the parent object of the image.
Double-click the 11/22/20 text to select it. Change the text to 09/13/21.
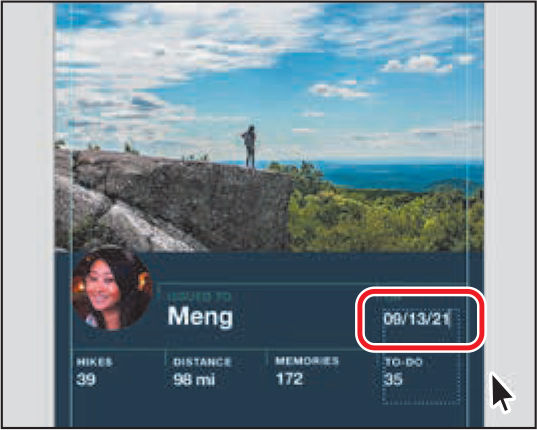
Press the Esc key to stop editing the text and select the text object; then press the Esc key again to select the entire group.
TipPressing the Esc key once more with the group selected would deselect all.
Choose File > Save (macOS), or click the menu icon (
) in the upper-left corner of the application window and choose Save (Windows).
Aligning content
Adobe XD makes it easy to align and distribute multiple objects relative to each other and to the artboard. In this section, you’ll explore the different ways to align and distribute objects.
Aligning objects to the artboard
Aligning objects to the artboard can be useful if, for instance, you need to center-align content. Next, you’ll align some of the content to the center of an artboard.
Press Command+0 (macOS) or Ctrl+0 (Windows) to see all of the content in your document.
Click the Memory artboard name above the artboard in your design, and press Command+3 (macOS) or Ctrl+3 (Windows) to zoom in.
NoteThe name may not be showing if you are zoomed out far enough. Instead, it may show as three dots (...). If that’s the case, either zoom or go to the Layers panel and double-click the artboard icon (
 ). For this to work, first make sure that nothing is selected.
With the Select tool (
) selected, click the map icon group in the top half of the artboard to select it. Click the Align Center (Horizontally) option ( ) at the top of the Property Inspector.
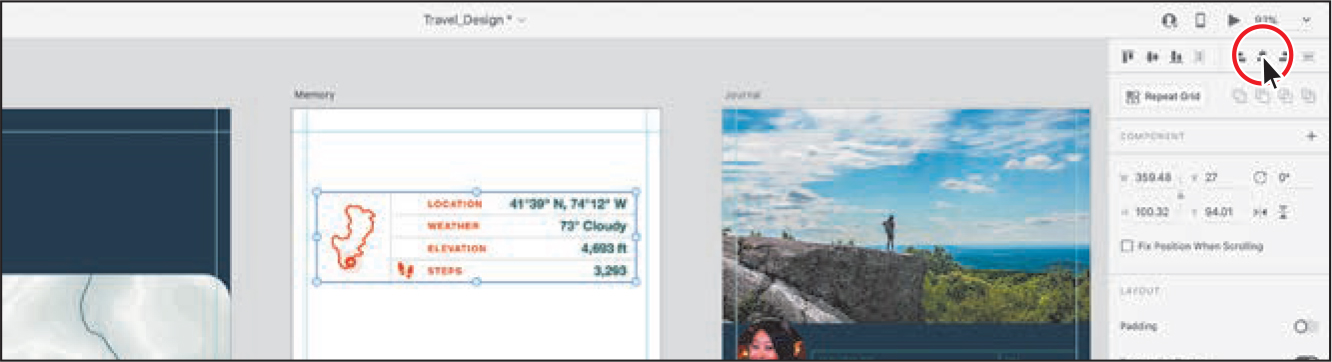
The group is horizontally aligned to the center of the artboard.
Click in a blank area away from the content to deselect.
Choose File > Save (macOS), or click the menu icon (
) in the upper-left corner of the application window and choose Save (Windows).
Setting up objects for alignment
Aligning objects to each other can be useful if you need to align a series of profile images horizontally, for instance. In the next few sections, you’ll align some icons on the Explore artboard to create a footer. But first, you’ll set up the icons for alignment by getting them onto the correct artboard and finishing them.
Press Command+0 (macOS) or Ctrl+0 (Windows) to see all of the content in your document.
Right-click the orange-red rectangle on the Home artboard and choose Copy. Right-click in the Explore artboard to the right and choose Paste.
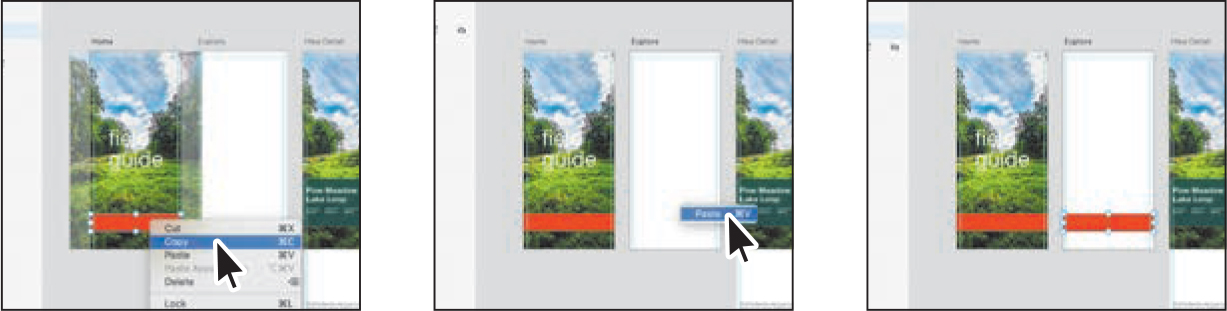
Content you copy and paste from one artboard to another is pasted in the same relative position as the original artboard.
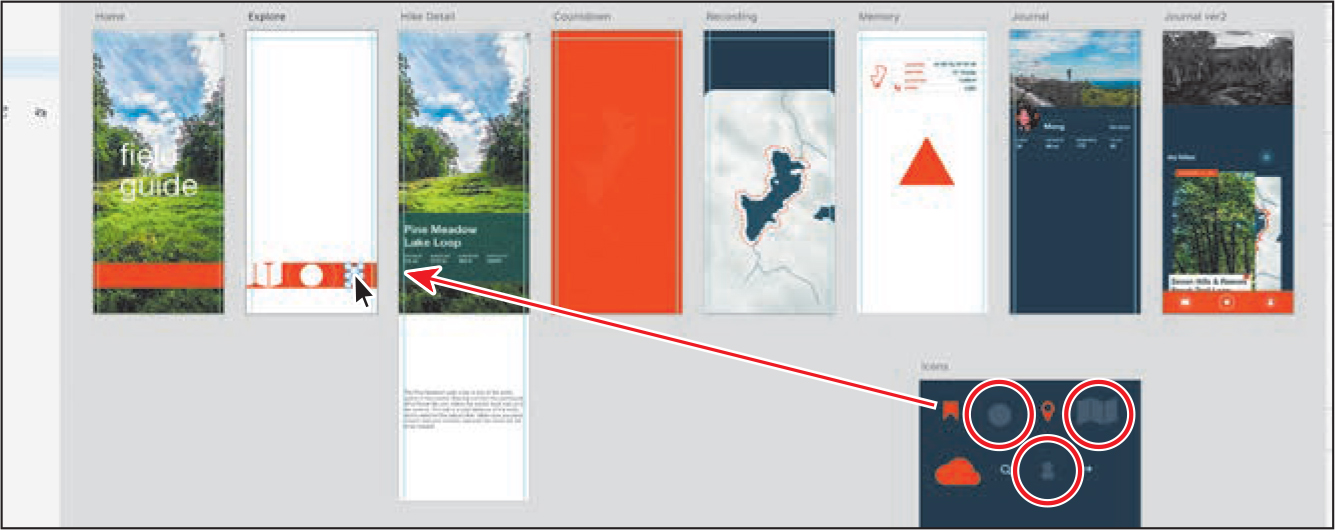
Press Command and + (macOS) or Ctrl and + (Windows) to zoom in a little. Make sure you can see the Explore and Icons artboards.
Drag the map icon, the double-circle, and the person icon onto the orange-red rectangle on the Explore artboard.
 Note
NoteIf your icons are larger or smaller than you see in the figure, that’s okay. You’ll resize them shortly.
With the icons roughly in place, next you’ll size them and add a circle behind the person and map icons. Then you’ll align all of the icons to each other.
Zoom in to the icons at the bottom of the Explore artboard.
Now you’ll resize the icons to better fit within the bounds of the orange-red rectangle.
Click the map icon. Shift-drag a corner until you see a height of approximately 20 in the Property Inspector. Release the mouse button and then the key.
 Note
NoteIf the height is snapping to larger increments, you can zoom in.
TipYou can proportionally scale an object to a specific dimension using the Property Inspector, but the Lock Aspect option (
 ) needs to be on.
Resize the person icon by Shift-dragging so it also has an approximate height of 20. Select and then Shift-drag the double-circle icon so it has a height of approximately 48.

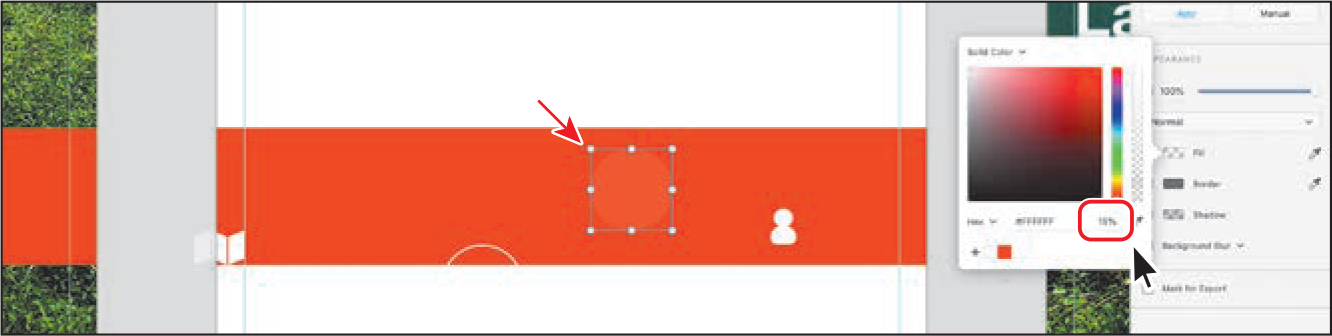
Select the Ellipse tool in the toolbar and draw a circle that has a width and height of approximately 48.
Deselect the Border option in the Property Inspector to turn off the border.
Click the Fill color box in the Property Inspector to open the color picker. Ensure that the fill color is white, and change Alpha (transparency) to 15. Press Return or Enter, and then press Esc to hide the color picker.
Select the Select tool (
) and make sure the circle is still selected. To make a copy of the circle and paste it right on top of the original, press Command+D (macOS) or Ctrl+D (Windows).Drag the copy away from the original so you can see both circles.
Next you’ll align one of the circles with the person icon and the other circle with the map icon.
Aligning objects to each other
When you select more than one object and apply an alignment method, the selected objects align to each other, not to the artboard. Next, you’ll align the content for each icon and then align the icons to each other.
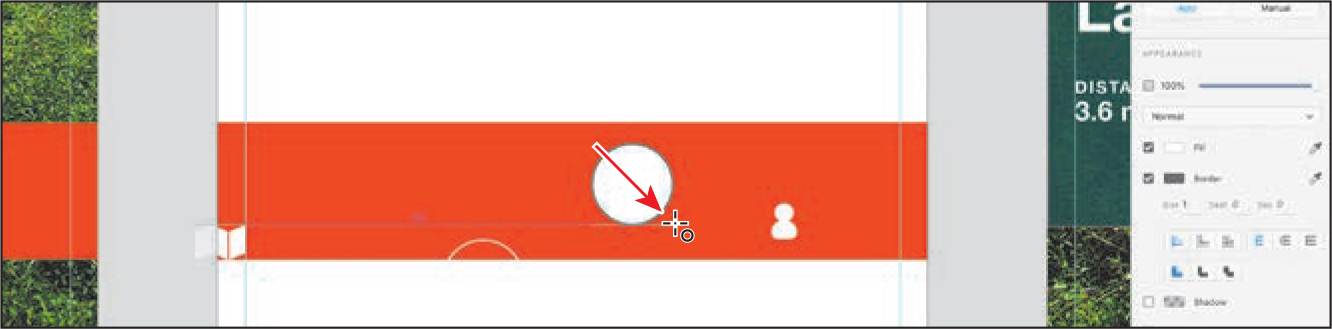
With the Select tool (
) selected, click the person icon. To arrange it on top of the circles you just created, choose Object > Arrange > Bring To Front (macOS), or right-click directly on the image and choose Bring To Front (macOS) or Arrange > Bring To Front (Windows).Drag the person icon onto one of the circles you just created. Shift-click the circle to select both objects. Click the Align Middle (Vertically) button (
 ) and the Align Center (Horizontally) button (
 ) at the top of the Property Inspector.
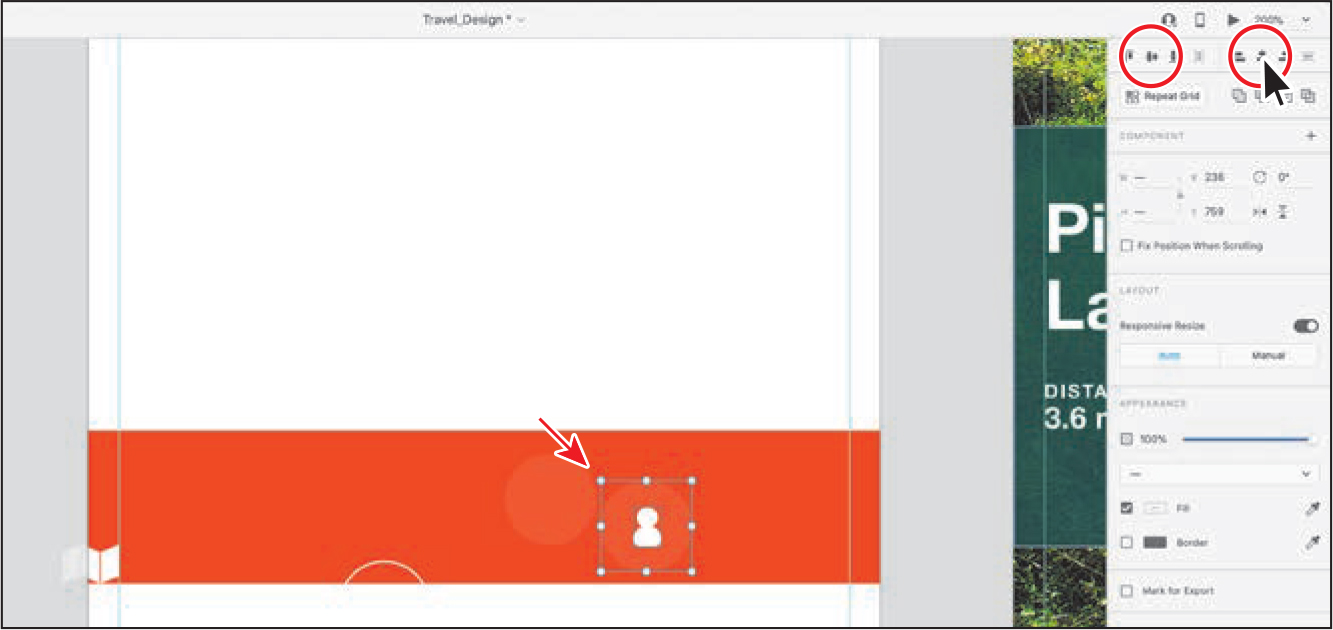
Alignment in Adobe XD is like it is in most Adobe applications, where aligning to top aligns all selected objects to the topmost object, aligning to bottom aligns all selected objects to the bottommost object, and so on.
To group the circle and person icon together, press Command+G (macOS) or Ctrl+G (Windows).
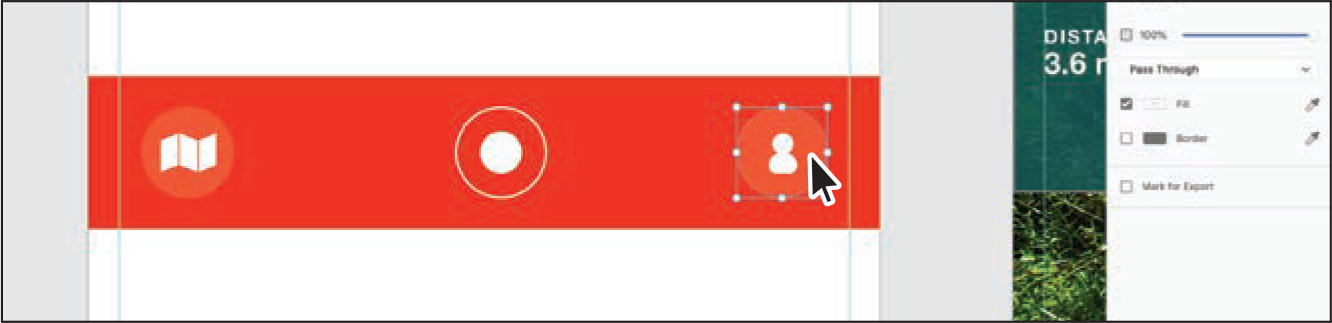
Click the map icon. To arrange it on top of the circles you just created, choose Object > Arrange > Bring To Front (macOS), or right-click directly on the image and choose Bring To Front (macOS) or Arrange > Bring To Front (Windows).
Drag the map icon onto the other circle you just created. Shift-click the circle to select both objects. Click the Align Middle (Vertically) button (
) and the Align Middle (Horizontally) button () at the top of the Property Inspector.
To group the selected content together, press Command+G (macOS) or Ctrl+G (Windows).
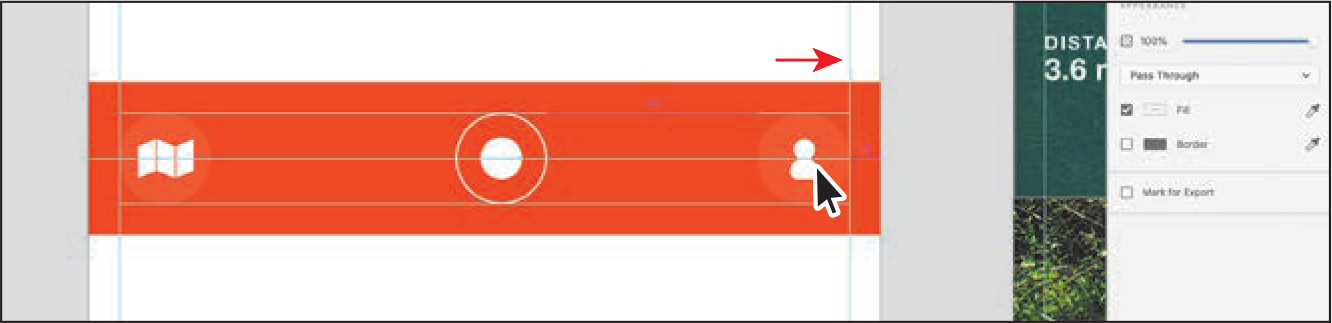
Drag each of the icons onto the orange-red rectangle as you see in the figure, if they aren’t there already.
Distributing the icons
Distributing objects enables you to select multiple objects and distribute the spacing between the centers of those objects equally. Next, you’ll position and then distribute the icons you were just working with.
Drag the map icon so that the left edge snaps to the guide near the left edge of the artboard.
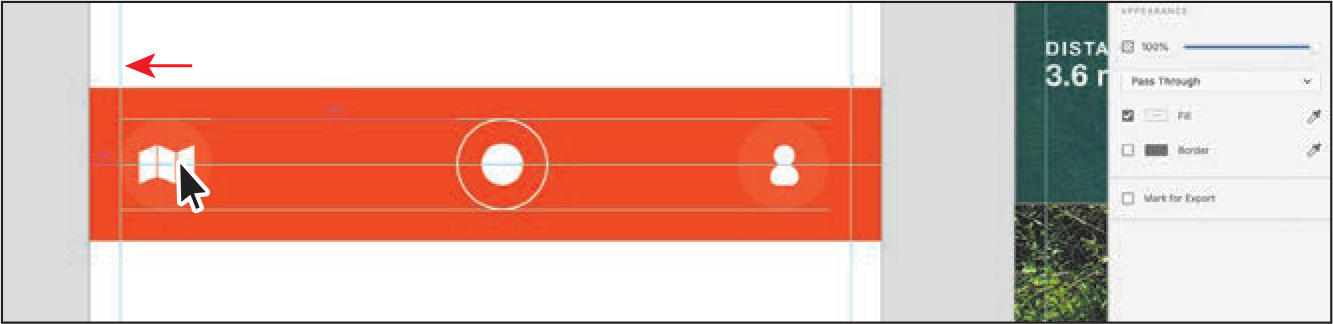
You may see horizontal alignment guides telling you the map group is aligning vertically to another icon to the right.
Drag across the icons and the orange-red rectangle to select them all. Click the Align Middle (Vertically) button (
) at the top of the Property Inspector. The icons should align to the orange-red rectangle.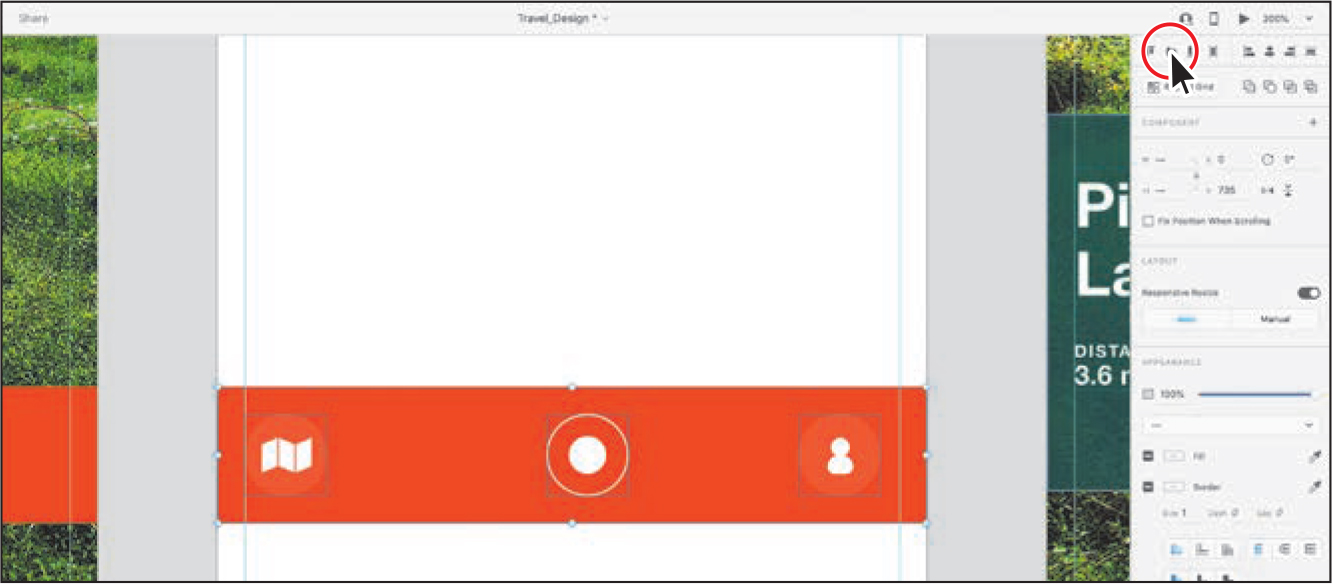
Click away from the selected artwork to deselect it all.
Drag the person icon so that its right edge aligns with the guide closest to the right edge of the artboard and you see the horizontal alignment guides, indicating it’s aligned vertically with the other icons.
Drag across the icons and the orange-red rectangle to select them all. Shift-click the orange-red rectangle to deselect it, leaving the three icons selected.
Click the Distribute Horizontally button (
 ) at the top of the Property Inspector.
Distributing moves all the selected shapes so that the spacing between the centers of each is equal.
Drag across the orange-red rectangle and the icons to select them all. Press Command+G (macOS) or Ctrl+G (Windows) to group them together.
Press the Esc key to deselect the content.
Choose File > Save (macOS), or click the menu icon (
) in the upper-left corner of the application window and choose Save (Windows).
Positioning objects
Up to this point in the lessons, you’ve positioned objects without much precision. When precision is required, Adobe XD offers different methods, including working with guides for spacing and alignment, as well as changing position values in the Property Inspector.
Aligning with temporary guides
To start, you’ll copy and paste an icon from the Icons artboard onto the Home button and use alignment guides to ensure that the content is aligned properly.
Double-click the artboard icon (
) to the left of the Icons artboard to zoom in to it.On the Icons artboard, right-click the small white arrow and choose Copy.
Press Command+0 (macOS) or Ctrl+0 (Windows) to see all of the artboards.
Click the orange-red rectangle on the Home artboard and press Command+3 (macOS) or Ctrl+3 (Windows) to zoom in to it.
Right-click the orange-red rectangle and choose Paste.

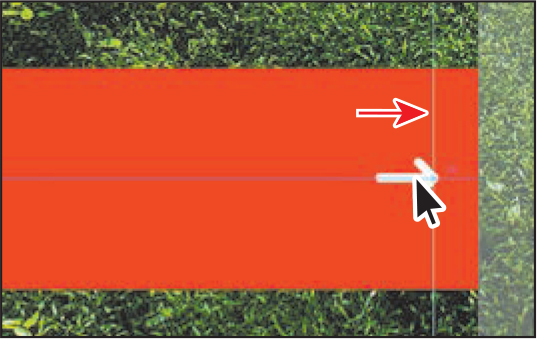
Drag the arrow so it’s centered vertically in the rectangle and aligned with the guide on the right side. A horizontal magenta guide appears when the arrow is vertically center aligned in the rectangle (the tip of the arrow may extend past the guide on the right).
Shift-click the orange-red rectangle and press Command+G (macOS) or Ctrl+G (Windows) to group the two selected objects together.
Press the Esc key to deselect the group.
Positioning icons for the Memory artboard
Next you’ll take a few more of the icons on the Icons artboard and add them to an artboard in the document so you can properly align them with existing content.
Double-click the artboard icon (
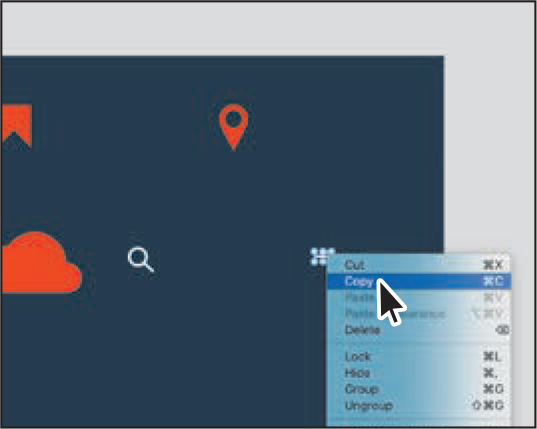
) to the left of the Icons artboard to zoom in to it.On the Icons artboard, click the orange-red cloud icon to select it; then Shift-click the orange-red pin icon to select it as well. Right-click one of them and choose Copy.

Press the spacebar to access the Hand tool, and drag in the window so you can see the Memory artboard. You can also drag on a trackpad with two fingers to pan in the document window.
Click in the Memory artboard and press Command+V (macOS) or Ctrl+V (Windows) to paste the icons. You may need to drag the icons so they are on the artboard.
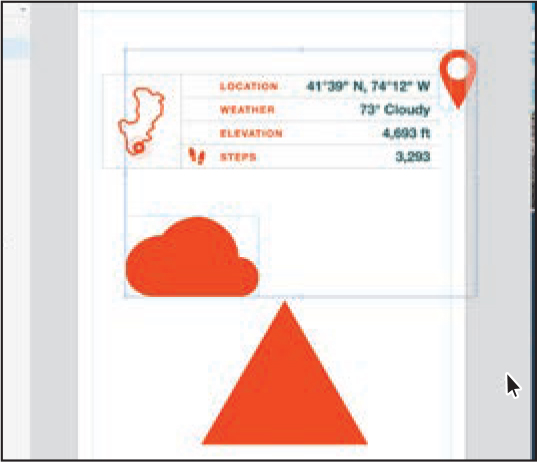
Zoom in to the pasted icons, using any method, making sure you can still see the triangle you created in a previous lesson.
NoteThe icons may have been grouped when you pasted them. If they are a group, right-click one of them and choose Ungroup.
Click away from the icons; then click the cloud icon and Shift-click the triangle.
In the Property Inspector, make sure the Lock Aspect option (
 ) is selected. Change Height to 12. Press Return or Enter.
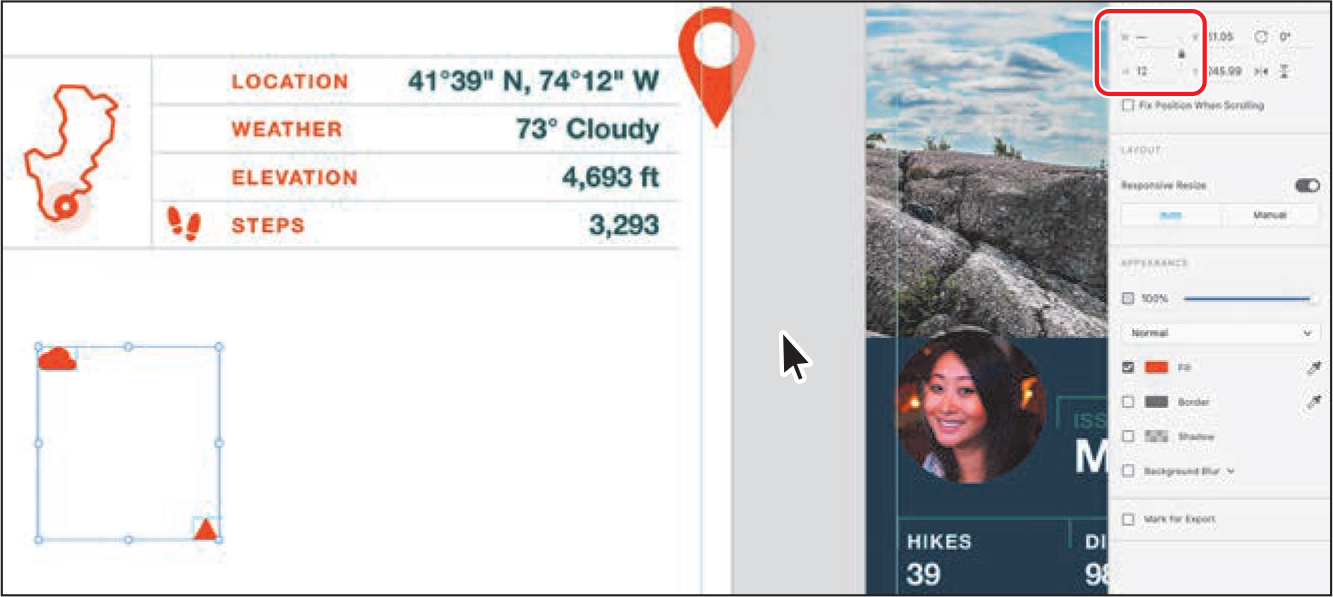
Click the map pin icon. In the Property Inspector, make sure the Lock Aspect option (
 ) is selected and then change Height to 18 in the Property Inspector. Press Return or Enter.
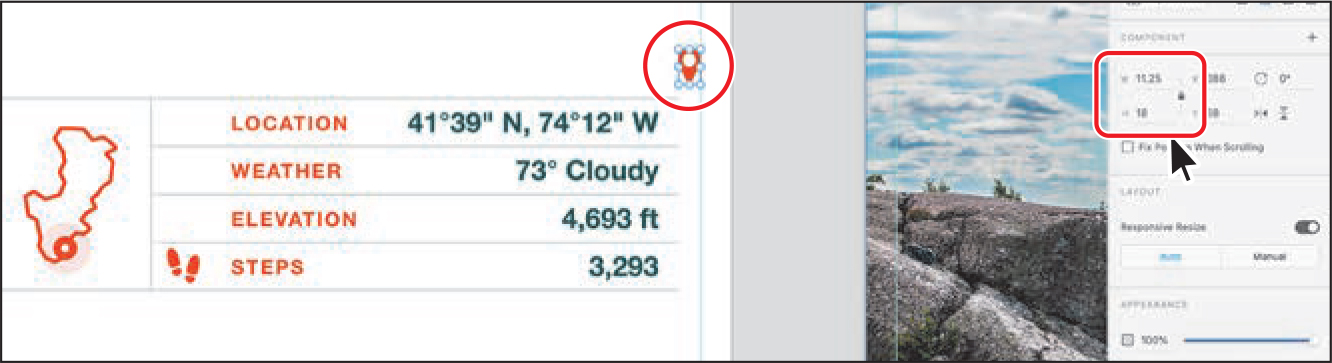
Drag the cloud icon to the left of the WEATHER text, the map pin icon to the left of the LOCATION text, and the triangle to the left of the ELEVATION text.
Notice that as you drag the icons into position, temporary alignment guides to help position the icons relative to the text are not showing. That’s because the LOCATION and WEATHER text is part of a larger group.
Setting gap distances
When you drag to align content, temporary guides appear between objects when the distance between them is the same. This is referred to as the gap distance. This can be a quick visual way to ensure that content spacing is even without having to distribute content. In this section, you’ll position a few icons using temporary guides.
Click the map pin icon. In the Layers panel, drag the selected Path object (the map pin icon) on top of the Memory table group and release the mouse button to add it to the group. Do the same for the cloud icon and the triangle in the Layers panel.

Zoom in closely to the map pin icon, triangle, and cloud icon.
Click the map pin, and pressing the Shift key, click both the cloud icon and triangle to select all three. Release the Shift key. Click the Align Center (Horizontally) button (
 ) to align them to each other.
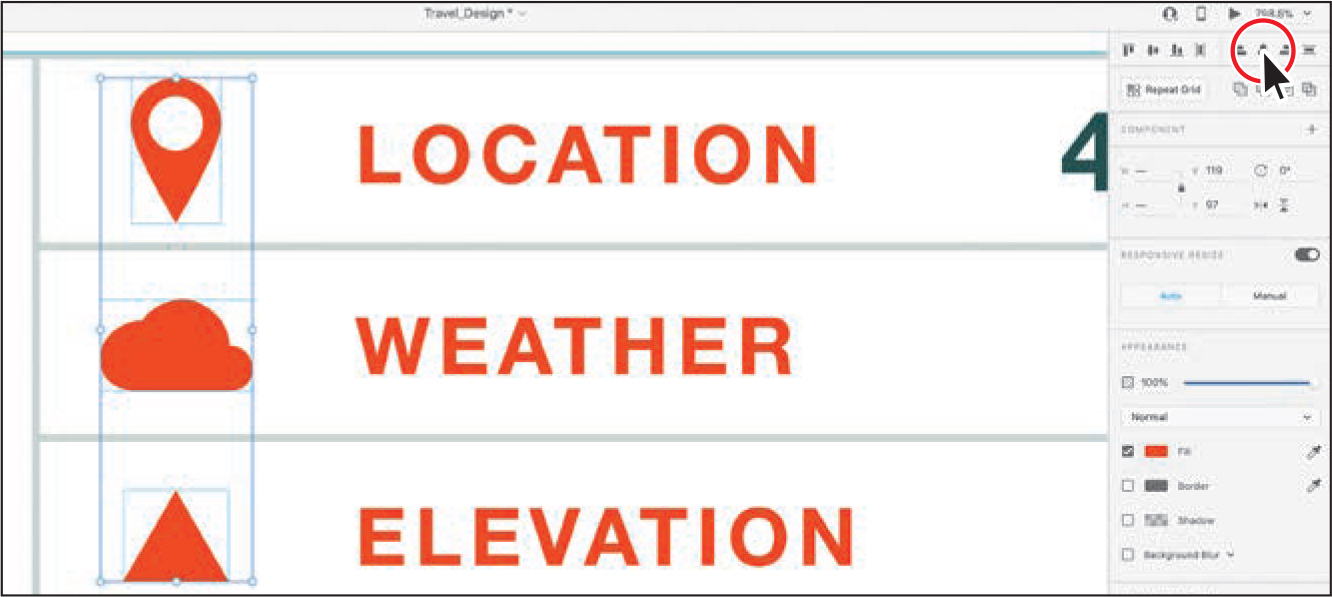
Drag the selected icons so they are vertically aligned with the shoe prints below them. A vertical aqua guide appears when they are aligned.
To deselect the icons, press Command+Shift+A (macOS) or Ctrl+Shift+A (Windows).
 Tip
TipMoving content with the arrow keys also displays alignment guides indicating when things are aligned.
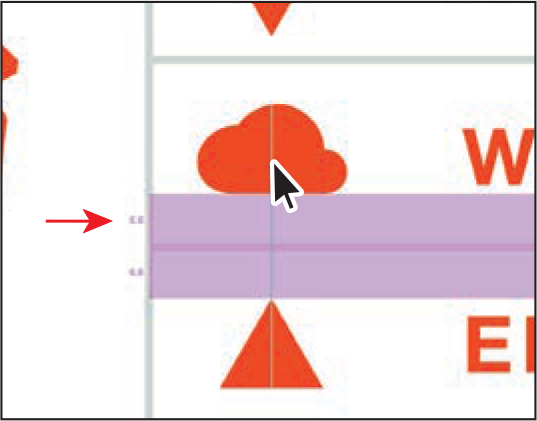
Double-click the cloud icon and drag it up or down; you’ll eventually see the magenta gap that indicates that the distance between the cloud icon and the gray line below it is the same as the distance between the triangle and the gray line above it.
If you don’t see the gap distance, you may need to zoom in or out. The closer you zoom in, the more granular the movement you have when dragging.
Zoom in to the map pin icon a little more, and drag the map pin icon so that it’s aligned with the cloud icon and centered with the LOCATION text.
Once again, you may or may not see the alignment guides indicating alignment with the LOCATION text, depending on your zoom level.

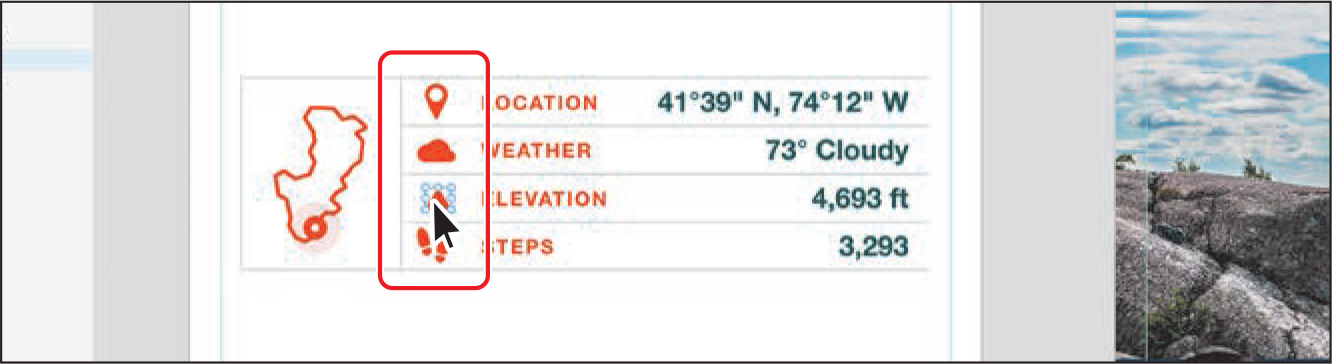
Viewing distances with temporary guides
Another great feature of temporary guides is the ability to view the distance between selected content and other objects or the edges of the artboard. This can be used to quickly ensure that several individual objects are the same distance from some other object, for instance.
Press Command and – (macOS) or Ctrl and – (Windows) a few times to zoom out so you can see more of the artwork around the icons.
Click the LOCATION text to select it. Press the Option key (macOS) or Alt key (Windows) and move the pointer to a blank area of the artboard.
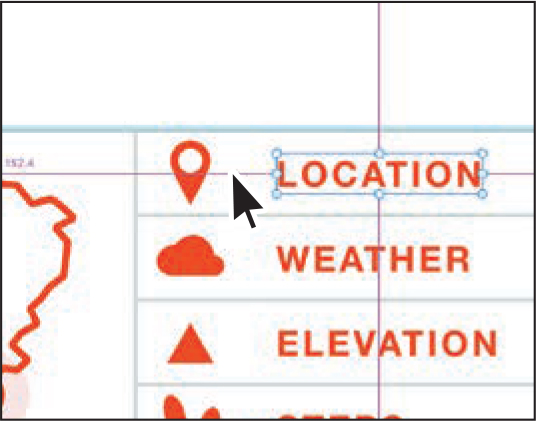 Note
NoteYou may need to double-click the LOCATION text to select the text object.
You will see four magenta lines extending from the edges of the text object, and values that represent the distance from the corresponding edge of the artboard. This is a quick way to see how far away from any edge of the artboard the selected object is.
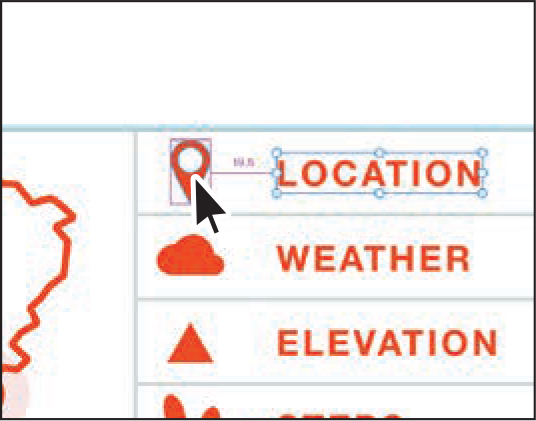
While still pressing the Option key (macOS) or Alt key (Windows), move the pointer over content like the map pin icon.
You can now see the distance between the LOCATION text and the object that the pointer is over.
Press Command+0 (macOS) or Ctrl+0 (Windows) to see all of the content in your document.
Click in a blank area of the gray pasteboard to deselect the content.
Choose File > Save (macOS), or click the menu icon (
) in the upper-left corner of the application window and choose Save (Windows).If you plan on jumping to the next lesson, you can leave the Travel_Design.xd file open. Otherwise, choose File > Close (macOS) or click the X in the upper-right corner (Windows) for each open document.
NoteIf you started with the L5_start.xd jumpstart file, then keep that file open.
Review questions
1. What is stacking order?
2. On what layer in the Layers panel do you find content on the pasteboard?
3. What effect does reordering artboards have on your document?
4. How can you edit content within a group without ungrouping?
5. Describe how to show distance measurements between objects when not dragging content.
Review answers
1. Stacking order determines how objects display when they overlap. You can change the stacking order of objects in your artwork at any time, using either the Layers panel or arrange commands.
2. When you have design content that’s not on an artboard (that is, it’s on the gray pasteboard instead), “Pasteboard” appears in the Layers panel.
3. Reordering artboards in the Layers panel affects how the artboards are stacked in the design, not their position (X and Y coordinates). Changing the ordering of artboards may be useful for organizing your designs, whereas changing the ordering of content within an artboard in the Layers panel has the same effect as using arrange commands.
4. To edit content within a group without ungrouping, select content within the group by double-clicking the group, selecting the content from the Layers panel, or Command-clicking (macOS) or Ctrl-clicking (Windows) content within the group.
5. To show distance measurements between objects, with content selected, press the Option key (macOS) or Alt key (Windows) and position the pointer on other content.