11 Exporting and Integration
Lesson overview
In this lesson, you’ll learn how to do the following:
Export assets.
Use XD plugins.

This lesson will take about 30 minutes to complete. To get the lesson files used in this chapter, download them from the web page for this book at www.adobepress.com/XDCIB2020. For more information, see “Accessing the lesson files and Web Edition” in the Getting Started section at the beginning of this book.
After you’ve shared a working prototype, gathered feedback, and implemented the suggested changes, you can create production-ready assets for development. In this lesson, you’ll export assets in a variety of formats and expand what is possible with XD using plugins.
Starting the lesson
In this lesson, you’ll learn how to share design assets by exporting and also how to enhance your design workflow with third-party plugins.
Start Adobe XD, if it’s not already open.
Choose File > Open From Your Computer (macOS) or click the menu icon (
 ) in the upper-left corner of the application window and choose Open From Your Computer (Windows). Open the Travel_Design.xd document in the Lessons folder (or where you saved it).
Exporting assets
At any point in the design process, you can create production-ready assets. With Adobe XD, you can export assets for developers and others involved in the project. Assets can be exported in the following formats: PNG, SVG, PDF, and JPG.
PNG (Portable Network Graphic): A raster graphics format best used for raster images such as banners.
SVG (Scalable Vector Graphic): A vector image format that is best used for icons, logos, and page elements.
PDF (Portable Document Format): A format for exchange that retains all vector, image, and text content. This is best for sharing your project designs.
JPG or JPEG (Joint Photographic Experts Group): A raster graphics format best used for photographs and other images.
![]() Note
Note
If you have not already downloaded the project files for this lesson to your computer from your Account page, make sure to do so now. See the “Getting Started” section at the beginning of the book.
![]() Note
Note
The screen shots for this lesson were taken on macOS. On Windows, the menus can be accessed by clicking the hamburger menu.
If your XD project was created as a proof of concept, you may want to export artboards to PDF (single PDF or multiple PDFs) or as images. To provide production-ready assets, you can export individual assets from your project in the previously mentioned formats. Given the need for responsive websites and apps, you will likely need to provide raster assets at multiple sizes to enable use on devices with different screen sizes and pixel densities.
When exporting assets, any selected content or artboard in your project is exported. If nothing is selected, all artboards are exported. Exported assets are named according to the name of the asset or artboard in the Layers panel. In the next few sections, you’ll export artboards and design content in different formats.
Exporting as PDF
Exporting as PDF allows you to export what you see on the screen (artboards or selected content). Saving as PDF is a great way to share your content for review so the end user doesn’t need Adobe XD to view the design. In this section, you’ll export all of the artboards as PDF and explore the export options.
![]() Note
Note
If you are starting from scratch using the jumpstart method described in the section “Getting Started,” open L11_start.xd from the Lessons > Lesson11 folder.
Make sure that Design mode is showing. Click Design in the upper-left corner if it’s not showing.
You can export content in Design mode, Prototype mode, or Share mode.
With the Select tool (
 ) selected, click in a blank area away from the artboards to deselect anything that is selected.
Choose File > Export > All Artboards (macOS), or click the menu icon (
) in the upper-left corner of the application window and choose Export > All Artboards (Windows).With nothing selected, you will see only two export options: All Artboards and Batch. If you select a series of artboards before exporting, you will see the same All Artboards command as well as the command File > Export > Selected to export only the selected artboards. If you choose File > Export > All Artboards, all artboards are exported, regardless of whether individual artboards are selected.
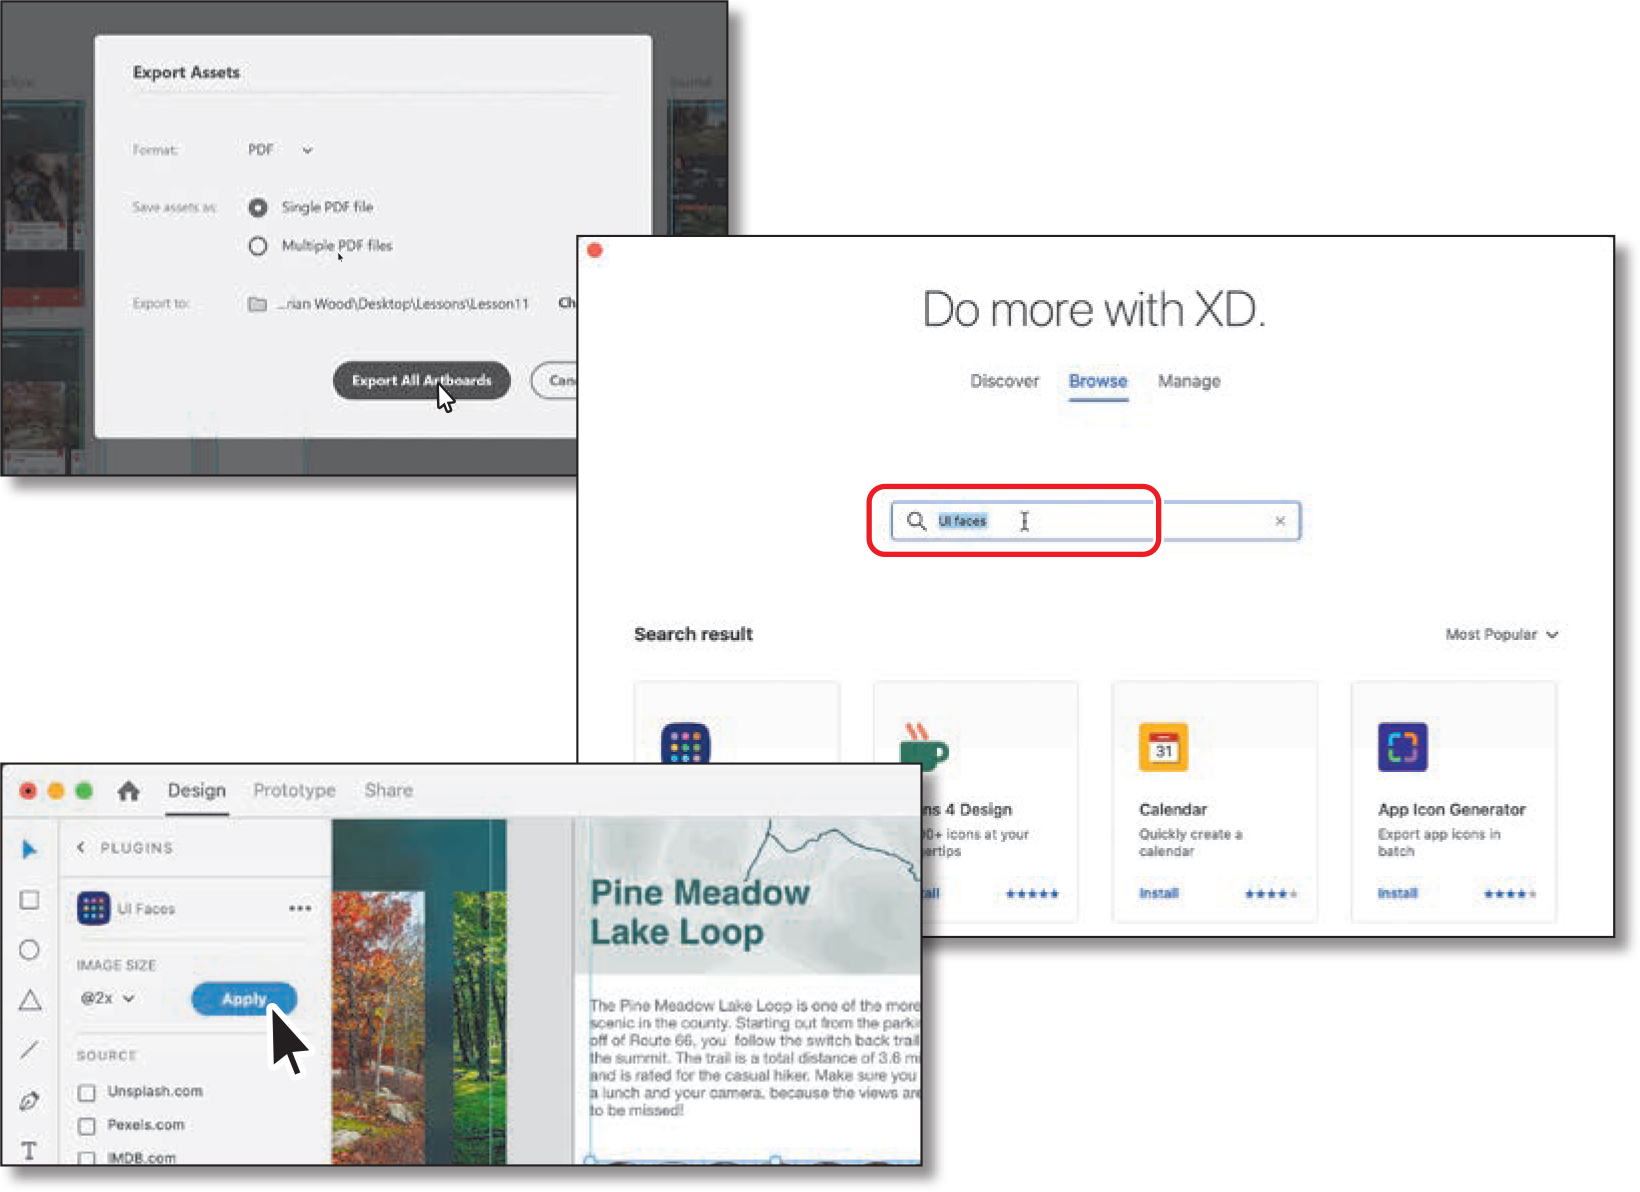
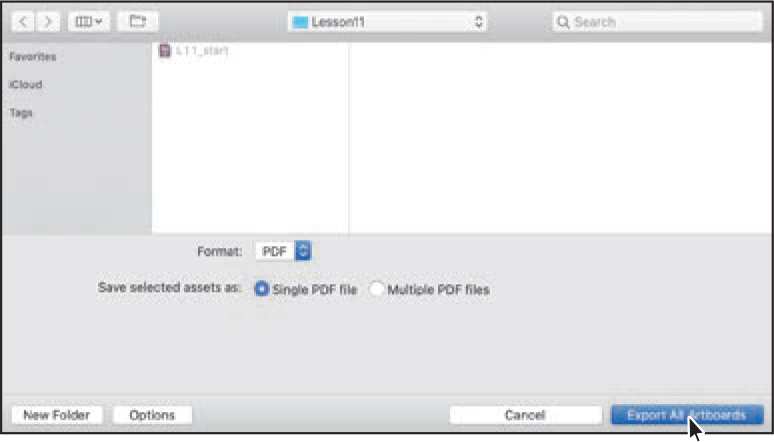
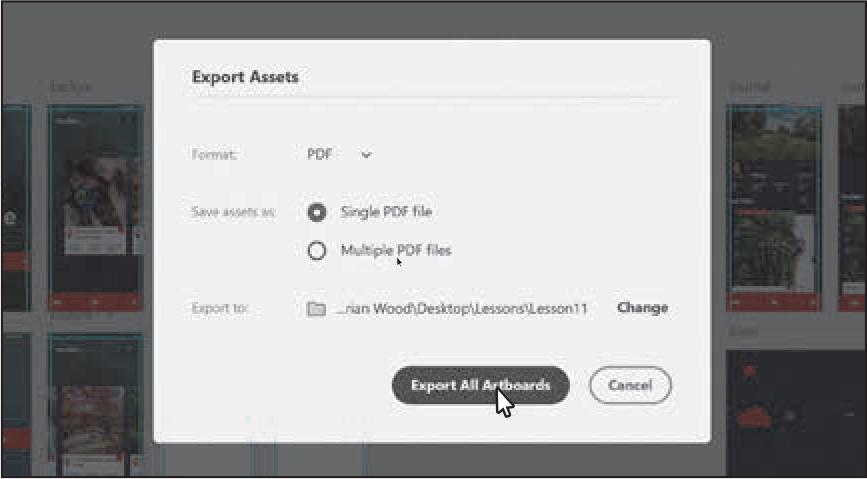
In the Export dialog box, navigate to the Lessons > Lesson11 folder (macOS), or, on Windows, click Choose Destination (or Change) and navigate to the Lessons > Lesson11 folder, and change the following options:
Format: PDF
Save Selected Assets As: Single PDF File (the default setting) (If you choose Multiple PDF Files with PDF chosen, each artboard will be saved as a separate PDF.)
 Note
NoteContent on the pasteboard that is not associated with an artboard will not be included in the PDF.
Click Export All Artboards.
The Export dialog box on macOS
The Export dialog box on Windows
A PDF named Travel_Design.pdf will be generated from all of the artboards and placed in the Lesson11 folder. That can be a useful way to share your design with others, and they only need to have a PDF reader to view the PDF.
Exporting as SVG
If your project contains vector graphics, it’s best to export them in SVG format. As with all vector graphics, graphics in SVG format are infinitely scalable, so there’s no need to export the same graphic at multiple resolutions. As an SVG graphic scales to accommodate various devices with a range of screen sizes, it remains crisp and clean. Icons, logos, and other drawn (rather than painted) page elements are perfect candidates for the SVG format. In this section, you’ll export an icon as SVG and explore the export options.
Make sure the Layers panel is showing by pressing Command+Y (macOS) or Ctrl+Y (Windows), if necessary.
With nothing selected in the document, double-click the Sign up artboard icon (
 ) in the Layers panel to zoom in to it.
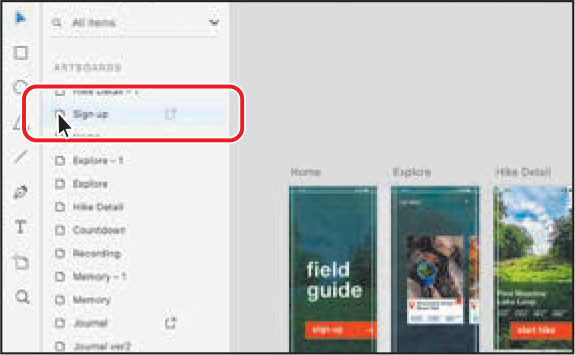
Click the person icon to the left of the John Doe text on the artboard, to select the icon component.
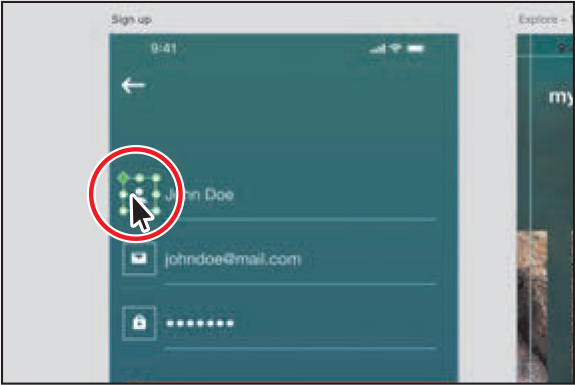
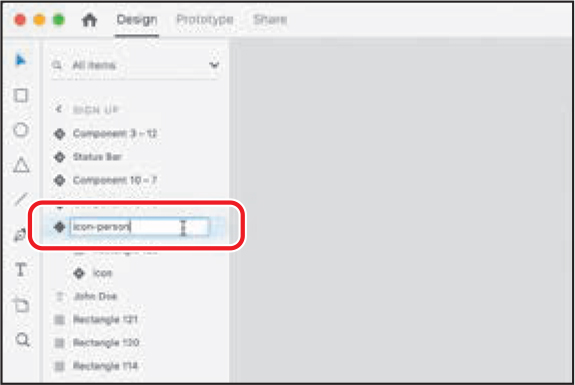
Looking in the Layers panel, you can see that the asset name is Component 10 – 1 (or something similar). When you export assets on macOS, you can change the name of the asset in the export dialog box. On Windows, the asset name is the same as the name of the content in the Layers panel and can’t be changed in the Export dialog box.
NoteAs a best practice when naming assets for use on web or app, avoid spaces in names. You can use hyphens (-) or underscores (_) in the names instead.
Double-click the highlighted name “Component 10 – 1” in the Layers panel (or whatever you see), change it to icon-person, and press Return or Enter to accept the change.
 Tip
TipThe assets you export are named according to the name found in the Layers panel. Naming content according to a final asset naming convention in the Layers panel can make it faster to export assets.
If there was text in the selected content, you might consider converting the text to outlines before saving as SVG. SVG files require the font to be present when viewing the file in browser or an application like Adobe Illustrator. You can convert text to outlines (shapes) by selecting the text object and choosing Object > Path > Convert To Path (macOS) or by right-clicking the text object and choosing Path > Convert To Path (Windows).
Choose File > Export > Selected (macOS), or, on Windows, click the menu icon (
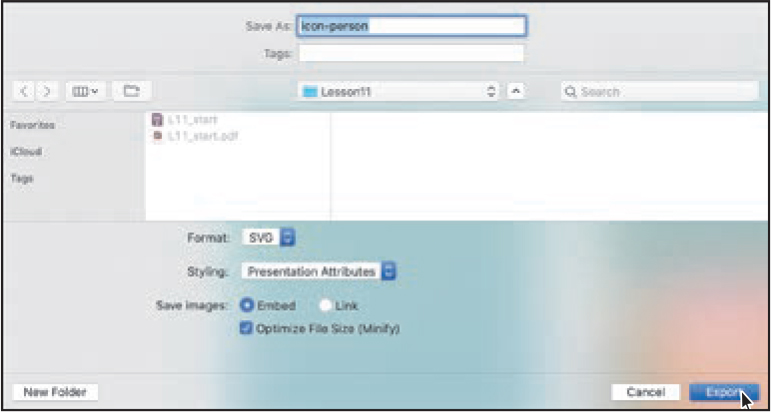
) in the upper-left corner of the application window and choose Export > Selected.In the Export dialog box, navigate to the Lessons > Lesson11 folder (macOS), or click Choose Destination (or Change) and navigate to the Lessons > Lesson11 folder (Windows). Change the following options:
Save As (macOS): icon-person (This should already be the name because it uses the name in the Layers panel. As a best practice, we remove spaces in asset names.)
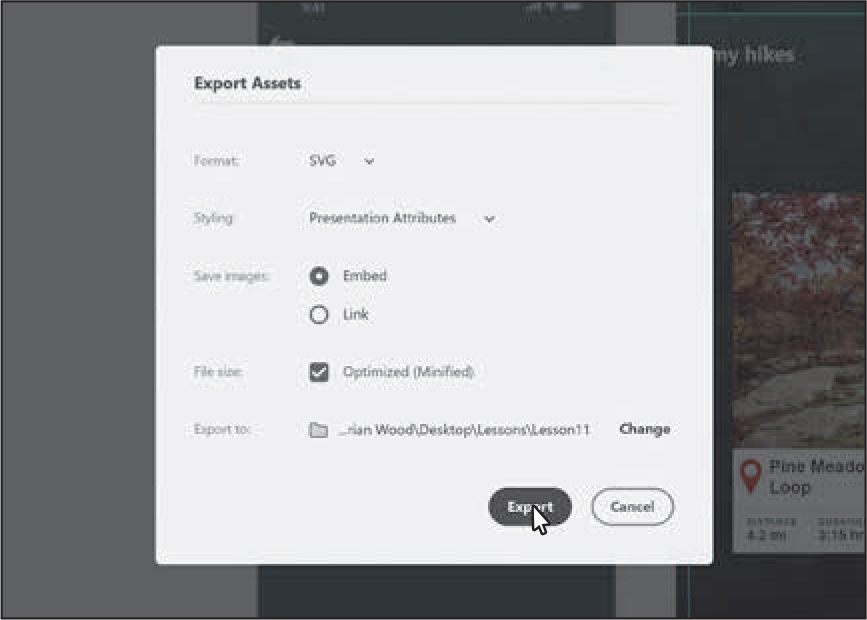
Format: SVG
Styling: Presentation Attributes (the default setting) (With presentation attributes chosen, any formatting, like width and height, will be written inline in the SVG code.)
Save Images: Embed (the default setting) (This option saves any selected raster content directly within the SVG file. If you select Link, selected raster content will be exported as a separate image file that is linked to the SVG file. This results in multiple assets being exported. Linking can be useful if you need to make frequent updates to the raster content and not the SVG content.) We usually embed raster content in SVG to minimize broken links.
NoteWhen exporting an SVG to hand off to a developer, for instance, you can ask the developer whether optimizing the SVG is suggested.
Optimize File Size (Minify) (macOS) or Optimized (Minified) (Windows): selected (Minifying SVG will potentially make the file smaller.)
The Export dialog box on macOS
The Export dialog box on Windows
Click Export.
Exporting as PNG
PNG files are raster files, which means they are composed of pixels and won’t scale well when resized. When exporting for websites, best practice is to save multiple versions of each image file: one at the original size in the XD design, and one at twice the size of the original to accommodate different screen sizes and pixel densities. When exporting a PNG asset for iOS apps, you will export three sizes of PNG files. When exporting for Android apps as PNG, you will also need a variety of sizes.
In this section, you’ll export content as PNG and explore the export options.
Press Command+0 (macOS) or Ctrl+0 (Windows) to see all of the design content.
Click the map artwork on the Hike Detail artboard.
 Note
NoteThis keyboard shortcut performs the same command as choosing File > Export > Selected (macOS) or clicking the menu icon (
) in the upper-left corner of the application window and choosing Export > Selected (Windows).Press Command+E (macOS) or Ctrl+E (Windows) to export selected content.
In the Export dialog box, for macOS, navigate to the Lessons > Lesson11 folder. On Windows, click Choose Destination (or Change) in the Export To section and navigate to the Lessons > Lesson11 folder.
Change the following options:
Save As (macOS only): Map (XD will automatically add a suffix to each saved asset, depending on the chosen format.)
Format: PNG
After choosing PNG, you will see four Export For options: Design, Web, iOS, and Android. Which option you select will depend on where you will use these images.
Design: This is the default option. Only one image is created, at the original size of the selected content. It is meant to match exactly what is seen on the screen. Design is a great option for sharing individual images and screen designs.
Web creates two sizes for each exported asset: one that is 1x (non-Retina or HiDPI) and another that is 2x, or double the size (Retina or HiDPI).
iOS creates three sizes for each exported asset: one at 1x, a second that is 2x (twice the size of the original), and a third that is 3x (three times the size of the original).
Android creates six sizes for each exported asset: ldpi, mdpi, hdpi, xhdpi, xxhdpi, and xxxhdpi.
Export For: iOS (since this is an app for iOS)
Designed At: 1x (the default setting)
With Web, iOS, or Android selected, before exporting, it’s important to set the size to the size you’ve designed at. With the iOS option, you have three choices: 1x (non-Retina or non-HiDPI), 2x, or 3x. By default, artboard sizes (such as iPhone X/XS) and the assets in them are sized at 1x (non-Retina). If you did not change the artboard sizes (the width, we mean, because the height can mean a scrolling screen), then you would leave the Designed At option set at 1x.
For another example, if you choose Web from the Export For option, you are given two choices for the Designed At option: 1x or 2x. You could either create your artboards at twice the default size (2x) and scale down to the smaller size (1x) when exporting, or you could design at smaller, default artboard sizes (1x) and then scale up (2x) when exporting.
Click Export.

The Export dialog box on macOS 
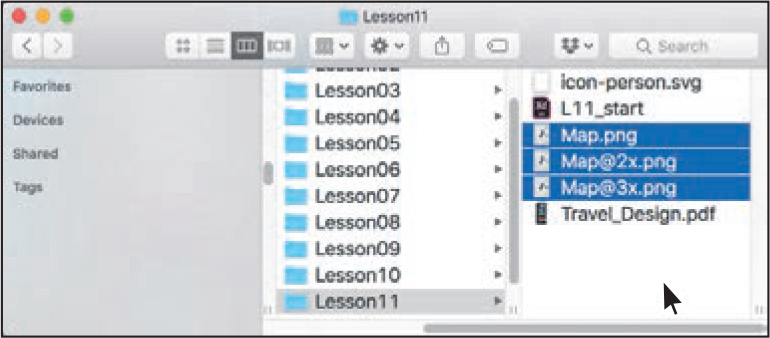
The Export dialog box on Windows There are three PNG files generated in this case. The images that are 2x and 3x are named with “@2x” and “@3x,” respectively.
To understand how this sizing works for an iOS app, see the sidebar “Exporting PNG for iOS.”
![]() Note
Note
To see a larger version of this infographic, visit helpx.adobe.com/xd/help/export-design-assets.html.
Exporting PNG for Android
Use the following infographic to understand how your design assets are exported for Android when you design at different resolutions: ldpi - Low density (75%), mdpi - Medium density (100%), hdpi - High density (150%), xhdpi - Extra high density (200%), xxhdpi - Extra extra high density (300%), xxxhdpi - Extra extra extra high density (400%).

—From Adobe XD Help
![]() Note
Note
If you’d like to see a larger version of this infographic, visit helpx.adobe.com/xd/help/export-design-assets.html.
Exporting PNG for iOS
Use the following infographic to understand how your design assets are exported for iOS when you design at 1x and 2x.
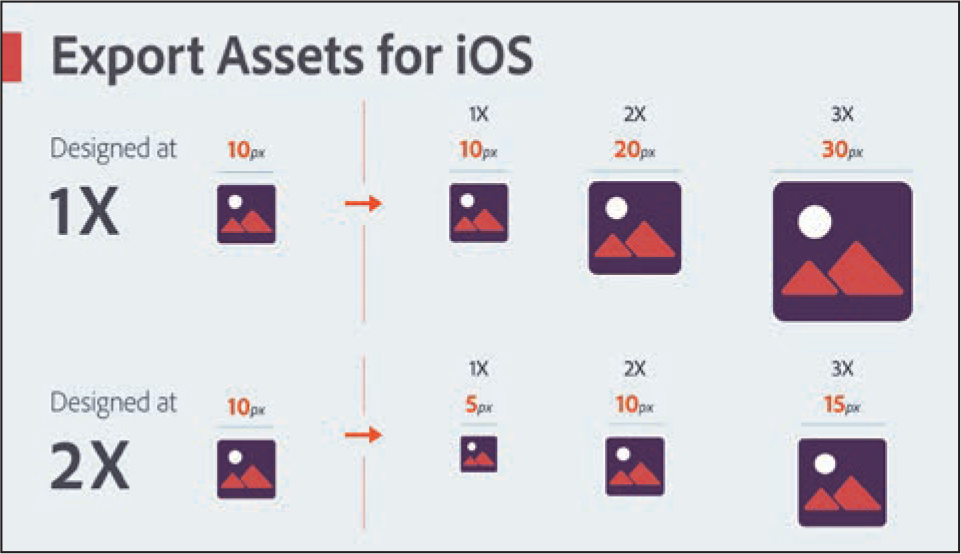
—From Adobe XD Help
Exporting as JPG
The final format we’ll discuss is JPG (or JPEG). When you export assets (such as photos) as JPG, you can set the quality level of the exported file according to your needs. You can export as JPG when saving images for a website, when someone asks for a JPG file, and more.
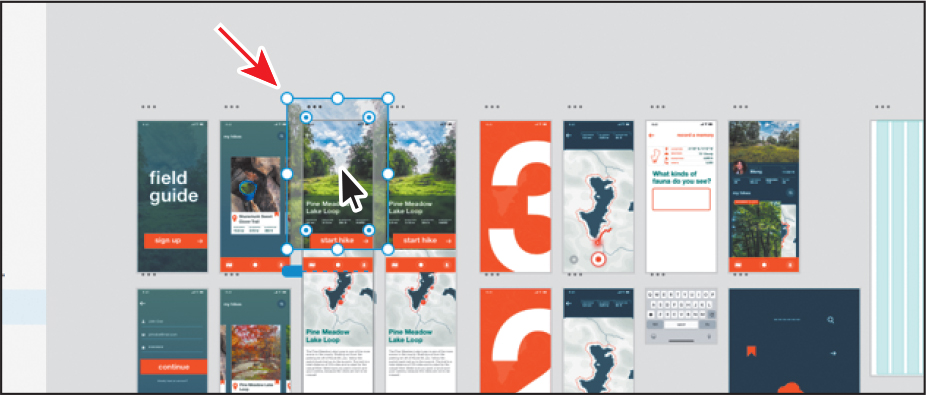
Click the image at the top of the Hike Detail artboard.
Press Command+E (macOS) or Ctrl+E (Windows) to export it.
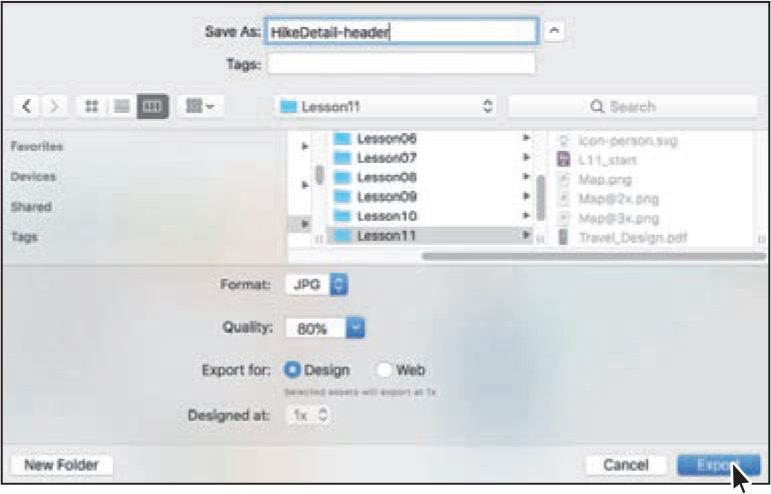
In the Export dialog box, for macOS, navigate to the Lessons > Lesson11 folder. On Windows, click Choose Destination (or Change) in the Export To section and navigate to the Lessons > Lesson11 folder.
Change the following options:
Save As (macOS only): HikeDetail-header
Format: JPG
Quality: 80%. (The Quality setting determines the file size of the generated asset and the quality. The lower the Quality setting, the smaller the file size, but you sacrifice more and more quality the lower you go.)
Export For: Design (the default setting) (The Design option will export a single JPG at the original size, whereas the Web option will export two sizes: 1x and 2x. When exporting your own assets, you will need to make a determination as to whether you need one asset or two.)
Click Export.
The Export dialog box on macOS 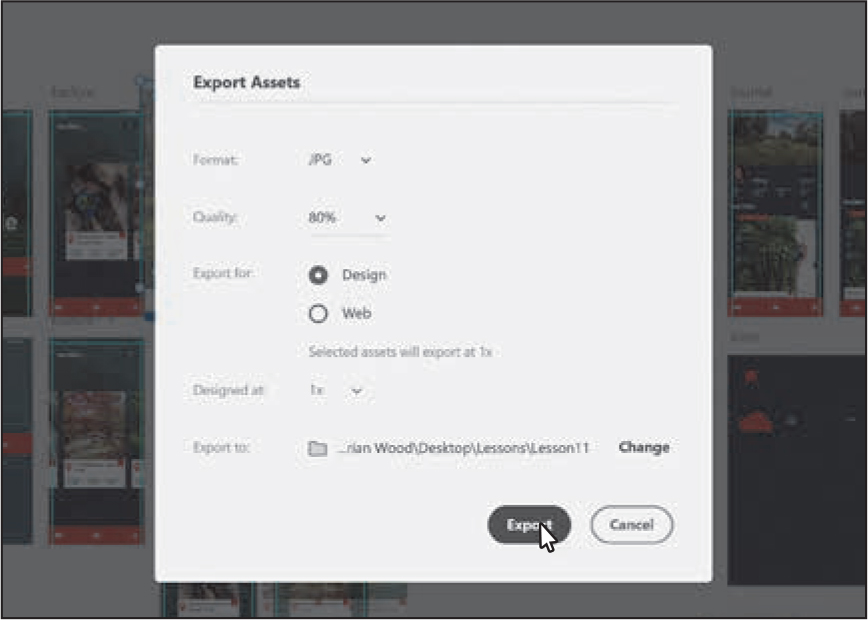
The Export dialog box on Windows Press Command+S (macOS) or Ctrl+S (Windows) to save the file, if necessary.
Exporting to After Effects
If you want to use After Effects to turn your XD designs into custom animations or micro-interactions, do the following:
In XD, select the layer or artboard you want to animate in After Effects.
Select File > Export > After Effects (macOS) or click the menu icon (
) in the upper-left corner of the application window and choose Export > After Effects (Windows). If After Effects is not installed on your machine, this option is dimmed. You can also use the Command+Option+F (macOS) or Ctrl+Alt+F (Windows) keyboard shortcut. After Effects launches (if closed) or moves to the foreground (if running in the background).
The selected layers or artboards are transferred as native shapes, texts, assets, and nested compositions in your After Effects project. You can perform multiple asset transfers to the same After Effects project and create animations in stages or from multiple XD files. For a list of supported features, visit helpx.adobe.com/xd/kb/open-after-effects-files-in-xd.html.
—From Adobe XD Help
Using plugins
![]() Note
Note
XD also supports external integrations such as JIRA and in-app extensions to provide a complete solution for designers and stakeholders.
![]() Tip
Tip
XD plugins are saved in the XDX format. If you’ve downloaded a plugin.xdx file, you can also double-click to install it.
![]() Tip
Tip
To access add-ons, such as UI Kits, plugins, and app integrations, press Command+N (macOS) or Ctrl+N (Windows) to open the Home screen. In the Home screen, click Add-ons on the left side of the dialog box.
In Adobe XD, you can use plugins and app integrations from Adobe and third-party developers to enhance your design workflow by automating complex and repeat tasks and enabling deep integration with external tools and services. In this section, you’ll discover where to find plugins in Adobe XD and use one of them to add a series of user images to artboards.
![]() Tip
Tip
To see a sampling of the plugins available for XD, visit adobe.com/products/xd/resources.html.
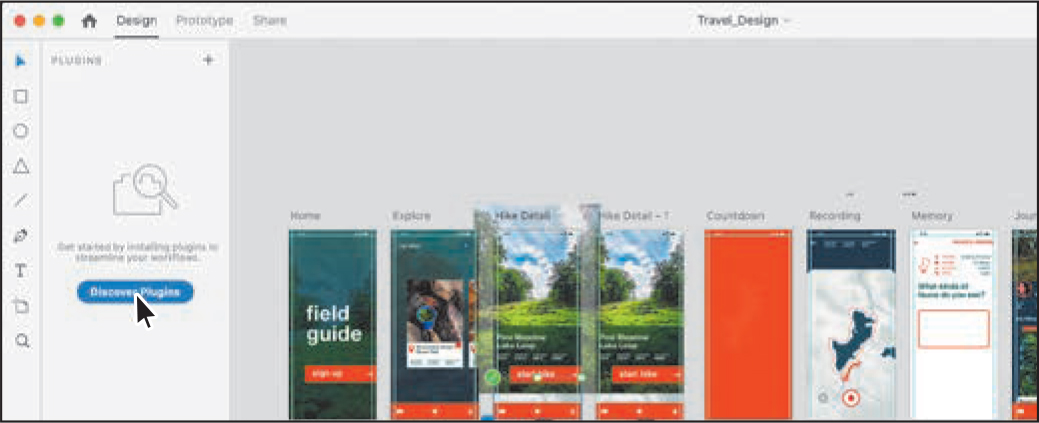
Installing a plugin
In Adobe XD, you can view and manage available plugins in the Plugins panel. In this first section, you’ll explore the Plugins panel and install a plugin.
Click the Plugins panel icon (
 ) in the lower-left corner of the application window.
In order to use plugins, you will install them. After you have installed at least one plugin, you can manage them in the Plugins panel.
In the Plugins panel, click Discover Plugins to get started or click the plus (+) toward the top of the panel.
By default there are no plugins installed. From the Plugin window, you can view, launch, install, and update plugins.
In the window that appears, click Browse to search for a specific plugin. Since new plugins are constantly added, the list of plugins you see will probably be different.

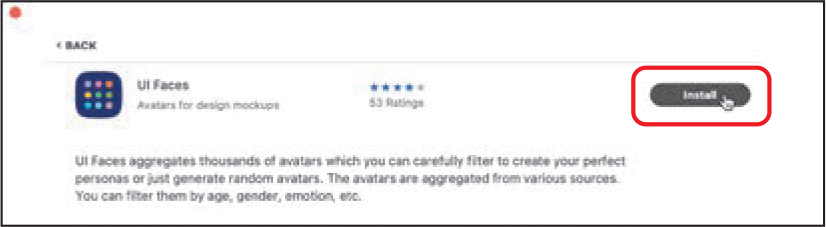
In the Search field at the top of the window, type UI faces. The UI Faces plugin should appear. If you don’t see it, you can clear the search field and try working with another plugin.
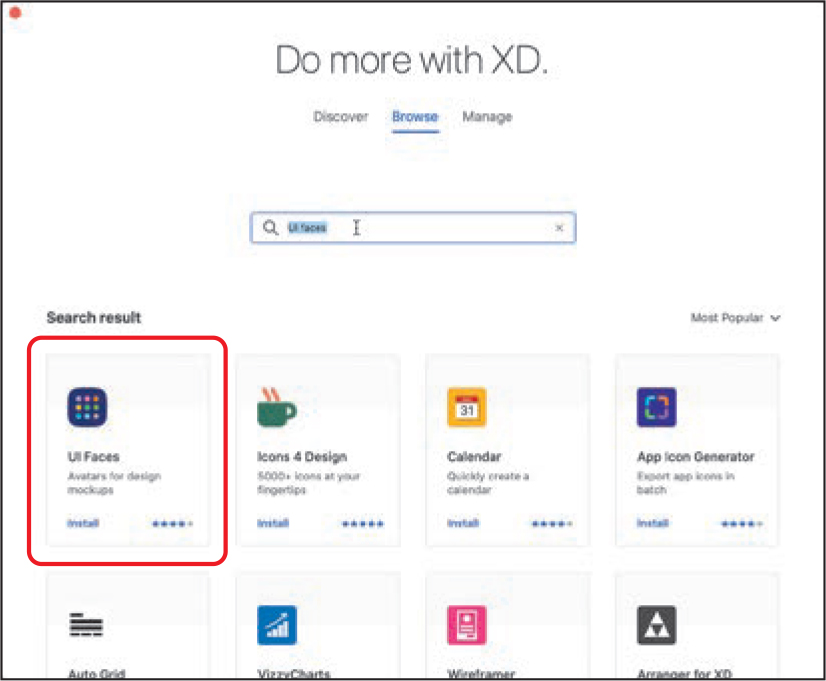
To learn more about the plugin, click the plugin in the list (circled in the previous figure). You should see a description of the plugin.
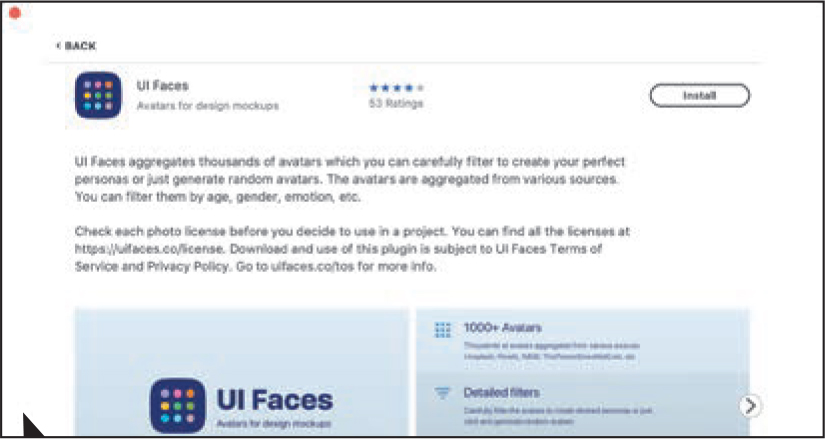
To install the plugin, click Install.
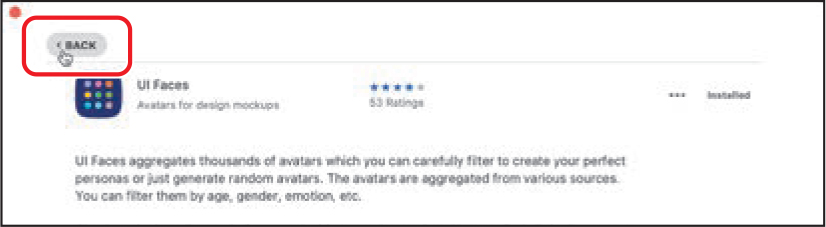
After a plugin is installed, a success message appears. You can now begin using it.
Click Back in the upper-left corner to return to the main options in the window.
To see any plugins you’ve installed, click Manage at the top of the window.
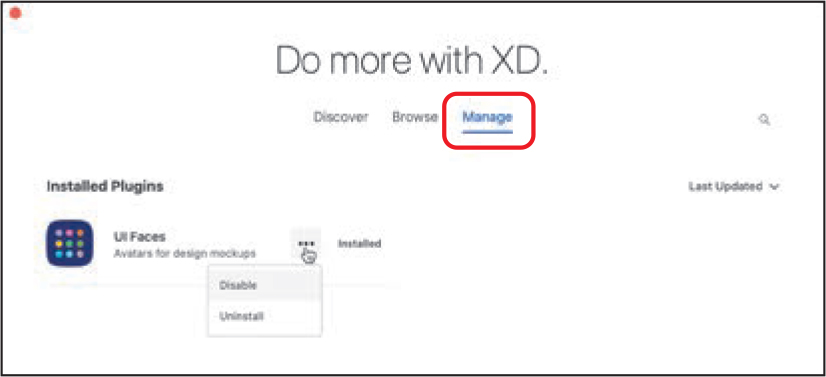
If you move the pointer over a plugin in the list, you’ll see an ellipsis (...). If you click the ellipsis, you can either disable the plugin or uninstall it.
Close the Plugins window by clicking the red circle in the upper-left corner (macOS) or the X in the upper-right corner (Windows).
Creating plugins
To get started with creating your own plugins, choose Plugins > Development > Create a Plugin (macOS) or click the menu icon (![]() ) in the upper-left corner of the application window and choose Plugins > Development > Create a Plugin (Windows). The Adobe I/O developer console (https://console.adobe.io/plugins) will open in your default browser, where you can learn what it takes to make your own plugin.
) in the upper-left corner of the application window and choose Plugins > Development > Create a Plugin (Windows). The Adobe I/O developer console (https://console.adobe.io/plugins) will open in your default browser, where you can learn what it takes to make your own plugin.
You can also visit adobexdplatform.com for more information on the XD platform, as well as samples, community access, and much more.
—From Adobe XD Help
Using a plugin
After installing a plugin, you can start to use it. In the Travel_Design document you’ll insert a series of user images (avatars) with the UI Faces plugin.
With the Travel_Design.xd file open, make sure that Design mode is showing. Click Design in the upper-left corner if it’s not showing.
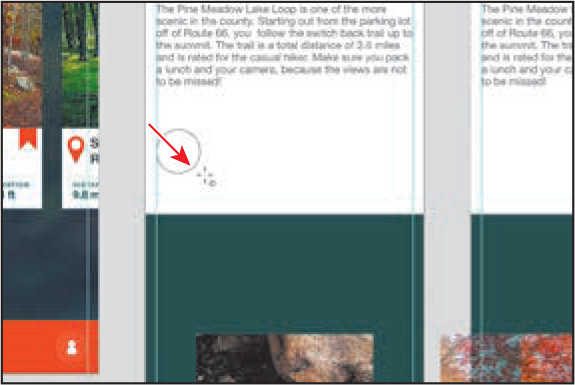
Zoom in to the bottom half of the Hike Detail and Hike Detail – 1 artboards.
Select the Ellipse tool (
 ) in the toolbar on the left.
Shift-drag to create a circle in a blank area of the Hike Detail artboard. When the circle has an approximate height and width of 64 in the Property Inspector, release the mouse button and then the key.
Select the Select tool (
 ) and drag the circle so its left edge is aligned with the vertical guide on the left.
Now you’ll make some copies using the repeat grid.
With the circle selected, click the Repeat Grid button in the Property Inspector. A repeat grid handle now shows on the right edge of the circle; drag it to the right to make a total of seven circles.
Move the pointer between two of the circles, and when the pink column indicator shows, drag left to overlap the circles. Stop dragging when the circles appear to fit width-wise within the bounds of the artboard.

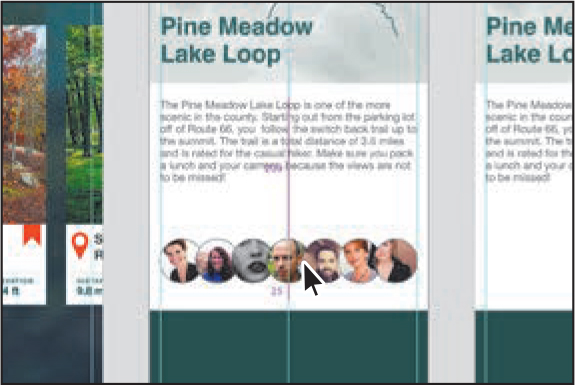
The UI Faces plugin requires separate circles, so next you’ll ungroup the repeat grid.
Click the Ungroup Grid button in the Property Inspector.
With the circles selected, click the UI Faces plugin in the Plugins panel on the left. Any plugins you install will be listed in the Plugins panel.

In the panel, you can select specific image sources to pull from, as well as age range, gender and more. Click Apply.

With all of the circles still selected, group them by pressing Command+G (macOS) or Ctrl+G (Windows).
Drag them into position as you see in the figure.
Finishing the design
Next, you’ll add some text to finalize the design and then copy the new content to the Hike Detail – 1 artboard.
Option-drag (macOS) or Alt-drag (Windows) the green Pine Meadow Lake Loop text down above the avatars. Release the mouse button and then the key.
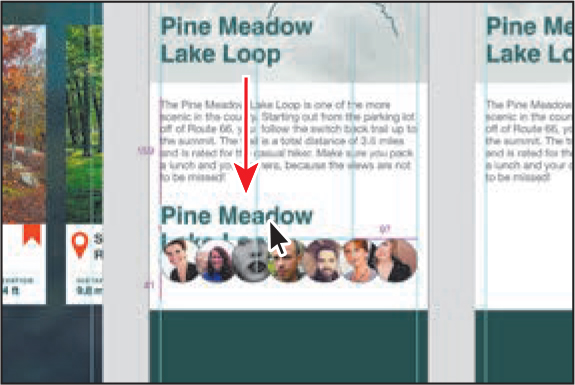
Double-click the text and change it to Hikers.

With the Select tool (
) selected, press the Esc key to select the text object and then drag it into position, as in the figure.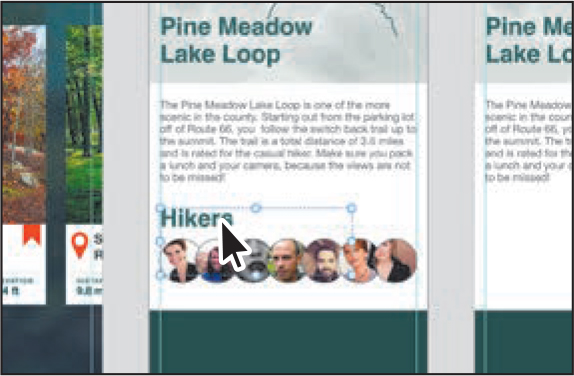
With the avatar content finished, now you’ll group it all and copy it to the Hike Detail – 1 artboard.
Drag across the Hikers text and avatar images to select it all. You may find that the text box above the content is overlapping it. If that is the case, click away from the content to deselect and then click the text box above. Drag the bottom handle up to make it shorter.

Drag across the Hikers text and avatar images to select it all again. Group them by pressing Command+G (macOS) or Ctrl+G (Windows).
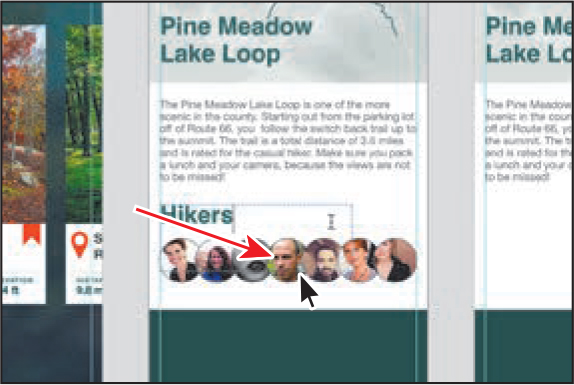
With the new group selected, copy it by pressing Command+C (macOS) or Ctrl+C (Windows).
Right-click in the Hiker Detail – 1 artboard and choose Paste to paste the group in the same relative position.

Press Command+0 (macOS) or Ctrl+0 (Windows) to see all of the design content.
Choose File > Close (macOS) or click the X in the upper-right corner (Windows) to close all open files.
You did it! You completed a prototype for an app using Adobe XD! I hope you will continue to learn and explore different ways to work with Adobe XD. The future is very bright for Adobe XD!
Review questions
1. In which file formats can you export content from Adobe XD?
2. When exporting PNG, what purpose does the Designed At option serve?
3. Before exporting assets, where can you change the name of the assets to be exported?
4. When exporting as JPG, what does the Quality setting effect?
5. What are some important reasons to use plugins with Adobe XD?
Review answers
1. Currently, you can export assets in the following formats: PNG, SVG, PDF, and JPG.
2. When exporting as PNG for Web, iOS, or Android, Adobe XD makes multiple sizes for each asset it exports as PNG. In order to do that, it has to know what size you designed at (what size the artboards are). In the case of an app you’re designing for iOS, you can choose from 1x, 2x, or 3x. If you left the artboard size at the default sizing when setting up a document (for instance, iPhone X/XS at 375 x 812), then you designed at 1x. If you changed the size of your artboards when you started, to 750 x 1624, for example, then you designed at 2x.
3. In the Layers panel in XD, you can change the name of the asset. The asset name given in the Layers panel is the asset name when it is exported.
4. The Quality setting determines the file size and quality of the asset generated from the export. The lower the Quality setting, the smaller the file size, but you sacrifice more and more quality the lower you go.
5. In Adobe XD, you can use plugins and app integrations from Adobe and third-party developers to enhance your design workflow by automating complex and repeat tasks and enabling deep integration with external tools and services.