2
Getting Started
Having introduced the Arduino, and learned a little about what it is that we are programming, it is time to learn how to install the software that we will need on our computer and to start working on some code.
Powering Up
When you buy an Arduino board, it is usually preinstalled with a sample Blink program that will make the little built-in light-emitting diode (LED) flash.
The LED marked L is wired up to one of the digital input output sockets on the board. It is connected to digital pin 13. This does not mean that pin 13 can only be used to light the LED; you can also use it as a normal digital input or output.
All you need to do to get your Arduino up and running is supply it with some power. The easiest way to do this is to plug it into the USB port on your computer. You will need a type-A-to-type-B USB lead. This is the same type of lead that is normally used to connect a computer to a printer.
If everything is working OK, the LED should blink. New Arduino boards come with this Blink sketch already installed so that you can verify that the board works.
Installing the Software
To be able to install new sketches onto your Arduino board, you need to do more than supply power to it over the USB. You need to install the Arduino software (Figure 2-1 ).
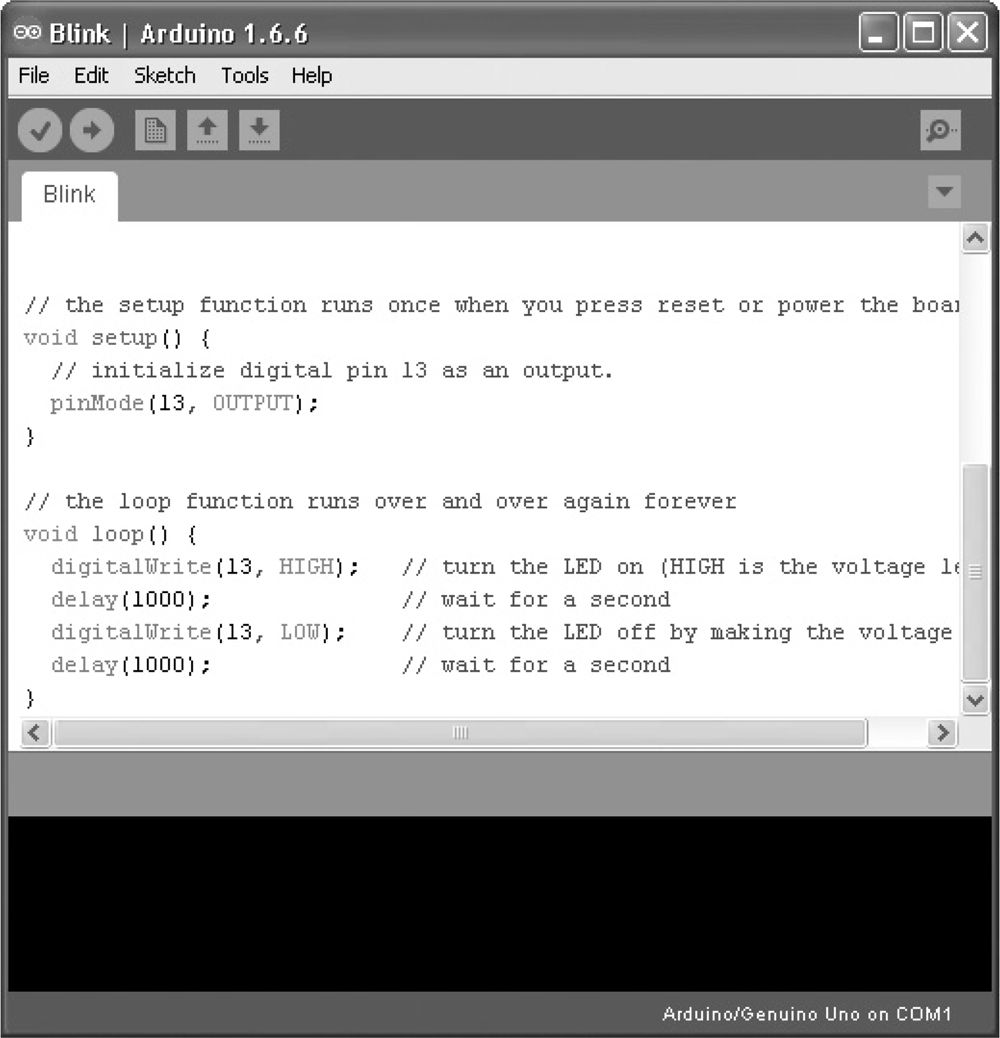
Figure 2.1 The Arduino application .
Full and comprehensive instructions for installing this software on Windows, Linux, and Mac computers can be found at the Arduino website (www.arduino.cc ).
Once you have successfully installed the Arduino software and, depending on your platform, USB drivers, you should now be able to upload a program to the Arduino board.
Uploading Your First Sketch
The blinking LED is the Arduino equivalent to the “Hello World” program used in other languages as the traditional first program to run when learning a new language. Let’s test out the environment by installing this program on your Arduino board and then modifying it.
When you start the Arduino application on your computer, it opens with an empty sketch. Fortunately, the application ships with a wide range of useful examples. So from the File menu, open the Blink example as shown in Figure 2-2 .

Figure 2.2 The Blink sketch .
You now need to transfer or upload that sketch to your Arduino board. So plug your Arduino board into your computer using the USB lead. You should see the green “On” LED on the Arduino light up. The Arduino board will probably already be flashing, as the boards are generally shipped with the Blink sketch already installed. But let’s install it again and then modify it.
Before you can upload a sketch, you must tell the Arduino application what type of board you are using and which serial port you are connected to. Figures 2-3 and 2-4 show how you do this from the Tools menu.

Figure 2.3 Selecting the board type .

Figure 2.4 Selecting the serial port (in Windows) .
On a Windows machine, the serial port is always COM followed by a number. On Macs and Linux machines, you will see a much longer list of serial devices (see Figure 2-5 ). The device will normally be the bottom selection in the list, with a name similar to /dev/cu.usbmodem621.

Figure 2.5 Selecting the serial port (on a Mac) .
Now click on the Upload icon in the toolbar. This is shown circled in Figure 2-6 .
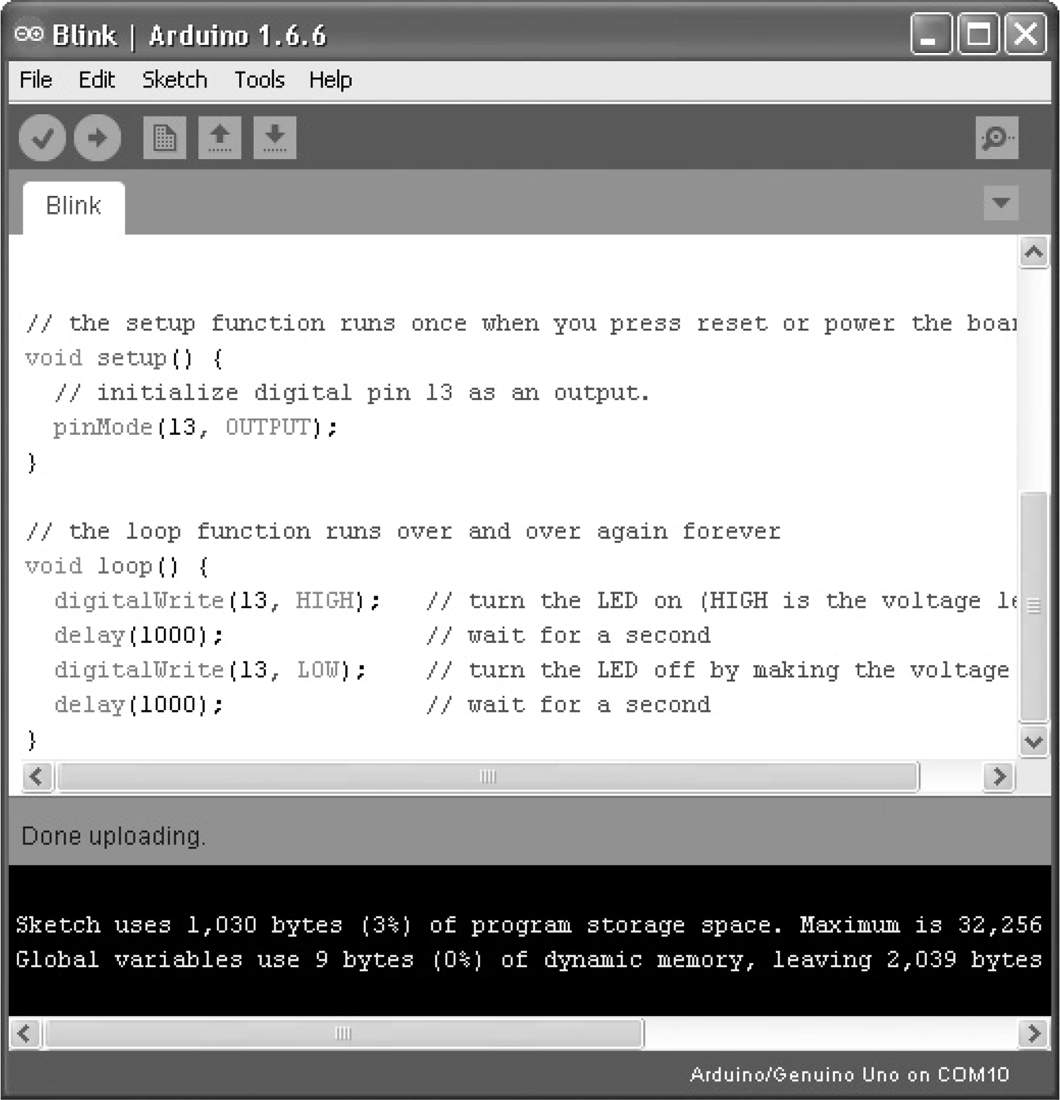
Figure 2.6 Uploading the sketch .
After you click the button, there is a short pause while the sketch is compiled and then the transfer begins. If it is working, then there will be some furious blinking of LEDs as the sketch is transferred, after which you should see the message “Done Uploading” at the bottom of the Arduino application window and a further message similar to “Sketch uses 1,030 bytes (3%) of program storage space.”
Once uploaded, the board automatically starts running the sketch and you will see the yellow ‘L’ LED start to blink.
If this did not work, then check your serial and board type settings.
Now let’s modify the sketch to make the LED blink faster. To do this, let’s alter the two places in the sketch where there is a delay for 1,000 milliseconds so that the delay is 500 milliseconds. Figure 2-7 shows the modified sketch with the changes circled.
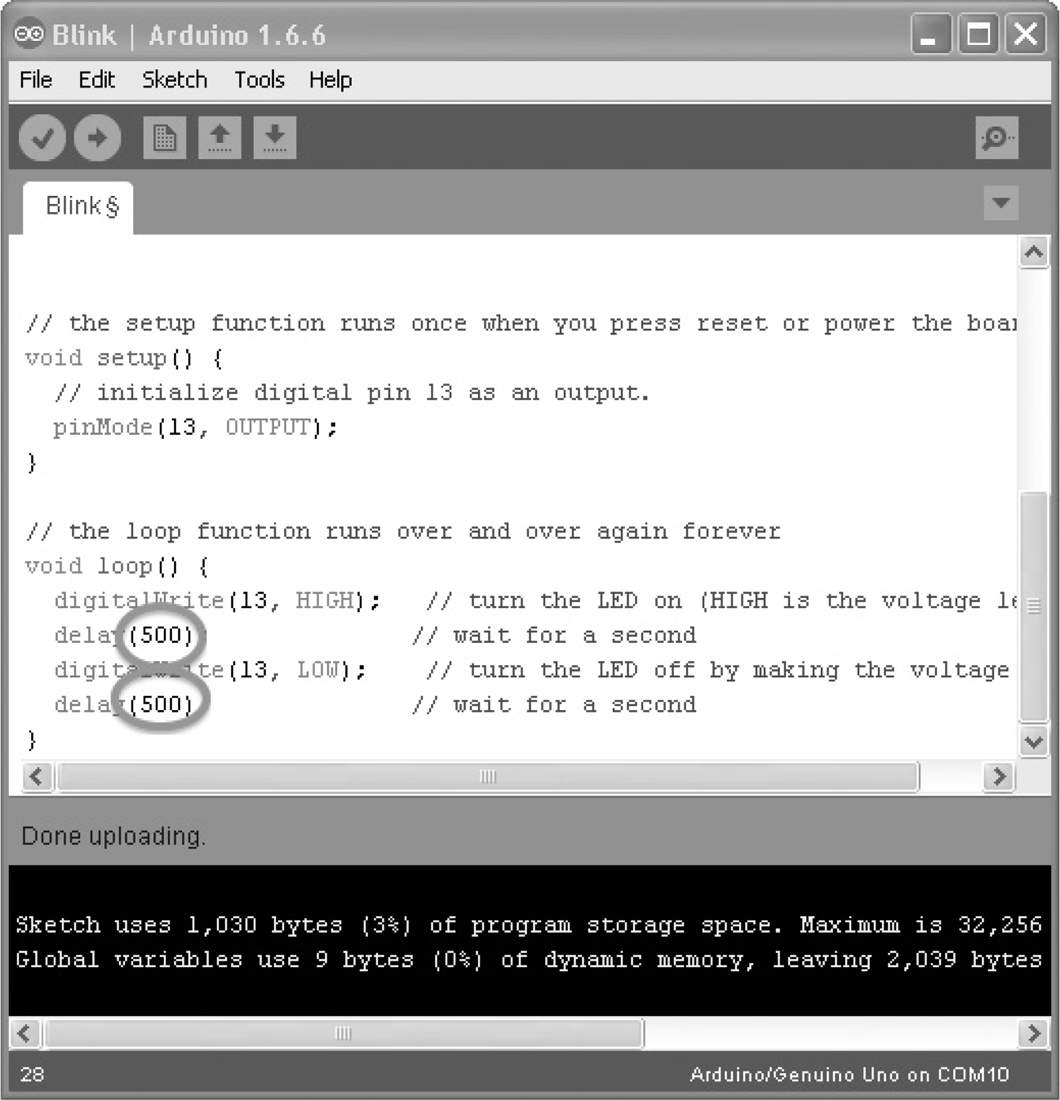
Figure 2.7 Modifying the Blink sketch .
Click on the Upload button again. Then, once the sketch has uploaded, you should see your LED start to blink twice as fast as it did before.
Congratulations, you are now ready to start programming your Arduino. First, though, let’s take a mini-tour of the Arduino application.
The Arduino Application
Sketches in Arduino are like documents in a word processor. You can open them and copy parts from one to another. So you see options to Open, Save, and Save As in the File menu. You will not normally use Open because the Arduino application has the concept of a Sketchbook where all your sketches are kept carefully organized into folders. You gain access to the Sketchbook from the File menu. As you have just installed the Arduino application for the first time, your Sketchbook will be empty until you create some sketches.
As you have seen, the Arduino application comes with a selection of example sketches that can be very useful. Having modified the Blink example sketch, if you try and save it, you get a message that says, “Some files are marked read-only so you will need to save this sketch in a different location.”
Try this now. Accept the default location, but change the filename to MyBlink, as shown in Figure 2-8 .
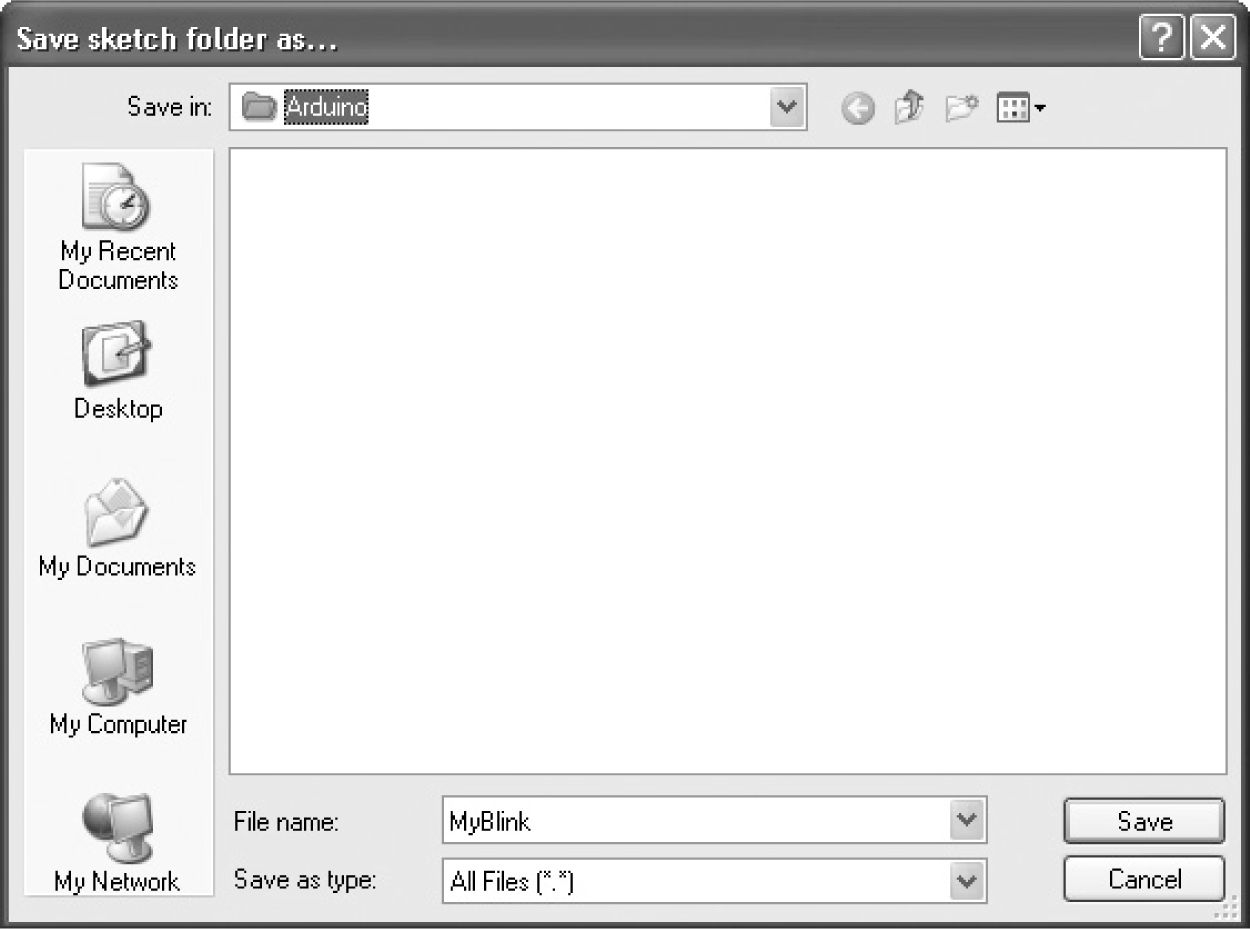
Figure 2.8 Saving a copy of Blink .
Now if you go to the File menu and then click on Sketches, you will see MyBlink as one of the sketches listed. If you look at your computer’s file system, you will find that, on a PC, the sketch has been written into My Documents\Arduino, and on Mac or Linux, it is in Documents/Arduino.
All of the sketches used in this book can be downloaded as a zip file (Programming_Arduino.zip) from www.arduinobook.com . I suggest that now is the time to download this file and unzip it into the Arduino folder that contains the sketches. In other words, when you have unzipped the folder, there should be two folders in your Arduino folder: one for the newly saved MyBlink and one called Programming Arduino (see Figure 2-9 ). The Programming Arduino folder will contain all the sketches, numbered according to chapter, so that sketch 03-01, for example, is sketch 1 of Chapter 3 .
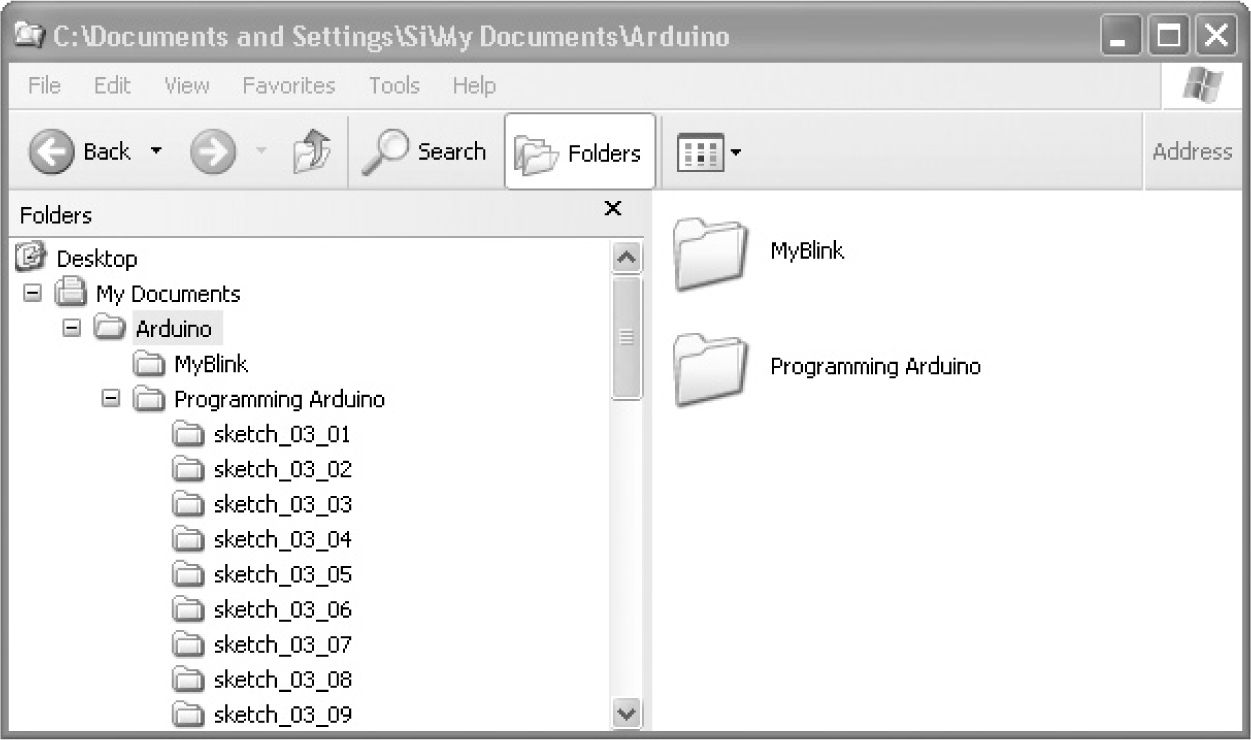
Figure 2.9 Installing the sketches from the book .
These sketches will not appear in your Sketchbook menu until you quit the Arduino application and restart it. Do so now. Then your Sketchbook menu should look similar to that shown in Figure 2-10 .
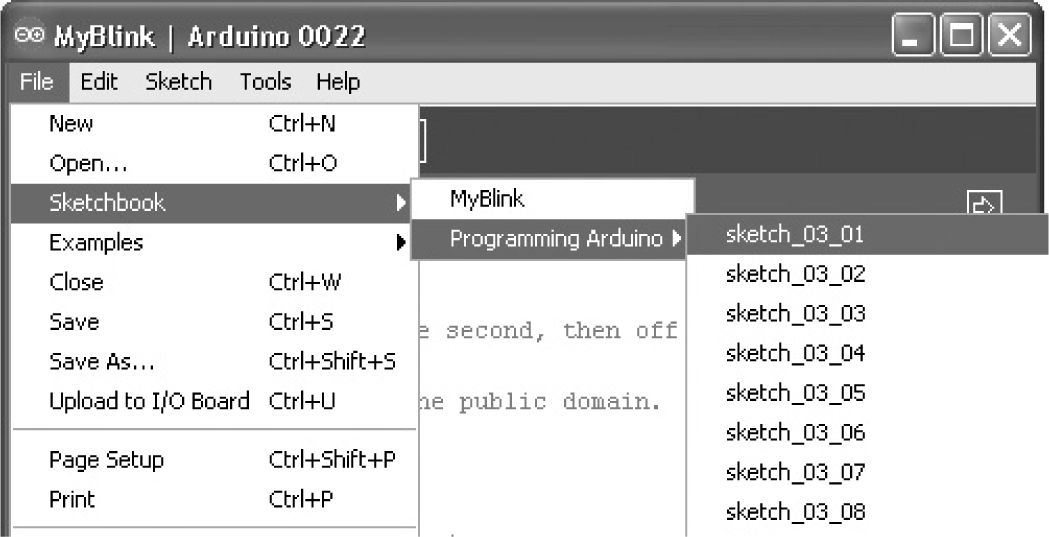
Figure 2.10 Sketchbook with the book’s sketches installed .
Conclusion
Your environment is all set up and ready to go.
In the next chapter, we will look at some of the basic principles of the C language that the Arduino uses and start writing some code.