" twist drill bit
MATERIALS
Lumber
2"×2" cedar balusters (ten 3' lengths)
1"×4" cedar (six 8' lengths)
Supplies
2½" pan-head exterior screws (40 or so)
1⅝" exterior wood screws (120 or so)
Landscaping cloth to line the finished planter
Tools
Tape measure
Pencil
Carpenter’s square
Wood saw
Jigsaw
Power drill
" twist drill bit
Driver bit to match screws
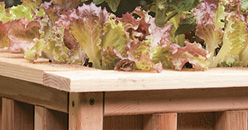
Like other gardening containers, this square planter can be stationed where you choose to do your gardening. Its depth is one of its top selling points. You can fill it with plenty of soil, which means your vegetables or flowers will naturally stay fresh longer. While the design is a basic box, the contoured trim boards at its base lend the planter a decorative flair.
BUILDER’S TIP
When screwing the wood together, use 2½" screws for the 2" material and 1⅝" screws for the 1" material. Space the balusters 3" in from the corner posts and 3" apart from each other.
SQUARE PLANTER. Filled with produce or flowers, this planter makes an attractive focal point in a yard or set along a driveway.
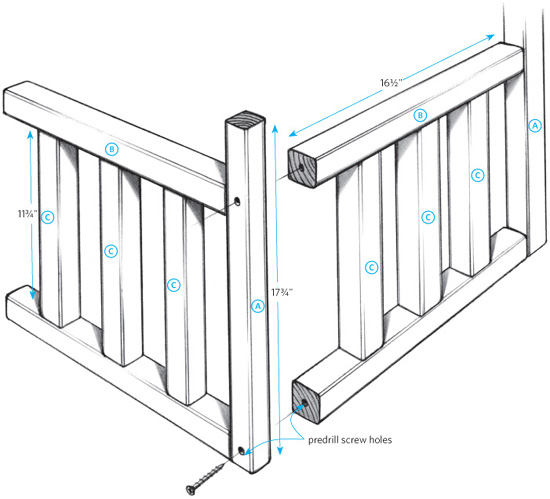
Cutting the lumber. From the balusters, cut four 17¾" posts  , eight 16½" rails
  , and twelve 11¾" balusters
  .
.
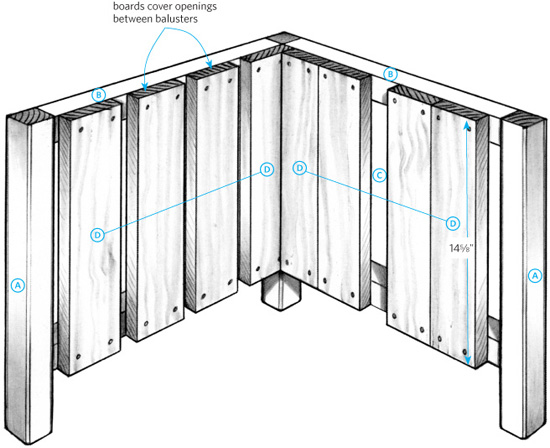
From the 1"×4", cut sixteen 14⅝" boards for the inner walls  , four 19¼" floorboards
  , and four 18" top trim boards
  . You’ll also need to cut four base trim boards
  , as specified in the cutting diagram.
Constructing the planter.
Assemble each of the four wall sections with one post on the end, then fasten the walls together to create the planter frame, as shown in fig. 1.
Cutting diagram
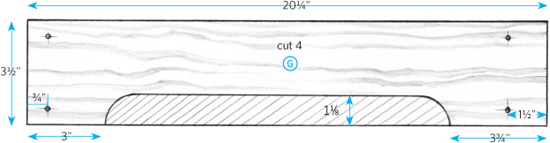
FIG. 1
Next, attach the inner wall boards (see fig. 2). To do this, fit a board into each of the two corners of one wall, then use two more boards to cover the openings between the balusters. Repeat the process on the opposite wall, mirroring the boards on the first. Then finish the two remaining walls. (Note: The spacing between the boards on these walls will be a little tighter.)
Next, attach the floor boards to the frame, spacing them ¼" apart for drainage.
Attach the first piece of base trim by flushing up the left side with a left corner post (the opposite end will overhang the right corner post) and leaving a pencil’s width of space between the bottom of the board and the ground to allow for drainage. Repeat the process to attach the remaining three base trim boards.
Attach the top trim , positioning the boards to form a square, with an inch of overhang along the outer perimeter of the planter frame. Keep in mind that you may have to angle the screws slightly to avoid the corner post screws below.
Finally, line the inside of the planter with a piece of landscaping cloth to help keep the soil in place.
FIG. 2