MATERIALS
Lumber
2"×6" cedar (12' length)
2"×4" cedar (four 10' lengths)
2"×2" cedar (seven 3' lengths)
1"×6" cedar (two 10' lengths)
1"×4" cedar (four 8' lengths)
Supplies
Twenty 2¼" stainless steel #1 trim-head screws
Eighty-eight 1¼" #6 stainless steel Phillips pan-head screws
Thirty-eight 2½" #8 stainless steel pan-head screws
Tools
Tape measure
Pencil
Combination square
Table saw or circular saw with rip fence
Jigsaw
Power drill
⅛" twist drill bit
#1 square driver bit to match trim-head screws
Phillips driver bit to match pan-head screws
Level for installing
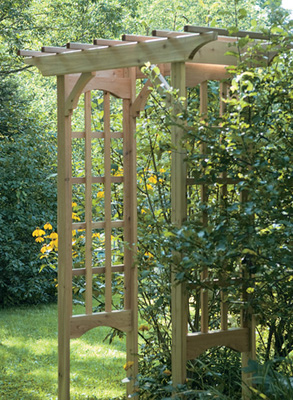
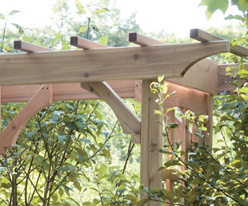
This classic fixture can greatly enhance the visual appeal of a garden. Although often referred to as a “rose arbor,” this sturdy structure is equally useful for supporting heavy vegetable vines, such as Italian trombone squash, cucumbers, or cheerful scarlet runner beans.
WELCOMING ARBOR. Homemade lattice panels, curved brackets, and a ladder-style top make this arbor both ornate and sturdy.
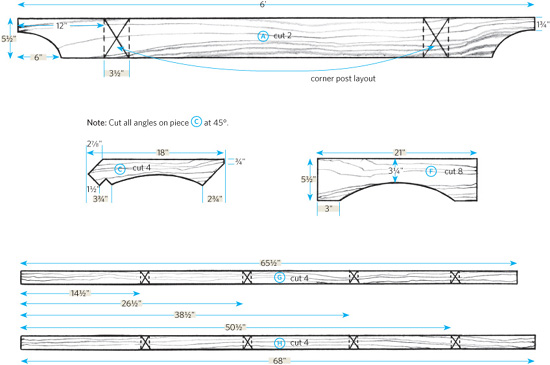
Cutting the lumber. From the 2"×6", cut two rafters  , as specified in the cutting diagram.
From the 2"×4", cut four 98½" corner posts  (18" will be buried in the ground). Also cut four 18" angled corner brackets
  , as specified in the cutting diagram.
From the 2"×2", cut seven 36" purlins  .
.
From the 1"×6", cut two 24" roof trim boards  and eight 21" arched wall trim boards
  (once you cut one, you can use it as a template for the others).
Rip all of the 1"×4" in half, then use the pieces to cut four 65½" lengths  and four 68" lengths
  for vertical lattice and eight 21" lengths for horizontal lattice
  . Mark the long vertical lattice as shown in the cutting diagram. (You’ll use this later for attaching the horizontal lattice.)
Cutting diagram
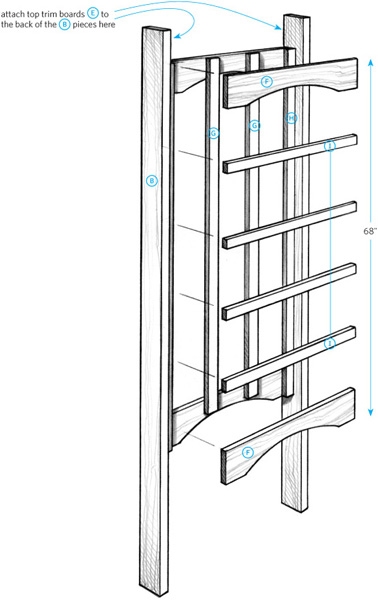
Constructing the arbor. Start by making up two lattice wall panels. For each, first attach a longer vertical lattice to each corner post as shown in fig. 1 (Make sure the layout marks are facing each other.)
Fasten the two corner posts together by attaching arched trim boards at the top and bottom. Then flip the panel over, and attach two shorter vertical lattice to the trim boards , spacing them equally apart, and cover the ends with another pair of arched trim boards . Attach four horizontal lattice , then attach the top roof trim boards to the tops of the corner posts , as shown in fig. 2.
FIG. 1
FIG. 2
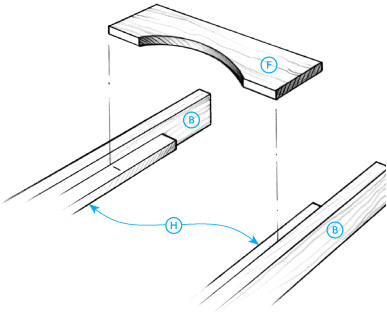
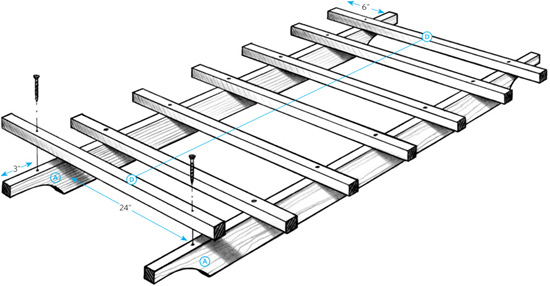
Assemble the arbor roof as shown in fig. 3. Flip the roof over, and insert the tops of the wall panels 12" in from the ends. Screw through the corner posts into the rafters, making sure they are squared up. Attach the angled brackets to the roof rafters and corner posts, positioning the bottom of the brackets 16" down from the top of the corner posts.
Installing the arbor. Set the corner posts 18" into the ground, and backfill the holes with gravel to provide drainage.
FIG. 3