MATERIALS
Lumber
1"×4" (4' length)
⅝" dowel (2½" length)
Supplies
Twelve 4d galvanized box nails
Twelve 6d galvanized box nails
1¼" galvanized wood screw
Tools
Tape measure
Pencil
Carpenter’s square
Combination square
Wood saw
Wood file
Power drill
⅝" spade drill bit
Driver bit to match screw
Hammer
Screwdriver to match the wood screw
Wood glue
You can purchase gate latches at your hardware store, but it’s easy to build one that will be far more decorative, and sturdier, as well. Here is a simple assembly made of wood that is designed to attach to the top rail of a gate and the adjacent fence section.
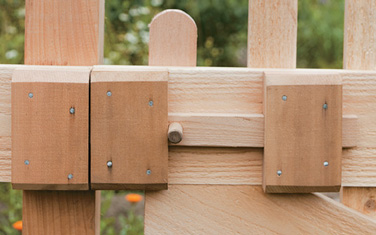
GATE LATCH. With little more than a few pieces of scrap wood, you can make a latch that’s functional and fun to use.
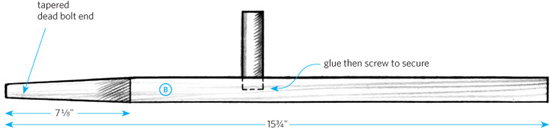
FIG. 1
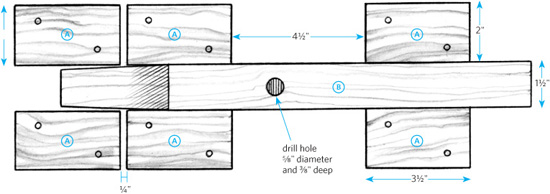
FIG. 2
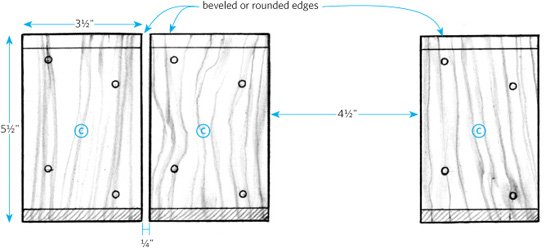
FIG. 3
Cutting the lumber. From the 1"×4", cut six 2" lengths for the inside latch blocks  ; one 15¾"×1½" length for the sliding dead bolt
  ; and three 5½" lengths for the outside latch blocks
  . Bevel the ends as specified in fig. 3.
Installing the latch. First, attach the dowel, which is the knob on the sliding dead bolt by gluing it into the hole. Then secure it by screwing through the underside of the dead bolt into the bottom of the dowel. (See side view of dead bolt in fig. 1.)
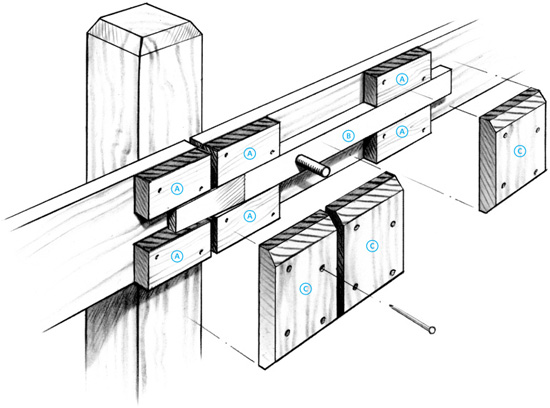
When the glue has dried, attach the inside latch blocks to the gate and fence rail with 4d box nails (fig. 2). Then fasten the outside latch blocks atop the first with 6d box nails so that the dead bolt can slide back and forth but will not fall out (figs. 3 and 4).
FIG. 4