PROJECT 13
One-Banana Hack: Hacking a Kid’s Toy
AN EVIL GENIUS SOMETIMES requires a quick hacking of a kid’s toy. Maybe your minions would prefer a toy xylophone that doubles as an electric guitar (see Figure 3-18)?

Figure 3-18 Toy xylophone hacked.
Cost: $
Make time: 2 hours
Skill level: 
Supplies

Step 1: Determine Conductivity
Try using your Makey Makey to test the keys of your xylophone. Plug the USB into the computer, and hook up an alligator clip to an EARTH input and another to the SPACE input. Now, hold both alligator clips (being careful that your hands don’t touch the metal on the alligator clips) to a key to see if it completes a circuit and registers a click with your Makey Makey. If it does, you can add alligator clips to each key and skip to step 5! If it doesn’t register a click, chances are that your keys are coated or painted and there isn’t enough bare metal for Makey Makey to register a click. It’s time to open up that xylophone and quickly hack the keys.
Step 2: Open Up the Toy Xylophone
No batteries here! Open up your xylophone, and explore how you can release the xylophone keys so that you can wrap them in conductive tape. As you can see in Figure 3-19, simply squeezing the plastic that held the keys releases them. While you are here, you can also tinker with creating a switch from the button press on this xylophone.

Figure 3-19 Inside of the xylophone.
Step 3: Wrap the Xylophone Keys with Conductive Tape
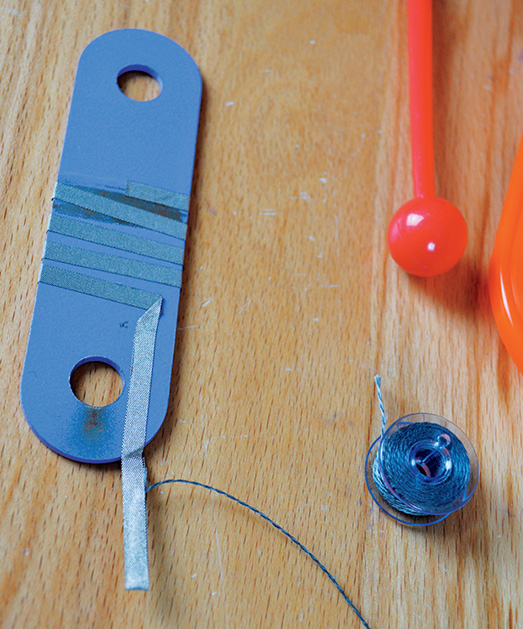
Wrap the middle of your key with conductive tape, making sure to keep the tape only in the center of the key so that it will still vibrate when hit with a mallet. If we connected an alligator clip to the key from the tape, it would decrease the vibration and tone due to the added weight. So place a small piece of conductive thread inside your conductive tape and fold the tape over, as shown in Figure 3-20.

Figure 3-20 Conductive thread to conductive tape.
You may want to experiment with the amount of tape you wrap around the key and see how the different amounts of tape or even types of conductive tape will affect the sound and volume of your xylophone. See a different amount of tape wrapping in Figure 3-21.

Figure 3-21 Experiment with tape wrapping and vibration.
We attempted to make each metal pin (located in the holes in the center of each key) as an EARTH input so that someone could press the buttons on this xylophone and have the metal pin hit and complete a switch. Unfortunately, the metal pin hits the key at such a rapid pace that it doesn’t cross the threshold for enough samples to register as a click. When creating switches with Makey Makey, both the time and area are important. If the contact is only made during a single sample of the sampling rate, then the sampling algorithm will think it is a glitch or just noise and not an actual key press. One way to see this concept in action is to connect EARTH to the metal pin of this xylophone key press and an another input to one of the metal xylophone keys. Put all keys back, and try pressing the key you hacked. Does Makey Makey register an input? Now try flipping your xylophone over so that the metal pin will be in constant contact with the xylophone key. Does your Makey Makey register an input now? Cool, huh?
Because Makey Makey works better with human interaction and you want a consistent result, make your mallet into EARTH to ensure connectivity.
Step 4: Test Ring Sound
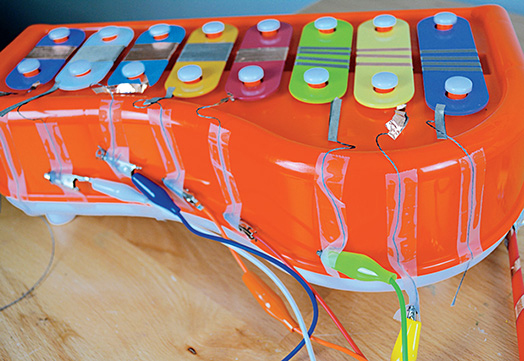
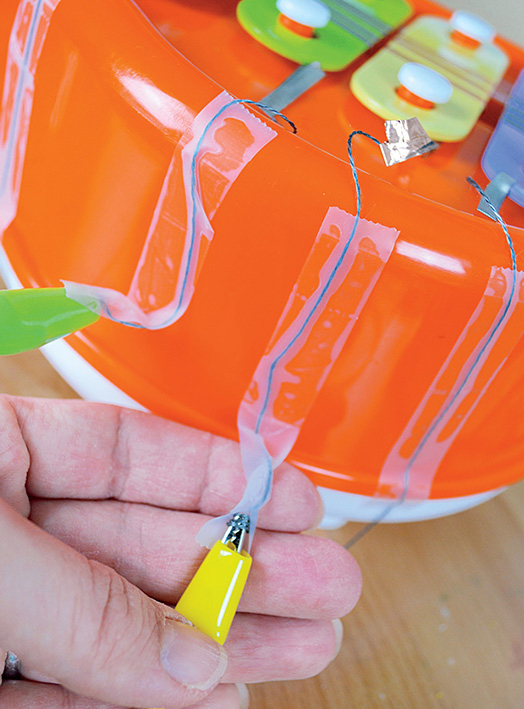
As you connect alligator clips, you’ll want to test the ring sound and make sure that your keys can vibrate enough to still make a good xylophone tone. Let your conductive thread still be somewhat loose as you tape it to the back of your xylophone, as shown in Figure 3-22. Wrap the thread around the alligator clip, and wrap nonconductive tape around the tip of the clip to hold the thread in and also insulate the connections (see Figure 3-23).

Figure 3-22 Connect alligator clips.

Figure 3-23 Close-up of alligator clip to conductive thread.
Step 5: Create EARTH with Mallet
Wrap the tip of the xylophone mallet with foil, and use copper tape to spiral around the handle so that you can alligator clip an EARTH connection to the end of the mallet (see Figure 3-24).

Figure 3-24 Playing the xylophone.
Step 6: Program with Scratch
Follow the directions to “Program with Scratch” in Project 12, and make as many remix pianos as you’d like. Now your one-banana hack xylophone can have as many sound effects as you can create!
Taking It Further
Now that you know the basics of transforming another instrument, start thinking of ways to transform things that weren’t intended to be instruments into melodic machines. Start looking for things that would make good keys to trigger events!