Culinary supporting actors? Side dishes don’t get their fair share of the limelight. This chapter shines the spotlight on the culinary ancillaries that make good barbecue great and great barbecue unforgettable. In the following pages, you’ll get a fresh look at techniques for grilling vegetables, such as roasting them in the embers, and you’ll find some recipes for vegetables not normally associated with grilling, like artichokes or horn peppers. I say it’s high time to move the side dishes to center stage, and a properly fired-up grill is the perfect way to do it.

The high, dry heat of the grill brings out a vegetable’s natural sweetness. Conventional wisdom holds that the best vegetables for grilling have a high water content, such as peppers, onions, mushrooms, zucchini, and corn. Firm, dense, low-moisture vegetables make less likely candidates. When was the last time you were offered a grilled beet or rutabaga at a barbecue? But every rule has its exception: In this case it’s an edible flower you would think would be leathery and tough when grilled—the artichoke. This recipe came to me from Cagliari, Sardinia, by way of a culinarian and former Thomas J. Watson Foundation fellow, Katherine Deumling. You’ll love the crackling crisp leaves and haunting smoke flavor, not to mention licking the garlic oil off your fingers as you pull the grilled artichoke apart with your hands.

1 lemon, cut in half
1½ to 2 cups extra-virgin olive oil
Coarse salt (kosher or sea) and freshly ground black pepper
4 cloves garlic, minced
3 tablespoons finely chopped flat-leaf parsley
1. Using a sharp knife, cut off and discard the top third of each artichoke. Then cut off the stems flush with the bottoms and discard. Using kitchen shears, cut the spiny tips off the artichoke leaves and rub all the cut edges with lemon. Using a grapefruit spoon or melon baller, scrape out the purplish inside leaves and “choke” (fibrous part) of each artichoke, creating a hollow cavity in the center. Squeeze lemon juice into this cavity. Generously brush the artichokes inside and out with some of the olive oil and season with salt and pepper.
2. Set up the grill for direct grilling (see page 8 for both charcoal and gas) and preheat to medium.
3. When ready to cook, place the artichokes on the grill, stem side up, and grill until the cut side is nicely browned, about 30 minutes. If the artichokes start to burn, move them to a cooler section of the grill, if possible.
4. Invert the artichokes, move them to a cooler part of the grill, and generously brush them inside and out with more olive oil (really slop it in), and place about ½ teaspoon chopped garlic and 1 teaspoon chopped parsley in the cavity of each. Season again with salt and pepper. Move the artichokes back over the heat, cover the grill, and continue grilling them, basting with oil every 10 to 15 minutes, until very tender, 30 to 45 minutes longer, 1 to 1¼ hours in all. If the artichokes start to burn, move them to a cooler part of the grill. When fully cooked, the leaves of the artichoke should pull off easily. Drizzle with any remaining oil and serve at once, providing empty bowls for the leaves and finger bowls and napkins.
SERVES 4 to 8
Some barbecue you love because it’s so darned delicious. Some you cherish for its sheer drama. Barbecued cabbage inspires both affections. I first came across this outrageous dish at the Memphis in May World Championship Barbecue Cooking Contest and it was love at first sight and bite. I was smitten with the spectacular presentation. I relished how the cabbage absorbed the heady flavors of butter, pork, and wood smoke. The first barbecued cabbage I tasted was flavored with bacon, and that’s the version you’ll find in my book How to Grill. But I soon discovered you could add wonderful shadings of garlic and spices by using diced kielbasa instead. Either way, you have the magnificence of a whole cabbage, smoked-scented and handsomely browned, with a rich smoky filling.
1 medium-size green cabbage (about 2 pounds)
3 tablespoons unsalted butter
1 small onion, finely chopped
2 cloves garlic, minced
3 ounces kielbasa (about 3 inches), cut into ¼-inch dice
¼ cup of your favorite barbecue sauce (use any of the recipes in this book or your favorite bottled brand)
Coarse salt (kosher or sea) and freshly ground black pepper
YOU’LL ALSO NEED:
2 cups wood chips (preferably hickory or pecan), soaked for 1 hour in cold water to cover, then drained
1. Crumple a 12-inch-long piece of aluminum foil and shape it into a ring about 3 inches in diameter. Use this ring to hold the cabbage upright while stuffing and cooking it.
2. Set the cabbage on a cutting board on its crown. Cut out the core by angling your knife about 3 inches down toward the center of the cabbage and cutting in a circle that is about 3 inches in diameter. Pull out the core and discard it. The piece removed should look like a cone. Prop the cabbage upright on the aluminum foil ring, cavity facing up.
3. Melt 2 tablespoons of the butter in a skillet over medium heat. Brush a little melted butter (about ½ tablespoon) over the outside of the cabbage. Add the onion, garlic, and kielbasa to the skillet with the melted butter and cook over medium heat until lightly browned, 3 to 5 minutes. Spoon the kielbasa mixture into the cavity in the cabbage. Pour the barbecue sauce on top and top with the remaining 1 tablespoon of butter. Season the outside of the cabbage with salt and pepper.
4. Set up the grill for indirect grilling (see page 9 for both charcoal and gas) and preheat to medium. If using a charcoal grill, place a large drip pan in the center. If using a gas grill, place all the wood chips or chunks in the smoker box or in a smoker pouch (see page 12) and preheat on high until you see smoke, then reduce the heat to medium.
5. When ready to cook, if using a charcoal grill, toss all the wood chips or chunks on the coals. Place the cabbage on its aluminum foil ring in the center of the hot grate, away from the heat, and cover the grill.
6. Cook the cabbage until very tender (when done, it will be easy to pierce with a skewer), 1 to 1½ hours. If using a charcoal grill, you’ll need to add 12 fresh coals per side after 1 hour, if the cabbage is not done. To serve, peel off any dried-out or charred outside leaves and discard. Present the cabbage on its ring to your guests, then cut into wedges and serve.
SERVES 8
Husk on or husk off? This is the great debate when it comes to grilling corn, and each camp has its partisans. I generally adhere to the husk-off school—I like the smoky flavor you get when the flames brown the corn kernels. (You also get a nifty snap and crackle as the kernels roast.) The husk-on folks believe that the husk seals in flavor and moistness, but I find it tends to steam the corn, not roast it. Still I’m willing to allow for husk-on grilling in at least one instance—roasting the corn in the embers. The process is like high drama with the best of endings, from the eerie sight of the green ears lined up on the glowing coals to the aesthetic dissonance of serving what looks hopelessly burned, to scraping off the blackened husk Ì to reveal golden, smoky, incredibly sweet kernels inside. Applause, please.
12 basil leaves (see Note)
10 tablespoons (l¼ sticks) salted butter
2 cloves garlic, minced
½ teaspoon freshly ground black pepper
8 ears of corn in the husk (the husks must completely cover the corn)
YOU’LL ALSO NEED:
A charcoal grill
Natural lump charcoal or wood chunks (optional)
1. Make the basil butter: Stack the basil leaves and roll them lengthwise into a tight small tube. Thinly slice the tube lengthwise with a knife or kitchen shears and fluff the resulting slices to make the thin slivers of basil that are known as a chiffonade. Melt the butter in a heavy saucepan over medium heat. Add the garlic, sliced basil, and pepper and cook until fragrant and the garlic has lost its rawness, 2 to 3 minutes. Do not let the garlic burn. Keep the basil butter warm until ready to serve.
2. Light charcoal or wood chunks in a chimney starter (see page 15). When the coals glow red, dump them into the bottom of the grill and rake them into an even layer. Let burn until the coals are just beginning to ash over, 5 to 10 minutes.
3. Lay the corn on top of the coals and cook until the husks are charred jet black on all sides, 2 to 3 minutes per side, 8 to 12 minutes in all, turning with tongs to ensure even cooking. Transfer the corn to a heatproof platter.
4. Pull the burnt husks and corn silk off the corn; wear clean, heavy-duty insulated gloves (see page 18) to do this. Alternatively, you can use a stiff-bristled brush or scraper for removing the husks. Brush each ear with basil butter and serve at once, passing any remaining butter on the side.
SERVES 4
NOTE: Of course, you can use any other herb you fancy.
Forget about gleaming stainless steel supergrills that cost more than you paid for your first car in college. Forget gas grills altogether, and consider a method of grilling that’s as old as mankind itself.
Back before man had invented grill grates or gridirons or even sharpened sticks for making shish kebabs, people cooked foods in the fire. Literally in the fire, or, more precisely, on the coals. They laid root vegetables or meats directly on the embers and let the radiant heat of the coals do the cooking. When the food was ready, the ashes were brushed off. Barbecue had been born.
Although I’m willing to grill just about anything in the embers (see the recipe for Dirty Steaks on page 194), the most likely candidates are root vegetables—potatoes, yams, beets, turnips—and at least one fruit, the breadfruit, which is the traditional accompaniment to jerk pork in Jamaica. But any vegetable with a protective skin or husk can be charred in the embers, from eggplants (cooked in this fashion they make a killer baba ganoush) to corn. When you grill in the embers, you sacrifice the skin; the blackened exterior is easy to remove with a paring knife, heatproof gloves, or a stiff-bristled brush. The charring imparts an incomparable smoke taste to the interior. Ember-charred sweet potatoes, for example, have a depth and complexity of flavor you’d have never dreamed possible.
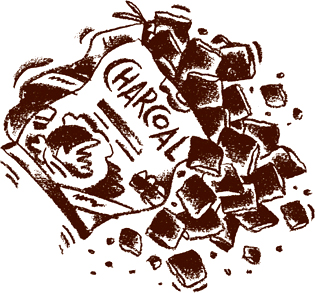
One of the virtues of grilling in the embers, especially for fledgling cooks, is that the food not only can but should be burnt. Vegetables should be cooked until the outsides are black as coal. When you pull a potato or pepper out of the fire, it may still be hot enough to set a paper towel or plate on fire. Use tongs to transfer hot vegetables to an aluminum foil tray or heat-proof platter and let them cool slightly. Brush off any excess ash with a pastry brush.
Of course, to practice this style of grilling, you need a charcoal grill or campfire. When using the former, I prefer natural lump charcoal—the kind made from whole pieces of wood that come in jagged chunks. You can certainly use briquettes—and I have—but any fuel that contains packing pallets, furniture scraps, and coal dust, as most commercial briquettes do, seems a lot less appetizing to me than do chunks of lump charcoal.
You can also cook in the embers of a wood fire. The backyard-bound grill jockey can buy hardwood chunks (no pressure-treated lumber, please) at his or her local hardware store or grill shop and light them in a chimney starter the same way you would charcoal. Oak, hickory, and mesquite are among the many woods you can buy in chunk form. Mesquite burns the hottest and has a tendency to snap, crackle, and pop, so exercise caution when using it. Better still, if you’re in the outdoors, build a campfire, letting the blazing logs die down to glowing embers. (As with any fire outdoors, take care that it doesn’t spread.)
In many parts of the country, the arrival of winter puts a stop to (or at least sharply curtails) outdoor grilling. But if you are lighting a fireplace, the hearth is a splendid place to roast on the embers. It’ll give you a whole new appreciation of “burnt” foods.
No, it’s not real caviar, it’s a gutsy eggplant dip known in Russia as givech (eggplant caviar; I suppose there’s something soft, gooey, and caviar-like about roasted eggplant and peppers). Tradition calls for the vegetables to be baked in the oven. Some years ago, to pump up the flavor, I took to roasting the vegetables on the grill. The results were good, even excellent, but the ultimate eggplant caviar would have to wait until I discarded the one piece of equipment most people consider essential for grilling—the grill grate. The secret is to lay the vegetables on the hot coals and roast them in the embers. If you like the flavor of smoke and fire, you’re going to love this eggplant caviar—even if you don’t think you like eggplant.
Tradition calls for the vegetables to be puréed or very finely chopped to make a sort of dip or spread. To make an ember-roasted salad instead, cut the vegetables into ½- or 1-inch dice.
1 cylindrical eggplant (1 to 1¼ pounds)
1 small red onion
1 green bell pepper
1 red or yellow bell pepper
1 large ripe red tomato
1 clove garlic, minced
3 tablespoons finely chopped fresh herbs, including dill, chives, and/or parsley
2 tablespoons red wine vinegar, or more to taste
1 tablespoon fresh lemon juice
4 tablespoons extra-virgin olive oil
Coarse salt (kosher or sea) and freshly ground black pepper
Garlic-Rubbed “Rabbit Ears” (grilled bread slices; recipe follows)
YOU’LL ALSO NEED:
A charcoal grill
Natural lump charcoal or wood chunks (optional)
1. Light charcoal or wood chunks in a chimney starter (see page 15). When the coals glow red, dump them into the bottom of the grill and rake them into an even layer. Let burn until the coals begin to ash over, 5 to 10 minutes.
2. Place the eggplant, onion, bell peppers, and tomato directly on the coals. Cook until charred black on the outside. It will take a total of 8 to 16 minutes to char the vegetables: 2 to 4 minutes per side for the eggplant and onion, which should be soft in the center when done; and 1 to 2 minutes per side for the bell peppers and tomato. Turn the vegetables with long-handled tongs to ensure even cooking. Transfer the charred vegetables to an aluminum foil pan or heatproof plate and let cool.
3. Using a paring knife, scrape the burnt skin off the vegetables. Don’t worry about removing every last bit; a little burnt skin adds character. Core and seed the peppers. Chop the vegetables (coarsely or finely, as you desire; a food processor works well for this) and place in an attractive non-reactive serving bowl.
4. Stir in the garlic, herbs, vinegar, lemon juice, and olive oil. Season with salt and black pepper to taste; the eggplant caviar should be highly seasoned. You can serve the eggplant caviar right away, but it will taste better if you let it sit for an hour or two in the refrigerator to let the flavors ripen. Reseason the dip before serving, adding salt or vinegar as necessary. Serve with Garlic-Rubbed “Rabbit Ears.”
MAKES about 3 cups, SERVES 4 to 6
VARIATION: To make eggplant caviar using a gas grill, preheat it to high. Place the vegetables on the hot grate and char as best you can. This will take 12 to 20 minutes in all.
Italians call it bruschetta. I call it grilled bread, and nothing makes a better vehicle for a dip or spread or even just eating out of hand. The bread is grilled using the direct method. These elongated oval slices of bread look a bit like rabbit ears to me.
1 thin loaf French bread (20 to 24 inches long)
2 tablespoons extra-virgin olive oil, or more as needed
2 cloves garlic, cut in half
1. Cut the bread sharply on the diagonal into ½-inch slices. Lightly brush each side of the slices with olive oil (don’t overdo it or the dripping oil will cause a fire).
2. Set up the grill for direct grilling (see page 8 for both charcoal and gas) and preheat to medium-high.
3. When ready to cook, arrange the bread slices on the hot grate and grill until nicely toasted on both sides, 1 to 3 minutes per side, turning with tongs. Don’t turn your back on the grill for a minute: Grilled bread burns quickly. Transfer the toast to a platter or wire rack.

4. Rub each slice of toast on both sides with cut garlic (or have your guests do this). Serve hot or at room temperature.
MAKES 20 to 24 slices
Taking their name from their slender, tapered, twisted shape, horn peppers are claimed by two of the world’s greatest grill cultures: Turkey and Japan. In both countries, they are prepared in virtually the same way. A recipe that requires only one ingredient and that’s beloved by barbecue buffs at opposite ends of the globe makes for pretty perfect grilling for me.
1 pound horn peppers (about 20)
YOU’LL ALSO NEED:
8 small metal or bamboo skewers, bamboo skewers soaked for 1 hour in cold water to cover, then drained
1. Lay the peppers side by side in groups of 5 or 6 and skewer them crosswise in two places with bamboo or small metal skewers (the idea is to make a sort of raft).
2. Set up the grill for direct grilling (see page 8 for both charcoal and gas) and preheat to high.
3. When ready to cook, place the skewered horn peppers on the hot grate and grill until darkly browned on both sides, 2 to 5 minutes per side (4 to 10 minutes in all). Transfer the peppers to a platter, unskewer, and serve hot or at room temperature. In Turkey, grilled horn peppers would be served with lamb or beef shish kebabs; in Japan, with yakitori or beef teriyaki.
SERVES 6 to 8
If you’ve done any grilling this summer, you’ve probably flame-charred steak, some burgers and hot dogs, maybe even chicken, a whole fish, and a vegetable or five. But one frontier remains to be crossed—a dish so improbable, only a flame-addled barbecue nut could conceive it. I’m talking about turning those grilled vegetables into a grilled soup. This satiny soup made from fire-charred yellow bell peppers can be served hot or chilled; the latter is particularly refreshing in the summertime. Peppers are among the few foods you can burn that will still taste great.
6 cloves garlic, peeled
1 medium onion, peeled and quartered (leave the root end attached)
3 tablespoons extra-virgin olive oil
Coarse salt (kosher or sea) and freshly ground black pepper
6 large yellow bell peppers
4 cups homemade chicken stock (page 52), low-sodium canned chicken broth, or vegetable broth
1 tablespoon balsamic vinegar, or more to taste
4 whole fresh basil leaves, plus 4 thinly slivered basil leaves, for garnish
½ cup plain yogurt or sour cream, plus 2 tablespoons, for garnish
1 teaspoon brown sugar, or more to taste (optional)
6 wooden toothpicks, soaked for 1 hour in cold water to cover, then drained
1. Skewer the garlic cloves on toothpicks. Brush the garlic and onion pieces with 1 tablespoon of the olive oil and season with salt and black pepper.
2. Set up the grill for direct grilling (see page 8 for both charcoal and gas) and preheat to high.
3. When ready to cook, place the garlic, onion, and bell peppers on the hot grate. Grill the garlic and onions until nicely browned on all sides, 2 to 4 minutes per side (4 to 8 minutes in all) for the garlic and 2 to 4 minutes (6 to 12 minutes in all) for the onion (the quarters have 3 sides). Grill the bell peppers until charred black on all sides, 4 to 6 minutes per side (16 to 24 minutes in all). Turn with tongs to ensure even roasting.
4. Transfer the garlic and onions to a heatproof plate to cool. Place the bell peppers in a large bowl, cover with plastic wrap, and let cool; the resulting steam helps loosen the skin. Unskewer the garlic and trim the roots off the onion. Scrape the burnt skin off the bell peppers with a paring knife (it’s okay to leave a few burnt spots). Core and seed the bell peppers. Put the garlic, onion, and bell peppers in a saucepan and add the stock, the remaining 2 tablespoons olive oil, and the vinegar and whole basil leaves. Gently bring to a simmer over medium heat and let simmer until the vegetables are soft, 5 to 10 minutes. Season with salt and black pepper.
5. Purée the soup in a blender until a little thicker than heavy cream. Add the yogurt and purée in short spurts just to mix. If serving the soup cold, strain it into a bowl and let cool to room temperature, then refrigerate. If serving the soup hot, strain it back into the saucepan and heat, but do not let it boil, for 2 minutes over medium-high heat. Straining is optional, but will produce a finer texture. Taste for seasoning, adding salt, black pepper, or vinegar to taste; the soup should be highly seasoned. If a touch of sweetness is desired, add the brown sugar.
6. Ladle the soup into bowls and garnish with a dollop of yogurt. Sprinkle slivered basil over each bowl of soup and serve.

SERVES 4
VARIATION: You can ember roast the vegetables. Light charcoal or wood chunks in a chimney starter (see page 15), and when the coals glow red, dump them into the bottom of the grill. Rake the coals into an even layer and let burn until they begin to ash over, 5 to 10 minutes. Place the garlic, onion, and bell peppers directly on the coals (do not peel or oil the garlic or onion and leave the onion whole). Cook until the vegetables are charred black on all sides, 1 to 2 minutes in all for the garlic (wrap the cloves in aluminum foil before placing them on the coals), 1 to 2 minutes per side (3 to 6 minutes in all) for the onion, and 1 to 2 minutes per side (4 to 8 minutes in all) for the bell peppers. Turn the vegetables with long-handled tongs to ensure even charring. Complete the recipe, starting with Step 4. You’ll need to scrape the charred skin off of the garlic and onion as well as from the bell peppers.
Long before there were grills, or even ovens, people roasted root vegetables in the embers. The process requires no special equipment and it imparts a charred smoky flavor you simply can’t get by baking, roasting, or grilling. This recipe will give you a whole new perspective on baked potatoes, for when you strip off the aluminum foil, you’ll find an incomparably steamy, fluffy, white flesh. The bacon-chive sour cream butter rolls all the traditional garnishes into one convenient topping.
FOR THE POTATOES:
4 jumbo baking potatoes (12 to 14 ounces each), scrubbed
1½ to 2 tablespoons olive oil or melted butter
Plenty of coarse salt (kosher or sea) and freshly ground black pepper
Garlic powder
FOR THE FLAVORED BUTTER:
4 tablespoons (¼ stick) salted butter, at room temperature
2 slices bacon, cut into ¼-inch slivers
¼ cup sour cream
2 tablespoons chopped fresh chives or scallion greens
Freshly ground black pepper
YOU’LL ALSO NEED:
A charcoal grill
Natural lump charcoal or wood chunks (optional)
1. Rub the potatoes with olive oil and season generously with salt, pepper, and garlic powder. Tightly wrap each potato in several layers of aluminum foil.
2. Put the bacon in a small nonstick frying pan and cook over medium-high heat until golden brown and crisp, 3 to 4 minutes, stirring with a wooden spoon. Drain the cooked bacon in a strainer over a metal bowl (the resulting fat is great for brushing grilled potatoes or making barbecue sauce).
3. Place the butter in a mixing bowl and whisk until soft and creamy. Beat in the sour cream, chives, and bacon pieces. Season with pepper to taste. Place the flavored butter in an attractive bowl for serving.
4. Light charcoal or wood chunks in a chimney starter (see page 15). When the coals glow red, dump them into the bottom of the grill and rake them into a pile on one side of the grill. Let burn until the coals begin to ash over, 5 to 10 minutes.
5. When ready to cook, lay the potatoes next to the mound of coals. Using a small shovel, long-handled spatula, or tongs, shovel glowing embers on top of the potatoes. Let the potatoes roast under the coals until very tender, 1 to 1¼ hours, rotating them from time to time and adding fresh embers as needed. When cooked through, the potatoes will feel squeezably soft through the aluminum foil (wear heatproof gloves when you test them). Alternatively, use a metal skewer to test for doneness; it should easily pierce the potatoes. You may need to replenish the coals after 45 minutes to 1 hour. Simply place fresh charcoal or wood chunks on top of the mound of coals. They’ll light in about 10 minutes.
6. When the spuds are cooked, remove them from the coals using long-handled tongs and transfer to an aluminum foil pan. Let cool for 5 minutes. Unwrap the potatoes, cut in half lengthwise, and serve in the skin with the bacon-chive sour cream butter alongside.
SERVES 4
VARIATION: You can use a gas grill to cook the potatoes. Rub them with olive oil and season with salt, pepper, and garlic powder but do not wrap them in aluminum foil. Lightly prick the potatoes in a couple of places with a fork. Set up the grill for indirect grilling (see page 9) and preheat to medium-high. Place the potatoes on the hot grate and grill until nicely browned and very tender, 1 to 1¼ hours.
My barbecue buddy “Oklahoma” Joe Davidson won first prize in a South Carolina hash competition with these baked stuffed potatoes. (The South Carolina contestants were not pleased with this upstart from Oklahoma.) Hash on the half shell may look like your ordinary baked stuffed potato, but the addition of chopped barbecued brisket takes it to a whole new level. If you don’t have brisket, you could add chopped pulled pork, boneless ribs, crumbled bacon, or, for a vegetarian touch, even grilled mushrooms.
4 jumbo baking potatoes (12 to 14 ounces each)
2 cups diced cooked brisket or other smoked meat
1 cup sour cream
8 tablespoons (1 stick) butter, cut into ½-inch dice
2 cups coarsely grated Colby, Jack, or Cheddar cheese
Coarse salt (kosher or sea) and freshly ground black pepper
½ cup finely chopped fresh chives or scallion greens
YOU’LL ALSO NEED:
1 cup wood chips or chunks (optional; preferably hickory or pecan), soaked for 1 hour in water to cover, then drained
1. Set up the grill for indirect grilling (see page 9 for both charcoal and gas) or preheat the oven to 400°F.
2. Scrub the potatoes and prick each in several spots with a fork. Place the potatoes in the center of the hot grate, away from the heat, and grill or bake in the oven until soft, 1 hour. Transfer the potatoes to a cutting board and let cool to room temperature. The potatoes can be cooked up to 3 days ahead.
3. Cut each potato in half lengthwise. Scoop out the potato flesh with a spoon, leaving ¼ inch of flesh in the shell. Coarsely chop the potato flesh and transfer it to a mixing bowl. Stir in the brisket, sour cream, 6 tablespoons of the butter, and half of the cheese. Season with salt and pepper to taste; the potato mixture should be highly seasoned. Stuff the mixture back into the potato shells and sprinkle the tops with the remaining butter and cheese and the chives. The recipe can be prepared through this step up to a day ahead.
4. Set up the grill for indirect grilling (see page 9 for both charcoal and gas) and preheat to medium-high. If using a gas grill, place the wood chips or chunks, if using, in a smoker box or smoker pouch (see page 12) and preheat to high until you see smoke, then reduce the heat to medium-high.
5. When ready to cook, if using a charcoal grill, toss all of the wood chips or chunks on the coals. Arrange the potato halves in the center of the hot grate, away from the heat. Cover the grill and cook the potatoes until the cheese is melted and the filling is bubbling, 10 to 15 minutes. Serve at once.
SERVES 8
Every barbecue needs potato salad. What better to serve at a Fourth of July bash than a patriotic potato salad made with red, white, and blue potatoes? Red and white are fairly common, of course, and I suggest using fingerling (small) potatoes with tender skins. Blue potatoes come to us by way of Peru (although they’re now grown in the United States), and their bluish flesh never fails to delight. Many supermarkets carry red, white, and blue fingerling potatoes these days, but if you can’t find them, everyday full-size red- or white-skinned potatoes will taste just as good.

1 or 2 slices of bacon or pancetta (optional)
3 tablespoons mayonnaise, or more if needed
1 tablespoon Dijon mustard, or more to taste
1 tablespoon tarragon vinegar or distilled white vinegar, or more to taste
1 tablespoon capers with their juices
2 scallions, both white and green parts, trimmed, finely chopped (set aside 2 tablespoons scallion greens for garnish)
1½ pounds red, white, and Peruvian blue fingerling potatoes
1½ tablespoons olive oil
Plenty of coarse salt (kosher or sea) and freshly ground black pepper
YOU’LL ALSO NEED:
1 cup wood chips or chunks (preferably hickory or oak), soaked for 1 hour in water to cover, then drained
An aluminum foil drip pan large enough to hold the potatoes
1. Cut the bacon, if using, into ¼-inch slivers, put it in a small nonstick frying pan, and cook over medium heat until lightly browned and the fat is rendered, 3 to 4 minutes. Using a slotted spoon, transfer the cooked bacon to paper towels to drain.
2. Make the salad dressing: Place the mayonnaise, mustard, vinegar, capers, scallions, and bacon, if using, in a large nonreactive serving bowl and whisk to mix. Set the salad dressing aside.
3. Scrub the potatoes with a brush, but leave the skins on. Place the potatoes in an aluminum foil drip pan. Drizzle with the olive oil and season very generously with salt and pepper. Toss the potatoes to mix.
4. Set up the grill for indirect grilling (see page 9 for both charcoal and gas) and preheat to medium-high. If using a gas grill, place all the wood chips or chunks in the smoker box or in a smoker pouch (see page 12) and preheat on high until you see smoke, then reduce the heat to medium-high.
5. When ready to cook, if using a charcoal grill, toss all the wood chips or chunks on the coals. Place the pan with the potatoes in the center of the hot grate, away from the heat. Cover the grill and cook the potatoes until tender, about 40 minutes. To test for doneness, insert a metal skewer into a potato; it should pierce it easily. Remove the pan with the potatoes from the grill and let cool.
6. Cut any large potatoes in quarters; cut medium-size potatoes in half. Leave small potatoes whole. Add the potatoes to the salad dressing and toss to mix. Taste for seasoning, adding salt, mustard, or vinegar as necessary; the salad should be highly seasoned. If the salad is too dry, add a little more mayonnaise. Sprinkle with the reserved scallion greens and serve at once.
SERVES 4 to 6