The GNU Image Manipulation Program (or GIMP) is one of the world’s most popular open source projects. It allows everyday users on a budget to harness the graphical abilities of virtually any computer. Open source means anyone can improve the program, and it’s free to download.
To install GIMP, go to http://www.gimp.org/ and find the download and installation instructions for your operating system. GIMP runs on all three major platforms: Mac, Windows, and Linux. In fact, if you use Linux, it’s probably already installed on your machine. You’ll need to run GIMP 2.8 in order to follow along with the tutorials in this book (though the tutorials are written to be applicable to the older 2.6 version as well). Come back once you’ve got it up and running! These tutorials provide practice and guidance in using GIMP’s features but little hand-holding when it comes to the program’s basic tools and features. The book assumes that you’ll learn best by experimenting and combining effects. If you’re a beginner, read the first section in each chapter carefully, and check out GIMP’s official user manual if you get confused (http://docs.gimp.org/en/).
For readers transitioning from other image-editing software programs and for those of you completely new to GIMP, this book begins with a quick introduction to the most important elements of GIMP’s interface: the toolbox and the image window. If you’re already a GIMP enthusiast, you may want to skip ahead to 1.1 Drawing and Painting. If you haven’t used GIMP before, or if you’d like to refresh your memory, read on.
GIMP 2.8 introduced two ways to work with GIMP windows. The original method used separate windows for everything: toolbox, dialogs, canvas, and so forth. In GIMP 2.8, choose Windows▸Single-Window mode to place all windows into a single one. This new method will be familiar to Windows users, while the original Multi-Window mode will be familiar to Mac and Linux users. Throughout this chapter, examples of both modes will be shown where appropriate and meaningful.

The default layout for GIMP, from left to right, includes the toolbox, an empty canvas window, and the default docks. The toolbox holds all of GIMP’s core tools. The canvas window is used to draw, paint, and edit images. Docks are windows that hold one or more of GIMP’s various dialogs, such as the Layers, Channels, Brush, and Paths dialogs.
Note
The term dialog refers to a type of window, usually one that opens upon a specific request for a tool or other feature.
The table below shows the icons for each tool available in the toolbox and briefly describes that tool’s abilities. Each tool also has a Tool Options dialog, which allows you to fine-tune how each tool is applied and achieve exactly the effect you desire. We’ll discuss the Tool Options dialog shortly.
Toolbox Icons | ||
|---|---|---|
Tool | Function | |
Rectangle Select | This tool allows you to create editable rectangular selections. Use the Tool Options to specify how the new selection should be combined with existing selections. Hold down the SHIFT key while selecting to create a perfect square. | |
Ellipse Select | The Ellipse Select tool is just like the Rectangle Select tool, except that the shape of the selection is elliptical. Hold down the SHIFT key to create a perfect circle. | |
Free Select | Another selection tool, the Free Select tool, allows drawing curved freehand and polygon outlines to create a selection. Both types of outlines can be mixed in a single selection. | |
Fuzzy Select | The Fuzzy Select tool selects pixels based on their similarity in color and proximity to the point you click in the image window. Using higher Threshold settings in the Tool Options dialog will cause more pixels to be selected. You can change the threshold by moving the mouse while pressing the left mouse button. Check the Sample merged checkbox to choose pixels from the visible canvas (i.e., from all layers combined) instead of from only the current layer. | |
Select by Color | The Select by Color tool is similar to the Fuzzy Select tool, except the chosen pixels don’t need to be in close proximity to one another. | |
Scissors | This is an intelligent tool that finds edges in an image, making it easier to manually outline an oddly shaped figure and create a selection around it. | |
Foreground Select | This tool allows you to isolate objects in a single layer from their surroundings, using free selects mixed with paint strokes. | |
Paths | Paths are vector components in GIMP[a] and consist of a series of nodes connected by straight or curved lines. You can edit the curve to change the position of nodes and the arc of lines. The Paths tool allows you to create a new path or edit an existing one. | |
Color Picker | Use this tool to change the foreground or background colors in the toolbox. With the Color Picker tool active, just click any pixel on the canvas. | |
Zoom | Use the Zoom tool to zoom in on or out of a section of an image. Drag a box around an area to zoom in on that spot. | |
Measure | Use the Measure tool to measure angles and distances in an image. These measurements are useful when used in combination with the Rotate and Scale tools. | |
Move | This tool allows you to move image elements like layers, selections, text, and masks around the image window. | |
Align | The Align tool allows interactive alignment of layers. | |
Crop | The Crop tool is the best way to crop images quickly. You can also use it to crop individual layers. | |
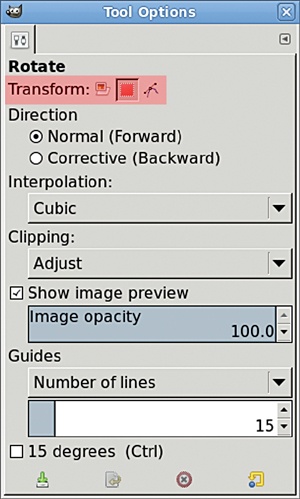
Rotate | The transform tools can be applied to layers, selections, and paths. Use the Rotate tool to perform a rotation on any of these. | |
Scale | Another transform tool, the Scale tool is used to interactively resize layers, selections, and paths. | |
Shear | Use the Shear tool to keep opposite sides of a bounding box (the edges of a layer, selection, or path) parallel while moving pixels within the box left/right or up/down. | |
Perspective | The Perspective tool stretches the bounding box as if you’re viewing a square photo head-on and you tilt the photo away from you, so that the far edge appears shorter than the near edge. | |
Flip | Use the Flip tool to flip a layer, selection, or path horizontally or vertically. | |
Cage Transform | A fun distortion tool, but one that won’t be covered here. It’s of little use to new and intermediate users. | |
Text | If you want to add text to a project, you’ll need to use the Text tool. The Tool Options dialog allows you to specify font size and family, along with alignment options. | |
Bucket Fill | Use the Bucket Fill tool to fill a portion of a layer with a solid color or pattern. | |
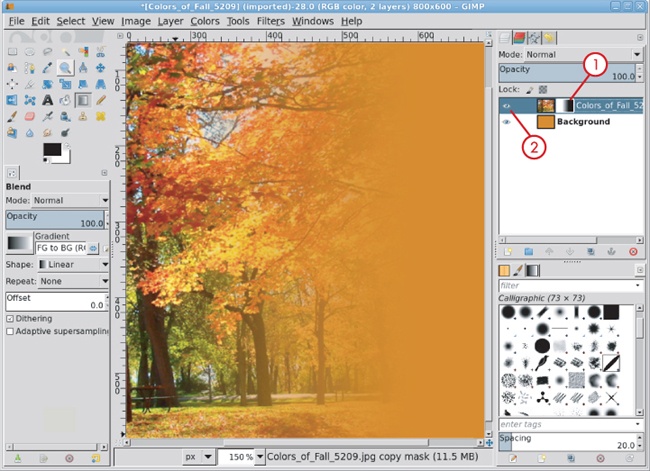
Blend | The Blend tool applies a smooth color transition (known as a gradient) to a layer or selection. Many stock gradients are available, and the Gradient Editor allows creation of custom gradients. | |
Pencil | Paint tools use the active brush and the current foreground or background color. The Pencil tool draws hard-edged lines that are not antialiased, even if the brush itself has a soft edge. | |
Paintbrush | Use the Paintbrush tool to draw with soft-edged strokes and the active brush. | |
Eraser | The Eraser tool removes pixels from almost all layers, leaving transparent pixels in their place. When applied to the Background layer, which by default doesn’t have an alpha channel, this tool will replace pixels with the background color. | |
Airbrush | The Airbrush tool works much like the Paintbrush tool, but the effect is softer. | |
Ink | The Ink tool is designed specifically for use with drawing tablets like those from Wacom. It responds to pressure and the tablets’ tilt features. | |
Clone | Cloning is the process of copying pixels from one region of a layer to use in another. To use the Clone tool, press the CTRL key and click the mouse to set the source point you want to clone. Then you can clone pixels using paint strokes. | |
Heal | A tool similar to the Clone tool but that does a better job of merging nearby pixels. A common use for this tool is removing wrinkles from photos. | |
Perspective Clone | Another Clone relative, this tool can copy an area given a perspective area in which to clone. You could, for example, copy a window on a building to an adjacent location while retaining the perspective of the original window. | |
Blur/Sharpen | The Blur/Sharpen tool functions like the Paintbrush tool and allows you to paint over a layer to sharpen or blur the regions under the brush. | |
Smudge | Imagine dragging your finger across wet paint on a canvas. This tool functions the same way, as you drag it in the image window. It’s perfect for small touch-ups. | |
Dodge/Burn | Similar to the Blur/Sharpen tool, the Dodge/Burn tool can be used to lighten (Dodge) or darken (Burn) the region under the brush. | |
[a] In simplest terms, vectors are lines that include information about the path they travel from one endpoint to another. They have no information about the pixels used to create them in GIMP’s image window. Most GIMP tools are raster based, which means they operate on pixels. A pixel is a dot with red, green, blue, and transparency levels. | ||


The Tool Options dialog gives you access to the active tool’s options and settings. This dialog opens as a tab at the top of the two initial docks. Clicking the icon for a GIMP tool does two things: it activates the tool, and it displays the Tool Options dialog for that tool.
Note
As well as a Tool Options dialog, many toolbox tools are associated with an additional dialog. These dialogs give easy access to tool-specific features. Click a tool’s toolbox icon to access its Tool Options dialog. Click in the canvas to open the tool’s associated dialog or use the File menu to access it (File▸Dialogs).
At the bottom of the toolbox you’ll find the color swatches and the brush, pattern, and gradient previews. If you’ve enabled it in the Preferences dialog, you’ll also see the active image preview.
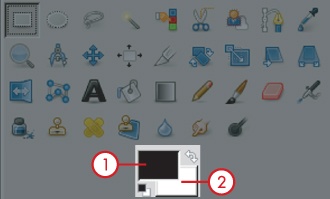
In the swatches box, you’ll find the current foreground color (upper-left box) and the current background color (lower-right box). The color swatches are referenced throughout this book. Clicking either of these will open a dialog in which you can adjust the current colors. Double-clicking the foreground or background color box is required when the alternate box is currently active. For example, if the background color box is active (it appears behind the foreground color box in the toolbox), clicking once on the foreground color box makes it active, and the second click opens the Change Foreground Color dialog.
The curved, doubled-ended arrow in the upper-right corner of the swatches box swaps the current foreground and background colors. Clicking the smaller boxes in the lower-left corner resets the foreground color to black and the background color to white. Pressing D in the canvas will also reset the colors, while pressing X will swap them.
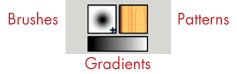
The brush, pattern, and gradient previews reflect the selection currently active for the Brushes, Patterns, and Gradients dialogs. Click any of these previews to open the associated dialog and change the active selection.
A gradient is a change in color, often smoothed in a way that simulates lighting changes or curved surfaces when applied to a selection. The Blend tool is often used to apply gradients. You can set that tool to use the current foreground and background colors, choose from a set of predefined gradients, or create your own.
As you’ll soon discover, having several image windows open at once can get confusing. The active image preview window lets you quickly activate the window of your choice. Double-click the preview to open a dialog to choose the active image window.
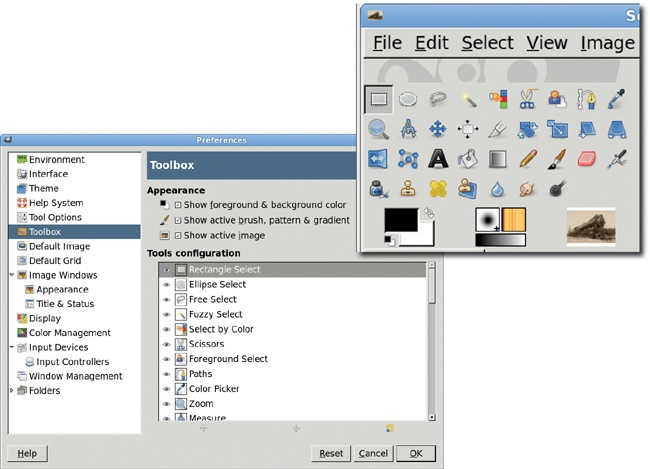
This feature is not enabled by default, so in order to use it, turn it on in the Preferences dialog. Choose File▸Preferences in the toolbox and select Toolbox on the left. Then check the Show active image checkbox. The active image window is displayed here at the bottom of the toolbox.
A dock is a window that holds other windows. For example, the toolbox has a dock at its base. Any dialog can be made into a dock. To do this, drag one dialog title into another dialog to dock the two, resulting in a series of tabs. To detach a dialog from one dock and move it to another, drag the tab to a new part of the screen.
In addition to the toolbox, GIMP’s other main window is the image window, or canvas, where your work is displayed. GIMP allows you to have several image windows open at once, and this is helpful when copying from one window and pasting into another.
All menus are in the image window. In Multi-Window mode, each image window has a copy of these menus. Most menu items apply to the image window from which the menu was opened. Some menus, like the File menu, apply to the entire GIMP application. In Single-Window mode, the menu bar across the top of the single window applies to the active image window tab or all tabs, as appropriate.
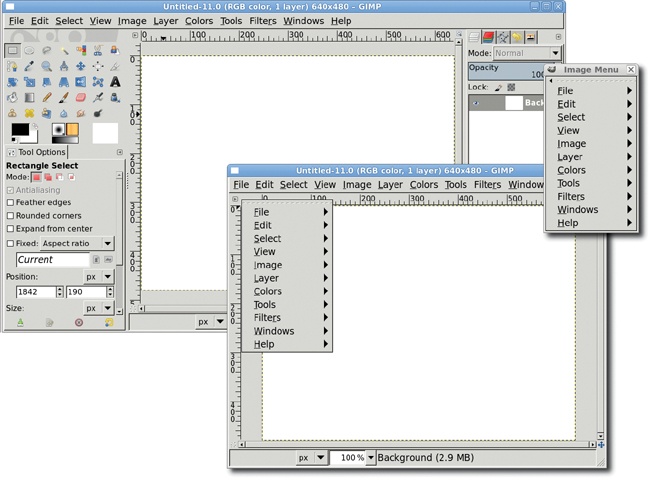
The menu can be accessed in multiple ways. The first is with the menu bar. Another is to right-click the mouse in the canvas area. The last option is to use the menu button in the upper-left corner of the canvas. In this book the menu bar will be used, though advanced users should become familiar with the menu button, as that’s the only way to use tear-off menus. Why are there multiple ways to do this? Because there are times when, working with small images (like icons for the web or a computer application), you’ll need to zoom in quite a bit. If you resize the window to fit this, you might not have every menu option available at the top of the image window. If that happens, use the right-facing arrow to access the out-of-view menu options. This menu also provides access to tear-off menus, which allow you to access common menu items quickly without having to repeatedly traverse menus. You might use this, for example, when creating guides to start a project.
The image window menus include File, Edit, Select, View, Image, Layer, Colors, Tools, Filters, Windows, and Help. Linux users may also find a Video option in the menu bar, depending on the manner in which their Linux distribution packaged GIMP. However, this option isn’t part of the base GIMP package for Windows or Mac users and will not be discussed in this book.
You’ll use features from the Edit, View, Image, Layer, Colors, and Filters menus throughout this book. The Select menu is also very useful, but you can use the mouse, the toolbox, and keyboard shortcuts to access most of its options. Don’t forget to look at the File menu to familiarize yourself with its Create, Save, Export, and Print options.
Even though it’s beyond the scope of this book, you should know that you can create your own add-on tools that can be added to any menu. If you’re a programmer interested in developing tools for the GIMP, I suggest you review the material on the GIMP developers’ website (http://developer.gimp.org/), specifically the Plug-In Development section.
There are a few other image window features you should get to know. Each is labeled and discussed briefly here.
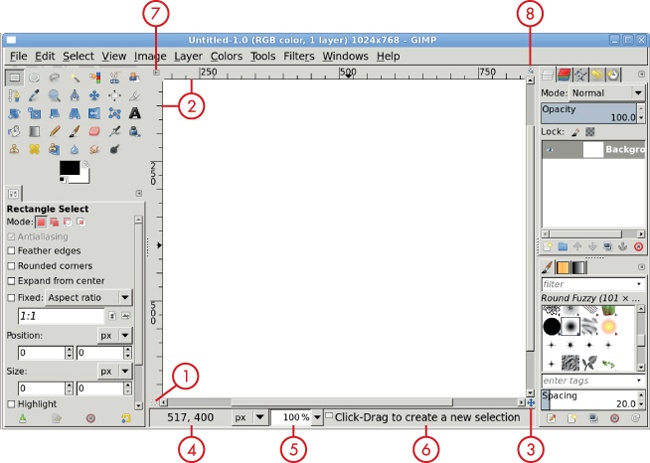
Use the Quick Mask to create and modify selections. It’s discussed further in 1.4 Selections. | |
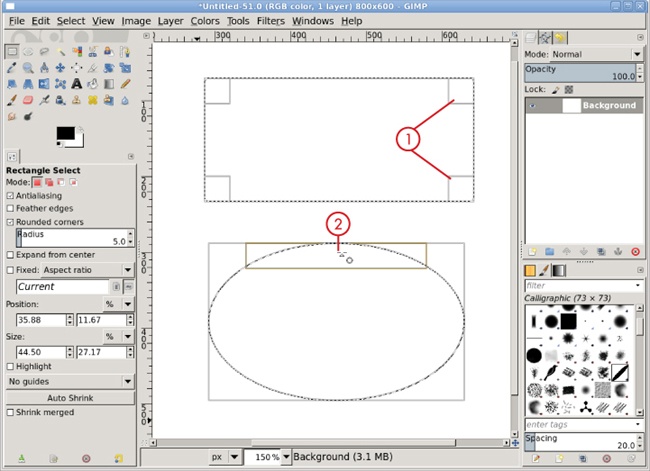
Use the rulers to pull out vertical and horizontal guides. Click one of the rulers and drag out to create a new guide, or create one more precisely by choosing Image▸Guides▸New Guide. Guides are like grid lines you can use to line up objects. | |
Panning around images is easier with the navigation control. Click it while viewing a large image or while zoomed in on a small one to see it in action. | |
The pointer coordinates display the exact location of the cursor in the units (inches, pixels, etc.) you select from the drop-down menu on the right. | |
The zoom drop-down menu lets you quickly change the view of your image, but you’re usually better off using the keyboard shortcuts plus (+) and minus (–) to zoom in and out. Press 1 to view your image at 100 percent. | |
The status area shows useful information, including angle information, when you’re dragging to create straight lines. | |
You can also use the right-pointing arrow (in the upper-left corner of the image window) to access the image window menu. | |
The image window also includes a zoom button, which is shaped like a magnifying glass and located in the window’s upper-right corner. Click this button, and then drag the window corners to resize the image. The canvas will zoom in and out to fit the new window size. |

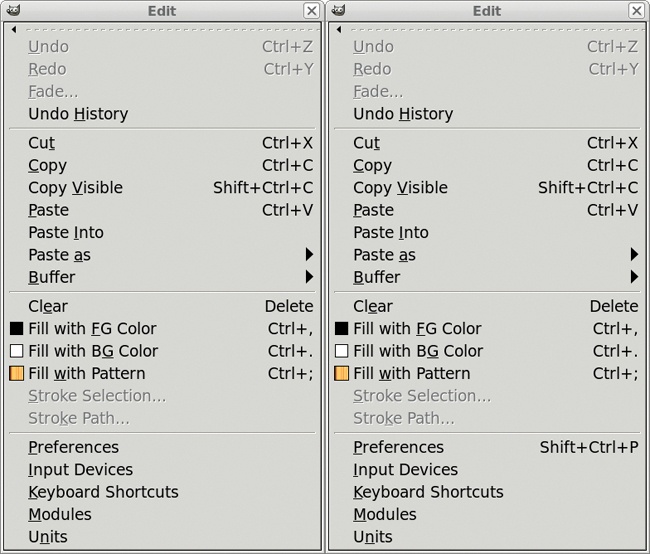
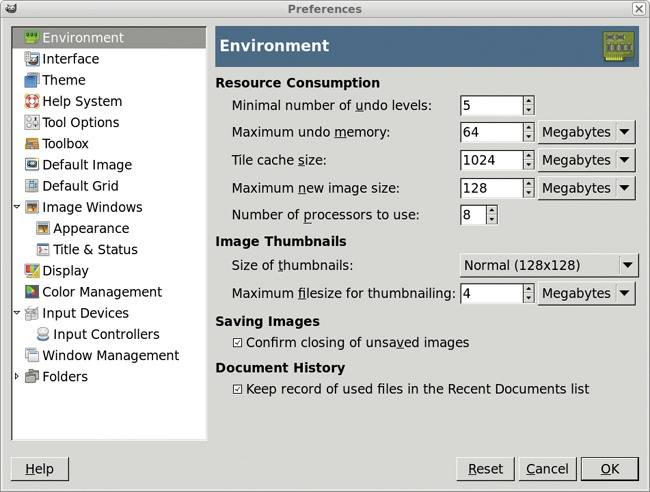
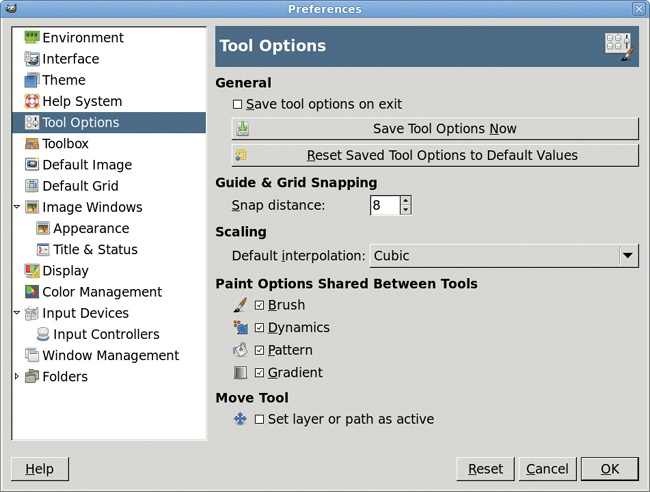
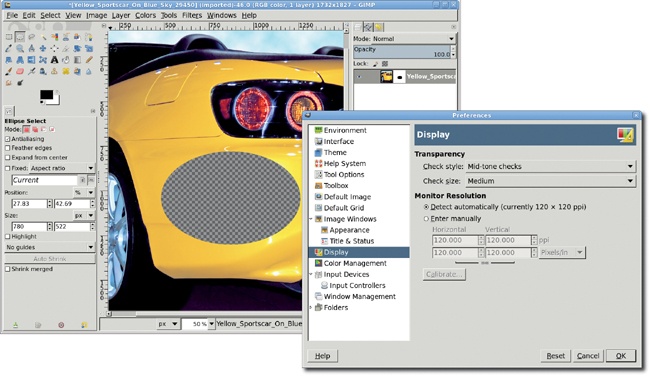
GIMP’s user interface is extremely configurable. You can change keyboard shortcuts used to access tools and filters, or you can add shortcuts to features that don’t already have them. In addition, you can change the default new image size, specify how your dialogs appear on startup, set your resource consumption preferences, and much more. These options and many others are accessible via the Preferences dialog (File▸Preferences).
One of the best ways to save time while working in the GIMP is to use existing shortcuts. You can also map your own, if you like. Open the Preferences dialog (File▸Preferences) and click Interface on the left. Clicking the Configure Keyboard Shortcuts button allows you to map commands individually. If, for example, you often have to blur images, you may want to map CTRL-SHIFT-B to the blur command you need to apply.
Alternatively, you can map shortcuts interactively. Check the Use dynamic keyboard shortcuts checkbox to enable this feature. Then click OK to save your Preferences.

Open the Edit menu in the toolbox. Notice that the Preferences option doesn’t have a keyboard shortcut listed to the right of it. To add a shortcut, place the cursor over the Preferences option but don’t click it. Instead, press CTRL, SHIFT, and P keys all at once. The Preferences dialog now has a keyboard shortcut, so go ahead and give it a try. Press CTRL-SHIFT-P to return to the Preferences dialog. To remove a dynamic shortcut, mouse over the menu entry and press the BACKSPACE key. Shortcuts are huge time-savers, and they’re an easy way to personalize your GIMP experience.
In order to clarify step-by-step instructions, this book will focus on menu selections, not shortcuts. However, as you gain experience, learning to use shortcuts will improve your creative workflow.
The Preferences dialog can also improve GIMP performance. You can modify features such as image cache size, number of undo levels, maximum memory that can be used for undo operations, and maximum size that can be used for image thumbnails. If you’ve got the memory and the inclination, feel free to push up these values. The most-often modified value is probably the tile cache size. Smaller values reduce memory usage by the GIMP but slow processing of large images. If you have lots of memory and work on large images, try increasing the value from 128MB to 256MB. If you’re low on memory, another option is reducing the undo levels. The default of five is already low, however. If you reduce this value to save memory, remember to save your work often.
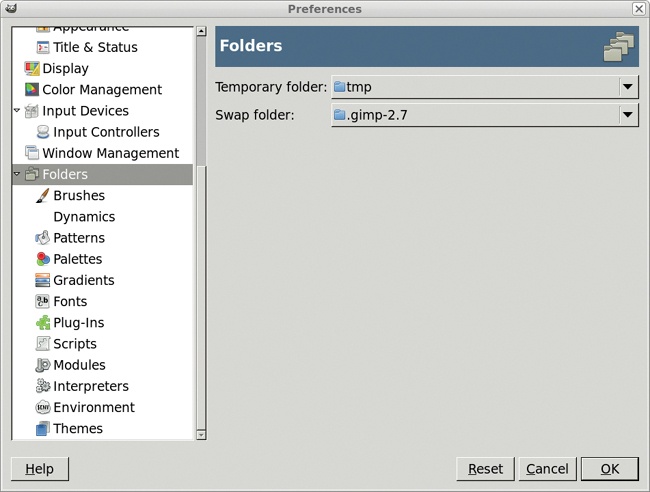
The Preferences dialog also allows you to configure the directories that hold files for your brushes, patterns, gradients, fonts, and so on. Click the arrow next to Folders to expand all resource folders. If you want to create your own patterns or files, you can use the Preferences dialog to tell GIMP where to save and look for those files. You can also add or remove collections of brushes and patterns this way.
GIMP can be used for drawing and painting, even if it’s better known as a tool for editing images and photographs. The Pencil, Paintbrush, Airbrush, Eraser, and Ink tools are collectively referred to as GIMP’s paint tools. This section of the book introduces these tools to new users. The Basic Tutorials in 1.10 Basic Tutorials will help you get a grasp on using these paint tools so you’ll be prepared to experiment with them later in the book.
Before discussing each of the paint tools, let’s examine some features they have in common.
Opacity. In the Tool Options dialogs for each of the paint tools, you can adjust the opacity of the brushstroke to be applied. Remember that opacity is the opposite of transparency, so a higher opacity value means the brushstroke will be less transparent.
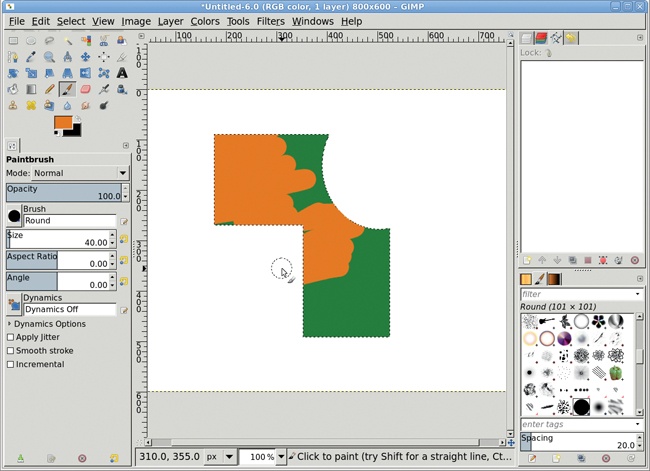
Mode. All the paint tools except the eraser allow you to set the Blend mode for the brushstroke. The Blend mode defines how the stroke blends with the existing pixels in the layer where the stroke is applied. Different modes have different effects. Addition mode adds the brush’s colors to those in the image, causing the image to lighten. Multiply mode causes the image to darken. Overlay mode can either lighten or darken the image, depending on the color or pattern being applied and the existing content in the layer where the stroke is made. Blend modes are also used in layers.
Modes are also used to composite layers. You’ll explore modes in more detail in 1.2 Layers and Modes. Don’t worry too much about them for now. While you experiment, stick with Normal mode.
Brush. The global brush setting is set in the Brush preview in the toolbox. You can also choose a brush for any of the paint tools from the Tool Options dialog. Except for the Ink tool, which uses its own brush, all the paint tools require that you choose a specific brush. The paint tools even remember brushes; you can switch from one to another and back again without losing your settings for either tool. The default configuration is for all paint tools to share the same brush, but this can be changed in the Preferences dialog under Tool Options.
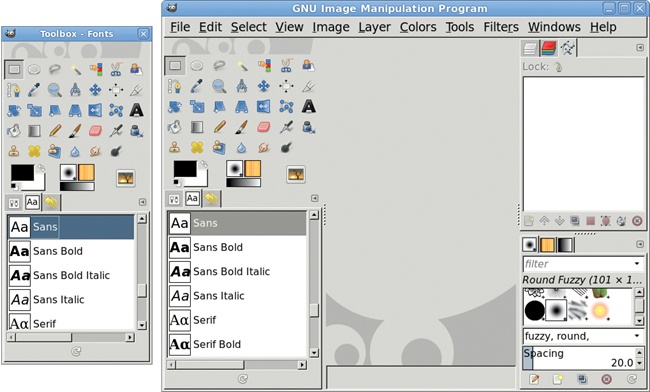
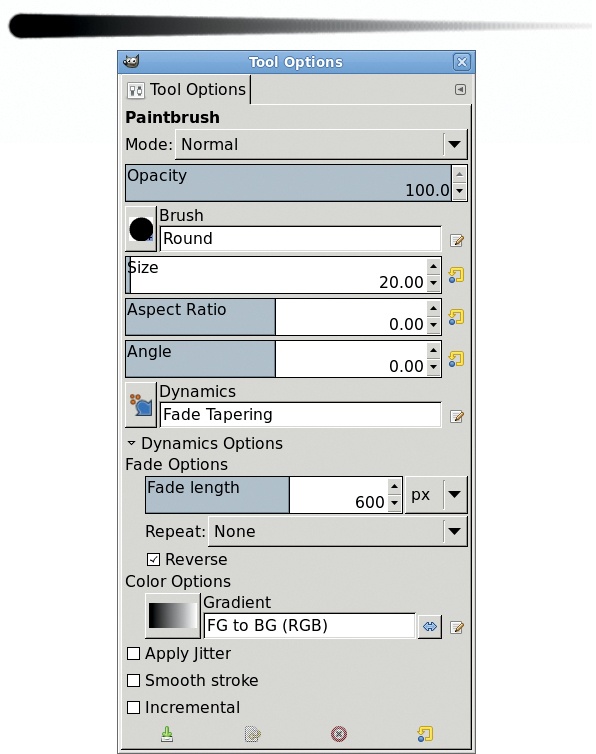
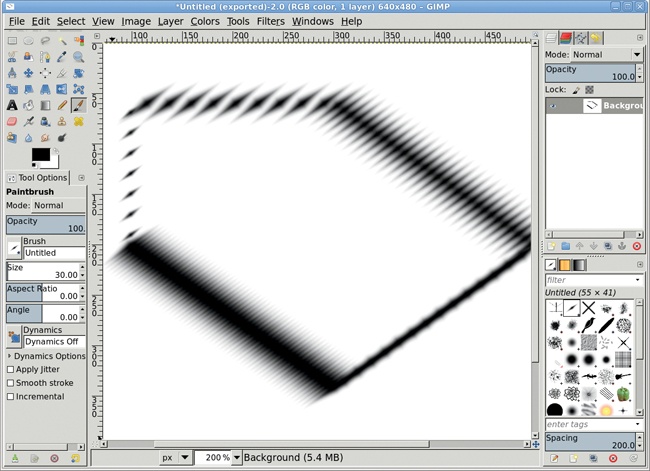
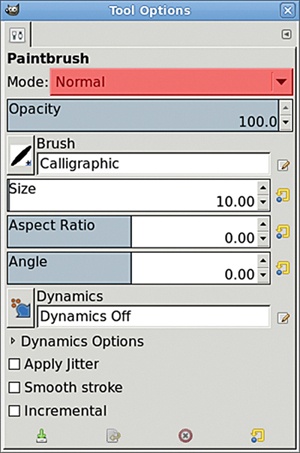
As you can see here, a paint tool’s brushstroke can be set to fade as it is applied. The distance the stroke travels before the fade can also be adjusted in the Tool Options dialog, using Dynamics. First, set the Dynamics option to Basic Dynamics. Then click Dynamics Options to display the Fade Options and adjust the Fade Length value to determine the length of the stroke before the fade. Changing the Dynamics option to Fade Tapering will add a tapered end to the fading stroke, as shown in this example. The Ink tool is the only paint tool that doesn’t offer this option.
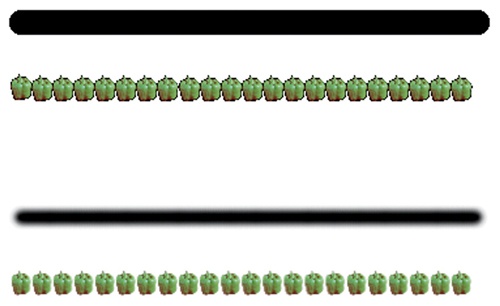
Spacing. All brushes have a Spacing setting. This value, measured in percentage of the brush’s width, determines how far apart brush images are applied during a brushstroke. You can use the Brush dialog to change the default spacing for any brush. A higher Spacing value allows you to create shapes like wire frames and tubing from ordinary brushes.

Now that you’re familiar with the basics, here are the GIMP paint tools used most often in this book’s tutorials.
The Pencil tool applies a hard edge, which is important to remember. Making the most of the paint tools requires that you understand the difference between hard and soft edges. When you work with soft edges, levels of gray or fading color in a brush are considered partially transparent and are merged with the existing pixels in the canvas. This creates soft edges around the brushstroke. When working with a hard edge, if a pixel in the brushstroke is more than 50 percent black (or more than 50 percent colored), the pixel in the brushstroke replaces the pixel on the canvas, rather than being merged with it. If a pixel in the brushstroke is less than 50 percent black or colored, the pixel on the canvas is unchanged.
The difference is easy to see here, where both the Pencil tool and the Paintbrush tool are used in conjunction with the Round Fuzzy (101) and Pepper brushes. The Pencil tool uses a hard edge, so there’s no antialiasing of the brush edge, whereas the Paintbrush tool uses a soft edge. For this reason, you probably won’t use the Pencil much when working with masks or editing photos.
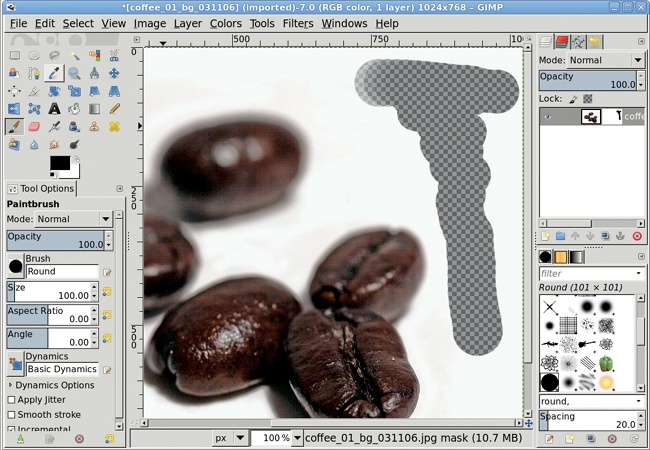
Throughout the tutorials, this is the paint tool you’ll use most frequently. The Paintbrush tool is perfect for creating layer masks and creating selections by painting Quick Masks. In either case, the soft-edged nature of the paintbrush makes it ideal for closely matching curves.
The Paintbrush tool applies its brush only once over a given point. That is, if the Paintbrush tool is active and you hold the mouse button over the canvas and click, only one brushstroke is applied. More brushstrokes are applied as you drag the cursor around the canvas.
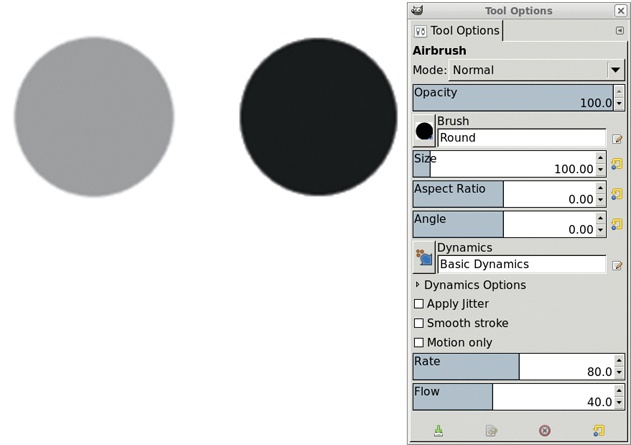
The Airbrush tool is very similar to the Paintbrush tool, except that it applies a lighter or darker stroke, depending on the Rate and Flow values set in the Tool Options dialog. It also continues applying the brush to a single point if the cursor doesn’t move. For these reasons, the Airbrush tool is useful for enhancing shading and lighting in images.
The Eraser tool is a soft-edged paint tool that removes pixels from a layer in the shape of the current brush. In all layers except the Background layer, the pixels are changed to transparent (or semi-transparent, depending on the brush used). In the Background layer, which by default doesn’t support transparency, the erased pixels are changed to the background color in the toolbox.
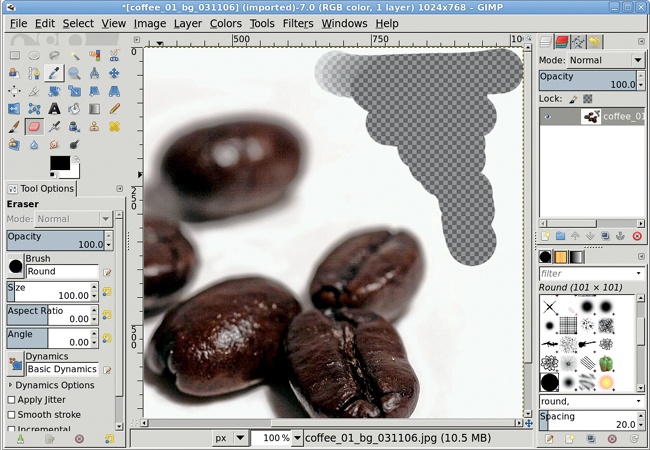
The Eraser tool is a destructive tool; the pixels it changes are gone forever once you save the file. A better way to hide those pixels from view is with a layer mask, which is not destructive. (You’ll learn a little more about layer masks and selections in 1.4 Selections.) You can edit a layer mask at any time in the future to adjust what’s hidden. That’s impossible with the Eraser tool, so you won’t be using it as often.
The Ink tool was specially designed for use with drawing tablets from manufacturers like Wacom. You can use the Ink tool’s Tool Options dialog to adjust the shape of the brush tip, the amount of tilt applied to the brushstroke, the speed at which the brush is moved relative to the tablet pen, and much more.
These features are quite helpful to users who do pen drawings, such as manga or similar artwork. Pen drawings are not this author’s forte, unfortunately, so the Ink tool won’t be used in any of these tutorials.
GIMP’s stock brushes are fine for most projects, and you’ll use them in tutorials throughout this book. But with a little effort, you can greatly expand the selection of styles available. Creating new brushes is almost a no-brainer. Almost.
Discussed here are two types of GIMP brushes: ordinary and colored brushes, and parametric brushes (which are scalable and must be created using the Brush Editor).
Note
The easiest way to create a new brush or pattern is to use the clipboard. Select a small region with any selection tool and copy it (Edit▸Copy or CTRL-C). The clipboard is shown in the very first box in both the Brushes and Patterns dialogs. This section describes how to have more control over brush creation.
You can create your own GIMP brushes. The simplest is an ordinary or colored brush, which consists of an image that you draw or import and save as a brush file by giving it a .gbr extension. Any image that can be opened in the GIMP can be saved as a brush, though some work better than others. Very detailed images don’t work well for this purpose, for example. In most cases the image should also be scaled down, because it will become the brush tip.
Note
Colored brushes are just like ordinary brushes, except the former have color while the latter are simply levels of gray.
Ordinary brushes paint with the foreground color wherever there’s black in the brush image. Where black fades to white in the brush, the foreground color is mixed with transparency before being mixed with the pixels in the canvas.
To create an ordinary or colored brush, just follow these steps:
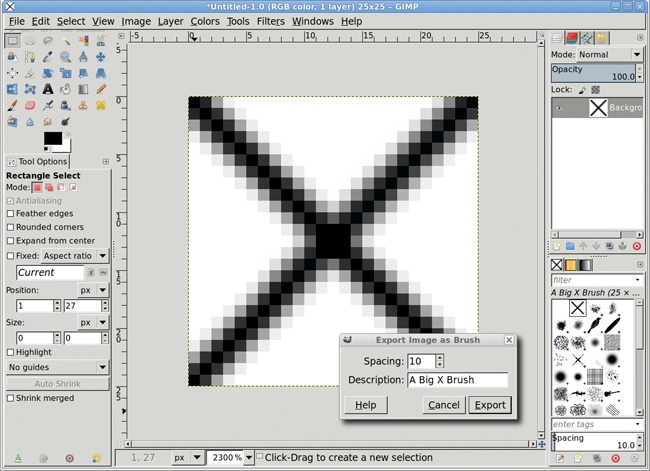
Open a new image window by choosing File▸New. Set the size to 25 × 25 pixels.
If you’re creating a colored brush, you need to add an alpha channel to the Background layer (Layer▸Transparency▸Add Alpha Channel). If you’re creating an ordinary brush, don’t add the alpha channel but instead convert the image to Grayscale (Image▸Mode▸Grayscale).
Use the Paintbrush tool to paint an X shape in the canvas. This is painted in color if you created a colored brush, or it appears in grayscale if you converted the image to Grayscale in the previous step.
Once you’ve finished creating your image, export it to a brush directory with a .gbr file extension. (Choose Edit▸Preferences to open the Preferences dialog, and then look under Folders▸Brushes for the correct path.)
When the Export Image as Brush dialog appears, type a brush name into the Description field and set the Spacing value appropriately. A brush is like a stencil applied repeatedly during a brushstroke; its Spacing setting is the percentage of brush width from the center of one stencil application to the next. For most purposes you can accept the default spacing.
Open the Brushes dialog (Windows▸Dockable Dialogs▸Brushes) and click Refresh to update the Brushes dialog. This causes GIMP to reread all available brush files, and it should find the one you just saved. Your new brush should appear in the palette along with the built-in brushes and any other brushes you’ve defined. Your new brush is ready to use. Select it and start painting.
Parametric brushes are easily modified and can be configured to change in a number of ways as they’re being used. Unlike ordinary and colored brushes, you can only create parametric brushes by using the Brush Editor. To open the Brush Editor, click the New icon in the Brushes dialog (it shows a blank sheet of paper). (If the Brushes dialog isn’t active, choose Windows▸Dockable Dialogs▸Brushes.)
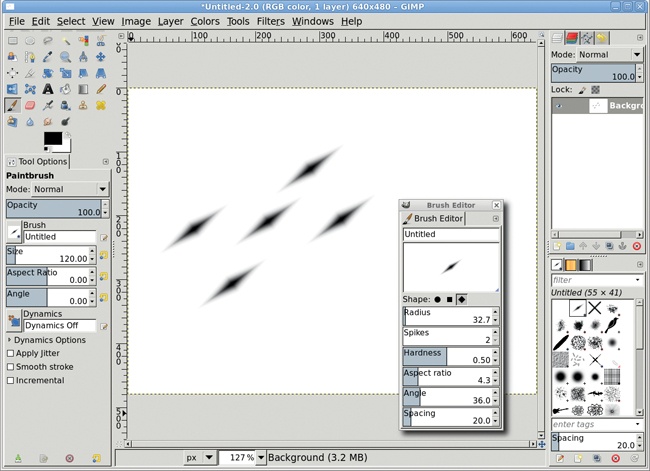
The Brush Editor window allows you to set a basic brush shape (oval, square, or diamond) and adjust that shape several ways by entering values for a variety of options. The Radius is the size of the brush in pixels. The Spikes value is the number of lines that run from the center of the brush outward. These lines are obvious in square and diamond shapes but aren’t immediately visible in the oval shape until you increase the Aspect Ratio, which exaggerates the effect of the spikes.
The last two options in the Brush Editor are Angle and Spacing. The Angle value is given in degrees and indicates how the spikes should be rotated around the brush center. As is true of other brushes, you can adjust the Spacing for parametric brushes.
The primary usefulness of parametric brushes is that they’re easy to change as you work. It’s also easy to tweak a particular brush shape to meet very specific needs. This can’t be done with other brush types without opening the brush file in a canvas window, editing the brush manually, and saving it as a new brush.
Layers in GIMP are like transparent sheets of paper piled one on top of another. Wherever a sheet is transparent, the sheets below it show through. If you lay several transparent sheets on an overhead projector and turn on the projector’s light, the colors in each sheet combine to form new colors. That’s exactly the way layers in a stack work: they combine to produce what you see in the canvas window. Changes made to layers are immediately reflected on the canvas.
Layers are the building blocks of GIMP projects because they allow you to build up an image one piece at a time, just as cartoons were created by hand before computers took over.
You can use either the Layer menu or the Layers dialog to manage layers.
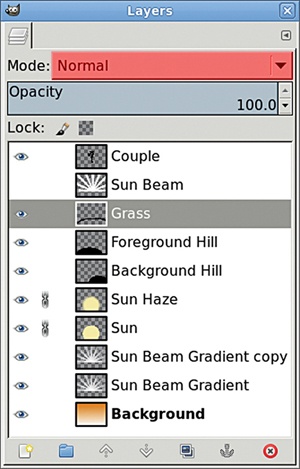
You can move a layer up or down the stack by using the arrow buttons  at the bottom of the Layers dialog, or you can simply click the layer and drag it to its new position. The other buttons at the bottom of the Layers dialog include the new layer button (single page icon
  ), the create layer group (folder icon
  ), the duplicate layer button (two page icon
  ), the anchor layer button (anchor icon
  ), and the delete button (an x in a red circle icon
  ). Aside from the anchor layer button, the functions of these buttons are self-explanatory.

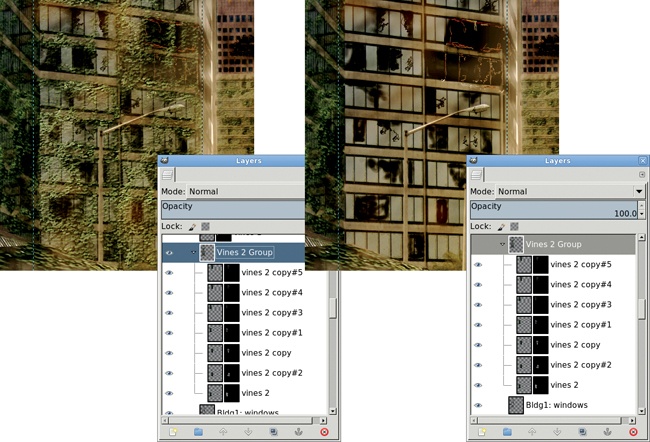
The Layers dialog folder icon was introduced in GIMP 2.8. This is used to create a layer group, which allows a single action to be performed on more than one layer at a time, such as moving or turning off visibility in the canvas. To create a layer group, click the folder icon in the Layers dialog. A layer group looks just like a normal layer in the dialog except for the hide button, a triangle-shaped icon to the left of the preview that’s only available when one or more layers are included in the group. Clicking this button will either show or hide the layers within the group inside the Layers dialog. The layers within the group are included in the canvas window if both the group visibility and the layer visibility are enabled (that is, the eye icon is visible for both).
Layers can be added to the group by dragging them in the Layers dialog and dropping them onto the group layer. Alternatively, select the group layer first, and then create a new layer.
When you copy and paste something onto the canvas, GIMP creates a temporary layer called a floating selection. You can anchor this temporary layer to the current layer (the layer that was active before you pasted the new selection onto the canvas), or you can make it a new layer. Anchoring the layer means the floating selection contents replace the existing layer contents wherever the two overlap. The anchor layer button is a shortcut for anchoring the floating selection to the current layer. Use the new layer button to make the floating selection a new layer instead. You can also use the new layer button to create a new layer from scratch.
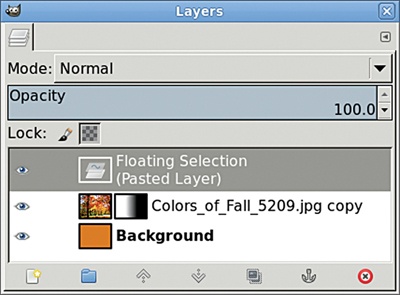
Layers can have masks that hide parts of the layer from being used in the composite image displayed in the canvas. Layer masks will be discussed in Using a Layer Mask to Colorize an Image. All layers in the Layers dialog have a layer content preview. Layer masks are displayed in this dialog as a second preview to the right of the layer content preview.
A layer can be visible or hidden, depending on the state of its visibility icon, the eye icon in the Layers dialog that accompanies every layer. Clicking this icon toggles the layer’s visibility. When a layer is not visible, its eye icon is not displayed.
Layers don’t have to be the same size as the canvas. Layer boundaries can also be outside the canvas boundary. If that’s the case, any part of the layer extending beyond the canvas is not shown on the canvas. To expand a layer to match the canvas size, just right-click the layer in the Layers dialog and choose Layer to Image Size.
You can also use the Move tool to move layers around the canvas. If you want to move more than one layer at a time, anchor them together by clicking each layer’s chain link icon. Click and drag on the canvas to move all the layers at once. Note that with GIMP 2.8 and later, you can also group the layers and make the group layer active in order to move all the layers within the group at once. The chain link can now be used to group layers that are not in a layer group.
Here, the Layers dialog shows a layer and its mask. The mask is indicated by the black-and-white preview to the right of the layer preview . The visibility icon appears on the far left . If the layer is hidden from view, this eye icon will not be visible. Just click the spot where the icon should be to bring back the icon and make the layer visible again.
You can make any layer partially opaque by choosing that layer and adjusting the Opacity slider in the Layers dialog. The setting you choose for this Opacity slider combines with any opacity changes you define with a layer mask.
GIMP takes the transparent sheet metaphor a bit further, of course. You can use one of several methods to combine a layer with the layers below it. Each method is called a layer mode.
Modes are an important GIMP concept. Besides being applicable to layers, they’re also applicable to the paint tools. We’ll take a look at paint modes before returning to layer modes, though as you’ll see, the two GIMP features are nearly identical.
Paint modes are available for use with all paint tools, from Blend to Bucket Fill to Paintbrush. A paint mode defines how the paint tool combines what it paints with the pixels already in the layer. This process of mixing the new with the old is known as compositing.
A paint mode is a mathematical method of combining colors and transparency in GIMP. The idea is that for each color channel (red, green, and blue), two different pixels are composited in a specified manner using some combination of addition, subtraction, multiplication, and division.
An important paint mode concept is that color channels only have 256 possible values (0 through 255, where 0 is no color and 255 is full color in that channel). That’s because GIMP only uses 8 bits per color channel: 8 bits = 28 = 256. And when you combine all three channels, you end up with 2,563 possible colors (not including the alpha, or transparency, channel) for any single pixel. With some modes, the process of adding, subtracting, and so forth can produce values outside this range. In that case the mode either clamps (forces) the value back to the minimum value (0) or maximum value (255), or it wraps around to the other side of the range.
Like paint modes, layer modes define how layers are composited. The difference between paint modes and layer modes is that paint modes are applied as painting operations occur, so those changes are immediate and actually change the pixels in layers. Layer modes instruct GIMP how to combine a layer with the layers below it, but this compositing doesn’t actually change pixels. It only changes the way the canvas appears, as the layers are composited internally and displayed in the image window.
There are 23 GIMP paint modes, of which 21 can also be used as layer modes (the Behind and Color Erase paint modes cannot be used by layers). The table below lists these modes and briefly describes how each of them works. In this table, the existing pixel is the pixel (and its multiple color channels) in the current layer, while the new pixel is the one added by the paint tool. Operations performed on pixels affect each channel (red, green, and blue). When you study layer modes in the next section, remember that those modes apply in the same way, except that the existing pixel comes from the current layer and the new pixel comes from the layer below it.
Using paint tools to mix pixels is an inherently destructive process, as painting with any mode will change the pixels in the layer. That isn’t always a bad thing, but what if you need to restore the original pixel information? Using GIMP to create art nearly always involves experimenting, which often means abandoning one set of changes, going back to the source image, and trying something different. What if tomorrow—after having saved and exited GIMP—you want to edit the image differently? Those pixels will have lost their original settings forever.
To keep the original pixel settings, use layer modes instead. A layer mode works by blending the current layer with the pixels in the layers below it. The method of blending is the same as with paint modes, except that layer modes combine the pixel values as they’re displayed on the canvas, without changing pixels in the lower layers. For example, using the Bucket Fill tool to apply a pattern and then switching to Hard Light layer mode doesn’t change any of the pixels below the current layer. The current layer can therefore change in any way necessary—at any time—without losing pixel values for any other layer.
To set a layer mode, use the Layers dialog’s Mode drop-down menu. Aside from the Behind and Color Erase modes, all modes available for use as paint modes are available for use as layer modes. And layer modes can be changed at any time. Changing layer modes doesn’t physically change the pixels (it only affects how the composite image is displayed on the canvas), so it doesn’t use up any additional memory or consume any of your undo levels.
Note
The Undo command allows you to step back through your recent changes. You can step back as many times as you want until you’ve used the maximum amount of undo memory, as configured in the Environment section of the Preferences dialog. The default amount of undo memory is 16MB, which is quite sufficient for small images destined for the Web but probably insufficient for poster-sized prints. You can step back through your recent changes by repeatedly pressing CTRL-Z or by choosing Edit▸Undo. You’ll know you’ve reached the maximum undo memory allowed if pressing CTRL-Z stops undoing your steps. Instead of being surprised when you reach that point while working on a project, you may want to increase the minimum undo level right away.
Layer modes appear in many tutorials throughout the book, but here’s a minitutorial to introduce you to them. Colorizing an image adds color wherever the target area isn’t completely black. In this process, the image is desaturated—all color content is removed—leaving behind an image still in RGB mode but only containing shades of gray. Only at this point do you add color.
Open any image and start by desaturating the original layer (Colors▸Desaturate). Click OK.
Add a new transparent layer above it by choosing Layer▸New Layer and setting the Layer Fill Type to Transparency.
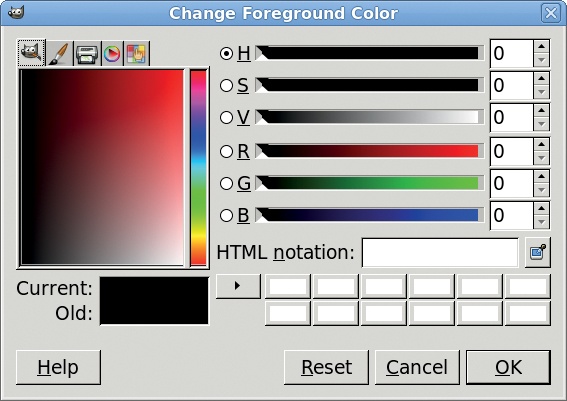
Click the foreground color in the toolbox to change the foreground color. Choose any color you like, and then drag the foreground color onto the canvas to fill the new layer with the chosen color.
Set the mode for this layer to Color.
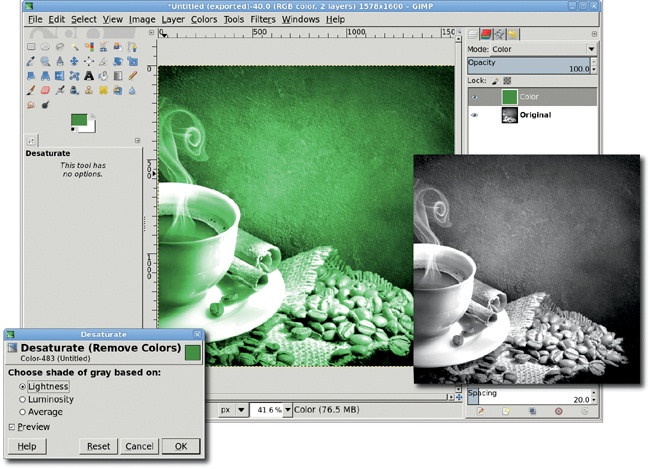
Because the color is specifically chosen in the Change Foreground Color dialog, this colorization method provides more control than other methods. It also doesn’t wash out the image as much as the Colorize dialog (Colors▸Colorize) does.
With layer modes you can selectively add color to your image by using the technique we just used combined with a layer mask. A layer mask prevents portions of a layer from showing through, so only certain parts of it appear in the composite image displayed in the canvas window. Wherever there’s white in the mask, that part of the layer is used in the composite image. Any black in the mask results in that part of the layer not being used.
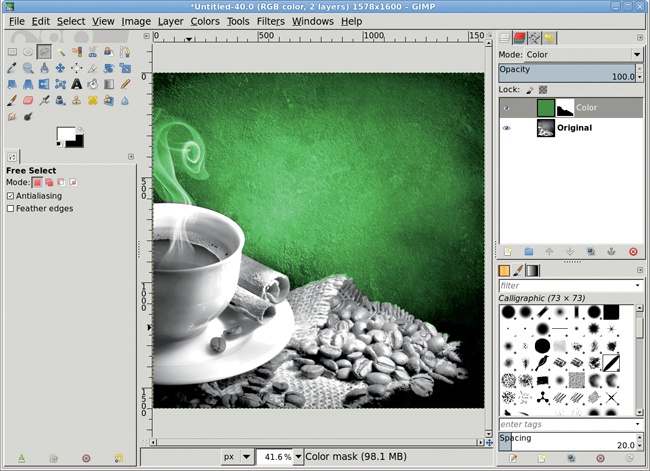
Add a layer mask to the colored layer from the previous example (Layer▸Mask▸Add Layer Mask).
When prompted, click the White (full opacity) radio button.
With the canvas selected, press D to reset the default foreground and background colors. Then drag the foreground color (black) from the toolbox onto the canvas. This fills the mask with black so none of the colored layer is visible.
Make a selection on the canvas, and then drag the background color (white) into the selection. This adds white to the mask inside the selected area, allowing that part of the colored layer to be used in the composite image displayed in the canvas window.
By now you should be familiar with the fundamentals of layers and modes. Here are some tips to keep in mind as you experiment.
Screen and Addition layer modes brighten images. Multiply and Subtract modes darken them. But Overlay mode can do both!
Remember that differencing white from red gives a different result than subtracting white from red. Subtracting one layer from another will clamp the result to black. Imagine that one layer contains a red value of 100 and a second layer contains a red value of 40. Subtracting the first layer from the second would result in –60, but Subtract mode can’t read values below 0 (black). Difference mode takes the absolute value instead.
For a cleaner effect, try using the Soft Light layer mode instead of the Color layer mode to colorize an image.
Layer modes don’t use up memory. Switching among layer modes will not affect GIMP’s overall performance, so go ahead and experiment! (You’ll get plenty of practice with layer modes in the upcoming tutorials.)
Be sure to give layers meaningful names. The default names are never descriptive enough, and it’s easy to get lost when working with a dozen or more layers. Just click the layer name in the Layers dialog and type the new, more descriptive name. Press ENTER when you’re finished making your changes.
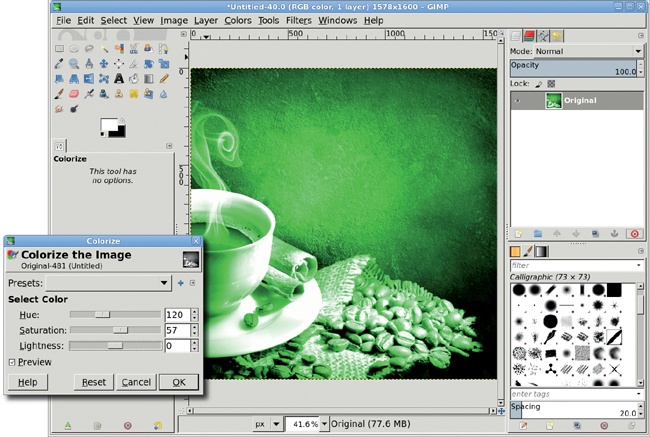
There are many ways to colorize an image. One way is to use the Colorize tool. This is the fastest method, and the results will be nearly as good as if you’d used a layer mode. Open any image and desaturate it (Colors▸Desaturate). Then open the Colorize dialog (Colors▸Colorize) and adjust the Hue, Saturation, and Lightness sliders until the preview shows the desired result. But remember that this changes the pixels in the layer. To keep the pixels desaturated, add a new layer above the desaturated layer, fill the new layer with color, and use a layer mode to blend the color with the desaturated layer.
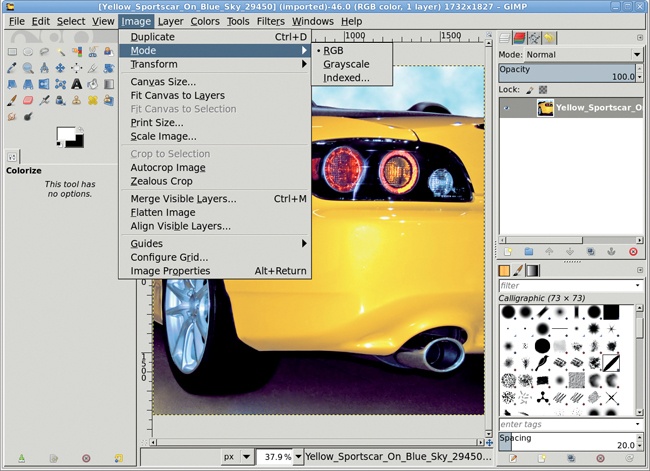
When working with images, GIMP uses one of three color modes: RGB, Grayscale, or Indexed. Each mode represents a particular type of color model. Color is a very complex subject, but I’ll try to summarize it for you.
A color model (the set of colors you can display) is a way of representing colors with a set of numbers that define the colors’ component parts. Different color models can map to different color spaces (defining the colors you see). Imagine a color space graph inside which you could draw a triangle. The triangle would be the model where each vertex is one of the three primary colors: R (red), G (green), or B (blue). According to this model, when R = 100, G = 100, and B = 100, you have dark gray. If you slide the triangle to the right, taking care to stay inside the graph, you still have a color model with three values at 100, but those values define a different color. To produce a particular color, you need both the color model and the color space.
Note
To be honest, color theory is much more complex than this. The mathematics behind it won’t be explored here, but as you’ll see, the general idea is important.
There are many different color models and color spaces. GIMP only works within the sRGB (standard RGB) color space using the RGB, Grayscale, and Indexed color models. The RGB model is used for displaying work on the monitor because it is an additive model in which components are added together to produce a color. The monitor starts with black (0/0/0), and as you increase the values of each component, the screen grows brighter. If the full amount of each component is added, you get white.
Another well-known and popular color model is CMYK, used primarily for printing, which GIMP doesn’t yet directly support. In contrast to RGB, CMYK is a subtractive model. If equal amounts of C, M, Y, and K are applied, you get black. Just as when you print over and over on the same paper, the ink accumulates until you get a black smear.
You can see why converting from one color model to another is a fairly complex task. You need to know a lot more than just the color of the pixel on your display.
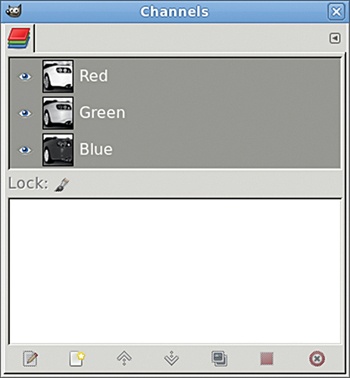
RGB is the most commonly used mode for screen images, and it’ll be used throughout this book. The letters R, G, and B stand for red, green, and blue and represent the three color channels of an RGB image. Every pixel in an image is a composite of the pixels in each of the three color channels. Each channel uses 8 bits and can define a color by a set of integer numbers that range from 0 to 255. This gives you a respectable 16 million total colors to work with.
Working in RGB mode (Image▸Mode▸RGB) means you can also use transparency. Transparency is a measure of how much light can pass through a given pixel. The color of a pixel appearing on the canvas is the result of combining that pixel’s three channels and then mixing the color of the composited pixel with some percentage of the composited pixels beneath it in the layer stack. Transparency is also the opposite of opacity. If a pixel is 30 percent transparent, it’s also 70 percent opaque.
If an RGB image has some transparency, that information is stored in a fourth channel, called an alpha channel. When you’re asked to choose Alpha to Selection or Add Alpha Channel, you’ll be working with the transparency information in an image or layer.
Grayscale mode (Image▸Mode▸Grayscale), an image setting using a single channel with 256 levels of gray (no color), can be useful for some artistic projects or for black-and-white photographs or scans. You can easily desaturate an image by switching to Grayscale mode, but the channel mixer (Colors▸Components▸Channel Mixer) is a better choice for converting color photographs.
Indexed mode (Image▸Mode▸Indexed) is useful when converting an RGB image to a GIF file destined for the Web. The GIF file format only allows for 256 colors in an image. Each image holds a table of index numbers, each one representing a single color. Only one of those index numbers can also be used to specify transparency. For example, if the index number specifying blue is also set to specify transparency in a GIF file, when a program displays the image, it’ll display transparency instead of displaying blue. Indexed formats like GIF have only two levels of transparency: on and off. When using Indexed mode, there’s no way to specify that a pixel should be semi-transparent.
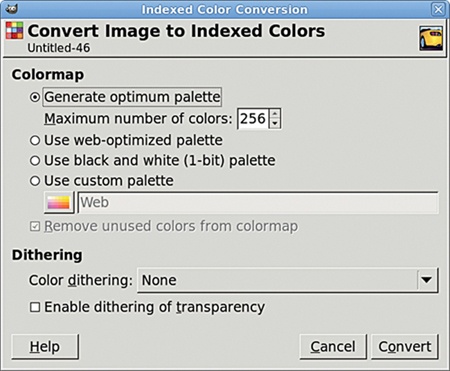
Changing from RGB mode to Indexed mode allows you to choose from one of several methods of dithering, a way to group similar colors into a single one, thus reducing the total number of colors to less than or equal to 256 (the maximum number of colors allowed in a GIF file). Dithering is required in conversion from RGB mode to Indexed mode because RGB images can have up to 16 million colors, while Indexed images can’t have more than 256 colors. The colors in the image can also be mapped to a particular color palette. Both the color palette and method of dithering are selected in the Indexed Color Conversion dialog, which opens when you choose Image▸Mode▸Indexed.
The GIF format uses a single pixel for transparency, making it difficult to blend round edges next to transparent areas with anything that might be behind them. The GIF format doesn’t support alpha blending, a technique for mixing pixels along edges that requires multiple levels of transparency for individual pixels. In a GIF file, a pixel is either transparent or it isn’t.
A good alternative to the GIF format is the PNG format, which supports multiple levels of transparency for individual pixels, comes with fewer licensing restrictions, and is also supported by GIMP. For all these reasons, GIF files are quickly being replaced by PNG files. I recommend converting Indexed images to RGB and saving them as PNG files.
While many web designers are migrating from GIF to PNG files, older versions of Internet Explorer (IE) still do not properly display PNG files that contain varying levels of transparency. GIMP can correctly save an RGB image with multiple levels of transparency (areas that are semi-transparent and intended to blend with whatever background the image is positioned over). The issue is that older versions of Internet Explorer interpret anything other than complete transparency incorrectly and display such images with a solid color instead. This problem has been corrected in more recent versions of IE.
Want to make the most of your GIMP experience? Master the art of effectively creating selections. Nothing is more important. The perfect selection can meld one image with another or map one image onto another. Or turn day into night. There’s not much you can do with an image editor without making selections, and this section focuses on learning how to select as accurately and efficiently as possible.
All GIMP selections are outlined by a set of moving dashes, known as marching ants. You can set the speed of the ants by choosing Edit▸Preferences from the image window menu and clicking the Image Windows entry. If you want to toggle the visibility of selections within a specific image window, choose View▸Show Selection.
GIMP offers nine different tools for creating selections: Rectangle Select, Ellipse Select, Free Select, Fuzzy Select, Select by Color, Scissors, Foreground Select, Quick Mask, and Paths. Paths are vector outlines that can be converted to selections. Alternatively, selections can also be turned into Paths. Both options can be found in the Paths dialog. Quick Mask allows you to paint in the image window with a colored mask while it’s enabled, and then convert the mask to a selection when it’s turned off. Quick Masks will be covered in more detail later in this section.
The Rectangle Select and Ellipse Select tools include interactive editing features. Click and drag within the image window using either tool. Notice that the selection is outlined with a bounding box. Along the edges of this box are hot spots that allow resizing of it, which also resizes the selection. Click and drag inside the bounding box to move the selection. To remove the bounding box, hit ENTER or just click once inside the selection. To get the bounding box back, click once inside the selection.
Any selection can be edited with these tools, but using them converts the original selection, such as a free selection, into a rectangular or elliptical selection.
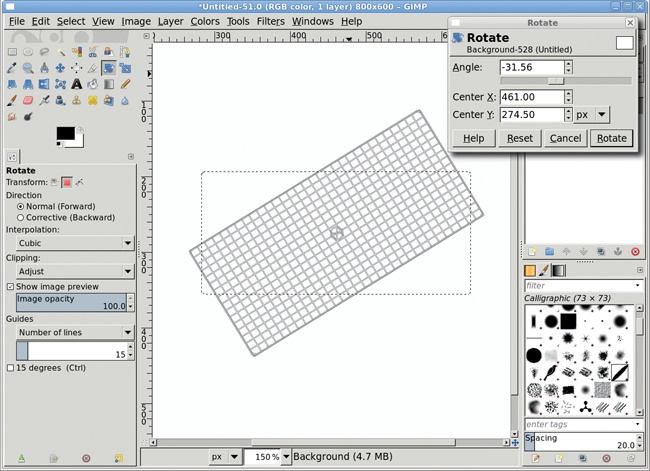
Selections can also be edited using any of the transform tools (Rotate, Scale, Shear, Perspective, Flip, and Cage). After creating a selection, choose a transform tool. Transforms can be applied to layers, selections, or paths. In the Tool Options dialog, click the Selection box to apply the transform to the selection.
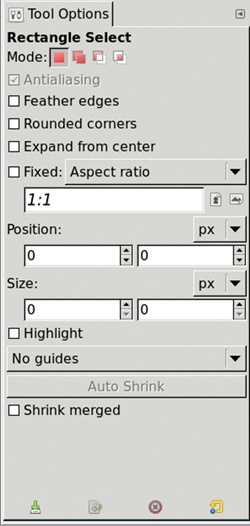
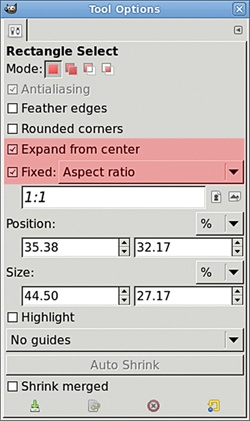
All selection tools can be configured using the Tool Options dialog. The Rectangle Select and Ellipse Select tools can be constrained in several ways from this dialog. A selection constraint defines the shape and size of a selection. Both the Rectangle Select and Ellipse Select tools have an Expand from center option. An unconstrained selection will anchor a corner at the point of the first mouse click. The corner that’s anchored depends on the direction in which the selection is dragged. Set Expand from center in the Tool Options dialog to anchor the selection’s center to the initial mouse-click point.
Fixed is the other constraint option for these two selection tools. It offers four ways to constrain the selection: Aspect Ratio, Width, Height, and Size. Choosing any of these will change the input field just below the options menu to allow setting appropriate values to which the selection will be constrained. For example, selecting Size allows the entry of a width-by-height value. Once this is configured, click in the image window to create a selection of that exact size. The selection cannot be edited until the Fixed option is disabled.
Tool Options constraints aren’t the only way to limit selection size and shape. Guides and layer boundaries can also serve as constraint tools.
Guides. A guide is a horizontal or vertical line that doesn’t show up in your final image but can be used to align project elements such as layers and selections. You can drag out guides from the rulers, but you can only position them imprecisely that way. If you need to position guides at absolute pixel offsets (as you’ll do in several of this book’s tutorials), use one of the options available in the Image▸Guides menu.
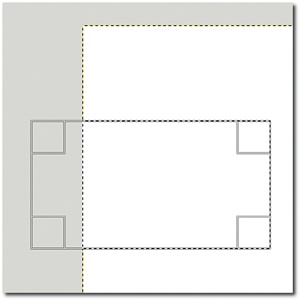
Layer Boundaries. Layer boundaries are indicated by yellow-and-black dashed lines. When a layer is selected, nothing can be drawn beyond its layer boundary. You can easily select a layer’s corner: start inside the image window and drag through the corner you want to select and beyond the layer boundary. Only the portion of the selection inside the layer boundary will be selected.
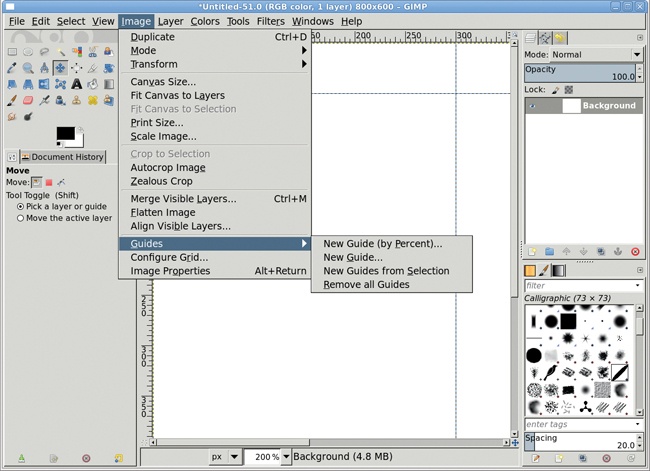
Pull horizontal guides from the top ruler or pull vertical guides from the left ruler. Use the Move tool to drag them out of the window one at a time or choose Image▸Guides▸Remove all Guides to remove all guides at once. The Image▸Guides menu allows you to add guides by percent (New Guide (by Percent)) or by pixel offsets (New Guide). You can also wrap guides around an existing selection (New Guides from Selection).
You can also change the behavior of GIMP’s selection tools by holding down various keyboard keys. These keys are known as keyboard modifiers, because they modify the behavior of the active tool. If a keyboard modifier is pressed when you click and drag on the canvas to create a selection, the modifier affects the selection constraint.
Pressing the SHIFT key after the mouse click and holding it down while dragging, when using the Rectangle Select or Ellipse Select tool, constrains the selection so that the height and the width are always equal. This means rectangular selections are squares and elliptical selections are circles. But this is only true if you release the mouse button before you release the keyboard modifier. If you release the SHIFT key first, the constraint is removed.
As mentioned previously, an unconstrained selection will anchor its left side at the point of the first mouse click. To anchor from the center of the selection, click first, press the CTRL key, and then drag the selection. As with the SHIFT key, the mouse button must be released first to maintain the constraint.
Using keyboard modifiers with selections is an advanced technique not well suited to tutorials. Therefore, this book usually references Tool Options settings when configuring selection tools.
While selection constraints set the size and shape of a selection, selection modes combine two or more selections, regardless of the constraints applied to each. It’s often necessary to make several selections and then combine them in different ways. Such merged selections are useful, for example, when selecting unusually shaped objects in a photograph or when outlining a shape before filling it with a color or pattern.
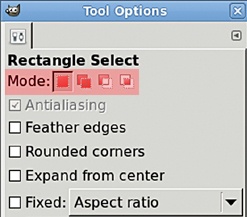
To combine selections, use the mode buttons in the selection tools’ Tool Options dialogs. In order from left to right, Replace mode creates a new selection that replaces any existing selections, Add mode adds the new selection to the existing one, Subtract mode subtracts from the existing selection wherever the new selection overlaps it, and Intersect mode creates a selection only where the new and existing selections overlap. If there’s no existing selection, Replace and Add modes simply create the new selection by itself and Subtract and Intersect modes do nothing.
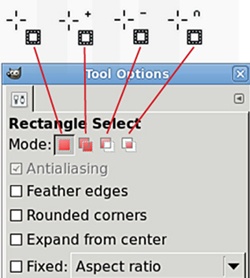
The mode buttons in the Tool Options dialog also map to keyboard modifiers. Holding down the SHIFT key while dragging activates the Add mode, while holding down the CTRL key while dragging activates the Subtract mode. Holding down both keys while dragging activates the Intersect mode. These keyboard modifiers apply to all selection tools except Foreground Select. Note that as long as you hold down these keys, the associated mode button is selected in the Tool Options dialog. If there’s no initial selection, the modifiers have no effect, and the Replace mode button stays active.
When using the various selection tool modes, the cursor changes depending on which mode is active, as shown here. With experience, you will learn to recognize these cursors, but if you’re new to GIMP, you’ll want to keep an eye on the Tool Options dialog when working with selections. When working with keyboard modifiers, it’s very easy to confuse the mode you’re in with the constraint you may (or may not) be trying to apply to a new selection. As with selection constraints, the tutorials in this book will always reference the mode settings in the Tool Options dialog, not the keyboard modifiers.
When working with photographs or any existing digital image, you seldom need a perfectly rectangular or oval selection. Instead, you need to outline odd shapes with odd selections. When these shapes have complicated edges, often your only option is to draw the selection by hand. In GIMP, you can use the Free Select tool for this.
To make a freehand selection, choose the Free Select tool from the toolbox, click the canvas, and drag around the shape you want to select. As you drag, a solid line appears, showing the edge of your selection. When you’re done outlining the selection, hit ENTER. The solid line is replaced by the familiar marching ants.
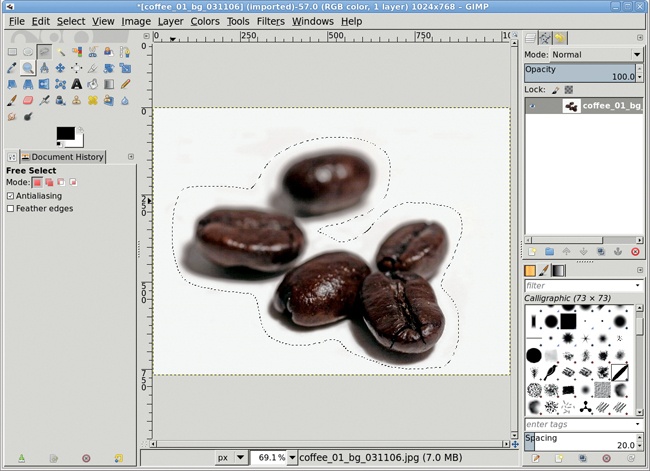
To close a Free Select loop, just drag back to the starting point and look for a small yellow circle. This signifies the two endpoints are overlapping and the selection loop will be closed.
Hand-drawn outlines aren’t always the easiest way to make a selection. Fortunately, GIMP offers a wealth of alternatives. If the portion of the image you want to select is outlined by a solid color or other obvious edges, the toolbox provides the Fuzzy Select, Select by Color, Scissors, and Foreground Select tools.
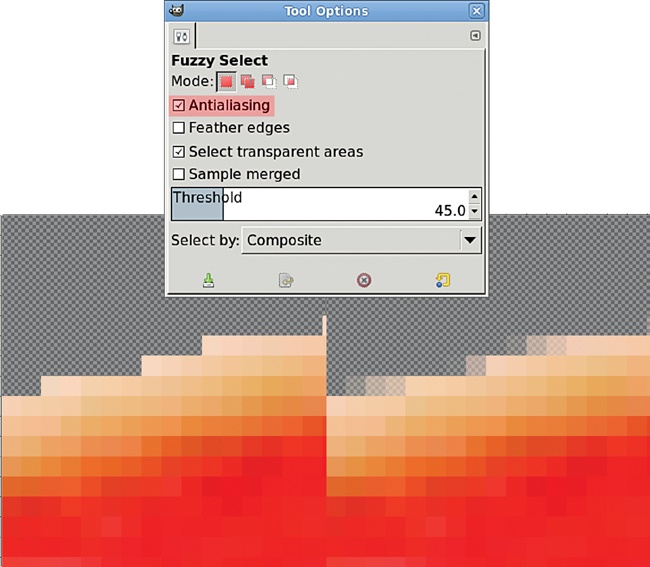
The Fuzzy Select tool works best when a solid color surrounds the object of interest.

The most important option in the Fuzzy Select tool’s Tool Options dialog is the Threshold setting. Lower Threshold values mean fewer pixels are selected. The threshold can be adjusted by moving the mouse while keeping the left mouse button pressed. Keep in mind that when you click the canvas using the Fuzzy Select tool, all pixels within the distance specified (a difference in color) and adjacent to each other are added to the selection. It’s important to remember that the pixels must be adjacent. Notice that the Fuzzy Select tool always creates one large selection. It’ll be oddly shaped, but there’ll be just one. The Select by Color tool, on the other hand, creates many selections.
The Select by Color tool is best at pulling a shape from an image based on groups of pixels that aren’t necessarily adjacent to each other. Its Tool Options dialog also offers a Threshold setting that functions just like the Fuzzy Select tool’s Threshold setting: it selects all pixels within range of the threshold. When using the Select by Color tool, however, the pixels do not have to be adjacent. Therefore, this tool can potentially create thousands of small, independent selections. In this example, because the white background contrasts so much with the beans and their shadows, the Select by Color tool creates only one selection. Using a low Threshold setting and clicking the white background creates a selection nearly identical to the Fuzzy Select’s.
Both the Select by Color and the Fuzzy Select tools can make very precise selections, as long as the contrast between the object of interest and the rest of the image is high. For situations where that isn’t the case, you’re better off using either the Scissors or Foreground Select tools.
Use the Scissors tool when you need to get down and dirty; it finds the edges of an object by noting dramatic color changes near a line you draw with mouse clicks.
To create a selection with the Scissors tool, click the canvas to drop anchor points around the object of interest. The anchor points are also referred to as control points or nodes, and the Scissors tool’s anchor points are similar to those of the Paths tool. As you drop anchors, GIMP draws a solid line connecting each new anchor to the previous anchors. GIMP computes these lines based on changes in color. In this example, the beans and their shadows have distinct color differences, so clicking near the edge of the bean creates an outline around just the bean, excluding its shadow. To close the outline, click the first anchor you dropped. Then click inside the outline to convert the area to a selection.
You can edit the outline before converting it to a selection by clicking any existing anchor point and dragging it to a new location. You can even add new anchor points by clicking a line between any two existing anchor points. Adding new anchors and moving existing anchors lets you tweak your outline before converting it to a selection. This might be necessary if you find that GIMP’s chosen dividing line doesn’t suit your needs.
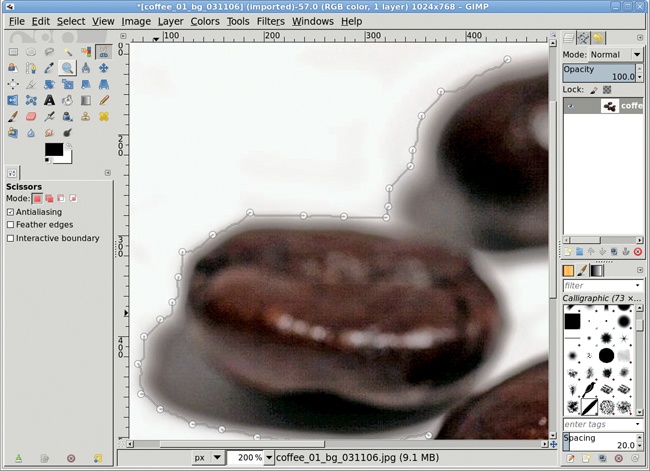
Clicking along the edges of the shadows sets anchor points automatically connected to wavy lines that’ll become the selection when the loop is closed. Scissors could be used to outline the beans (sans shadows) to make a finer-grained selection, though for this particular image it would probably be easier to use Fuzzy Select and increase the Threshold setting.
The Foreground Select tool is more complicated than the tools discussed so far, but with practice it can become the best tool for isolating foreground shapes over cluttered backgrounds. Foreground Select uses a multi-step process to specify an object in an image as the foreground. After you choose the tool from the toolbox, the lasso pointer is displayed in the image window. Drag the lasso around the foreground object to create a rough selection. After outlining the object, press ENTER to complete the first step. By default, the masked area (which is not in the selection) will be highlighted in blue, though this color can be changed in the Tool Options dialog.
The second step is to paint over the foreground object. The current foreground color is used in this step along with a round brush. Hold down the left mouse button and paint near the edges and across any dramatic color changes (dark to light or light to dark) inside the foreground object. The object doesn’t have to be completely painted over. When the mouse button is released, the Foreground Select tool will update the masked area based on the pixels that were painted over and the current masked area.
Repeated brushstrokes can be used to refine the selection. The Tool Options dialog allows setting brush size to select contiguous regions or adjustment of color sensitivity. When editing is complete, press ENTER to convert the unmasked area to a selection.
The Foreground Select tool can be very precise when isolating objects in an image. However, in practice this tool does best at creating rough selections that need further refining with the Quick Mask (described in Using the Quick Mask).

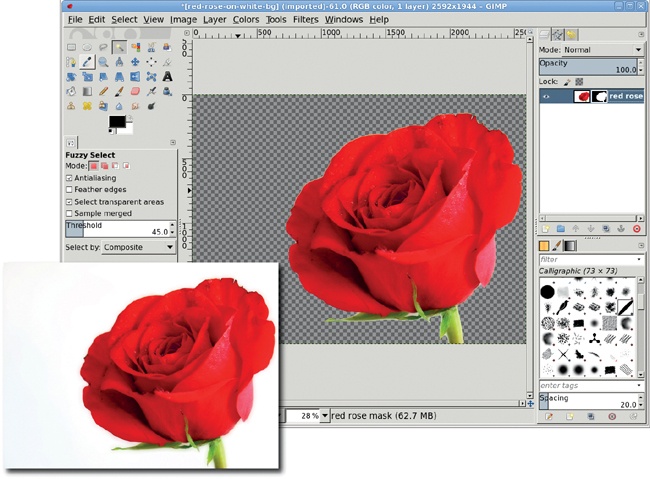
Sometimes a project requires you to isolate an object in an image in order to create a mask of that object. Often this object is not easy to select by itself, but the area around it is.
Look at this rose set against a white background. It’s easy to isolate the white area with the Select by Color or Fuzzy Select tools. Once the selection is made, invert it (Select▸Invert) to create a selection that only includes the flower. Then all you need to do is create a black mask and fill it with white.
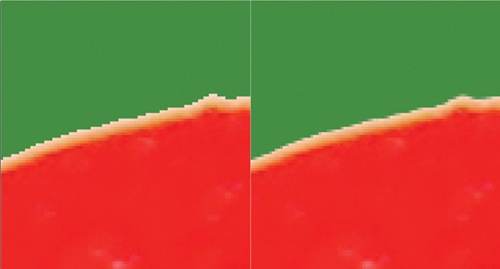
Creating a selection to isolate an object in a photograph sometimes requires a little more work. You may need to feather the selection. When creating a selection, GIMP offers the use of antialiasing. If antialiasing isn’t used, GIMP either includes a pixel or doesn’t include it in the selection; there are no partially selected pixels.
Feathering a selection softens its edge by allowing pixels to be partially selected. This means that some pixels are actually partially transparent, so when you copy and paste the selection, its edge blends more easily with its new surroundings.
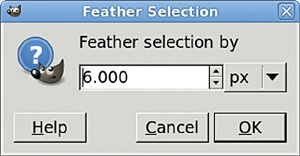
You can use the Feather Selection dialog (Select▸Feather) to feather a selection you’ve created. By default, the feathering depth is set in pixels, but you can choose several other units from the drop-down menu in the dialog. The feathering process straddles this range on either side of the selection, one half outside the selection and the other half inside. The innermost edge of this range is fully opaque, while the outermost edge is fully transparent. As you move from the innermost to the outermost edges of the feathered range, the pixels become increasingly transparent.
The Fuzzy Select tool works well with images like the rose, where the subject appears against a solid background. But there’s an even more intuitive way to make selections of oddly shaped objects, which can be especially handy when the background isn’t solid. Quick Mask allows you to paint over an image to create your selection.
To use Quick Mask, click the Quick Mask button in the lower-left corner of the image window. Doing so gives the image a red tint. Choose any paint tool and any brush. Set the foreground color to white by pressing D and then X while the canvas is selected. Start painting with your chosen paint tool and brush, rubbing away the red in the Quick Mask. Click the Quick Mask button again when you’ve uncovered the area you want to select. Where you remove the Quick Mask, the painted area is converted into a selection. It doesn’t get any easier than that!
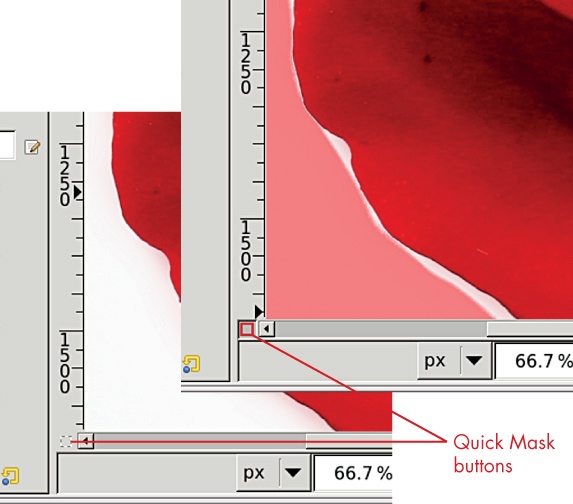
The Quick Mask button is in the lower-left corner of the canvas window. When not in use, the button’s icon is a square selection symbol. When you click the Quick Mask button, the icon becomes a red square, and all areas outside existing selections are tinted red (unless you’ve changed the default mask color).
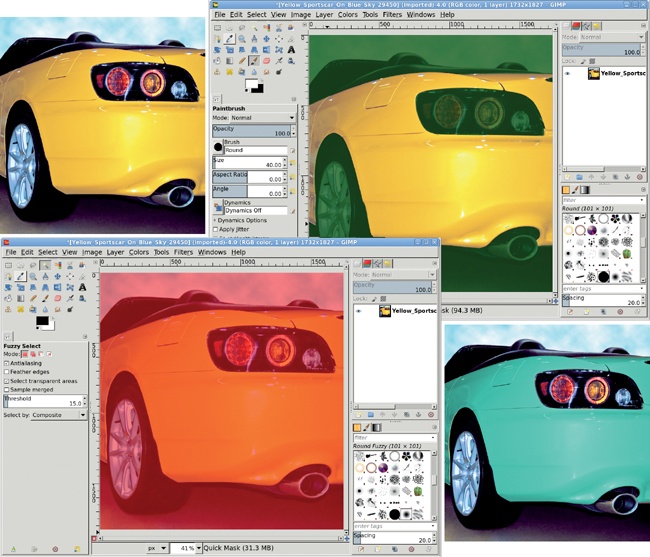
The original yellow car is in the upper left. In the lower left, the Quick Mask is turned on and the image is tinted red. In the upper right, the yellow body of the car has been painted with white and the mask color changed to dark green for better contrast. Clicking the Quick Mask button again converts the painted area into a selection and allows us to change the color of the car’s body.
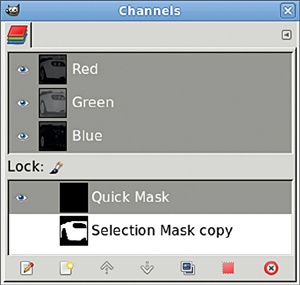
What do you do after you’re done with your selections? You can save a selection to a channel by choosing Select▸Save to Channel, or you can discard the selection. Choosing Select▸None will discard the current selection. Alternatively, you can press CTRL-SHIFT-A.
Saving a selection to a channel allows you to retrieve the selection from the Channels dialog later (Windows▸Dockable Dialogs▸Channels). Simply click the saved channel to make it active, and then click the Channel to Selection button at the bottom of the dialog. We’ll use this process a few times in various tutorials later in this book.
Once you have a good selection, you can do just about anything with it. You can fill it with color by simply dragging the foreground or background colors from the toolbox into the selection. You can use any of the paint tools inside the selection without worrying about painting outside the selection area.
You can also use selections to isolate regions where filters can be applied. For example, you can apply a motion blur to the rose selection without blurring anything that lies beyond it.

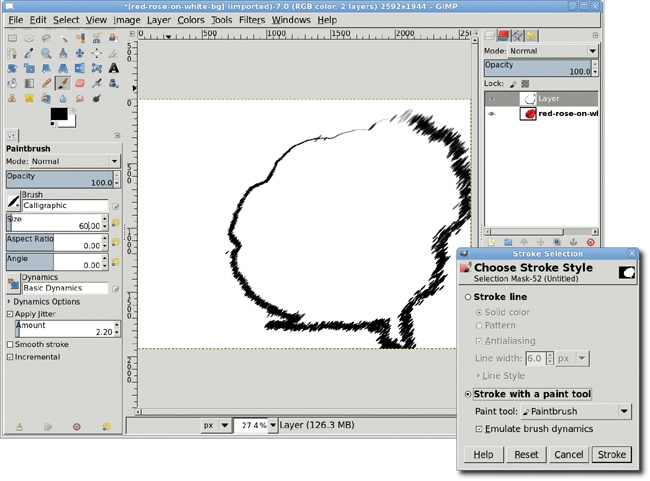
You can also use any paint tool in combination with the foreground color to trace a selection. Tracing a selection in this manner is known as stroking the selection, and the Stroke Selection dialog is available by choosing Edit▸Stroke Selection.
Keep these hints in mind as you practice working with selections:
If you have trouble remembering how the SHIFT and CTRL keyboard modifiers work, remember that it’s easier to use the mode buttons in the selection tools’ Tool Options dialog to specify how you want the new selection to interact with the existing one. You can set the aspect ratio in the same dialog, so you can just forget about the SHIFT and CTRL keys.
You can combine Quick Masks with existing selections. Any existing selections won’t have the red tint when you click the Quick Mask button for the first time. Paint as necessary, and then click the button again to combine the selections.
It’s not uncommon for users to find that they can’t create a new selection, having forgotten that they chose Subtract or Intersect mode in a selection tool’s Tool Options dialog. If this happens to you, just check the Tool Options dialog and make sure the mode is set to Replace. Using the mode buttons sets a selection tool to that mode until you change it manually. That’s one reason why experienced users learn to use the keyboard modifiers. The modifiers only apply for the time it takes to make a new selection.
GIMP is a raster image editor. Translated into plain English, that means it works great on photographs by changing the colors of individual pixels. It wasn’t initially designed for editing lines or geometric shapes as is a dedicated vector-graphics editor (such as Adobe Illustrator and Inkscape). Of course, vector editors don’t do as well dealing with pixels in photographs. But in today’s world, the line between raster image editors and vector editors is blurred, since graphics programs written for one type of editing often offer some level of support for the other. GIMP is no exception.
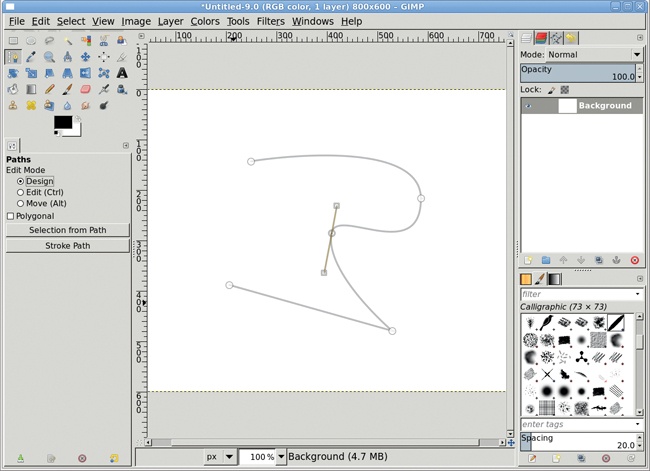
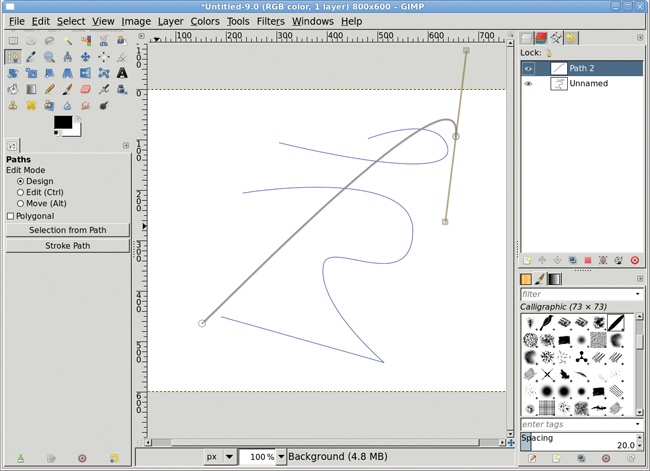
GIMP’s vector editing is handled with paths. A path consists of at least two points separated by a straight or curved line. The points are known as anchors, or sometimes as control points. The lines and their anchors are technically known as Bézier curves in honor of the French engineer who popularized their use in designing cars. The lines between anchors can be curved by dragging handles out from the anchors. Each anchor has two handles, each associated with either the line coming into or out of the anchor.
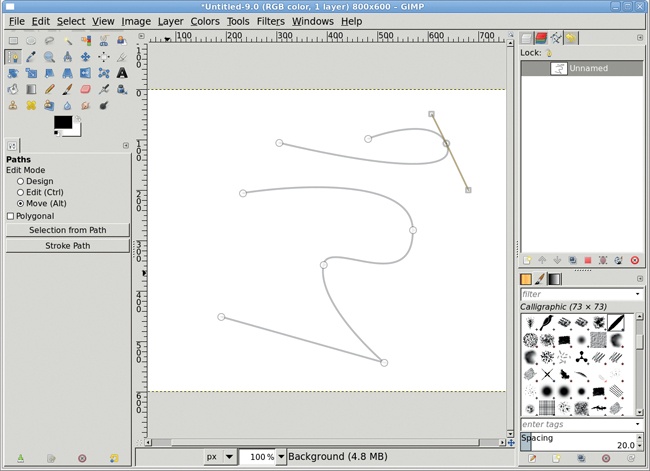
The Paths tool in the toolbox is the primary method of creating paths, though they can also be created by converting a selection to a path. The Tool Options dialog is used to set the editing mode for a path. Design mode is used to drop and position new anchors. The mouse cursor changes in the image window when positioned over an anchor or not. Edit mode allows adding new anchors between two existing anchors, splitting the line between them. Anchors can also be deleted using this mode, by holding down the SHIFT key. Move mode is used to move the entire path with all anchors at the same time.
Paths are grouped in two ways. First, the path exists as a whole, including all of its anchors. To see this for yourself, choose Move in the Paths dialog, click any point not on a line in the path, and then drag the mouse. The entire path will move. Second, all the anchors on each line are connected. Click any line and drag; you’ll see that the connected points move. Text can be converted into a path, but disconnected paths aren’t grouped when this is done. Notice that when you move some paths in an e or a that’s been converted to a path, the internal portions of those letters don’t move.
Paths are created on their own layers in the Paths dialog. Path layers can be given names and reordered just like image layers. However, path layers aren’t associated with specific image layers. A single path layer can be applied to any number of image layers and can contain a single path or multiple, disconnected paths.
The Paths dialog allows an existing path to be edited later. First, choose the Path tool. Then click your desired path layer in the Paths dialog, click the visibility icon to show the path in the image window, and click the path in the image window to start editing. When editing is complete, turn off the visibility of the path layer.
Paths are either open or closed. A closed path connects the last control point to the first. This can only be done in Edit mode. Click the last anchor, and then click the first anchor to close the path.
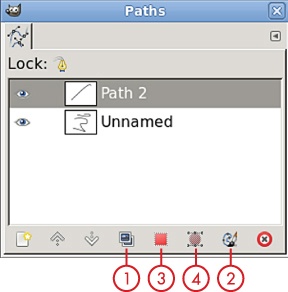
Paths can be converted to selections. Create the path, and then click the Path to Selection button at the bottom of the Paths dialog. All selections are closed, which means when the selection is created, the first and last anchors are connected via the selection even if the path itself is not closed. A selection can also be converted to a path. Create the selection, and then click Selection to Path at the bottom of the Paths dialog, just to the right of the Path to Selection button. One of the hidden GIMP dialogs can be found here. After creating the selection, hold down the SHIFT key and click the Selection to Path button. This opens a dialog of advanced options for converting the selection to a path.
Most transform tools (Rotate, Scale, Shear, Perspective, and Flip—but not Cage) can be applied to paths. After creating a path, turn on its visibility in the Paths layer dialog. Then choose the transform tool from the toolbox. In the Tool Options dialog, there’s a line of Affect icons at the top. Click the Path icon at the end of that line. Click in the image window to open the transform editor and modify the path. Path layers can be linked in the Paths dialog so that transformations apply to all linked path layers, even if the path isn’t visible in the image window.
Note
It is important to note, especially with respect to scaling a path, that transforming paths applies to an entire path layer. If a path is to be scaled up a large amount, zoom out of the image window first, click in it to open the transform editor, and perform that transformation on the path.
Paths are visible but not rendered (that is, drawn or applied) in the image window. They must be stroked or converted to a selection to be applied to the image window. To stroke the path, select a path layer in the Paths dialog. Then either select Edit▸Stroke Path or click the Stroke button at the bottom of the Paths dialog, to the right of the Selection to Path button. The Stroke Path dialog will open. The path can be stroked with a solid line or pattern using a specified width or style, or it can be stroked using the currently active brush and one of the available paint tools.
Paths are useful for creating designs that need to be rendered at different sizes, such as logos or comics. They’re designed to provide scalable shapes within GIMP, where scaling of layers would normally affect the quality of the image.
Paths are an advanced topic and, as such, won’t be covered by the tutorials in this book.
The most common question new GIMP users ask is, “How do I create basic shapes?” In this section you’ll explore two methods: stroking selections and using the Gfig plug-in.
Straight lines are easy. Choose any drawing tool and click once in the canvas to start the line. Hold the SHIFT key down and move the cursor to the end point and click again. To constrain the line to multiples of 7.5 degree angles, hold down the CTRL key with the SHIFT key.
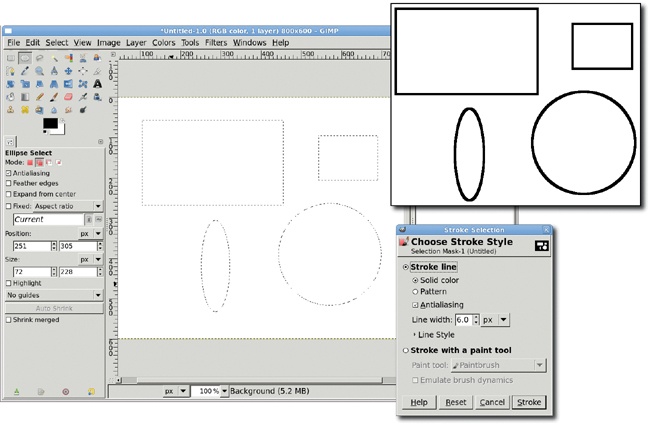
If the shapes you need to draw are relatively simple, your best bet is to stroke selections.
Choose the Rectangle Select tool or the Ellipse Select tool from the toolbox, and then drag to create a selection. Press the SHIFT key as you drag to constrain the selection so its width and height are equal (producing a perfect square or circle), and then release the SHIFT key to create the selection.
Select the Round (101) brush from the Brushes dialog. Choose the Paintbrush tool and set the size to 2.00 in the Tool Options dialog.
Choose Edit▸Stroke Selection and in the Stroke Selection dialog, click the Stroke with a paint tool radio button. Select Paintbrush from the Paint Tool drop-down menu. This gives the selection nice, clean edges.
Click Stroke to stroke the selection.
Triangles require a little special handling.
Configure the image grid (Image▸Configure Grid). For this 800 × 600 image, a grid with spacing of 100 pixels in width by 100 pixels in height is used.
Choose the Paths tool from the toolbox, and then click any three intersections of the grid lines to mark the vertices of the triangle.
In the Tool Options dialog, click the Stroke Path button. This will draw the shape.
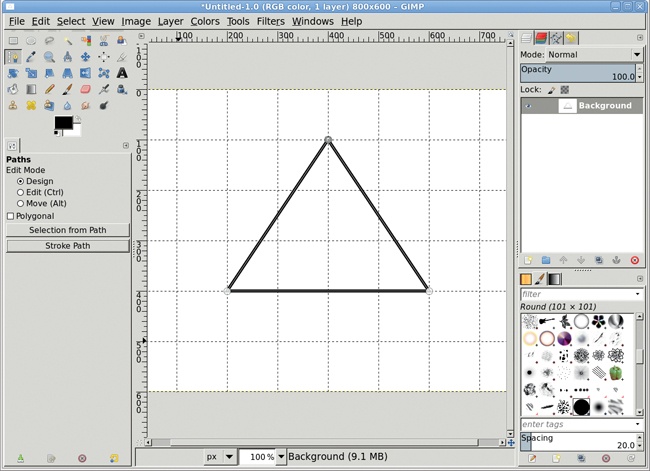
Creating closed irregular shapes can be simple, or it can be complicated, depending on the project. The easy way to create such shapes is to subtract from and add to existing selections. For example, start by creating a rectangular selection. Then hold down the CTRL key to subtract from the existing selection, or hold down the SHIFT key to add to the existing selection. As an alternative, you could also use the selection tool’s Tool Options dialog, clicking the appropriate mode buttons instead.
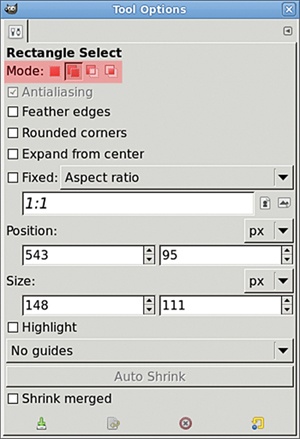
Using the Paths tool to create irregular selections is more difficult than simply adding to and subtracting from selections, but it’s also more accurate. Pull out horizontal and vertical guides that intersect where the vertices of your irregular shape should be, and then use the Paths tool to outline the shape. Stroke the path or convert it to a selection, and then fill as desired. This method works well when you need to isolate multiple buildings in a photo.
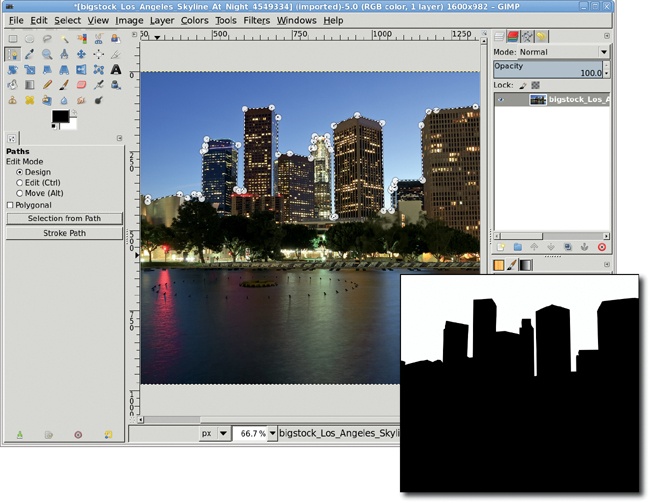
Gfig is a primitive vector-drawing tool that offers a set of predefined shapes, including stars, spirals, curves, polygons, and arcs. For simple shapes like squares and triangles, it’s faster to use the techniques we discussed earlier in this section, but Gfig can come in handy when you need to create something more complex. Go ahead and experiment a bit with it:
Add a new layer to the image (Layer▸New Layer).
Open Gfig (Filters▸Render▸Gfig).
Click the Create Star button on the button bar. Change the Sides setting to 5 sides.
Click the middle of the preview and drag toward the lower-right corner of the preview. The star will be created using the brush that’s currently selected.
If you need to move the star once it’s been created, click the Move an Object button (three buttons to the right of the star), and then drag the star around the preview.
Modify the brush and fill options as necessary, and then click Close to render your shape on the canvas.
Before you render them on the canvas, the objects you create in Gfig are in vector format and have a stacking order. You can use Gfig to change this order, or you can render each shape on a new layer and change the stacking order later by moving around the layers in the Layers dialog.
You can use Gfig to edit shapes you’ve rendered to layers, even after you’ve applied effects to those layers. Those effects will be lost when you use Gfig to edit the shapes, however, so plan your workflow carefully.
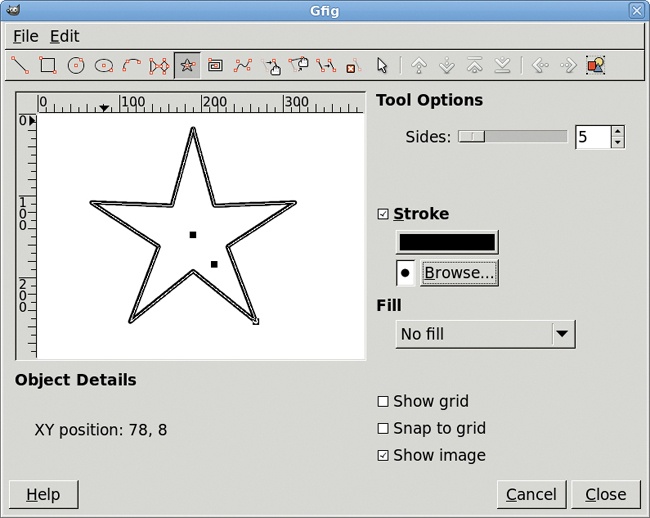
The problem with Gfig is that it’s a very simple vector editor. A regular polygon created with Gfig, for example, doesn’t have editable points at its vertices. You can only move the center point or resize the polygon. And brush selection is limited to selection of the brush, not its size, opacity, or other settings found in other paint tool options. Finally, Gfig isn’t the most stable GIMP plug-in either. It has a tendency to crash if you try to create a lot of objects or edit objects repeatedly.
If you need real vector-editing capabilities, you’re better off using a tool like Inkscape (http://www.inkscape.org/). Just create the shape and then export it as a PNG or SVG for use in your GIMP project.
Here are a few words of wisdom you should take away from this section.
By default, selections want to attach to guides! As you’ve seen, this simplifies tasks like outlining a city skyline. But you can disable this behavior if necessary; just toggle View▸Snap to Guides.
Want to rotate a shape? Use the Rotate tool on a selection or path. Alternatively you can rotate the layer after the shape is rendered.
Draw shapes in new, transparent layers instead of drawing over existing layer content. It’s always easier to delete a layer later than to recover pixels that have been overwritten. Be sure the Lock Alpha Channel option is turned off for the transparent layer. If you don’t, you won’t be able to draw over the transparent parts of the image.
Stroking with a brush that’s 1 pixel wide and the default foreground color (black) won’t produce a solid black outline because of the antialiasing of the brushstroke. Just repeat the process once or twice to get a darker line. Larger brushes don’t have this problem. Or, create a selection like a square or circle, fill it with a color, shrink the selection (Select▸Shrink) by 1 pixel, and then delete it. This will produce a very clean 1-pixel-wide outline of the shape.
Don’t forget that you can fill a selection with a pattern or solid color instead of stroking it. Use the Bucket Fill tool for patterns, or drag the foreground or background color from the toolbox into the selection to fill the selection with a solid color.
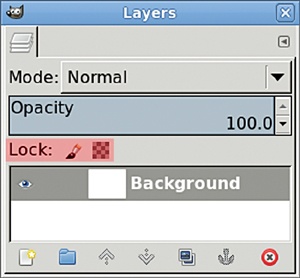
Patterns are image files you can use to fill selections or layers. They are most commonly used to create textures for three-dimensional objects like castle walls or a scaly creature’s skin. Gradients are formed when two or more colors blend together. You can use gradients for a variety of purposes, from simulating tubes, pipes, and poles to applying wave distortions to cloth or water.
GIMP provides a wide range of stock patterns and gradients. Most of the stock patterns are suitable for Web images but are probably too small for larger print projects. The stock gradients are plentiful, and you’ll use several of them in tutorials later in this book.
This section is an introduction to creating your own patterns and gradients. You won’t be creating any for this book’s tutorials, but learning how to do so is useful for when you strike out on your own.
Patterns, like brushes, can be made from any image. A pattern that’s designed correctly is tileable—many copies of the pattern blend together seamlessly. Tiled patterns are often used as background images for web pages and textures for three-dimensional projects.
You can access the Patterns dialog and see all the patterns available to you by choosing Windows▸Dockable Dialogs▸Patterns. Any image can be saved as a pattern, and a pattern can be any size. Patterns can be saved in any file format. The GIMP-specific extension is .pat, but there’s no advantage to using one file format over another.
If you want to access a pattern file through the Patterns dialog, it must be saved in one of GIMP’s pattern directories (choose Edit▸Preferences and select Folders▸Patterns on the left).
If a pattern is large, the Patterns dialog will only display a thumbnail of the image. Click the pattern and hold down the left mouse button to view it at full size.
New GIMP users often underestimate the usefulness of patterns. And to be honest, the built-in patterns are a little boring. But it isn’t difficult to create reusable patterns that simulate the textures of concrete and cloth. It just takes a little imagination.
Note
Patterns don’t have to come from the Patterns dialog. GIMP’s render filters (Filter▸Render) also make very good patterns, and you can save the resulting images as pattern files for use in project after project. The tutorials in this book often ask you to generate patterns on the fly, but it’s good to know there are so many options.
One of the easiest textures to create is a simple concrete background. Such textures can be used to turn a basic box into a cement block or to turn any flat surface into a sidewalk or road. Now you can walk through the steps:
Open a new white canvas window by choosing File▸New from the image window menu.
Add a transparent layer (Layer▸New Layer) and use the Plasma filter to fill it with colored clouds (Filters▸Render▸Clouds▸Plasma). The default settings should be sufficient for this texture. Click OK to apply the filter.
Choose Filters▸Noise▸RGB Noise from the canvas menu to use the RGB Noise filter to apply some noise to this image. Make sure the Correlated noise and Independent RGB checkboxes are not checked. Set the Red, Green, and Blue sliders to 0.20 to apply a visible but not overwhelming amount of noise to the layer. Click OK to apply the filter.
Desaturate the layer (Colors▸Desaturate) using any of the available options. This removes the color content and makes the image look more like concrete. Click OK.
To give the texture some depth, open the Bump Map filter (Filters▸Map▸Bump Map). Keep an eye on the preview window as you play with the Azimuth, Elevation, and Depth values. Pan around the preview to see how each adjustment affects the image. Choosing Linear, Spherical, or Sinusoidal from the Map type drop-down menu also alters the effect, but this setting is less important than the others. Click OK to apply the filter to the desaturated layer.
While the result is a fairly realistic concrete texture, adjustments to the contrast and brightness (Colors▸Brightness-Contrast) can soften the effect and give you a jumping-off point for even more complex textures like skin.
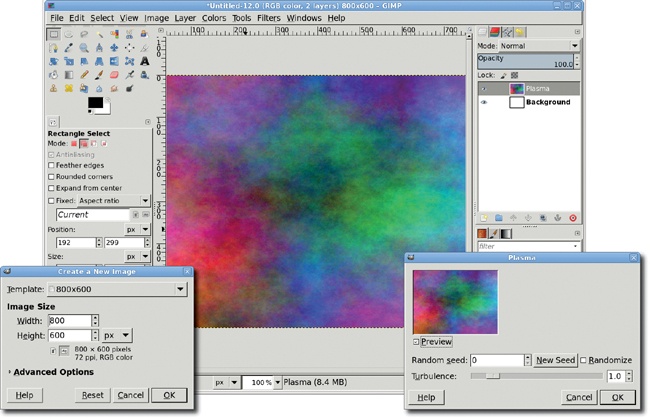
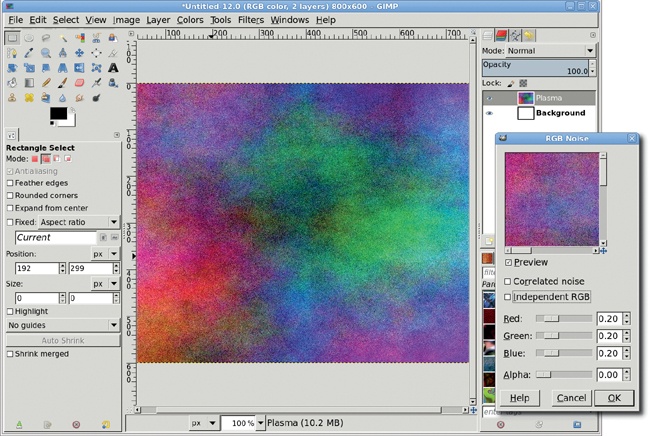
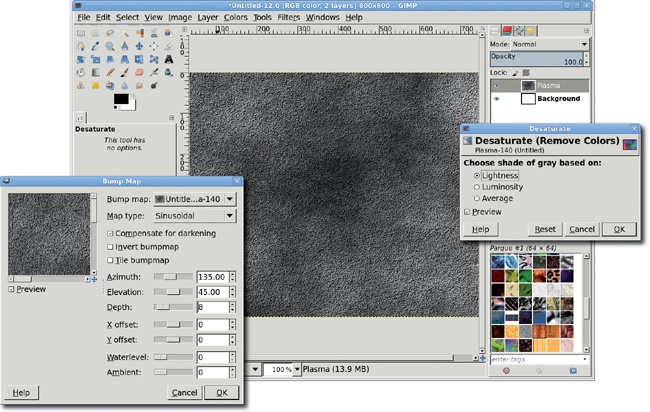
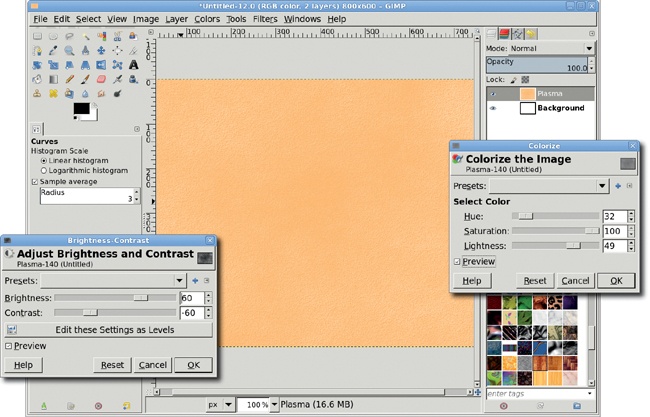
Creating a cloth texture starts with noise. Start with a new white canvas window of 300 × 300 pixels. Because you’ll soon be rotating one of the layers, a square image works best.
Open the RGB Noise filter again (Filters▸Noise▸RGB Noise), but this time increase the Red, Green, and Blue values to 0.90. Click OK to apply this filter.
Open the Motion Blur filter (Filters▸Blur▸Motion Blur). Set the Blur Type to Linear, the Length to 130 pixels or more, and the Angle to 0 degrees. Click OK to apply this filter layer.
Repeat the previous step, this time setting the Angle to 180 degrees. This cleans up the edges of the layer.
Duplicate the Background layer (Layer▸Duplicate Layer). The duplicate layer will become the new active layer.
In the Layers dialog (Windows▸Dockable Dialogs▸Layers) change the duplicate layer’s mode to Multiply. This composites the two layers in such a way that the image appears darker.
Rotate the duplicate layer by 90 degrees (Layer▸Transform▸Rotate 90° clockwise).
You can now flatten the image (Image▸Flatten Image) and colorize it as you like.

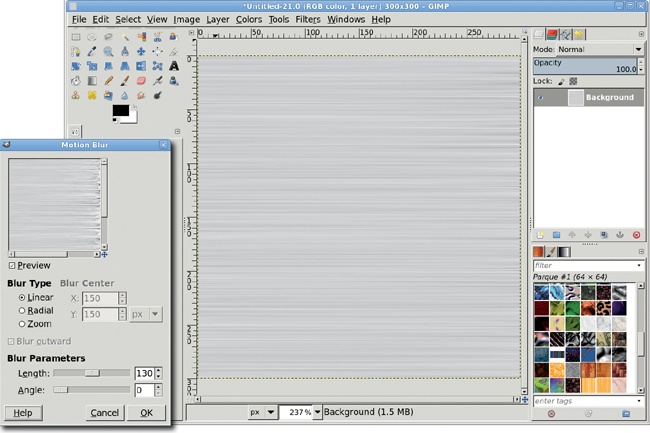
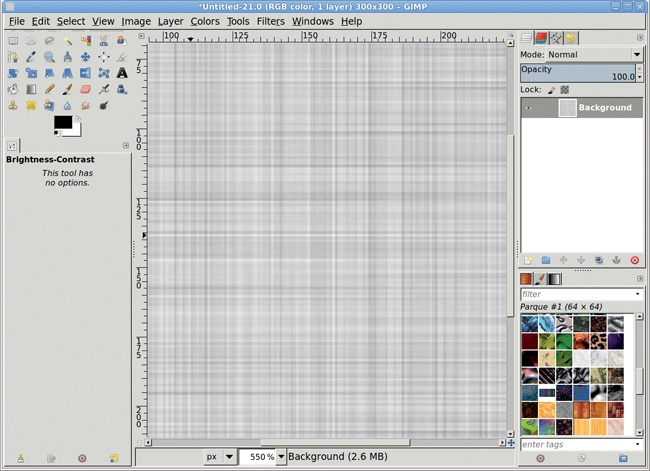
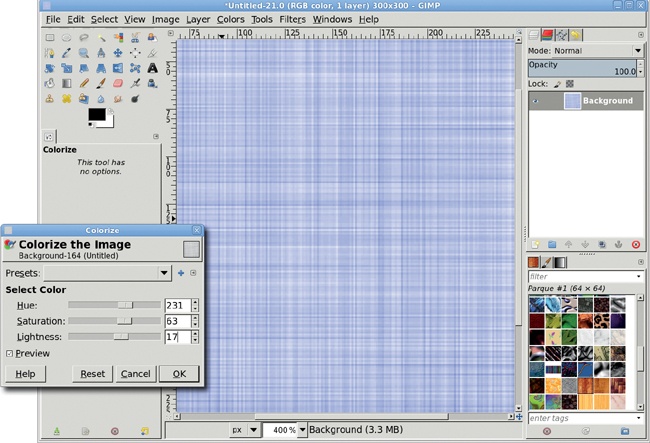
To create a tileable pattern, offset an image by one-half of its width and height by choosing Layer▸Transform▸Offset and clicking the Offset by x/2, y/2 button. Click Offset. Use the Clone tool to patch the seams as shown here. To use the Clone tool, first press the CTRL key, and then click the source location (which can be in any layer). The Clone tool works by taking a source copy of the image at one point (where you’ve clicked while pressing CTRL) and copying it to some other destination location in the image. The copy is in the shape of the active brush. When you click a destination location, hold down the left mouse button, and drag, the source is copied to the destination. Additionally, the angle and distance between the destination and source remain constant, which means the source location changes as you drag. Take a moment to play with the Clone tool, as it’s one of the most powerful GIMP tools.
You don’t have to use the Clone tool to create tileable patterns. The Tileable Blur filter (Filters▸Blur▸Tileable Blur) and the Make Seamless filter (Filters▸Map▸Make Seamless) work more quickly but give you less precise results.
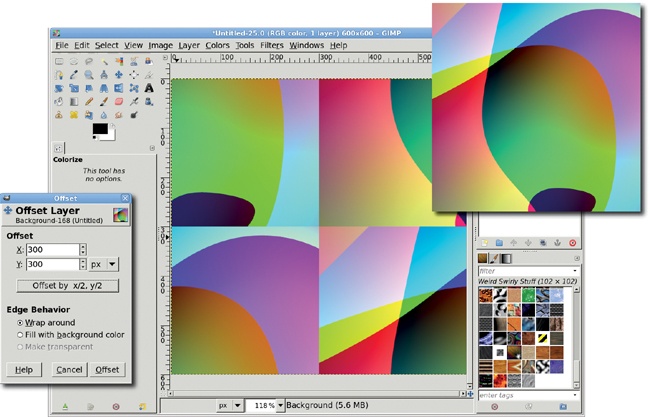
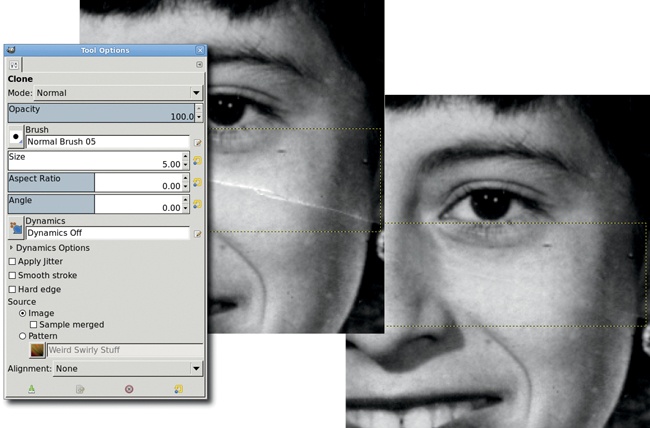
Gradient files are different from pattern and brush files in that they don’t contain image data. Instead, they’re text files that describe how color should be applied across a range of pixels. The gradient preview in the Gradients dialog (Windows▸Dockable Dialogs▸Gradients) shows you how the colors would be blended if you chose a Linear Shape, but the preview shows only the definition of the gradient. You can use the Blend tool to apply the gradient in many different ways.
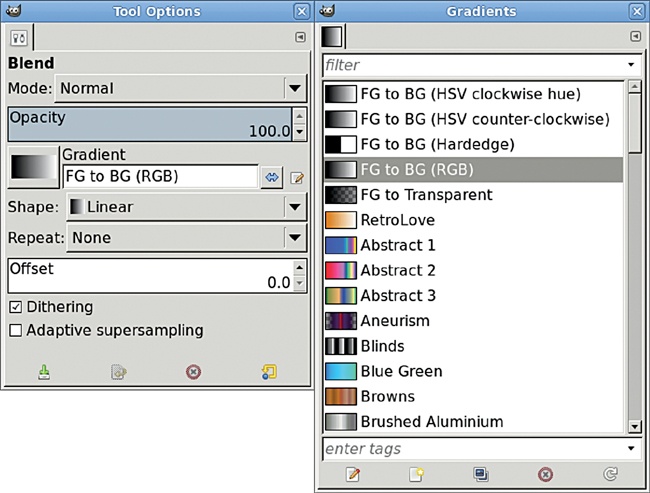
The Blend tool’s Tool Options dialog includes an important feature: the Shape setting. The Shape drop-down menu allows you to define the direction and shape the gradient takes when applied to a layer, mask, or selection. You’ll use Linear, Bi-linear, and Radial in this book’s tutorials. Choosing Linear applies a smooth gradient that starts where you press the left mouse button and begin dragging and ends where you release the mouse button. The Bi-linear effect is similar, but it resembles applying two brushes at the same time, each of which moves in the opposite direction. Choosing Radial applies the color to the left side of the gradient at the start point and radiates the color out to the point where you stop dragging and release the mouse button.
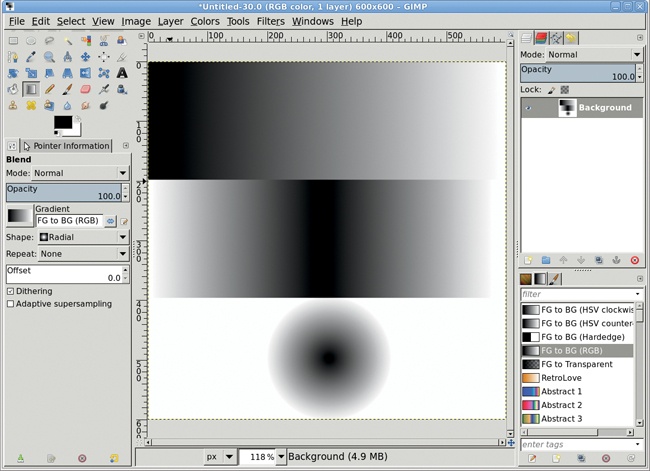
A gradient is a color transition. Most of the gradients in this book are made up of smooth, gradual color transitions. But the transition doesn’t have to be slow and smooth. It can be abrupt. Consider the Radial Eyeball Blue gradient. When you choose Linear from the Shape drop-down menu and apply this gradient, the effect is an abrupt change from white to blue to black. But when you choose Radial and apply the same gradient, the result looks like an eyeball.
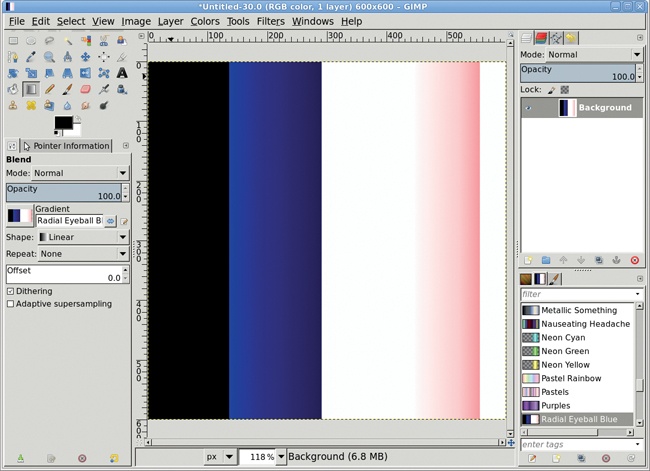
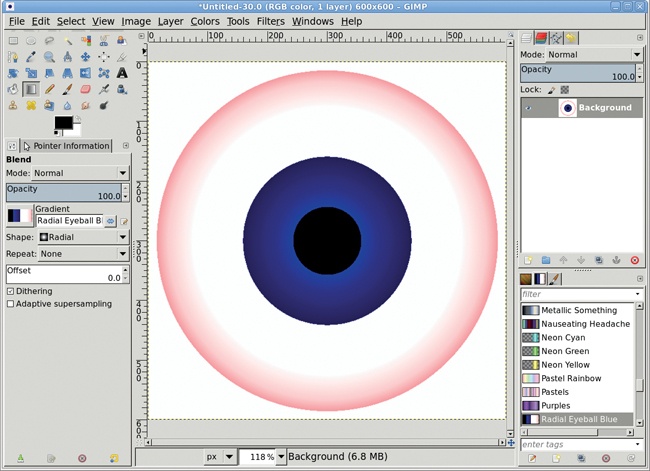
Experimenting is the only way you’ll discover all of the ways your projects can benefit from gradients. You can choose Radial from the Shape drop-down menu and use the FG to BG (RGB) gradient to create balls or spheres. Choosing Linear and using the Blinds or Crown Molding gradients can simulate undulating waves when used in layers below a color layer.
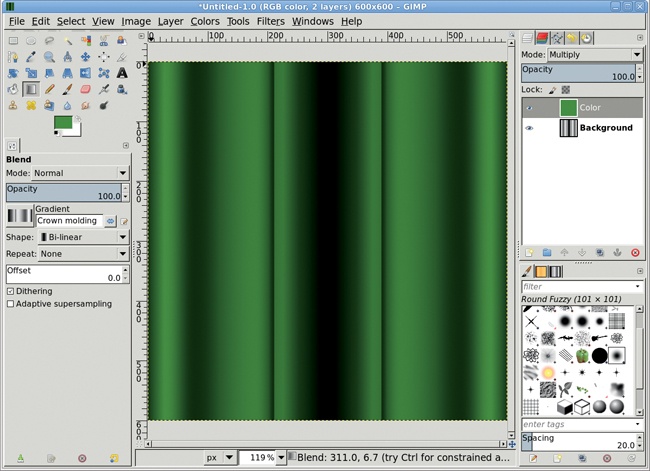
So why use gradients? In this book we use them primarily for two reasons: to create layer masks and to apply textures to other layers. Applying a gradient to a layer mask can create a smooth transition from the image in one layer to the image in the layer below it. After applying a gradient in a layer by itself, you can also use one of the layer modes to blend it with another layer. This latter method is used when creating wave patterns, though you can also use it to blend colors in a pattern.
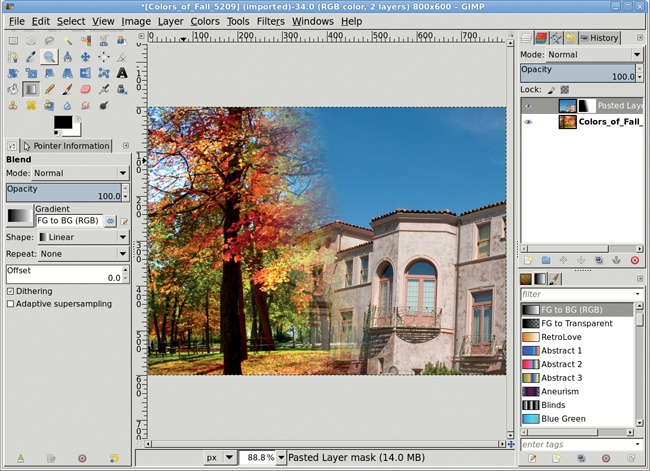
While you won’t need to do so for any of the tutorials in this book, it’s possible to create your own gradients. At the bottom of the Gradients dialog is a set of icons. Click the second icon from the left to open the Gradient editor and create a new gradient.
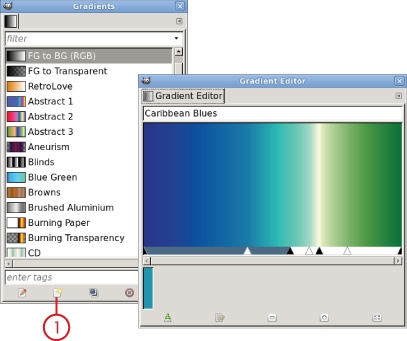
Below the preview window in the Gradient Editor window is a set of triangles. These are handles. There are two black handles on either end of a segment and a white handle between them. Initially there’s only one segment in the preview. Right-click this segment to open the Gradient Editor menu. In this menu you can set the colors for each side of a segment (Right and Left Endpoint colors), add new segments (Split and Replicate menu options), and adjust the way color flows across the segment (Blending menu options).
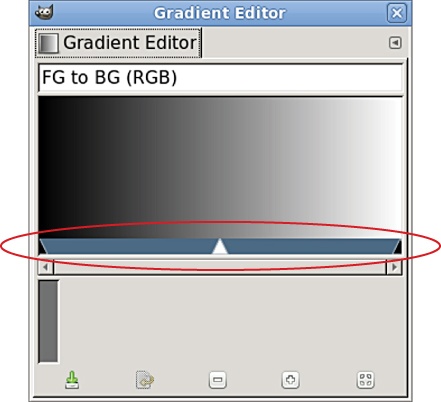
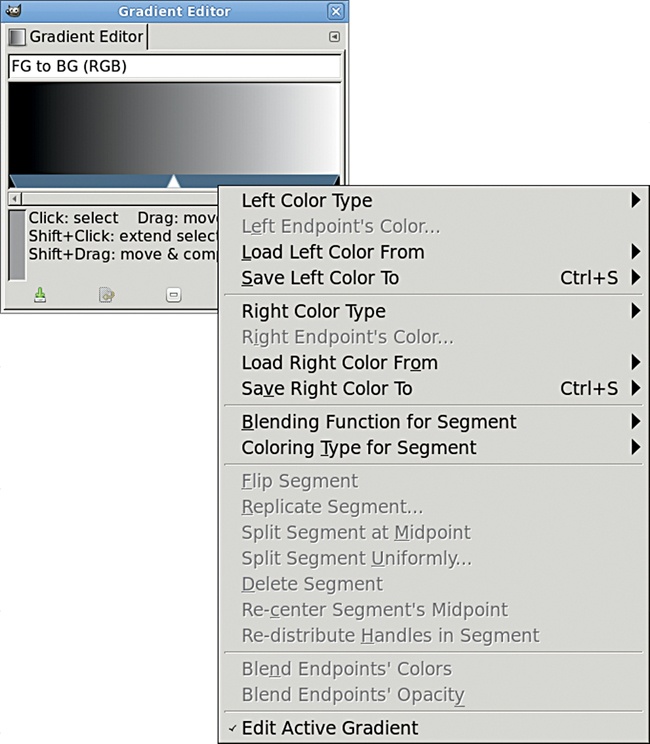
Now you can play around with creating gradients for your own projects. Just remember that you can create as many gradients as you like and then use the Gradients dialog to delete them when you don’t need them anymore. Go ahead and experiment. You’ve got nothing to lose!
Think you’ve got a handle on patterns and gradients? Here are some tips:
You can use patterns to stroke selections. Make a selection, choose Edit▸Stroke Selection, and then choose the pattern option in the Stroke Selection dialog.
Besides using patterns to fill your layers and selections, you can use them as the source image for a bump map. Fill one layer with the pattern, and then apply the Bump Map filter (Filters▸Map▸Bump Map) to another layer by using the first layer as the bump map image.
Sometimes a pattern is very small when compared to a canvas. Applying the texture to the canvas gives you several tiled versions of the pattern. Want to scale a pattern to fit the canvas without tiling it over an entire layer? Make a small selection, fill it with the pattern, copy and paste the selection as a new layer, and then scale the layer to the size of the image.
You can use the Bucket Fill tool’s modes to blend patterns with existing layer content. But an even better, nondestructive method is to fill a layer directly above the target layer with the pattern, and then set the layer blend mode accordingly. (See 1.2 Layers and Modes to learn more.)
As you’ll see in later chapters when making balls and buttons, gradients are often used to simulate lighting because they can represent gradual changes from dark to light. However, the appearance of a smooth gradient can be lost if you save it in the wrong file format. GIF files, for example, are not well suited for images with gradients, because the GIF format reduces the number of colors and can cause banding (streaks of colors). If you’re saving your gradient image for use on the Web, try using the JPEG format instead and use little to no compression.
When using gradients to create spheres, always have the gradient flow from a lighter color on the left to a darker one on the right. In the Tool Options dialog for the Blend tool, check to make sure the Gradient option shows it this way. If this isn’t the case, try clicking the Reverse button just to the right of the Gradient option.
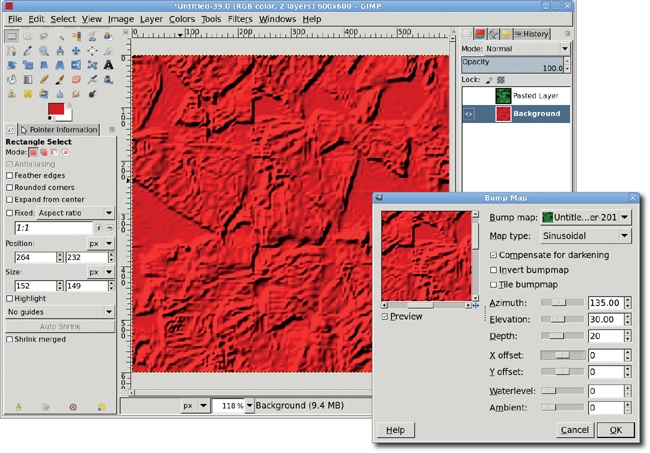
The first edition of this book often used multiple layers to create multi-line offset text. This technique was required because GIMP’s text-editing capabilities were somewhat limited. While the usual font selection, size, and even letter spacing were available, it wasn’t possible to have a single layer with text containing different font settings.
All that changes with GIMP 2.8. An on-canvas editing box allows you to set font characteristics for individual text letters, words, and phrases, including positioning relative to other text in the same layer. This means a single layer can now hold an entire text project, a process you’ll be able to try for yourself in 3.5 Simple Logos.
Click the Text tool in the toolbox, and then click and drag in the canvas to open an editing box. This box, also called a bounding box or text frame, will stretch to fit any text you type. But it can also have its size fixed by setting the Box value in the Tool Options dialog to Fixed. A fixed width can be used to wrap paragraphs without newlines within the bounds of a layer. The default setting, Dynamic, allows the box to grow to fit text added to the frame.
Above the editing box is the Style Editor. This has two rows of options used to change font characteristics of any text selected in the editing box. This includes the font, font size, baseline, and kerning features. See how this works with the following example.
Open a new canvas, using the default size. Choose the Text tool from the toolbox.
Click and drag in the canvas to create the editing box and open the Style Editor.
Type the phrase GIMP is cool in the editing box. Select the word GIMP.
In the far-left field in the first row of the Style Editor, type a few letters of the name of any font known to exist on your system, such as Sans Serif or Times. A list of matching font names is displayed below this field. Select a font from this list.
In field to the right of this, type a number (or use the mouse scroll wheel) to change the font size.
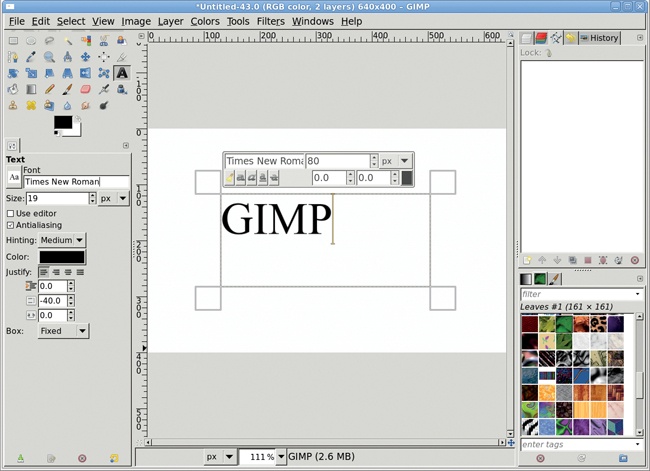
At this point the selected font should be different from that of the rest of the phrase. The Style Editor can be used to change the color of the selected word, or another selection can be made to apply different settings.
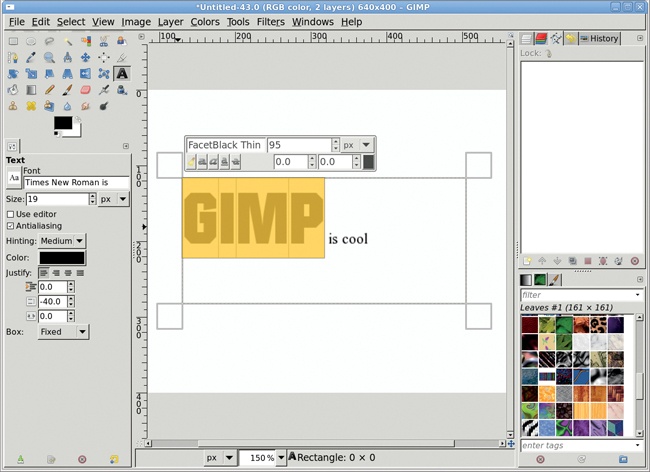
The Style Editor can be used to change most of the same options available in the Tool Options dialog. However, line spacing can only be changed in the Tool Options dialog and is always applied to all lines in the editing box, even if they’re not currently selected.
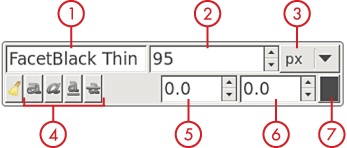
The first row of options in the Style Editor is for font , font size , and unit of font size . The second row provides font styles (bold, italic, etc. ), baseline position , letter kerning , and color options  . The far-left button in the second row can be used to remove text that is currently selected in the editing box.
Changes to the baseline cause space to be added below the selected text. This feature is useful if you create an oversized first letter or word on a line and want to raise the rest of the letters to the top edge of the first letter. Kerning adjustments are used to adjust the spacing between letters in the selected text.
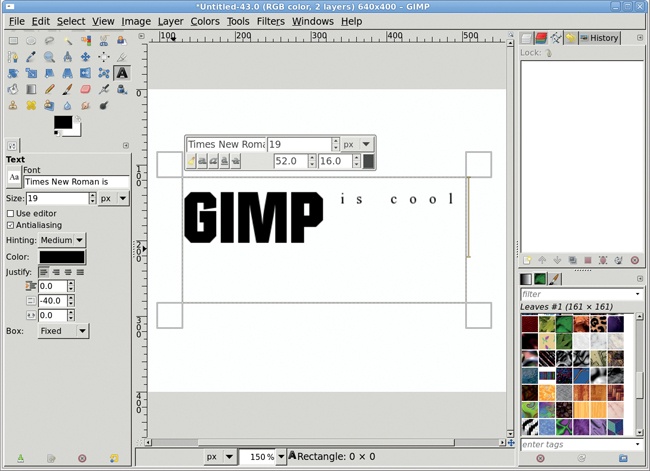
The Tool Options dialog offers some features that are also in the Style Editor. The Tool Options affect all text in a text layer that hasn’t been changed using the Style Editor. For example, changing the font in the Tool Options dialog will change the font for all text in the previous example except the word GIMP. The same is true for font size and color.
Certain options are only available in the Tool Options dialog. This includes features such as antialiasing, hinting, and justification. Changes to these options affect all text in the editing box.
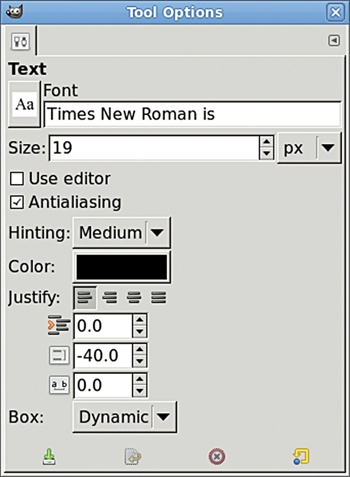
Before the editing box, GIMP provided text-editing features in a dialog called the Text Editor. This dialog works just like the in-canvas editing box, with the added benefit of having an icon at the top for loading files (the editing box requires use of the context menu). Changes to the Text Editor are reflected immediately in the editing box.
To open the Text Editor, click Use Editor in the Tool Options dialog. To close the editor, click its Close button or uncheck the Text Editor option in the Tool Options dialog.
Text can be aligned with a path, creating text that flows along a curve or box. This feature can be hard to find. When editing text in the canvas, right-click the text to bring up the context menu. Select the Text along Path option. This converts the letters in the text layer to a series of paths shaped like the letters and flows those paths so the middles of the letters align with the currently active path in the Paths dialog. To move the text farther down the path, add a few spaces to the front of the text.
Since the text is now a series of paths, you’ll need to convert them to a selection and fill that with color to get the letters back.
The Path from Text option is similar to Text along Path, except the paths created are in the same position as the original text.
If loading a file into the editing box, first set the box to Fixed in the Tool Options dialog. If you don’t, lines from the file without carriage returns will flow out to the right in one long line.
Use baseline adjustments to align multi-sized text on a single line. Use line-spacing adjustments to align text on multiple lines.
Covert text to paths to make it easier to scale up a logo design. Paths are vector objects, and making them larger doesn’t affect their quality, while enlarging rendered text will cause jagged edges. You could just increase font sizes in the text layer, but if you have many font types and sizes, you may find it easier to scale a path version of the text and then fill in appropriate colors.
New fonts can be added to GIMP by installing to any directory and then updating the Font folder in the Preferences dialog. Changes to the font configuration require a restart of GIMP.
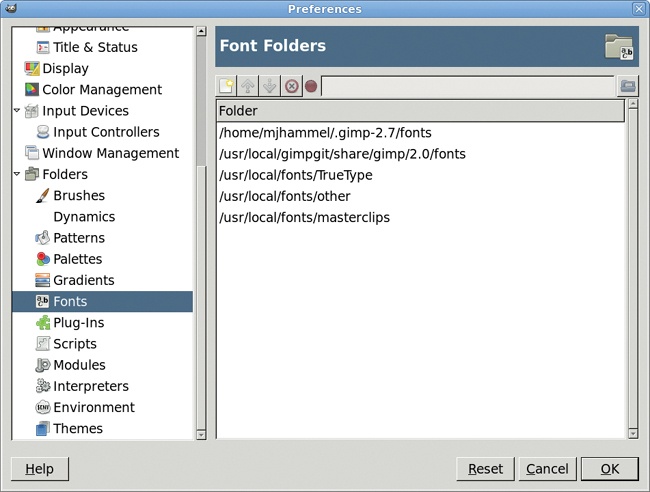
If you’ve graduated from flatbed scanners, then you’re ready for digital cameras. Digital cameras provide you with a simplified method of acquiring images for use in GIMP. You no longer need to worry about converting from film to digital files but instead can work with digital files directly. No more boxes of prints and negatives. The digital life is much easier.
Yet with new technology comes new processes. Scanners are typically connected using USB. Digital cameras use solid state devices (SSD) like flash memory cards. While scanners don’t know anything about the camera that took the image, digital images contain metadata to help with mapping colors from one device to another. There is new software to consider, as well as new issues with the files you load into GIMP.
Cameras today generate images that are GIMP ready by storing digital image files on a memory card. Many phones have integrated cameras that can produce high-quality images. To get these images on your computer, remove the card from the camera (don’t forget to charge the battery while you have your camera open) and insert it into an appropriate slot in your computer or USB card reader. On most computers, the card will be automatically detected, and an appropriate program for organizing your digital files will open. On Linux you can choose from Shot-well, F-Spot, digiKam, Darktable, and others. There are a many options available for Mac OS X and Windows users. Copy the files onto your hard disk using your own personal organizational method, such as one folder per day or one folder per event.
If you still use film or have old images that you want to process, you’ll need a flatbed scanner to get them into GIMP. Scanning is not difficult on Mac and Windows systems but can be more involved under Linux. Once the scanner is connected to your system, experimentation is key. Getting a good scan can take a lot of practice.
Most modern digital cameras provide very high-resolution photographs. The number of megapixels combined with the aspect ratio determines the actual size of the photograph. A 4 × 3 aspect ratio on a camera with 12-megapixel resolution produces photos roughly 4000 × 3000 pixels. At 250 dpi, these would print at 16 × 12 inches, significantly larger than the old 3 × 5-inch prints you got from the local supermarket photo booth. (Changing the aspect ratio is easy using GIMP’s crop tool, so it doesn’t really matter what ratio your camera provides.)
Now that you can access the files on the camera, you should know a little something about them. First and foremost: file formats. All digital cameras support JPEG-formatted files. Since it’s a lossy format, it’s not ideal for image-editing processes. JPEG images are compressed by an algorithm that takes human visual perception into account. It removes a lot of the details that you can’t see. For example, our eyes can’t differentiate among unlimited shades of blue in the sky, so the compression algorithm reduces these shades to a lower number. But when you later change the color of the sky in GIMP to get a more dramatic image, you’ll get bands of uniform color where a gradient should be.
If you want to process your JPEG images in GIMP, you should set your camera to neutral colors, low compression (or larger file size), and low sharpening and noise reduction. Your images will look bland and boring out of camera, but these settings will provide you more options when editing in GIMP.
Some cameras support the TIFF format, a lossless format that can also be compressed. What’s the difference? A lossless format doesn’t lose any image information when compressed, so opening a compressed TIFF image will restore the original image. The same is not true of uncompressing a compressed JPEG image.
But neither of these formats comes close to the image quality you get from the native file format for the camera. The general term for this format is RAW, but RAW formats are camera specific. They have file extensions like NEF, CR2, RAF, and more. Only high-end cameras are able to export the RAW file to memory cards. Consumer-grade cameras store it only in the camera’s memory until they have processed the image.
Since most cameras have low processing power, they use less sophisticated software to process from RAW to JPEG than tools for your desktop computer. This processing from RAW format may include destructive processes you’d rather apply manually, if at all. These may include effects like noise reduction, color correction, or sharpening. So working with RAW is generally considered the only way to go for professionals—even a “lossless” TIFF will have been processed by your camera.
That said, getting RAW images is not always easy. GIMP’s plug-in (UFRaw, itself based on the dcraw software) for processing these images doesn’t actually retrieve the images from the camera. Additionally, RAW files are larger than their JPEG or TIFF counterparts and generally require more memory and better processors. This is why the average desktop consumer might be better suited to using JPEG images, especially if your camera can set the amount of compression used on those photos. Again, JPEG is not completely ideal, but for lower-end consumer-grade cameras, it may be your only option without modifying your camera’s firmware.
Note
Information on using UFRaw and dcraw, along with the cameras they support and options for modifying camera firmware, can be found at the appropriate websites:
Once imported, files can be opened directly by GIMP. Most cameras will record some level of textual information about photographs in the image files. This is usually done as EXIF (Exchangeable Image File) format metadata. Alternative metadata formats include XMP (Extensible Metadata Platform) and IPTC (International Press Telecommunications Council), with XMP being the standard toward which camera makers are headed.
Access to photo metadata in the EXIF and XMP formats is provided by the Image Properties dialog (File▸Properties) in the Advanced tab, which allows viewing and editing of the metadata. EXIF data is saved by default when saving to GIMP’s native XCF format and to JPEG files, but the resolution may change to match the default setting in the GIMP preferences. EXIF data may not be saved to other file formats, since they do not all support it.

While there are other tools for viewing camera images, GIMP is ideal for photo processing when you need to manually color correct an image, blend images together, or perform complex operations like depth of field or color swapping. Take a look at these basic operations as performed in GIMP.
Color enhancement is a common requirement for digital photographs. The problem in this example is the poor lighting on the subject at the time the photograph was taken. In the original photograph the color is somewhat washed out. Running this through F-Spot’s color correction produces an improved image, but GIMP produces the most accurate color. In both cases various levels and saturation were adjusted, but in GIMP an additional step through the Channel Mixer produces the best results.

Image alignment is necessary when the subject of a photo is angled from the (possibly imaginary) line of horizon. Rotation is required to align the image, but rotation of a rectangular image will produce a larger image with some areas filled with the background color (or transparency). Alignment therefore requires two steps: rotation and cropping.
Rotation in GIMP has improved with the addition of a live preview shown in the image window. In this image the building is at an angle. You can straighten this by placing a horizontal guide so it touches the higher end of the roofline on the left side of the image, using the Measure tool to determine a rotation angle, and then using the Rotate tool to make the roofline parallel to the guide. After rotating, the image includes transparency at the corners that must be cropped out.
Red eye is now directly supported by GIMP filters. In this image the camera flash has reflected off the backs of the eyes, causing the pupils to appear red. Make a selection around the eyes using the Free Select tool, being careful not to include any of the skin (which also has a red tint to it). Then open the Red Eye Removal filter (Filters▸Enhance▸Red Eye Removal). The default settings work well for this image, so you don’t need to make any additional adjustments.
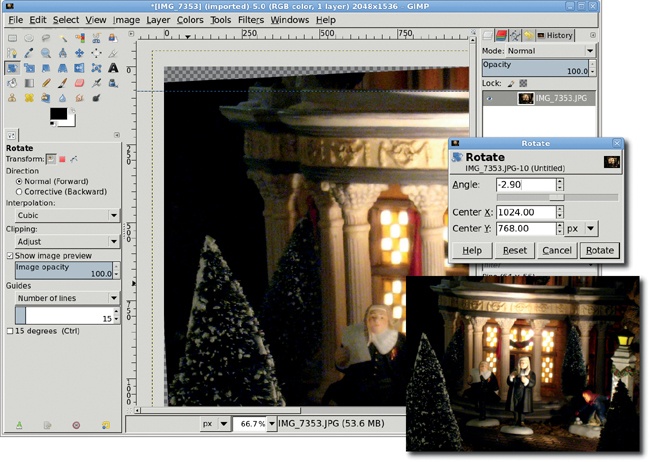
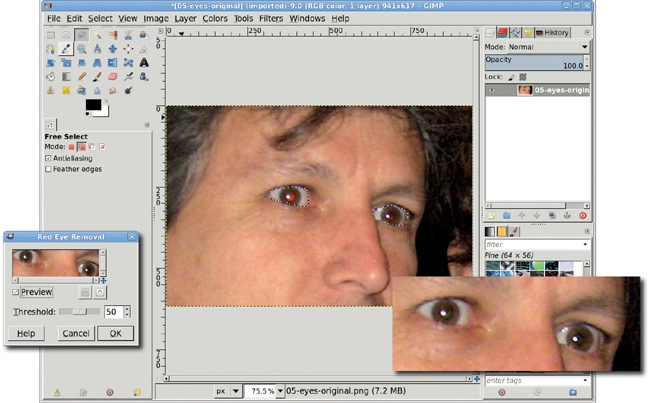
Linux users: the most recent, updated releases of Linux distributions such as Ubuntu, Fedora, OpenSUSE, and Debian should have good support for card readers.
Flash media can be slow to access, so your best bet is to simply copy the files off the media to a local hard drive before working with the photos.
If you’re new to the GIMP, the best way to get started is to familiarize yourself with some common processes that you can apply to different projects. These tutorials aren’t as detailed as the ones in the rest of the book, but they’ll help you master techniques applicable to all kinds of designs. If you can’t find all the menu items or dialogs mentioned here, don’t fret. These are just quick tutorials. The tutorials throughout the rest of the book will walk you through the processes in greater detail.
Some of the most artistic GIMP effects involve merging layers in random ways. A grunge image, for example, might mix several textured layers resembling a collage of torn pages. Creating the texture in each layer is an artistic experiment in itself. But how do you then tear the layers? It’s easier than you might think. You just apply a layer mask filled with random shapes to each layer. The layer masks block out sections of the layers, making it look as though they’ve been torn away.
What kinds of random shapes work well as layer masks? You can use brushes to draw in layer masks and produce customized results. But the process is often time-consuming, and it’s difficult to achieve random shapes with similar brushstrokes. You need something fast that gives more randomness than hand-brushed strokes ever would. Like clouds.
Clouds are very effective graphic design tools. While creating grungy textures might not be your thing, you can simulate increased depth of field in any design project by applying a cloud as a layer mask and then using it to create selective blurs. As you’ve already seen, you can also use clouds as the starting point for various textures, including skin and cloth. And, of course, clouds can be used simply as clouds, to create everything from wispy cigarette smoke, to light steam rising over a cup of coffee, to those big white balls of cotton in the sky.
GIMP provides four filters for creating clouds: Difference Clouds, Fog, Plasma, and Solid Noise. While you can use each filter on its own to create interesting cloud shapes, you may find that combining any two or more results in more realistic effects.
The Plasma filter (Filters▸Render▸Clouds▸Plasma) produces a colored smoke screen. Most of the tutorials in this book involving clouds use the Plasma filter, precisely because it provides random noise. In many of these tutorials, you’ll apply the Plasma filter to a layer mask.
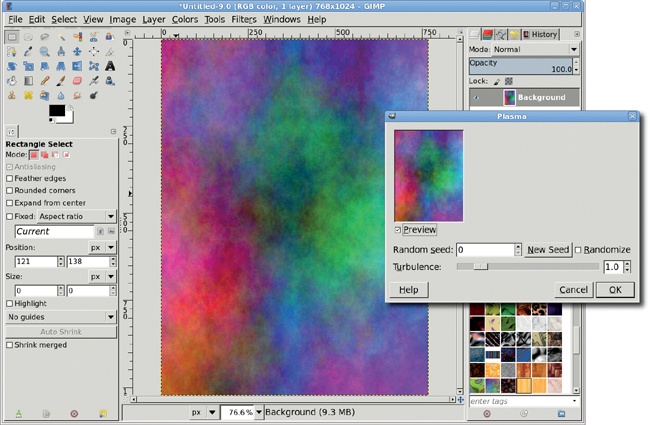
The initial application of the filter won’t resemble a cloud, however.
To remedy this, first desaturate the layer (Colors▸Desaturate). Choose any option from the Desaturate dialog and click OK.
Adjust the curves to increase the black space (Colors▸Curves). The curves adjustment is a curve initially shown as a diagonal line. Click the line near its middle and drag down to increase the layer’s black content. You can also click other sections of the line, dragging down for more black or up for more white. In this example, one section of the line (left of center) was dragged down, while another section (right of center) was dragged up.
Add a new layer (Layer▸New) and move it below the plasma layer in the Layers dialog.
Fill the new layer with sky blue and then change the layer mode of the plasma layer to Screen. This creates wispy clouds that can be manipulated for other cloud effects.
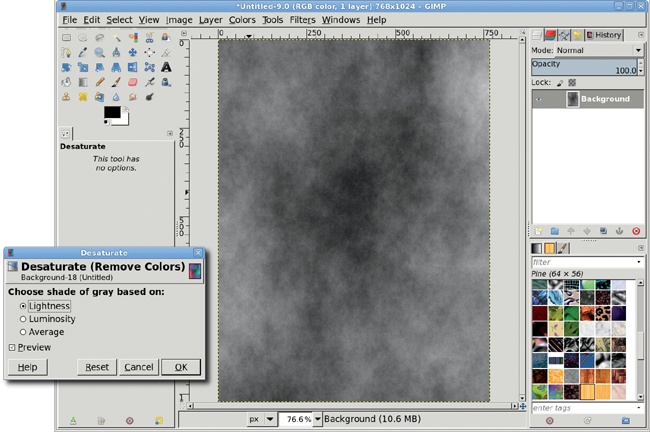
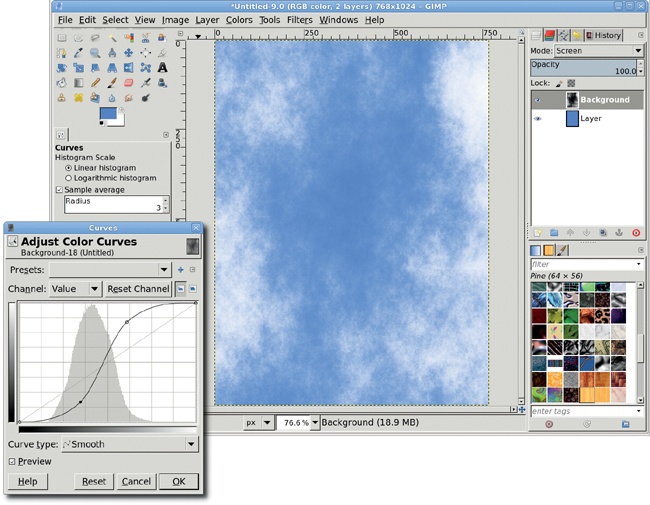
Lowering the Plasma filter’s Turbulence setting produces more uniform cloud coverage, resulting in something that looks more like fog than clouds. Increasing this setting is useful for achieving more complex effects, like simulating fire (see Section 4.12).
Clouds in the sky often have a little more puff to them, like cotton balls. The Solid Noise filter helps create more substantial clouds.
Start with a sky-blue Background layer.
Add a new layer and apply the Solid Noise filter (Filters▸Render▸Clouds▸Solid Noise), using a low X size value (about 1.0) and higher Y size value (about 4.0) to stretch the clouds horizontally. Click OK.
Adjust the curves to increase the black area of the cloud layer. Set this layer mode to Screen. Duplicate the layer to emphasize the effect.
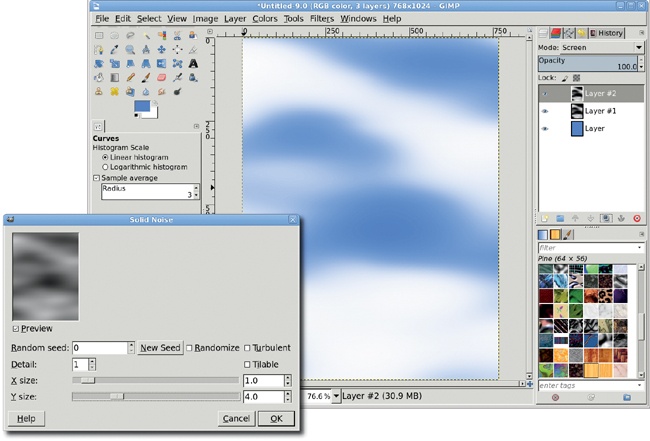
When you use the Difference Clouds filter, you’ll see the Solid Noise dialog show up instead. This is because Solid Noise forms the basis for the Difference Clouds filter. The only difference between the two is that Difference Clouds applies Solid Noise to a new layer just above the active layer, changes the layer mode for the new one to Difference, and merges it with the active one.
The Fog filter is actually a Python script that allows you to apply color to a desaturated Plasma filter. It also allows you to automatically name the fog layer, which the Plasma filter does not. It’s basically a convenience filter that allows you to perform the multiple steps you’d normally do with Plasma using just a single filter.
While the solid noise effect is good, it could be better.
Add a desaturated Plasma cloud layer with its layer mode set to Screen above these layers to add some random wisps to the clouds.
Add a white layer mask to the Plasma layer. Then copy and paste a Solid Noise layer into the mask by choosing Edit▸Copy, Edit▸Paste, then Layer▸Anchor.
Adjust the layer mask’s curves to increase the white content. As a result, the cloud patterns should appear fluffier.

To create steam such as might rise from a cup of coffee, first use the Solid Noise filter to create puffy vertical clouds.
Choose Filters▸Render▸Clouds▸Solid Noise, set the Y size to 1.0 and the X size to 4.0, and click OK to apply the filter.
Add a white layer mask to the cloud layer (Layer▸Mask▸Add Layer Mask). Type D in the canvas area to reset the foreground and background colors.
Choose the Blend tool from the toolbox. In the Tool Options dialog set the Shape to Bi-linear and the mode to Multiply, and then drag from the image’s middle to its right edge.
Drag again, from the near-left edge to the left edge, then from the near-right edge to the right edge.
Apply the layer mask (Layer▸Mask▸Apply Layer Mask).
Copy and paste the noise layer into an image of a coffee cup (available from an online stock image archive). Name the layer Steam.
Use the Move tool to position the wisps of steam over the cup.
Use the Scale tool to adjust the size of the Steam layer as needed. Use Distort filters (Filters▸Distorts) such as Ripple or IWarp to create waves in the steam.
Add a layer mask to the Steam layer to mask out steam overlapping the outside of the cup.
Set the layer mode for the Steam layer to Screen or Grain Merge.
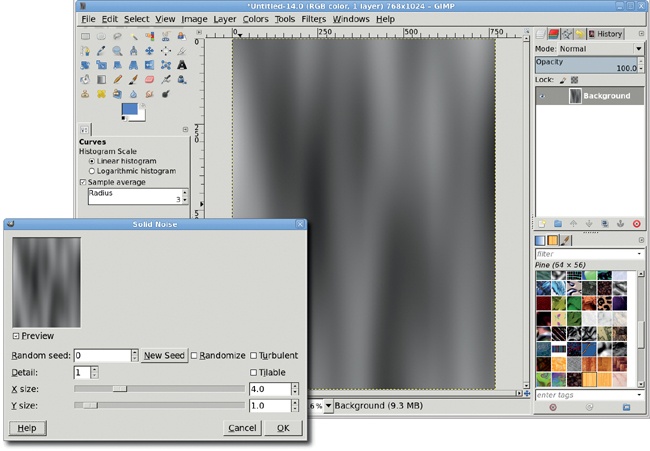
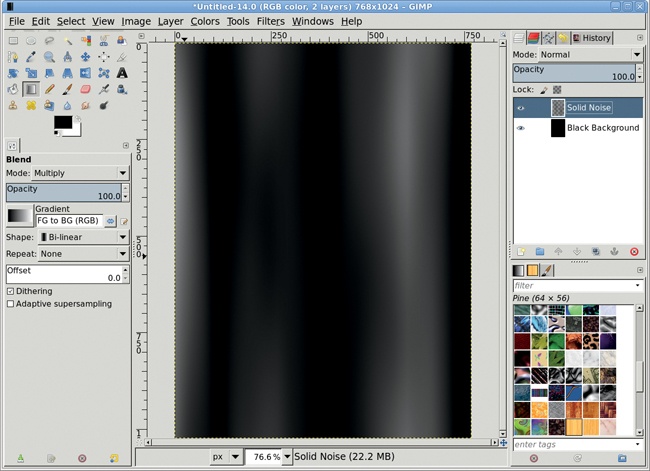

These suggestions will help you take your cloud effects to the next level:
Use the IWarp filter (Filters▸Distorts▸IWarp) to add swirls to your smoke and clouds. This filter provides more control over the swirls’ location than the Whirl and Pinch filter (Filters▸Distorts▸Whirl and Pinch).
When the wisps of smoke you’ve created are drowned out by light or busy backgrounds, duplicate the smoke layers. Set the layer modes for those layers to Screen, Addition, or Grain Merge.
You can apply most GIMP filters to both layers and layer masks. Before rendering a cloud, make sure to click the appropriate thumbnail in the Layers dialog!
Rip effects are popular, but they’re often difficult for new GIMP users to reproduce. The technique is actually very simple and amounts to nothing more than careful use of layer masks and selections. A similar process adds cracks (or other patterns) to an image. Again, layer masks make it all possible.
Start by creating the colored background layer that will show through the ripped edges. Open the image you want to use to practice ripping (this tutorial uses a colorful beach photograph). This process works for images of any size, but start by practicing on a small image no larger than 500 × 800 pixels.
Add an alpha channel to the Background layer (Layer▸Transparency▸Add Alpha Channel).
Add a new layer (Layer▸New Layer), fill it with white, and then move the colored layer below the Background layer in the Layers dialog.
Add a white layer mask to the original image layer (Layer▸Mask▸Add Layer Mask).
Create a rectangular selection of the entire image layer by choosing Layer▸Transparency▸Alpha to Selection. This instructs GIMP to select all the opaque pixels in the image. Because this image is entirely opaque, this operation selects the whole image. (Pressing CTRL-A also works.)
Shrink your selection (Select▸Shrink) by 135 pixels. Round the corners of the selection (Select▸Rounded Rectangle) by 35 percent. This creates a boundary area of the photograph that remains unchanged when you create the layer mask.
Feather the selection (Select▸Feather) by 32 pixels. This allows the rips to meld with the image.
Invert the selection (Select▸Invert) to isolate the area where the rips are applied.
Type D in the canvas to reset the foreground and background colors.
Click the layer mask for the original image layer in the Layers dialog to make it active. Fill the selection with black by dragging the background color from the toolbox into the canvas.
Use the Paintbrush tool and select a brush to paint with black in the layer mask. (The Galaxy (AP) brush works well: move the Spacing slider to 60.0 pixels for an image of this size and adjust the size of the brush in the Tool Options as necessary.) Paint with various-sized brushes along the inside edges of the selection, focusing less on them and more on the edges of the image.
Because you’re working on a layer mask and not modifying the actual image, feel free to experiment. Try using a different brush along the outer edges of the layer mask to change the shape of the ripped edge.

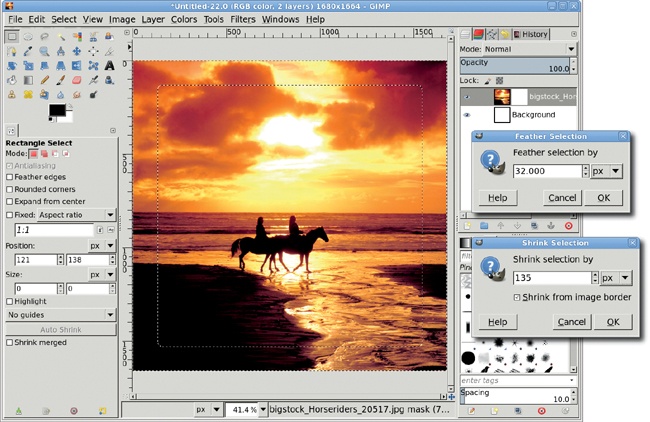
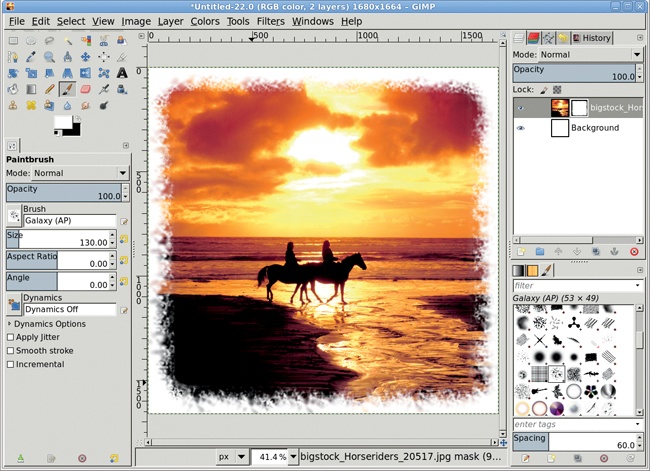
Think rips might be just what your project needs? Here are a few more tips:
To get the right effect, you need the right brush. If GIMP’s stock brushes don’t suit your needs, consider creating a few new ones. The process is described in 1.1 Drawing and Painting.
Want to use layer masks to create text effects? The quickest way is to choose Layer▸Transparency▸Alpha to Selection to select the area around the text for use as a layer mask region. Fill the layer mask with a grungy, scratched texture. Then invert the text selection and fill it with white. This only applies the effects inside the text area.