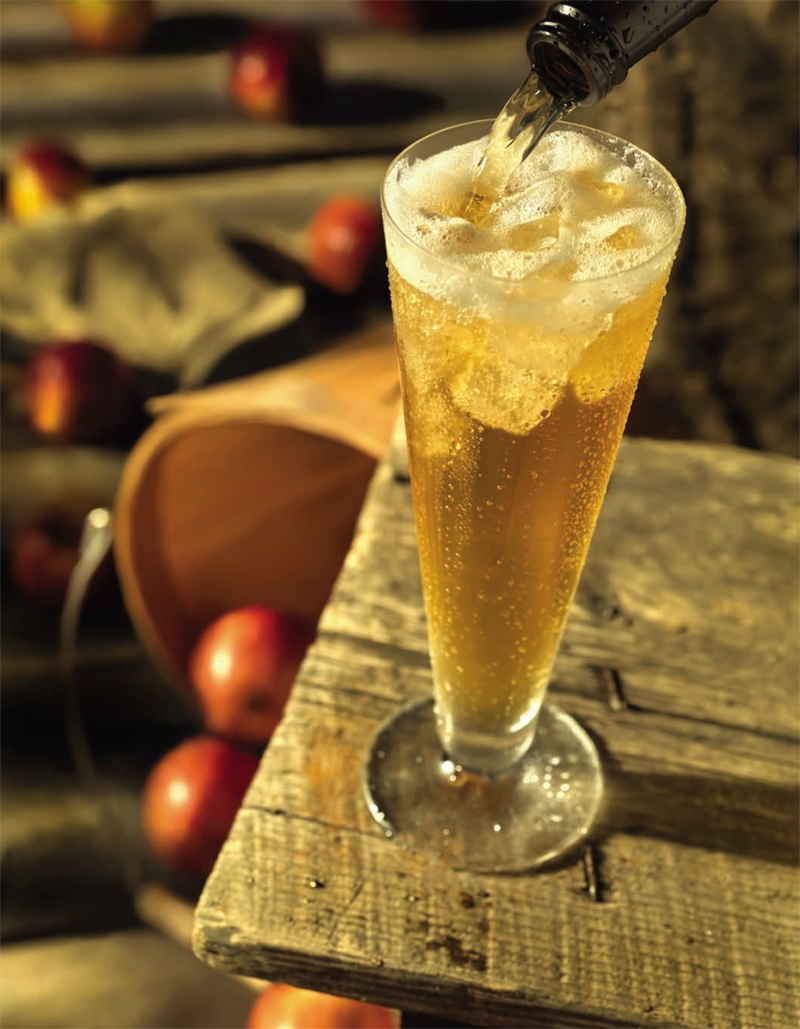
YOU HAVE ULTIMATE CONTROL OVER the quality and blend of your apples, which will eventually end up in an amazing drink that you can enjoy with your friends and family.
I’ve already talked about where to get fruit and discussed what apples you can use. So now let’s talk about how to go from apple to juice.
Presses
The first thing you need to do is figure out what kind of press you want to use or – more likely – what kind of press you’re able to obtain.
The first step would be to see if your local shop rents apple presses, like our home-brew shops here in Portland do. If they do, they’re likely to have the ol’ standby: the screw press. Typically these presses have two baskets, so you can grind apples as you press. These presses are great to start with and usually cheap to rent, but the yield, of course, is not as great as with a professional press.
In my experience using one of these presses, you’ll average twenty pounds or so to the gallon. Obviously, these number vary wildly with what kind of apple you use. But there are some tricks to make sure you get the most out the press and the apples you have:
1. A lot of home-brew shops are closed on Sundays. If you can swing it, rent the press on Saturday. Most places won’t charge you for that Sunday, and you can get an extra day for free.
2. Planning for a quick four-hour press? Double it! Pressing apples takes a lot of work. Give yourself plenty of time to set up, press, and tear down. You’ll want to make sure you return the press as squeaky clean as when you got it.
3. Rice hulls, a well-known secret to getting the most out of your pomace, are your friend. Almost all home-brew shops sell rice hulls, and they’re super affordable. You simply mix them into your pomace, and they create little channels for the juice to travel better – without adding any flavor to your juice. Add about two cups per pressing-basket full, and mix in well. The drier the pomace, the more you’ll want to use.
4. Don’t sweat the small stuff . . . but sweat those apples! Sweating apples means letting them rest after they’ve been picked. When the apples are sweated at room temperature, it allows the moisture content to lessen and the sugars to increase. And as we know, more sugar equals more booze!
The rule of thumb is, they’re done sweating when you can gently press your finger into an apple and it leaves an impression but still feels sound. But the reality is that if you’re doing this in tight quarters, you may not have space to sweat your apples for very long. Ideally you want to sweat, but don’t be discouraged if you can’t. Sweating will also make the apples easier to grind, assuming your rented press, with grinder attached, is hand powered. For sweating, you’ll want at least five days at room temperature.
If you rent a press, make sure you treat it like any other piece of brewing equipment you have. Make up a cleaning and sanitizing solution, and give it a thorough clean. I like to make a cleaning solution and clean the press well. Then I make up a sanitizing solution, put it into a spray bottle, and spray down the whole press, allowing it to air-dry.
The press you rent and start with will likely be a screw press, also known as a double-tub press. But this is definitely not the only kind of press out there. As with anything, it all comes down to how much money you want to spend, and how much volume you plan on pressing.
RACK-AND-CLOTH PRESS: The next step up for a serious home cider maker is a rack-and-cloth press. The basic idea here is the racks are filled with the pomace and made into “cheeses.” Cheeses are layers of pomace that go into a cloth and are then folded together. The cheeses go into the racks, and the racks are stacked on top of each other. Once stacked, the press squeezes down from the top and the juice flows out.
Plans for rack-and-cloth presses to be made at home are all over the internet. I’ve never personally built one, but if you have the mechanical skills it would be a cool project!
I like these presses, but I personally like to use stainless steel whenever possible. Most of these are wood, unless you buy a commercially made one built with more metal. They’re also quite bulky.
Still, being the classic press you see on farms and orchards, they do have a sense of romance about them.
BLADDER PRESS: This is what I use at Bushwhacker, and I’ve been really pleased with it. The bladder press is made with high-grade steel, and the idea is simple. The press contains a rubber bladder in the middle. You fill up the press with pomace while the bladder is empty. After you put the pomace into the press, you slowly start filling the bladder up with water. As the bladder fills, it presses against the pomace and juice comes flowing out.
Mine is on wheels and takes up very little space in my production area. The downside is that they’re pretty spendy, and once the bladder fills, you need to dump all the water out between presses. I haven’t come up with a clever way to reuse that water.
They do have smaller versions than mine (and much much bigger ones) that rely on filling the bladder with air instead of water. I haven’t tried one, but for a home user they may be a great option.
BELT PRESSES AND ACCORDION PRESSES: Used mainly by commercial makers, these presses take up a substantial amount of room and can easily cost tens of thousands of dollars. You’re free to drool over them, but I suspect you won’t have one in your garage anytime soon.
Don’t want to buy a press, or rent one?
Check with local orchards to see if they’ll custom-press your fruit for you. They might be keen on making some money from a piece of equipment they only use for a short time each year.
Also, if you have any juice companies in your area, see if they want to press for you as well. Most of them have really nice presses with an awesome yield that you’re not likely to get from your rented one.
So you picked out a press. Good for you! But how are you going to grind your apples?
The presses you rent will likely have a hand-driven grinder on them, or possibly a motor-driven one. Most presses, however, need some sort of external grinder to do that work for you.
There are plans online that show you how to build a grinder from an old garbage disposal, or even from a wood chipper! I say do what you’re comfortable with. But I’ve also heard disaster stories about these grinders, since they’re not made with the grade of steel needed for constant use with highly acidic products.
The only other option that makes sense, if you’re very serious, is to invest in a stand-alone grinder made specifically for fruit. I’ve had mine for years now and had zero issues with it. But be prepared to spend at least fifteen-hundred dollars. You’ll have to ask yourself if it’s worth it.
You’ll likely do just fine with the one attached to the press you bought or rented.
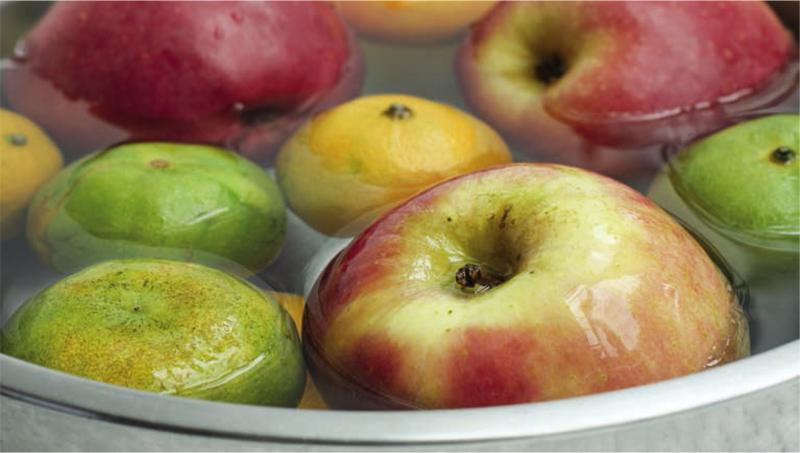
APPLES: You should wash your apples before pressing them, but after sweating them. Use only clean water, with nothing else in it. The bigger the basin you choose to do this in, the better. During this process, look for any apples that sink to the bottom. You do not want to use these; good apples float, bad ones sink. This is also an excellent chance to inspect all of your fruit. If you bought your apples at a store, make sure to get the pesky little stickers off of them before grinding them.
THE BAGS: You’ll want to line your press of choice with some sort of straining bag, which you press through. These bags will also need to be cleaned and sanitized before use. Make sure, when you buy them, that they fit the press you’ve selected. If taken good care of, these bags should last you many, many years. Let them completely air-dry before putting them away until your next use. These are almost always available at the same home-brew shop where you rented the press.
PREPARING: Make sure you have all the buckets cleaned and sanitized before you start pressing. Also, make sure you know what size buckets you want to use, and that they fit under the spout. When the juice starts flowing it comes out fast. When you take a bucket away, make sure you pour it into your carboy so you have another bucket ready to go – you don’t want to lose a single drop of your hard-earned cider. If you do use a separate grinder, you’ll also need plenty of buckets to grind your pomace into.
Pull the apples from the water, and start loading up your grinder. Don’t overload it; grind only a few handfuls at a time. If you’re grinding small apples, such as crabs, make sure to have a few larger apples handy to throw into the mix. This will help the smaller apples go through the press. Fill up your bucket, and mix in some rice hulls if the pomace is particularly dry.
Transfer the pomace to your press. Fair warning: pressing is time consuming, labor intensive, and messy. Go slow. No matter what kind of press you have, you’ll want to slowly add pressure and let the pomace do its thing. For example, in the typical rented press you’ll find at home-brew stores, each press will take you at least thirty minutes.
I also recommend, once you think you’ve gotten every last drop out, that you undo the press, get in there with your hands, remix the pomace, and try another pressing to squeeze out every last ounce.
Well, now you have a problem I bet you didn’t predict. . . . What do you do with all that dry pomace?
POMACE PROBLEMS: First of all, the most important thing is to figure out how you’re going to get rid of your pomace before you start. Pomace has limited use. It doesn’t compost well, and if you just throw it into your yard it can invite critters you may not want to attract.
That being said, I’ve heard of some clever ways to get rid of pomace, and I’ll throw in some thoughts of my own:
Put an ad up online and let people now you’ll have pomace available on a certain day. Some claim that pomace is great to add acid to the soil of certain plants that like it, such as blueberries. Whatever their reason, if they take it, it’s gone!
Contact local farmers if you can. At Bushwhacker, we load up buckets of the stuff and give it to a guy who feeds his animals with it. Be warned though, if you plan on doing this for your own animals, they’ll eat it until they get sick. I will say, though, from personal experience, chickens don’t seem to like it as much as cows or pigs.
I’ve also heard some cool stories of people drying the pomace out and adding it to the wood as they smoke meats or fish. I’ve never tried it myself, but it sounds like a groovy idea.
Our friends at Reverend Nat’s and Cider Riot! – both Portland-based cideries – use spent pomace to make a traditional ciderkin. A ciderkin is a very low-alcohol cider, made from adding water into the pomace after you finish with it, and then repressing it. If you do this, you’re probably looking at a two- to three-percent ABV finished product. I’ve had theirs, and while it lacks immense complexity or body, it’s one of the most refreshing drinks I’ve ever had!
If you come up with another way to use pomace, please drop me a line! I’ve always wondered if pomace could be used for baking or cooking.
Another note about pomace: make sure you wear your least-beloved clothes while you press. Pomace can permanently stain anything it touches, so put your fancy pants away!
A Basic Overview of Pressing Apples
(see here for visuals)
1. PURCHASE APPLES FROM A STORE or a local orchardist. When buying, think about the balance of flavors you want your final cider to have.
2. WHEN THE APPLES ARE BACK HOME, let them sweat to soften them up a little – usually five days or so, at room temperature.
3. WHEN THE AROMA IS STRONG, and the apples can be pushed in a bit with your thumb, wash the apples with regular water in as large a container as possible. Discard any apples that sink to the bottom of the tub. Also, remove any stickers affixed to the fruit.
4. MAKE SURE YOU’VE CLEANED and sanitized your grinder and press. Then place your sanitized buckets where they will catch your juice.
5. LINE YOUR BASKET under your hand grinder, or have your bucket ready beneath your electric one, so that it’s ready to catch the pomace. Start putting apples into your grinder. If the grinder has a hand crank, I feel it’s easier to start cranking and then slowly add handfuls of apples. If you’re using an electric one, make sure it’s running before you start throwing apples in.
6. WHEN YOUR POMACE IS READY, start filling the press. If it’s a typical double-tub press, as rented at most home-brew stores, slide the pomace basket under the press and fold over the top of the cloth. Place the wood piece on top, and slowly start applying pressure. Crank it down a bit, then start another basket grinding.
7. AFTER CRANKING THE PRESS DOWN as far as you can, when you’ve gotten the last bit of juice out, unscrew the press, loosen up the pomace a bit, then try to repress it. You’ll likely yield another cup or so, if you’re lucky.
8. WHEN YOUR JUICE BUCKET GETS FULL, have another one ready to go, in order to catch any juice that comes out when you pull it away. And be sure to dump the fresh juice into your vessel.
9. WHEN YOU’RE ALL DONE, rinse the press down with a hose and make sure it’s dry and clean before you store it or return it to the store.
Pressing the apples …
then making them alcoholic
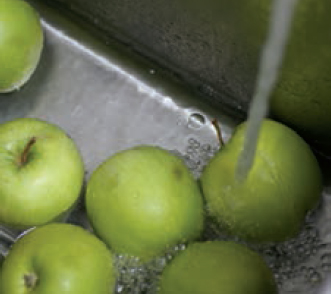
1. Washing the apples.

2. This is a blend, so I will use Galas and Granny Smiths, shown here in the proportions I’ve decided on.

3. Inserting the screen into the grinder.

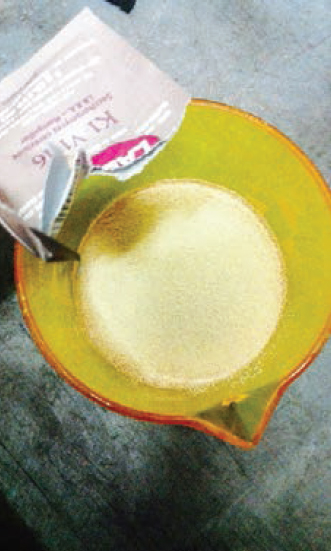
4. Mixing up One Step.
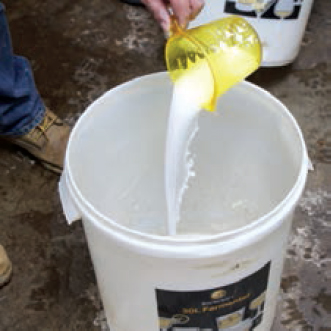
5. Putting One Step solution into fermentation vessel.

6. Cleaning airlocks in One Step solution.
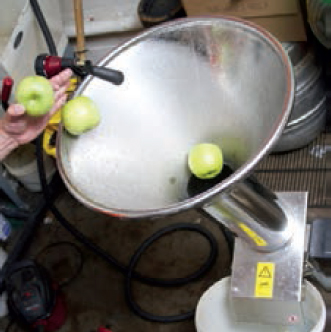
7. Starting to drop clean apples into the grinder.

8. Apples in grinder.

9. It’s faster to pour them out of a box than doing it one at a time; the grinder functions better then, as well.
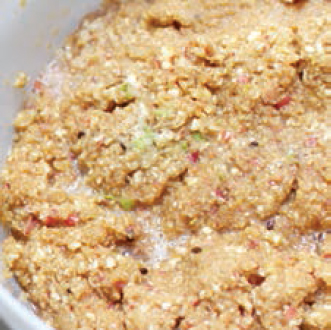
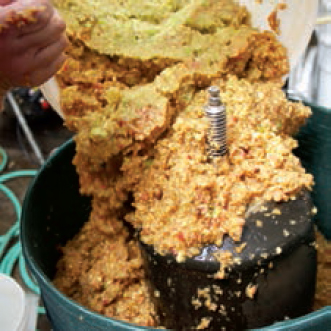
10. Pomace left over in grinder after grinding.

11. Collecting the ground apples.

12. Checking the press to make sure it’s ready.
13. Pouring apple pulp into the press.

14. Wrapping bag around pulp, ready for pressing.
15. The concentrated cider flowing into the container, ready for the yeast.

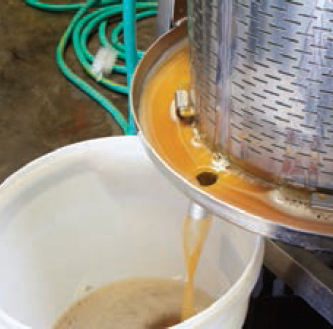
16. Pressing into bucket.

17. Using a “wine thief” to draw out some cider to test sugar levels.

18. Testing for sugar levels with a hydrometer.
19. Preparing the yeast.

20. Filling airlock with water.

21. Making note of the Specific Gravity that I measured with the hydrometer.

22. Leftover pomace.