6.4 New Features of the Process Integration Designer
As part of the new features delivered in SAP PO 7.5, this section discusses the capabilities related to the SAP Process Integration Designer perspective in the SAP NetWeaver Development Studio. As already mentioned in the previous section, the SAP Process Integration Designer perspective is used to create an iFlow scenario. The new features will be discussed in the next sections.
6.4.1 Export Objects from the Integration Designer
To speed up the transport process, you can now also start the export of objects developed within the SAP Process Integration Designer perspective of SAP NetWeaver Design Studio by following these steps:
- In the PI Explorer browser view, right-click on the object to be transported and choose Export. This object can be an iFlow, folder, receiver rule, communication party, or system.
- The selected objects are now selected in the export assistant.
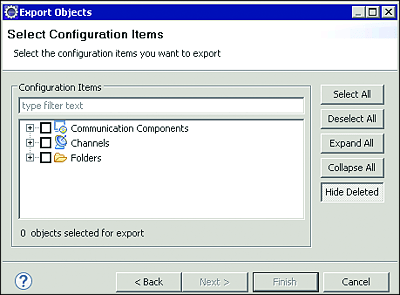
The export feature enables you to hide deleted objects in the object selection pages of the export assistant using the Hide Deleted button, as shown in Figure 6.41.
Figure 6.41 Options in the Export Assistant
Note
If the object to be exported is of type folder, all objects that are contained in the folder are automatically selected in the export assistant. Furthermore, if you only have one transport mechanism type (file or enhanced Change and Transport System [CTS+]) configured, you’re prompted to first select an Object Type, which can be All Objects, Integration Flows, or Value Mappings.
If both file and CTS+ are configured, you must first select the desired transport mechanism type.
6.4.2 Automatically Deploy after Import
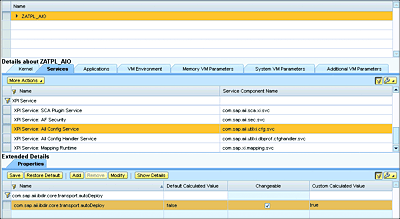
You can also automatically deploy iFlows right after import. To activate this feature, you must set the property com.sap.aii.ibdir.core.transport.autoDeploy=true from the service XPI Service: All Config Service in the SAP NetWeaver Administrator, as shown in Figure 6.42.
Figure 6.42 Enabling the Automatic Deployment via XPI Service
Notes
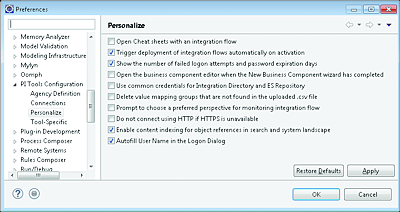
Enabling the automatic deployment feature only works if you also activate the automatic activation of import change lists in your SAP NetWeaver Design Studio, as shown in Figure 6.43.
Figure 6.43 Enabling an Automatic Deployment after Activation
6.4.3 Version History and Deployment Status
From SAP PO 7.5 SP 04, you can also check the history of the different versions of a particular iFlow. To view the Version History of an object, follow these steps:
-
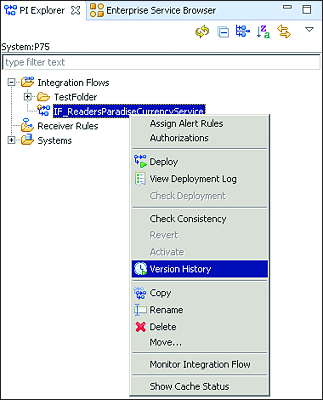
In the PI Explorer view, select the desired object on the left and right click to bring up the context menu, as shown in Figure 6.44.
Figure 6.44 Selecting the Version History Option
- Next, select the version history option from the context menu as shown in Figure 6.44.
- A view for the version history is displayed at the bottom of the screen as shown in Figure 6.45.
Figure 6.45 Version History of an Object
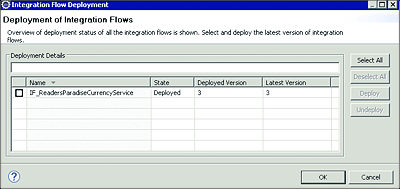
You can also check which one of the versions mentioned in Figure 6.44 and Figure 6.45 is deployed in the server. To do so, select Process Integration, then Check Deployment from the top menu of the SAP Process Integration Designer view. You then get details of the latest activated version as well as the deployed version, as shown in Figure 6.46.
Figure 6.46 On Overview of the Latest Activated Version and Deployed Version
