Homemade Fabric Dye 
By this point in your relationship with turmeric, it is not news to you that the stuff stains. If you use turmeric regularly, chances are you’ve had at least one incident wherein something in your house—a piece of clothing, a spot on the rug, a cutting board—is now permanently yellow. And not just kinda yellow. Yellow like a thousand burning suns. YELLOW. Well, guess what? You aren’t the first to notice that turmeric is a powerful pigment. It’s been used—along with fruits, vegetables, and flowers—to alter the color of fabric since ancient times. So, why not harness that staining power and make your own homemade natural fabric dye? It’s easy, it’s eco-friendly, and it costs almost nothing. Plus, the result is stunning. You can dye just about any fabric—clothing, table linens, bedsheets, throw rugs—just make sure you’re using a natural fiber, such as cotton, wool, linen, muslin, or hemp. And remember that the longer you leave the fabric in the dye, the more vibrant the result. After that, this project is all about having fun! (And maybe making it look as though that apron you accidentally stained with last week’s curry was meant to be yellow all along.)
Number of uses depends on the size of the item to be dyed
3 quarts water
½ cup salt
¼ cup ground turmeric
1. Combine 2 quarts of the water with the salt in a nonreactive pot and bring it to a boil, then add your fabric and let it simmer for 1 hour. This salt bath will help your fabric take the dye later on.
2. Remove the fabric from the salt bath. When cool enough to handle, wring it out and rinse the pot.
3. Combine the remaining quart of water and turmeric in the same pot, bring to a boil, then lower the heat and simmer for 15 minutes.
4. Remove the dye from the heat, add your fabric to the pot, and, using tongs or a large spoon, submerge the fabric. Allow it to soak for at least 5 to 10 minutes, or longer if you want to achieve more vibrant color.
5. When you’re pleased with the color of your fabric, rinse it in the sink until the water runs clear, then hang it to dry (or dry it in a dryer). When your garment is in need of laundering, be sure to wash it with like colors for the first couple of go-rounds.


Natural Air Freshener 
There’s no debating it: one of the best things about ginger is the way it smells. Fresh, pungent, kind of warm but also kind of lemony, its intoxicating perfume is like no other. To give your home a gingery scent, whip up this fresh and easy room spray. With nothing more than baking soda (a natural air freshener), ginger essential oil, and water, this stuff is the real deal—no gaggy fake smells, no overly perfumy lingering clouds, no weird chemicals. No headache! This recipe makes enough to fill an 8-ounce spray bottle. But, if you want to go bananas and stash a bottle in every room of the house, go for it! Just scale up all the ingredients. And feel free to add other scents you like. Lemongrass, mint, and citrus pair very nicely with ginger.
Makes about 1 cup freshener
1 tablespoon baking soda
5 to 6 drops ginger essential oil (and/or any other oils you like)
1½ to 2 cups water
1. Combine the baking soda and essential oil(s) in a small bowl. Stir well, then transfer the mixture to a spray bottle and fill with water. Shake well until the baking soda has dissolved.
2. Use the air freshener anywhere in your home or office. The spray is great in closets, bathrooms, and the kitchen!
Natural Garden Pesticide 
Gardening—getting your hands dirty, connecting with the earth, living off the land—is a calming, centering, life-affirming pastime . . . until it drives you completely mad! I certainly love the idea of a garden, and when things go my way I’m giddy with excitement about the bounty it can produce, but the insects, animal invaders, and other unwelcome guests make me insane. I thought casual, backyard gardening consisted of plunking a few seeds in the dirt, watering them every few days, and then literally enjoying the fruits of my (moderate) labor. But what are those brown spots on the big, once-beautiful leaves on my zucchini plant? And . . . what the?! Something ate all the lettuce last night? And heeeeeey! Where did those tiny holes in my tomatoes come from?! Come on! (By the way, praise be to the farmers, who endure everything.) Fortunately, I have managed to find at least one way to wage war against garden pests without resorting to scary chemicals. This spray, in which turmeric figures prominently, is full of all kinds of smells and tastes that bugs seem to dislike, and it can help turn things around in a garden that’s suffering from common pests. Use it once a week, unless you have a full-on invasion of insects, in which case you can apply it more frequently. Once the garden starts to recover, use it every couple of weeks or so to get rid of those pesky buggers.
Makes about 12 cups spray
3 quarts water
2 garlic heads, cloves separated and peeled, roughly chopped
3 cups fresh mint, leaves and stems roughly chopped
2 tablespoons ground turmeric
2 tablespoons cayenne pepper
½ teaspoon liquid dish soap
1. Combine the water, garlic, mint, turmeric, and cayenne in a large pot and bring to a boil over medium-high heat. Lower the heat to medium and allow the mixture to simmer for 2 minutes. Remove from the heat and allow to steep overnight.
2. Strain the mixture into a large bottle or jug and add the liquid soap. Store it in a relatively cool, dark place. A garage or basement is perfect.
3. To use: Fill a spray bottle with the solution. Spray the mixture on the leaves of affected plants. Don’t forget the undersides!
Note: Please make sure to use this spray with caution. It is a pesticide, after all, and can kill beneficial bees and bugs just as easily as it can wipe out the “bad” ones. Use common sense: Don’t just spray this stuff broadly in your garden; target the plants and areas where you need some help and leave the rest alone. That way, you’ll keep from harming the good guys.
DIY Acid-Base Indicator 
One of the most valiant uses for turmeric (one that I have not, thankfully, had occasion to test) is as an antivenom for king cobra bites. Research backed and everything! Second on my list of favorite obscure uses for turmeric—only slightly less useful than the antivenom—is the fact that it can be used to make your own litmus paper. Litmus paper tests whether a substance is acidic or basic. Simply dip the paper into the substance you’re testing, and it will change color depending on whether it is acidic or basic. Curcumin, the main compound responsible for turmeric’s color, will turn red in solutions with a pH greater than 7.5. Pretty cool! But why exactly you would need to perform a litmus test at home? Well, in all likelihood you wouldn’t need to, but science is dope, folks, and this experiment is fun and easy to set up with common household ingredients. After you make the strips, you can dazzle your friends and family by trying them out on all kinds of things from the fridge or pantry to see whether they’re acidic or basic.
Makes 20 to 40 test strips
2 tablespoons isopropyl alcohol (rubbing alcohol)
1 teaspoon ground turmeric
1 or 2 coffee filters
1. Place the isopropyl alcohol and turmeric in a glass jar or other container with a tight-fitting lid. Stir or shake to combine. Let the mixture sit, covered tightly, for at least 10 minutes and as long as several hours.
2. Meanwhile, cut your coffee filters into ½-by-2-inch strips.
3. Without stirring the turmeric that has settled at the bottom of the jar (you want to work with a clear, unclouded liquid), quickly dip your paper strips about halfway into the jar, then blot off any excess with a paper towel, or use a paintbrush to lightly paint the solution onto the strips.
4. Lay the paper strips on a nonporous surface to dry.
5. To use your litmus strips, pour a little bit of whatever liquid you want to test into a cup or jar, then dip in the strip and swirl it around for about 10 seconds. Take out the strip and observe the color!
Example of liquids to test:
• Vinegar
• ¼ teaspoon baking soda dissolved in ¼ cup water
• Lemon juice
• Milk
• Soapy water
• Tap water
Warning: This is not food! Rubbing alcohol is poisonous if ingested, so do not drink the turmeric extract. And, because isopropanol is flammable, do not work near an open flame.
Growing Ginger and Turmeric Indoors 
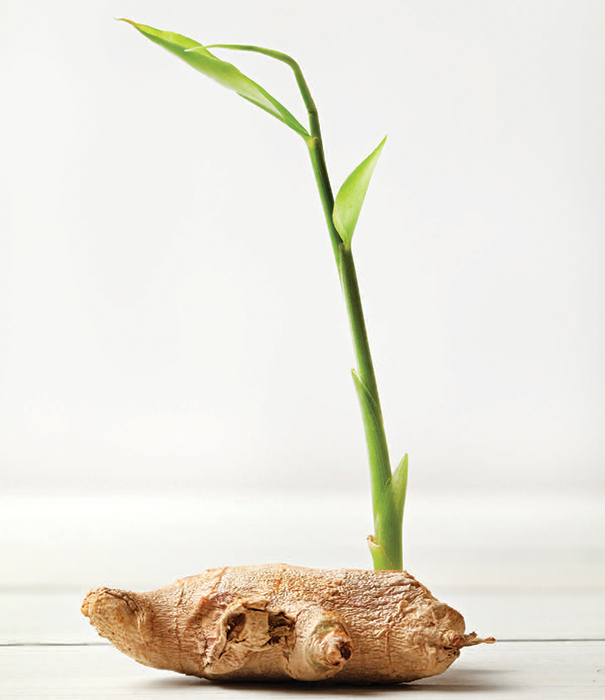
I love growing stuff from food scraps. The windowsill above my kitchen sink is often crammed with an assortment of jars sprouting who-knows-what that I just couldn’t possibly throw away. A handful of scallion nubs, an avocado pit, a pineapple top, the butt from a bunch of celery . . . But my favorite kitchen gardening project is regrowing ginger and turmeric from scraps. It couldn’t be easier and results in not only more ginger and turmeric, but also an attractive houseplant!
Grows 1 plant
1 piece fresh ginger or turmeric
Potting soil
Water for misting
1. Soak the ginger or turmeric rhizome in warm water overnight to stimulate growth and rinse off any chemicals that might be present, including growth inhibitors which would stymie your whole project!
2. Fill a shallow, wide flowerpot with potting soil.
3. Place the rhizome with the eye bud (this looks a bit like the eye on a potato) pointing up and cover it with about an inch of soil. Mist lightly with water.
4. Place the pot in a spot that stays warm and gets filtered, not direct, sunlight.
5. Keep the soil moist, being careful not to overwater. A spray bottle works well.
6. After 2 to 3 weeks, shoots should begin to appear.
7. In a few months, when you’re ready to harvest, pull up the whole plant, including the roots, remove a piece of the rhizome, then replant it and repeat the process.

The Easiest Way to Peel Fresh Ginger and Turmeric 
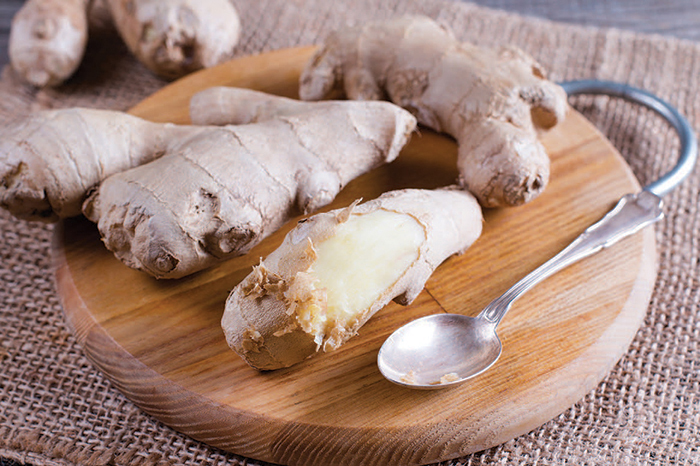
Staring down a knobby, gnarly piece of ginger or turmeric, knowing that the only thing standing between you and a gorgeous recipe is that papery, brown peel covering every inch, nook, and cranny, can be enough to incite an adult-sized temper tantrum. Peeling ginger and turmeric is annoying! And as I’ve mentioned more than once, quite often I simply don’t bother. But there are definitely times when texture and/or aesthetic does demand peeling, which is when I use the best tool I’ve got for the job: a spoon. Surprised? Well, it’s true. The edge of a metal spoon works better than a vegetable peeler or even a sharp knife at getting around all the awkward curves and angles on a knob of ginger or turmeric. To do so, simply scrape the side of the spoon across the surface of the ginger. It’ll get into all the bends and otherwise hard-to-reach places, easily removing the skin with such little effort you’ll wonder what all your anticipatory crankiness was about in the first place!

Tips for Making Fresh Ginger and Turmeric Last Longer 
If you aren’t juicing or otherwise going through large quantities of ginger or turmeric quickly, you could run the risk of ending up with a shriveled, dried-out piece of the rhizome (or a mushy, moldy one if your storage problems go another way) hiding out in your crisper bin. Such a bummer. You can, however, keep your ginger and turmeric safe from an untimely trip to the compost heap by relying on your freezer to keep it fresh longer. Here are three ways to go about it:
1. Freeze it whole. Just wrap it tightly in plastic wrap or store it in a freezer-safe container. When you need to use it, just take it out of the freezer and grate as much as you need, still frozen and everything!
2. Slice it. Lay slices of ginger and/or turmeric in a single layer on a baking sheet and freeze. Once frozen, store the slices in a resealable plastic bag or freezer-safe container. Then add them straight from the freezer to soups, tea, smoothies, or wherever you’d normally chuck in a slice of fresh ginger or turmeric.
3. Grate it. Press grated ginger or turmeric into an ice cube tray or blob it into little mounds on a baking sheet. Freeze it, then remove from the ice cube tray or baking sheet and store in a resealable plastic bag or freezer-safe container. You can then toss the frozen ginger or turmeric blobs directly into stir fries, soups, sauces, or smoothies. And for baking, all you have to do is pop the desired amount into a microwave and defrost it for a few seconds, then proceed with your recipe!
five Uses for Leftover Ginger Peels 
If you cook with a lot of ginger, there’s a good chance you’re going to find yourself with a lot of ginger peels that might end up in the garbage can or, slightly better, the compost bin. True, they aren’t the prettiest sight and they’re not exactly a tender bite, but they’re actually super flavorful and most definitely worth hanging on to. I like to stockpile leftover skins in a container in the freezer, adding to the stash each time I peel some ginger. Then, when I have a good, solid supply, I put those peels to use in one of these five ways:
1. Make a marinade for chicken or fish. For a spicy hit of fresh ginger flavor, combine a handful of ginger peels with 2 tablespoons of dark brown sugar, 2 tablespoons of soy sauce, 1 tablespoon of rice vinegar, and 1 teaspoon of sesame oil.
2. Make broth. Once you have a good-sized stash of peels, you can make this delicious, all-purpose broth to flavor all sorts of stuff from soups to smoothies to cocktails and more. Simply combine ½ to 1 cup of ginger peels with 4 to 6 cups of water in a medium saucepan. Bring the mixture to a boil, then lower the heat and simmer for 20 minutes. Remove from the heat and let steep for 1 hour. Strain and use immediately or store in the fridge for up to 1 week.
3. Make tea. Leftover peels work perfectly in tea, where they pack plenty of punch. Combine a tablespoon or two of leftover peels with a couple of slices of fresh lemon and 2 cups of water in a small saucepan. Bring the mixture to a boil, then lower the heat and simmer for 20 minutes. Strain the solids and sweeten, if desired.
4. Infuse vodka. This one is kind of a no-brainer and really couldn’t be easier. Place a few tablespoons of ginger peels along with a thinly sliced lemon in a quart-sized mason jar. Add 2 cups of vodka (or rum or really just about any spirit you like). Cover the jar with a lid and let the mixture steep for at least 48 hours and up to 1 week, tasting it daily to see how you like it. Once the vodka is steeped to your satisfaction, strain out the solids and start enjoying your ginger-infused vodka.
5. Make a simmering potpourri. Fill your home with the clean, fresh scent of ginger and citrus with a stove-top simmer pot. Combine about ¼ cup of ginger peels with 2 sliced oranges, lemons, or limes and about 4 cups of water. Keep the mixture on a steady simmer over medium-low heat, adding water as needed throughout the day. Breathe deeply and enjoy!

Tips for Removing (Some) Turmeric Stains 
Your new favorite superfood has left its signature golden calling card on some of your old favorite dishware, linens, countertops, and, in all likelihood even your hands. Now what?! Don’t fret—if you act fast and follow these stain-busting tips, you’ll be able to salvage your stuff and your sanity.
PLASTIC AND CERAMIC DISHWARE:
1 cup hot water
½ cup bleach or white vinegar
Combine the water and bleach or vinegar in the stained dish or mug or in another container large enough to hold the item to be cleaned (mixing spoon, food processor parts, what have you). The solution can be scaled up, as necessary, for larger items. Soak the stained item overnight, then wash well with soapy water.
COUNTERTOPS:
1 tablespoon baking soda
1 tablespoon water or fresh lemon juice
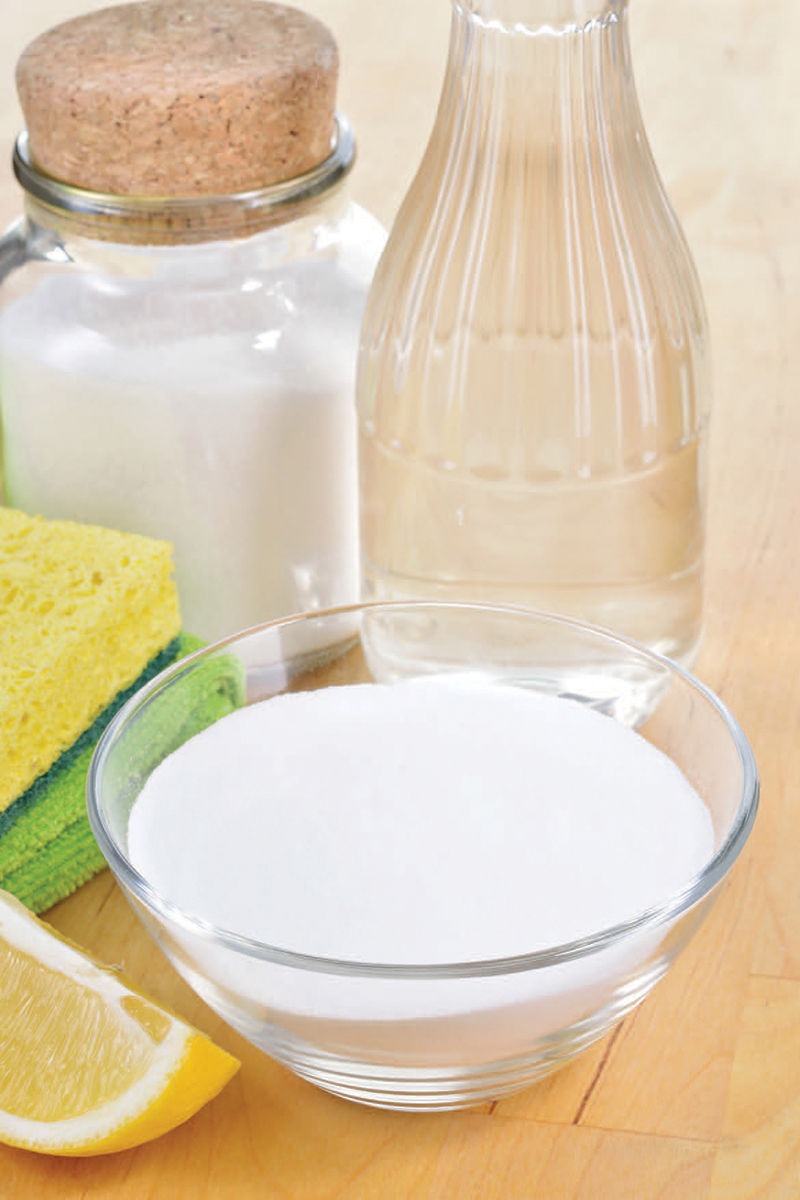
Combine the baking soda and water or lemon juice to make a paste. Apply it to the countertop, then allow it to sit for 10 to 15 minutes. Scrub with a sponge, rag (perhaps from a T-shirt you’ve already stained with turmeric), or Magic Eraser until the stain is minimized and/or removed completely.
FABRIC (SUCH AS CLOTHING OR TABLE LINENS):
1 to 3 teaspoons baking soda or cornstarch
1/8 teaspoon liquid laundry detergent or liquid dish soap OR ¼ cup bleach
Bucketful of hot water
1. Here’s where acting quickly counts the most! First, wipe off as much turmeric as you can, then sprinkle the baking soda or cornstarch onto the affected area. After 5 to 10 minutes, you should notice the powder soaking up some of the stain, which allows it to safely be brushed away.
2. Next, pour the liquid detergent onto the stain and scrub gently for several minutes on both sides of the fabric with a washcloth or soft toothbrush. Let the detergent sit for about 10 minutes, then wash your garment in a washing machine on its hottest setting. Dry in a dryer or in the sun. For some reason, sunlight has magical stain-lifting powers. Really!
3. And, of course, for stains on pure white fabric, there’s always bleach. Add the bleach to the bucket of hot water and soak your white clothes or linens for about 15 minutes before sending them through the wash.
4. If all else fails, use the stained fabric for something else. Like, as a rag for cleaning your turmeric-stained counters!
