
UNIT 01
ENERGY BASICS
WHAT IS ENERGY? You’ve probably heard someone describe another person as “high energy,” or perhaps you’ve seen a news story about clean energy. Energy is all around us: it’s a part of everything we do and everything we see. It can be described as the ability to do work or make a change. It helps people move and plants grow. It powers machines and technology. We observe energy all around us in the forms of heat, light, sound, and motion.
The labs in this unit will help you recognize that energy is always present. By the end of Unit 1, you’ll be able to observe many of the things energy can do. You will explore how heat moves in solids, liquids, and gases. You’ll observe light and how it travels. You’ll test how objects move with different amounts of energy and friction. You’ll make sound travel through different mediums. These are all examples of work or change.
Let’s get to work!
Observing convection currents in Lab 1.
|
CONVECTION CURRENT IN A CUP |

Why does the deep end of a pool always feel so much colder? Why does cold coffee creamer sink to the bottom of a cup of hot coffee, so that it needs to be stirred? This lab will explore how heat, or thermal energy, moves through fluids.

TIME:
15 minutes
PERSON POWER:
No Sweat!
MESS ALERT!
Be cautious with food coloring; it can stain fabrics, furnishings, and your skin. Use a plastic tablecloth or newspaper under the cups, just in case!
SAFETY IS KEY:
Be cautious handling hot water. The hot water needed for this activity should be just under boiling, approximately 185–200˚F (85–93˚C). Use the cooking thermometer to check the temperature.
 MATERIALS
→ 2 clear plastic cups per color
→ cold water
→ food coloring
→ 4 or 5 marbles
→ hot water
→ cooking or lab thermometer
1. Fill one plastic cup 3/4 full with cold water.
2. Wait until the water has become completely still.
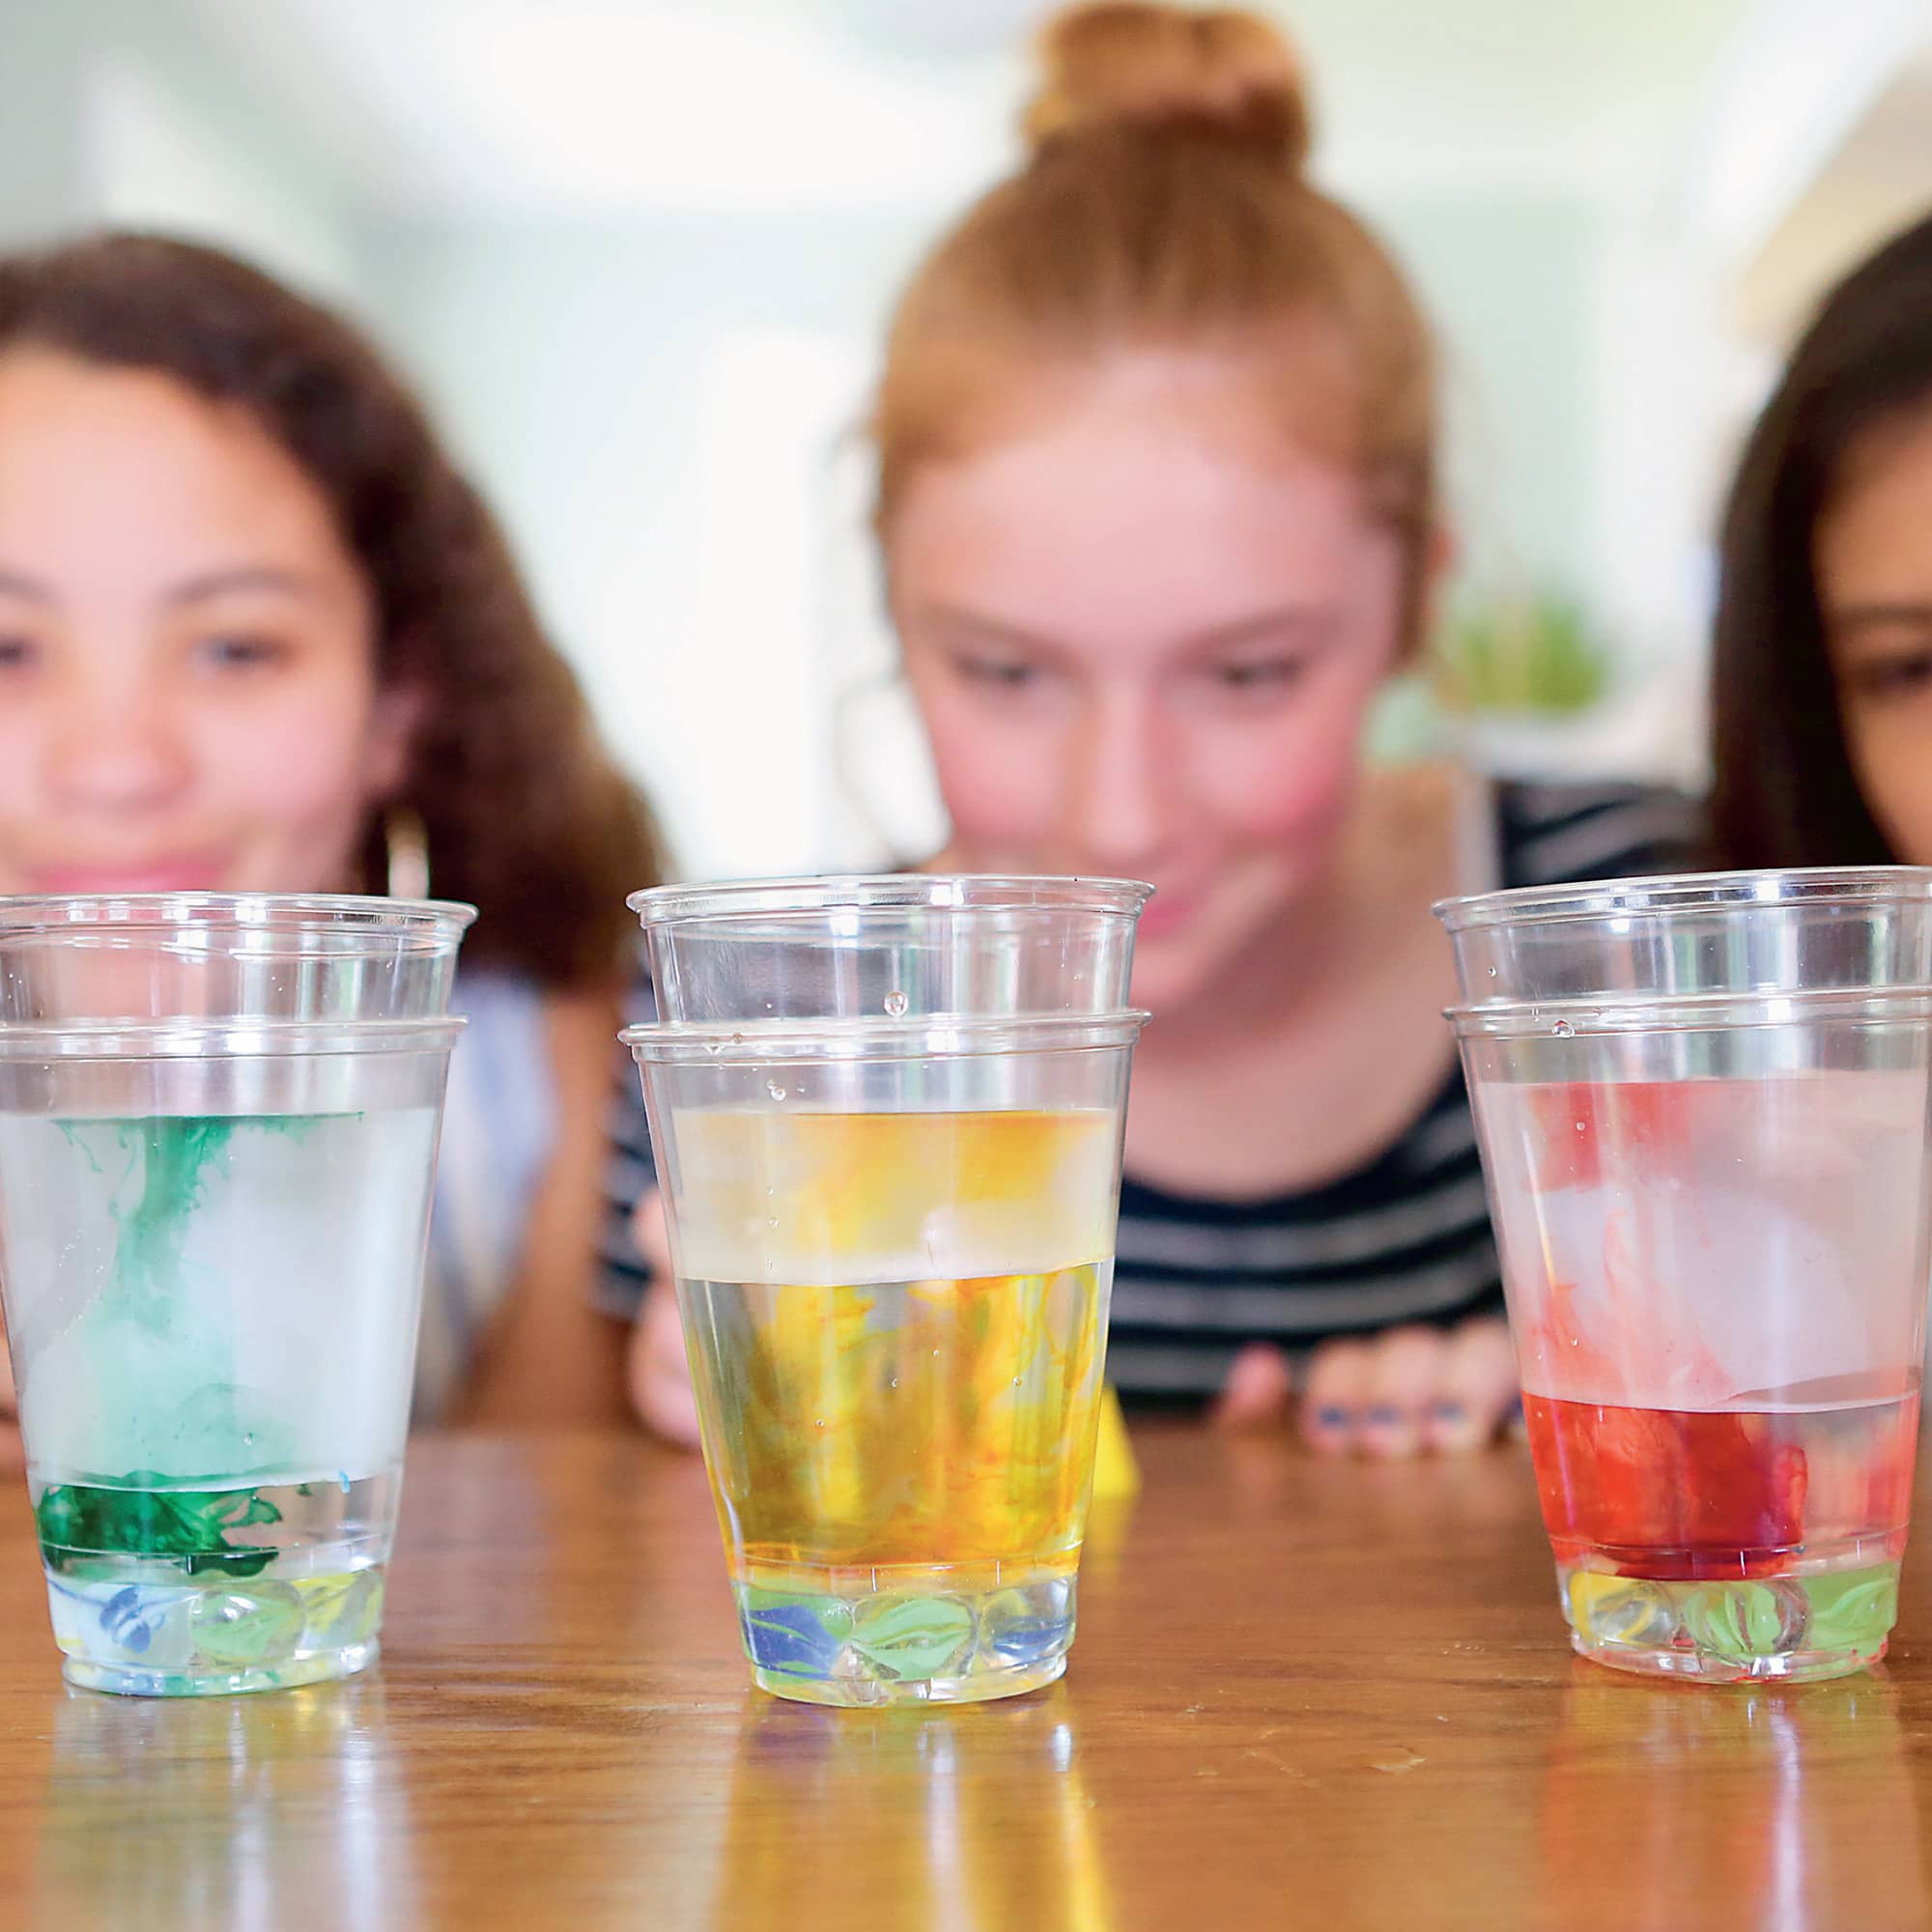
3. Add a few drops of food coloring (fig. 1). What happens to the food coloring? Take a photograph or draw a picture of what you see.

Fig. 1: Add a few drops of food coloring.
4. Empty the cup.
5. Put the marbles in the bottom of the second cup.
6. Add hot water to the cup so that the hot water just covers the marbles (fig. 2).
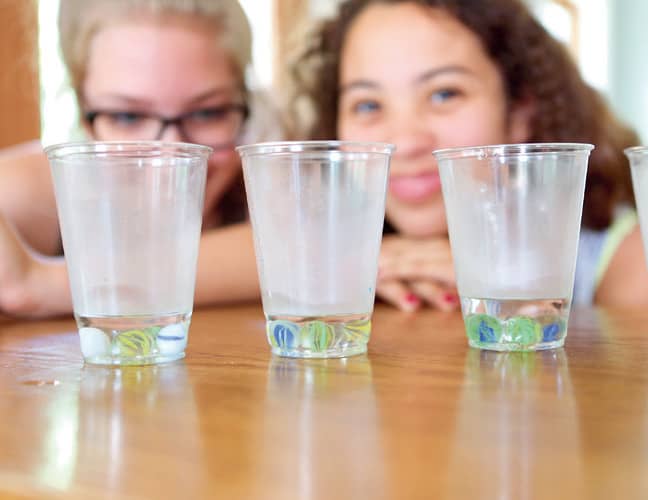
Fig. 2: Add hot water to cover the marbles in the cup.
7. Put the first cup on top of the marbles and hot water (fig. 3). Fill this cup with cold water again.
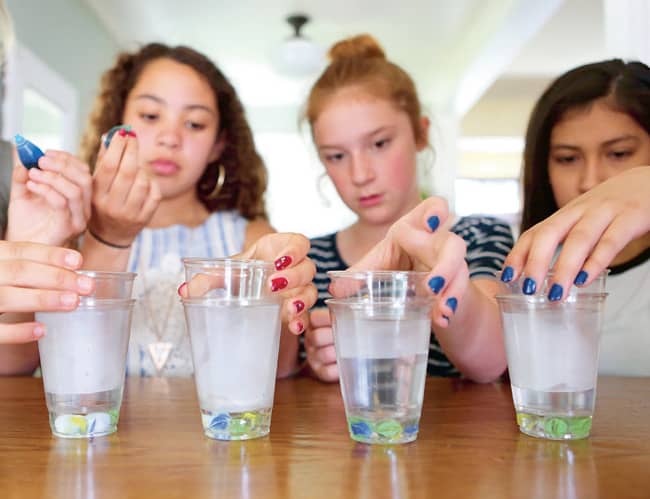
Fig. 3: Put the first cup on top of the marbles and hot water.
8. Add a few drops of food coloring to the cold water (fig. 4). What happens to the food coloring this time? Take a few photographs or a video, or draw a picture of what you see happening over time (fig. 5).
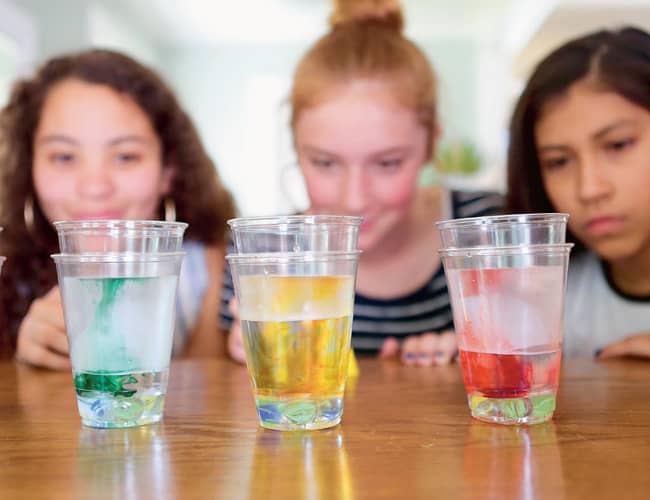
Fig. 4: Add a few drops of food coloring to the cold water.
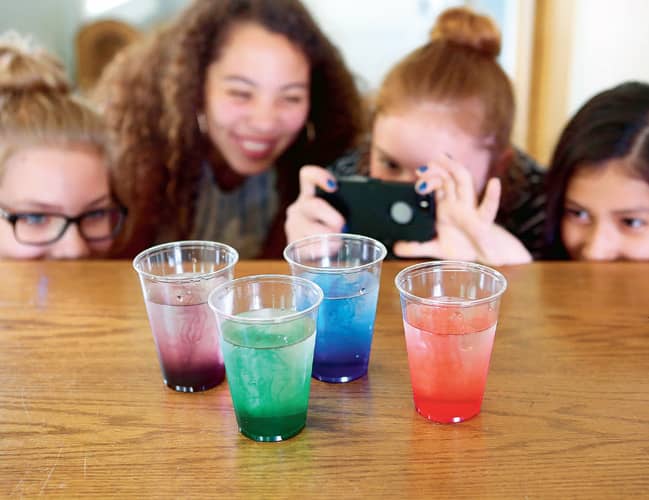
Fig. 5: Take photographs of what you see.

Heat Seesaw
Everything in nature seeks balance. Heat seeks balance, too. Heat flows from high temperature to low temperature. What happens if you pour hot water into a cold tub? The molecules of hot water are moving fast and will have more energy. These hot water molecules crash and collide into the colder molecules, giving them some of their energy. The hot water molecules slow down, having lost some energy, while the colder molecules start to speed up. The cold water becomes warmer, and the hot water gets cooler. This continues until all the water is the same temperature and all the water molecules are moving at the same speed. It’s like the hot and cold molecules are on a seesaw!
This seesaw happens in all substances: solids, liquids, and gases!
|
BEACH BASICS |
Sometimes on a hot day at the beach, you have to run from your blanket to the water. That sand is so hot! Why is the sand so much hotter than the water? And why, on a summer night, is the sand cooler than the water? This lab explores how heat, or thermal energy, can travel and be absorbed by substances. Do different substances absorb and hold their thermal energy differently?
TIME:
30 minutes or more
PERSON POWER:
No Sweat!
SAFETY IS KEY:
Be cautious when handling lightbulbs, as they may become hot when illuminated.
MATERIALS
→ 2 clear plastic cups
→ 2 cooking or lab thermometers
→ room-temperature sand
→ room-temperature water
→ timer
→ desk lamp with heat bulb or traditional incandescent bulb
1. Fill one cup with water (fig. 1).
2. Fill the second cup with sand so the sand and water are at the same level (fig. 2).
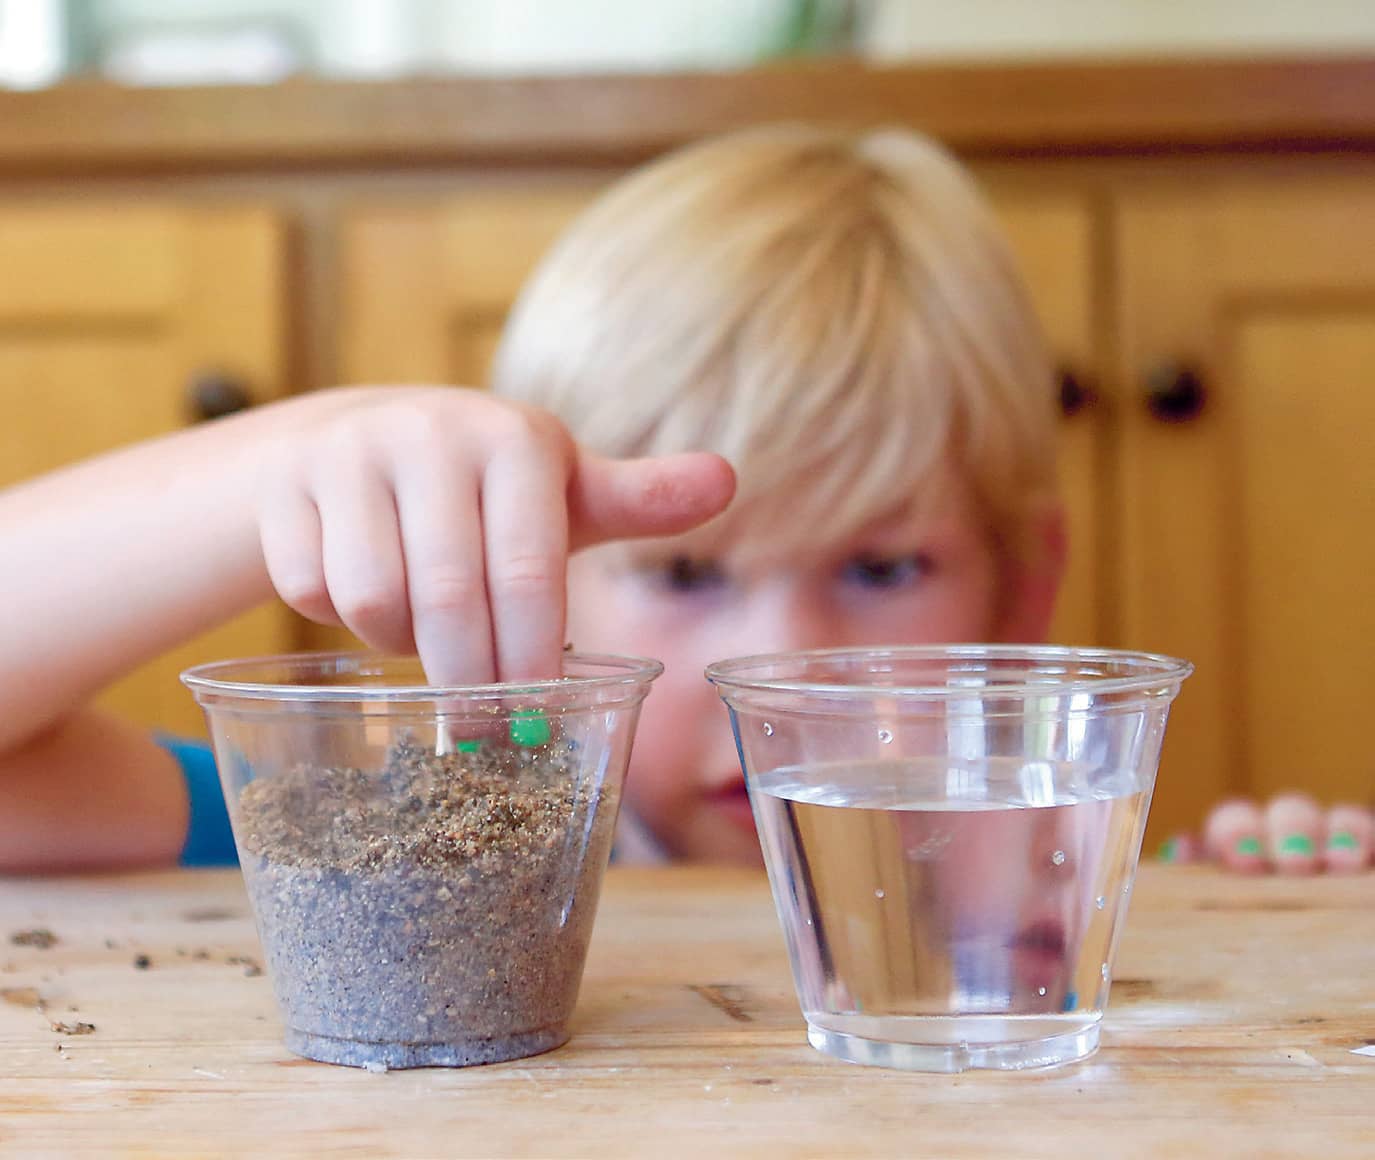
Figs. 1 and 2: Fill one cup with water and the second cup with sand.
3. Put a thermometer into each cup (fig. 3). Record the starting temperature of each cup. Make a table like the one shown here to record your data.
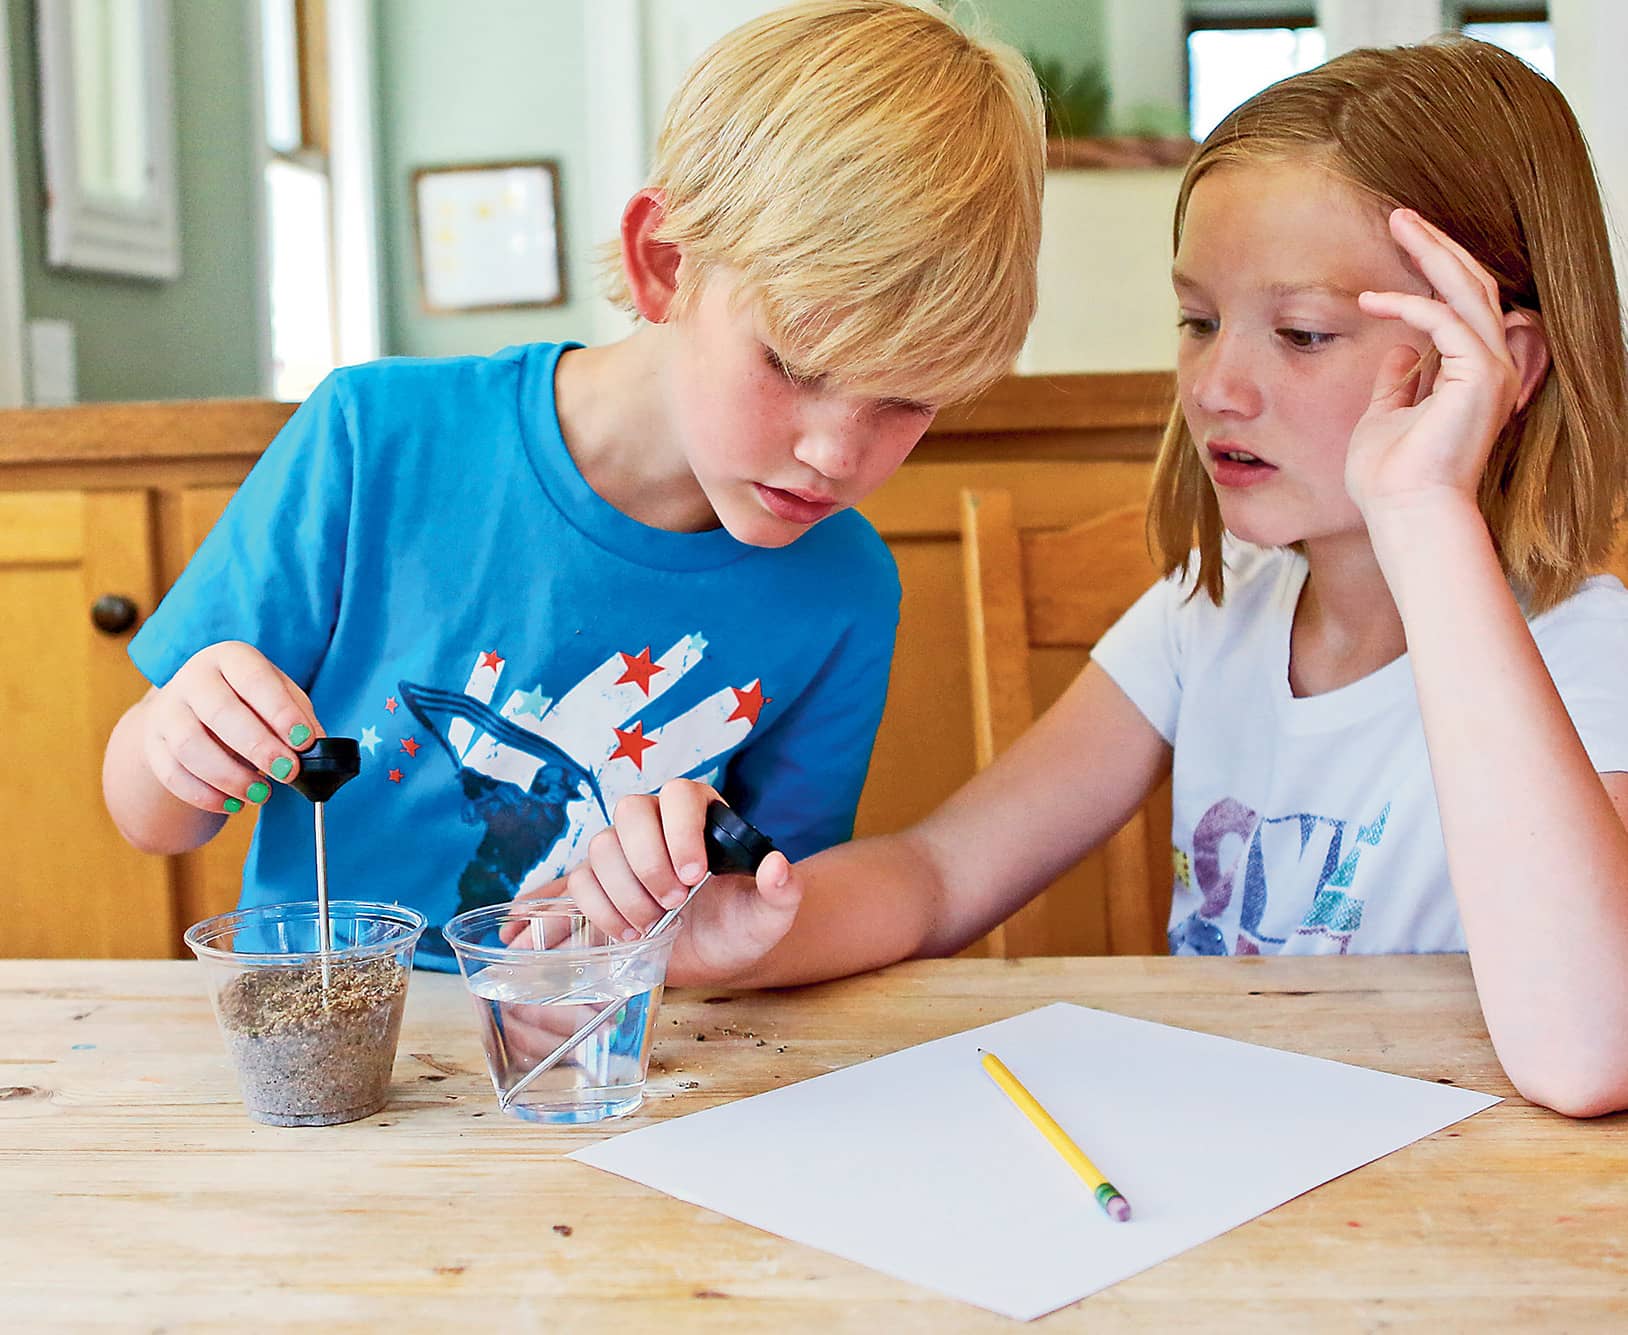
Fig. 3: Put a thermometer into each cup.
4. Place both cups about 4" (10 cm) away from the lamp (fig. 4). Turn on the lamp. Make sure that both cups are receiving approximately the same amount of light.
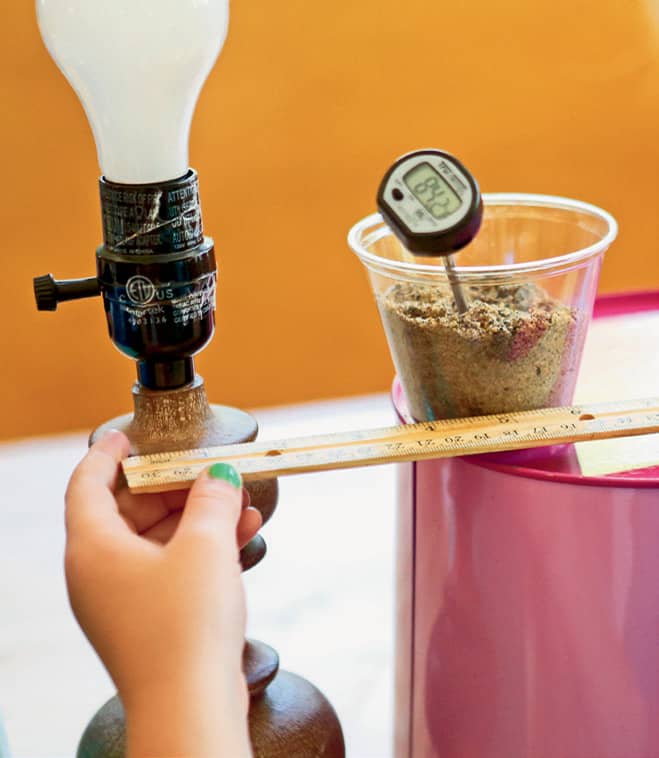
Fig. 4: Place both cups about 4" (10 cm) away from the lamp.
5. Set a timer for one minute and record the temperature in each cup every minute for ten minutes. Does one material have a higher temperature? Why?
6. Turn off the lamp and record the temperature every minute for ten minutes (fig. 5). Did one material cool more quickly?
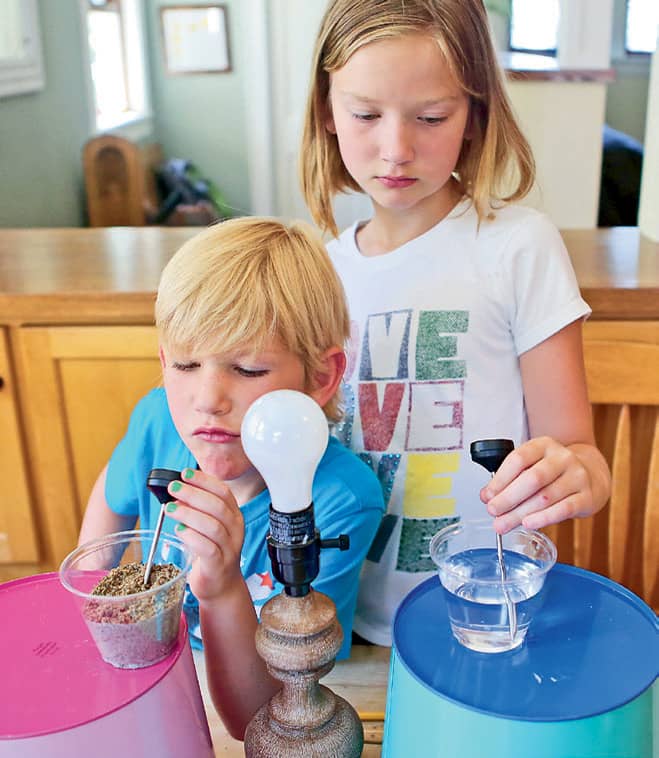
Fig. 5: Record the temperature every minute for ten minutes
What a Breeze!
Wind is energy in motion, but where does it come from? As you learned in this lab, when the sun shines, land warms faster than water. Land absorbs energy from the sun quickly and changes it to heat. This means that the air just above the land will also be warmer than the air above the water. Warm air over the land rises and moves out toward the ocean, where it cools and sinks toward the water. When it does, the cooler ocean air moves in toward land. This is called a sea breeze—the refreshing, cool air from the sea. Overnight, however, this process reverses. Why? Think about what you observed in this lab. At night, the land cools more quickly than water. Since the ocean retains its temperature longer, the air above it stays warmer. Warm air rises up from the ocean and sinks down again when it reaches the land. The cooler land air rushes out to sea. This is called a land breeze. The movement of air in this fashion is what creates wind!
Now Try This! 
Different materials absorb and retain heat in different ways. Does color or texture matter, too? Experiment by filling cups with different colors of sand and water and repeat the steps of the lab. Try it with cups of different materials like rocks or even a cup of air!
BEACH BASICS DATA
TIME |
LAMP |
NO LAMP |
||
|
Sand |
Water |
Sand |
Water |
Starting |
|
|
|
|
1 min |
|
|
|
|
2 mins |
|
|
|
|
3 mins |
|
|
|
|
4 mins |
|
|
|
|
5 mins |
|
|
|
|
6 mins |
|
|
|
|
7 mins |
|
|
|
|
8 mins |
|
|
|
|
9 mins |
|
|
|
|
10 mins |
|
|
|
|
|
WHAT A GAS! |
We know that heat, or thermal energy, travels through solids and liquids well. But what happens when it travels through gases like air, oxygen, or helium? In this lab, we’ll trap some gas from our lungs (breath!) in a balloon and explore what happens when it’s heated or cooled.
PERSON POWER:
Grab a Crew Member! It might be handy to have help tying the balloon and holding it for measurements.
SAFETY IS KEY:
Use caution with the hot water. The hot water needed for this activity should be just under boiling, approximately 185–200˚F (85–93˚C). Use tongs or an oven mitt to place your balloon in the hot water.
MATERIALS
→ 1 or 2 round balloons
→ bowl of ice water
→ bowl of hot water
→ measuring tape
→ oven mitt or tongs
→ cooking or lab thermometer
1. Blow up the balloon to the size of a baseball and tie it (fig. 1).
Fig. 1: Blow up the balloon to the size of a baseball.
2. Allow the balloon to sit for a few minutes so that the gas in the balloon can equalize with the temperature of the room.
3. Use the measuring tape to measure the circumference of the balloon at its widest point (fig. 2). Circumference is the distance around a circular object.
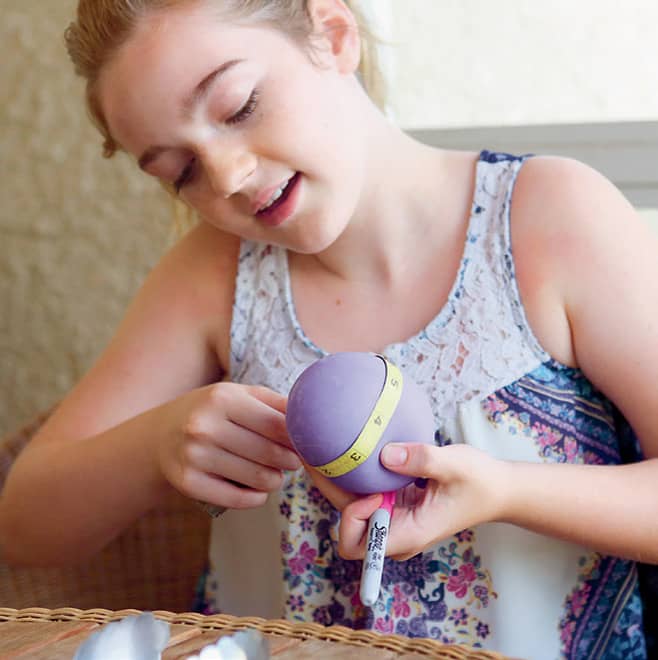
Fig. 2: Measure the circumference of the balloon.
4. Check the temperature of the room using your thermometer. Keep in mind the size of your balloon at this temperature, or take a picture of it!
5. Fill a bowl with ice water. Place the balloon in the ice water for one minute (fig. 3). After one minute, measure the circumference of the balloon and the temperature of the water. Did you notice a change?
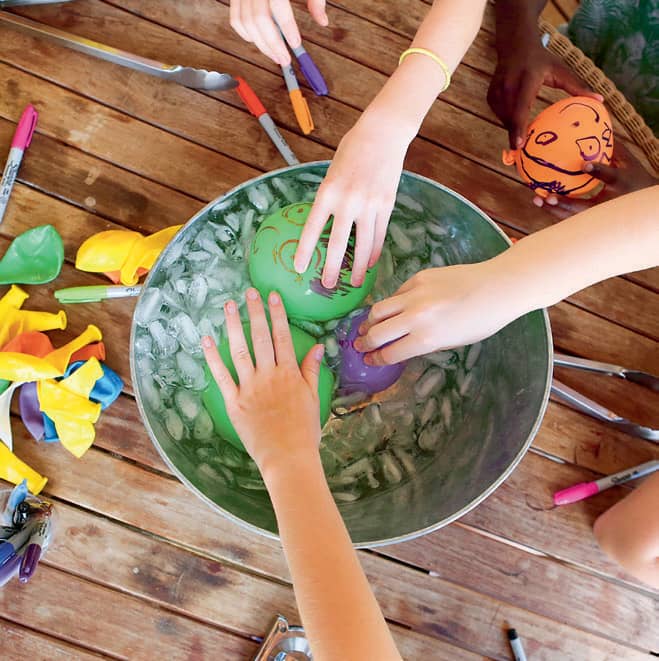
Fig. 3: Place the balloon in the ice water for one minute.
6. Fill a bowl with hot water. Using tongs or an oven mitt, carefully put the balloon in the hot water for one minute (fig. 4). After one minute, measure the circumference of the balloon and the temperature of the hot water. Did you notice a change?
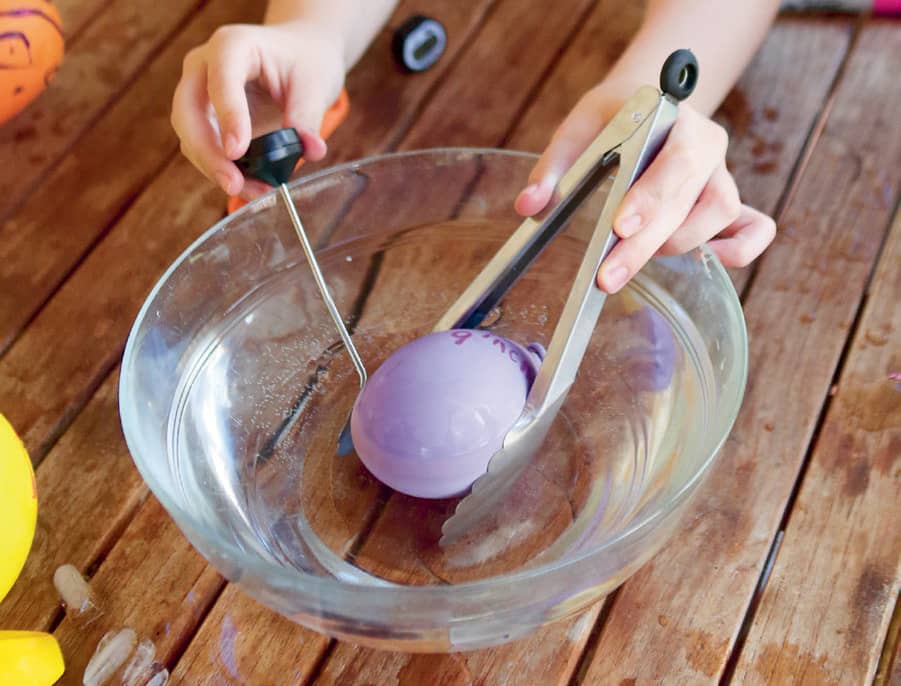
Fig. 4: Carefully put the balloon in the hot water for one minute.
Don’t Step on a Crack!
Ever wonder why sidewalks become cracked? All materials expand when they’re heated and contract when they’re cooled. When sidewalks and roads heat up and cool down as the seasons change, they expand and contract, too, which can cause cracks. When sidewalks and roads are designed with seams or joints between sections, the surfaces can expand and contract without cracking.
Now Try This!
Perform the experiment again, but this time, use a kitchen scale to take the mass of the balloon at the start and again after you take the balloon out of the hot and cold water. When the balloon changes size, does it change its mass? Mass is a measure of the amount of matter—has the amount of matter in the balloon changed?
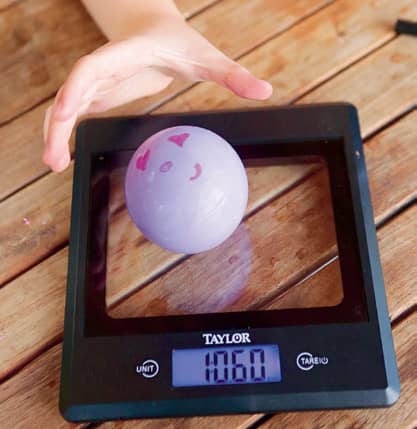
Use a kitchen scale to take the mass of the balloon.
|
SHADOW SHAPER |
We use light energy every day. Light that we see is called visible light, and it travels like waves in straight lines. But light can’t pass through most objects. This lab will explore how shadows are created when something blocks light’s path.
TIME:
15–20 minutes
PERSON POWER:
No Sweat!
MATERIALS
→ 11" × 17" (28 × 43 cm) piece of white paper
→ tape
→ table or flat surface near a wall
→ flashlight, (single bulb, non-LED works best)
→ small object, such as a wooden spool or nail polish bottle
→ ruler
→ notebook and pencil
1. Tape the paper vertically on the wall closest to the table (fig. 1). The bottom edge of the paper should be at the same level as the table top.
Fig. 1: Tape the paper vertically on the wall.
2. Place the flashlight on the table 12" (30 cm) from the paper (fig. 2). Orient the bulb so that the light points at the paper.
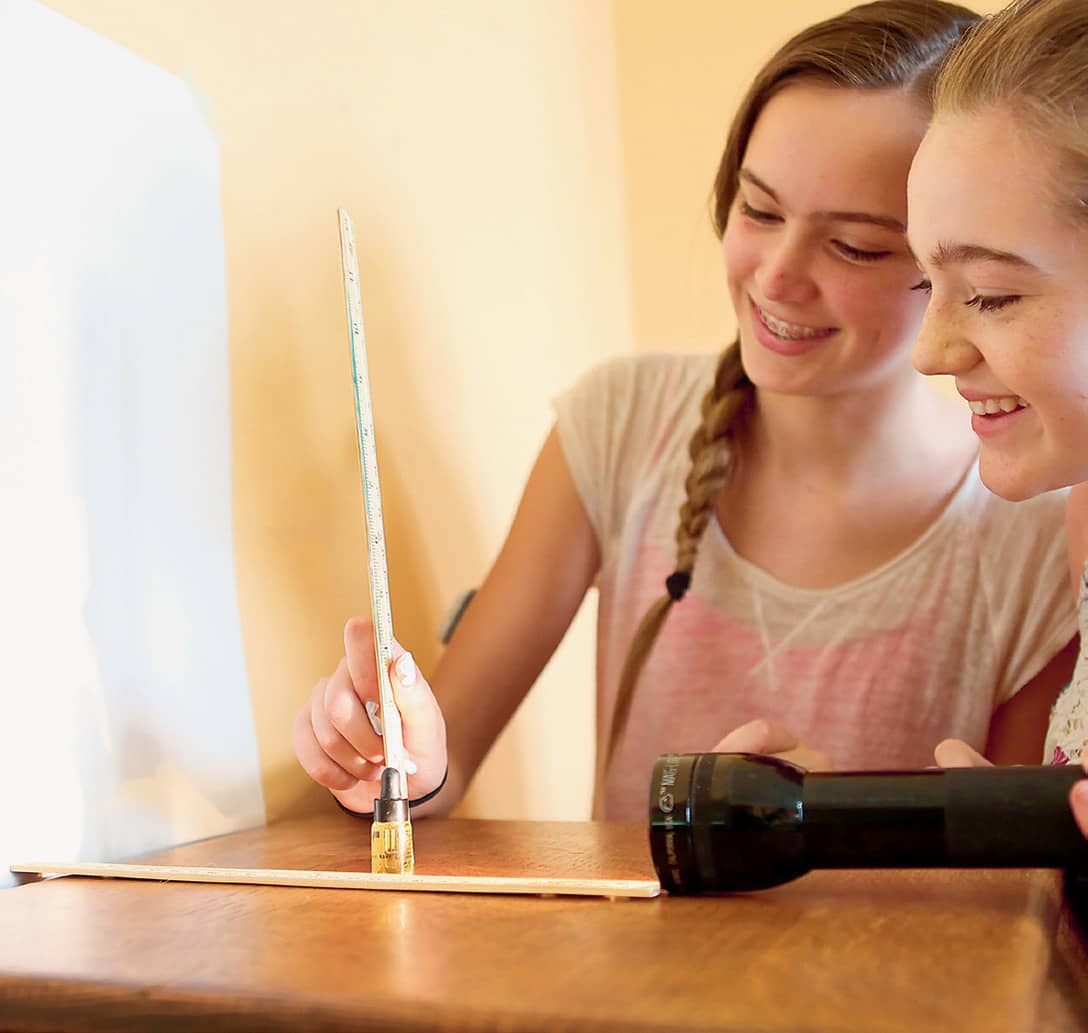
Fig. 2: Place the flashlight 12" (30 cm) from the paper.
3. Measure the height of the small object (fig. 3). Record the height so you remember it later. Draw a table like the one shown here, if necessary.
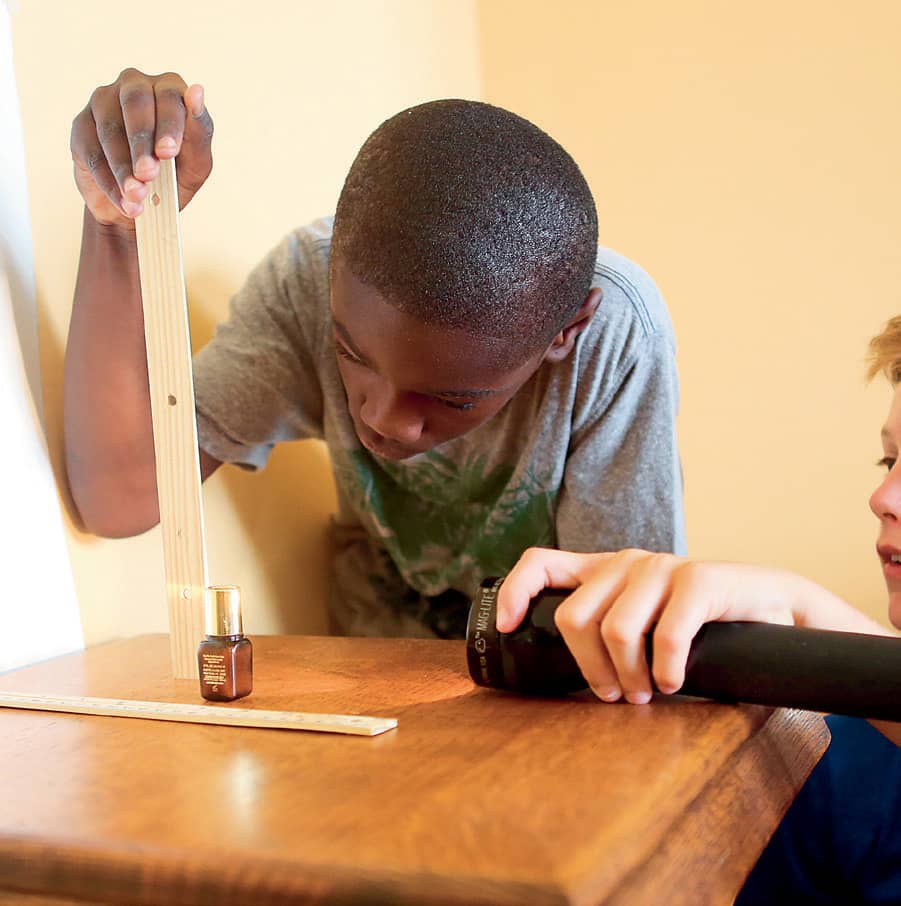
Fig. 3: How does the shadow change with each movement of the object?
4. Position the small object between the flashlight and the paper, so that the middle of the object is 2" (5 cm) from the paper on the wall.
5. Measure the height of the shadow. Notice how clear or blurry the shadow and its edges appear. How does the height of the shadow compare to the height of the object? Record your observations on the chart.
6. Move the object back so that it is 4" (10 cm) from the paper on the wall. How has the shadow changed?
7. Continue moving the object closer to the flashlight, at distances of 6", 8", and 10" (15, 20, and 25 cm) from the wall. How does the shadow change with each movement of the object (fig. 4)?
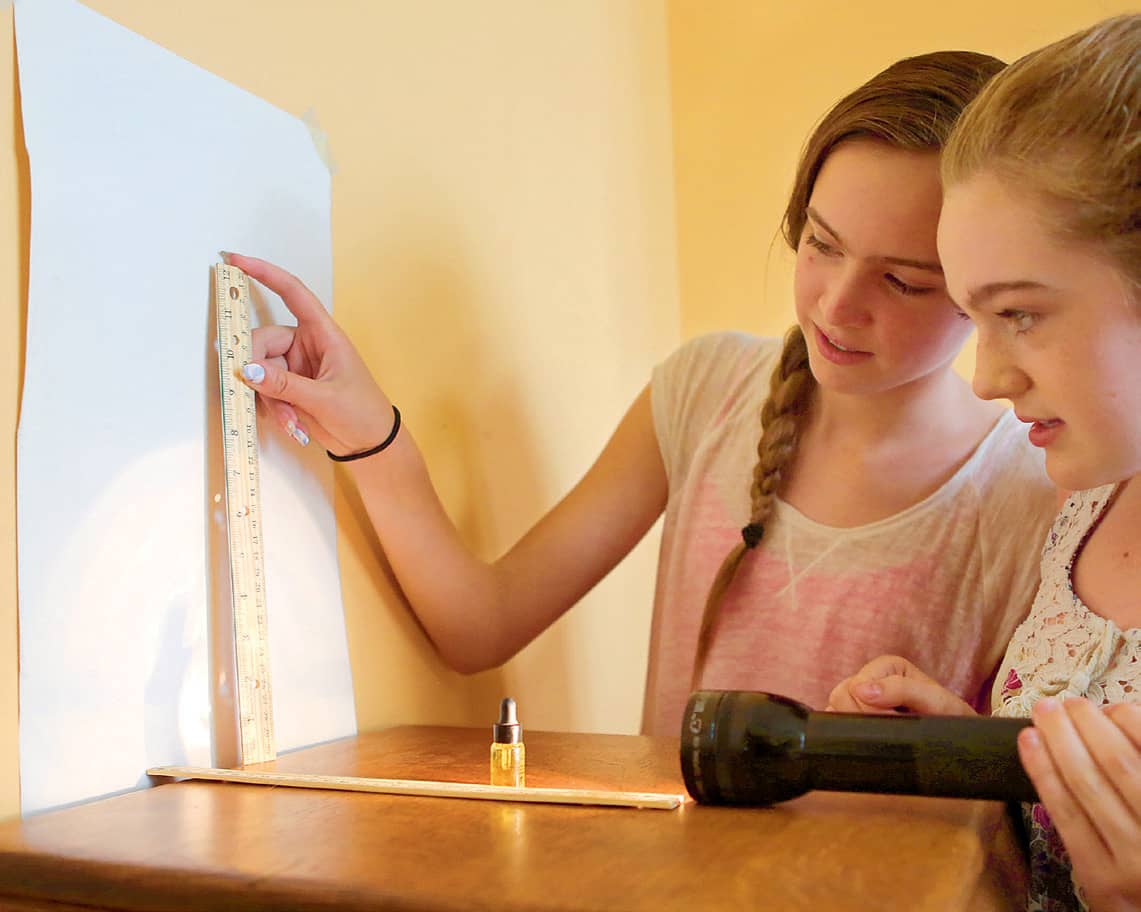
Fig. 4: How does the shadow change with each movement of the object?
Sundial
Early Egyptians knew all about shadows and how light travels. They observed that the sun follows the same pattern in the sky each day. They realized that as the position of the sun changes in the sky, so does your shadow. They used their observations to create a tool for telling time. This device, a sundial, was made simply by placing a stick in the ground. They used the length and position of the shadow to tell them the time of day!
Now Try This!
Hold the flashlight at a different angle. How does your object’s shadow change? Have some time on your hands? Go outside on a sunny day and have a friend take a picture of your shadow. Mark the spot where you stood, and come back to repeat this process every hour for a few hours. How does your shadow change and why? Come back to the spot a few months later at approximately the same times. Does your shadow change?
SHADOW SHAPER DATA
FLASHLIGHT DISTANCE TO WALL |
OBJECT DISTANCE TO WALL |
SHADOW HEIGHT |
SHADOW CLARITY |
12 inches |
2 inches |
|
|
12 inches |
4 inches |
|
|
12 inches |
6 inches |
|
|
12 inches |
8 inches |
|
|
12 inches |
10 inches |
|
|
|
MIRROR MADNESS |
When light strikes an object, it can pass through the object, be absorbed by the object, or be reflected by the object. This lab will explore how light can bounce off an object in a straight line. You’ll be making your own fun house of mirrors!
TIME:
30 minutes
PERSON POWER:
If you have nine stuffed toys, you can do this activity by yourself or with the help of a friend. Otherwise, grab nine crew members, because it’s All Hands on Deck!
SAFETY IS KEY:
This activity requires a full-length mirror. Ask for help from an adult to move and orient your mirror for the lab. Mirrors can be heavy and are breakable. Be careful when you move mirrors, especially if you’re superstitious!
MATERIALS
→ full-length mirror
→ measuring tape
→ 9 stuffed toys (or friends)
→ sticky labels
→ colored pencils
→ paper
→ protractor
1. Place the mirror vertically against a wall. Hang or place it on top of a few stacked books, so that it is 8" (20 cm) off the floor (fig. 1).
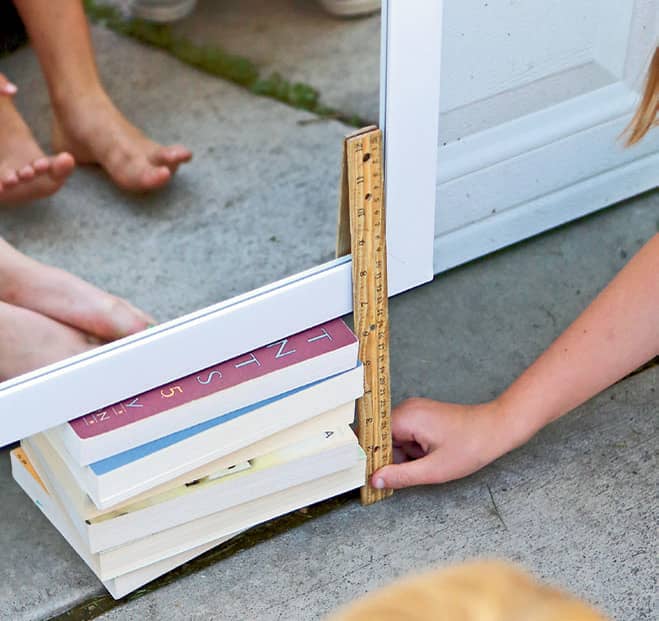
Fig. 1: Place the mirror so that it is 8" (20 cm) off the floor.
2. Make labels for your nine stuffed toys (or friends), each one with a number 1 to 9 (fig. 2).
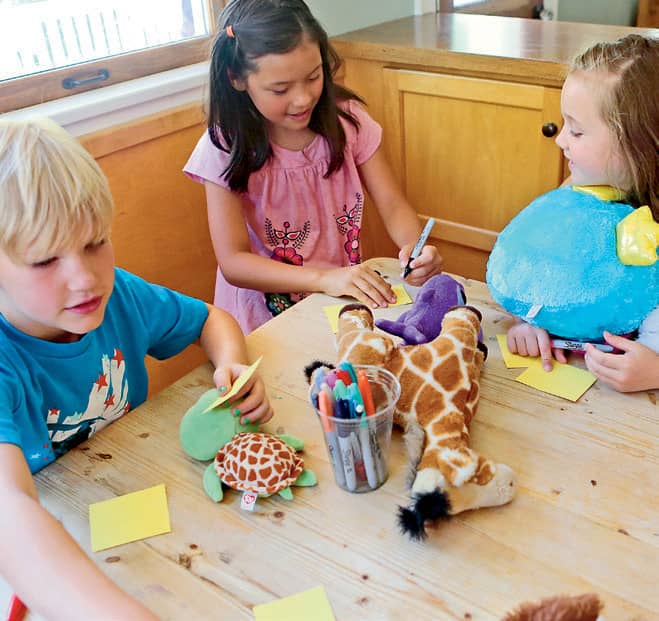
Fig. 2: Make labels for your stuffed toys (or friends).
3. Position toy 5 so it is 60" (1.5 m) from the center of the mirror (fig. 3).
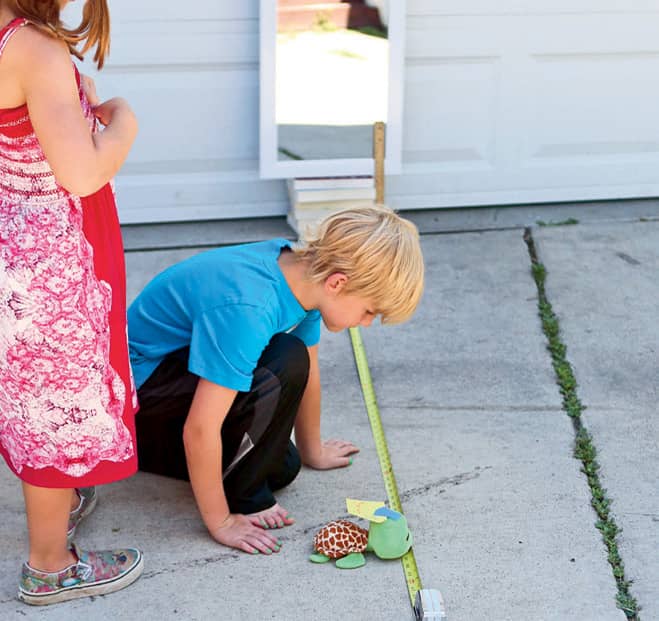
Fig. 3: Position toy 5 so it is 60" (1.5 m) from the mirror.
4. Position toys 1 through 4 to the left of toy 5 (fig. 4), each one 16" (41 cm) away from the next. Do the same with toys 6 through 9 on the right. All the toys should be in a straight line, 60" (1.5 m) from the mirror wall (fig. 5).

Fig. 4: Position toys 1 through 4 to the left of toy number 5.
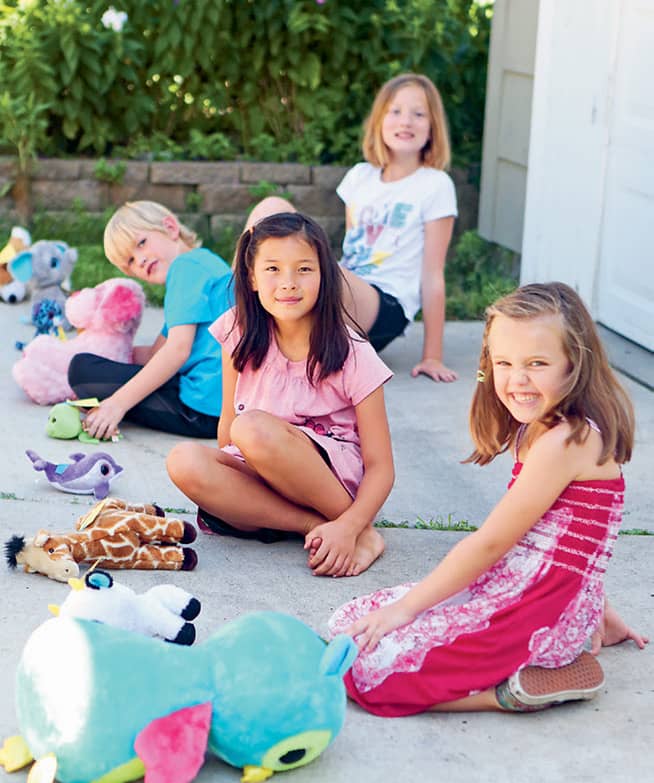
Fig. 5: All the toys should be in a straight line.
5. Draw a diagram of the mirror and the toys.
6. Stand directly behind toy 1, kneel to its level, and look directly into the mirror (fig. 6). Which toys can you see? On your diagram, draw a straight line with a colored pencil from toy 1 to the mirror and from the mirror to any toy you see.
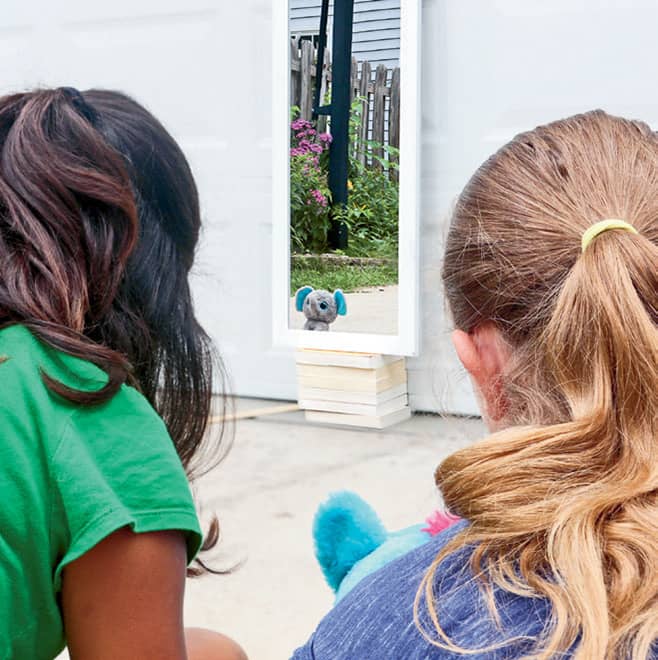
Fig. 6: Stand behind toy 1 and kneel to its level.
7. Stand directly behind toy 2. Using a different color, repeat step 6 and draw your lines. Repeat this for all nine toys.
8. Use a protractor to measure the angles you drew.
To Reflect or to Absorb?
Light waves can be reflected by mirrors, but reflection happens even if an item isn’t shiny. Different materials reflect light differently based on their color, texture, and other properties. Light waves (radiant energy) can also enter a substance and change into other forms of energy. Our skin absorbs light energy and turns it into heat (thermal energy). Some things are better reflectors than others in nature. Snow and ice reflect light better than forests. Glass buildings and homes with light-colored paint reflect more light than a home made of stone or painted with dark colors.
|
RAMP IT UP! |
When you look around you, many things may be in motion. All of this motion takes energy; nothing can move without it. In this lab, you’ll use ramps and marbles to explore the basics of motion and energy: What gets things moving, keeps things moving, and what makes things stop moving.
TIME:
20 minutes
PERSON POWER:
Grab a Crew Member! It’s easier to have help finding your marble if it goes missing!
MATERIALS
→ 5 books (all the same thickness)
→ ruler with a grooved center channel
→ pencil and paper or notebook
→ marble
→ measuring tape or meter/yardstick
1. Place one book on the floor (a smooth floor works best). Put the end of the ruler on the edge of the book binding and allow the ruler to extend out like a ramp.
2. On a piece of scrap paper or in a notebook, create a data table like the one on the right.
3. Place the marble at the top of the ruler and let it go. Let it roll down the ramp (fig. 1). Don’t push it!
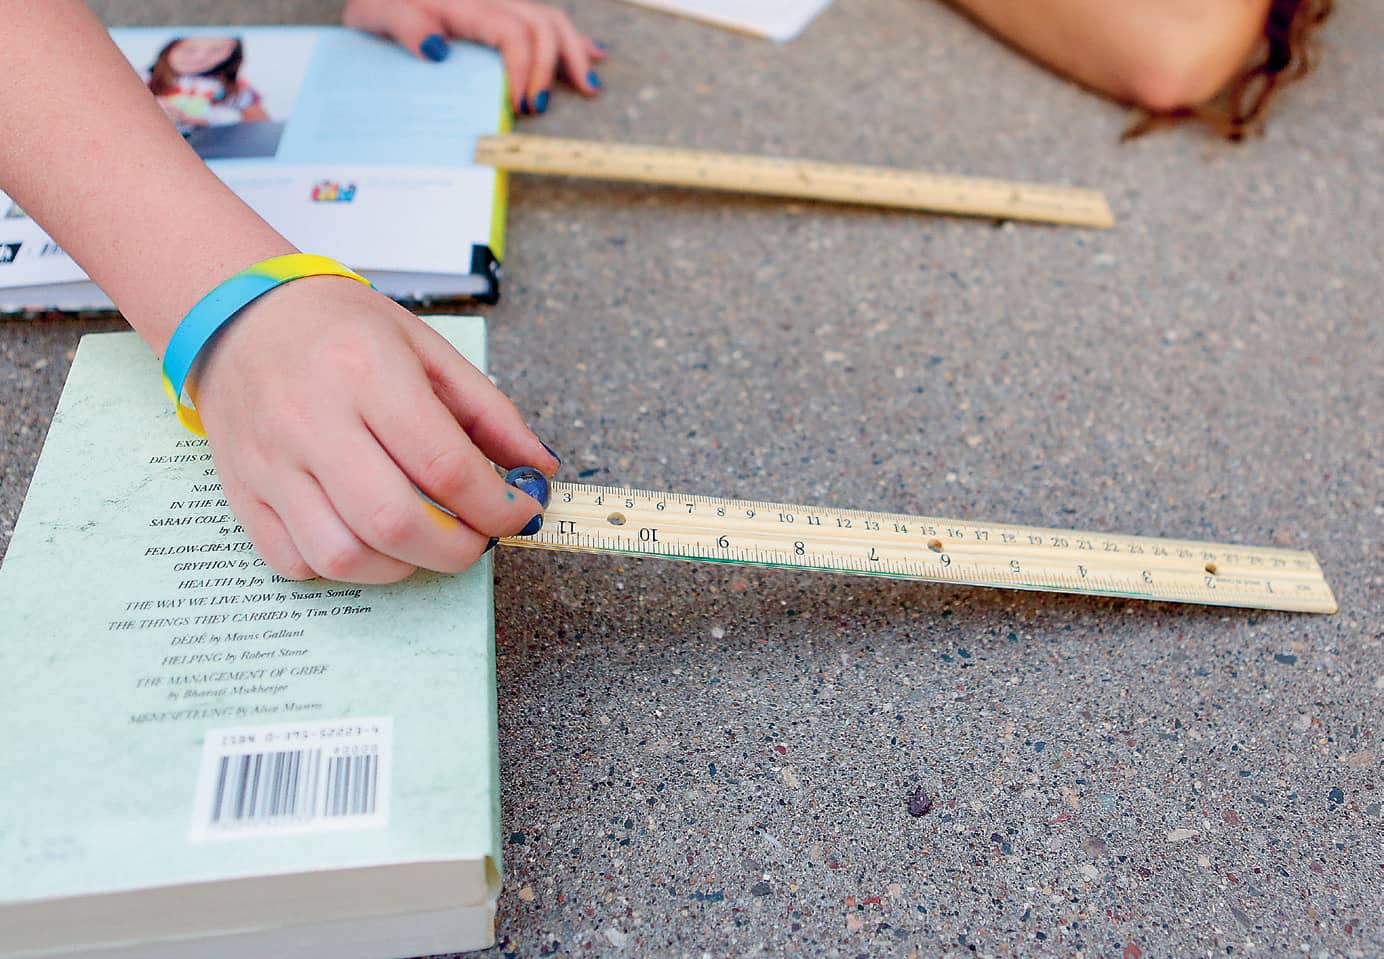
Fig. 1: Place the marble at the top of the ruler and let it go.
4. Allow the marble to come to a stop. Stretch the measuring tape from the bottom of the ruler ramp to the marble to see how far the marble traveled (fig. 2).
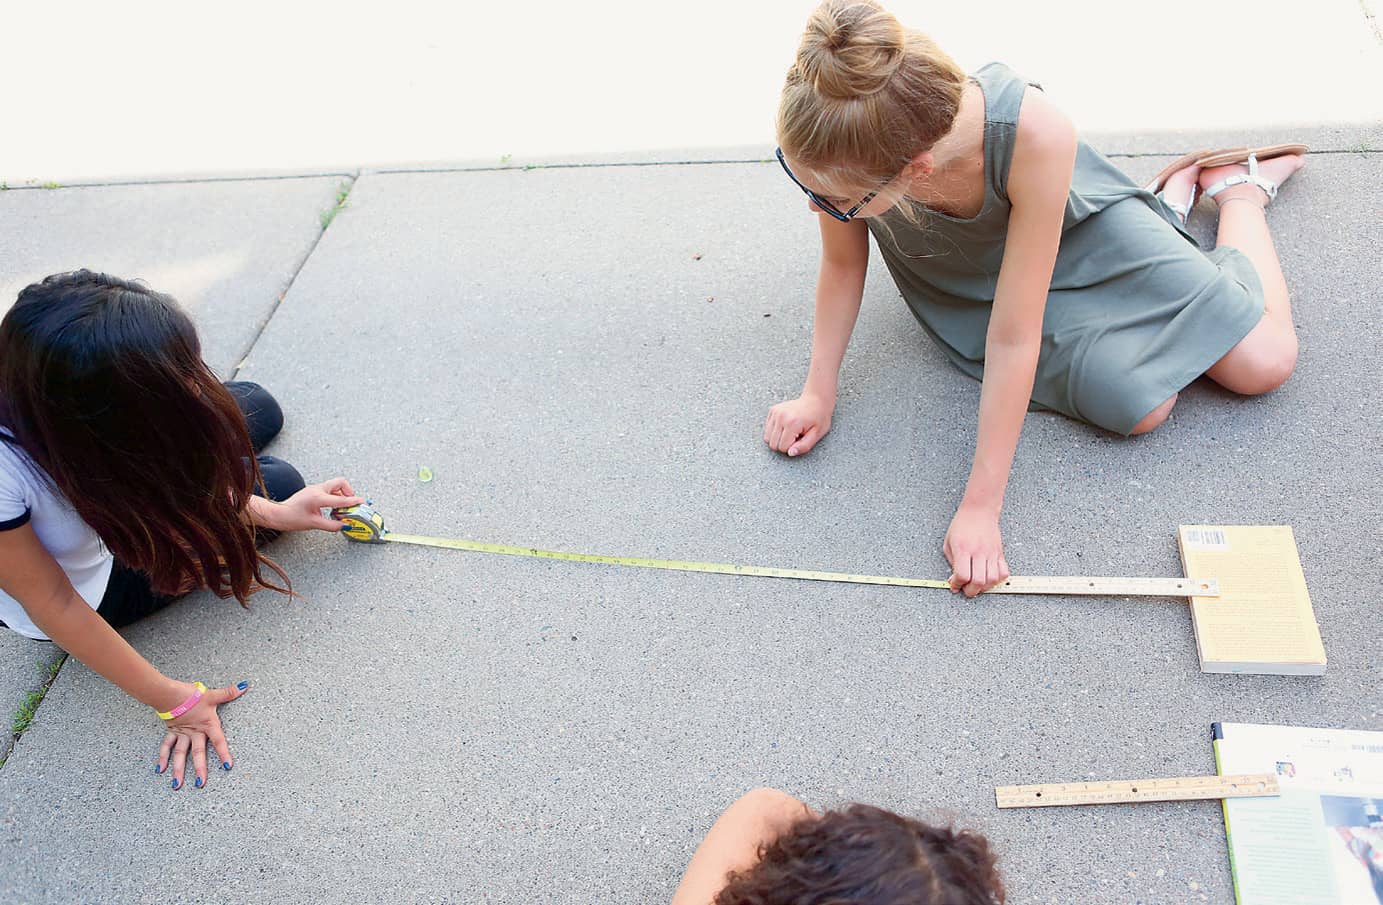
Fig. 2: Stretch the measuring tape from the ruler ramp to the marble.
5. Record the distance and repeat two more times for a total of three trials. Calculate the average distance traveled for the marble at a ramp height of one book.
6. Repeat the trials, adding a book each time, until your ramp is five books high (figs. 3 and 4). How did the height of the ramp affect the marble’s motion?
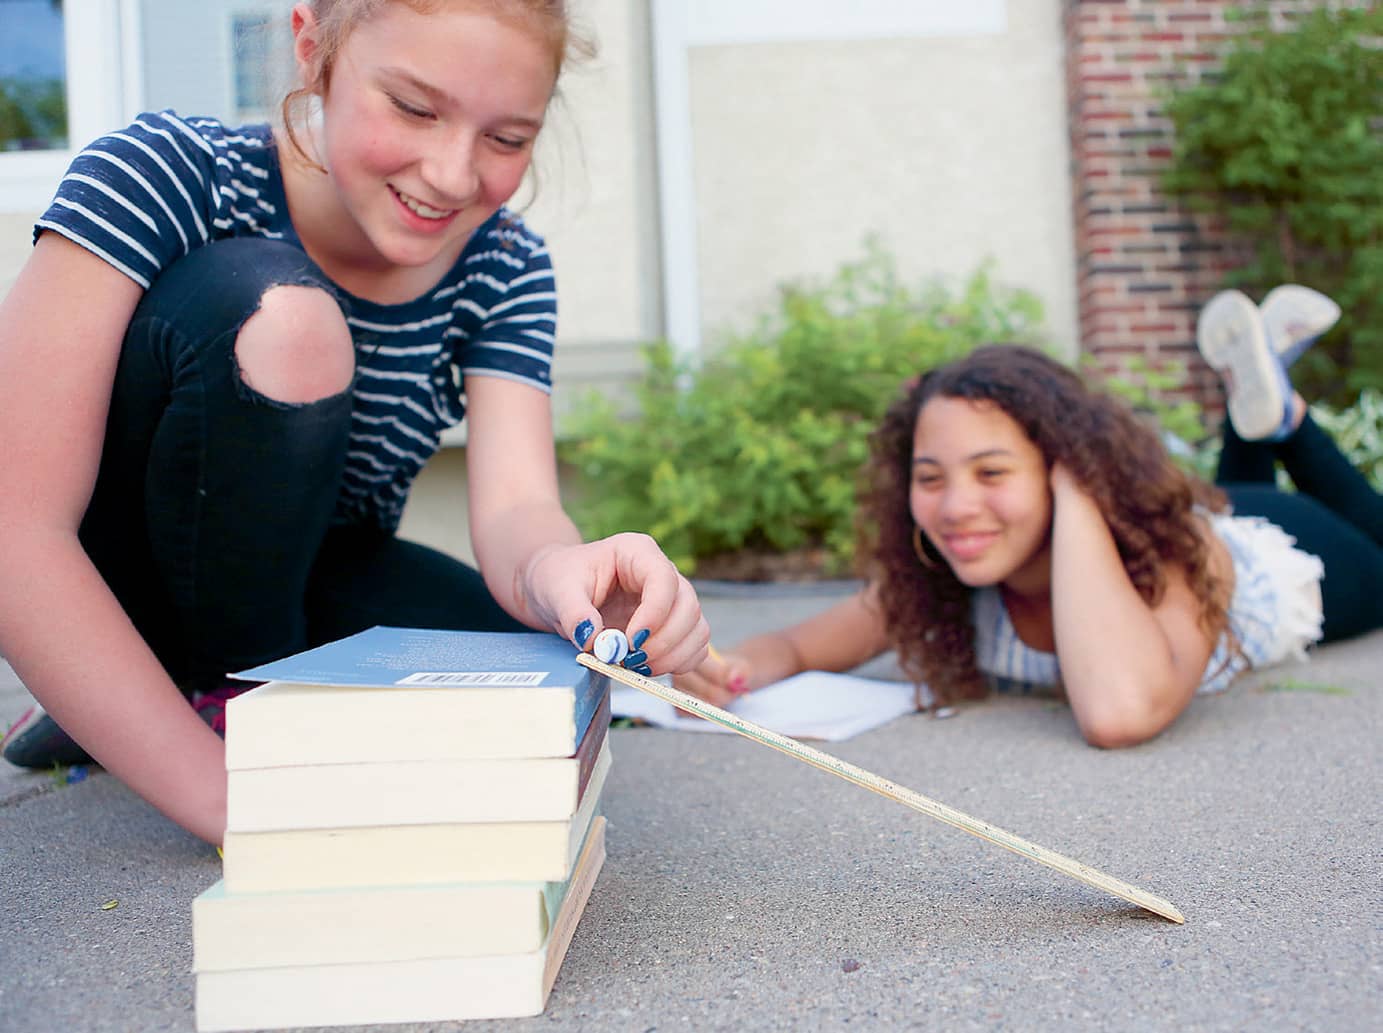
Fig. 3: Repeat the trials, adding a book each time.
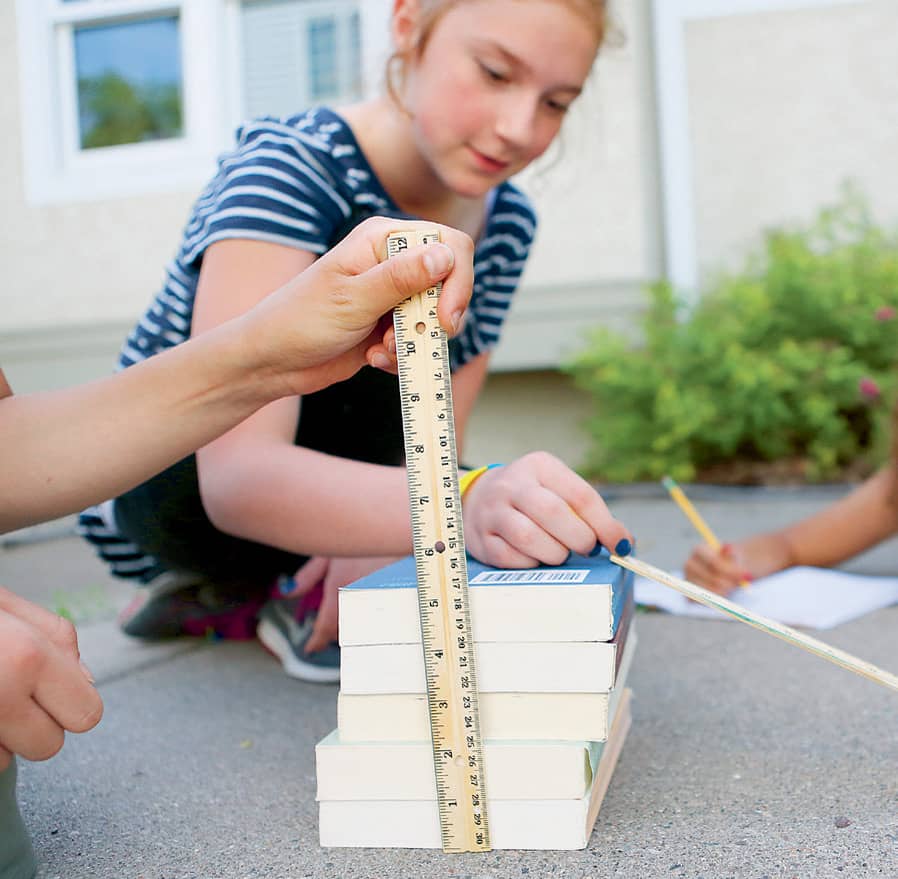
Fig. 4: Repeat the trials until your ramp is five books high.
RAMP IT UP DATA
RAMP HEIGHT |
TRIAL 1 |
TRIAL 2 |
TRIAL 3 |
TRIAL 4 |
1 Book |
|
|
|
|
2 Books |
|
|
|
|
3 Books |
|
|
|
|
4 Books |
|
|
|
|
5 Books |
|
|
|
|
Now Try This!
Try the experiment on different surfaces, such as carpet, a wooden deck, grass, or asphalt.
|
PENDULUM SWINGER |
Motion doesn’t always happen in a perfectly straight line. For example, if you get on the swings at a playground, why does the swing follow a curved path? Swings are examples of pendulums, and this lab sets up a mini pendulum to explore how gravity and motion work together.
TIME:
30 minutes
PERSON POWER:
All Hands on Deck! This activity works best with a few friends: one to work the stopwatch, one to do the swinging, and one to do the counting.
MATERIALS
→ meter/yardstick
→ 2 tables or desks of the same height
→ piece of string, 2' long (61 cm)
→ several large 1/2" (1.3 cm) washers
→ stopwatch
→ measuring tape
→ masking tape
1. Place the yardstick across the two tables or desks.
2. Tie one washer to the end of the string.
3. Tie a loop at the other end of the string. Slide the loop onto the yardstick so that the washer hangs between the tables (fig. 1). Tape the loop in place on the yardstick, and tape the yardstick to the tables (fig. 2).
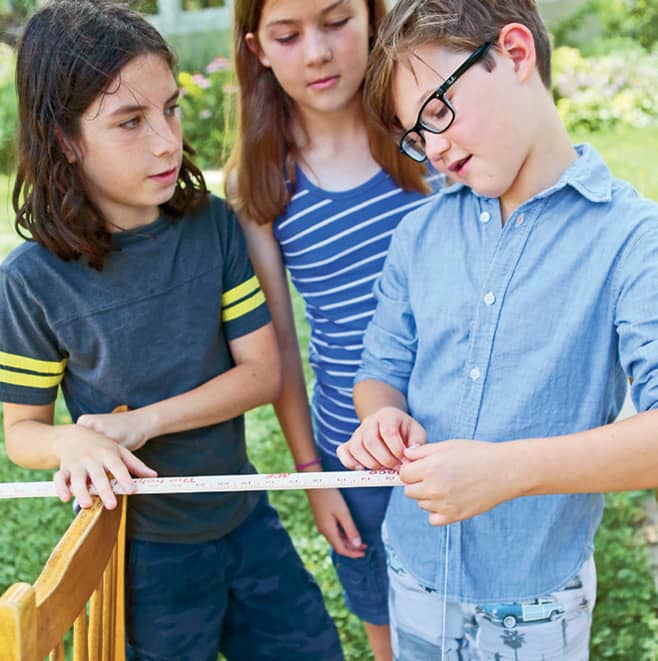
Fig. 1: Tie a loop in the string and tie it onto the yardstick.

Fig. 2: Tape the loop into place.
4. Raise the washer to the side so that the string is taut and the washer is at the same height as the yardstick (fig. 3).
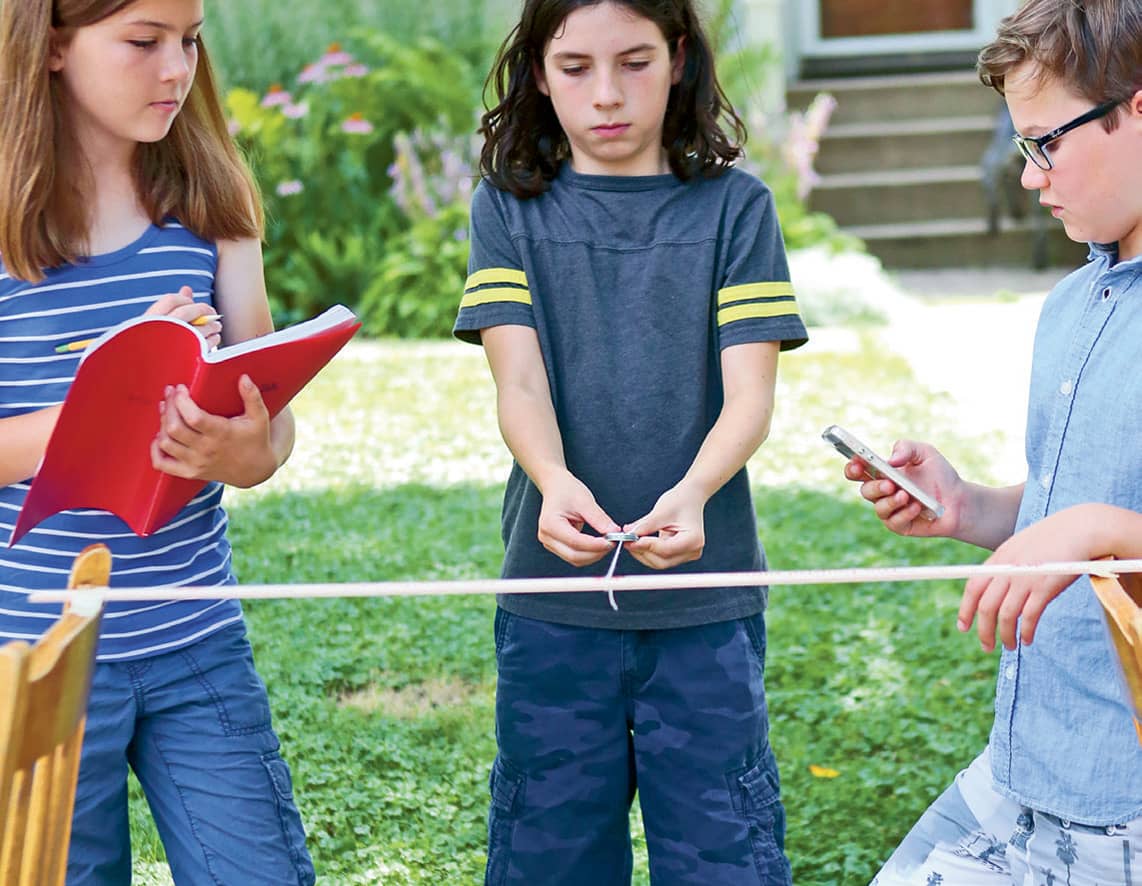
Fig. 3: Raise the washer to the side so that the string is taut.
5. Set your stopwatch for ten seconds.
6. Let the washer go, allowing it to swing back and forth (fig. 4). Count each complete back and forth motion the washer makes in ten seconds. Each back and forth is called one vibration. Make a table or chart to keep track, if needed.
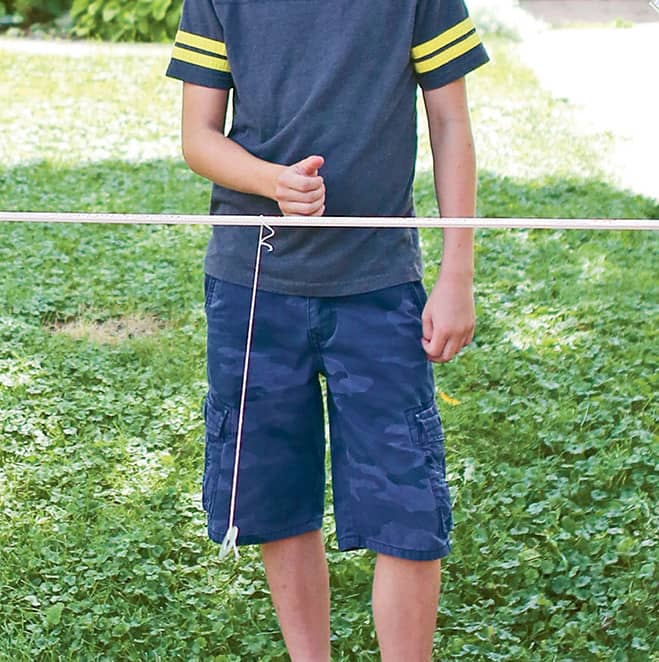
Fig. 4: Let the washer go, allowing it to swing.
7. Remove the tape and slide the string off the yardstick. From the top, slide another washer down the string so it rests on the first washer. Reattach the string to the yardstick and tape it back into place so the washers hang between the tables.
8. Repeat steps 4 to 6. Do you see a difference? Add another washer or two and repeat. What do you observe?
9. Now try changing the height where you release your washer. Do you notice a difference?
Now Try This!
Try the experiment again with one washer. This time, however, shorten the string by half the length. Do you think the vibrations will increase or decrease? Continue adding washers each time and compare.
|
SLINKY WAVES |
Sound is energy. It travels in waves, but these waves are different than the waves that carry light, X-rays, radio signals, or even water. This lab explores the different types of wave motion to understand how sound energy is carried from one place to another.
PERSON POWER:
Grab a Crew Member! You’ll need a partner or two to complete this activity.
MATERIALS
→ Slinky spring
→ long table
1. Your partner should stand across from you, holding one end of the spring, while you hold the other end (fig. 1). Another friend can record a video of the activity. It’s really fun to view this in slow motion!

Fig. 1: Your partner should hold one end of the spring.
2. Your partner’s end of the spring should be completely still while you move your end up and down slowly, about 4" (10 cm) off the surface. The motion should mimic ocean waves (fig. 2).
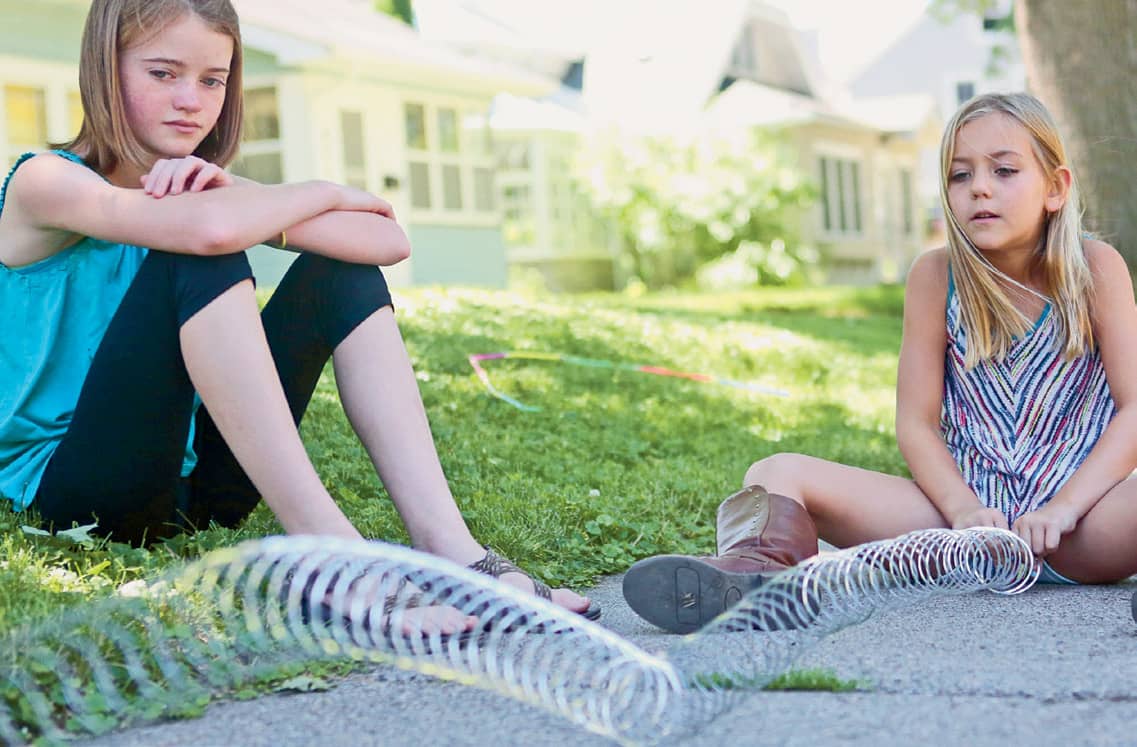
Fig. 2: The motion should mimic the waves of the ocean.
3. Move the spring more quickly, but at the same height. Does it respond in the same way?
4. Slow the movement down again, but increase the height to 8" (20 cm) off the surface (fig. 3). Observe the spring motion compared to the lower height, and then move it more quickly as in step 3. Has anything changed?
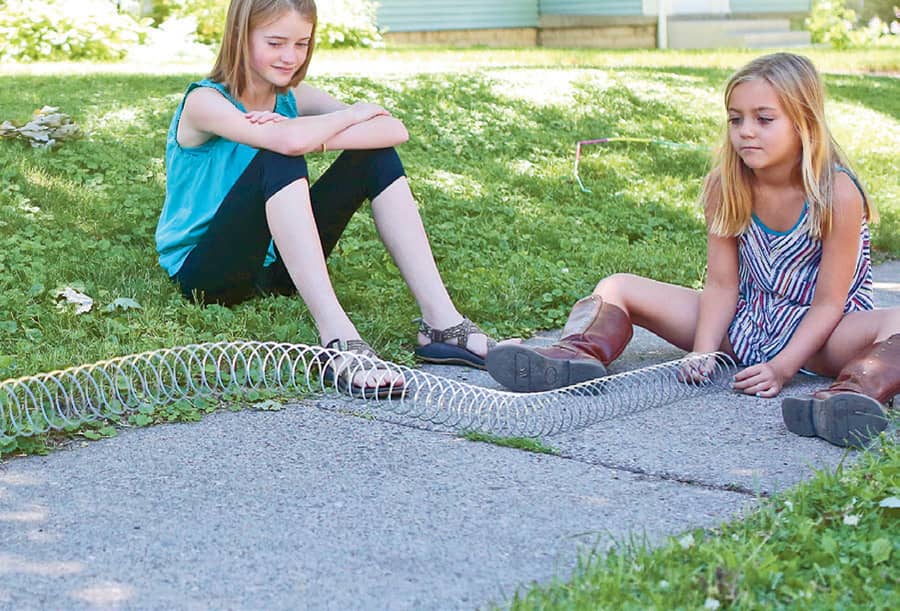
Fig. 3: Slow the movement down, but increase the height of the spring.
5. Now your partner should move the spring while you keep your end still (fig. 4).
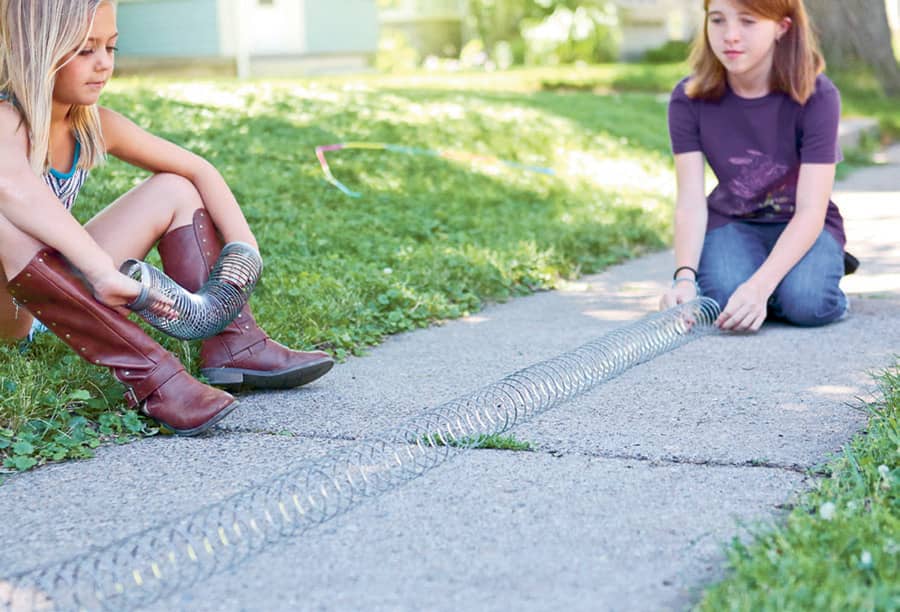
Fig. 4: Keep your end of the spring still while your partner moves the other end.
6. Have your partner slowly push and pull the spring 6" (15 cm) forward and backward on the surface in a straight line, toward you. How does the spring respond this time?
7. Increase the speed of the forward and backward motion and observe. What happens when you increase the length of movement to 12" (30 cm)?
Now Try This!
Explore the amplification of sound by inserting the bottom of a foam cup into a metal slinky. Hold the slinky up by your head and bounce it straight down to the ground and back. Then try holding it closer to the ground and bouncing it. What do you observe?
|
SOUND STOPPER |

Sound waves travel in long lines and vibrate through materials. So, what makes a room soundproof? Often we can hear sounds through thick and heavy-duty materials. Will a material stop sound? This lab explores how sounds vibrate through various solids.
TIME:
30 minutes
PERSON POWER:
Grab a Crew Member! You’ll need a partner or two for this activity. You’ll take turns listening.
MATERIALS
→ smartphone with your favorite song downloaded
→ piece of paper
→ sweatshirt
→ cookie sheet
→ roll of paper towels
1. Sit facing your partner, about 3' (91 cm) from each other. Place your materials between the two of you.
2. Hold the phone so that its speaker is aimed toward your partner. Press “play” on your song, and then place the paper so that it’s between the speaker and your partner (fig. 1). It should be close to the speaker, but not touching it. Ask your partners to tell you what they observe about the song before and after you move the paper into place. Do you notice anything different about the song on your side of the paper?
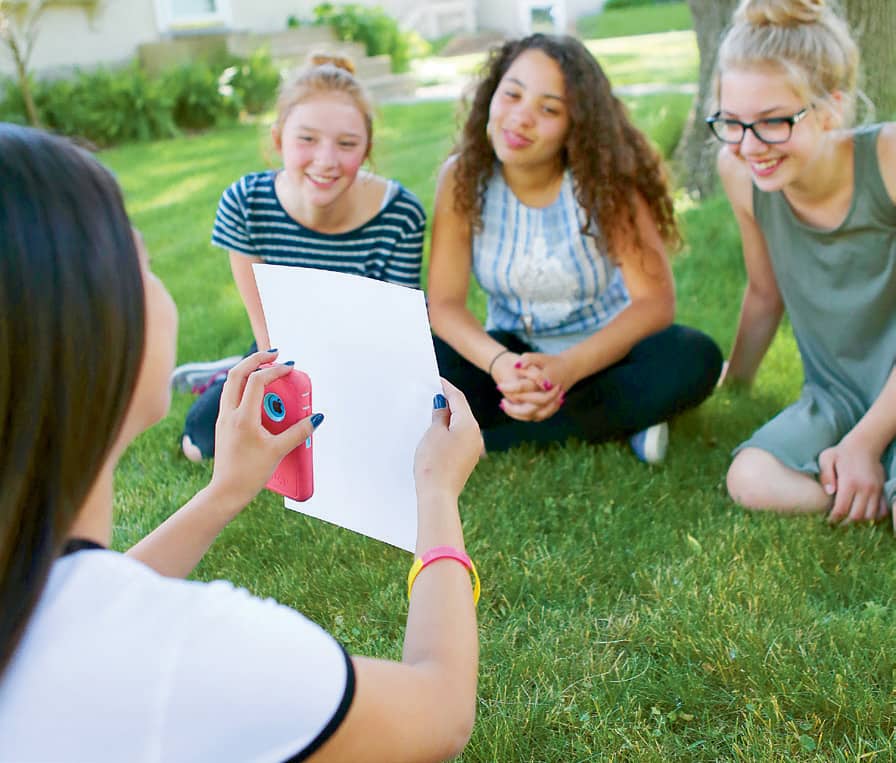
Fig. 1: The motion should mimic the waves of the ocean.
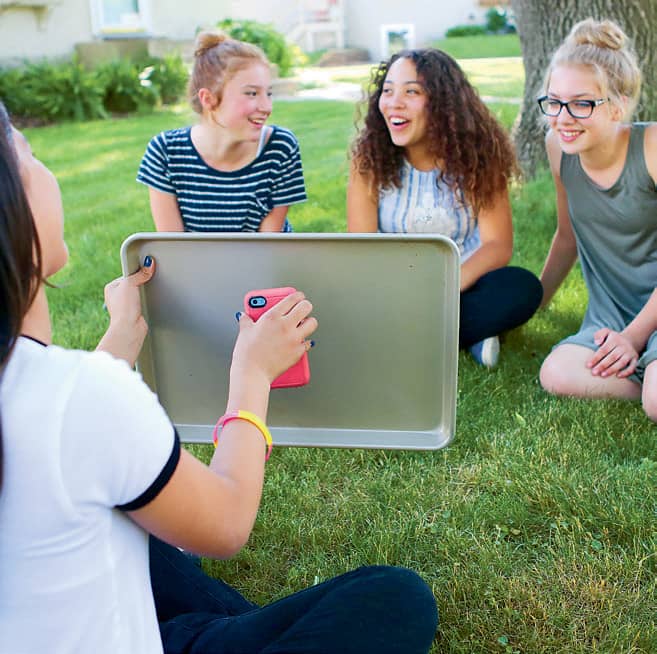
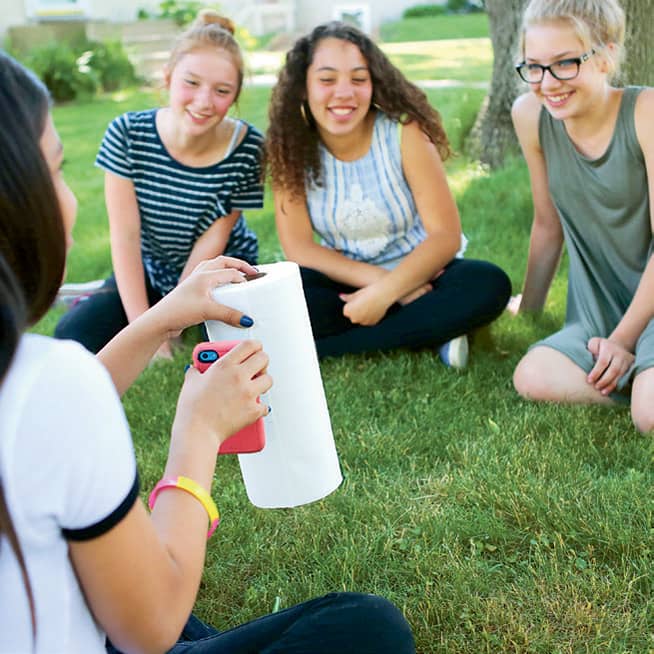
3. Keep the volume the same on your phone, start the song again, and repeat the process with the sweatshirt, cookie sheet, and roll of paper towels. Discuss what you hear each time with each item.
4. Switch roles and repeat (figs. 2–4).

Figs. 2–4: Repeat the process with the sweatshirt, the cookie sheet, and the roll of paper towels.
5. Try substituting any type of barrier you wish! What items are great at stopping the sound? What items amplify the sound?
Blind as a Bat
If you’ve ever heard this phrase, you’ll know that bats have poor eyesight. Bats actually use sound waves to help them “see” while flying. Bats can tell where objects are by listening to how sounds are reflected. They emit a sound that travels out and then back to them. If sounds are reflected quickly, they know to change direction. Bats can even find the insects they feast on using sound waves!