
UNIT 03
RENEWABLE AND NONRENEWABLE ENERGY SOURCES
AS WE HAVE LEARNED, energy is constantly changing or transforming as work is done. We can witness this in many forms all around us. People have always used energy to do their work. Different sources of energy provide us with the ability to move our vehicles, generate electricity, heat and cool our homes, and even run down the soccer field! There are ten major energy sources, and each is classified into two groups—renewable energy sources and nonrenewable energy sources.
Supplies from renewable energy sources can be replenished in a short period of time. Renewable sources of energy include biomass, geothermal, hydropower, solar, and wind. Biomass often consists of plants, wood, garbage, and waste. Geothermal refers to the heat produced inside the core of the Earth. Hydropower is the energy that comes from flowing water, and you probably already know what solar and wind power are. These sources of energy can be used to generate electricity and create heat, but they are replenished quickly or are constantly available for our use.
Nonrenewable energy sources cannot be replenished in a short period of time. These include petroleum (oil), natural gas, coal, propane, and uranium. They can be used for energy to move cars, heat homes, generate electricity, and manufacture products, but because they cannot be replenished quickly, their supplies are limited.
These nonrenewable resources are found in the Earth in layers of rocks and minerals. They took millions to hundreds of millions of years to form. The petroleum that powers our vehicles was being formed even before dinosaurs roamed the Earth! We use lots of nonrenewable sources each year for our energy, and it’s possible that we could run out of these resources in the future because they take so long to create!
The labs in this unit will allow you to explore how we find and harness each of the ten energy sources to power our lives. These activities may also allow you to get a glimpse of some of the advantages and disadvantages of each of the ten sources of energy. Each source has its benefits and drawbacks for use. Identifying and evaluating these benefits and challenges is an important part of determining how we will use energy in the future. Be on the lookout at the end of each lab for career connections and interesting energy facts!
Wind power works.
|
CANDY COLLECTOR |
Renewable and nonrenewable fuels power everything we do. In this lab, we’ll use candies to represent each type of energy source. As the energy team for your town, you must recover the energy sources. Think carefully about how long each type will last if you continue to use energy in each round. There are two phases to the activity: past and present.

TIME:
30 minutes
PERSON POWER:
Grab a Crew Member! Make sure your crew members aren’t hungry. Candy can’t be eaten until after the activity is complete!
 MATERIALS
→ 50 M&M’s candies
→ 2 plastic bowls
→ small plastic cup
→ 2 plastic straws
→ timer
→ 3 jelly beans
1. The first phase of this lab shows how we used energy in the past. Place 50 M&M’s in a bowl (fig. 1). Set the other bowl aside as the discard bowl. Place the cup near the M&M’s bowl. The M&M’s represent energy, and you must provide energy for your town each year. Each year will last fifteen seconds.

Fig. 1: Place fifty M&M’s in a bowl.
2. Set the timer for fifteen seconds. During that time, each person will use a straw to transfer as many M&M’s into the plastic cup as possible. Use the straw for suction (fig. 2). You may not use your hands for anything, not even to hold the straw!

Fig. 2: Use a straw to provide suction.
3. Time’s up! Count how many M&M’s made it into your cup. This represents the amount of energy you were able to gather and harness for this year. How much energy remains in the bowl? Place any candy in your cup into the discard bowl—this is used energy (fig. 3).
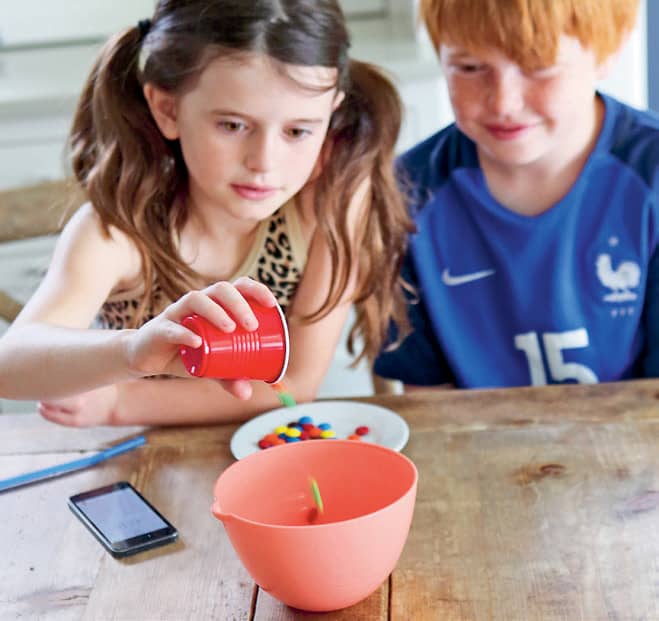
Fig. 3: Place the candy from the cup into the discard bowl.
4. Repeat steps 2 and 3 for a total of four rounds (or years). Are there energy sources left for you to gather? How many more years do you think the energy will last if it’s used and discarded this way?
5. Now let’s set up the activity as if it is the present day. Place all the M&M’s back in the original bowl and add three jelly beans (fig. 4). In this phase, you’ll transfer candy to the cup as in step 2, but you’re only required to transfer two pieces per person. Set your timer for fifteen seconds and go to it.
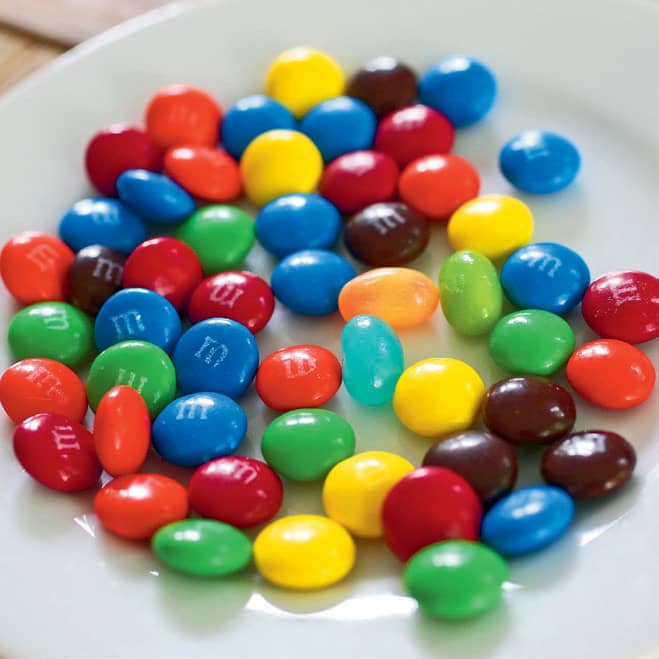
Fig. 4: Add three jelly beans to the M&M’s.
6. After the fifteen-second year is complete, count how many candies made it into your cup. Did you get two per team member? How many candies remain in the original bowl? Transfer all the M&M’s in the cup to the discard bowl. The jelly beans can be returned to the original bowl and gathered again for future years (fig. 5)!

Fig. 5: Return the jelly beans to the original bowl.
7. Complete three more fifteen-second years, following steps 6 and 7 for each year. Will your candies last longer now that the jellybeans are in place?
|
CHOCOLATE CHIP EXTRACTION COMPETITION |
Fuels, including coal and uranium, are found through mining. Today, mining must be done carefully to preserve the land and to maintain safe conditions. What is that process like? In this activity, chocolate chips represent the desired ore and the cookie represents the land in which you mine. Be careful, though! Miners must reclaim their land, or return it to its original state, when mining is complete!
TIME:
25–30 minutes
PERSON POWER:
All Hands on Deck!
MESS ALERT!
Use a table cloth or a newspaper under your mine site.
MATERIALS
→ chocolate chip cookies
→ toothpicks
→ paper clips
→ graph paper
→ pencil
→ camera phone (optional)
→ timer
1. Find a few friends to compete as separate mining companies. Or, each company can have a few team members.
2. Give each team one cookie, one toothpick, one paper clip, and one piece of graph paper.
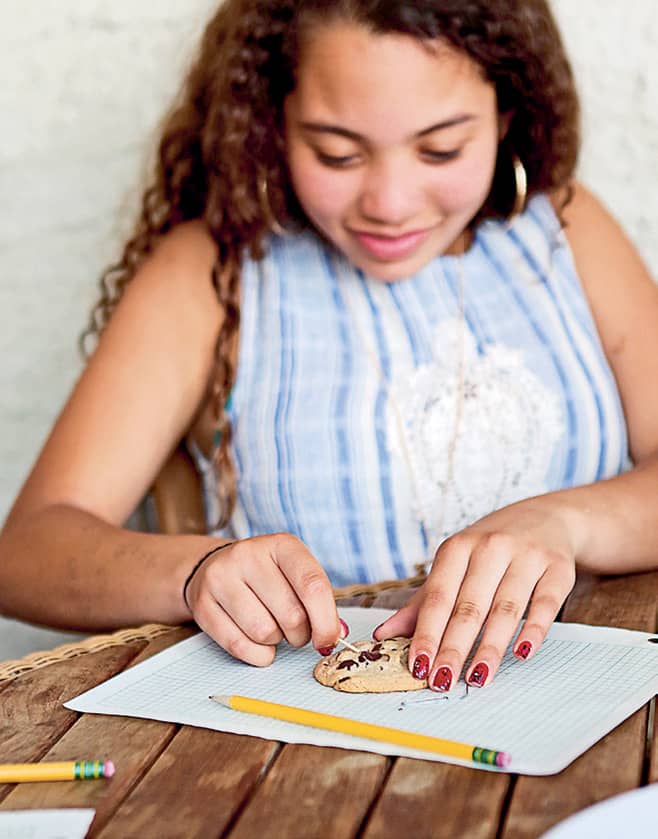
3. Each team should place its cookie on the graph paper and trace around it with a pencil (fig. 1). If you have a camera available, take a picture.
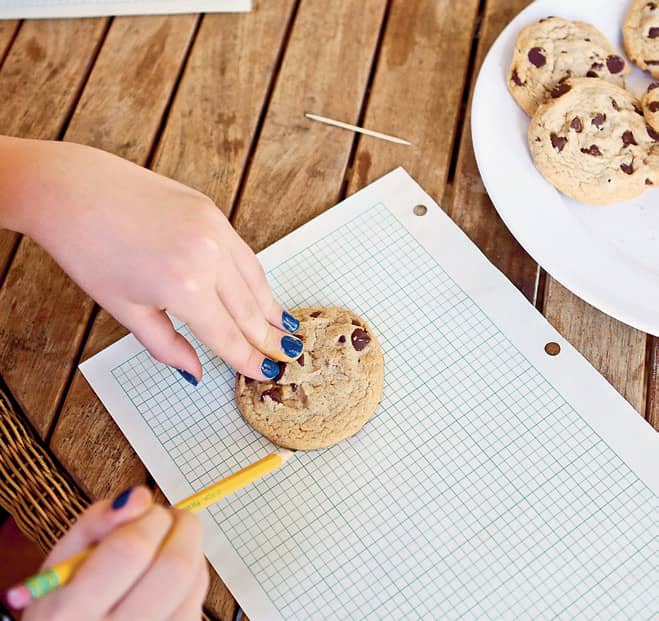
Fig. 1: Trace your cookie on the graph paper.
4. Each team will use only the toothpick and paper clip as mining tools to extract their chocolate chip “ore.” No fingers allowed (fig. 2)! Place each piece of extracted ore on an empty grid square on the graph paper outside your mining area, using only the allowed tools. Each square must contain ore to be counted.
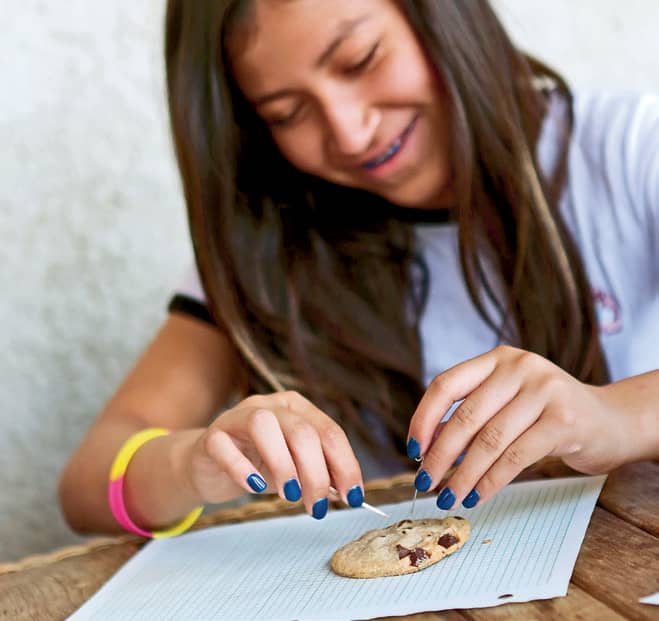
Fig. 2: Use only toothpicks and paper clips as mining tools.
5. Set the timer for two minutes. When time is up, count your team’s squares of ore (fig. 3). Each filled square earns your company $5. Which team was the most successful?
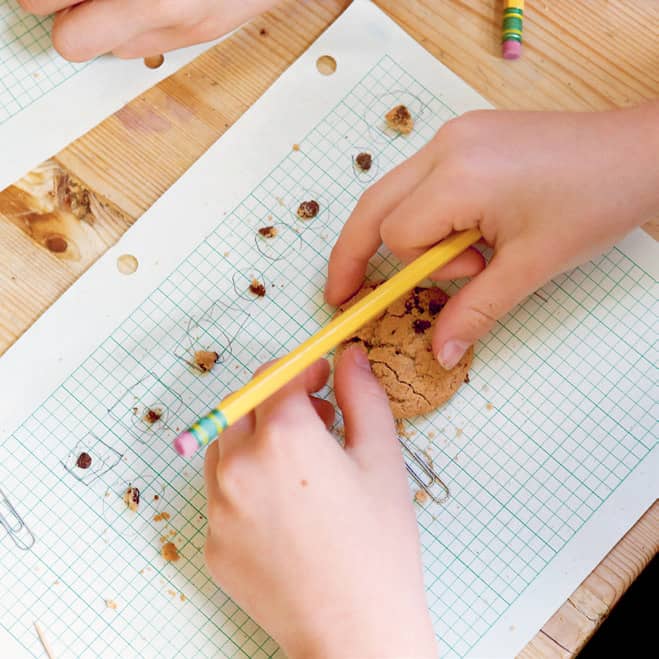
Fig. 3: Count your team’s squares of ore.
6. Want to keep mining? Mine for another two minutes. Teams may choose to buy more tools for $5 each, which should be subtracted from the team’s profits. Continue competing as long as teams are able to mine.
7. Refer to your cookie outline and starting photo. Reclaim your mined land by putting your cookie back together with the materials remaining in the traced area (fig. 4). Try to make your cookie look like it did when you started.
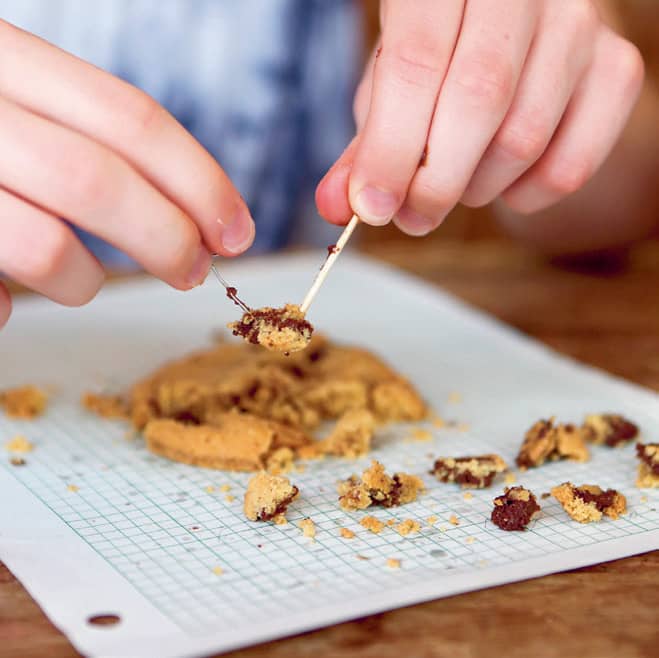
Fig. 4: Reclaim your mined land by putting your cookie back together again.
8. Talk with the other teams. What makes a successful mining company? If you have to put the land back together after you are finished mining, does it always make sense to try and get every chip? What if you also have to buy your land and pay your miners? How difficult might it be to make money on your mine?
Mining chocolate chips.
|
GETTING THE OIL OUT |
Petroleum, or crude oil, is found thousands of feet below the Earth’s surface. In order to bring oil to the surface, companies must drill down several thousand feet, creating a well. Many sections of pipe, called well casing, are put in, giving the oil an easy pathway to the surface. If the oil does not seep up on its own, machines can create artificial pressure to suck the liquids to the surface. How much pressure needs to be applied? Let’s drill for oil to simulate this process!
TIME:
15–20 minutes
PERSON POWER:
Grab a Crew Member!
MESS ALERT!
Set up this activity inside and complete the activity outdoors or on the kitchen floor, in case spills occur.
SAFETY IS KEY: When it’s time to get the oil out, you may need to stand on a stool or chair. Make sure you have a friend or adult spotting you.
MATERIALS
→ scissors
→ 8 plastic drinking straws
→ masking tape
→ cola
→ 3-oz (88 ml) plastic cups
→ chocolate syrup
→ ruler
1. Using the scissors, cut a 1/3" (1 cm) slit at one end of each straw (fig. 1).
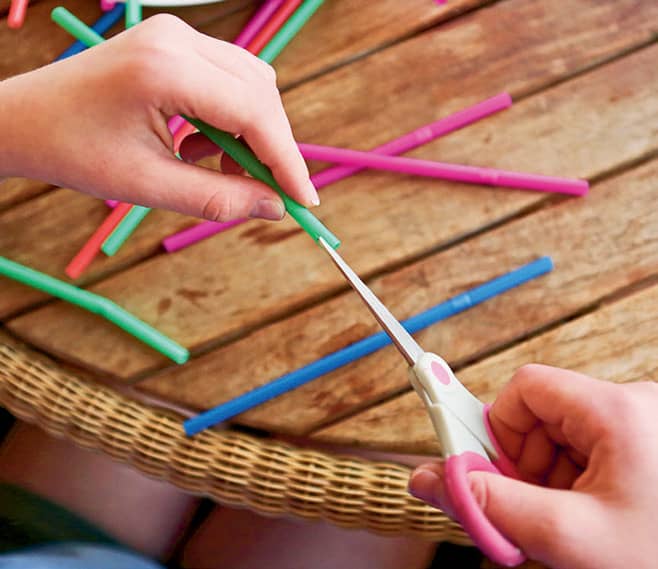
Fig. 1: Cut a slit at one end of each straw.
2. Join the straws end to end, forming one long tube, by placing the slit end of one straw inside the next (fig. 2).
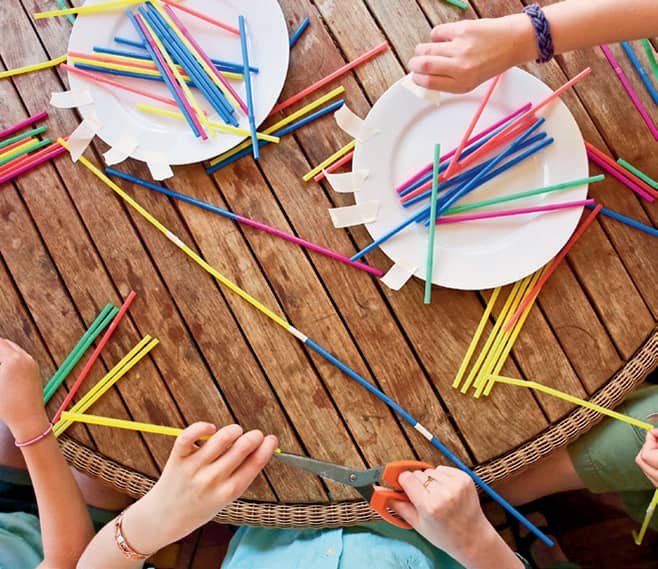
Fig. 2: Join the straws end to end to form one long tube.
3. Place masking tape over each connection to secure the straw joints and create an air-tight seal (fig. 3).
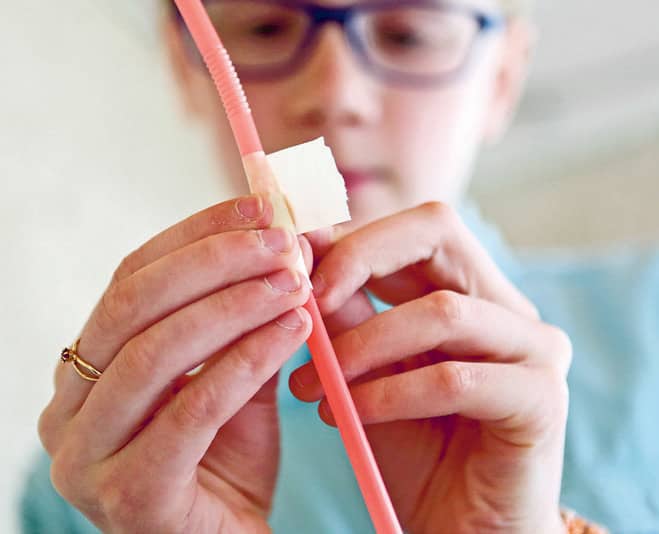
Fig. 3: Place masking tape over each connection.
4. Pour some cola into a plastic cup. This will represent the oil. Place your oil well on the floor.
5. Place one end of your straw tubing into the cola so that it sticks straight into the air. This will represent your oil well casing.
6. If necessary, stand on a stool so that the well casing forms a straight line from your mouth to the cola (fig. 4). Now suck on the end of the straw to try to bring the liquid to the top of the well casing.
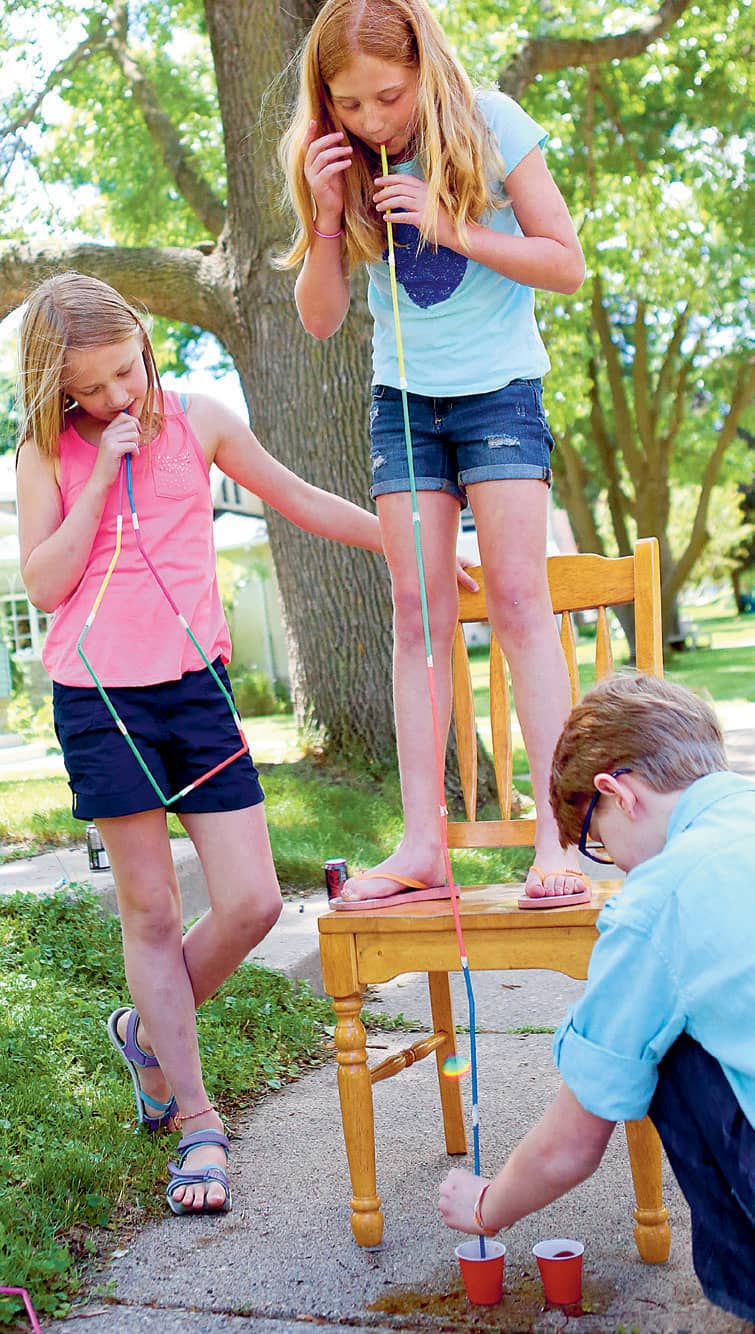
Fig. 4: Stand on a stool so that the well casing forms a straight line from your mouth to the cola.
7. If it’s difficult, perhaps air is getting in through the casing’s seams. Wrap additional tape around the joints in the casing. Can you get the oil out of the well now?
8. Try a few variations. Pour some chocolate syrup into a cup. Replace the cup of cola with the cup of syrup. Try to bring the chocolate syrup to the surface using the same technique (fig. 5). Is it harder?
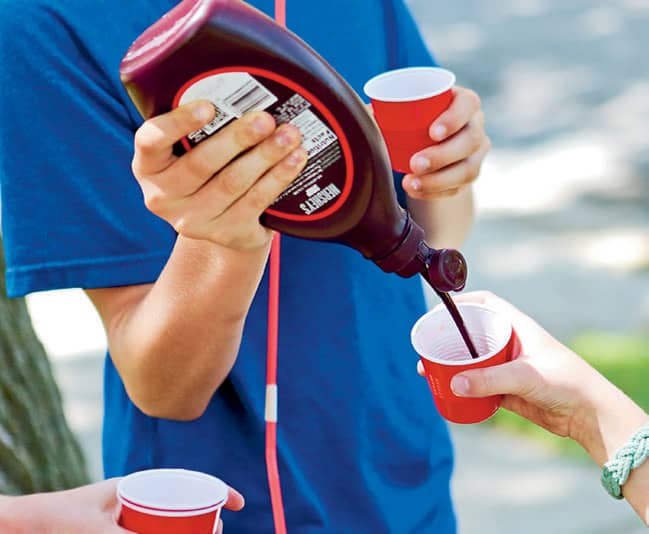
Fig. 5: Pour chocolate syrup into a cup and try to bring it to the surface through the straws.
9. Decrease the length of the casing by cutting off one straw. What do you notice when you try to bring liquids to the surface now?
Now Try This! 
Continue to experiment with different viscosities of liquids and different configurations of straws. Try to find the best well casing set-up for each viscosity.
|
PERFORATED PERFECTION |
If you imagine drilling for oil is like sucking through a drinking straw, how many openings would you need to bring the fluids up to the straw’s surface? Well, just one. This lab will explore a few techniques employed by drilling companies to allow more fluids to flow into a well. Do more holes mean more fluids? Let’s test it out!
TIME:
20 minutes
PERSON POWER:
Grab a Crew Member!
MESS ALERT!
Perform this Lab outdoors or on a plastic tablecloth. Things might get a little slippery!
MATERIALS
→ 2 foam plates or meat trays (clean)
→ plastic wrap
→ 2 kitchen sponges, (dry or barely moist) of the same size and shape
→ flexible drinking straws
→ masking tape
→ water in a liquid measuring cup
→ 3 identical books or weights
→ 1 oz (30 ml) graduated cylinder or medicine measuring cup
→ push pin
→ ruler
→ paper towels
1. Lay out one of the foam trays. Cut a large piece of plastic wrap and lay it across the tray.
2. Place one sponge on top of the plastic wrap and tray. Lay one of the straws on top of the sponge so that the bottom edge of the straw is inside the edges of the sponge and the elbow end hangs off the other end (fig. 1).
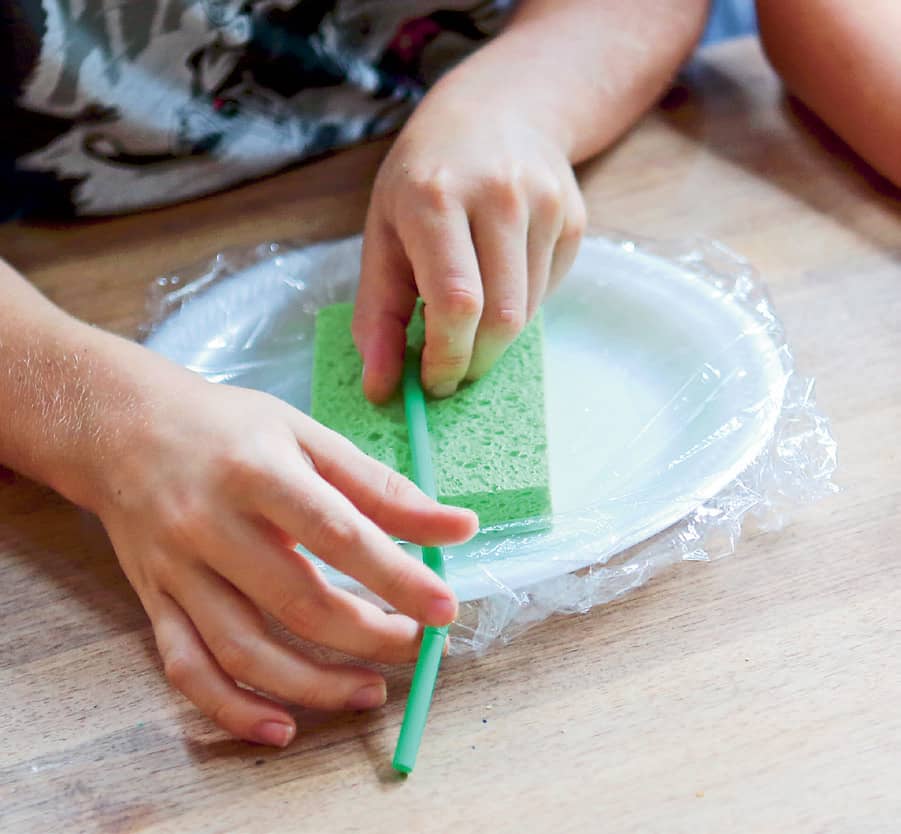
Fig. 1: Place a sponge on the plastic wrap and lay one of the straws on top.
3. Lay the other sponge on top of the straw/sponge set-up, so that all the sponge edges match up (fig. 2).
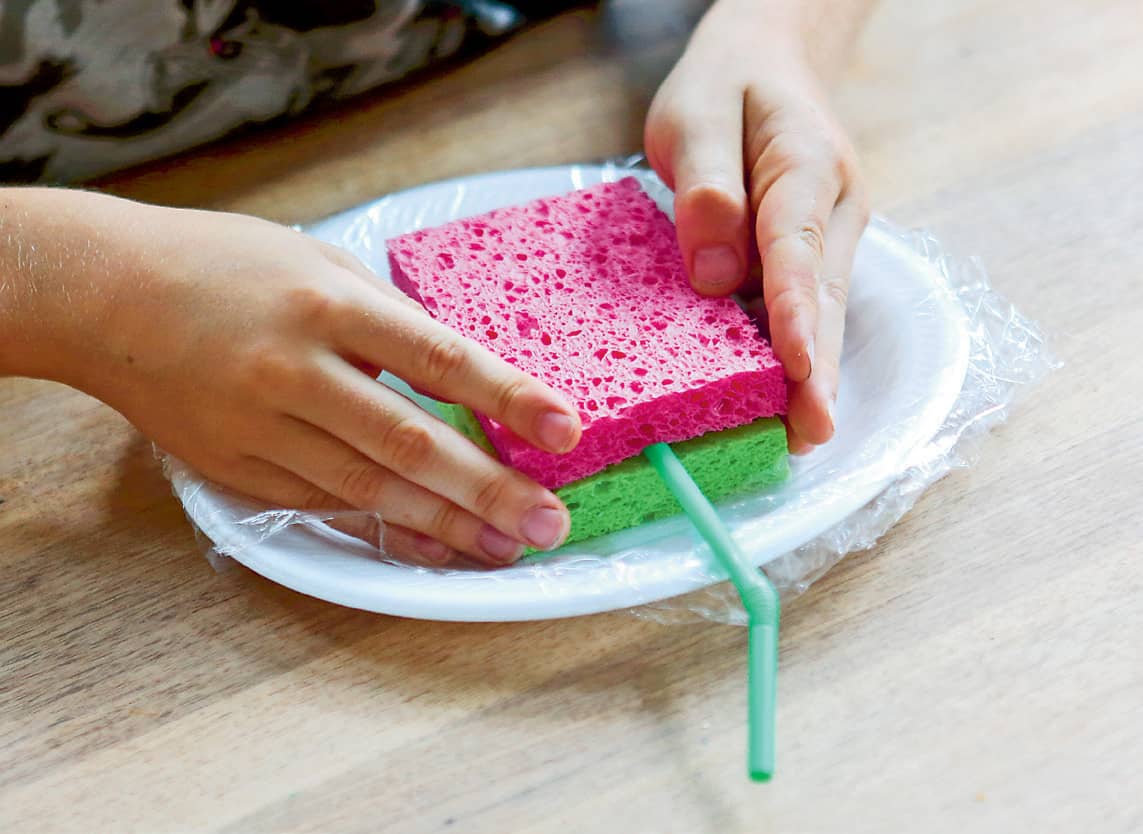
Fig. 2: Lay the second sponge on top so that all the edges line up.
4. Slowly pour water on the sponges so that they become saturated, but little or no water is leaking out (fig. 3). Keep track of how much water you used.
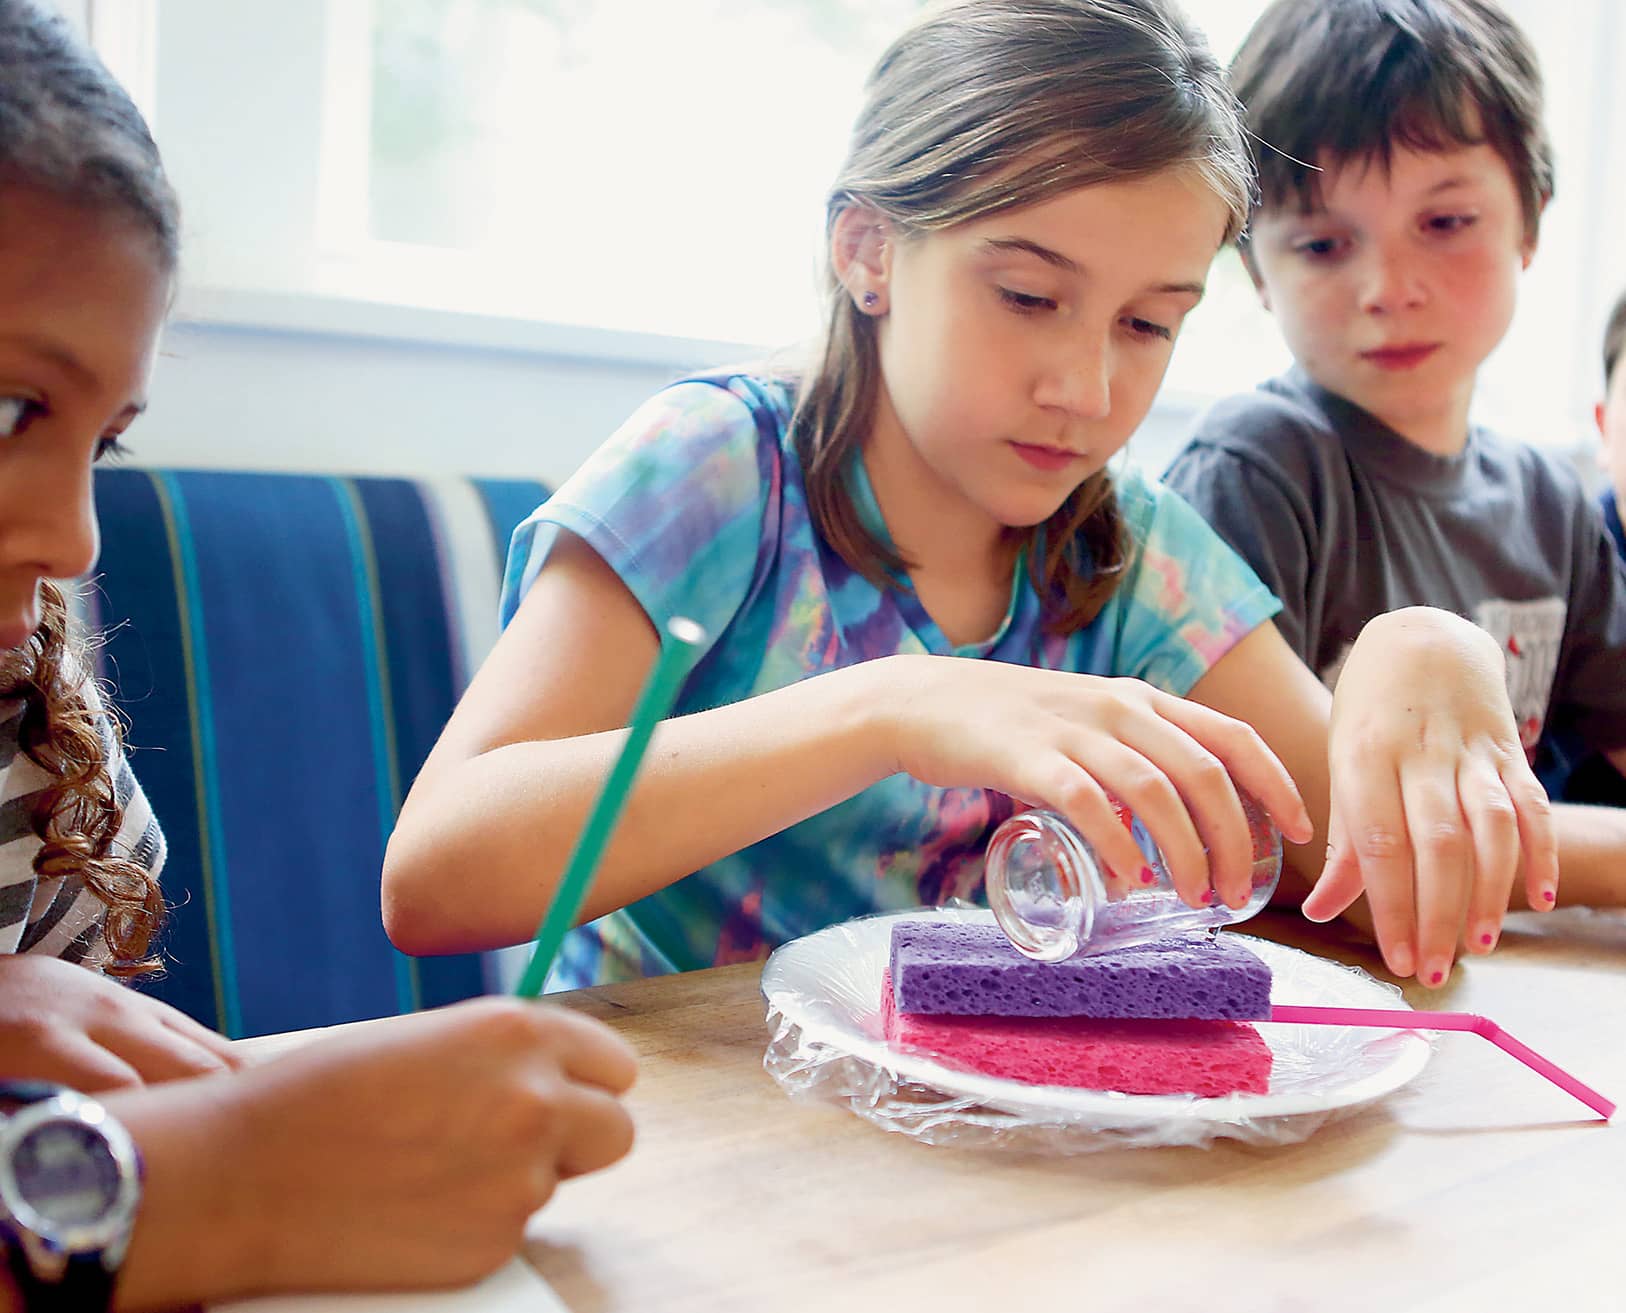
Fig. 3: Slowly pour water on the sponges.
5. Cover the sponges and straw with plastic wrap (fig. 4). Try to create a sealed package with no places for water to escape. Use tape to help seal it.

Fig. 4: Cover the sponges and straw with plastic wrap.
6. Place the second foam dish under the exposed end of the straw. This tray will collect fluids.
7. Lay books, one at a time, on top of the sponges and observe the amount of water that comes out of the straw and onto the collection tray (fig. 5). Press by hand if additional pressure is required or if the books are so heavy that they kink or crush the straw. Continue until no more water exits the straw.
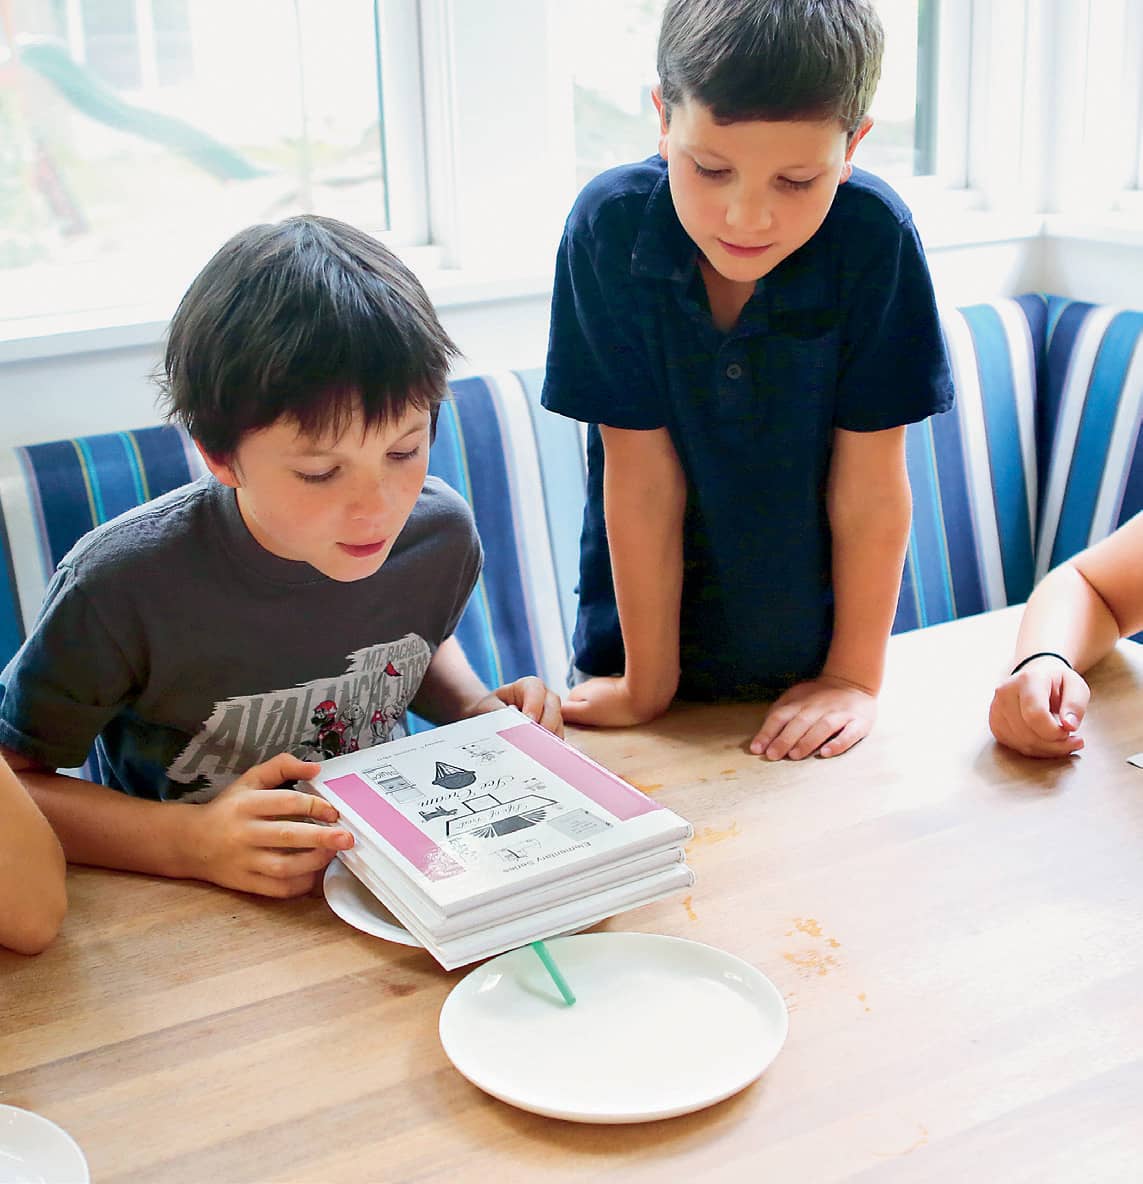
Fig. 5: Lay books on top of the sponges.
8. Measure the amount of water in the collection dish by pouring it into the graduated cylinder (fig. 6).
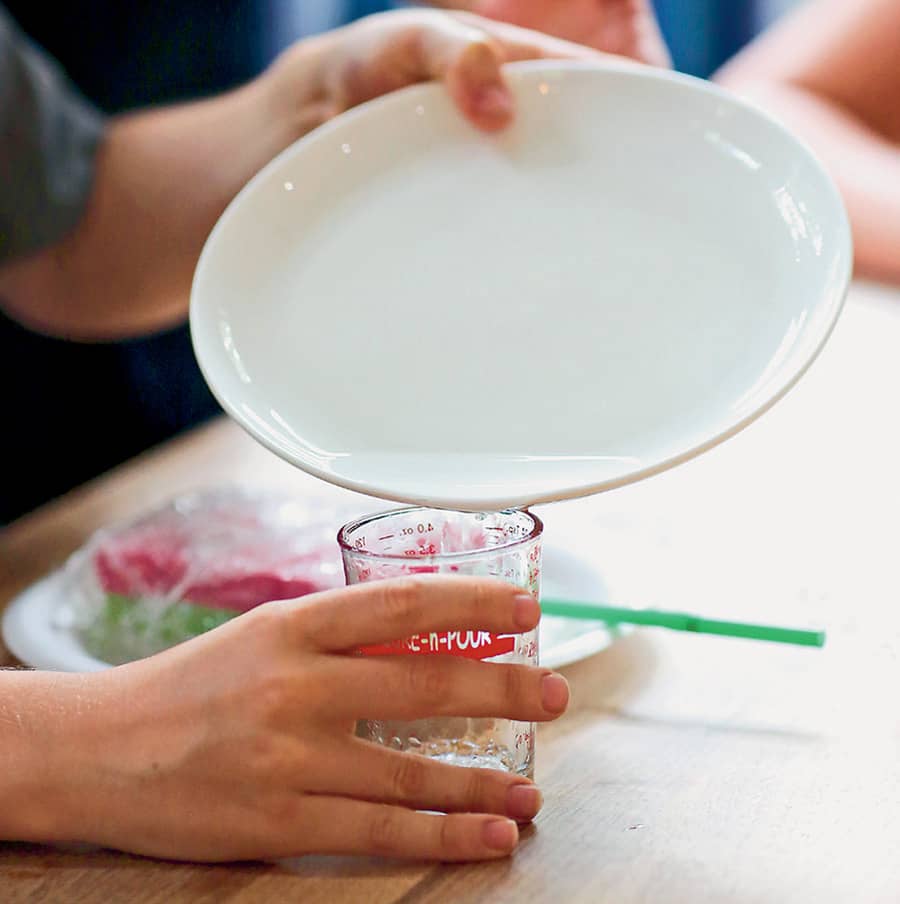
Fig. 6: Measure the amount of water in the collection dish.
9. Disassemble the stack of sponges. Drain or squeeze out the sponges to remove any remaining water.
10. Using a push pin, poke several holes about 1/8" (3 mm) apart at the long end of the straw, farthest from the elbow (fig. 7). If your straw is striped, use the stripes as the guide for hole punching!
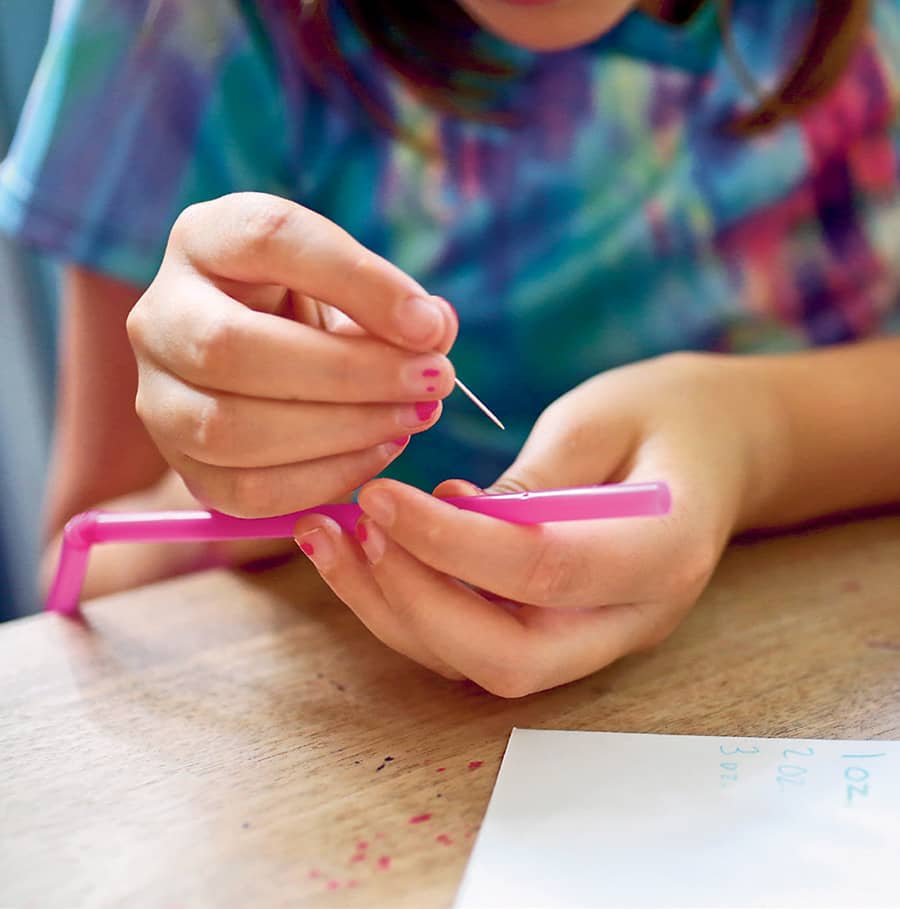
Fig. 7: Use a pin to poke holes in the long end of the straw.
11. Lay out a new piece of plastic wrap with a sponge on top. Place the straw from step 10 on this sponge, and place the other sponge on top, as in step 3. Repeat steps 4 to 8, using the same amount of water to saturate the sponges. Do you notice a difference in the amount of water collected?

Propane is not a pain to find!
Propane is on the list of the ten energy sources. But how do we find it in the world around us? Propane is a product that can be separated from oil and natural gas. When we have oil or natural gas, we often have propane, too! Propane is very useful; it can be used for fueling grills, heating farm buildings, drying crops, generating electricity, and even powering forklifts and other vehicles.
|
FRACTURING GELATIN |
Natural gas is a fossil fuel much like petroleum. The two have very similar properties because they were formed under the same conditions, but natural gas is, of course, a gas, and petroleum is a liquid. North America has a large supply of natural gas, which is a nonrenewable fuel. Bubbles of natural gas are often trapped in tiny little pores of rocks—just as the pores in your face trap oil, dirt, and air! In order to open these pores and release the natural gas, companies sometimes use a technique called hydraulic fracturing. This lab explores how fractures are created underground.
TIME:
30 minutes, plus one overnight for gelatin to set
PERSON POWER:
All Hands on Deck! This activity requires a few hands. Have an adult help with preparing the gelatin. It might be fun to have a friend record your fracturing on video!
MESS ALERT!
This activity is best completed on a plastic tablecloth or on newspaper. Keep paper towels and warm water on standby for cleaning up sticky situations.
SAFETY IS KEY:
Boiling water is needed for preparing gelatin. Ask an adult for help with this step!
MATERIALS
→ water
→ saucepan or teapot
→ large measuring cup
→ 3 packets of unflavored gelatin
→ wire whisk
→ loaf pan
→ nonstick cooking spray
→ spatula
→ dinner plate
→ flexible drinking straws
→ ruler (with metric measurements)
→ push pin
→ plastic wrap
→ plastic oral syringe for medicine (1 1/2 tablespoons/22 ml)
→ tape
→ pancake syrup
→ plastic knife
→ paper towels
1. Prepare the gelatin the night before you plan to complete this lab. Gelatin can be kept in the refrigerator until it’s time for fracturing fun! Follow these steps to prepare the gelatin:
a. Boil water on the stove in a saucepan or teakettle.
b. While the water is boiling, fill the large measuring cup with 1/2 cup (118 ml) of room-temperature water.
c. Sprinkle three packets of gelatin over the room temperature water and mix it using the whisk.
d. Add 3 1/2 cups (828 ml) of boiling water. You should now have 4 cups (946 ml) of liquid. Whisk to continue dissolving the gelatin.
e. Spray the inside of the loaf pan with cooking spray and pour the gelatin solution into the pan.
f. Refrigerate overnight.
2. Cut the gelatin into four or five blocks with the plastic knife. Using the spatula, remove one block and place it on the dinner plate.
3. Insert a straw in the side of the gelatin block so that the straw is parallel to the plate (fig. 1). Insert it about half to two-thirds of the way into the block, being careful not to allow it to exit the opposite side.
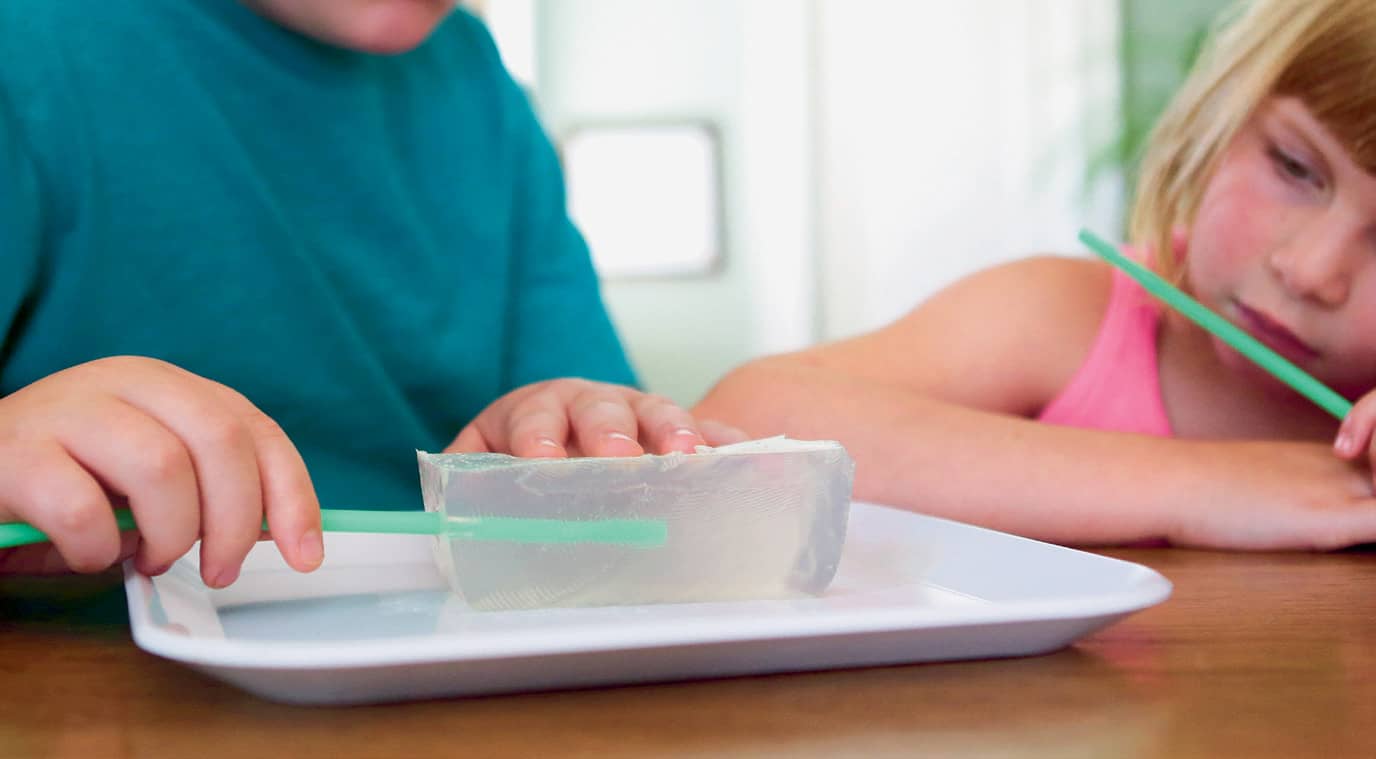
Fig. 1: Insert a straw into the side of the gelatin.
4. To bore out the hole you’ve created, twist the straw and slowly remove it from gelatin, bringing the excess gelatin with it. Discard this straw.
5. Lay a fresh straw along the ruler’s metric edge. Beginning about 10 mm in from the long end of the straw, use the push pin to poke six holes into the straw, making each hole 3 to 5 mm apart (fig. 2). If the push pin doesn’t go through both sides, rotate the straw and make six more holes directly across from the first set.
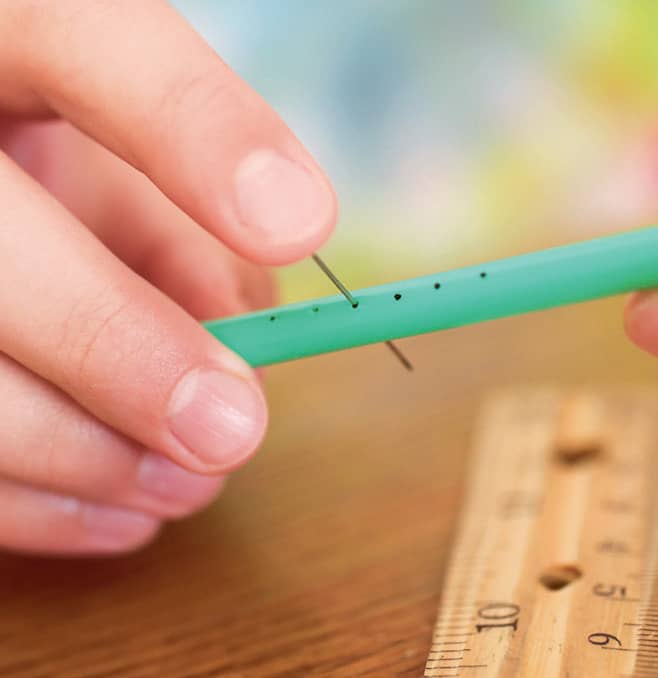
Fig. 2: Use a push pin to poke six holes through both sides of the straw.
6. Cover this end of the straw with a small piece of plastic wrap to prevent any leaking through the holes during the next few steps (fig. 3).

Fig. 3: Cover the end of the straw with plastic wrap.
7. Attach the other end of the straw to the syringe using tape and/or plastic wrap for a good seal.
8. Remove the plunger from the syringe and fill the syringe with syrup from the large opening at the top (fig. 4). It’s easiest to hold the syringe at an angle while you do this. You want the syrup to begin running down into the straw. Continue until most of the straw and syringe are full.
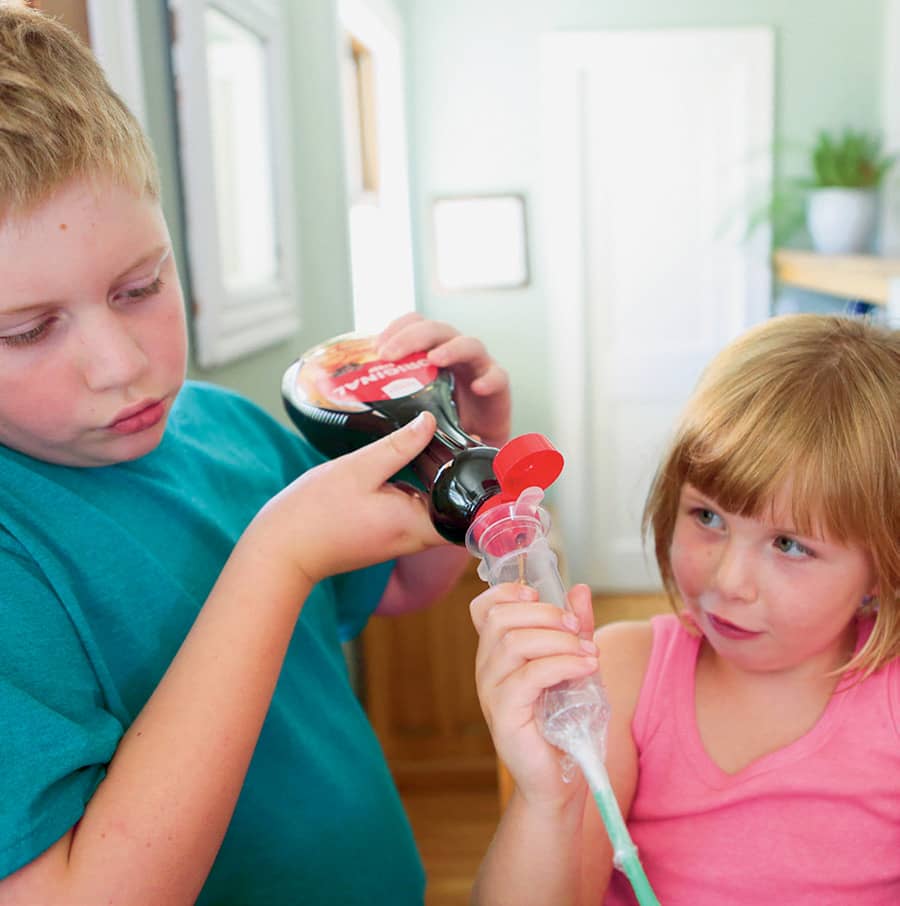
Fig. 4: Fill the syringe with syrup.
9. Quickly replace the plunger in the top of the syringe to keep the syrup from gushing out. It may still drip a bit.
10. Remove the plastic wrap from the pin holes at the other the end of the straw. Insert this end of the straw into the hole you bored in the gelatin block.
11. Using very firm pressure, quickly push on the syringe’s plunger and inject the syrup into the gelatin block (fig. 5).
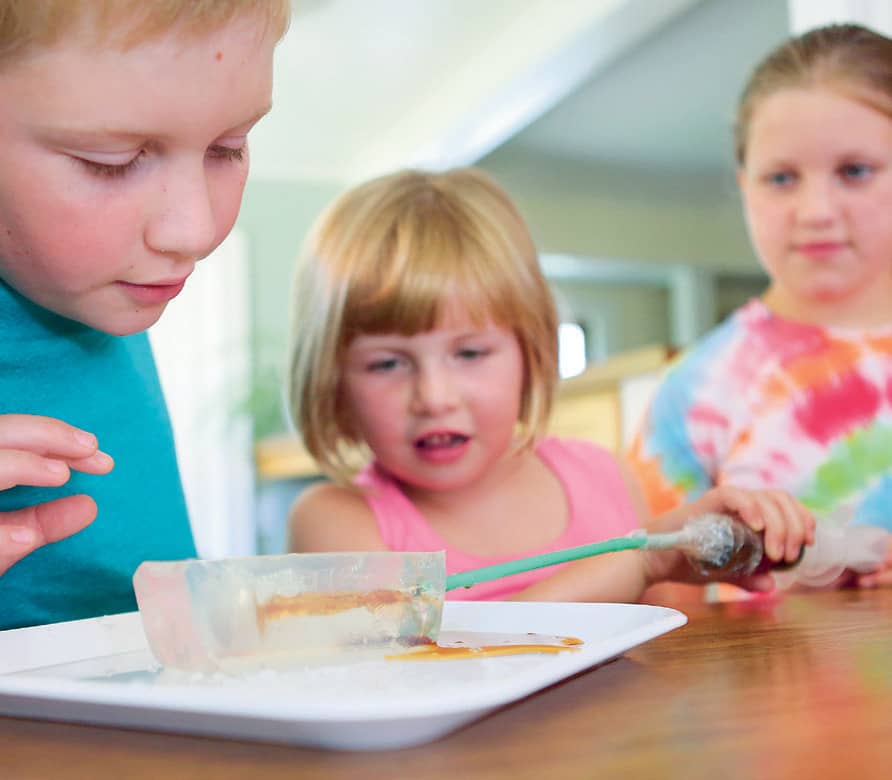
Fig. 5: Push on the syringe’s plunger and inject the syrup into the gelatin block.
12. Observe what happens to the gelatin and take note of any fractures you might see (fig. 6). Pull the straw out and begin the clean-up process, or repeat with another gelatin block!
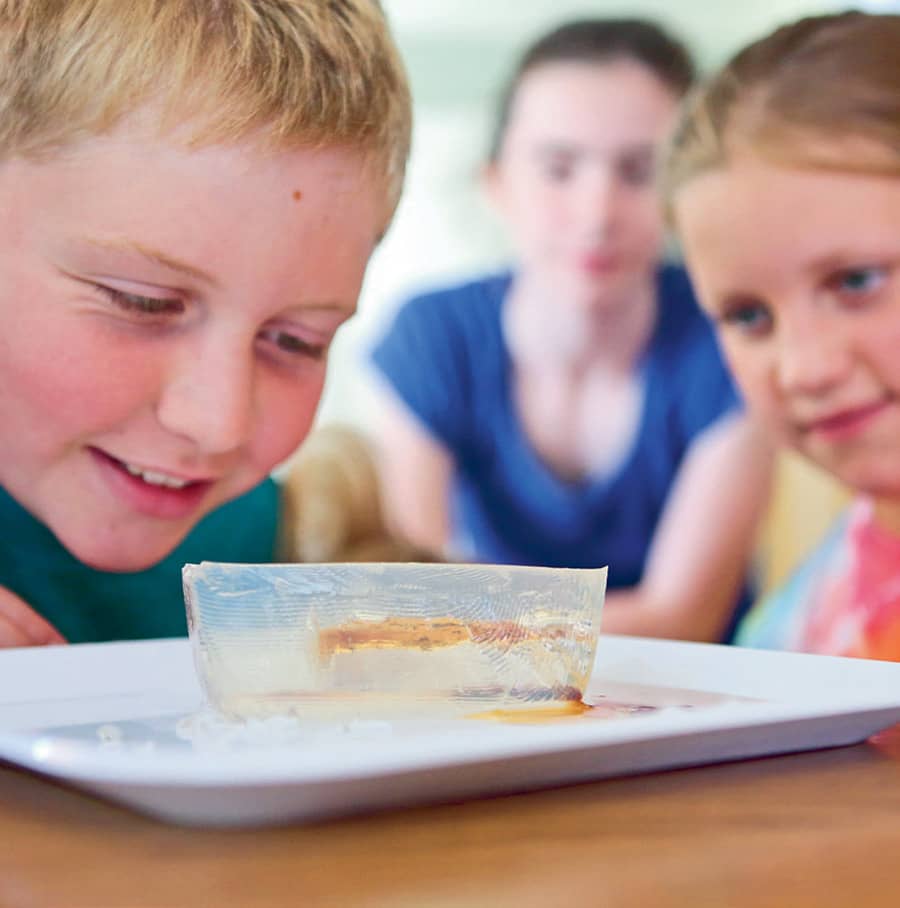
Fig. 6: Observe what you see happening and notice the fractures.
Porosity
Have you ever heard something described as porous? An object is porous if it has holes or openings that can trap liquids or gases. Your face, sponges, strawberry shortcake, and even some rocks can be porous.
Rocks that were formed over hundreds of millions of years by sand and dirt piling on top of more sand and dirt and sediment are called sedimentary rocks. As they formed, little pockets of air remained between the pieces of dirt and sediment. Some rocks have smaller pockets, and some have larger or different-shaped pockets, depending on what the conditions were like as they were formed. These pockets are called pores. Rocks that have lots of pores are said to have a high porosity.
Sometimes fossil material—like plants or tiny sea animals (plankton)—was also trapped in the rocks. As the fossil matter decayed and pressure was added, oil and natural gas were created and trapped in the pores. The oil and gas can flow from pore to pore if the pores are very close together. Some pores, however, are not close together and don’t allow for this to happen. Geologists look for natural gas and oil in rocks that have a high porosity. The pores don’t have to be big, they just have to have a lot of pockets to trap the good stuff!
|
URANIUM MILLER |

Uranium is the fuel used in nuclear power plants to generate electricity. It’s an element found most commonly in ores and rock, but in order to use the uranium, we have to separate it from the ore. This process is called milling. You will become the miller in this lab as you attempt to separate salt, sand, and gravel in a mixture, and capture only the salt—much as is done in the uranium milling process. We’ve used grams in this lab because the measurements are so small. One gram = 0.03 ounces!
TIME:
45 minutes
PERSON POWER:
No Sweat! This activity can be completed easily on your own, but for safety purposes it may be helpful to grab a crew member, and maybe even an adult crew member!
MESS ALERT!
This activity should be completed on top of a tablecloth or newspaper. It could get a bit messy!
SAFETY IS KEY:
You have the option of using a stove or burner to complete this lab. Use caution handling pots and glassware that are hot. Check with an adult before using the stove or burner.
MATERIALS
→ digital kitchen scale
→ 10 grams sand
→ 10 grams salt
→ 5 grams gravel or rocks
→ plastic cup or bowl
→ small piece of screen or wire mesh
→ water
→ coffee filter
→ beaker or glass measuring cup
→ measuring spoons
→ small cooking pot
→ metal spoon
1. Mix the sand, salt, and gravel in a plastic cup or bowl. Make sure it is well mixed. If you don’t use the measurements listed, be sure to note how much of each item you use. For this activity, salt will represent the uranium, while sand and gravel will be the waste ore.
2. Begin trying to mill for uranium by pouring the mixture through the screen (fig. 1). Remove the largest particles and set them aside.
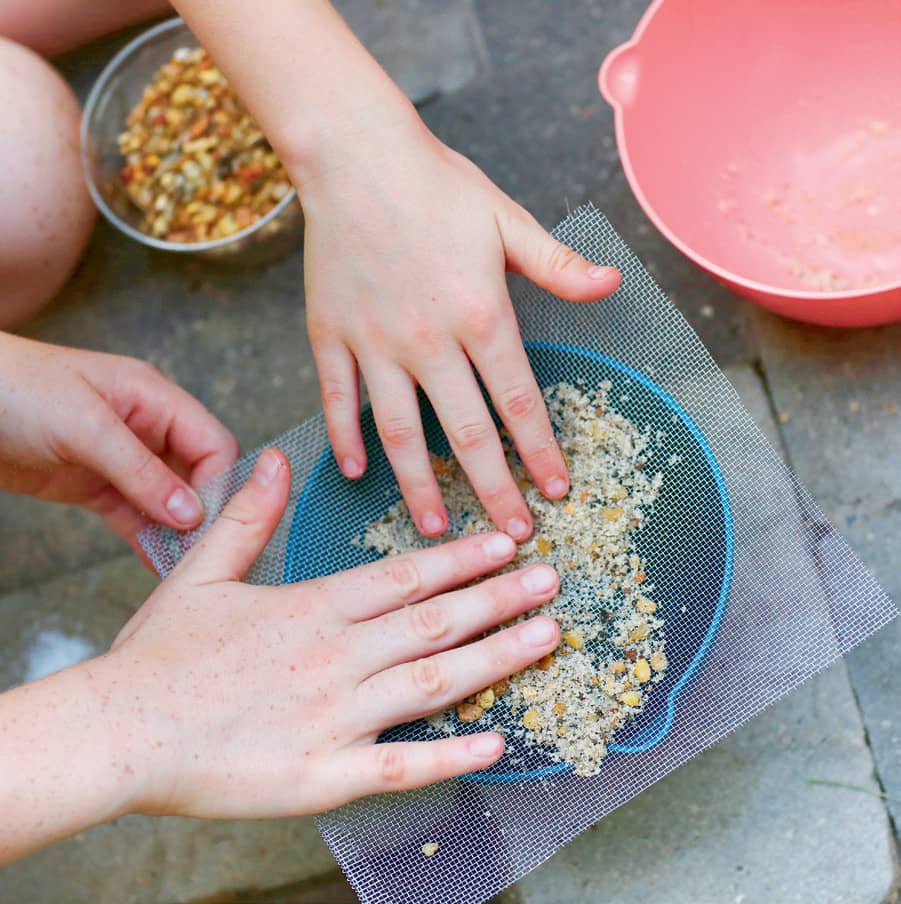
Fig. 1: Pour the sand, salt, and gravel mixture through the screen.
3. Mix the remaining ore with 3 to 5 tablespoons (44 to 74 ml) of water. Stir well.
4. Put a coffee filter over the glass beaker or measuring cup. Slowly pour the water/ore mixture over the filter (fig. 2). The material that collects on the filter is waste ore. Remove the filter and waste ore and set them aside.
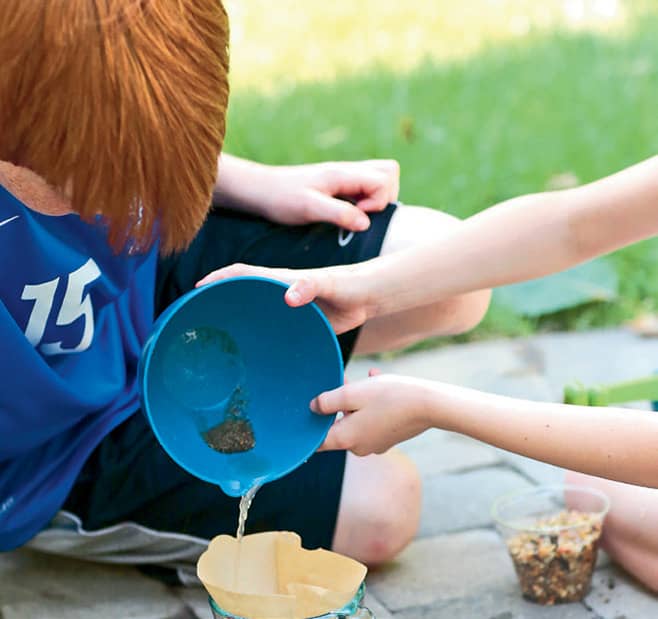
Fig. 2: Pour the water/ore mixture over the filter.
5. Pour the remaining water mixture into the pot (fig. 3). Boil the solution until all of the water evaporates.
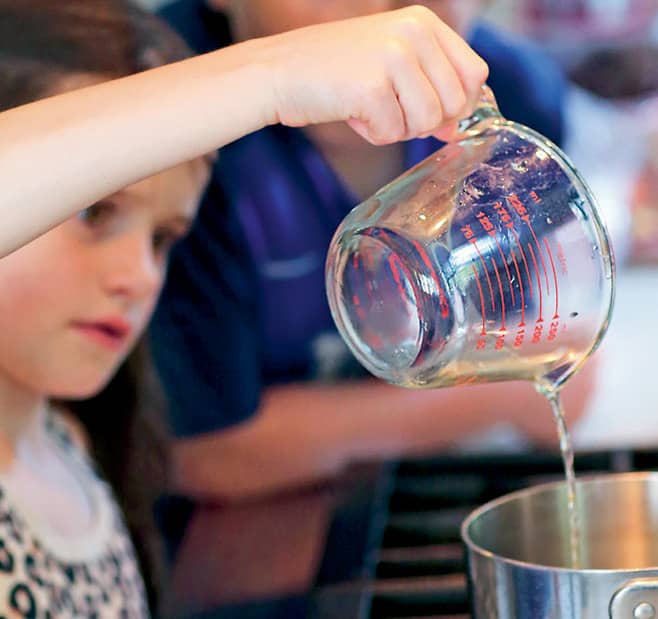
Fig. 3: Pour the remaining mixture into the pot.
6. Collect any solid material or residue that remains in the pot or on the sides of the pot (fig. 4). This is the uranium. How much uranium remains? Place it on the kitchen scale to see if the weight is similar to the weight you started with.
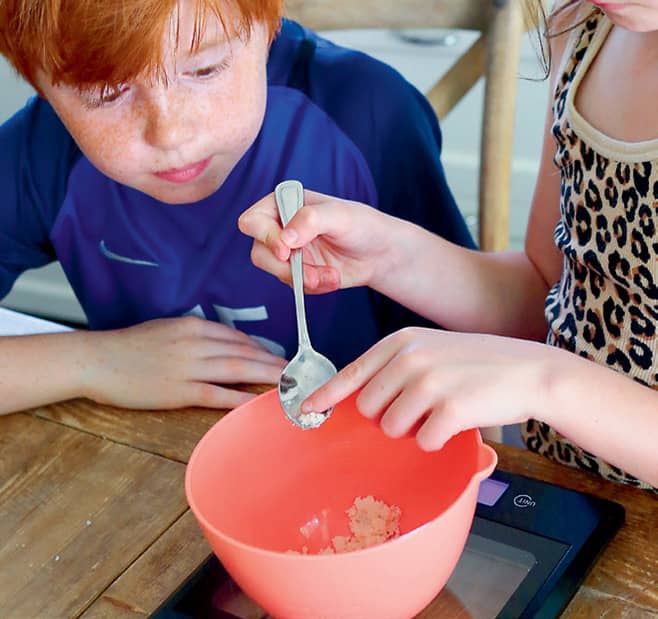
Fig. 4: Collect any solid material that remains in the pot.
Now Try This!
For a quick math application, calculate the percentage of mined material you recovered from milling. You started with 25 total grams of material. Take the mass of the uranium (salt) at the end and divide by 25 grams to find your percentage of uranium recovered. What percentage was waste rock?
|
WIND DOES WORK |

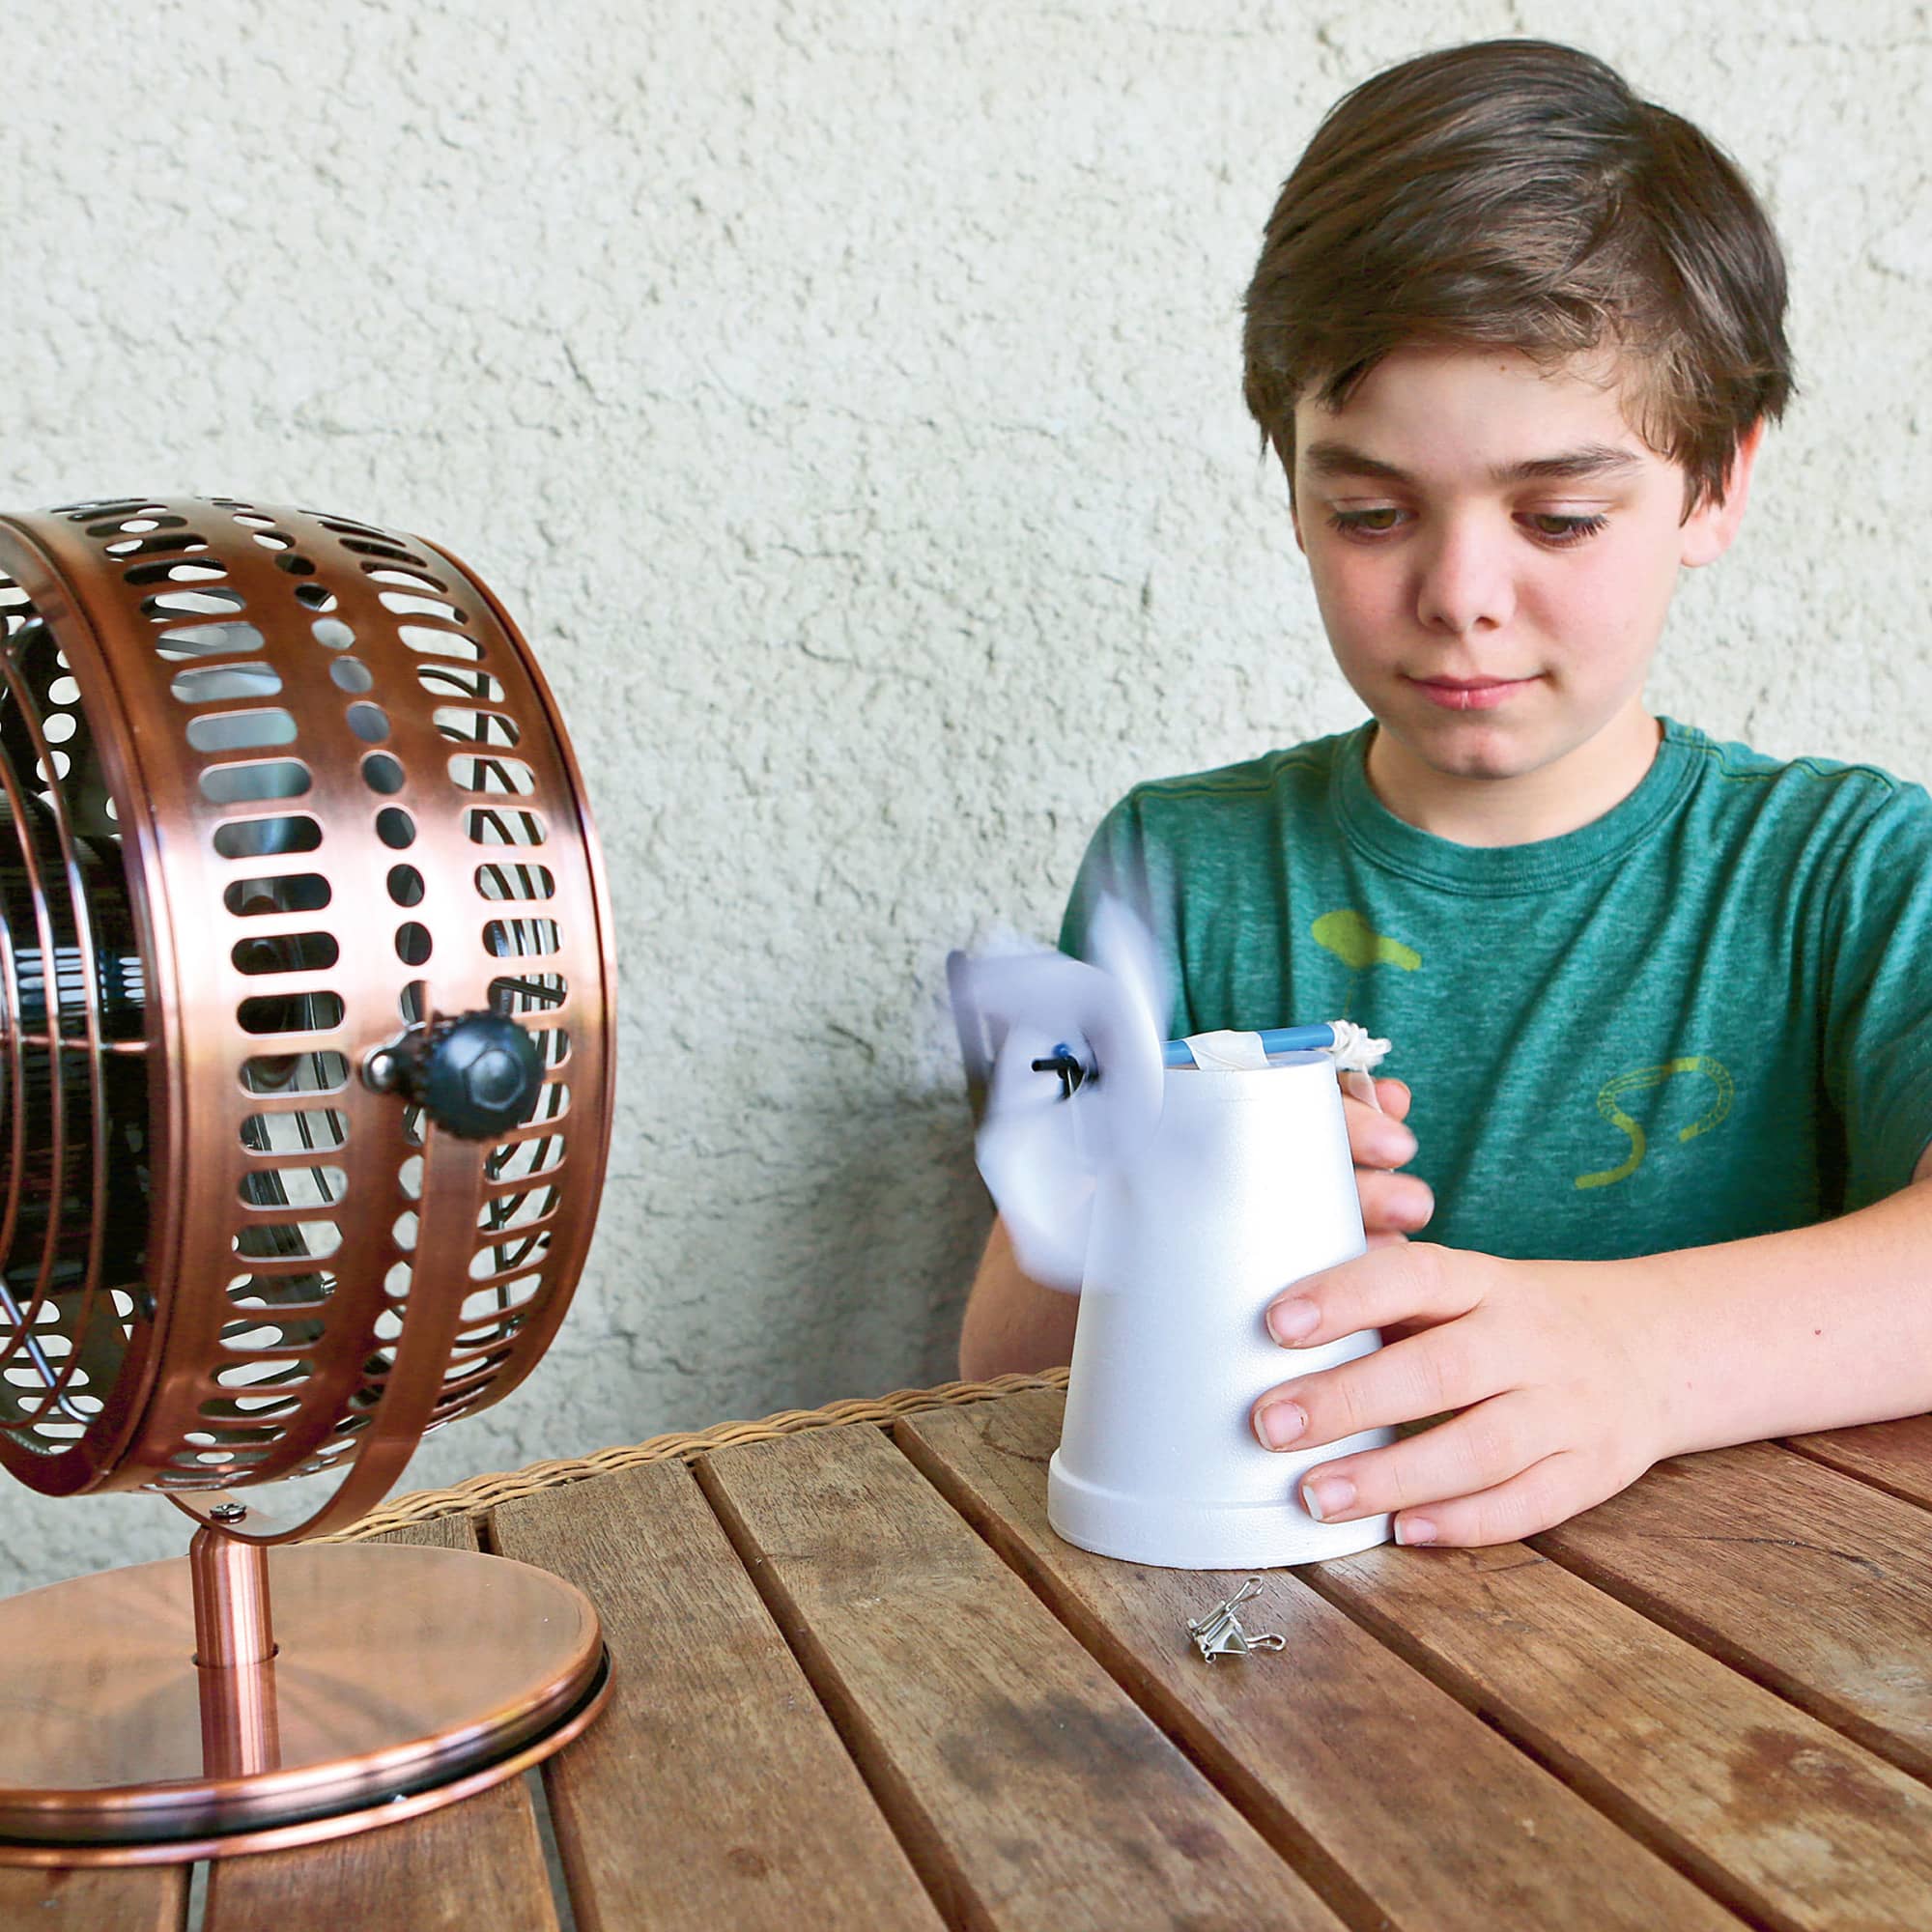
For centuries, we’ve been harnessing wind to do work. Moving air can be used to pump water, grind grain, move boats, and generate electricity. Wind turbines that generate electricity work in the same way as a windmill that might grind grain or pump water. Build a windmill and explore just how much work moving air can do. Invite some friends and hold a windmill competition!
TIME:
30 minutes
PERSON POWER:
No Sweat! or Grab a Crew Member!
MATERIALS
→ pencil
→ printer paper or construction paper
→ scissors
→ hole punch
→ foam cup
→ plastic straw
→ marker
→ ruler
→ masking tape
→ plastic stirrer straw
→ straight pins
→ string
→ paper clips
→ small binder clip
→ electric fan
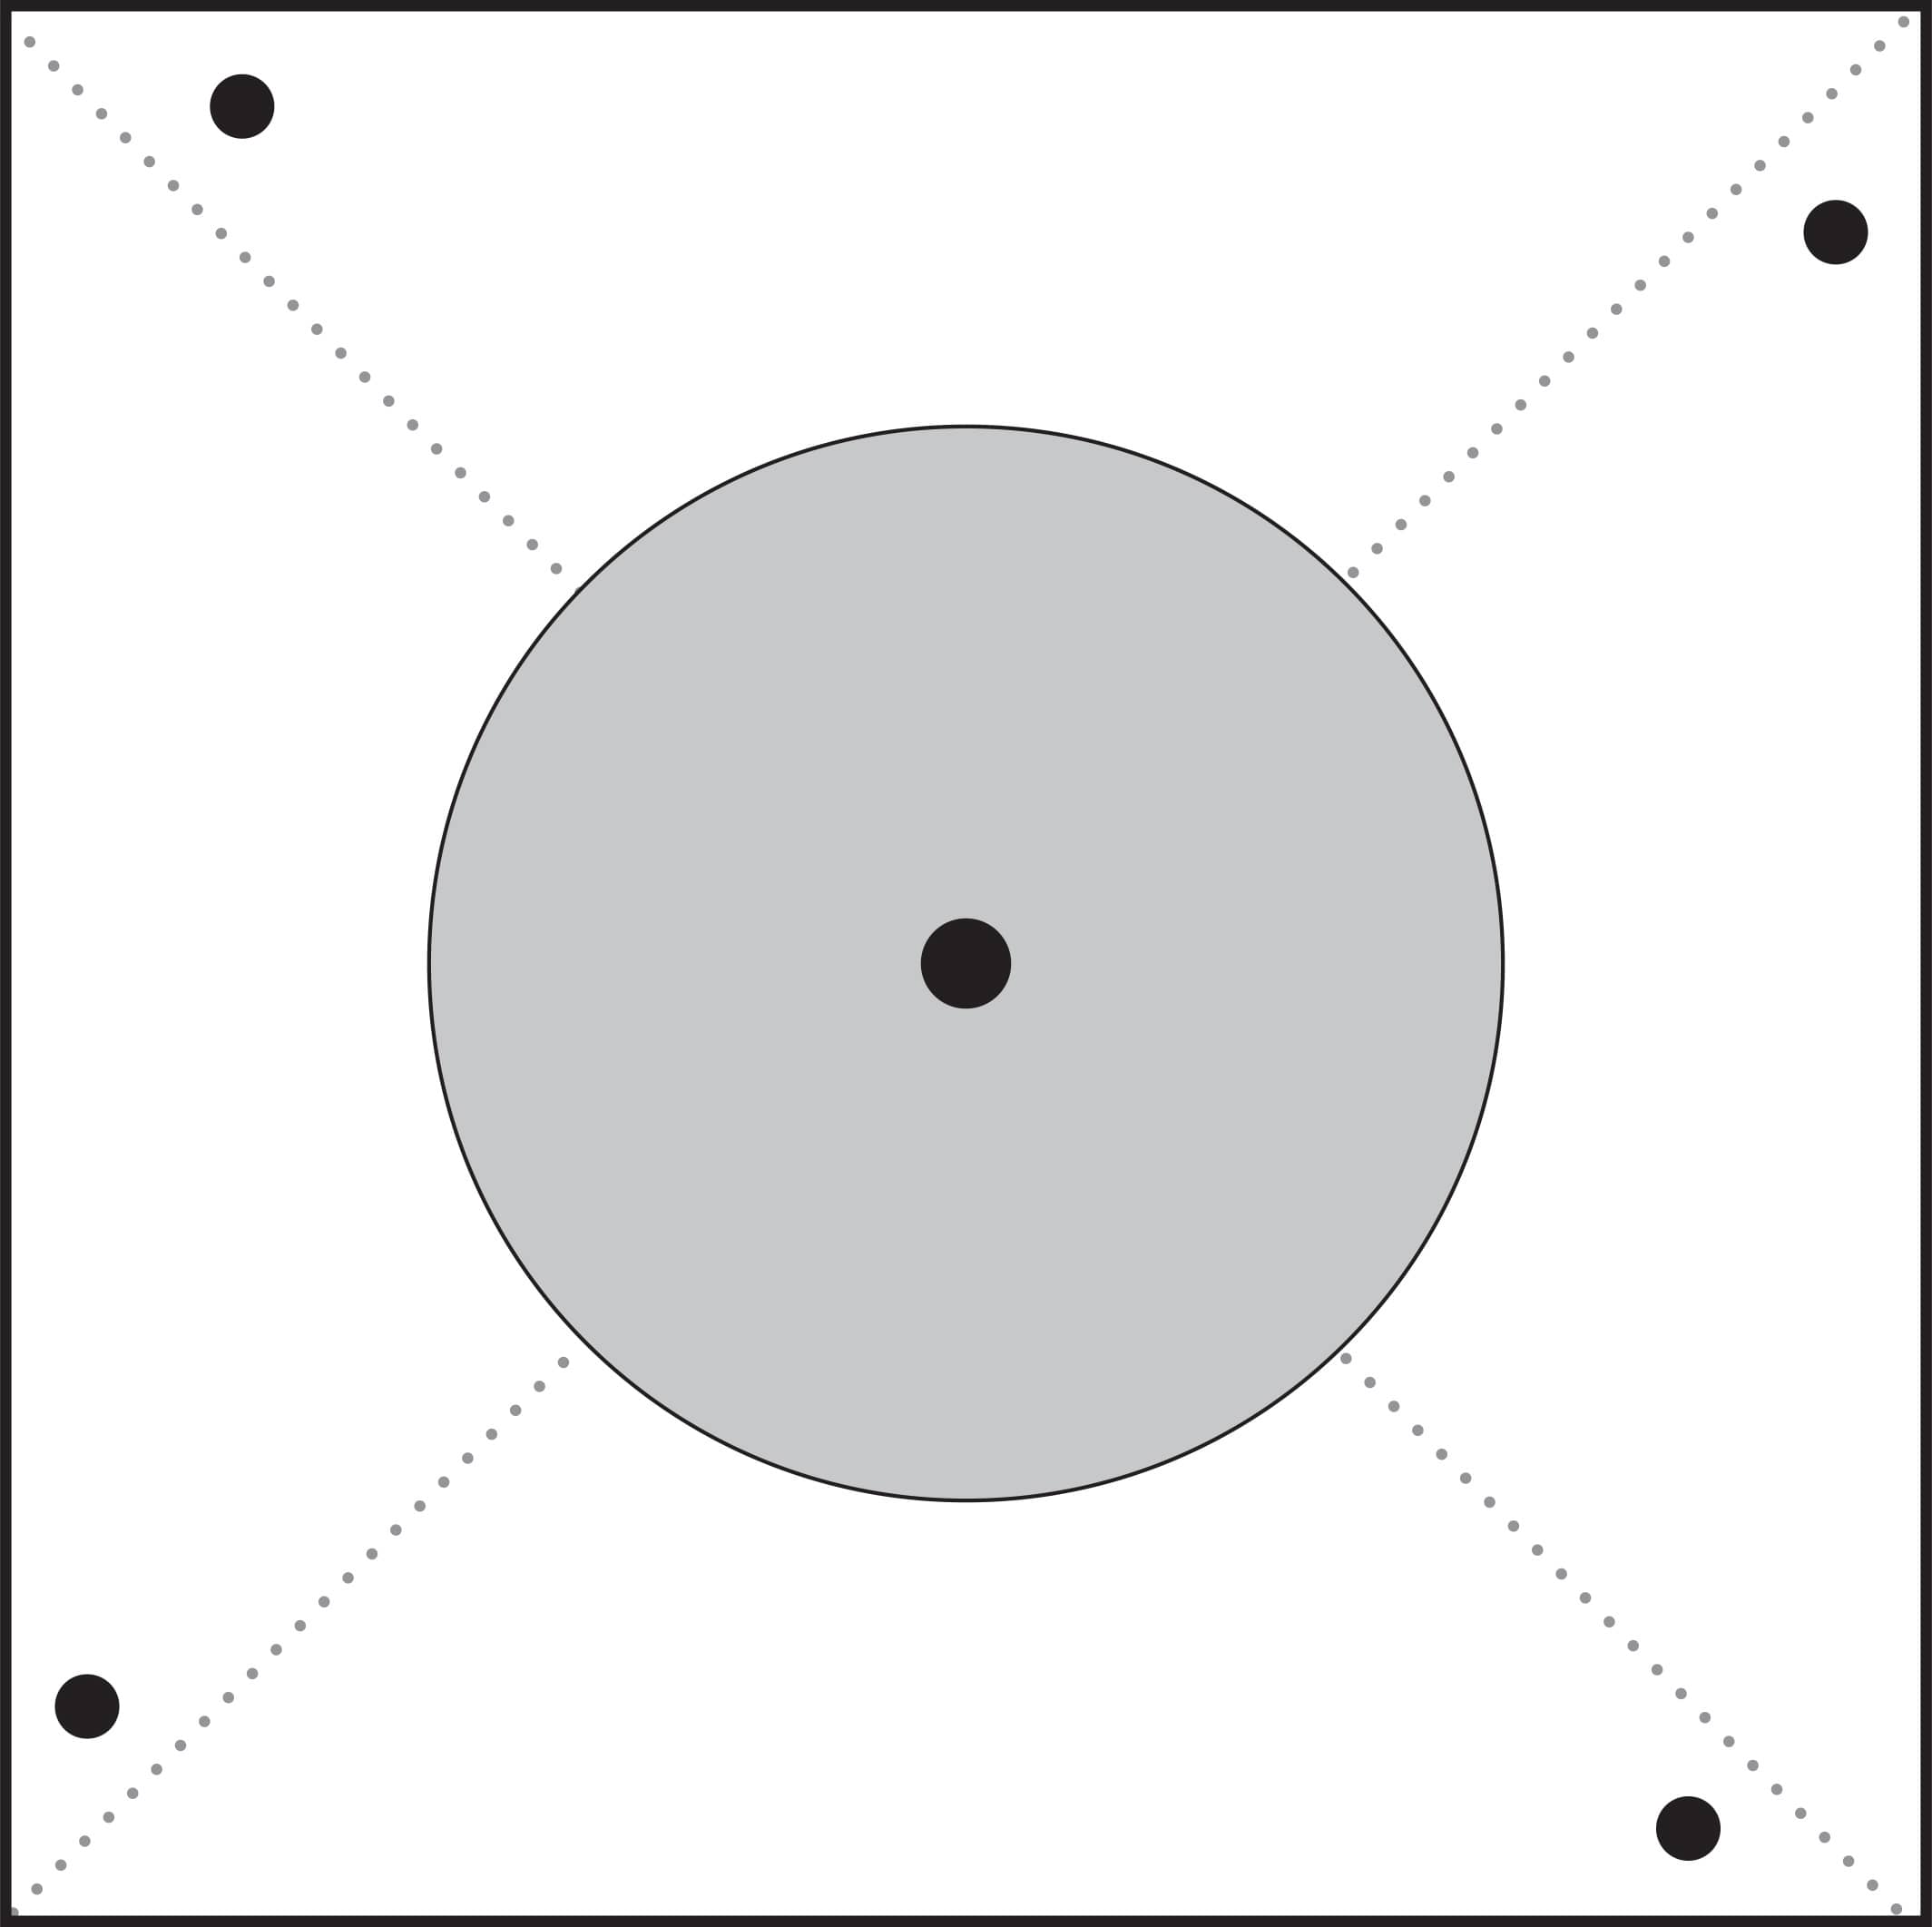
1. Trace with a pencil or photocopy the windmill-blade template shown here onto a piece of paper.
2. Cut out the square outline. Cut along the dotted diagonal lines.
3. Punch holes in the four corner black dots and the center dot (fig. 1).
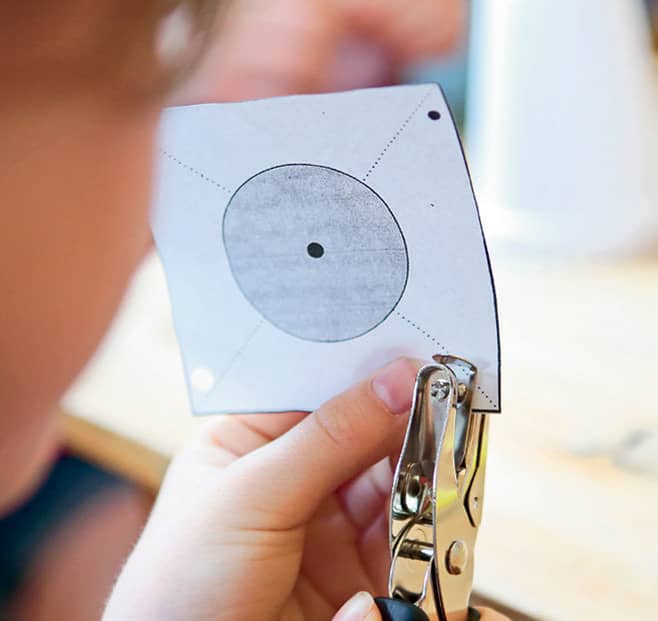
Fig. 1: Punch holes in the corners and center of the template.
4. Turn the foam cup upside-down on your work surface.
5. Place the straw on top of the bottom of the cup. With a marker and ruler, measure a piece of straw slightly longer than the diameter of the bottom of the cup. Tape the piece across the bottom of the cup (fig. 2). This will hold the windmill’s central axle.
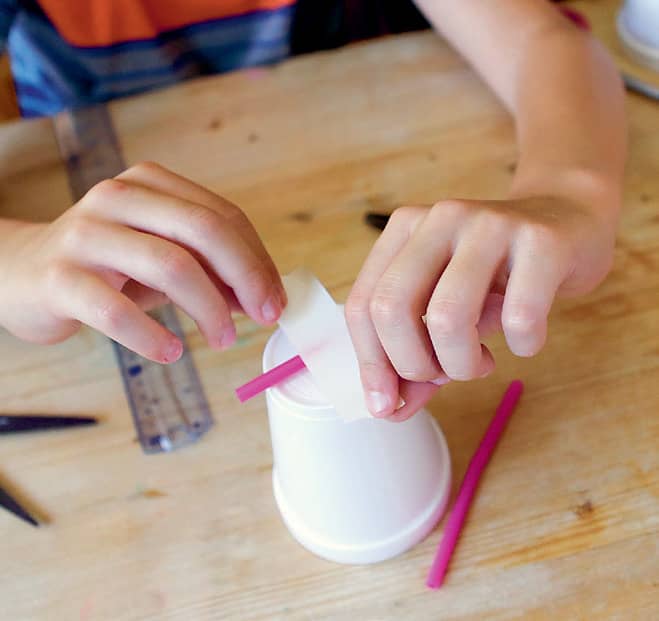
Fig. 2: Cut and tape a piece of straw to the bottom of the cup.
6. Make the central axle for the windmill blade from the stirrer straw. Be sure the stirrer is at least 2" (5 cm) longer than the diameter of the bottom of the cup. Mark a spot 3/8" (1 cm) from the end of the stirrer. Insert a straight pin through the stirrer at this spot so the pin head is up against the stirrer (fig. 3). This short end of the stirrer will be the front of the axle.
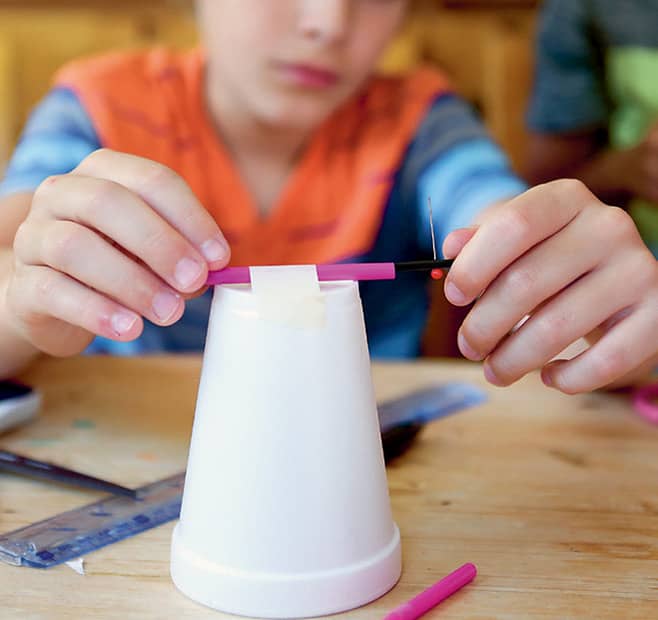
Fig. 3: Make an axle from the stirrer straw. Insert a straight pin through the stirrer.
7. Insert the front of the axle through the center hole of the windmill template. Let the paper rest against the pin. Slip each corner of the template over the end of the axle so that all the holes overlap and four windmill blades are formed (fig. 4). Be careful not to crease the blades. Secure the blades by inserting another straight pin into the axle. Use tape to secure the blades if the pin is too loose.
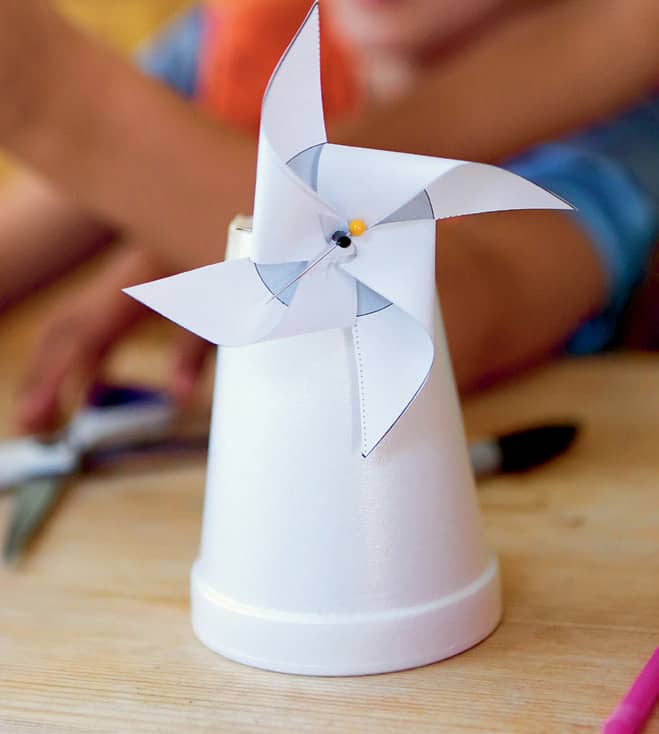
Fig. 4: Slip each corner of the template over the end of the axle to form four windmill blades.
8. Insert the long end of the axle into the straw on top of the cup.
9. Cut a 16" (41 cm) length of string. Tape the end of the string to the back end of the axle (fig. 5). Tie the other end of the string to a paper clip. Make sure there is at least 12" (30 cm) of string between the axle and the top of the paper clip.
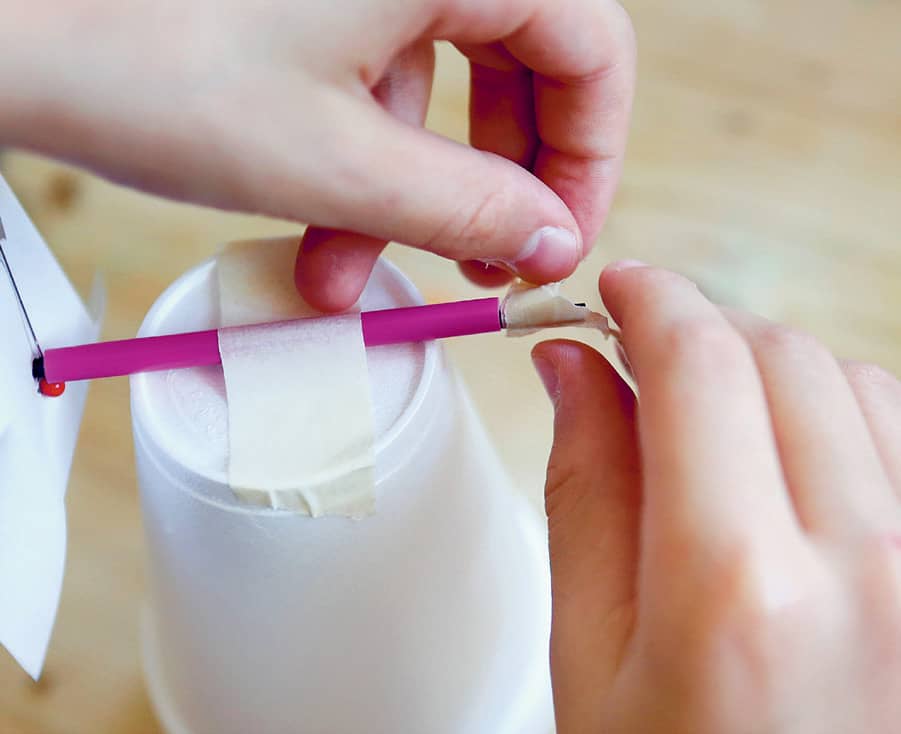
Fig. 5: Tape the end of the string to the back end of the axle.
10. Fasten a small binder clip to the back end of the axle for balance and to keep the string from sliding off.
11. Slide the axle forward so that the binder clip touches the end of the straw. Insert another straight pin through the axle at the front end so that the blades spin without hitting the cup. Blow air toward your pinwheel to test this and adjust as necessary (fig. 6).
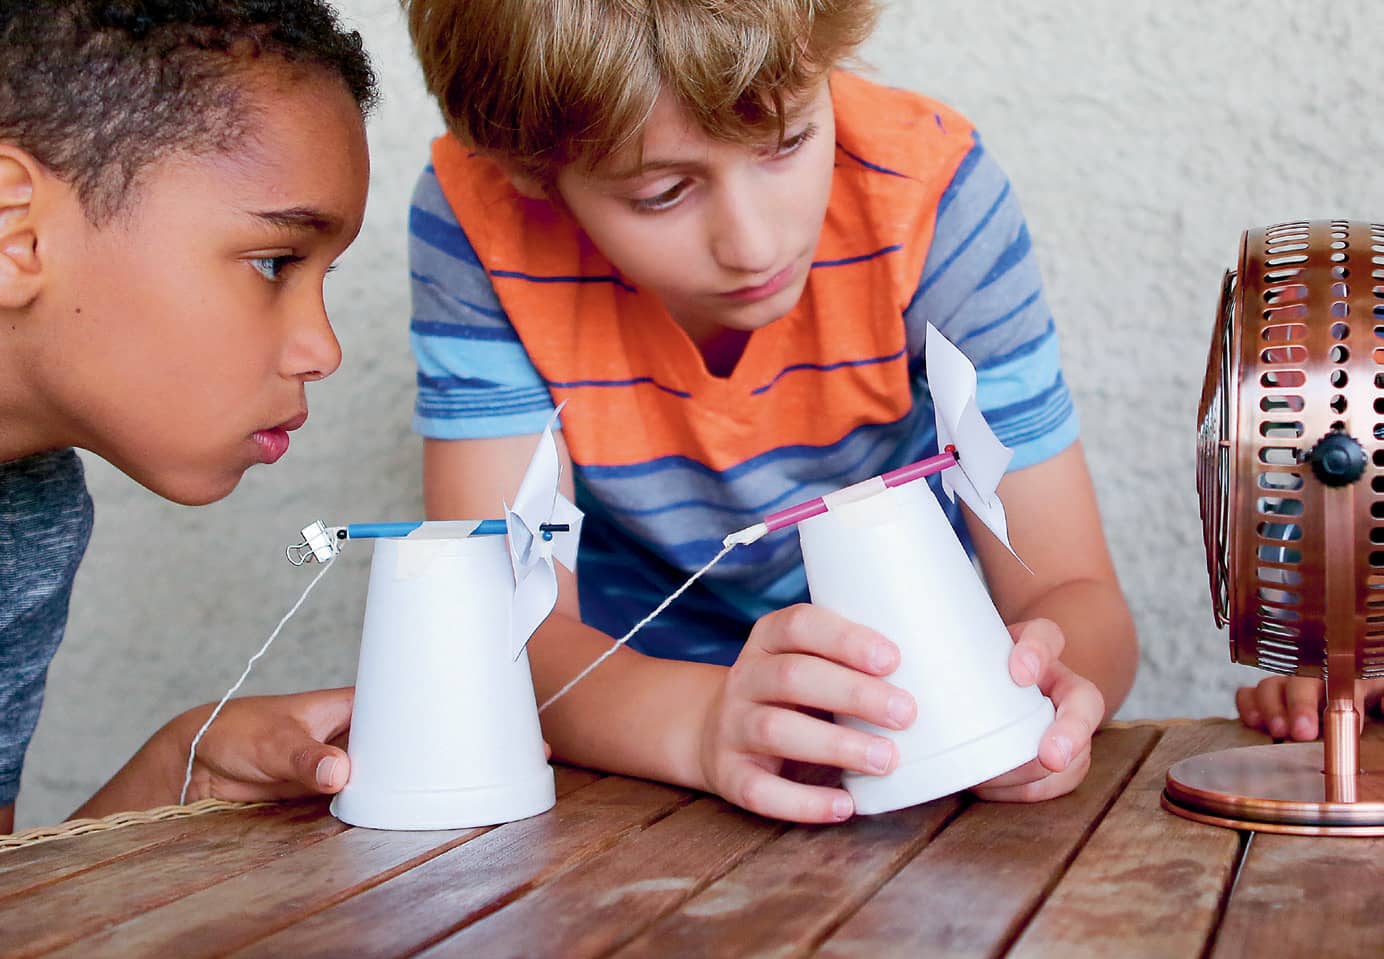
Fig. 6: Blow air toward your pinwheel to test it.
12. Place the windmill in front of the fan. Watch the blades spin, wind the string, and lift the paper clip to the top (fig. 7). Continue adding paper clips to see how many your windmill can lift.
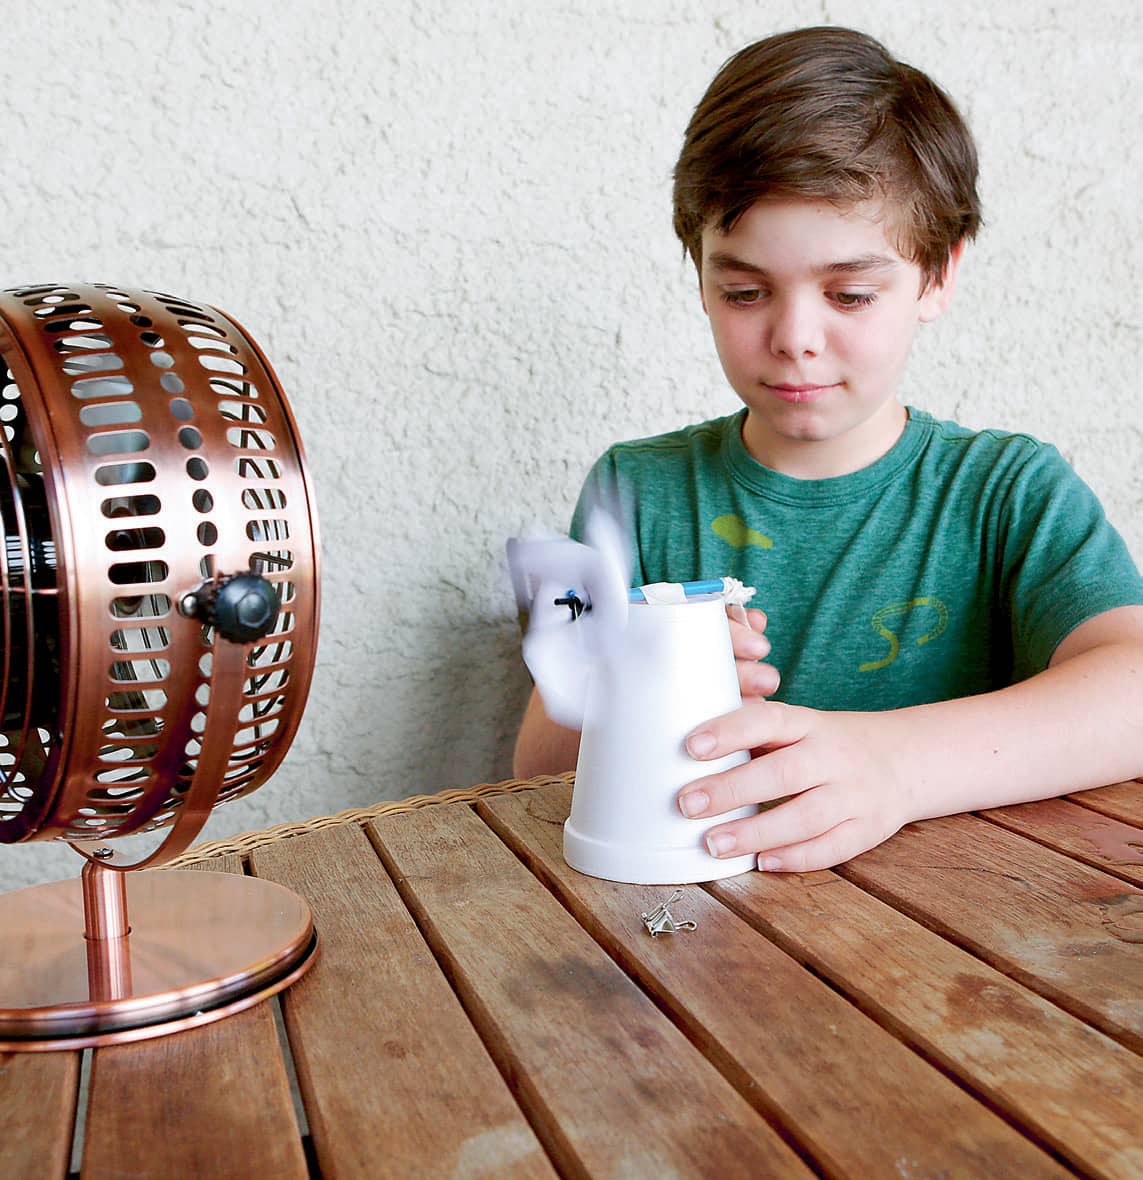
Fig. 7: Place the windmill in front of the fan so that the blades spin.
Now Try This!
Redesign your model to do more work. How could it be used to lift more paper clips, lift heavier items, or even do a different type of work?
If you would like to download this pattern, please use this link: www.quartoknows.com/page/energy-lab
|
GEOTHERMAL HEATER |
Geothermal means heat from within the Earth. The Earth’s core is very hot. This heat radiates up through the layers of rock between us and the core. In some places, there is enough heat to create magma in a volcano and geysers that erupt with steamy water! Geothermal energy at very high temperatures can also generate electricity.
Not every area is exposed to geothermal energy hot spots, but we can still use the constant temperature below the surface to heat or cool our homes and water. This lab will show you how geothermal energy can be used to exchange or pump fluid out of your home and replace it with fluid at a warmer or cooler temperature—from just below the Earth’s surface!
TIME:
45 minutes
PERSON POWER:
No Sweat! However, it might be fun to grab a crew member for less mess.
MESS ALERT!
This activity should be done on a kitchen counter or table covered with a plastic tablecloth. There will be drips, so have towels or paper towels handy!
SAFETY IS KEY:
This lab requires hot water. Use caution, because splashes and drips can burn, and water that is too hot could melt the cups and straws! Use caution when pouring water as it may be near a heating pad used in the lab. Water and electrical devices should not come in contact.
MATERIALS
→ 2 small plastic cups
→ nail
→ scissors
→ 4 flexible straws
→ tape
→ tongs
→ 13" × 9" (33 × 23 cm) baking dish
→ heating pad
→ paper towels
→ dish towel
→ digital thermometer
→ ice
→ cold water
→ notebook and pencil
→ oven mitt
→ hot water
1. Poke a hole in the bottom of one cup using the nail or scissors. This will be your drain cup (fig. 1). Poke a hole in the second cup 1/2" to 1" (1.3 to 2.5 cm) from the top. This will be your collection cup.
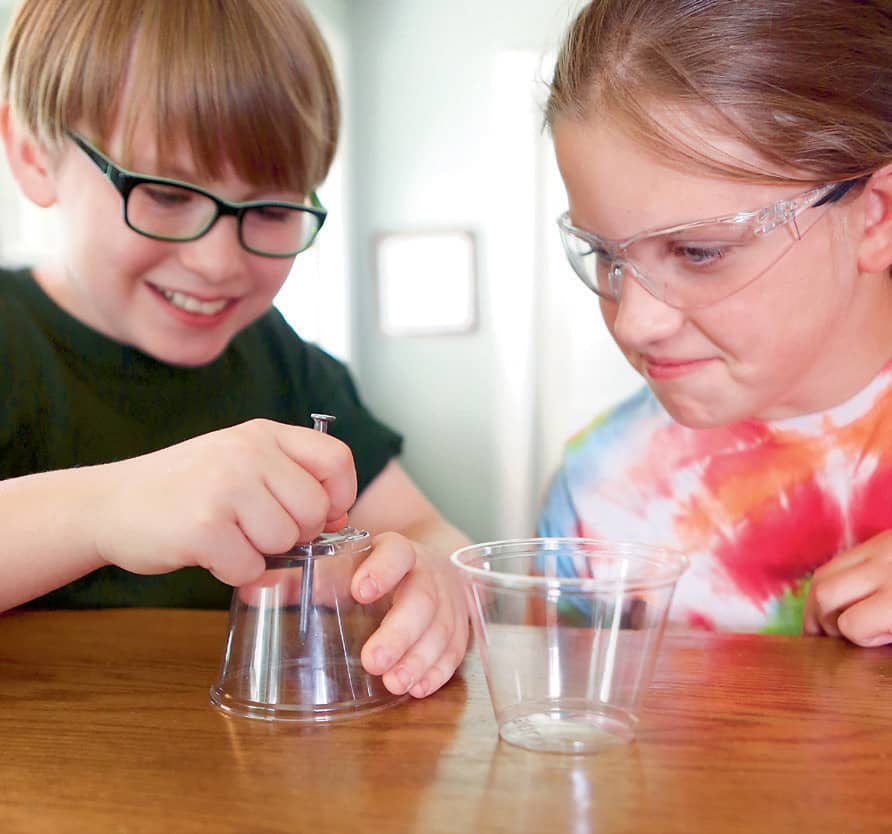
Fig. 1: Poke a hole in the bottom of a cup. This will be your drain cup.
2. Select three straws. Note that the section of the straws below the elbow is longer than the section above. Use the scissors to cut small slits into the long end of three straws. Pinch the sliced end of one straw and insert it into the short, unsliced end of the second straw. Tape over the joint. Repeat this so that all three cut straws are connected. Connect the last edge to the remaining straw (fig. 2).
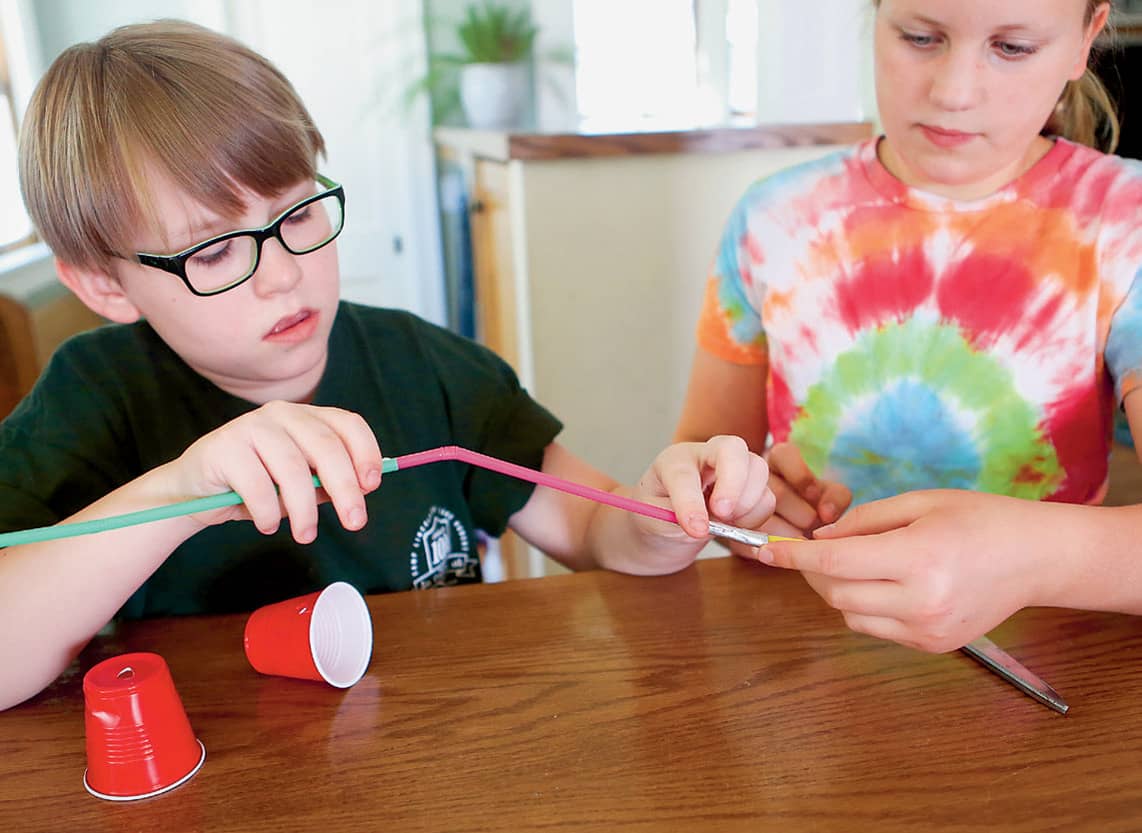
Fig. 2: Select three straws. Fit them together end to end and tape over the joints.
3. Insert the first straw’s short end through the hole you created in the collection cup (fig. 3). Trim this end of the straw if it hits the other side of the cup due to the diameter of the cup and length of the elbow. You want the elbow be inserted far enough into the cup so that water drips in but does not leak back out. Use tape to secure the straw around the opening, if needed.
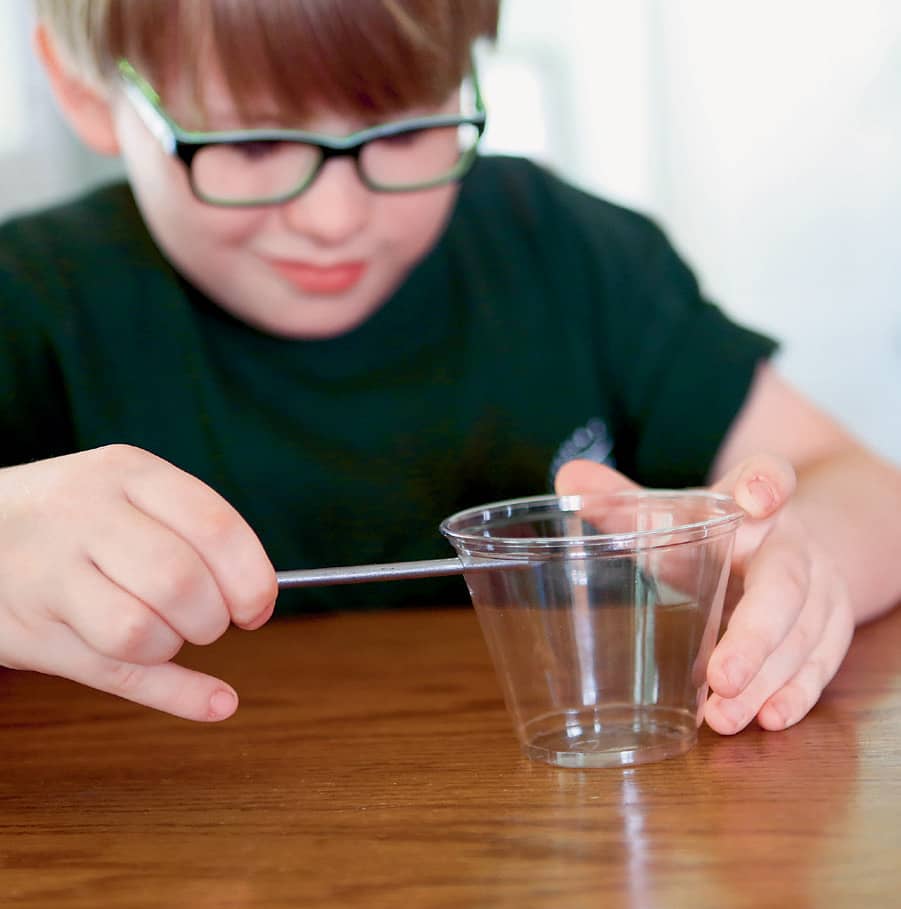
Fig. 3: Insert the first straw’s short end through the hole you made in the collection cup in step 1.
4. Insert the opposite end of the connected straws into the drain cup through the bottom hole. Use tongs to pull the straw up through, and use tape to secure it around the opening, if needed.
5. Bend the elbow of the straw below the drain cup. Bend the next elbow in the straw line as well. Lay these flat so they make a V-shape and the drain cup is upright. Tape the V-shaped straws inside the bottom of the baking dish and position the cups outside the baking dish, next to the two corners of one long side of the dish (fig. 4). The drain cup will be slightly elevated off the table; the collection cup should rest on the table. Tape the straws to the dish so the cups and straws remain in position.
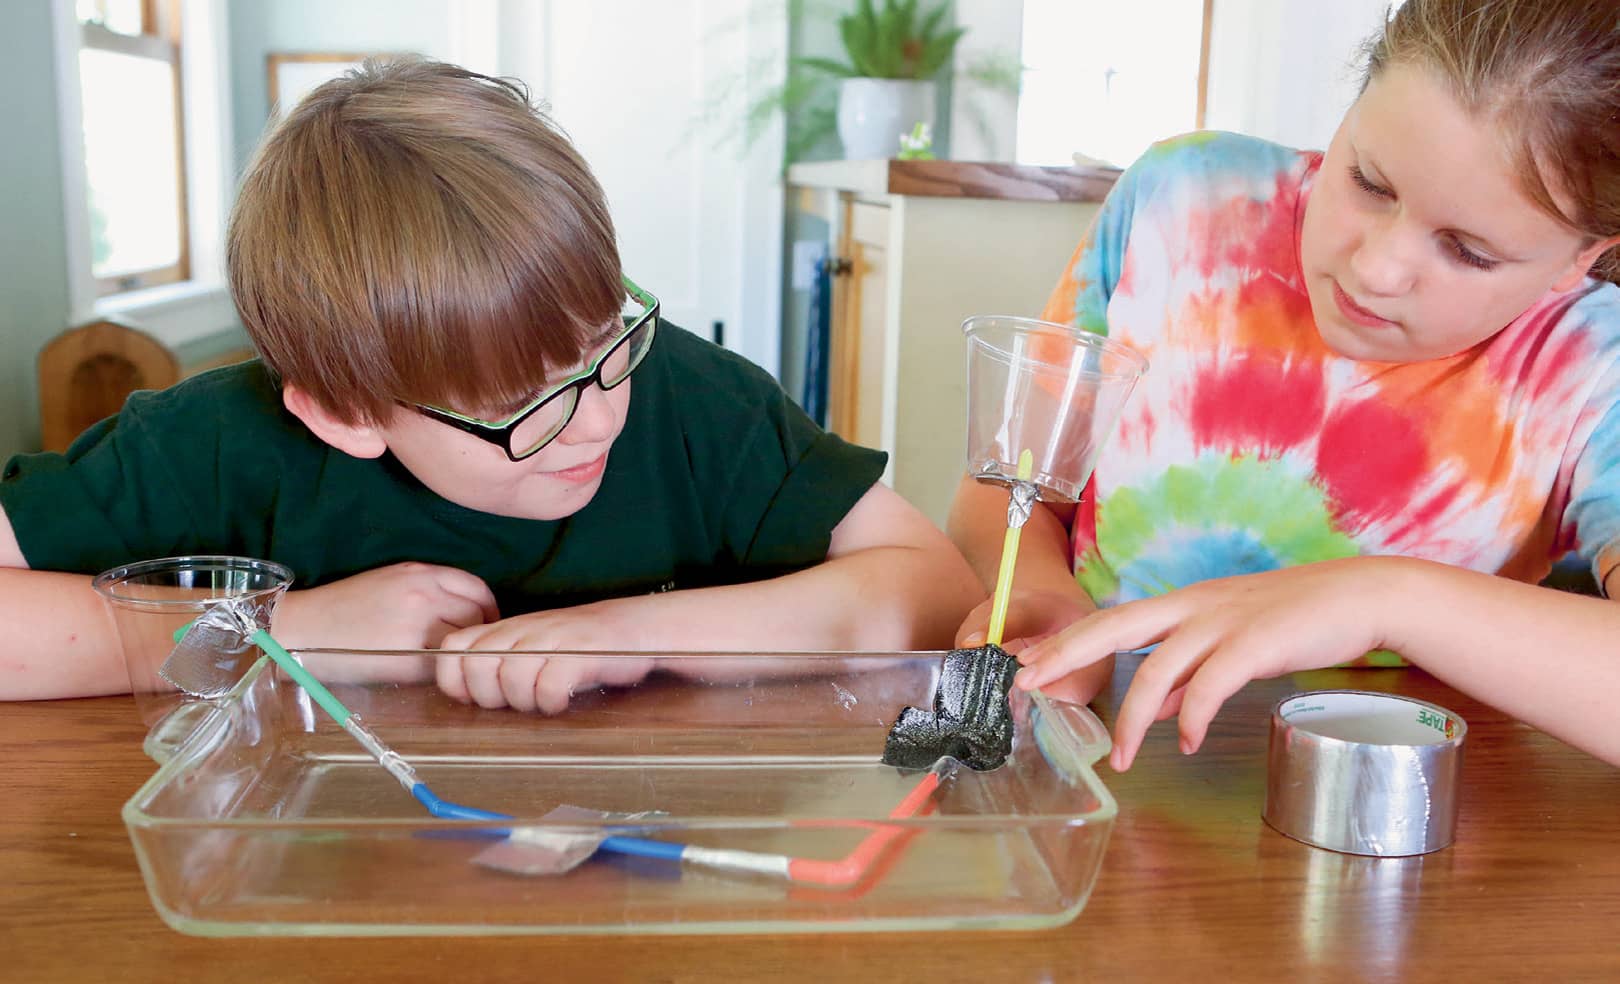
Fig. 4: Tape the V-shaped straws to the inside bottom of the baking dish, and position the cups outside the dish.
6. Turn on the heating pad to the highest setting. Center the baking dish on top of the heating pad. NOTE: Make sure no part of the heating pad is under the cups, in case a drip occurs. Arrange paper towels under the cups so that drips are absorbed by the paper towels and not the heating pad.
7. Place a dish towel over the straws inside the dish. Wait ten minutes for the heating to occur.
8. Pour ice water into the drain cup. Measure the temperature with the thermometer (fig. 5). Record the temperature.

Fig. 5: Pour ice water into the drain cup. Measure the temperature.
9. Water should begin to fill the collection cup. Take the temperature of this water (fig. 6). Has the temperature changed? Remove the cups from the straws and drain any water in the cups and straws. Turn off the heating pad and remove it from the area.
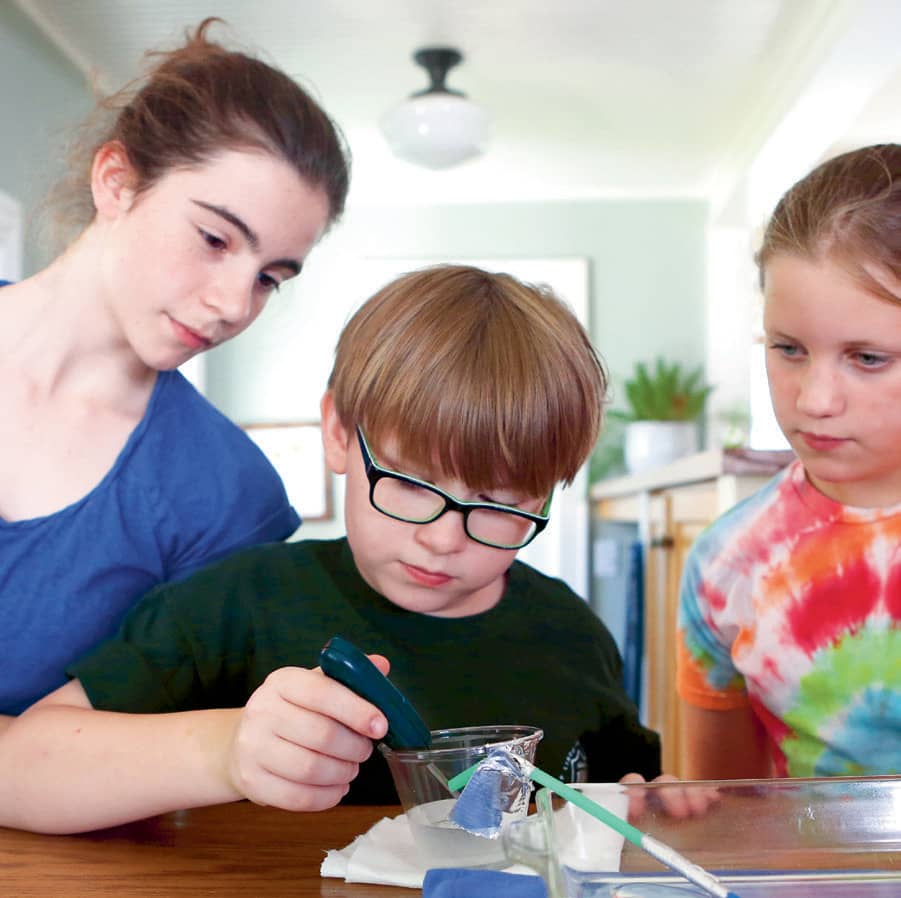
Fig. 6: Take the temperature of the water in the collection cup.
10. Try to reverse the conditions! Heat some water to no more than 100˚F (38˚C). Do not use water at a higher temperature.
11. Make sure the V-shaped straws are secured to the dish and the straws are inserted back into the cups and sealed with tape. Fill the baking dish with ice. Cover the dish with the dish towel.
12. Pour hot water into the drain cup and take the temperature at the start. Record the temperature in your notebook.
13. Take the temperature of the water that fills the collection cup. Do you notice a difference in temperature from the drain cup?
|
SOLAR COOKER |

Ever hear the phrase, “It was so hot outside, you could fry an egg”? This can actually work! The sun’s radiant energy travels to Earth as light. If you can trap this light as heat, the oven effect takes place. If you’ve ever left a candy bar in the car on a hot day, you know what we mean. In this lab, we’ll set up our own solar cooker for use on a sunny day.
TIME:
1 hour or more (set-up and cooking)
PERSON POWER:
Grab a Crew Member! Cooking is always more fun with a friend. You can even do this as a challenge to see who has built the best oven.
SAFETY IS KEY:
Consider the foods you wish to cook in your oven. Be sure to cook items that will not make you sick if they’re undercooked. Use the oven thermometer to make sure your food has been adequately warmed.
MATERIALS
→ small cardboard pizza box
→ marker
→ ruler
→ scissors
→ aluminum foil
→ plastic wrap
→ masking tape
→ black construction paper
→ paper plate (dark colors work best)
→ wooden skewer
→ oven thermometer (optional)
→ food to cook (such as cookie dough, nacho chips and shredded cheese, or carrots)
1. On the top of the pizza box, use the marker to draw a square with edges 1" (2.5 cm) from all sides of the box.
2. Use the scissors to cut along the marked lines on the side and front edges, but leave the hinge edge uncut (fig. 1).

Fig. 1: Cut along the lines on three sides of the box top, leaving the fourth as a hinge.
3. Tape aluminum foil to the inside surface of this flap (fig. 2). Make sure the shiny side of the foil is facing out. This will reflect sunlight into the box. Smooth out any wrinkles that might occur.
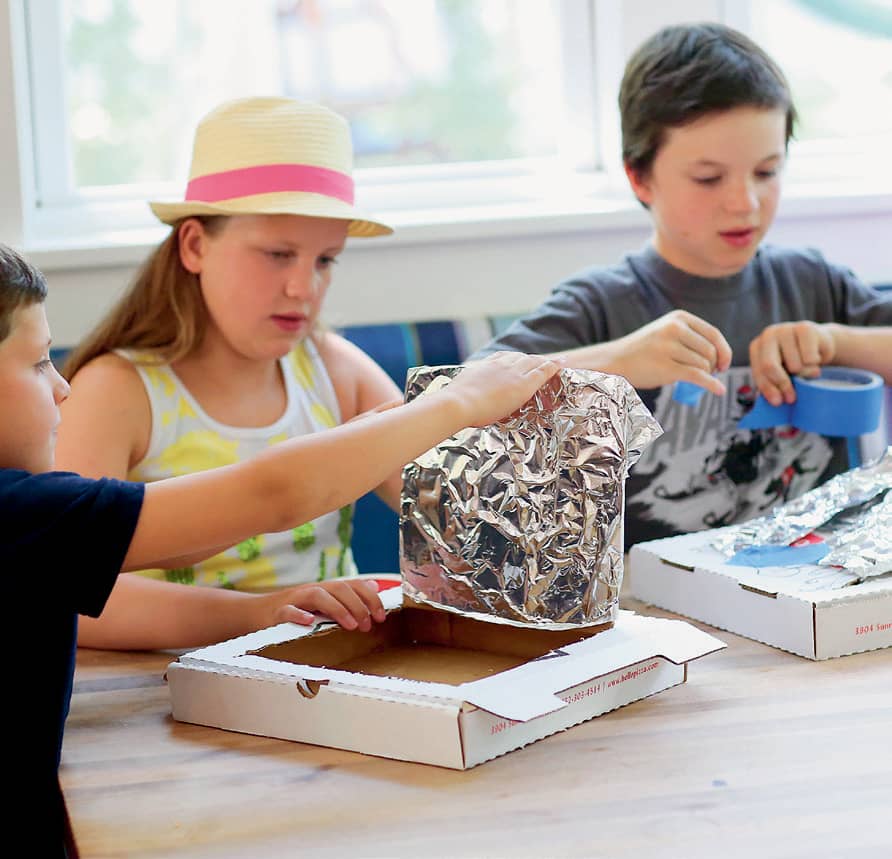
Fig. 2: Tape foil to the inside surface of the flap.
4. With the reflector flap lifted, tape plastic wrap over the rest of the box lid (fig. 3). The plastic wrap will cover the flap hole you just made. Seal the edges with tape.

Fig. 3: Tape plastic wrap over the rest of the box lid.
5. Open the box lid completely. Tape more plastic wrap to the underside of the lid’s flap hole, and seal any air leaks with tape.
6. Tape black construction paper inside the bottom of the box (fig. 4).

Fig. 4: Tape black construction paper inside the bottom of the box.
7. Prepare your food on a paper plate. Dark paper plates can be helpful to absorb extra light. Take the paper plate of food, the skewer, tape, thermometer, and box outside (fig. 5).
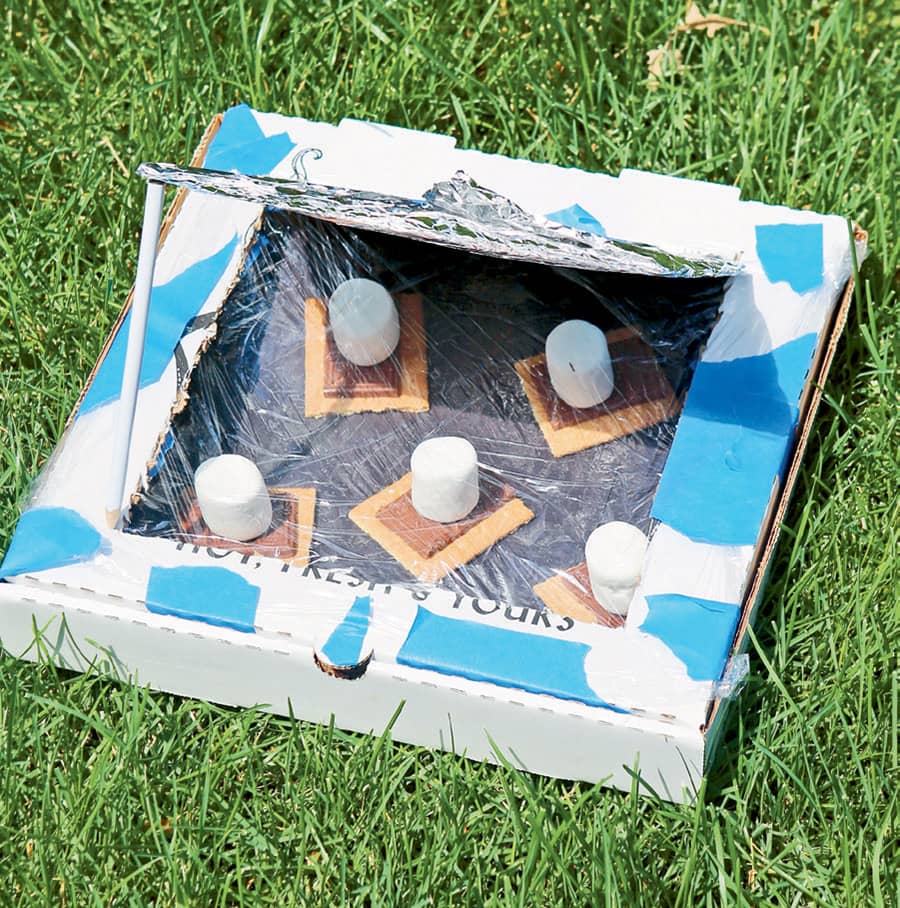
Fig. 5: Take your solar cooker outside.
8. Find a flat, level surface in the sunlight to do your cooking (fig. 6). Place the food items inside the oven with the thermometer and close the box lid, keeping the reflector flap tilted back to collect light (fig. 7). Tape the wooden skewer to the reflector lid and use it to prop the flap up. Make sure your oven is facing the sun so that sunlight strikes the reflector flap and shines onto your food.
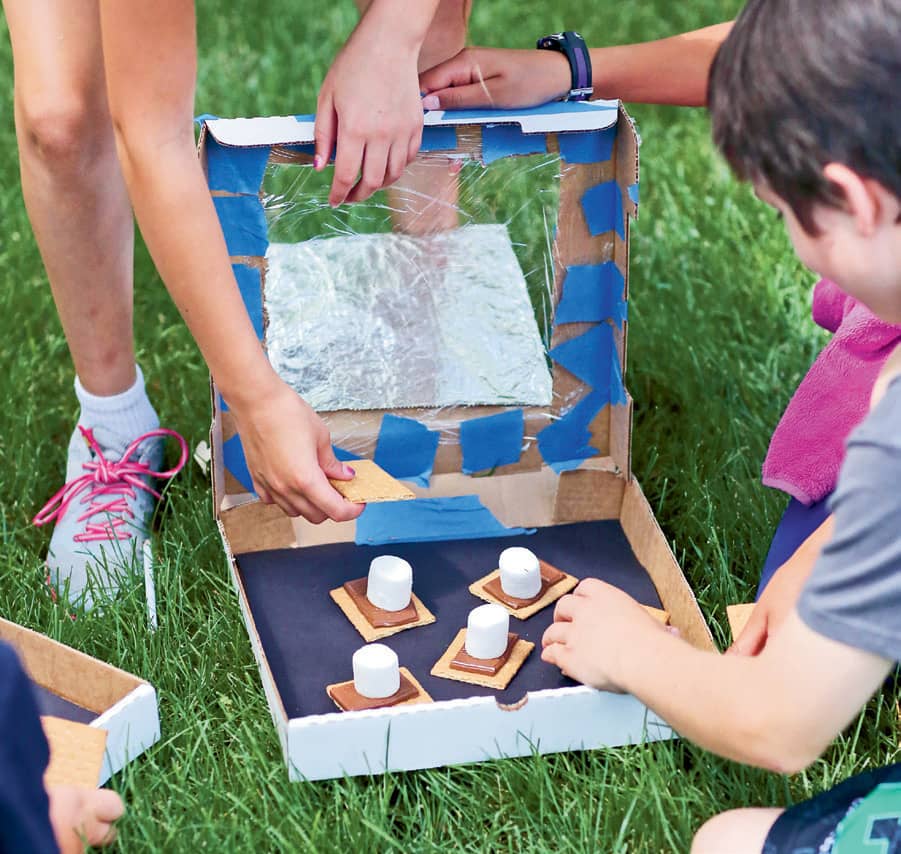
Fig. 6: Find a flat, level surface to do your cooking.
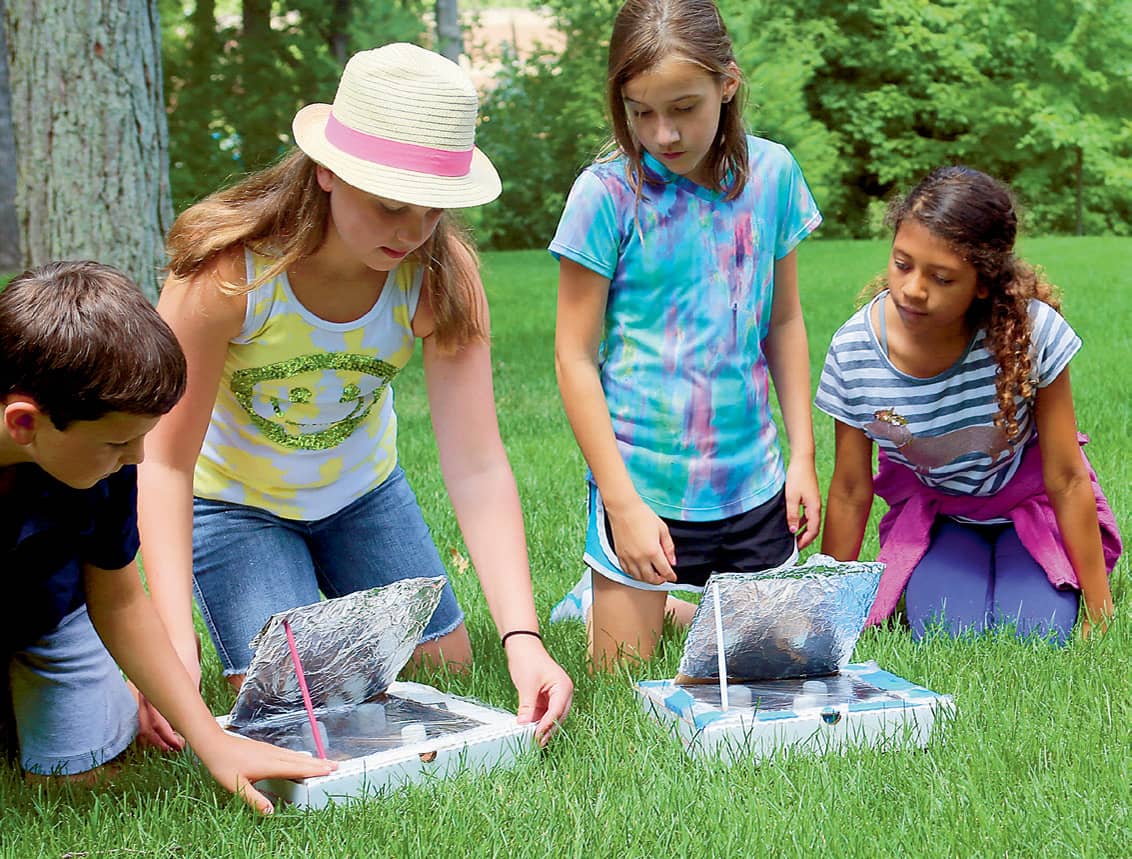
Fig. 7: Keep the reflector flap tilted back to collect light.
9. Allow your oven to heat up, cooking your food. Depending on the type of food you’re cooking and where you live, your food could be warmed in minutes or maybe hours. Check your food every five to ten minutes. Make sure to adjust your oven position and reflector flap position as the sun’s angle changes. Is it done (fig. 8)? Enjoy!
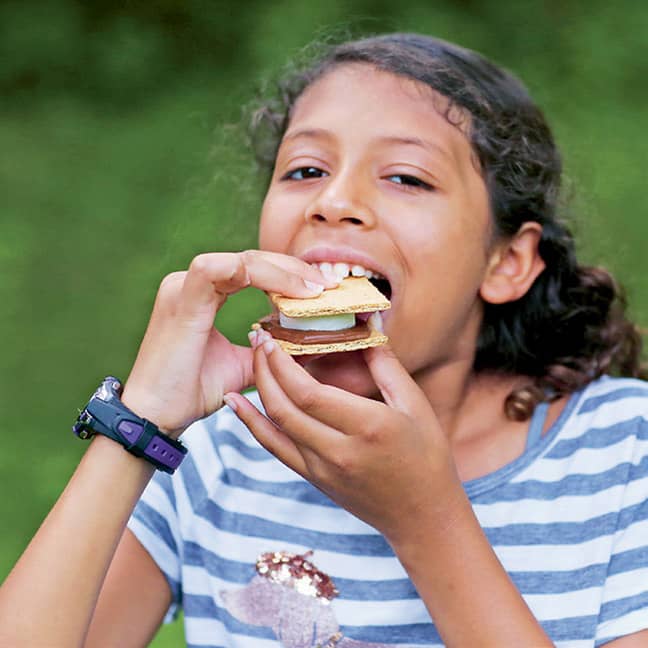
Fig. 8: Enjoy!
Now Try This!
Add insulation to your oven. Use some newspaper, bubble wrap, or cotton balls around the inside perimeter of your box. These materials will take up the empty space in the box and trap more heat inside the oven! Does it cook your food more quickly?
|
BIOMASS BAG |
Biomass energy is energy that comes from living things. Wood, garbage, animal waste, landfill gas, and crops all count as biomass. None of these items can give off their energy until they are burned, fermented, or decayed. In this lab, we’ll make some biomass in a bag!
TIME:
15 minutes, plus a few minutes each day for 1 to 2 weeks
PERSON POWER:
No Sweat!
MATERIALS
→ resealable plastic bag
→ yard waste (leaves, grass clippings, etc.)
→ leftover food scraps (lettuce, pizza crust, etc.)
→ packet of powdered yeast
→ water
→ camera or camera phone
→ notebook and pencil
1. Open the plastic bag. Grab some yard waste items that you find outdoors, or pick some leaves, flowers, and grass and put them in your bag.
2. Take the bag inside and add some food scraps. It’s best to avoid meat, but veggies, fruit, or even some old pizza crust will do! Make sure your bag has empty space, too (fig. 1).
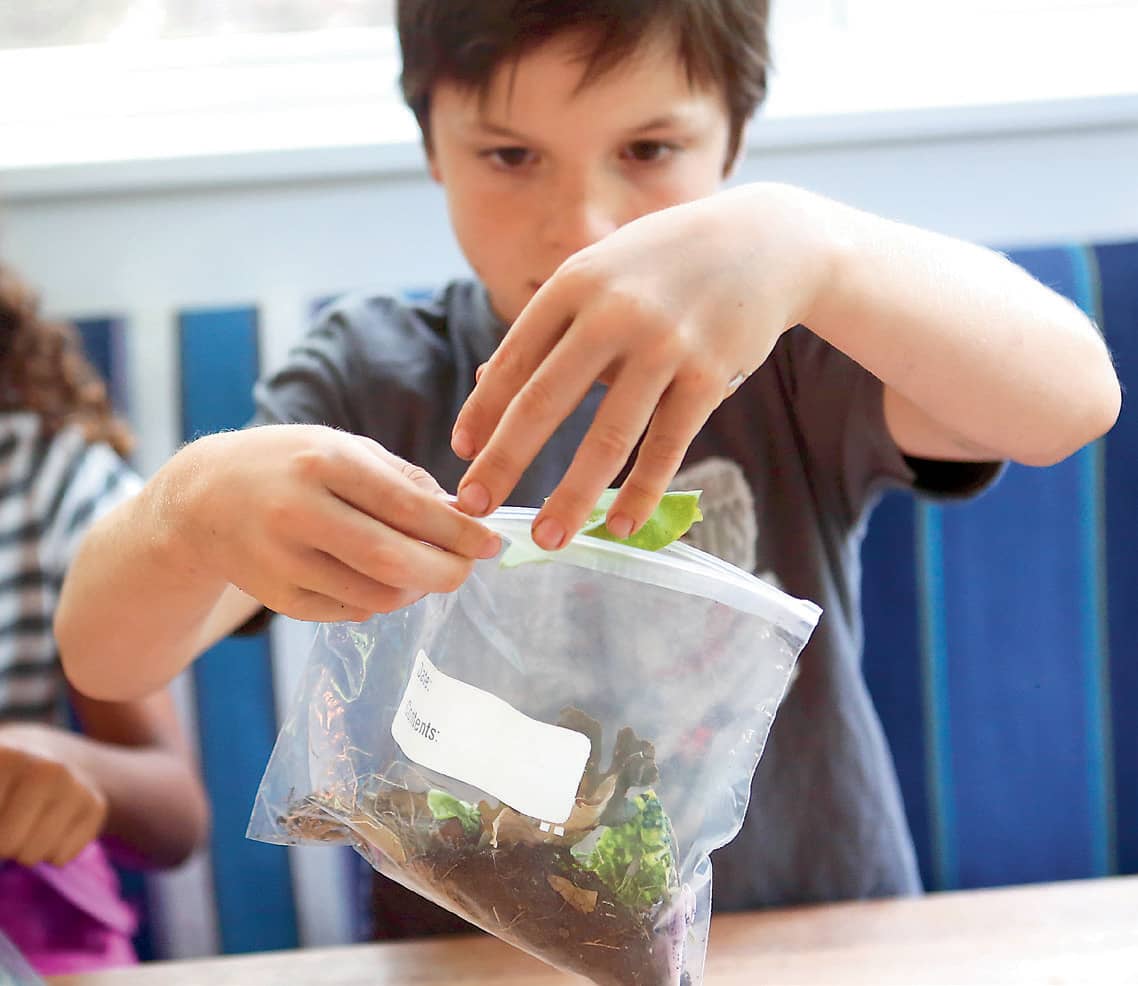
Fig. 1: Take the bag inside and add some food scraps.
3. Add a pinch of yeast to the collection in the bag (fig. 2).
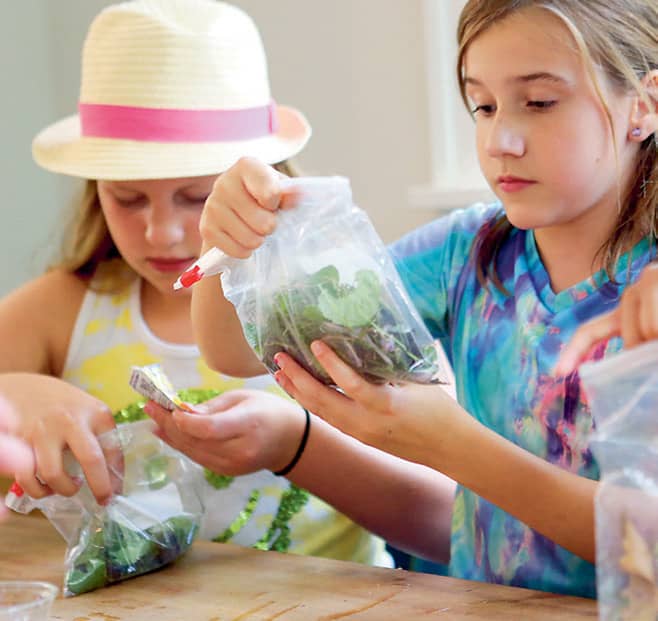
Fig. 2: Add a pinch of yeast to the bag.
4. Add a few drops of water so that the mixture is moist.
5. Force as much air as possible out of the bag before sealing it (fig. 3). Take a picture of the bag and note anything you see on day 1.

Fig. 3: Force as much air out of the bag as possible.
6. Place the bag in a warm place, like a window-sill, and allow it to stay there for a week or more (fig. 4). Snap a picture each day and compare what you see happening to the contents of the bag and the space in the bag.
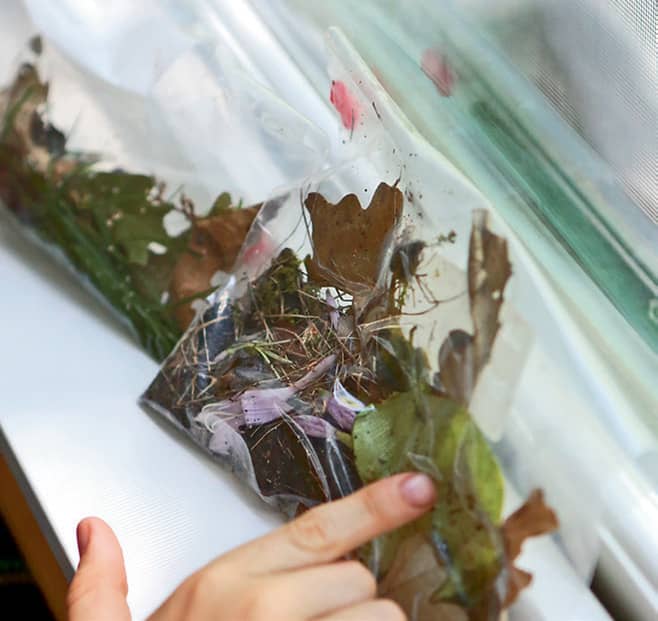
Fig. 4: Place the bag in a warm place, like a windowsill.
French Fry Fuel
Biodiesel and ethanol are fuels that are created from biomass. Ethanol is made by fermenting corn, grass, or sugarcane, which creates a liquid that can power our vehicles. Ethanol is put into gasoline in the U.S. in small percentages, and some cars use as much as 85 percent ethanol. It’s even used in race cars! Biodiesel is a diesel fuel that is made from plant oils or animal fats and grease. Biodiesel is added to diesel fuel just like ethanol, or it can be used by itself in cars and pickup trucks and even garbage trucks and buses. People can make their own biodiesel easily by collecting fryer oil and grease from restaurants that make fried food!
|
DAM FUN |
Hydropower is energy that comes from the force of moving water. Usually, we harness this energy in rivers. A dam is built to control the water and create a reservoir that is able to focus the flow of water toward a turbine that is attached to a generator. Does it make a difference how high the water is in the reservoir? This lab will allow you to explore how height and force are related at a hydropower dam.
TIME:
20 minutes
PERSON POWER:
Grab a Crew Member!
MESS ALERT!
This activity should be done outside or on a kitchen counter, as things can get a bit slippery!
MATERIALS
→ 2-liter soda bottle with cap and smooth sides
→ wallpaper pan
→ marker
→ push pin
→ water
→ duct tape
→ paper towels
→ notebook and pencil
1. Remove the sticker or label from the outside of the soda bottle and make sure it is dry.
2. Place the ruler in the wallpaper pan and make marks on the bottom of the pan every inch (2.5 cm) until you reach the end of the pan (fig. 1).
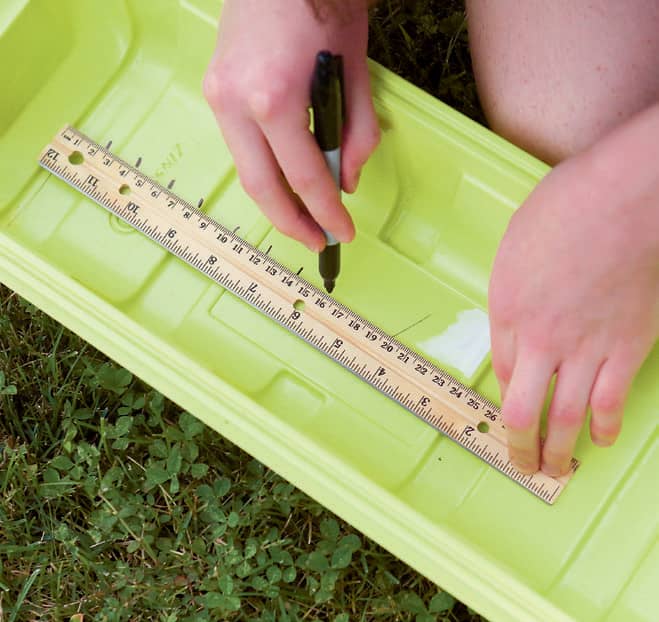
Fig. 1: Mark the bottom of the pan every inch (2.5 cm).
3. Place the bottle in the wallpaper pan. Use the ruler to measure up from the bottom of the bottle. Mark the bottle at 2", 4", 6", and 8" (5 cm, 10 cm, 15 cm, and 20 cm) (fig. 2).

Fig. 2: Mark the bottle at 2" (5 cm) intervals.
4. Use the push pin to make holes at each of the marks in the bottle (fig. 3). Cover each hole with a piece of duct tape (fig. 4).
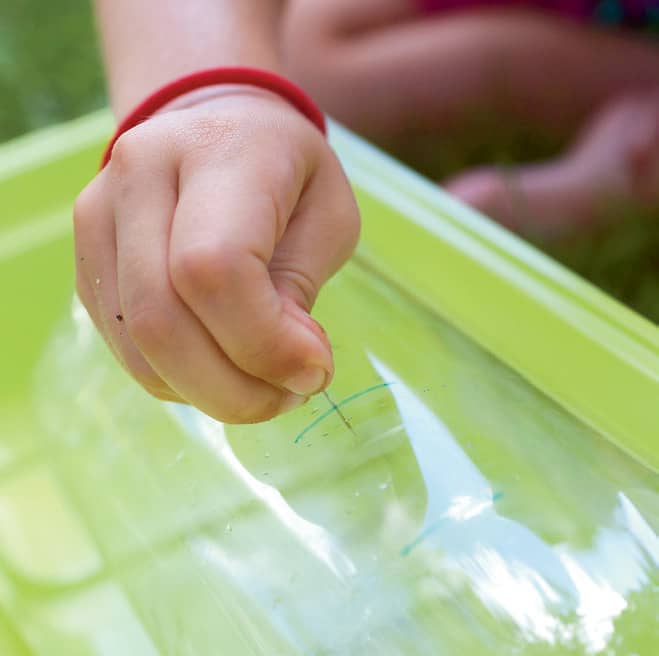
Fig. 3: Make a hole at each of the marks with a push pin.
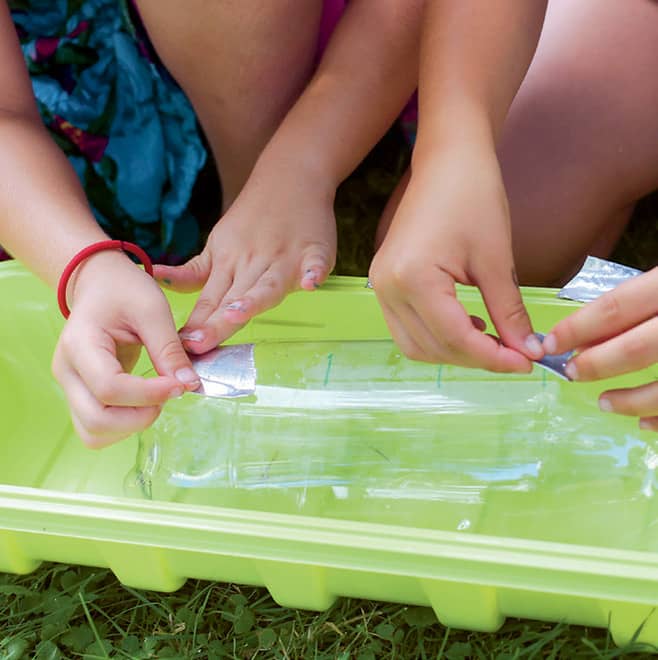
Fig. 4: Cover each hole with duct tape.
5. Fill the bottle with water to the 8" (20 cm) line. Seal the cap to prevent any leaking around the taped lines.
6. Line up the bottle in the wallpaper pan so the holes are facing outward toward the lines in the pan (fig. 5). Remove the duct tape from the 2" (5 cm) mark. How far does the water shoot? Record the distance in your notebook.

Fig. 5: Line up the bottle in the pan so the holes face outward.
7. Close the cap, seal the hole with tape, and uncap and refill the bottle to the 8" (20 cm) line. Place the bottle back in the pan.
8. Repeat steps 6 and 7 for a total of three trials.
9. Dry the outside of the bottle and tape the hole closed. Follow steps 5 through 8 at the other three marks, repeating each one for three trials. Which height caused the water to push out with the greatest force?