
UNIT 04
USING ENERGY
IMAGINE HOW MUCH ENERGY YOU USE EVERY DAY. You wake up to an alarm powered by electricity, you charge your phone, you take a shower with hot water that is heated by electricity or natural gas, you eat breakfast, and you take a bus to school. These are only a small part of your day’s energy use. The average citizen in North America uses about as much energy as is stored in 6 to 8 gallons (22 to 30 liters) of gasoline each day!
There are many ways we can use energy. A large percentage of the energy we use goes into transportation—transporting us in our personal or public vehicles, and transporting our goods from production facilities to points of sale. Another big chunk of the energy we use goes toward generating electricity to power our cell phones, computers, televisions, refrigerators, lights, and much more. The rest of our energy goes into keeping us comfortable in our homes and producing heat to make more goods. The labs in this unit will demonstrate the ways in which we consume or use energy each day, and how we’re able to take energy sources like wind, petroleum, and biomass and turn them into energy to fuel our days and nights.
Light it up with a closed circuit in Lab 29!
|
PRETZEL POWER |
We use a good amount of energy each day, just to get from point A to point B. Most of our vehicles run on petroleum products, like gasoline and diesel fuel. Some of our vehicles are more efficient than others and allow us to go further on less fuel. The number of miles we can travel per gallon of gas (MPG) is a common description used to tell how efficient a vehicle may be. In this lab, you’ll be able to get good idea of how to compare a vehicle’s MPG rating as you try and get “around town” on a few gallons of gasoline!
TIME:
30 minutes
PERSON POWER:
All Hands on Deck! This activity is much more fun with a few friends, and they may come in handy for round two!
 MATERIALS
→ pretzels
→ resealable plastic sandwich bag
→ construction paper
→ marker
→ tape
→ 3" × 5" (7.6 × 12.7 cm) index cards
→ Internet access
1. Place ten pretzels in a sandwich bag. Prepare one bag for each person who is participating (fig. 1).
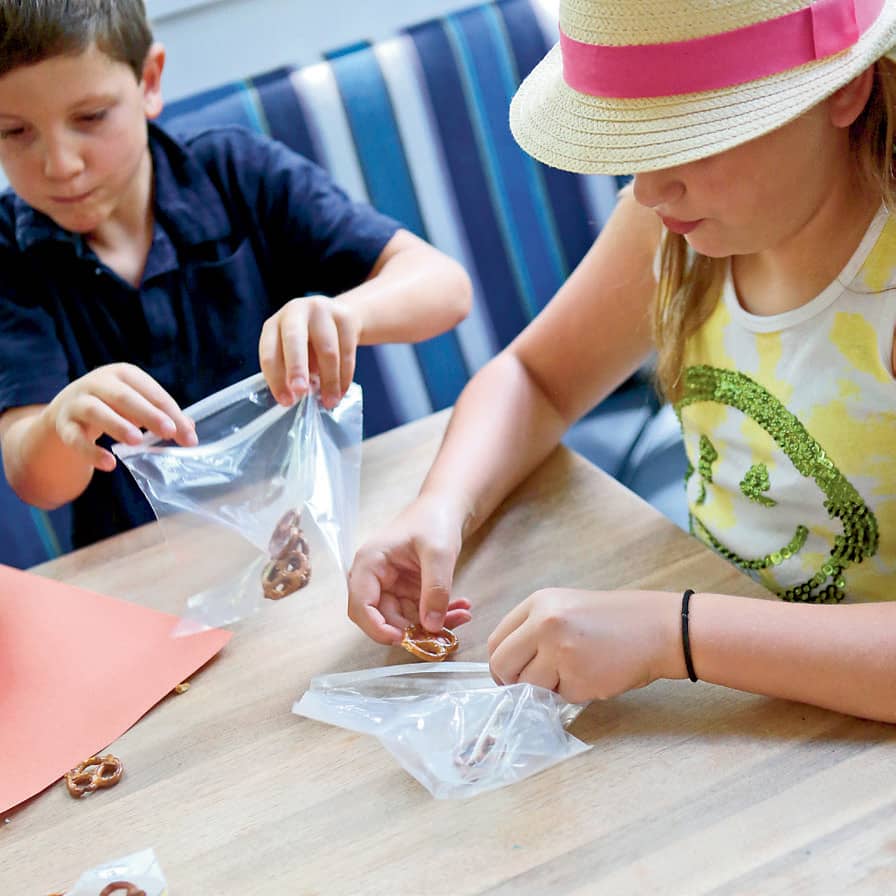
Fig 1: Place ten pretzels in a sandwich bag.
2. Make three signs on construction paper: one labeled “Home,” one labeled “Downtown,” and one labeled “Across Town.”
3. Select a large, open area. Tape the Home sign at a location that you will designate as your home base or starting point (fig. 2). Walk 50 steps (heel to toe) from home base, and tape the Downtown sign up so all crew members can see it. Walk another 50 steps (heel to toe) and tape the Across Town sign up for all to see. The Across Town sign should be about 100 steps away from Home. Don’t tell anyone how far away is the signs are from each other!
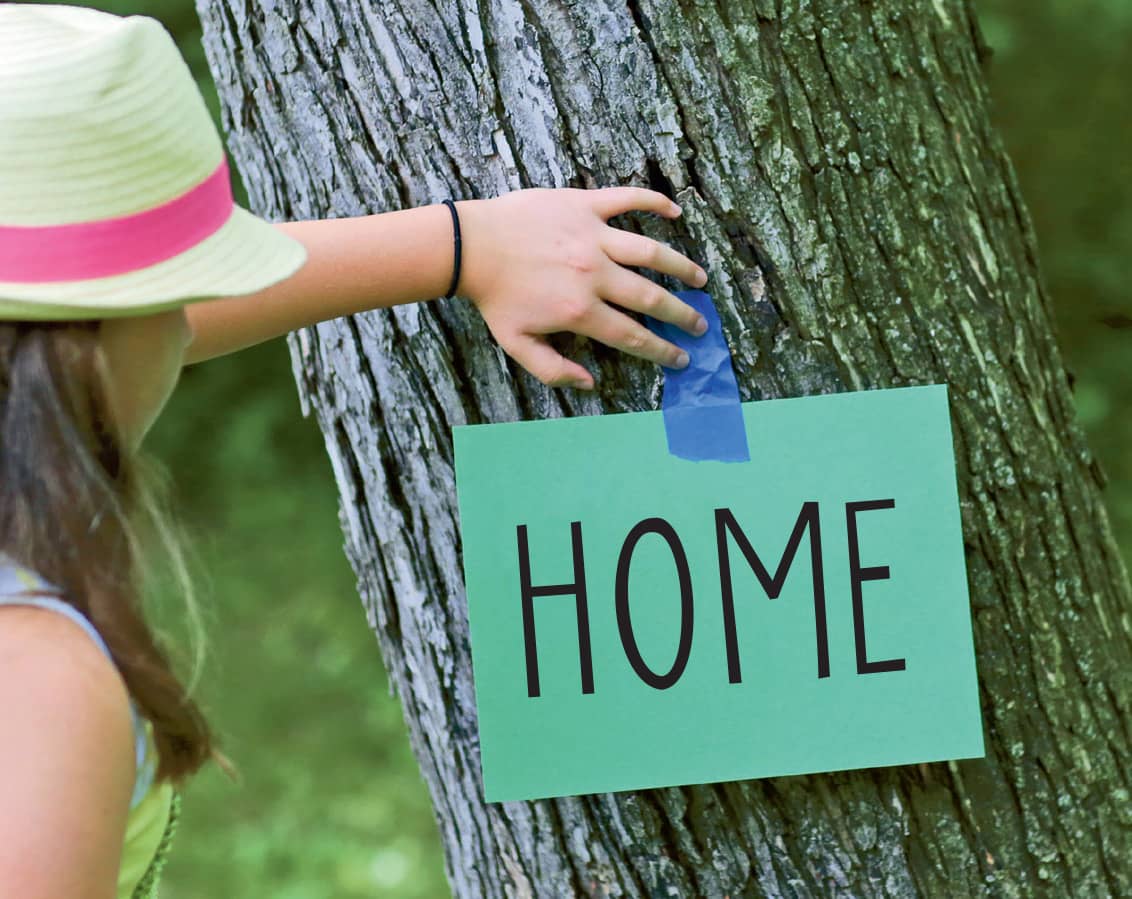
Fig. 2: Tape the home sign at your base.
4. Give each person an index card. Have them visit www.fueleconomy.gov and look up any car they might like to drive. Each person should record the car’s name, model year, miles per gallon, type of fuel required, and number of passengers it can hold (fig. 3). If you pick a Flex Fuel Vehicle (FFV), select only one fuel you will use—gasoline or E85—and record the mileage.
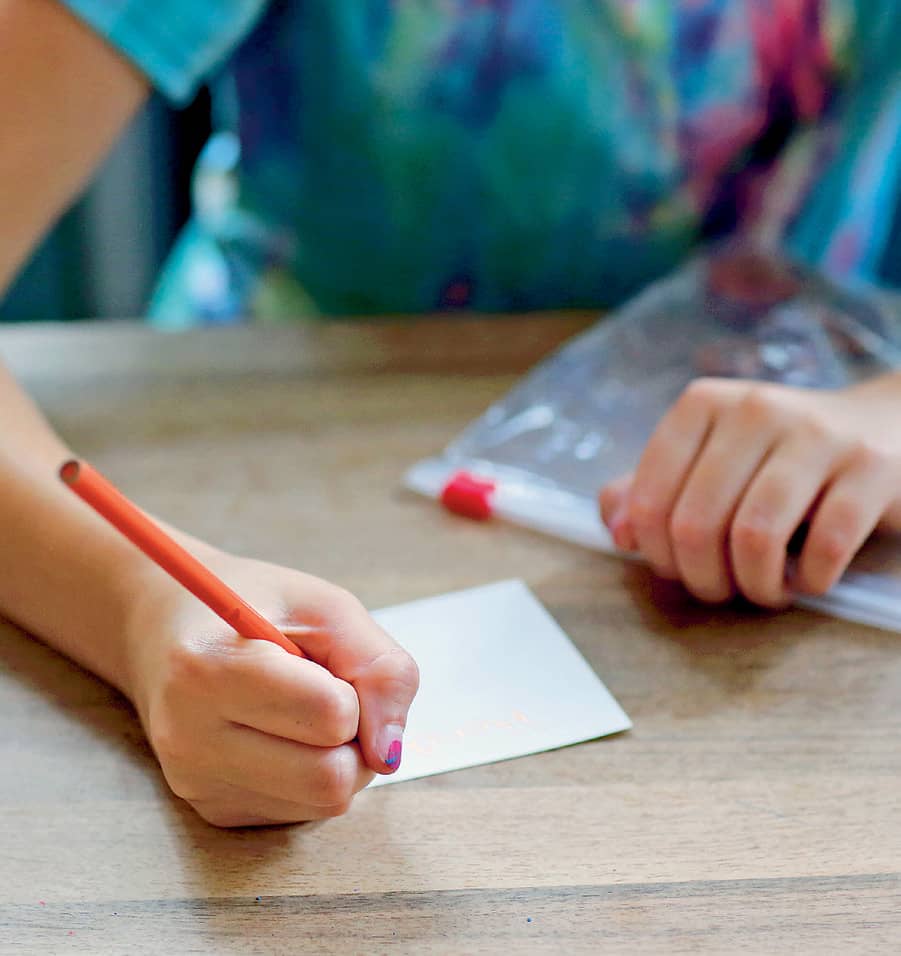
Fig. 3: Give each person an index card to write down his or her selected car’s name, year, miles per gallon, type of fuel, and number of passengers.
5. Have all the participants join you at home base with their cards and their bags of pretzels (fig. 4). Make sure everyone waits to start snacking! Everyone will get a chance to eat the pretzels!

Fig. 4: Have all the participants meet at home base with their cards and pretzels.
6. Each person will try to go from Home to Downtown and back using the car they have selected and only 5 gallons of fuel. Each pretzel in the bag represents one gallon of fuel, and each step they take, (heel to toe), will equal one mile traveled. Each person should eat one pretzel and take the appropriate number of steps (heel to toe) as listed on his or her car’s MPG rating before eating the next pretzel. Aim to get from home to downtown and back on 5 gallons of fuel. Example: If your car has an MPG rating of 15 miles per gallon, eat a pretzel and take fifteen steps. Do you have any fuel remaining? Save it for future trips!
7. After everyone has eaten five pretzels (used five gallons), take a look around. Were there any cars that didn’t make it (fig. 5)? Are there similarities between cars that made it and cars that didn’t? Were there any cars that didn’t even use five pretzels?
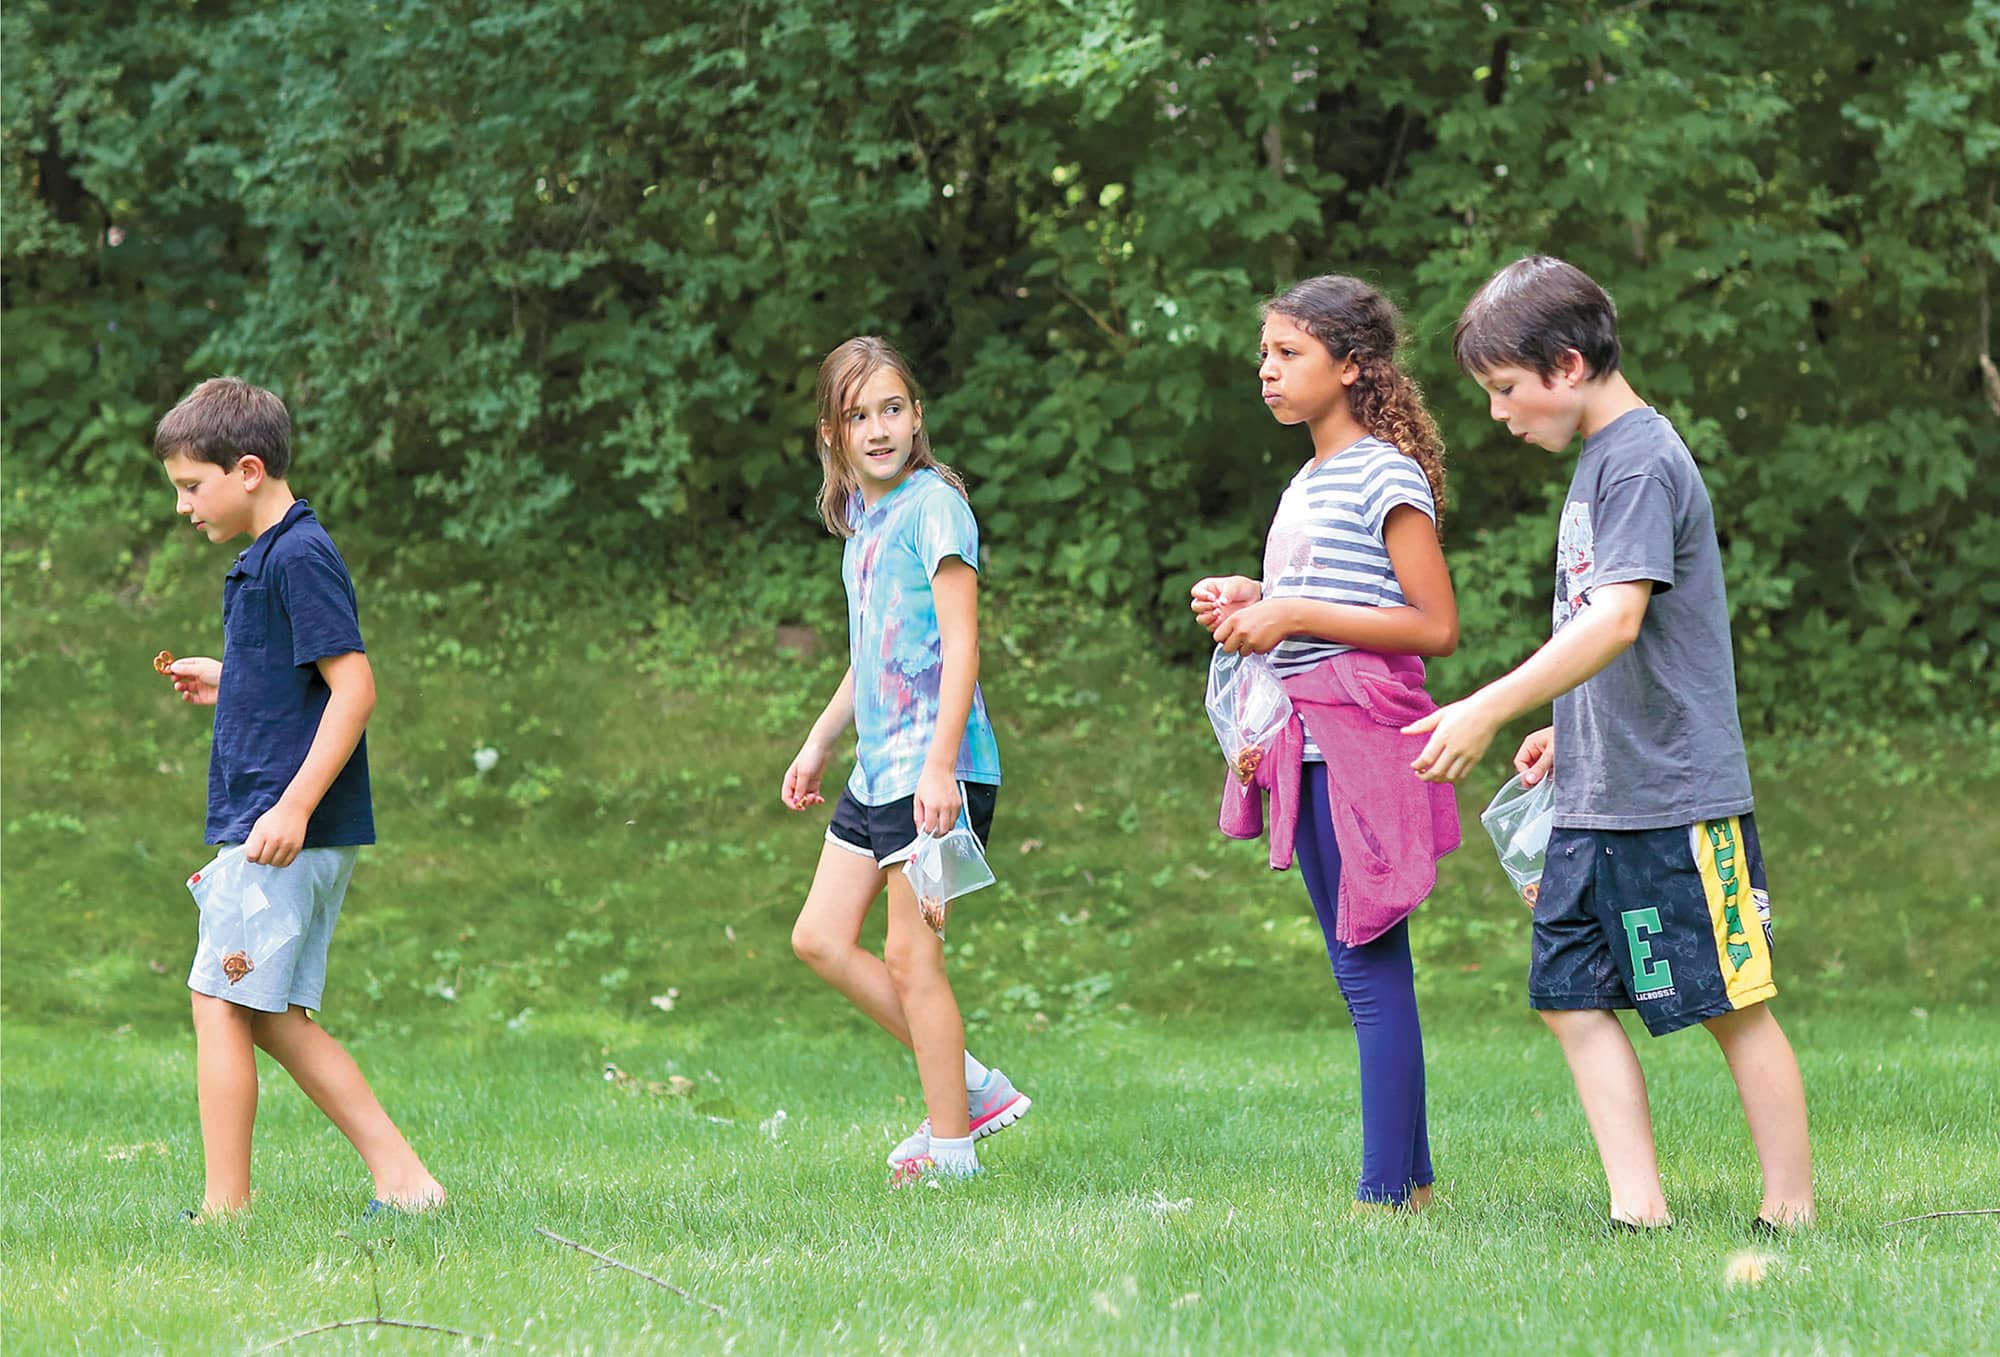
Fig. 5: After everyone has eaten five pretzels, look around. Were there any cars that didn’t make it?
8. Have everyone start from Home again. This time, you want to make it from Home to Across Town and back Home again. Can you do it with the pretzels left in your bag? For those who know they won’t make it, can you carpool? Join a group to share pretzels, but be careful—pick a car for all to ride in, but make sure you have no more than the maximum number of passengers. You wouldn’t want to get a ticket!
|
ELECTROMAGWHAT? |
Would you be lost without electricity? Possibly. Try and think of all the things you can do because you have the ability to flip a switch or plug in a device. Electricity wouldn’t be possible without a few items—magnets, metals, and motion. In fact, electricity and magnetism are intricately related. In this lab, you’ll experiment with electricity and magnets to see how they are related and allow us to do cool things!
TIME:
30 minutes
PERSON POWER:
No Sweat!
SAFETY IS KEY:
The battery set-up can get hot! Use caution, and if the wire or battery begins to feel hot, detach the wire from the battery and allow both to cool before continuing with the lab. Be sure to disconnect the wire from the battery when you’re finished! If the ends of the wire are not exposed, have an adult use wire strippers to strip the ends about 1/2" to 1" (1.2 to 2.5 cm).
MATERIALS
→ 3' (91 cm) piece of insulated copper wire (22 gauge), with ends exposed
→ compass
→ large steel nail
→ 9-volt battery
→ metal paper clips with no coating
1. Move the wire piece over the compass (fig. 1). Do you see the compass needle move?
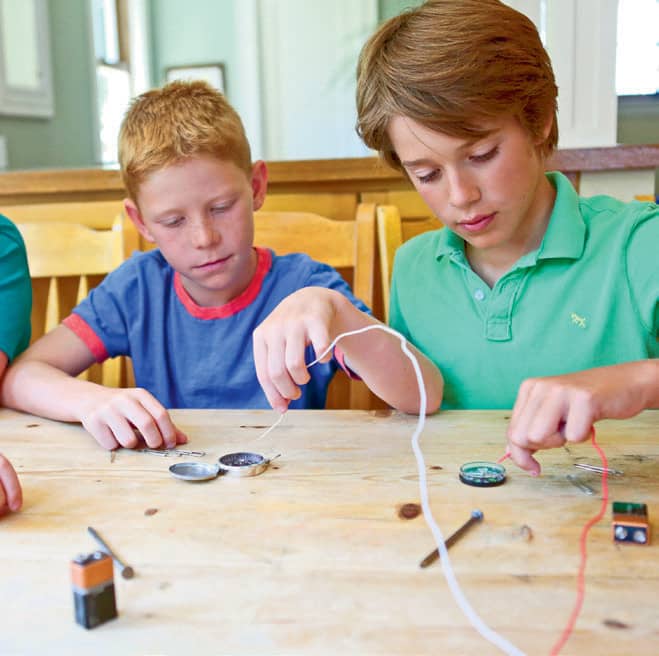
Fig. 1: Move the wire over the compass.
2. Wrap the middle of the piece of wire around the large nail ten times so that it looks like a spring. Try to keep the coils from crossing or touching each other (fig. 2).
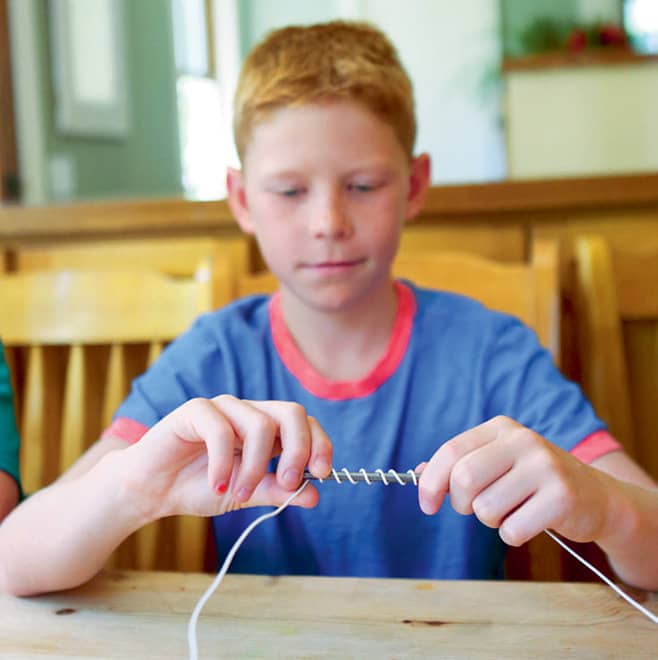
Fig. 2: Wrap the middle of the piece of wire around the nail ten times.
3. Attach the wire to the 9-volt battery terminals by wrapping each end around the metal contacts in a loop shape (fig. 3).
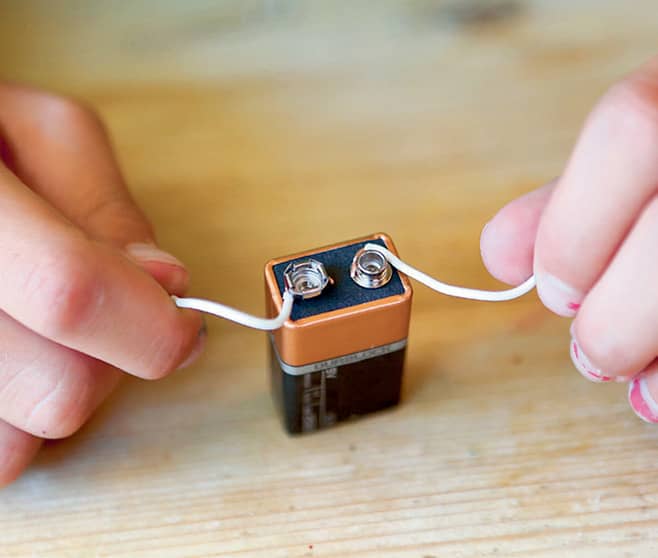
Fig. 3: Attach the wire to the 9-volt battery.
4. Move the compass near the wire-wrapped nail (fig. 4). Do you see the compass needle move? Which direction does it move? What have you done to the nail?
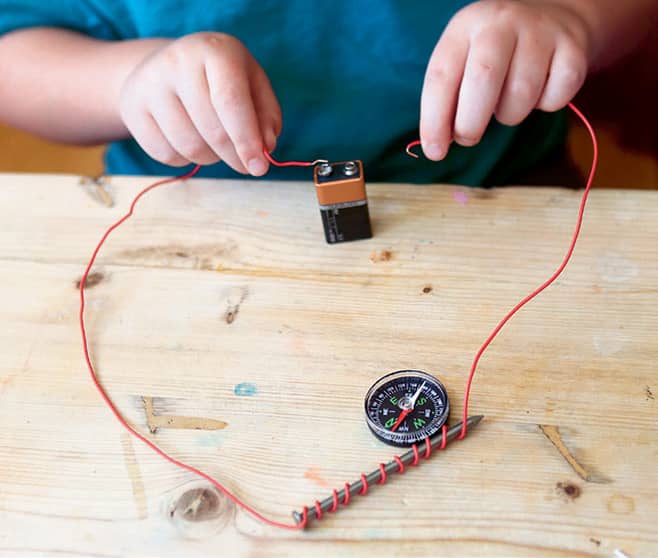
Fig. 4: Move the compass near the wire-wrapped nail.
5. Place a stack of paper clips on the table. Touch the end of the nail to the paper clips and lift. What do you see (fig. 5)?
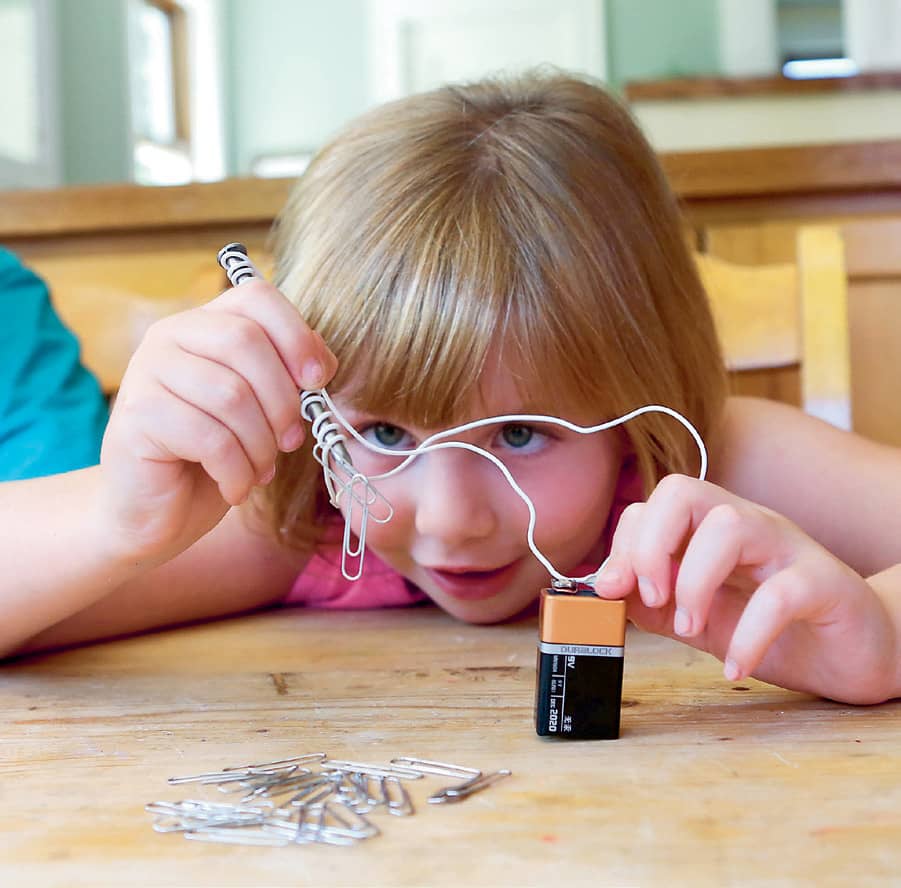
Fig. 5: Place the nail above the paper clips and lift.
6. Remove the ends of the wire from the battery.
7. Move the nail over the compass. Does the compass needle move now? Does it move in the same direction? Try again with only the coil of wire.
8. Place the nail above the paper clips and lift. Does the nail lift the paper clips now? Try it again with just the coil.
Now Try This! 
Experiment with ways to lift more paper clips. What could you alter in your experiment to make a stronger electromagnet?
|
GENERATE THIS |
Electricity and magnetism work together. With this relationship, we can use a very important device, called a generator. Let’s build a generator and watch how magnets, motion, and metal wire can help generate electricity!
TIME:
1 hour
PERSON POWER:
Grab a Crew Member!
SAFETY IS KEY:
Use caution when cutting cardboard and poking holes with nails. The model generates a small amount of voltage, but there is no shock risk.
MATERIALS
→ 12" × 3" (30 cm × 8 cm) piece of cardboard
→ metric ruler
→ marker
→ sharp scissors
→ push pin
→ long nail
→ 2 ceramic bar magnets
→ 30-gauge magnet wire spool
→ sandpaper
→ LED single bulb
→ masking tape
→ glue or hot glue gun
1. Cut the piece of cardboard to the dimensions specified below. Use the ruler to measure and make marks across your piece of cardboard (fig. 1). Starting from the left edge, make a mark at 2 1/8" (5.4 cm). Move over another 1 3/4" (4.4 cm) and make a mark. Move over another 2 1/8" (5.4 cm) and make a mark. Move over another 1 7/8" (4.7 cm) and make a mark. Move over another 2 1/8" (5.4 cm) and make a mark. Make sure to mark the bottom edge of the cardboard, too, and draw lines from top to bottom to make rectangular sections.
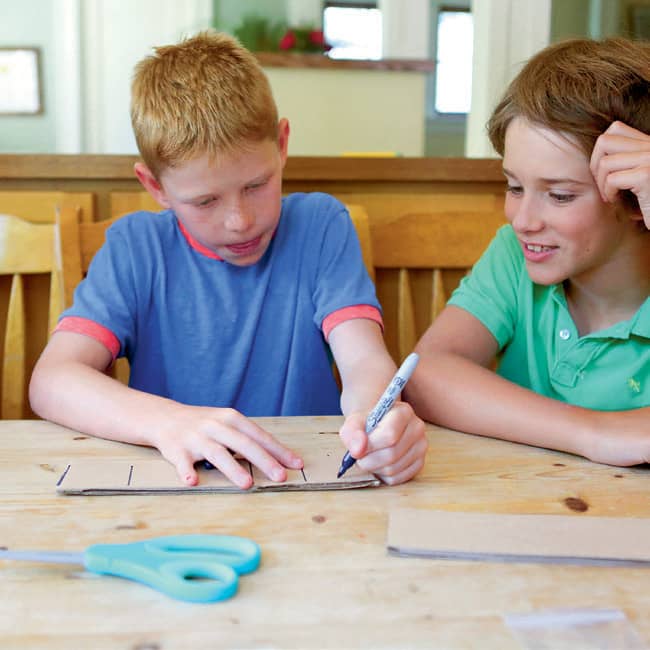
Fig. 1: Make marks across the cardboard at the specified dimensions.
Example:

2. Cut off the extra material but do not discard it. You’ll need it later. Number the remaining sections 1 through 5.
3. In sections 2 and 4, make a mark 7/8" (2.2 cm) in from the left edge and 1 5/8" (4 cm) up from the bottom. This is where the nail will be inserted. Insert the push pin into the markings, and then push the nail through to enlarge the holes. Make sure the holes are actually a bit larger than the nail so that the cardboard can spin freely around the nail.
4. Using the scissors and the ruler, carefully score the cardboard on the lines between the numbered sections so they fold easily (fig. 2). Be careful not to cut the whole way through the cardboard. Starting with section one, fold the sections into a box, with section 5 overlapping section 1. Hold a magnet inside the box. If it doesn’t fit, make it a bit wider. Once it’s wide enough, tape the box together.
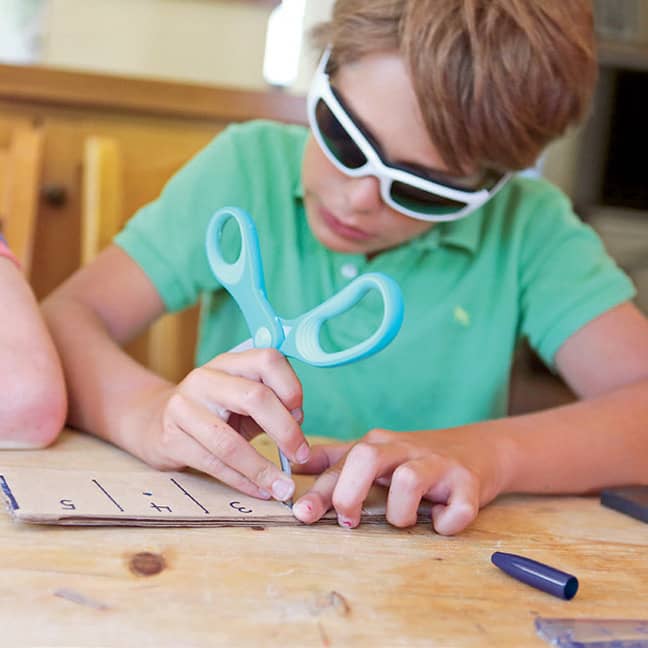
Fig. 2: Carefully score the cardboard on the lines between the numbered sections so they fold easily.
5. Tear off six pieces of masking tape, each 2" to 3" (5 to 7.6 cm) long, and have them ready.
6. Leaving an 8" (20.3 cm) tail hanging off, begin to wrap the magnet wire clockwise around the box about 1" (2.5 cm) below the nail hole (fig. 3). Tape the first wrap in place. Wrap it 200 more times in this area below the hole. Make sure you do not wrap so tightly that the box collapses, but make sure your wire wraps are close together. Do not cut the wire. Use a piece of tape to secure the 200 wraps in place below the hole.
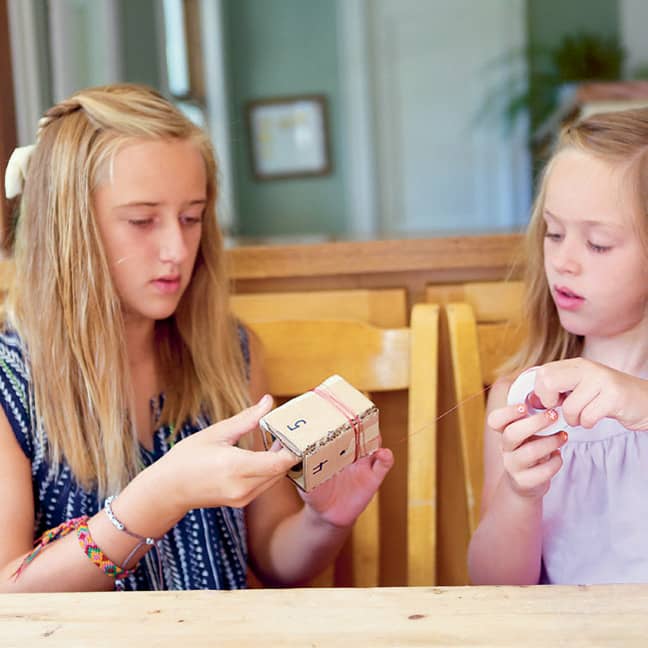
Fig. 3: Wrap the magnet wire clockwise around the box.
7. String the wire above the hole (do not cut it). Tape it in place. Continue to wrap clockwise above the hole for an additional 200 wraps. Again, keep the wraps close together, but do not cover the holes. Tape these wraps in place, too (fig. 4).
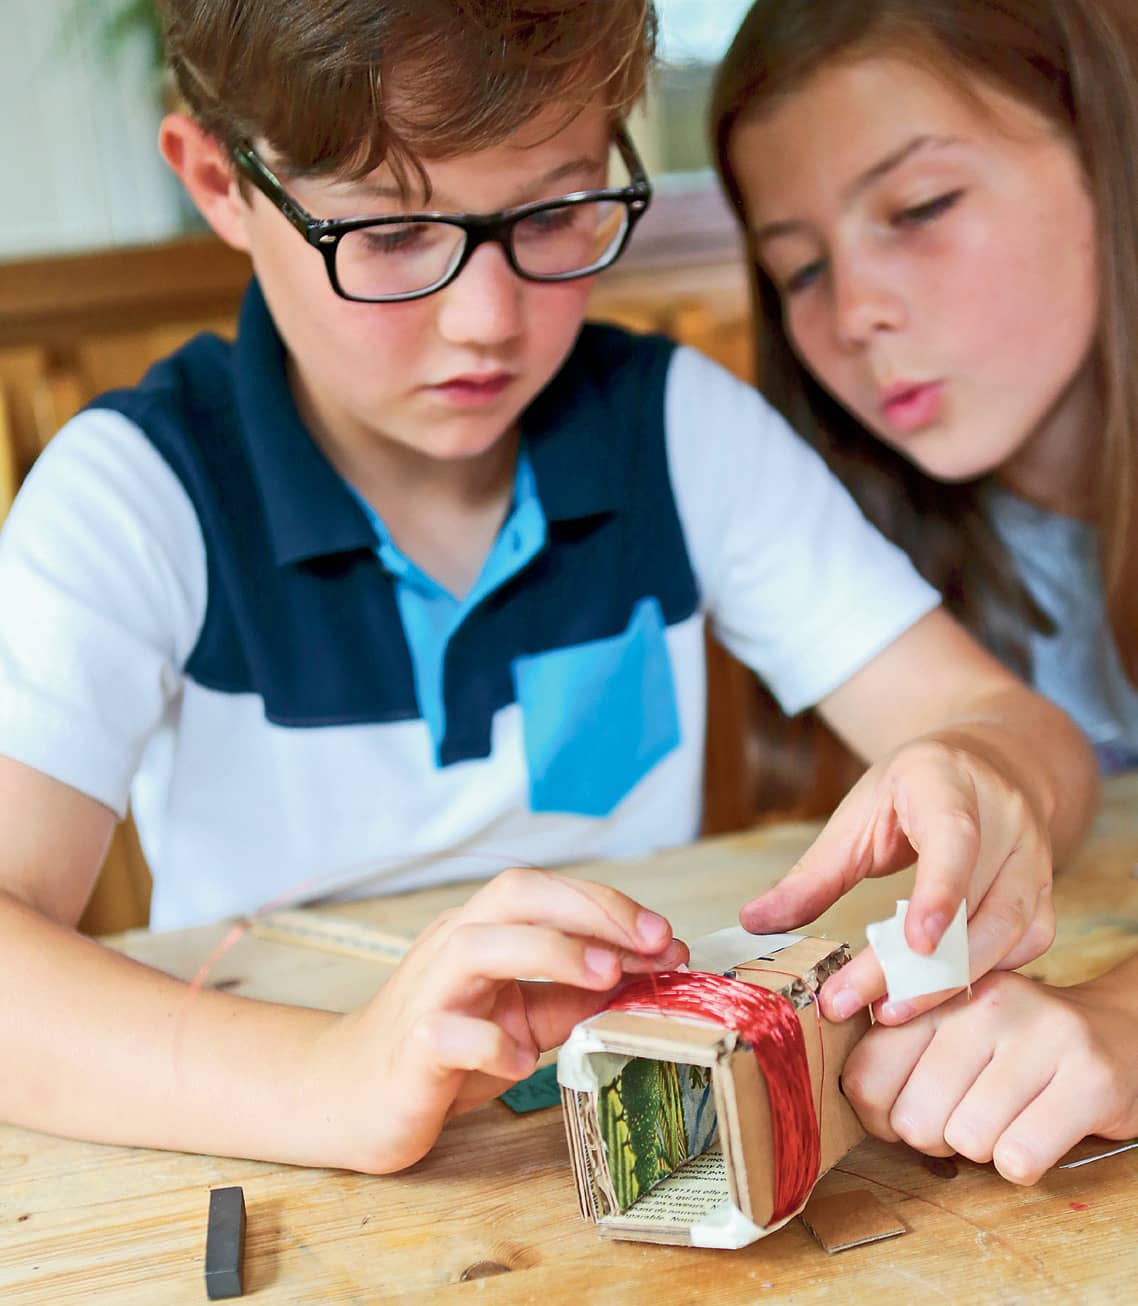
Fig. 4: Tape the wires in place.
8. Leave an 8" (20 cm) tail of wire attached to the last wrap above the hole. You should now have two tails, each hanging from one set of wraps—one above and one below the nail hole. Cut the wire.
9. Stack the two magnets together lengthwise so you know which ends attract (fig. 5). Place a 3/4" (2 cm) piece of cardboard between the magnets to act as a spacer. Make sure the nail can slide into the corrugation between the two magnets. Tape the magnets together so they will stay put during spinning.
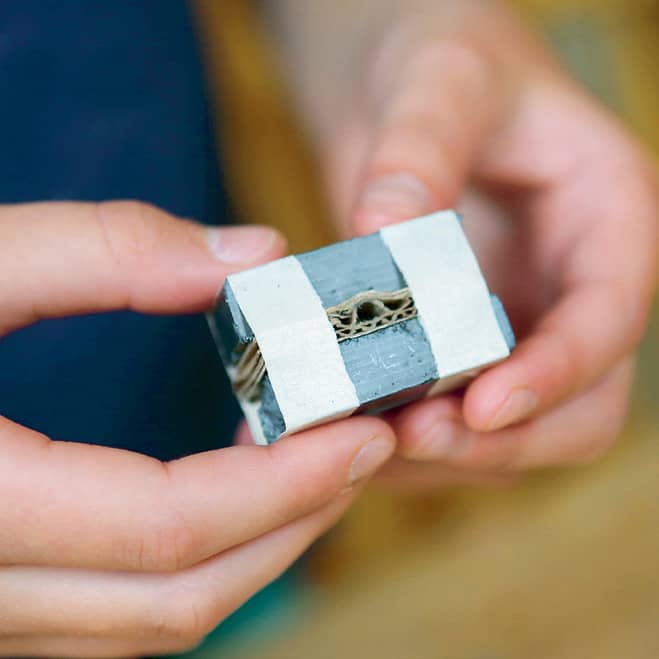
Fig. 5: Stack the magnets lengthwise.
10. Holding the magnets in place inside the box, slide the nail through one side of the box, into the spacer between the magnets, and out the other side of the box (fig. 6). Spin the nail to make sure the magnets move freely.
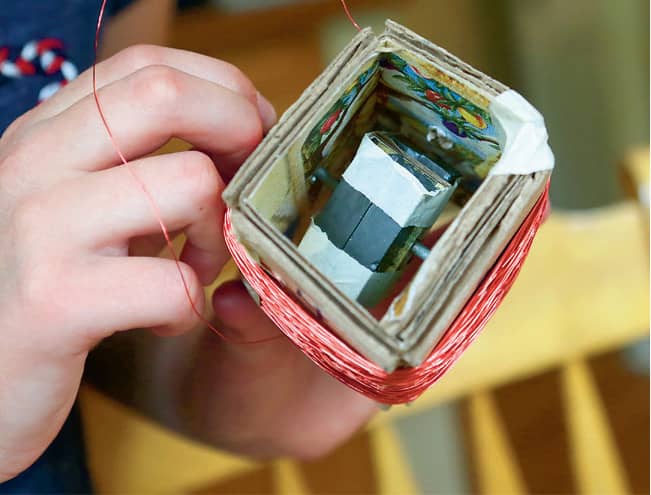
Fig. 6: Slide the nail into the spacer.
11. Using sandpaper, scrape the colored coating off the wire tails, so no color remains (fig. 7). Twist the wires around the lightbulb ends (fig. 8). Spin the nail (fig. 9). Can you get your bulb to light? What happens when you spin it faster or slower?
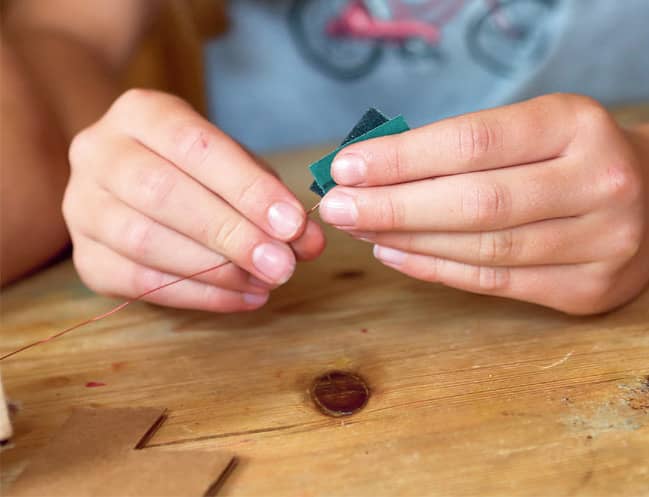
Fig. 7: Scrape the colored coating off the wire tails.
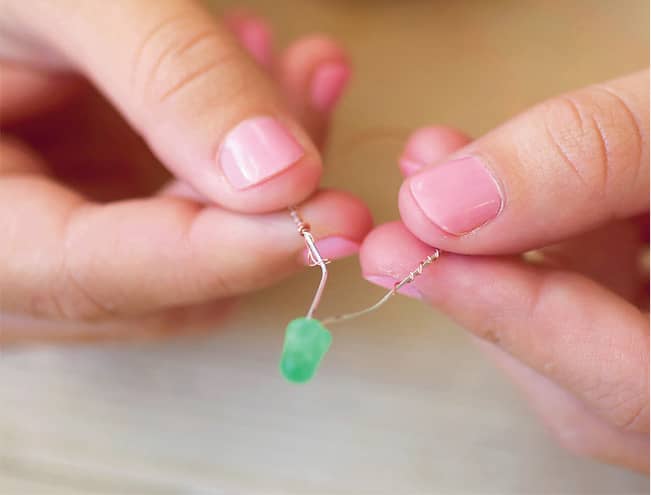
Fig. 8: Twist the wires around the bulb ends.
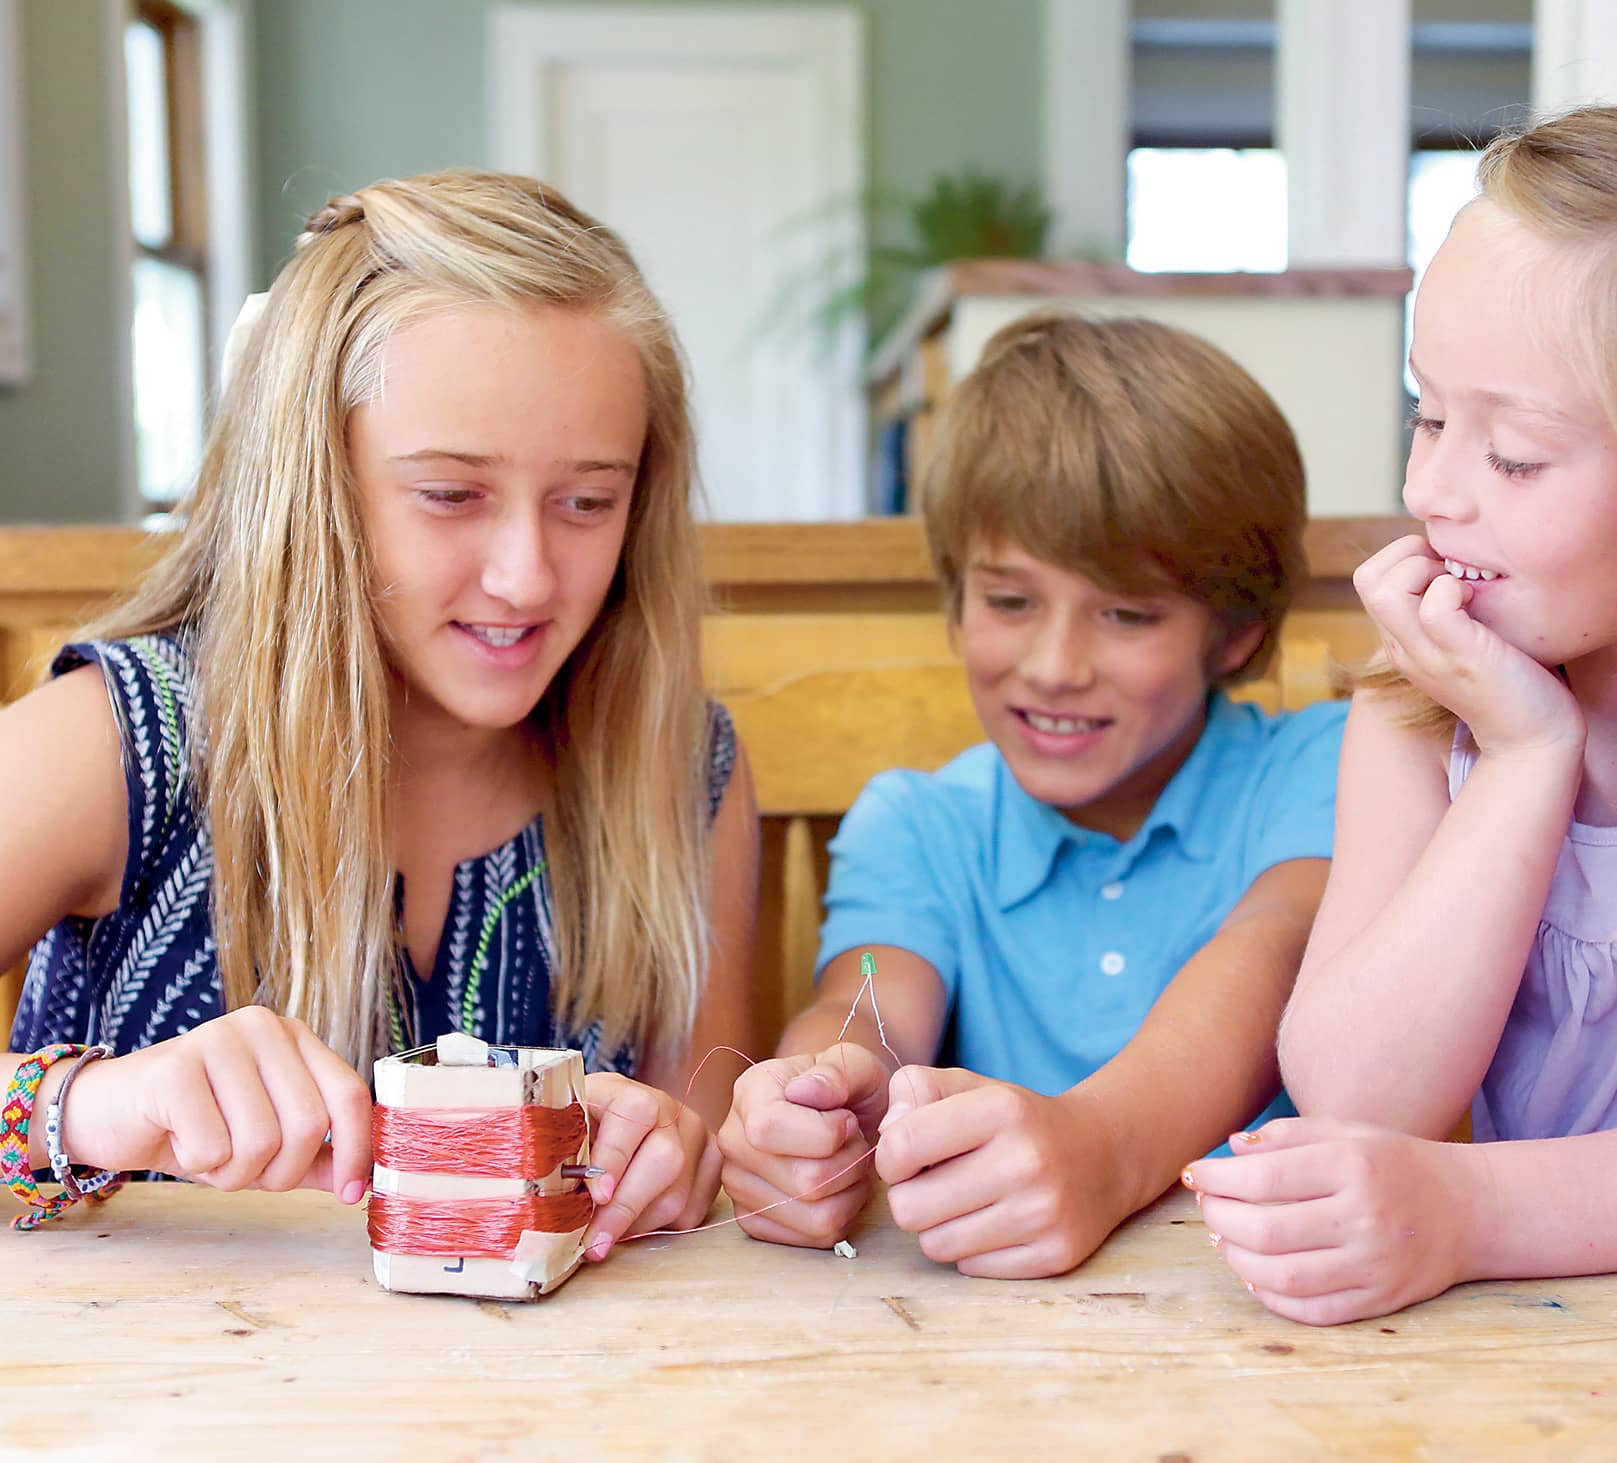
Fig. 9: Twist the wires and spin the nail.
|
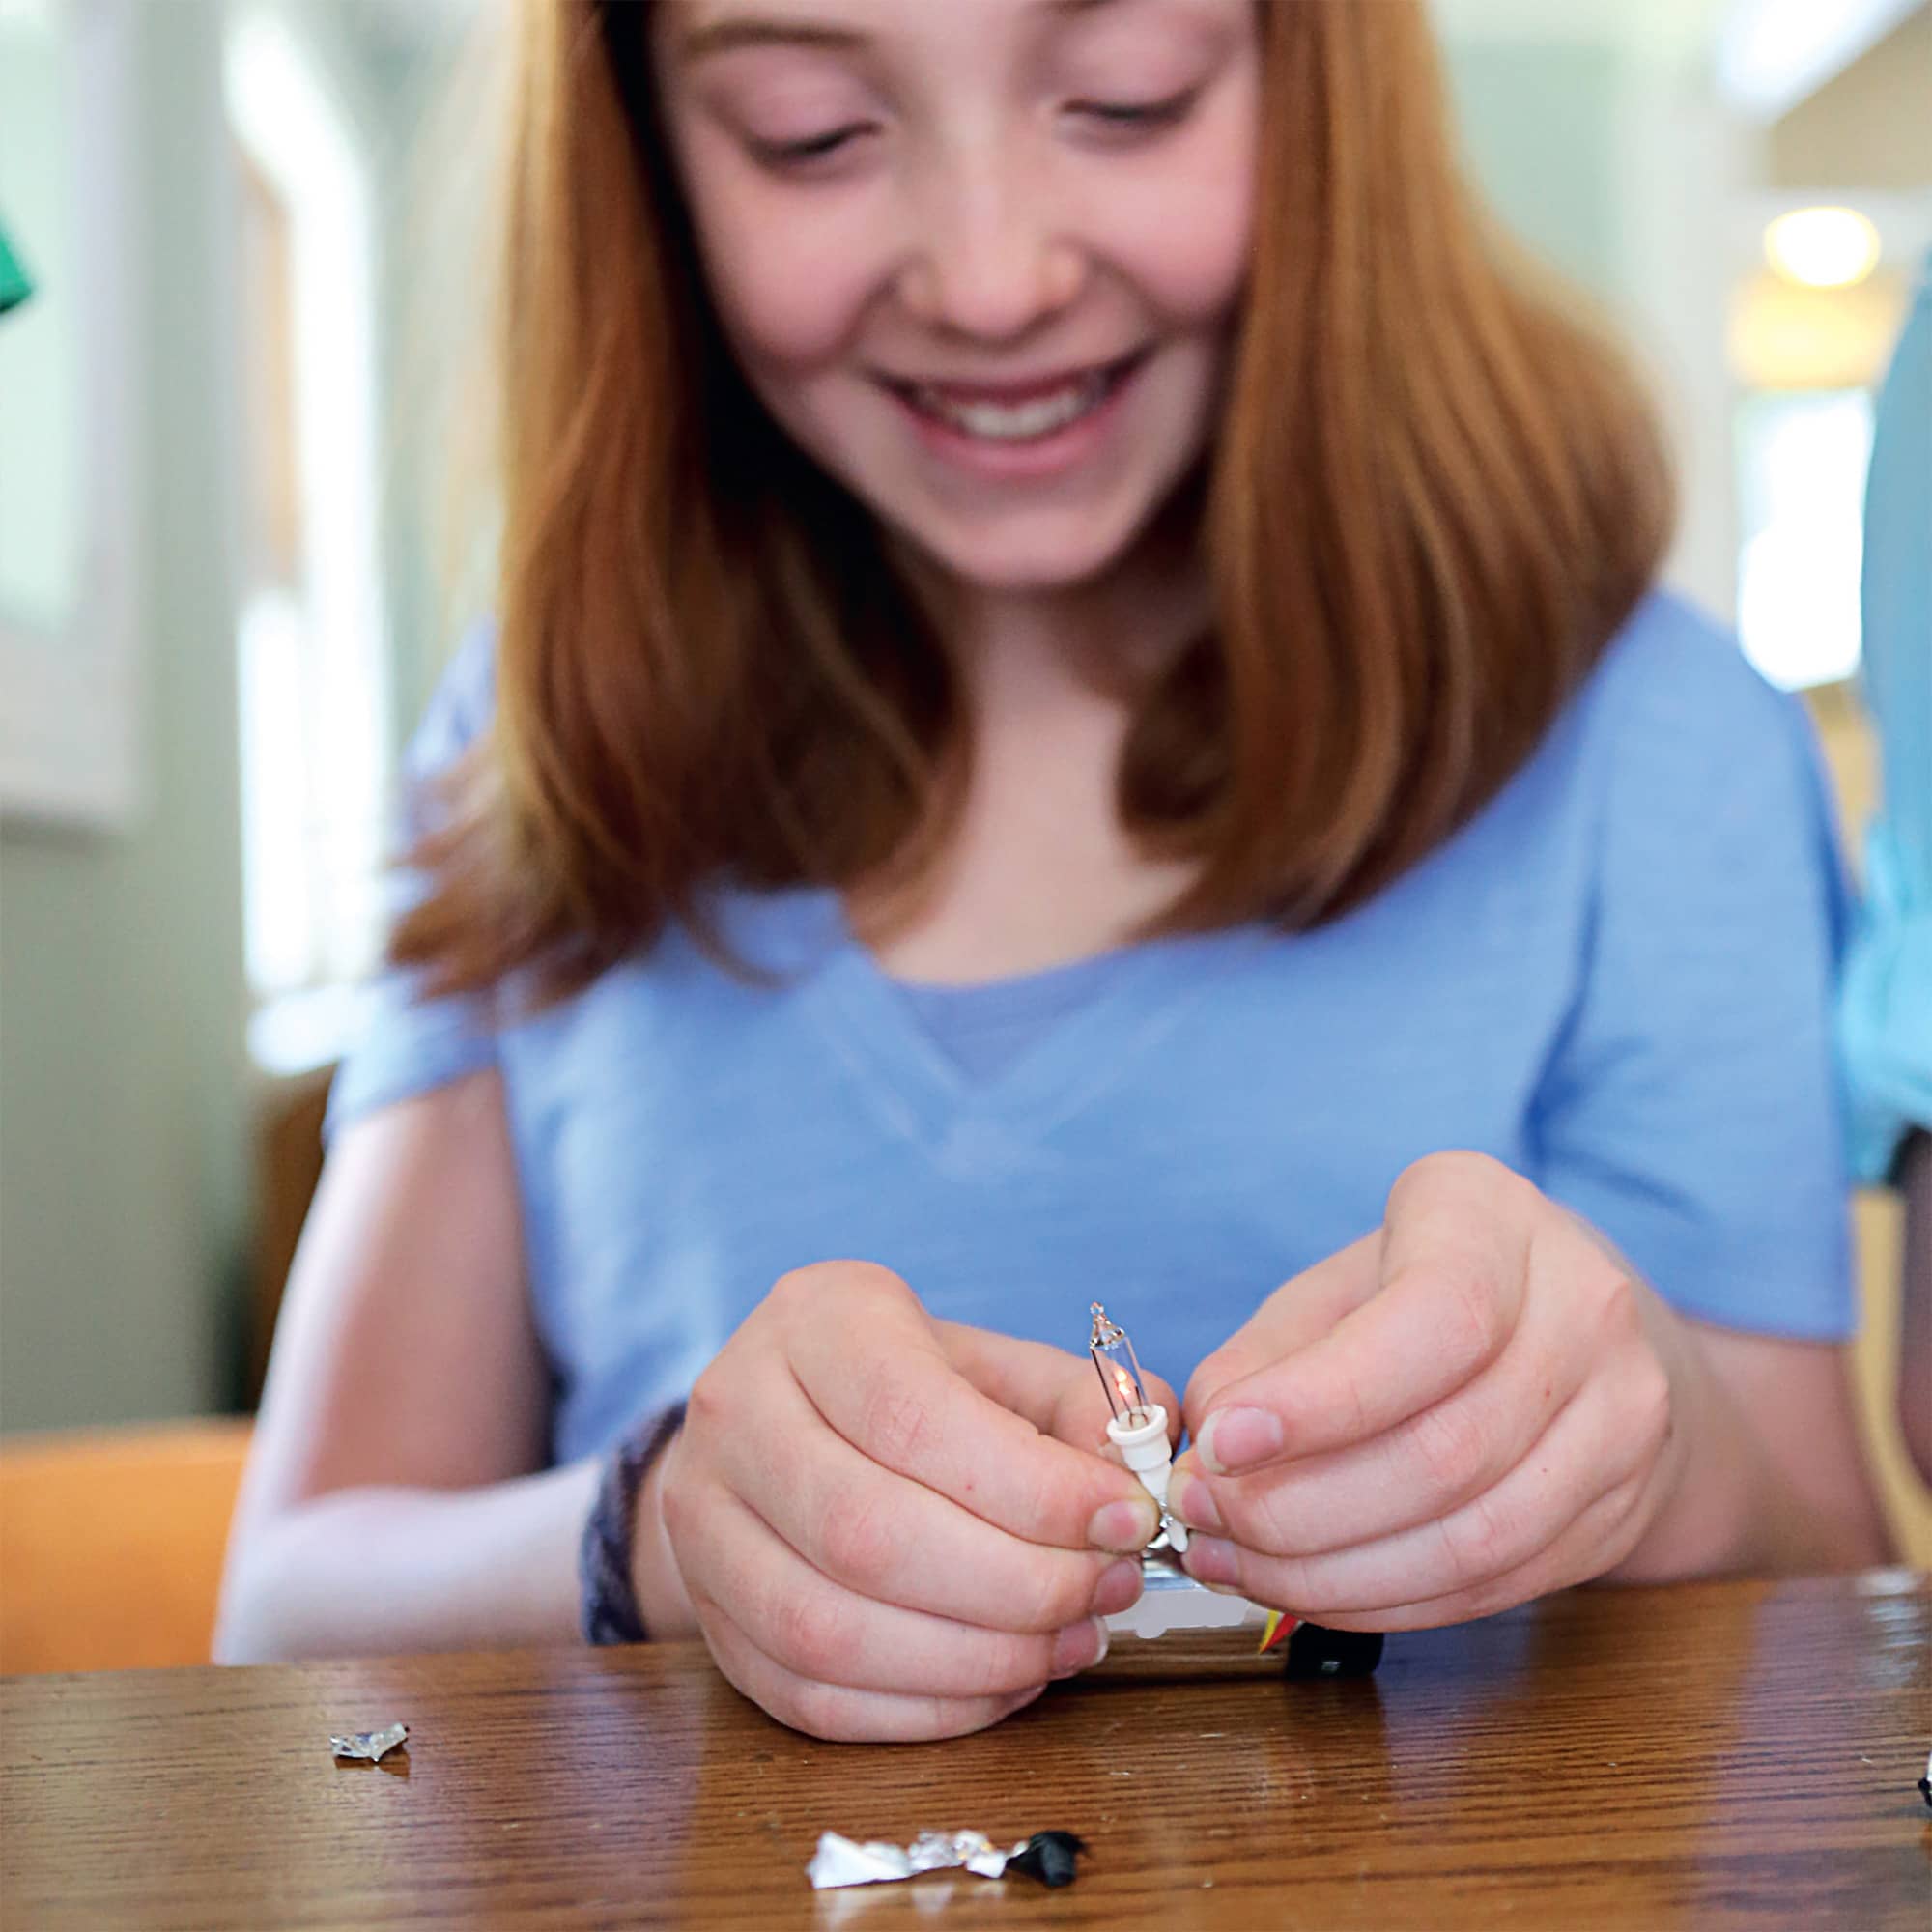
LIGHT IT UP! |
We use energy to create electricity, which, in turn, powers many of the things we use every day. Most of our electricity is generated by one of two devices: a generator or a battery. Generators move magnets near coils of wire to get electrons flowing. Batteries use the chemical reaction of an acid with two different metals to make electrons move, like in the electromagnets activity.
Electricity travels in closed circuits. Electrons must have a complete path made of wires running from the generator or battery into devices and back to the generator or battery in order to have a continuous flow. If the circuit is open or broken, electricity cannot flow. When you flip a light switch, you are opening and closing the pathway for electricity to flow from power lines into your lightbulbs. But can we make a lightbulb light with a battery? What would the circuit look like?
TIME:
5–20 minutes
PERSON POWER:
No Sweat!
SAFETY IS KEY:
Be careful when you touch the foil to the battery. The foil may become hot.
MATERIALS
→ aluminum foil
→ scissors
→ masking tape
→ D-cell battery
→ mini incandescent or LED flashlight bulb (0.5–3 volts/0.2 amps)
1. Cut a piece of aluminum foil into strips at least 4" (10 cm) long. The width of the strips can vary (fig. 1).
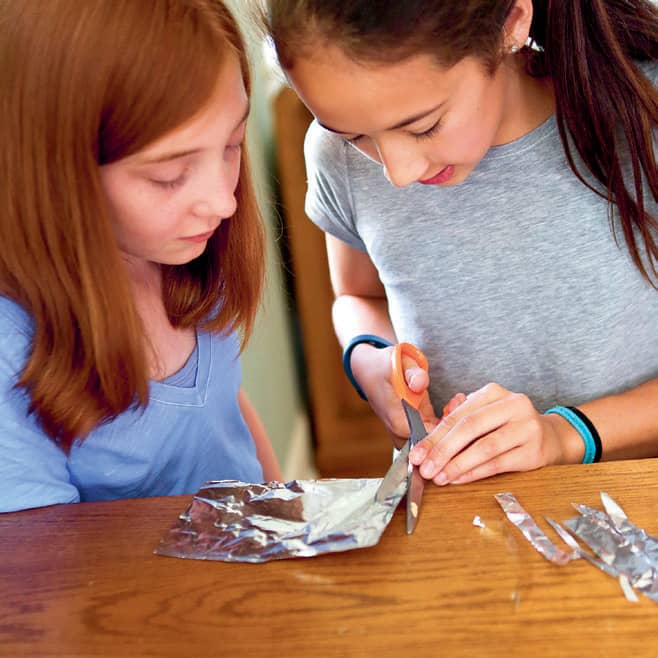
Fig. 1: Cut the foil into strips.
2. Select one foil strip. Make a closed electrical circuit by taping one end of the strip to one end of the battery, and the other end of the strip to the opposite end of the battery (fig. 2). Feel the battery and the strip of foil at different spots. What do you notice?
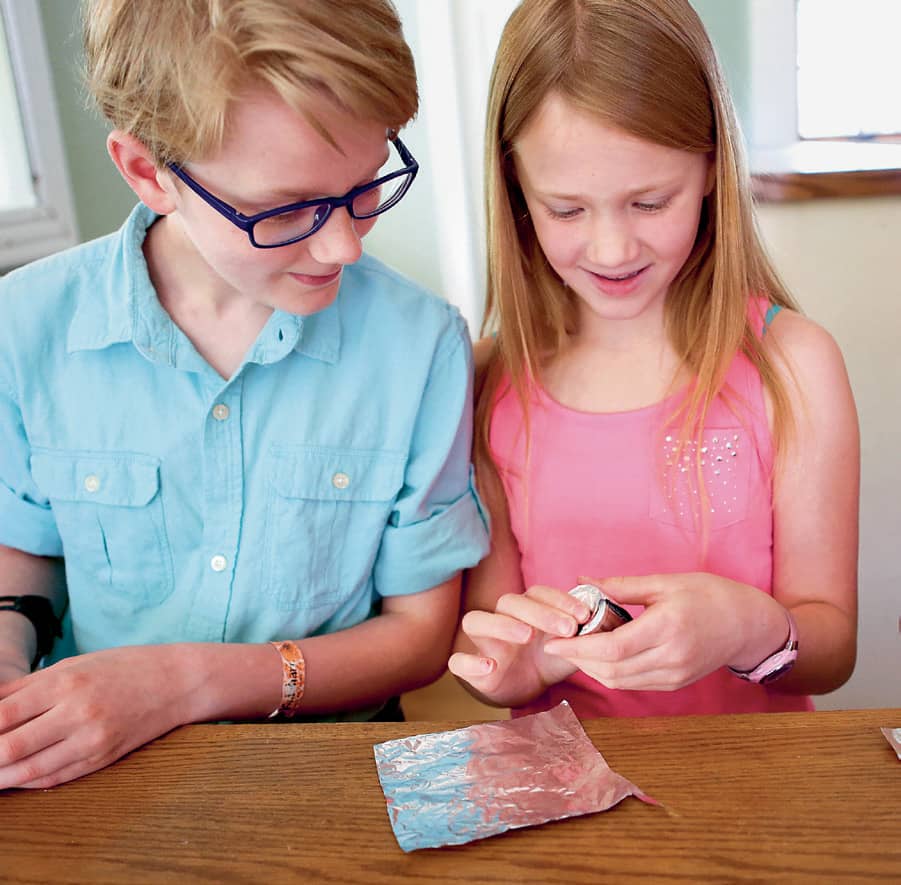
Fig. 2: Make a closed circuit.
3. Remove the tape and foil to disassemble the circuit.
4. Experiment with different widths and lengths of foil and pay attention to the similarities or differences you observe (fig. 3). Disassemble each piece after observation.
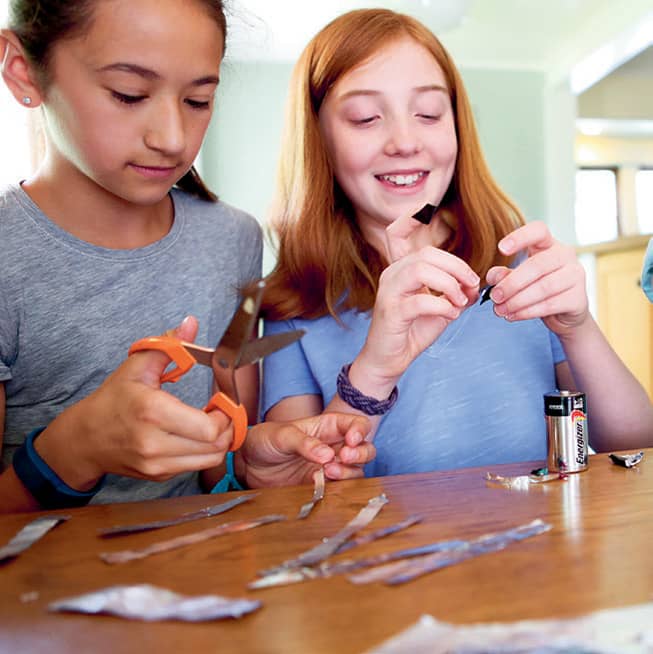
Fig. 3: Experiment with different widths of wire.
5. Using one foil strip of your choice, the battery, and the lightbulb, try to make a complete circuit so that the foil connects to both the battery and the bulb (fig. 4). You can do it! Check out the Quick Tip to get you started.
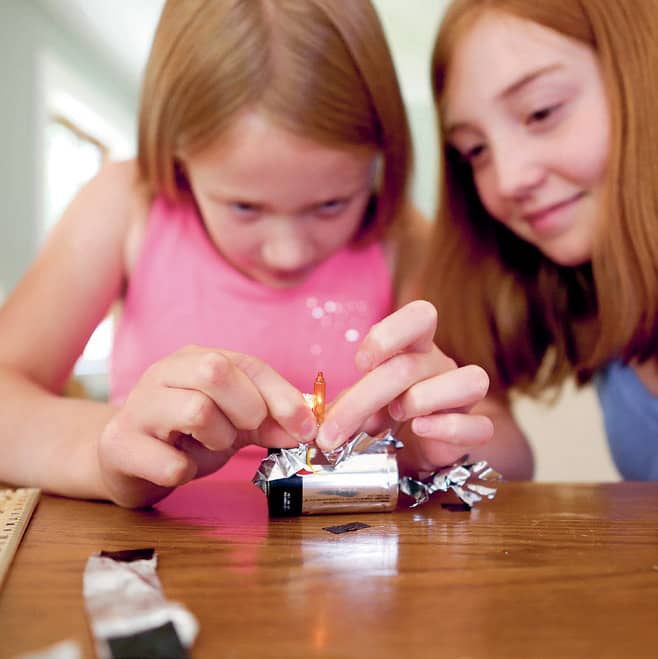
Fig. 4: Try to make a complete circuit.
6. Try several different arrangements of the circuit, and alter the foil size and shape. Which configuration makes the bulb light the brightest?
|
CHIP COMBUSTION |
Living things need energy. We use a lot of energy to move and grow each day. Even if we don’t grow bigger each day, we still grow new cells! Living things need chemical energy to make this happen. Our chemical energy comes from the food we eat. Much of this food got its energy from the sun. We have to release this chemical energy in some way in order to make use of it, so our bodies digest it to break it down and we burn calories. Let’s burn some food and see what happens!
TIME:
45 minutes
PERSON POWER:
Grab a Crew Member! For this activity, it’s best that you have an adult crew member available.
MESS ALERT!
This lab is not messy, but since you will be burning food, it is best to conduct the activity in a well-ventilated area or outdoors.
SAFETY IS KEY:
You’ll need an adult to supervise this lab. You will be puncturing an aluminum can and using fire. Use goggles, an oven mitt to handle the cans, and be very careful.
MATERIALS
→ can opener
→ empty, clean aluminum drink can
→ empty, clean metal coffee can
→ sharp scissors and/or screwdriver
→ 2 metal skewers
→ water
→ glass thermometer or candy thermometer (a digital thermometer will not work)
→ metal paper clip
→ cork
→ potato chip, cheese curl, or similar snack food
→ long-handled lighter
1. Using the can opener, make sure the larger can is completely open at the top and the bottom.
2. Using the scissors and/or the screwdriver, carefully make four holes in the sides of the aluminum drink can, 1/2" (1.3 cm) from the top edge (fig. 1). The holes should be evenly spaced and directly across from one another.
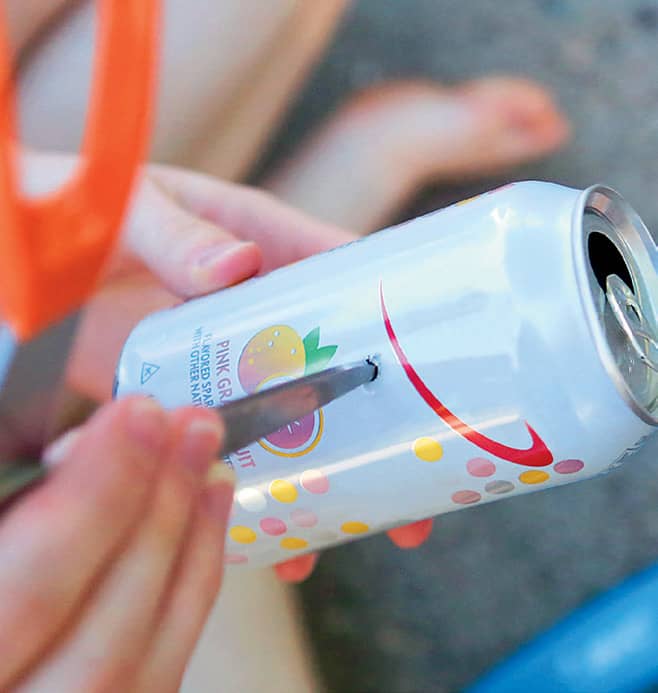
Fig. 1: Carefully make four holes in the sides of the drink can.
3. Slide one metal skewer into one hole and out of the hole across from it. Slide the other skewer through the other hole and out the opposite side (fig. 2). The skewers should cross each other in the middle.
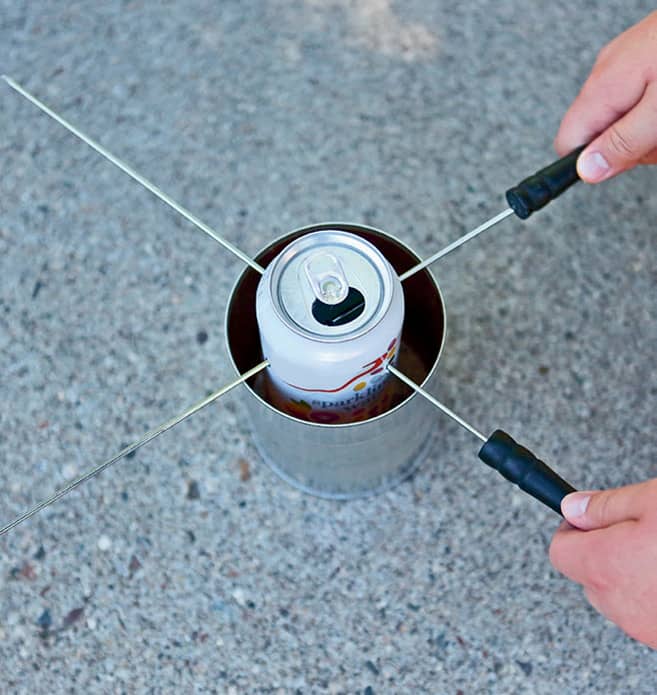
Fig. 2: Slide a skewer into one hole and out the hole across from it.
4. Place the larger can on a flat surface. Place the smaller can inside, making sure the skewers rest on the top edges of the larger can and that there is space between the bottom of the aluminum can and the flat surface to place the cork.
5. Pour 1/2 cup (118 ml) of water into the aluminum can through the hole in the top. Insert the thermometer in the can and take a temperature reading (fig. 3).
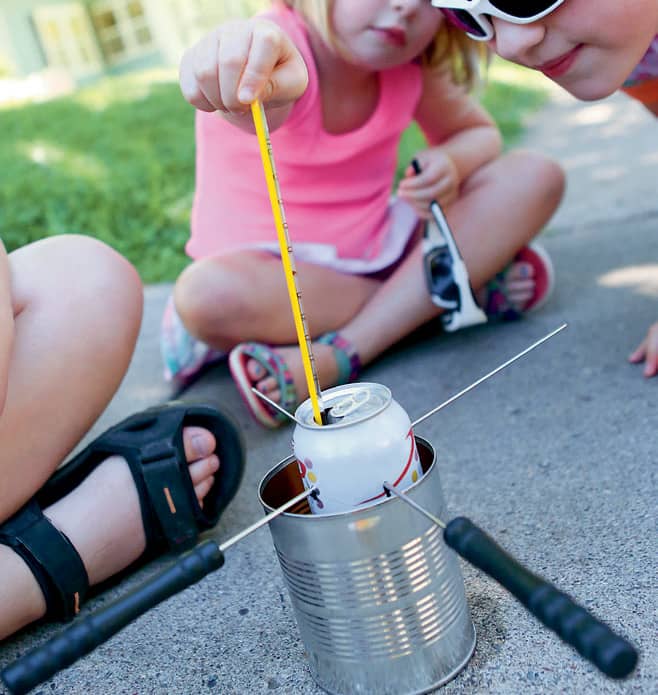
Fig. 3: Insert the thermometer in the can and take a reading.
6. Make sure your cork will fit under the cans in your set-up. Cut the cork down if needed or lay it on its side. Partially open a paper clip and insert the straight end into the piece of cork (fig. 4). Leave a flat surface at the opposite end of the paper clip. This end of the paper clip will act as a stand on which to place the food you will burn.
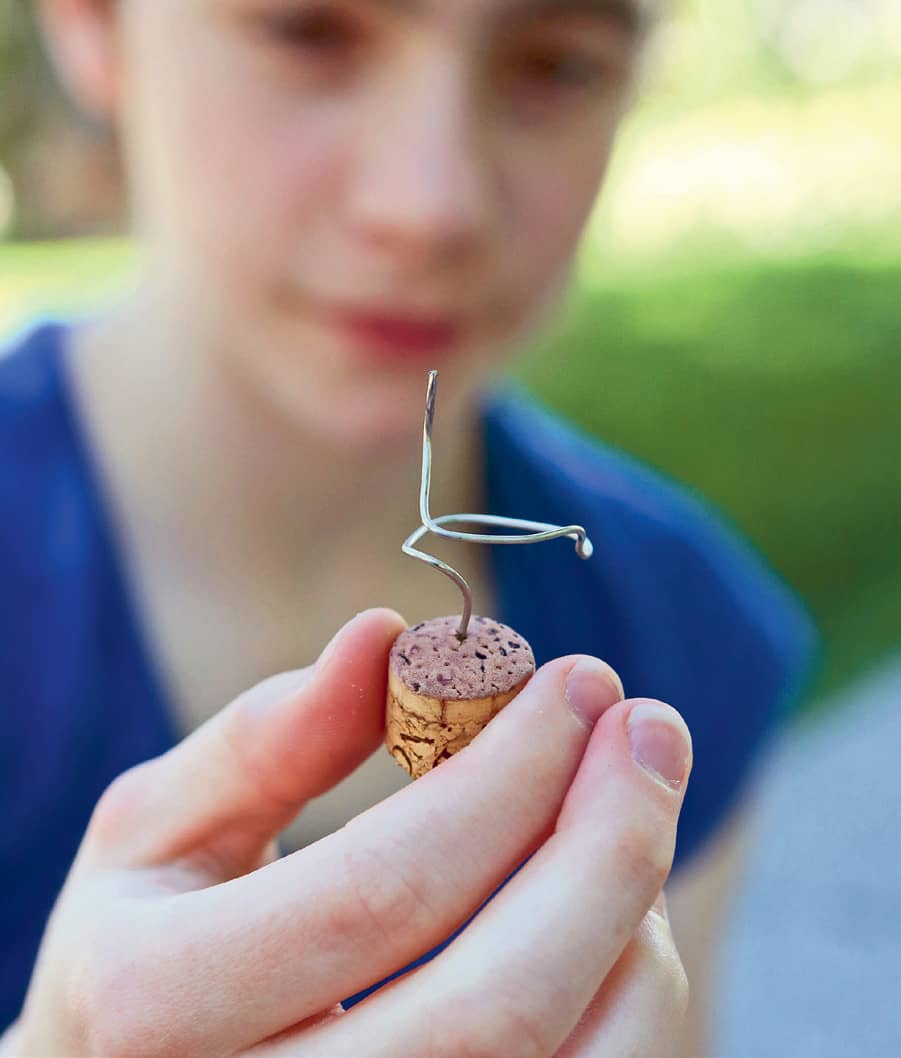
Fig. 4: Open a paper clip and insert the straight end into the piece of cork.
7. Remove the small can from the larger can and keep it close by. Place the cork in the center of the larger can and rest or balance one snack item on the paper clip on top of it. Unfold or adjust the clip to help keep the food from moving. Spear the food, if you must (fig. 5)!

Fig. 5: Balance or spear the food onto the end of the paper clip.
8. Ask a partner to hold the aluminum drink can nearby as you light the food on fire (fig. 6). As soon as you light the food, place the smaller can down into the large can, so it is resting as it did before, but just above the burning food (fig. 7). Allow the food to burn completely, and then stir the water and examine how the temperature of the water changed (fig. 8). Why did it change? Would a different piece of food produce different results?
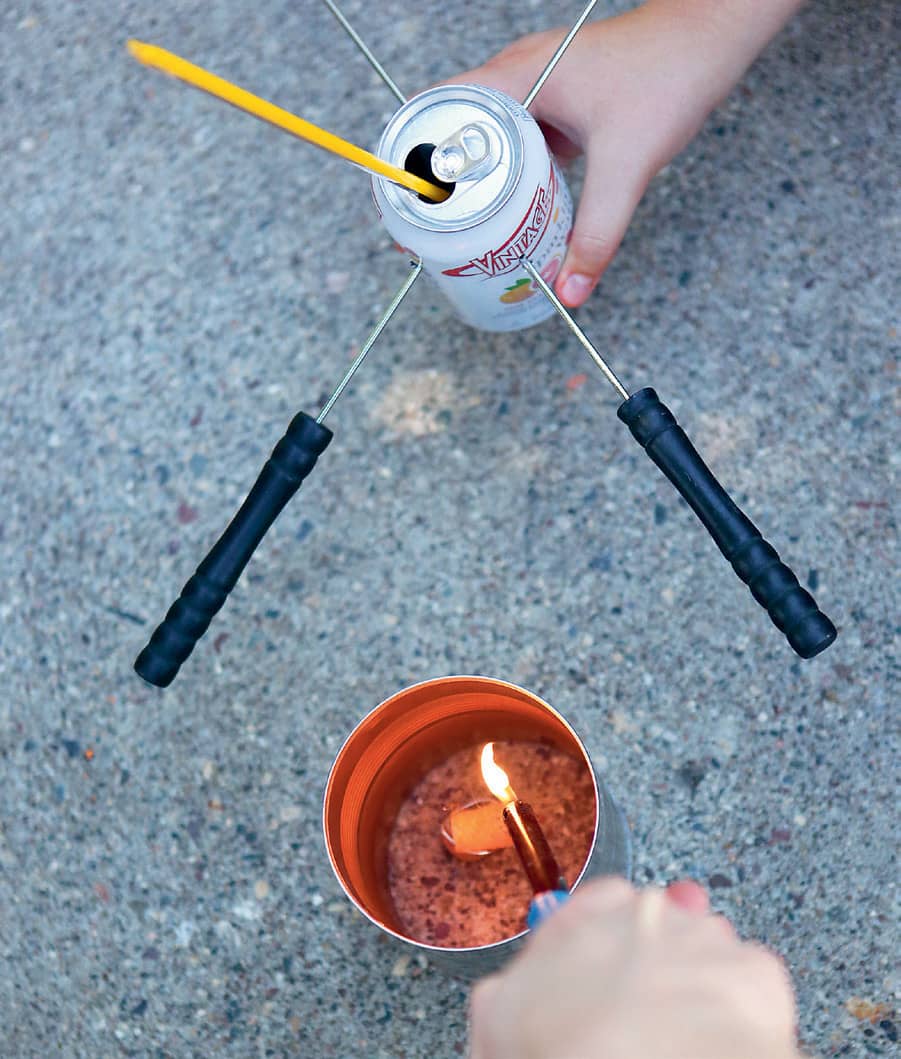
Fig. 6: Ask a partner to hold the drink can while you light the food.
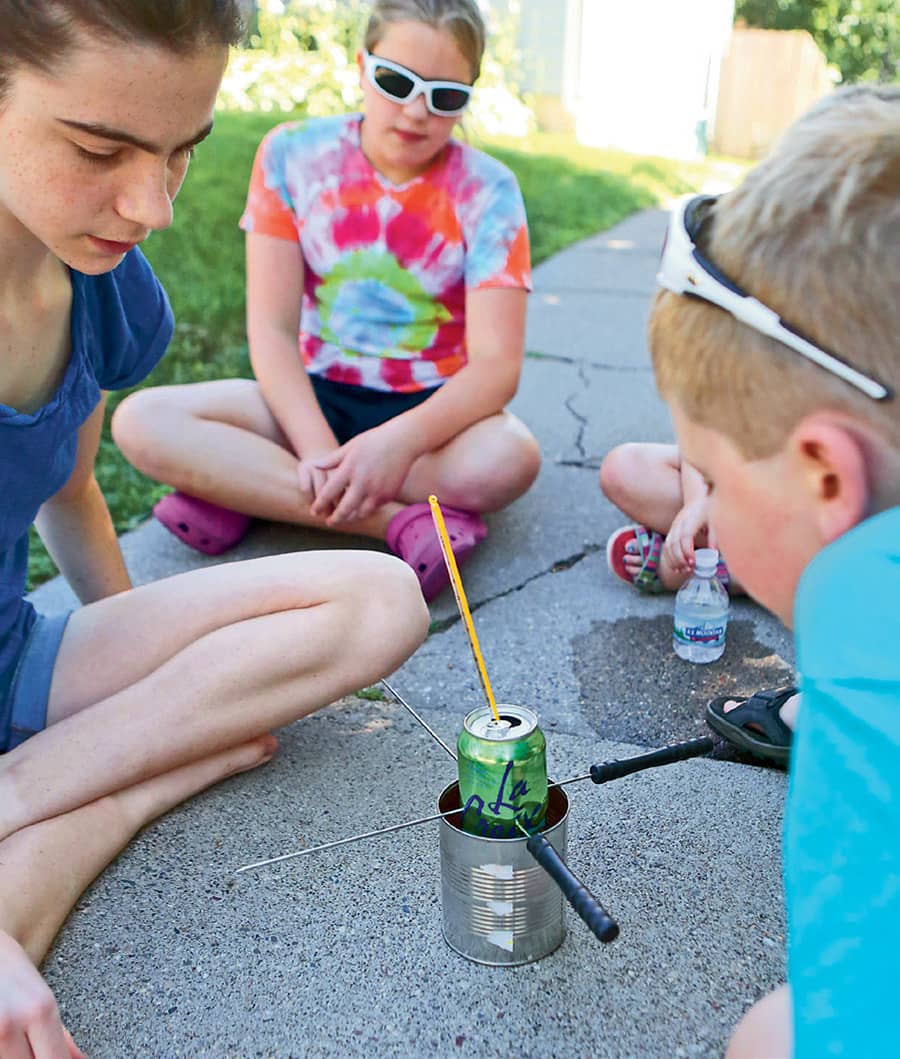
Fig. 7: Place the smaller can down into the large can.
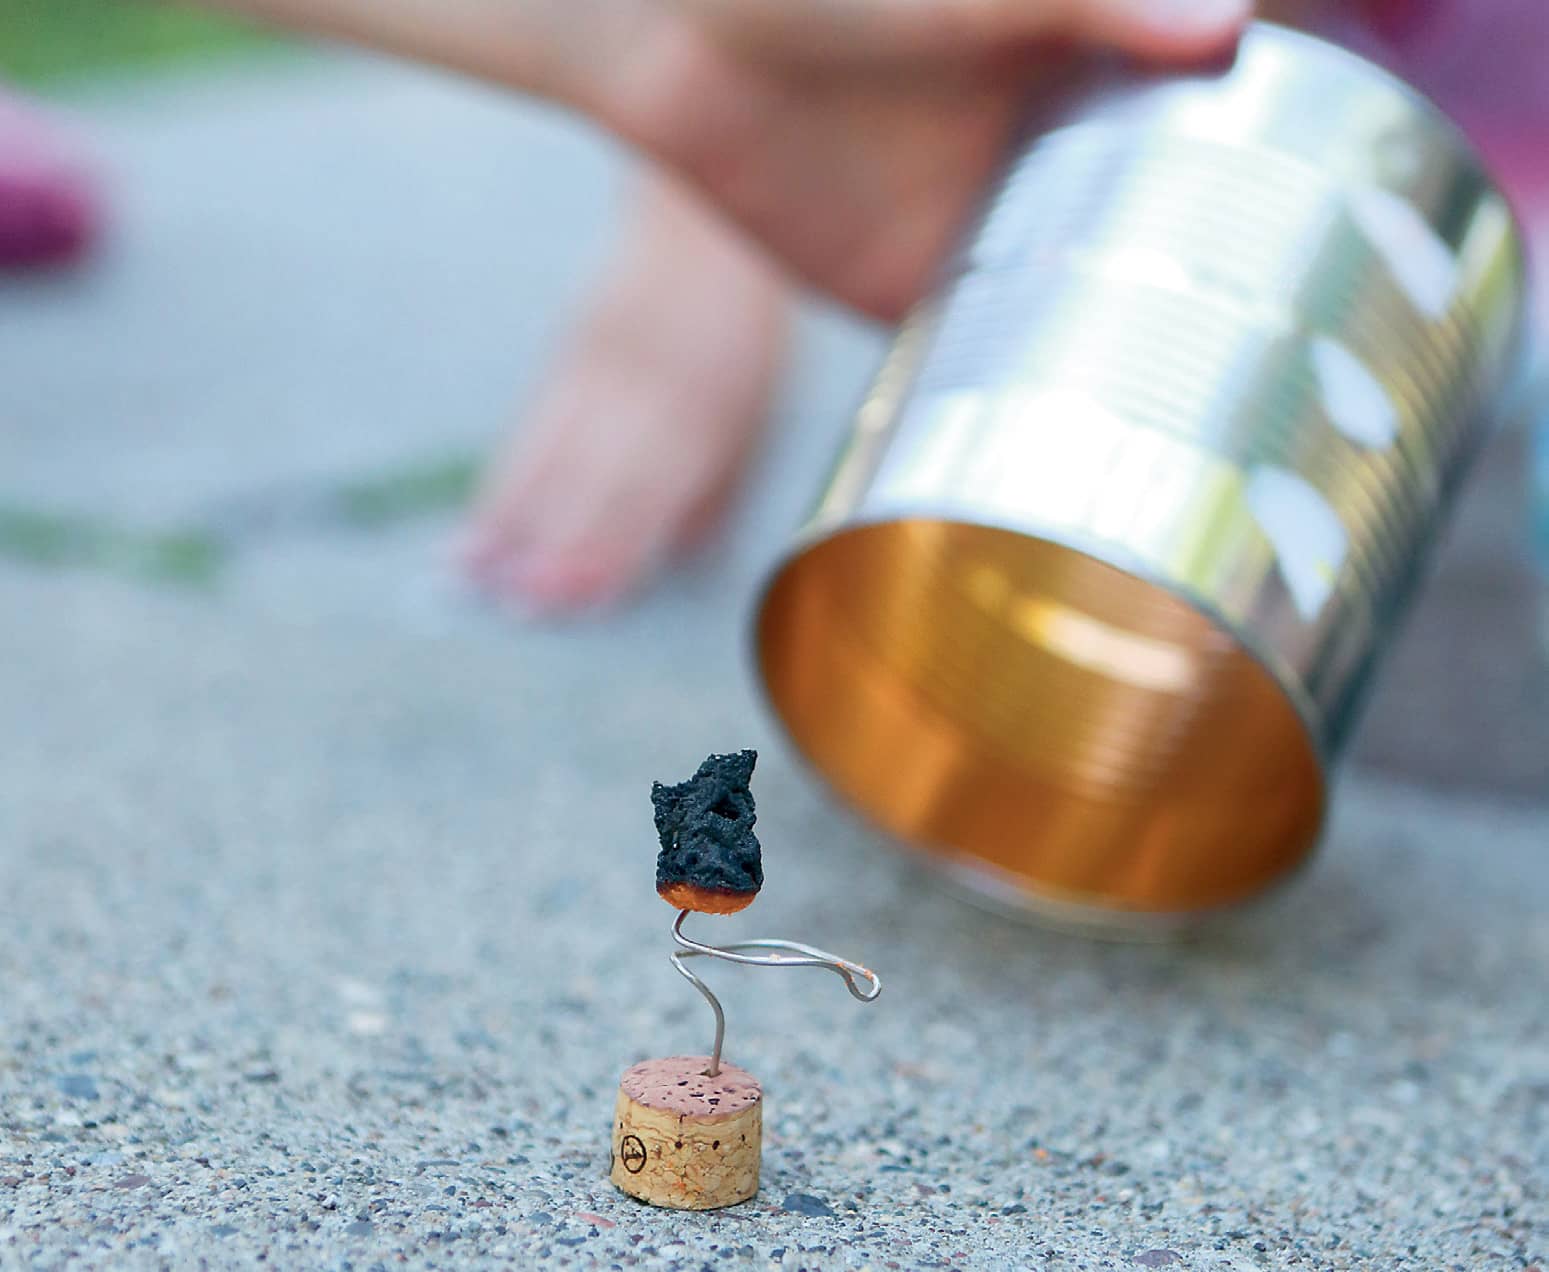
Fig. 8: Allow the food to burn completely.
Now Try This!
Figure out how many calories were in your food! A simple equation for calories = volume of water (in ml) × temperature change (in degrees C). You started with 118 ml of water. Multiply by the temperature change, and that should roughly equal the number of calories in the item burned!
Try comparing it to the nutrition labels and try it with different foods.