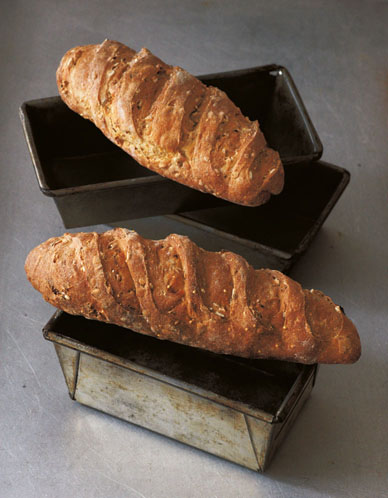
You will bake your best bread when you are feeling relaxed and comfortable, and the more you bake, the more you will feel at ease. My way of working the dough, as you will see in this chapter, is the key to light, airy bread, and with a little practice it will seem like second nature. Like all bakers, I create my own comfort zone by having my tools ready before I even roll up my sleeves. Just as an artist has his favourite brushes and palettes, all bakers have their own special tools, collected over the years, which are so familiar they feel like an extension of yourself – and I have included some of my favourites.
One of the great things about making bread is that you don’t need masses of fancy gadgets – just your hands, and a few basic bits and pieces. Having said that, I find that as people do more baking they like to treat themselves to some of the ‘proper’ equipment that a baker would use…
1. Measuring jug – for weighing and pouring liquids.
2. Stainless steel mixing bowl – Mine is big enough to comfortably hold at least 4kg of dough. I use it for mixing, resting, and sometimes also for proving the dough. Stainless steel is easy to clean, if I drop it on the floor it won’t break and it’s light and easy to lift and move around. A china bowl might look beautiful, but it isn’t as practical, and a key part of baking is to feel comfortable.
3. Pastry knife – When I am making things like croissants, where I need to cut a clean triangular shape rather than use the sharp end of my scraper (see 9), I use a big-bladed blunt chef’s knife so I can use it to cut directly onto my wooden work surface without damaging it.
4. Bread knife – When you make your own bread, I think you owe it to yourself to treat it with respect – so invest in a proper, big, sharp, serrated bread knife.
5. Sharp scissors – Sometimes, rather than using a blade, it is also decorative and effective to snip the top of your bread before baking with a pair of scissors, as I do for Chestnut Bread Flour.
6. Pastry brush – For croissants, brioche, etc. which are brushed with an egg-wash (just beaten egg and a touch of salt) before baking.
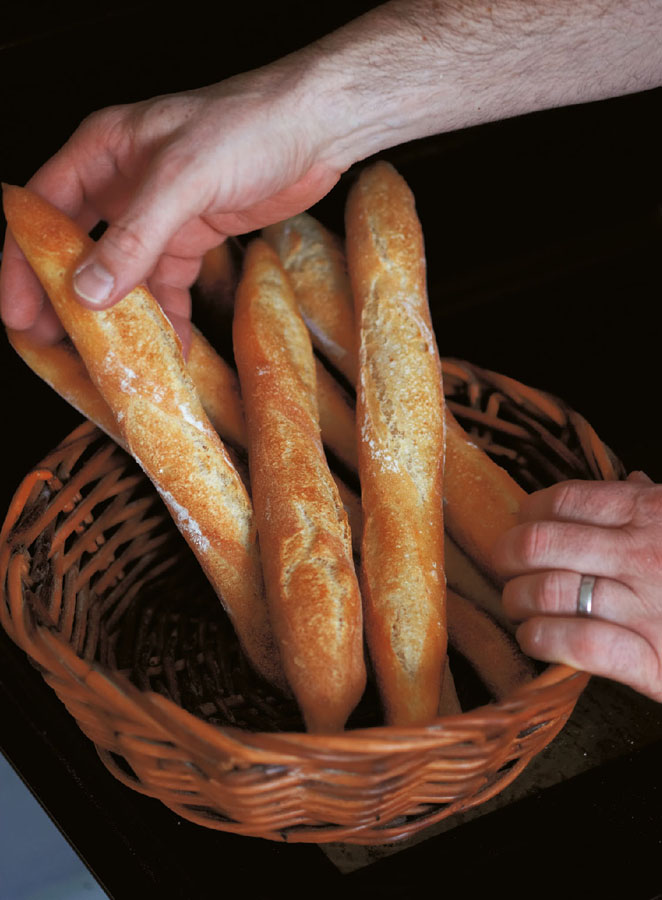
7. Cooling rack – When bread is hot from the oven it is indigestible (more on this in Chapter 5) so always use a wire rack or wicker basket to cool it down before eating.
8. Baking tray – You’ll need these for proving and baking, instead of, or as well as a baking stone. Upturned or flat trays without a lip can be used for sliding loaves into the oven, if you don’t have a peel.(see here)
9. Plastic and metal scrapers – My plastic scrapers are probably my favourite tools, and are extensions of my hands. I use the rounded end to mix the dough and help turn it out from the mixing bowl in one piece without stretching it. I use a metal scraper or the straight edge of my plastic scraper for cutting and dividing the dough, and the rounded end to scoop it up as the less you handle the dough the less sticky it is to work with.
10. Digital weighing scales – When you are cooking, you can usually afford some leeway in your quantities of ingredients, but baking is more of an exact science, so it is important to weigh everything accurately. Scales are more reliable than trying to read the level in a jug so I even weigh my water, as well as any other liquids and eggs. Why do you need to weigh eggs, you might say? The reason is that I want to encourage you to use the very best ingredients, which means free-range, preferably organic farm eggs – and these will often vary in size. So while a standard large egg (out of its shell) will usually weigh around 55–60g, that doesn’t necessarily apply to a random box from your local farm.
11. Thermometers – One to check room temperature and an oven one to check that the temperature inside the oven equates to what it says on your control, because to know the heat is crucial to achieving a beautiful crust. Most ovens have a hot spot so move the thermometer around to gauge the best position for baking your bread. If you are baking several loaves at the same time, you may need to swap them around during baking.
12. Lame – The purpose of slashing the tops of your loaves before they go into the oven is to open up the dough, so that you control the point where the gases escape, creating what bakers call a ‘burst’. By doing this, you also create extra crunchy edges to your crust, which look and taste great. You can use a sharp knife, scalpel or even a Stanley knife but a razor blade fitted into a handle, known as a lame, is the specialist baker’s tool and it does the job quickly and cleanly, without pulling or snagging.
13. Water spray – Using a clean plant spray to mist the inside of your oven just before and after you put in your loaves helps to add humidity. This slows down the process of the crust forming, allowing the gas inside the dough to expand nicely. If you don’t use steam, the crust forms too quickly and thickly, often giving it a greyish tinge, and your loaf may not burst where you want it to. When you combine steam with the heat of a baking stone, you get something close to the atmosphere inside a professional baker’s oven (Misting the oven).
14. Tins – small (for around a 400–600g loaf) and large (800g–1kg).
15. Baking cloths – I have a good stack of thick, natural fibre linen cloths for covering dough while it is resting. You can also use baking cloths for lining baking trays, if you don’t have a baker’s couche (see 20). Don’t use cotton tea towels, as the dough will stick to them. I simply shake or brush my cloths well after each breadmaking session and let them dry, since they will have soaked up some of the moisture from the dough. I never wash them, because I don’t want to introduce the smell of washing powder which will carry over to my dough. The more you bake, the more the cloths become impregnated with natural yeasts and flavours, and become an organic part of the whole breadmaking process.
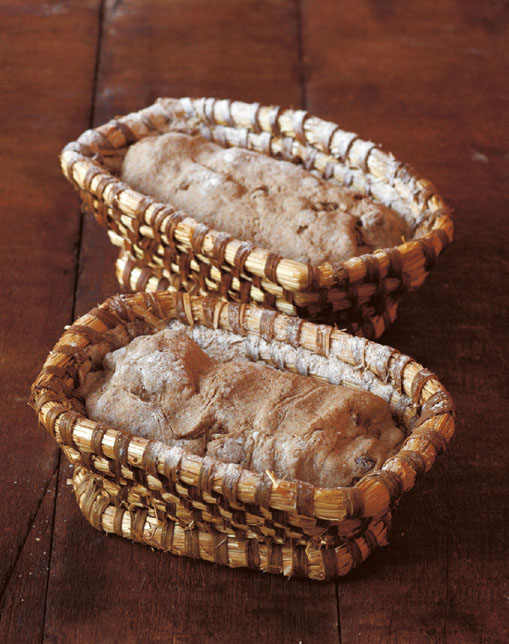
16. Proving basket – You don’t need one of these – you can just use a baking cloth inside your mixing bowl. Wicker proving baskets are lined with the same material used for couches, and they are perfect for holding big loaves like sourdough as they prove. The wicker allows the air to circulate around the dough and lets it breathe, without sticking, inside its lining. Not all proving baskets are made of wicker. They come in various materials, from plastic to wood, and in different shapes. I have some handmade reed baskets, which were traditionally used in Brittany without a lining. I put my dough straight into them to prove, and as it rises and fills the baskets, the reed imprints its pattern, giving the crust an interesting texture and design.
17. Wooden peel – This is what bakers use for transferring proved loaves onto the hot baking stone or tray in the oven and pulling them out again to check they are baked. You could substitute a flat-edged baking tray, or a lipped tray turned upside down, but a wooden peel is perfect for sliding the loaves into the oven easily and quickly, so the oven door is open for the minimal time, and you don’t lose heat. Peels come in different shapes and sizes, according to whether you are using them for loaves or baguettes. However, you don’t have to buy ready-made ones – you can easily make your own from pieces of plywood (for baguettes, you need pieces roughly 40cm long by 10–12cm wide). What makes the perfect long peel is the lid of a wooden box that holds a magnum of Champagne.
18. Rolling pin – I prefer wooden rolling pins, because I like the natural feel of wood. Mine is very special to me because my grandfather made it for me when I was 16. Choose a good solid rolling pin, not too thin, and of a size that feels comfortable in your hands. You will need it for rolling the dough in some recipes, and for making Pain Brie.
19. Soft brush – Buy a little natural fibre hand brush, like the one you might use with a dustpan. You can keep it exclusively for baking and use it all the time to brush away excess flour from your work surface. I use nothing but my brush and scraper to keep my work surface clean until I have completely finished my breadmaking for the day. Only then do I wash the surface thoroughly with soap and water, otherwise the smell of soaps and cleaners permeates the dough.
20. Baker’s couche – This is a heavy canvas or linen cloth, made from untreated natural fibre, which is used for laying your shaped loaves on while they prove. Because the surface is quite rough the dough won’t stick to it. The cloth is stiff enough to be pleated to keep baguettes or rolls separate, or you can use it to line a wicker proving basket. A couche isn’t essential – you can use a baking tray lined with a baking cloth instead – but this is one of the pieces of equipment that I find people really enjoy using. Brush and dry your couche after each baking session.

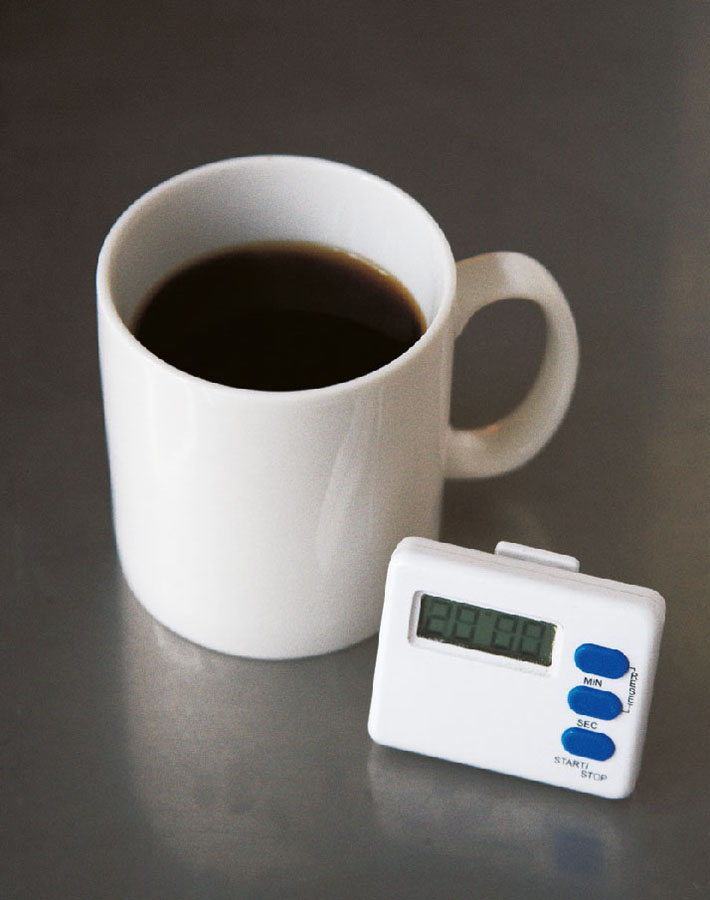
Timer – A mug of coffee is an essential tool in my kitchen… and yes, I forgot to put a timer in the main picture, which just goes to prove my point that even when you have been baking all your life, you can forget to time your bread. There’s nothing worse than spending a morning happily making and proving your dough, only to leave your bread in the oven until it is black because you forgot about it. Seriously, don’t assume you will remember to take it out – time it!
There are some fantastic strong bread flours being milled in the British Isles, in very careful, traditional ways by millers who know how to treat the grains with respect, retaining much of their natural goodness. These days, such flours aren’t difficult to get hold of and most can be ordered online and delivered by post (stockists).
1. Strong white – For most breads you need good-quality, naturally strong bread flour (organic, if possible, so that the wheat crop hasn’t been subjected to chemicals), which is higher in protein than ordinary white flour. This means that during the process of making the dough more gluten is formed, which makes the dough more elastic, helps it to rise better and results in a light, airy loaf.
The flours I use come from small, artisan mills such as Shipton Mill in Tetbury, Gloucestershire (which also imports specialist ciabatta and 00 flour from Italy) and Bacheldre Watermill in Wales. These traditional mills stonegrind the grains slowly in the old-fashioned way, rather than using the big steel rollers favoured by large, commercial operations. Stonegrinding keeps the temperature down and the proteins stable. The result is naturally strong flour which doesn’t need any of the additives or ‘improvers’ often used by bakeries to help commercial flours perform better. Good-quality, stoneground flours won’t have been bleached or treated with heat to whiten them, so they tend to have a creamy-ivory colour and that great smell of wheat.
2. Seeded – In my recipe for Seeded Bread, I suggest you make up your own combination of seeds to mix into the flour. However, if you want someone to do the work for you, Bacheldre Watermill has an organic stoneground strong white flour that also contains malted wheatflakes, sunflower seeds, pumpkin seeds, golden linseeds, sesame seeds and fennel seeds. If you want to use this blend in the recipe, just add up the quantity of flour and seeds in the list of ingredients and substitute seeded flour instead.
3. Rye – This always adds flavour and character to your bread. I like to use dark rye but usually combine it with strong white flour – as little as 30–40g of rye will make a difference to the taste of your bread – as 100% rye can be quite heavy, unless you use a ferment to help lighten it.
4. Red Cabernet grape – This really unusual flour from Canada isn’t made from grain at all, but from the dried and powdered skins of grapes left over from winemaking. It has a fantastic rich red colour that carries over into the bread, giving it a real depth of ‘winey’ flavour (recipe).
5. Fine Semolina – I like to use fine semolina to dust my peel before I put the proved loaves onto it ready to load them into the oven. The grains are like little pearls which help the loaves to slide easily from one to the other. You can use ordinary flour but, since it burns more quickly than semolina, it can give a darker look to the base of your loaves.
6. Wholemeal – This flour is sometimes called wholewheat flour, and is often seen as the most healthy as it contains the whole grain, whereas a brown flour contains around 85%, and white flour 75–80%.
7. Spelt – I love the flavour of spelt. It is an ancient grain of the wheat family that is even mentioned in the Bible. For a while it was out of favour, as the world opted instead for modern, more prolific and easier to grow varieties of wheat, but now its slightly nutty flavour is very much back in fashion. Although spelt flour contains gluten, it is less strong and more fragile than is usual in flour, so people with wheat, rather than gluten, intolerance might find it more digestible. The spelt I use comes from Bacheldre Watermill, Wales (stocked in some supermarkets), or Sharpham Park in Glastonbury, where they grow organic spelt that is stoneground at Burcott Mill in nearby Wells.
8. Khorason (or Kamut) – This is another ancient wheat which, like spelt, fell out of favour and has been reborn. In America, where it is grown organically in Montana, it is called Kamut, and the story is that it was used in ancient Egypt and rediscovered by an American airman in the 1950s. However, at Shipton Mill, where I buy the flour, they have done their research and discovered that its true name is Khorason, and it probably originates in northern Iran. In parts of the Middle East and Central Asia, it has been grown in subsistence farming systems for centuries. The flour is slightly more fibrous than wheat flour, with a sandy golden colour and a lovely earthy flavour – almost a taste of the fields. You can use Khorason on its own, but it contains a less strong form of gluten than wheat, which can make for heavy bread, so I find you get much lighter results when you blend it with strong white flour.
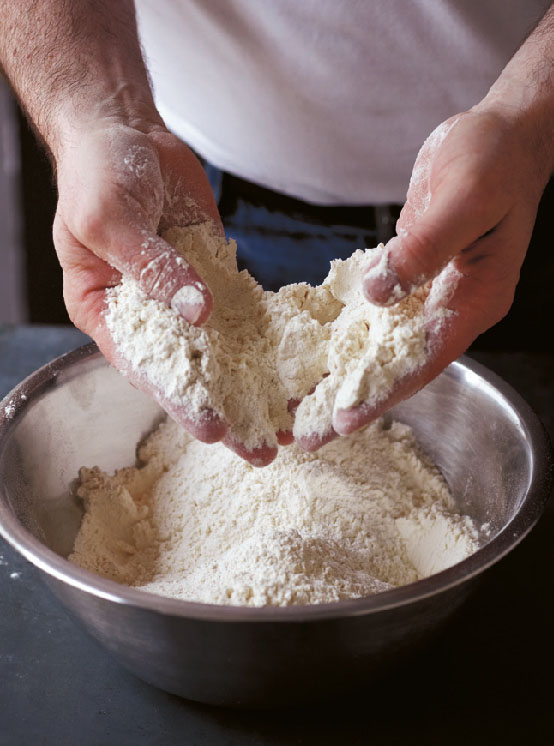
9. Cornmeal – This is milled from corn (sometimes called maize meal) and is used for polenta. I use it instead of flour to dust my ciabatta before baking as it gives a beautiful finish to the loaves.
10. Chestnut – This comes from France or Italy mostly, is often only available seasonally and may be in short supply, so can be quite expensive. It gives a fantastic flavour to your bread though and is also gluten free.
11. Oats – I like to add oats to my mix of edible seeds when I make Seeded Bread. You can also roll the top of rustic looking breads in oats before baking.
12. Buckwheat – Most people think of buckwheat as an American crop used for pancakes, but it is also traditional in Brittany where we use it to make savoury galettes. In France, it is known as sarrasin after the Saracens, Arab invaders who may have introduced it to Europe in the 15th century. Despite its name, buckwheat isn’t wheat at all, but the fruit of a bushy plant related to rhubarb and sorrel. Because it doesn’t contain gluten, it doesn’t rise – unless you combine it with white flour – which is why it is typically used in flatbreads and pancakes that are cooked on a griddle (originally, probably, just on a hot stone). I use buckwheat with white and rye flour in my Breton bread, and for Blinis. It adds a subtle, slightly sour flavour. which works especially well with seafood.


Yeast – Yeast is amazing stuff. It belongs to the fungus family and apparently ten billion cells are needed to make a single cell of fresh yeast. The recipes in my first book, Dough, used fresh yeast, which is made from cells cultured in a laboratory, but in this book I will also be introducing you to natural yeasts, which like those used in making cheese or beer, will breed and multiply if you give them the right conditions.
Personally, I rarely use dried yeast because I find it tends to be too strong in terms of flavour and activation. However, there is no harm in having some in the cupboard just in case you need it. If you do use dried yeast, buy the ‘easy-blend’ type and halve the ratio of yeast to flour recommended on the pack. Instead of dissolving it in warm water first, just rub it straight into your flour as if you were making a crumble. You don’t need to add any sugar because there is enough natural sugar in the flour to feed the yeast. By using less yeast and not over-feeding it with extra sugar, you will help the yeast to react more slowly and stop it from becoming too powerful.
A simple and basic rule, whether you are using fresh commercial yeast or dried yeast, is that the less you use, the longer the dough will take to prove, but the flavour will be better developed and the bread will last longer. Conversely, the more yeast you use, the quicker the dough will rise, and as a result your loaf may be brick-like and yeasty tasting, and will go stale much more quickly.
Water – Some bakers insist on using bottled water, but personally I have no problem with tap water, unless you live in an area where the chemicals used to clean it give it a harsh taste – in which case filtering it first should help.
The water, unless a recipe says otherwise, should be at body temperature, which means that if you put your fingers into it they won’t feel either hot or cold. That said, in extreme temperatures, you may sometimes need to use cooler or warmer water. I weigh my water so it is measured in grams rather than millilitres.
Salt – Much has been written about salt and its overuse in recent years. It is easy to demonise it and forget that without it we would, quite literally, die. In breadmaking, salt is important because it helps to stabilise the fermentation, improve the colour and flavour, develop the crust and conserve the bread. Without salt, bread will become stale and dry much more quickly. Sometimes in my bread classes people say: ‘20g of salt in 1kg of flour? That’s a lot!’ But you have to remember that 1kg of flour will give you 2 large loaves, or their equivalent, so the quantity of salt in each slice of bread is relatively little (see here). Of course, you can reduce the levels of salt in the recipes if you want to, but you may find that the dough proves more quickly and the flavour and colour of your finished bread is different.
I feel it makes sense to use fine, pure, natural sea salt judiciously in your breadmaking and when you are cooking with natural raw ingredients, and to avoid the kind of processed foods which are full of salt – and most probably processed salt, stripped of much of its natural mineral content – especially those that you might not expect to contain high levels, such as biscuits and cereals (see Chapter 5, for more on this). I usually use sea salt for making dough, rather than rock salt, which is harder to dissolve. However, one of my favourite sea salts is the large-grained, rustic sel gris, full of minerals, from Brittany, which you will need to dissolve using a little of the water from your recipe before adding it.

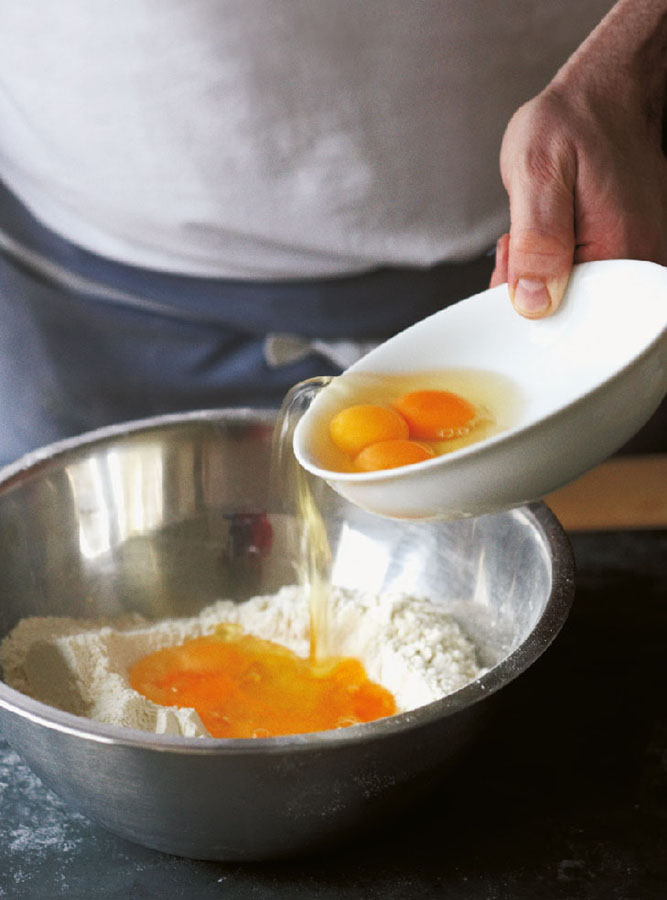
Eggs – Good eggs make all the difference. Compare the deep golden colour of the yolks of eggs from hens that have been allowed to run around and forage freely, to the anaemic pale yellow yolks of hens from overcrowded battery cages, and you will be amazed. It isn’t just the colour, but the flavour, and the strength of the albumen, that is so much more powerful when eggs come from thriving hens, especially the old-fashioned breeds which aren’t cross-bred to lay eggs constantly. I buy from local farms, as well as from Clarence Court who produce beautiful blue and green eggs from Old Cotswold Legbar hens and dark brown ones from Burford Browns, and Columbian Blacktail eggs – all available from good supermarkets. The depth of flavour, colour and sheen they give to a bread like brioche make the small extra expense well worth it, not to mention the welfare of the hens. As I said on here, when you buy good farm eggs they tend to be different sizes, so in all the recipes in this book that use whole eggs I have given a shelled weight, as well as an approximate quantity, since weighing your eggs is far more accurate.
Butter – Most of the recipes use unsalted butter, though the Pain Brie calls for a good Breton, salted butter, the kind I was brought up on – and which I still think is fantastic. The best breakfast, for me, is a lightly toasted slice of sourdough with salted Breton butter. And I love it on scones too.
Salted butter is softer than unsalted, so it doesn’t work for croissants, where you need your butter to be as hard and cold as possible. For croissants, especially, where you really taste the butter, the quality is crucial. A lot of croissants in supermarkets these days are made with something called ‘concentrated butter’ (you’ll see it listed on the labels), which has carotene in it to make it a bright yellowy-orange colour that is supposed to make the croissants look more attractive. Personally, I think it just makes them glow unnaturally, as though they have been lying on a sunbed!
My favourite butter for croissants and pastry is unsalted, fresh and creamy French Appellation d’Origine Contrôlée butter from Normandy or the Charente. In the Charente, they say that it takes 1,000 litres of milk to make 100 litres of cream to make 10kg of butter. The best butters from both regions have a wonderful creamy taste when raw, which becomes nutty and refined when you bake with them. That’s not to say there aren’t plenty of lovely and often very different styles of English and Irish butters out there – it’s just that I tend to stay with French butter for croissants. If I am making scones or Bath Buns, on the other hand, I usually use English butter. The thing to do is taste as many good butters as you can, find the ones you like, and stick with them.
Often people don’t believe that you can bake good bread in a domestic cooker. When I teach my bread classes we use typical ovens, the kind that everyone can relate to, nothing cheffy or ‘baker-ish’. However, you need to maximise the potential of your oven by preheating it really well, using a baking stone, spraying it with water when you put in your bread, and most importantly making sure you don’t waste heat by leaving the door open for any longer than necessary.
Preheating – Dough is at its most responsive in a warm atmosphere so you need to heat up not just your oven, but your whole kitchen as early as you can. Usually when I bake, the first thing I do when I get up in the morning is to put the oven on to its highest setting (250°C, if possible). For some of the recipes, you will need to turn the oven down to a lower temperature just before you put the bread into the oven; for others you can leave it at this heat. If you are going to bake your bread directly on a baking stone or tray, put this in as soon as you switch on the oven so that it too gets really, really hot.
Using an Aga – When I moved from London to a house in Bath, I found myself with an Aga for the first time. While I did manage to make very good bread, especially small loaves, even though the Aga was probably 40–50 years old, we didn’t stay there long enough for me to become an expert. So if you want to know everything there is to know about baking in an Aga, I suggest you have a look at one of the many good books on Agas that are around.
All I would say is make sure your Aga is fully hot before you make your bread and try to bake first thing in the morning (when the oven is at its hottest), rather than at the end of the day when you might have been cooking supper and the oven might have cooled down. It’s a good thing to use an oven thermometer to check the temperature. I also found it advisable not to use the hot plates on the top of the Aga for cooking at the same time, as it drew away too much heat.
My best loaves were made directly on the floor of the top right, hot oven – even better with a hot baking stone inside first. Sometimes the bread would start to brown after 5 minutes, in which case I would prop the door slightly ajar.
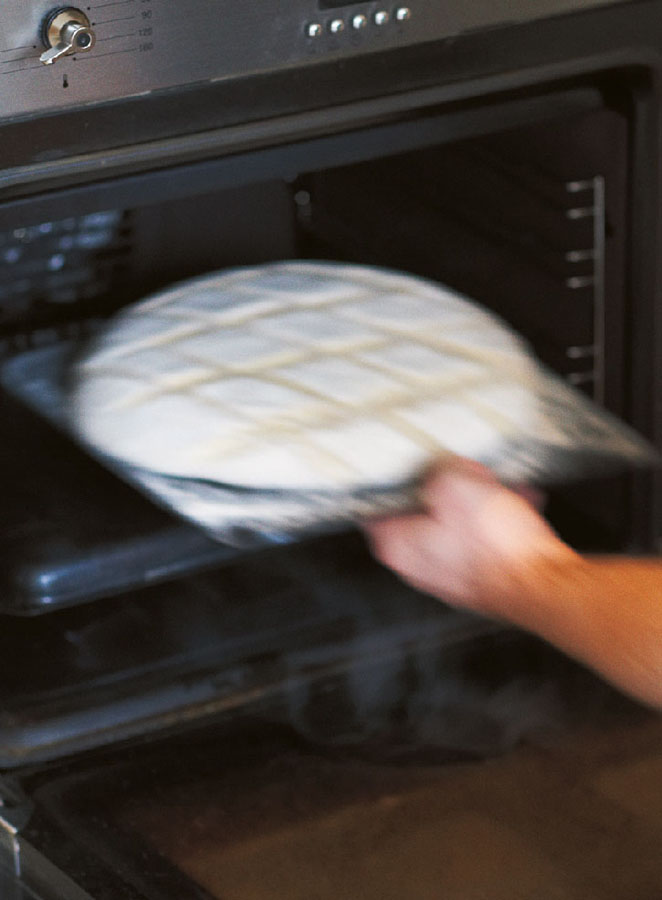
Using a baking stone – The idea of using a baking stone is to try to recreate the baker’s oven, in which the dough is slid straight onto a hot brick floor, so it starts to bake immediately underneath. Because I tend to bake quite a lot of bread at one time, I use two pieces of granite which live permanently in my oven on two different shelves, so I never have to remember to put them in. The moment I turn the oven on, the stones start to heat through, then when I am ready to bake I just slide the dough onto them using my peel. A baking stone isn’t essential – you can substitute a heavy baking tray turned upside down so that it is completely flat, or have one baking stone and use an additional tray when you need it. However, a baking stone will retain the heat better and it is one of those things that I find gives people real confidence in their baking.
Misting the oven – To make bread with a good crust and colour, you need to add some steam into the oven as the loaves bake. Just as using a baking stone is the closest you can get at home to the brick floor of a baker’s oven, misting creates a similar effect to the steam injection system that professional bakers use to put humidity into the oven.
Without steam, the crust of your loaf will form very quickly and the expanding gas inside will have nowhere to go. The result is that the crust will burst open – but not necessarily where you would like it to. You will find, too, that it takes on a greyish, rather than a golden, tinge. With steam, the top of the loaf stays moist, delaying the formation of the crust, allowing the gas to expand until the crust bursts, as you intended, through the slashes you have made in the top of the loaf.
Some people suggest putting ice cubes in the bottom of the oven, but I find that this doesn’t create steam instantly enough. By the time the cubes have melted, the crust is already starting to form. Others put a lipped tray of water in the bottom of the oven, which can work well, especially if you have a gas oven where the source of the heat is at the base.
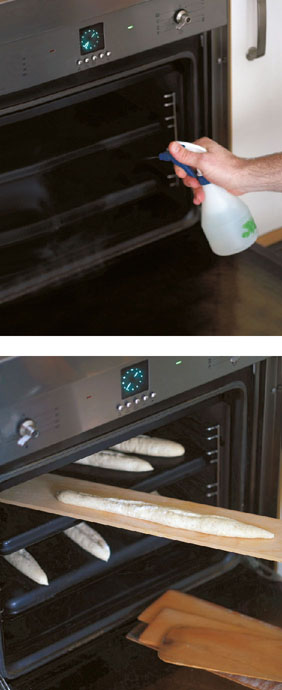
Misting the oven with a clean plant spray filled with water is by far my favourite way – it’s so easy. The more I bake using a domestic cooker the more I am aware that the more you mist the better – it makes such a difference, especially for baguettes. Obviously don’t spray so much that your oven is filled with water, but around 15 good squirts before your bread goes in and another 5 after should do it. Get close to your oven when you spray – just a few centimetres away – you should be able to feel the steam on your hands. And do it quickly, so that you don’t keep the door of the oven open for too long.
Loading the oven – It might sound obvious to say: ‘don’t leave the oven door open for any longer than you have to, otherwise you will lose heat’, but when I am teaching I find this is one of the hardest messages to get across. Loading your oven should take no more than 15–20 seconds – any longer and you could lose 40–60°C, which robs you of the instant surge of heat that seals the base of the bread and helps to form a beautiful crust. The key is to be organised and have a mental checklist: are your loaves on your peel/ baking tray? Have you slashed the tops? Are they close to the oven? Is your water spray handy? If the answer is yes to all of these, then open the oven door. Mist the oven quickly – 15 or so squirts – slide in your bread, give another 5 squirts, then close the oven door and don’t do as most people do when they come to classes for the first time – that is, open the oven door again. You will need to check the progress towards the end of baking time, but other than that don’t be tempted to keep peeking inside the oven.
I prefer to talk about ‘working’ the dough, rather than ‘kneading’ it, because my technique is very different to the traditional English way.
First you need to mix your ingredients (according to your recipe) in your mixing bowl for about 3–5 minutes, making sure that all the dry bits are incorporated, and everything is bonding. Then, with the help of your scraper, turn out your dough onto your (unfloured) surface, ready to work it. Get into the habit of scraping out the bowl really well, making sure you don’t leave any scraps of dough in there, because you are going to put your dough back into the bowl after you have worked it, to rest and expand to around double its size, so any bits in the bowl that have dried out will attach themselves to the dough and snag its silkiness. (Never wash the bowl until after you have finished baking, as you don’t want to introduce any smells or tastes of soaps or sprays.)
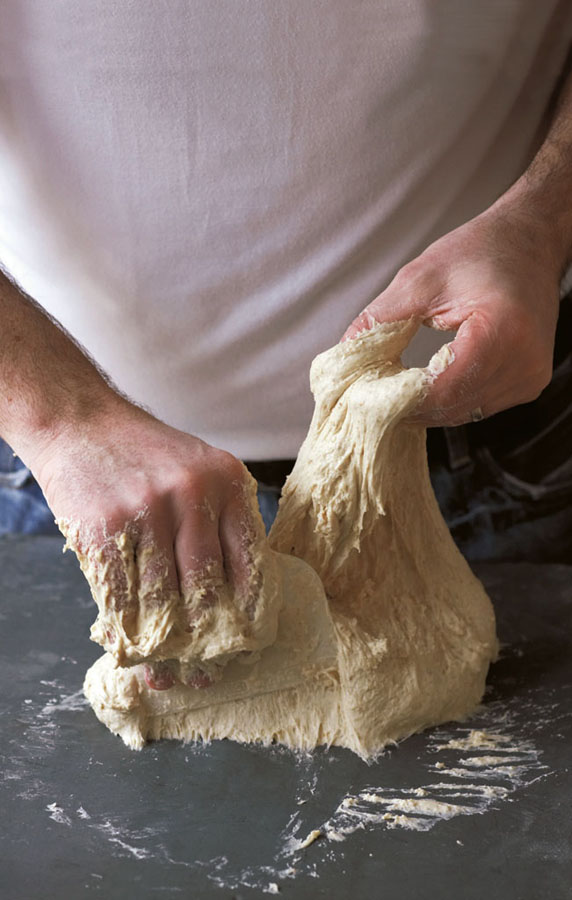
Now you need to transform what feels like a sticky mixture into a silky, smooth, lively dough. In England people talk about ‘kneading’, which involves pushing and pummelling the dough with the knuckles and the heel of your hand. My way is very different, and is based on an old French technique from the times when bakers typically had to work around 80kg by hand. It involves stretching and slapping the dough down in quite a dramatic way, so that as much air as possible is introduced and trapped inside, and the gluten stretches, forming a light, lively dough.
It is this technique, which I have adapted to home-baking that allows you to work with wetter, softer dough than most people in England are used to. When I first started baking in England, I was struck by the fact that most recipes required a much lower ratio of water to flour than I had ever used. Often they would also say to add more flour, if necessary. Then you would be told to flour your work surface well to prevent the dough from sticking during kneading. This adds up to a lot of extra flour – and too much flour, to my way of thinking, means dough that is quite stiff and unresponsive and heavy, brick-like bread.
When I work the dough, I don’t flour the work surface at all. When people who have been making bread for many years see how much water I use, then start to handle the sticky dough, they often struggle at first as it takes a bit of getting used to, but once they get the hang of the technique and feel the airiness and life in the dough they never look back.
So, don’t flour your surface – yes, the dough will stick at first, but resist the temptation to dip your hand into the flour bag, because it will come together. You just have to believe!
Slide your fingers under the dough, then with your thumbs parallel to your index fingertips (1), lift it lightly (2), swing it upwards (3) and then slap it back down, away from you, onto your work surface (4). Stretch the front of the dough towards you, then flip it back over itself like a wave (5), stretching the dough forwards and sideways and tucking it in around the edges (6).
Keep repeating this sequence (initially, after every 10–15 flips, using your plastic scraper to help you lift the dough from the work surface). The more you practise, the more you get into a rhythm and can do everything in one smooth movement. The secret is to relax. Don’t worry about the stickiness, keep your touch very light and work the dough quickly. Often in classes I see people struggling because they are gripping the dough too tightly, pressing their fingers into it so it gets even stickier. When I step in and work the dough quickly and lightly for a minute or so, they can see the difference immediately as it swells and comes to life.
As you continue to work the dough it will expand as the air bubbles get trapped inside and feel silky, smooth and firm, yet at the same time lively and a little wobbly, and it should come away from your work surface cleanly. If, after you have been working it for 10–15 minutes, the dough is still a bit sticky, don’t panic. You’ve still done enough to get plenty of air through it. Just finish by forming into a ball (see here) and next time try to handle it a little more lightly and stretch it a bit more as you work it.
I prefer to mix and work my dough by hand, but I know that for some people it is easier to use a machine. All the doughs can be done in a mixer with a dough hook and for some recipes, such as brioche, it makes sense because it is a long process that can seem quite daunting.
I would say, though, that when you first start baking, it is good to work the dough with your hands a few times before switching to a machine, just so that you get the feel of the way the dough comes together and you know the results you are looking for.
I still haven’t found a dough hook that can properly handle my kind of very soft dough without having to stop it every so often and scrape the bottom to incorporate the ingredients properly. Also, because I don’t feel you can get as much air into the dough as you would by hand, I suggest that even when you do use a machine, once you have turned out your dough onto your work surface, you work it for a minute or so by hand (see here) to get a bit more life and air through it.
To mix in a machine, put the ingredients into the bowl and start off at just under number 1 speed. Mix for 4–5 minutes, stopping every so often to scrape up all the dry bits at the bottom of the bowl, so they can be worked in. Increase the speed to 2½–3 for a further 7–8 minutes, until the dough comes together.
Tip out onto your work surface, without any flour, and work the dough for another minute – 5 or 6 flips should be enough – then form it into a ball.
Once you have worked your dough, now you can very lightly flour your work surface. The flour won’t affect the texture of the dough, but you still don’t want to spoil its smooth surface, so only use a fine dusting. By that I mean you should see hardly any flour on your work surface, if you were to run your scraper across it, you would gather up a small mound.
Having lightly dusted your work surface with flour (1), place your dough, smooth-side down (2), and fold each edge in turn into the centre of the dough, pressing down well with your fingers (3) and rotating the ball as you go (4–5). Finally turn the whole ball over and stretch and tuck the edges underneath (6).
Once you have worked your dough and formed it into a ball you will need to let it rest in a warm, draught-free place and then, depending on the recipe, fold it and reform it.
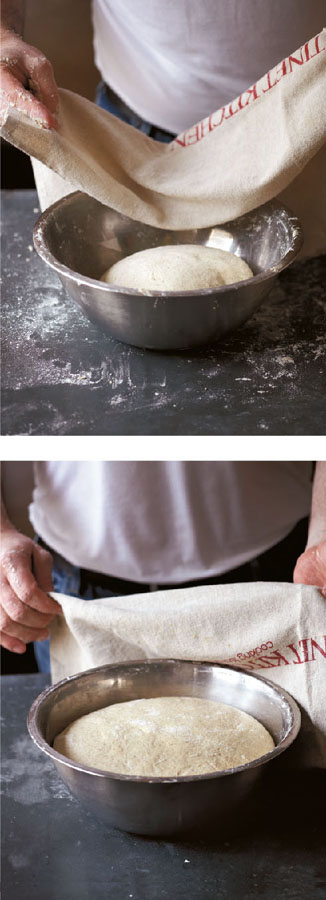
Lightly flour your well-scraped bowl, put in the ball of dough smooth-side up, cover with a baking cloth and let it rest, usually for about an hour (though the time will vary from recipe to recipe), in a warm, draught-free place, during which time it will rise to around double its volume and develop its structure while the flavour matures.
By a ‘warm place’ I mean around 25–30ºC, which is the temperature in my kitchen after I have had the oven on since early morning. I simply leave the dough on the top of my cooker, which is away from any draughts. Other places you could use include a microwave (turned off, of course), or a kitchen cupboard. Often an airing cupboard is recommended as a good place, but the warm air inside can be quite dry, so you need to be careful that you don’t let the dough dry out too much and form a skin because this will prevent it from rising properly. If you are using an airing cupboard, I would recommend putting a damp baking cloth over the top (but not touching the dough). If the cloth dries out, spray it lightly with your water spray.
Just as the dough needs to be warm so that the yeast will activate and raise the dough properly, it is equally important for it not to be in a draught, as this, too, can cause a skin to form. When you are working in a professional bakery, a draught coming through is the worst thing that can happen, since it upsets the balance and constancy of warmth that is crucial to turning out loaves of a consistently high quality. Some of the recipes in this book, such as sourdough, call for the dough to be rested twice or three times throughout the process. In general, the longer the dough is allowed to rest, the more developed the flavour will be, and the longer the bread will last.
Folding – When a recipe calls for the dough to be rested more than once, you need to re-shape the dough in between each resting to reinforce it and help the flavour to develop. This is the point where an English recipe would call for the dough to be ‘knocked back’, which roughly translates as punching the living daylights out of it. I prefer to use the term ‘folding’, because what I do is much gentler. I just lightly flour the work surface, then turn the dough out of the bowl, with the help of my scraper, so that the smooth, rounded side that was uppermost in the bowl is now underneath. I flatten it down a little with my fingertips, then fold the outside edges in on themselves a few times, pressing down gently each time, and rotating the dough as if forming a ball (see photograph and here). Then the dough can go back into the bowl (again lightly floured) to rest again, according to the recipe.
Your rested dough will now be full of life and responsive, ready for you to turn out and divide up to make loaves, baguettes or small rolls.
Whenever you need to divide a large piece of dough into any more than two pieces, very lightly dust your work surface with flour first. When I’m teaching I find that, after managing not to use too much flour on the work surface up to this point, once people start cutting the dough and feel it getting a bit sticky again, they tend to relapse and start putting their hands in the bag of flour. So really try to persuade yourself not to, so that you preserve the smoothness and sheen of your dough.
With the help of your scraper, turn the dough out of the bowl, smooth-side down, onto your work surface (1). Press gently into a rectangular shape. With the long side facing you, fold one third into the middle (2) and press down with your fingertips. Then fold the other side into the middle and again press down (3–4). Next bring the top edge of the dough over the top and tuck underneath to seal (5). Turn the length of dough over, so the seam is underneath (6). Now you are ready to divide it.
Have your scales ready. In my first book, I generally left it to you to decide whether to weigh the pieces as you divided the dough into pieces for rolls or baguettes. However, as you bake more, you’ll find it pays to be a bit more precise and keep your loaves or rolls all the same size so that when they are in the oven they will all bake at the same rate. Otherwise, you will lose heat opening the oven to take out smaller loaves or rolls which will be ready first.
So, in this book, I want to encourage you to use your scales. Use the sharp end of the scraper to cut each piece of dough (7), and then lift it up with the scraper. As you are using the minimal amount of flour on your surface, this will help you to lift the pieces cleanly without them clinging, keeping the springiness in the dough. If a piece sticks and you start clawing at it with your hands, you will only make it even stickier.
It might sound pedantic, but it’s good to get into the habit of keeping each piece of dough upright – that is, with the smooth side upwards – when you put it on the scales, and when you lift it off ready for shaping. That way you handle it as little as possible.
Cut one piece at a time and then weigh it (8–9) – don’t cut all the pieces at once – because unless you have an incredibly good eye you won’t be that accurate in your cutting when you start out, and you will end up with lots of scraps of dough as you try to make adjustments. Once you have been baking for a while, though, you will find that you can gauge weights fairly instinctively. I challenge myself to try and get it spot on every time! So, cut and then weigh, cut and then weigh…. If a piece of dough is underweight or overweight, either cut a little off with your scraper, or cut a bit from the main piece of dough and add it on. As you go along, make use of the scraps so that as little dough as possible is wasted. Now you are ready to shape your dough.
In a bakery we would use the term ‘moulding’ for the process of forming loaves or rolls – however, I find that people relate much better to the simpler idea of ‘shaping’.
Before you start shaping your dough into rolls or loaves, have your baskets or tins ready to hold them while they are proving. Good baking is all about being organised and thinking one step ahead.
If you are making large loaves, prepare your proving basket, couche or bowl lined with a baking cloth with a light dusting of flour (unless the recipe calls for a long proving time, in which case you will need to dust more heavily). If you are baking in tins, make sure they are lightly greased with vegetable oil or butter.
If you are making rolls or baguettes, line a baking tray with a couche or baking cloth and again lightly dust with flour. Once you have put in your first row of rolls or baguettes, you can make a pleat in the cloth before putting in the next row to keep them from touching each other as they prove.
Also have some extra baking cloths ready to put over the top of your dough as it proves.
When you start to shape your dough into a loaf it is important to get some strength into what I call its ‘spine’, so that the bread holds itself firm.
To do this, first lightly dust your work surface with flour. Take your piece of dough and place it, smoothest-side down, on your work surface and flatten it with your fingertips into a rough oval shape.
Fold one side of the flattened dough into the middle (1) and press down quite firmly with the tips of your fingers. Bring the other side over to the middle and again press down firmly (2–3). Now fold the bottom edge into the middle and press down (4), then repeat with the top edge (5). You should be able to see clearly the indents of your fingertips forming the ‘spine’. Fold over in half and then press down again firmly to seal the edges (7–8).
Finally, turn the loaf over so that the seam is underneath and either place in a greased loaf tin (9), on a couche, or in a lightly floured wicker proving basket, or bowl lined with a baking cloth.
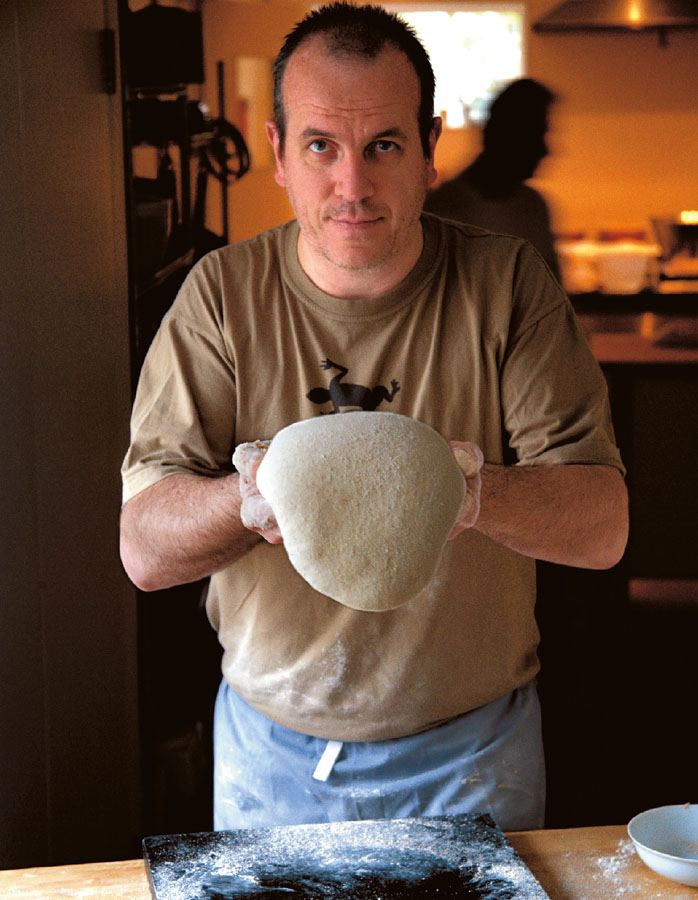
Using the same technique as (Forming the dough into a ball), fold each edge of the dough in turn into the centre and press down well with your fingers, rotating the ball as you do so. Turn the ball over and, cupping your hand over the top, roll it with your fingers until it is round and smooth (you can see me doing this on pic 4). When all your rolls are shaped, lay them on a baking tray lined with a lightly floured couche or baking cloth.
Since the characteristic of a baguette is that it is long and thin, it is extra-important to get some good strength into its ‘spine’.
As for shaping any loaf, dust your work surface lightly with flour, flatten your piece of dough with your fingertips (1), then fold one side into the middle and press down firmly (2). Fold the other side into the middle and again press down firmly (3).
Finally, fold the dough in half lengthways towards you to form a long log shape. If you are right handed, starting at the right end of the dough, hold the edge of the dough between the forefinger and thumb of your left hand (4) and twist the dough slightly towards you, then press down with your right thumb (5–6). Work this way all along the length of the dough. This slight twisting movement will give the edge more strength than if you just crimp it with your fingers to seal it as you would for a more chunky loaf (7). Work as quickly as you can – the less time you spend handling the dough, the springier and more responsive it will be and the less it will stick to your hands.
Turn the baguette over so that the seam is underneath, and then roll the top very lightly and quickly with your fingertips. Don’t press down or you will flatten the life out of it – you just want enough light touches to loosen the dough. Place on your lightly floured couche or cloth-lined baking tray (8–9).
If you are making more than one baguette, make a pleat in your flour-dusted couche or baking cloth to keep each one separate.
Cover with another baking cloth and leave to prove according to your recipe.
This is the time when the dough is left to rest again, after it has been moulded or shaped into loaves or rolls. Once more, it will rise to just under double its volume.
The breads in this book usually take between 1 and 2 hours to prove (in the same place you rested your dough earlier), depending on the recipe and the temperature in your kitchen. The reason I say ‘just under’ double its volume is that until you get a feel for baking, it isn’t always easy to gauge that moment when the volume of your dough has doubled. You will get better results if you slightly under-prove your dough (it will still rise and burst open on the top) than if you over-prove it, in which case it is more likely to collapse – leaving you with something that resembles a brick.
Retarded proving – This is simply a method of proving your dough overnight in the fridge, rather than at room temperature. The longer fermentation gives a really good flavour and crust, though it’s not practical all the time as you won’t always want to wait 24 hours before you bake. You might like to try it if you have more dough than you want to use in one day.
Put the dough on a lightly floured couche or in a bowl lined with a baking cloth and cover it with another baking cloth, as before. Put in the fridge for 12 hours or overnight, allowing an extra hour for it to come back up to room temperature before you bake it.
A great, tasty, crunchy crust is the product of various things: a well-worked, smooth airy dough that has proved well without drying out or forming a skin on top, a good misting in the oven, some serious heat and the careful slashing of the top of your loaf.
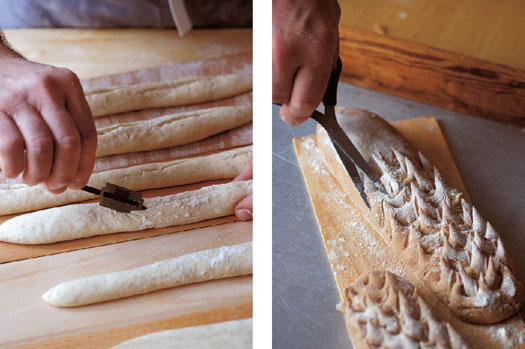
Savouring good food begins long before you put it in your mouth. It is to do with aroma, and the way it looks. A rustic loaf with a wonderful crust invites you to eat it. And a big part of achieving a great crust is slashing the top of the loaf so that the gas that expands upwards as it bakes will have somewhere to escape and break through, in what we call a ‘burst’. The way you slash the top of your dough controls where that burst will happen as well as how the finished loaf will look.
Sourdough loaves are probably the most famous for their appearance – very often the designs that are cut into the tops of the loaves look all the more dramatic because of the traditional dusting of white flour against the dark colour of the bread.
In France the story behind the marking of sourdough is actually a practical one, dating back to the days when very few families had ovens. Instead, they would make their bread and take it down to the local baker who would bake it for them. In order to be able to recognise their bread when it came out of the oven, each family would carve their initials, a crest or some identifying mark into the top of their loaves. Overleaf you can see some before and after pictures of classic sourdough decoration. Or create your own signature.
Traditionally bakers use a lame for slashing the tops of loaves, but you can use a sharp knife or a pair of scissors. The important thing is to make your cuts quickly and cleanly, with the tip of the blade, so as not to pull and drag the dough.
To slash baguettes, use your blade to make diagonal cuts along the top. In France, a baguette from a bakery must weigh 320g and have 7 cuts. However, you can make your baguette as long or short as you want, and make 5 or 6 slashes if you prefer – less, maybe, for small ones.
When you bake regularly, you will probably find that at some times your dough is more responsive than others. Often this is related to whether the atmosphere is cold or hot, humid or dry. With a few adjustments, however, you can have consistently good bread every day.
Bakers always talk about the weather, the way it can affect dough, and what compensation they can make. It is one of the things that people read a little about, and then feel very confused, so in my first book, Dough, I made no reference to the weather at all because all the doughs I make and the techniques I use are forgiving enough to give you good bread irrespective of the conditions in your kitchen. By just following the recipes in this book you will make very good bread, but you also have to remember that everyone’s kitchen will be slightly different, just like their ovens.
Furthermore, as you bake more often, you will begin to notice that on a hot day, for example, the dough might develop more quickly than you expected, or if it is stormy outside it might seem unusually ‘sweaty’ and sticky and harder to handle. Maybe on some days you are more pleased with the results than on others. So part of being comfortable with baking is getting used to making small adjustments – most of them just common sense – in order to get consistently good results every time you bake. In Brittany they always used to say that in the old days when the weather got cold, in order to prove the bread, people used to put the big reed baskets full of dough under the marital quilt! I’m not suggesting you go that far, but you will find that with practice and experience, you will be able to troubleshoot, as if it were second nature.
I often suggest people keep a little diary when they start baking, noting down the weather, how the bread came out, and how the dough behaved. If necessary, you can then use the adjustments opposite to compensate for any weather-related problems. The symbols refer to your kitchen at ambient temperature (i.e. with no air conditioning and without the oven being put on to warm up the room).
