THE ABILITY TO ADAPT TO THINGS AS THEY ARE—A PRACTICAL NECESSITY IN WILDERNESS EXPLORATION—ALSO TEACHES US HOW TO LIVE MORE PERCEPTIVELY. IN HIGH AND WILD PLACES, ADVENTURE IS LIFE ITSELF.
—High and Wild, Galen Rowell
Walking is very easy. Walking in the wilderness with a pack isn’t quite so simple. You have to find your way, perhaps in dense mist or thick forest; you need to cope with terrain, which may mean negotiating steep cliffs, loose scree, and snow; and you must deal with hazards ranging from extremes of weather to wild animals. Most wilderness walking, however, is relatively straightforward as long as you’re reasonably fit, have a few basic skills, and know a little about weather and terrain.
Knowing how to read a map is a key wilderness skill, yet many hikers can barely do so. I have one regular backpacking companion who has little understanding of maps and is quite happy to let me plan and lead. The only solo backpacking he’s ever done was on a coastal footpath, where route finding consisted of keeping the sea on the same side. There are also some inland areas where trails are so well posted and trail guides so accurate that you don’t need a map. Even in such areas, though, you may find unmarked trail junctions where it’s impossible to work out which way to go without a map.

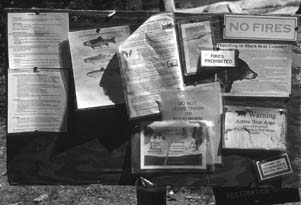
A plethora of signs, indicating a popular place.
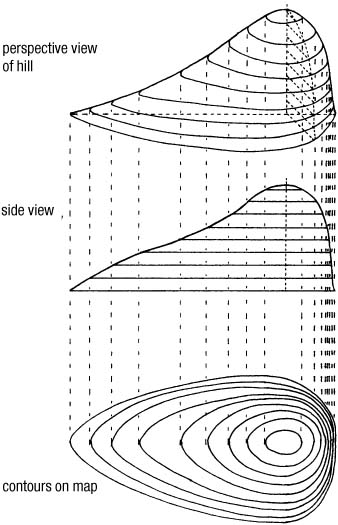
Contour lines join together points of equal elevation. The patterns they form represent the three-dimensional shapes of features. Once you can interpret them, you can tell what the hills, valleys, and ridges of an area are like.
With a map you plan walks, follow your route on the ground, and locate water sources and possible campsites. But maps also can open an inspiring world—I can spend hours poring over a map, tracing possible routes, wondering how to connect a mountain tarn with a narrow notch, speculating whether it’s possible to follow a mountain ridge or if it will turn out to be a rocky edge that forces me to take another route.
Every map has a key. Using this key to interpret the symbols, you can build a picture of what the terrain will be like. There are two types of maps: planimetric and topographic. The first represents features on the ground; the second shows the topography, or the shape of the ground itself. Topographic (“topo”) maps use contour lines, which join points of equal elevation starting from sea level. Contour lines occur at given intervals, usually from 15 to 500 feet. U.S. Geological Survey (USGS) 1:24,000 maps have a contour interval of 40 feet. On most maps, every fifth contour line is thicker and has the elevation indicated, though you may have to trace it for some distance to find this marker. The closer together the contour lines, the steeper the slope. If they’re touching, expect a cliff (though cliffs of less height than the contour interval won’t show on the map). Some maps mark cliffs, others don’t; check the key to see if you might encounter cliffs not shown on the map.
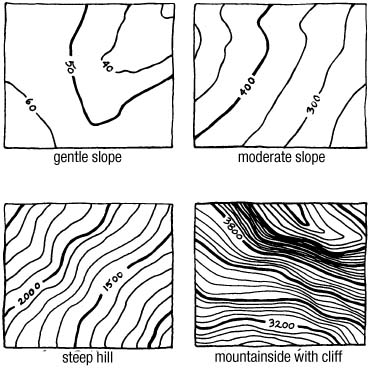
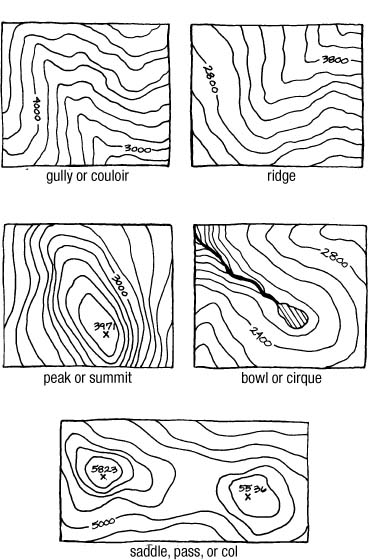
The patterns that contour lines form represent the three-dimensional shapes of features. Once you can interpret them, you can tell what the hills, valleys, and ridges of an area are like and plan accordingly.
The scale tells you how much ground is represented by a given distance on the map. The standard scale for USGS topo maps outside Alaska is 1:24,000. These are known as 7.5-minute maps because of the area of latitude and longitude they cover. On a 1:24,000 map, 1 inch equals 24,000 inches on the ground, which is roughly 2.5 inches per mile. In Alaska, 1:63,360 maps—about 1 inch to the mile—are the norm. These 15-minute maps are still available for some other areas but are being replaced by 1:24,000 ones—a pity, since the scale is adequate for backpacking and each sheet covers a larger area. USGS topo maps, sometimes known as quads (from quadrangle), are the standard in the United States.
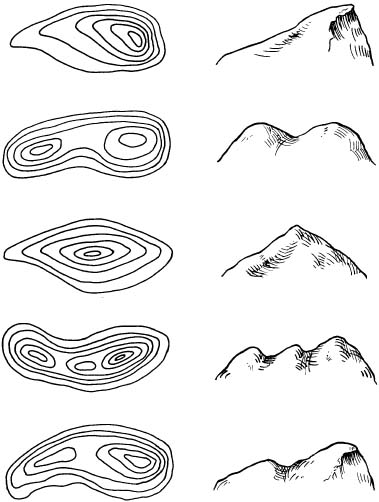
The topo views (left) match the appropriate profiles (right).
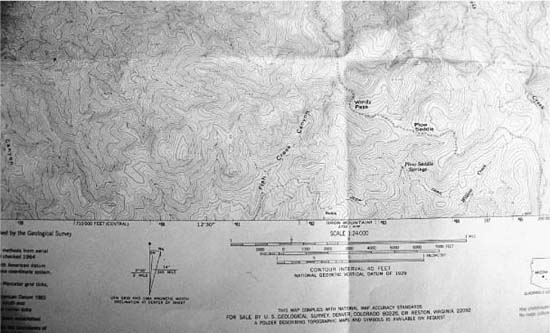
USGS topo map with scale and declination information. These maps cover the whole country but often don’t contain up-to-date trail information.
For most of the world, metric scales are standard, with 1:25,000 and 1:50,000 the most useful for walkers. Smaller-scale maps covering larger areas, such as 1:100,000 and 1:250,000, are helpful for planning. Although the greater detail of large-scale maps is best for walking, it’s possible to use smaller-scale ones in the wilderness. In remote areas they may be all that’s available. I’ve used 1:250,000 maps in Greenland and even 1:600,000 in the northern Canadian Rockies.
Most Forest Service maps are planimetric, but there are some topographic ones covering designated wilderness areas, such as the 1:63,360 maps covering the Ansel Adams and John Muir Wildernesses in the Sierra. The Bureau of Land Management also makes an increasing number of metric topo maps at different scales, such as 1:100,000, with contour intervals of 50 meters.
Several companies produce maps for wilderness use that are more up to date and have more trail information than USGS topo maps. Those from Trails Illustrated (now owned by National Geographic) are excellent. Printed on a paperlike recyclable plastic called Polyart, they are tearproof and waterproof. The maps are also attractively designed, clear, and easy to read. The scale varies from map to map. Each map is based on USGS data, but this is customized for outdoor recreation and updated every year or two to keep the maps accurate. Trails Illustrated maps are topographic, but they also contain information needed for planning trips, such as the location of trailheads, ranger stations, and campsites, plus the precise route of trails, advice on bearbagging, Giardia, park and wilderness area regulations, and outlines of topics like wildlife, history, geology, and archaeology. Tom Harrison’s 1:63,360 trail maps to the High Sierra and Green Trails’ 1:69,500 maps of the Pacific Northwest are also superb. Earthwalk Press’s maps are worth looking out for, too; I found the 1:48,000 map covering part of the Grand Canyon very good. For the northeast Appalachians, Map Adventures’ waterproof topo map of the White Mountains of New Hampshire and Maine is excellent as are the Appalachian Mountain Club’s maps.
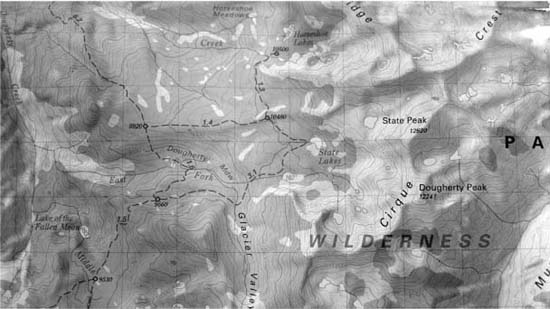
Tom Harrison Trail Map with trails clearly marked, along with distances. Maps like this are excellent for trail hiking but are available only for popular areas.
A selection of hiking maps.
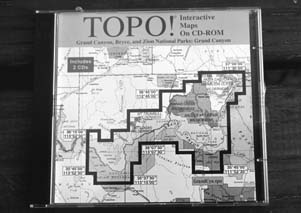
A Topo! interactive map CD-ROM. Maps on CD-ROMs are good for route planning. You can print out individual sections for specific trips.
Maps based on USGS quads are now available on compact disc or can be downloaded from the Internet, from companies like National Geographic Topo!, Topo USA, and TopoZone. You can draw routes on the map and calculate distances and ascents, then print out the results so you have a complete route plan or even download them to some GPS units. Maps can be printed too, though with an A4 printer you’ll need several sheets to cover much of an area. You can get waterproof tear-resistant paper such as National Geographic’s Adventure Paper for this. Maps can be bought at outdoor stores, bookstores, agency offices, and direct from the publishers. Web sites such as Map Link, Fresh Tracks, and the USGS are very useful. (See Appendix 3.)
For general planning, the state atlases and gazetteers published by DeLorme are useful. The maps are topographic (mostly 1:250,000 or 1:300,000, though national parks may be shown at 1:70,000). They also give a great deal of other information. I’ve used the Arizona and Utah atlases for planning a thousand-mile walk in the Southwest canyons. I haven’t done the walk yet, but the planning has been fun!
Many topographic maps have a grid superimposed on them; each line in the grid may be numbered. If it is, you can record the grid reference for precise location. Also, counting the number of squares a route crosses is a quick way to estimate the distance.
To work out distances on maps without grids, a map measurer is useful. You set this calibrated wheel to the scale of the map and run it along your route. You can then read the distance off a scale on the device. It weighs only a fraction of an ounce, but I’ve never carried one. You could draw a grid on a map, but I’ve never done this, either. Laying a piece of string along the route and measuring it is another way of determining distance.
While large-scale topographic maps are the best for accurate navigation, other maps offer information useful to the walker. Land-management agencies, such as the National Park Service, often issue their own maps showing trails and wilderness facilities. These maps are more up to date than the topographic maps for the same area. Forest Service and Bureau of Land Management planimetric maps (usually half an inch to the mile) often show roads and trails that don’t appear on topo maps. These planimetric maps don’t have contour lines, so they don’t tell you how much ascent and descent there is over a particular distance. (The 1:600,000 map I used in the northern Canadian Rockies was planimetric; I worked out when I would be going uphill and downhill by studying the drainage patterns of streams, but I had no way of knowing whether I was headed for a 300- or a 3,000-foot climb.) Some planimetric maps are shaded to show where the higher ground lies, but this gives only a rough idea of what to expect.
Maps normally have the date of publication listed with the key, along with the dates of any revisions. Remote areas are rarely remapped, and you may find that some maps are decades old. Obviously, the older the map, the less accurate the information may be, especially with regard to man-made features like roads. The maps I used in the northern Yukon in the 1990s didn’t show the Dempster Highway, built in the 1960s and 1970s. I added it myself from highway maps, which are updated regularly. On one section of the Arizona Trail, which I hiked in 2000, the USGS map I used had last been field-checked thirty-six years earlier in 1964. Features can disappear as well, of course, and trails on maps may be hard or impossible to follow if they haven’t been maintained. It’s wise to consult current guidebooks and ranger stations if you don’t want to risk a nasty surprise.
I am a firm believer in doing virtually all navigating with only a map. As long as you can see features around you and relate them to the map, you know where you are. The easiest way to do this is by setting, or orienting, the map, which involves turning it until the features you can see are in their correct positions relative to where you are. If you walk with the map set, it is easier to relate visible features to it.
Many people automatically use a compass for navigating, ignoring what they can see around them, yet even at night you can navigate solely with a map. Many years ago I did a night-navigation exercise on a mountain leadership-training course and was the only person to travel the route without relying on a compass. It was a clear night, and the distinctive peaks above the valley were easily identifiable on the map, while the location of streams showed me where I was on the valley floor. The others in the group navigated as though we were in total darkness, relying on compass bearings and pace counting. If you always depend on such methods, you cut yourself off from the world around you, substituting figures and measurements for a close understanding of the nature of the terrain. I don’t like my walking to be reduced to mathematical calculations.
When you’re following a trail, an occasional map check is enough to let you see how far along you are. When you’re going cross-country, however, study the map carefully, both beforehand and while on the move. Apart from working out a rough route, note features such as rivers, cliffs, lakes, and, in particular, contour lines. Be prepared not to always find what you expect, though. The lack of contour lines around a lake may mean you’ll find a nice flat, dry area for a camp when you arrive, or it may mean acres of marsh (as happened to me a few times in the Canadian Rockies). Close-grouped contour lines at the head of a valley may mean an impassable cliff or a steep but climbable slope. You have to accept that sometimes you’ll have to turn back and find another route, that sometimes you’ll have to walk twice as far as planned to reach your destination and it will take you twice as long. No map will tell you everything. Flexibility in adapting your plans to the terrain is important.
Always keep your map handy, even if the route seems easy or you’re on a clear trail. A garment pocket is the obvious storage place. Unless the maps are made of waterproof plastic, it’s essential to protect them from weather. Unfortunately, most map cases are bulky, awkward to fold, and hard to fit into a pocket or fanny pack. Those from Ortlieb (a fraction over 2 ounces) are quite flexible and very tough. Mine is a decade old. Plastic bags work well, but they don’t last long. An Aloksak bag would be a good, durable alternative. You can cover maps with special clear plastic film, and some hikers use waterproofing products, such as wipe-on Nikwax Map Proof, which I’m told are effective. I don’t bother with waterproofing maps. Although some of mine look disreputable, I’ve never had one disintegrate.
Those who wander widely may be interested in World Mapping Today, by R. B. Parry and C. R. Perkins, which describes maps available for each country.
Although I prefer to navigate with just a map, I always carry a compass. For trail travel I hardly need it, except perhaps when at an unsigned junction in thick mist or dense forest. For cross-country walking, though, a compass may prove essential, especially when visibility is poor.
The standard compass for backpacking is the orienteering type, with a liquid-damped needle and a transparent plastic baseplate. Silva is the best-known brand; Suunto and Brunton are others. Corporate changes have led to some confusion, however. Johnson Outdoors holds the rights to the brand name Silva in the United States and used to distribute the Swedish-made Silva compasses. In 1996 Silva bought Brunton and ended its link with Johnson, but Johnson still had the rights to the name Silva. This has led to the strange situation where the original Swedish Silva compasses are sold in the United States and Canada under the Brunton label (though as Silva elsewhere in the world), while compasses sold under the name Silva by Johnson Outdoors are now made in Finland by Silva’s big rival Suunto. So there are three brands but only two makers. Luckily both make top-quality compasses.
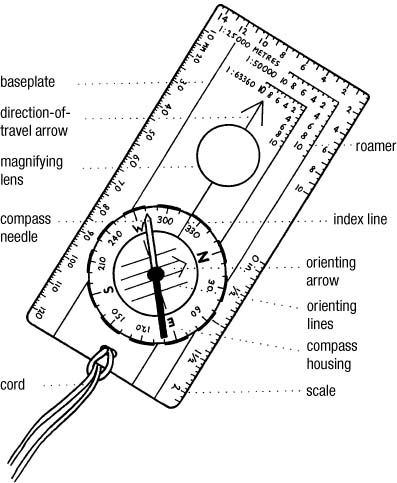
The main features of an orienteering compass, including a magnifying lens. The compass housing is a rotating ring, also known as the azimuth.
I mostly use the smallest, lightest model—the Brunton 7DNL Star (Silva Field 7 outside North America), which weighs 0.8 ounce. This is just 0.2 ounce lighter than the Silva Type 3 I used to use. But that’s still a 20 percent weight saving. For backpacking, models with sighting mirrors and other refinements are unnecessary.
The heart of the compass is the magnetic needle, which is housed in a rotating fluid-filled, transparent, circular mount marked with north, south, east, and west, plus degrees. The base of the dial is marked with an orienting arrow, fixed toward north on the dial, and a series of parallel lines. The rest of the compass consists of the baseplate, with a large direction-of-travel arrow, roamers for taking grid references, and a set of scales for measuring distances on a map. Some baseplates also have a small magnifying glass built in to help you read map detail.
A compass helps you walk toward your destination, even if you can’t see it, without reference to the surrounding terrain. Without a compass, you might veer away from the correct line. The direction you walk is called a bearing. Bearings are given as degrees, or the angle between north and your direction, reading clockwise. To set a bearing, you use the compass baseplate as a protractor. Point the direction-of-travel arrow toward your destination, then turn the compass housing until the red end of the magnetic needle aligns with the orienting arrow. As long as you keep these two arrows pointing to the north and follow the direction-of-travel arrow, you’ll reach your destination, even if it’s hidden. However, you can rarely take a bearing on something several hours away and walk straight to it (although it’s possible in desert and wide-open tundra). It’s better to locate a visible, stationary feature (a checkpoint) that lies along your line of travel, such as a boulder or a tree, and walk to that. You may have to leave your bearing to circumvent an obstruction, such as a bog or a cliff, but that’s all right as long as you keep the chosen feature in sight. Once you reach a checkpoint, you can check your bearing and find another object to head for.
In poor visibility, solo walkers may have to walk on their bearings by holding the compass and literally following the arrow. Two or more walkers can send one person ahead to the limit of visibility. The scout stops so another walker can check the position with the compass and direct the scout to move left or right until in line with the bearing. Then everyone else joins the scout and the process is repeated. It’s a slow but very accurate method of navigation, particularly useful in whiteout conditions. I’ve used it many times when skiing.
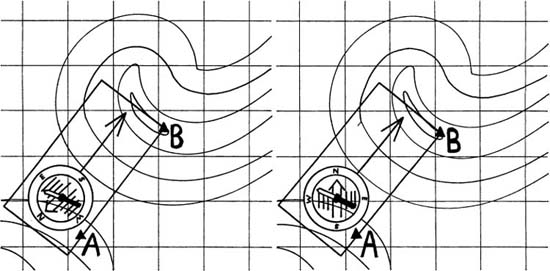
Taking a compass bearing from a map. Align the compass with your objective on the map (left), then rotate the housing to line up the orienting arrow with the north-south grid lines (right).
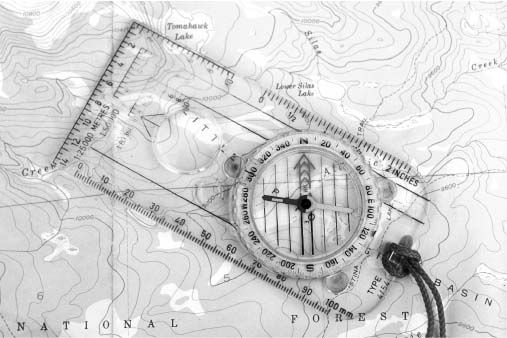
Taking a map bearing with an orienteering compass from the trail to Tomahawk Lake. Place an edge of the baseplate on the point on the trail at your location and line up the edge with Tomahawk Lake. Rotate the compass housing until the orienting arrow is aligned with north on the map. Remove the compass from the map and turn it—without rotating the housing—until the magnetic needle and orienting arrow are aligned. The direction-of-travel arrow now points to Tomahawk Lake.
If you know where you are but not which way you need to go to reach your destination, then you need to take a bearing off the map. To do this, place an edge of the baseplate on the spot where you are, then line up the edge with your destination. Rotate the compass housing until the orienting arrow is aligned with north on the map. Remove the compass from the map and turn it, without rotating the housing, until the magnetic needle and orienting arrow are aligned. The direction-of-travel arrow now points in the direction you want to go. The number on the compass housing at this point is your bearing.
This process is straightforward, but you must account for magnetic variation. Most topographic maps have three arrows somewhere in the margin showing three norths. Grid north can be ignored for compass navigation (though not for GPS navigation—see UTM sidebar, pages 368–70); the other two are very important. One is magnetic north, the direction the compass needle points. The other is true north. The top of the map is always true north, so if your map has no grid marked on it, you can use the margins. Because compasses point to magnetic north and maps are aligned to true north, the difference between them should be taken into account when using the two in conjunction. This angle is measured in degrees and minutes (60 minutes equal 1 degree) and is called the magnetic variation or declination.
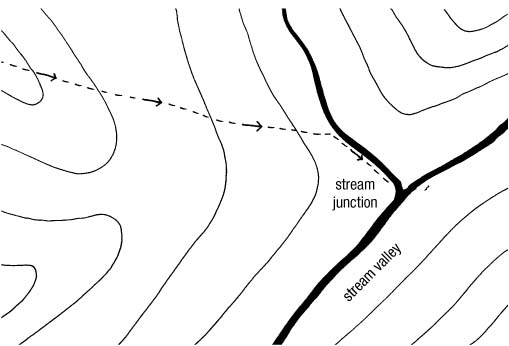
Aiming off.
Since magnetic north lies in the Far North of Canada, true north can be either east or west of magnetic north. In parts of Michigan, Indiana, Ohio, Kentucky, Tennessee, and North and South Carolina, however, magnetic north and true north coincide. In areas of North America to the east of those states, true north is west of magnetic north, but to the west of them, true north is east of magnetic north. The declination is usually marked on topo maps. For example, the Tom Harrison Trail Map for the Mono Divide High Country in California gives the declination in 2002 as 14.5 degrees east, while the Appalachian Mountain Club map of the Presidential Range in New Hampshire gives the declination in 2003 as 17 degrees west. Just to confuse matters further, magnetic north isn’t stationary but moves in a (luckily) predictable pattern. The declination on an old map will not reflect the current position of magnetic north. Some maps list the rate of change so you can work out the current figure. If your map isn’t new and doesn’t show the rate of change, you may be able to find it in a trail guide. You also can calculate the magnetic variation yourself by taking a bearing from one known feature to another, recording the bearing (without taking any declination into account) and then taking the same bearing from the map. The difference between the two is the current declination. If you stick a piece of tape on the compass as a declination mark, you won’t have to recompute it every time you use the compass. You will have to remember to move it if you visit different areas, though. Some compasses come with adjustable declination marks.
In the eastern United States, because magnetic north lies west of true north, when you take a bearing from the map you add the declination figure. However, if your bearing is taken from the ground and transferred to the map (not something you’re likely to do often), you subtract the declination. A mnemonic for remembering this is “empty sea, add water”—MTC (map to compass), add. Of course, in western states the opposite applies; you subtract declination when taking a bearing from the map and add it when taking one from the ground.
There’s always an element of error in any compass work. If your bearing is 5 degrees off, then you’ll be 335 feet off the correct line of travel after walking 0.6 mile, 650 feet after 1.2 miles, and more than half a mile after 6.2 miles. This makes it difficult to find a precise spot that lies some distance from your starting point unless you can take a bearing on some intermediate feature. One of the few compass techniques I use, other than straightforward bearings, is aiming off, which is especially handy in poor visibility. If your destination lies on or near an easy-to-find line such as a stream, you can make a deliberate error and aim to hit a line on one side or the other of your destination. When you reach the line, you know which way to turn to reach your destination. I used aiming off on a large scale in the Canadian Rockies. I knew that hundreds of miles somewhere to the northwest was the little town of Tumbler Ridge, which I wanted to reach, and that a road ran roughly east-west to the town. By heading north rather than northwest, I knew I’d hit the road east of Tumbler Ridge, and after a week’s walking I did—and found myself 46 miles away. But I knew where the town was, and, more important, where I was.
The compass has other, more complex uses; you’ll find instructions for them in good navigation books. Don’t rely on your compass blindly, though. There are areas high in iron ore where a compass won’t work.
Keep your compass where you can reach it easily; otherwise you might be tempted to skip checking it when you’re unsure of your direction. As I’ve learned, this can mean retracing your steps a considerable distance. Like most people, I have a loop of cord attached to my compass (most come with small holes in the baseplate for this purpose), though I don’t often hang it around my neck. I may tie the loop to a zipper pull on a garment pocket so that I don’t lose the compass and can refer to it quickly whenever I want to.
GPS (global positioning system) is a government-operated system that consists of twenty-eight satellites 12,000 miles up, four of them used for backup. Each satellite orbits earth twice a day and sends out a continuous signal, giving its position and the time. By locking onto a minimum of four satellites, a GPS receiver on the ground can triangulate its position. An accurate fix may not be obtainable if the satellites aren’t in the right alignment, however. Also, there must be a line of sight between the receiver and the satellites; it can be impossible to get a fix in dense forest or below steep cliffs.
Using electronic gadgets like GPS in the wilderness is frowned on by some. Whatever you think about the place of electronics in the wilds, one thing is clear: they won’t go away. Indeed, their use will increase as more devices designed for wilderness use are developed. It is futile to debate whether the wilds are an appropriate place for such technology. The point is to look at electronic devices exactly as we would any other new gear: to consider what purpose they serve and just how useful they are. After all, they’re only tools, like packs or stoves.
I’ve tried a number of GPS units, but this is an area of rapid development, so before buying a unit I’d recommend getting up-to-date expert advice. GPSinformation.net is the Web site for such information.
For several reasons, GPS should not be considered a substitute for a map and compass (and the skills to use them) but rather as complementary. On a few occasions I’ve been unable to confirm my position with GPS because the receiver wouldn’t give a reading; each time I was very glad I’d been checking my progress on the map.
Once a receiver has a fix, it will show the position on its screen. This can be in latitude or longitude or UTM (Universal Transverse Mercator), the grid used on USGS topo maps. To translate this reading onto the map, you must be able to plot grid references accurately (see sidebar). All receivers can be set to give positions for the maps of different countries. These are known as map datums. It is very important to set the correct map datum, as an incorrect one will result in an inaccurate reading. The most common map datums for North America are North American Datum 1927 (NAD 27) and World Geodetic System 1984 (WGS 84).
Anyone comfortable with computers should have no problem with GPS. Technophobes and those who have trouble programming a video recorder might find GPS receivers difficult. Studying the manuals carefully (which takes several hours) and practicing with the receiver at home are essential if you are to make full use of a unit in the field.
GPS receivers have multiple functions. In addition to showing your position, they tell you the approximate altitude, and they can be programmed to guide you to a specific destination by a series of legs—they can store from dozens to hundreds of locations, called waypoints—or take you back to your starting point. They can tell you how far you have to go to reach your goal, which direction to go, how fast you’re traveling, how long it will take you to get there, and the estimated time of arrival. If you stray from the route they’ll warn you of that, too.
Using all these functions requires power, and that means batteries. Most receivers run off AA batteries, some off AAA; and though figures for battery life are impressive (twenty hours and more), these are usually for temperatures of about 70°F (21°C). In colder temperatures (I’ve used receivers at 0°F [−18°C]) battery life is much shorter, even when the receiver is kept warm inside your clothes and you use lithium batteries. Carrying spares is advisable.
The most common use of GPS is to guide you toward a destination. To do this you first enter the grid references of the destination and waypoints en route into the receiver’s memory (most easily done by downloading them from a computer mapping program), then follow the direction indicators on the screen to each point or transfer the bearings given to your compass. Of course, the receiver can direct you only in straight lines, though most will indicate how far off your line of travel you are.
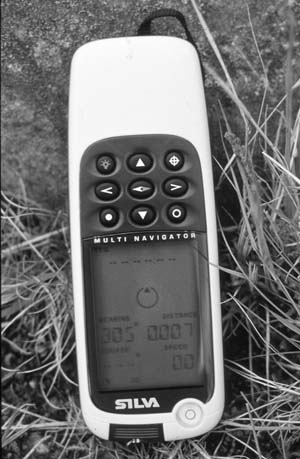
A GPS receiver. Brunton/Silva Multi-Navigator.
Using GPS like this means walking with the receiver in your hand and consulting it regularly. I tried this on a cross-country walk in viewless forest, and it worked well. However, I don’t go for walks in order to stare at a screen; I do enough of that when I’m writing. There are times and places—when I was unsure of my whereabouts for nearly a week in the Canadian Rockies, for example, or in a whiteout in winter anywhere—when I could see the usefulness of following a preset course. But for most walking it’s unnecessary and a waste of batteries. I think GPS is better used as a means of checking your position when it’s important you know exactly where you are. I’ve used it for this in trackless, snow-covered terrain in poor visibility and felt reassured when the receiver confirmed that I was where I thought I was. For this a simple tiny, lightweight receiver is adequate, like one of the 3-ounce Garmin Gekos.
The GPS receivers I’ve tried perform well once you master the necessary procedures and the technical jargon of the instructions. Besides Brunton and Garmin, good units are made by Magellan and Trimble.
Wrist altimeter-watches have become popular in recent years, mainly owing to Suunto and Casio, which make large ranges. For Alpine and Himalayan mountaineers altimeters are important navigational aids. For backpackers, a map and compass have always been adequate. Initially I was dubious about the usefulness of altimeters for backpacking (and I still don’t think they’re essential), but after using one for over a decade, I now find one very helpful, especially for cross-country travel.
On an ascent, knowing the height and the time means you can monitor progress and work out how long it will take to reach the top. If you know the height at which you need to leave a ridge or start an ascent from a wooded valley, an altimeter will tell you when you reach that point. During a long traverse on steep, difficult terrain during a ski tour in the High Sierra, I could see from the map that the only safe descent to the valley was through a tiny notch that led into a wide, shallow gully. By using the altimeter I was able to ski through trees in growing darkness directly into the notch. It would have been much harder to find by map and compass alone.
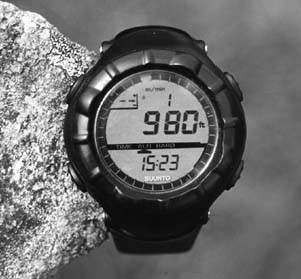
A wrist altimeter for navigation. The Suunto Altimax.
Altimeters are barometers—they work by translating changes in air pressure into vertical height. To maintain accuracy, they must be reset at known heights. Temperature changes can cause inaccurate altimeter readings. The best altimeters are temperature compensated, but the least expensive ones usually aren’t. The best way to minimize inaccuracies is to avoid temperature variations by keeping the altimeter at the same temperature as the outside air. For quick reference, you can wear a wrist altimeter on the outside of your jacket.
The altimeter I currently use is the temperature-compensated Suunto Altimax, which will measure the altitude from −500 to over 9,000 feet at a resolution of 10 feet. I wear it on my wrist, though of course the temperature reading isn’t accurate if it’s worn this way. The Altimax will record the ascent during a trip and the time taken, useful data for future trip planning, and tell you the rate at which you’re ascending or descending, which can be useful in timing your progress. Because it’s also my watch, I wear the Altimax even when I carry the SAK Altimeter knife, which simply gives the height with no other data. And because the SAK Altimeter is also my knife I carry that when I also carry the Sherpa Atmospheric Data Center to measure wind speed, which includes a barometer/altimeter. This means I’m sometimes carrying three altimeters! I’ve compared them at times and found that they rarely disagree by more than 20 feet.
There are many ways to navigate without a map or compass, but I habitually use only two—the sun and the wind, and then only as backups. Knowing where they should be in relation to my route means I’m quick to notice if their position has shifted. If I’ve veered off my intended line of travel—easy to do in rolling grassland or continuous forest—I stop and check my location. I also check that the wind hasn’t shifted and see what the time is so that I know where the sun should be.
There are many helpful books for those who want to learn more about navigational techniques. The classic is Be Expert with Map and Compass by Björn Kjellström; a good modern one is David Seidman’s Essential Wilderness Navigator. To learn more than these books can teach, you’ll need to take a course at an outdoor center or join an orienteering club.
Paint splashes, piles of stones (called cairns, or ducks), blazes on trees, posts, and other devices mark trails and routes throughout the world. (In Norway, wilderness ski routes are marked out with lines of birch sticks.) These waymarks, combined with signposts at trail junctions, make finding many routes easy, but I have mixed feelings about them—part of me dislikes them intensely as unnecessary intrusions into the wilderness; another part of me follows them gladly when they loom up on a misty day. But waymarking of routes doesn’t mean you can do without map and compass or the skills to use them. Useful though it is, I would not like to see waymarking increase. I’d rather find my own way through the wilderness, and I don’t build cairns or cut blazes, let alone paint rocks. In fact, I often knock down cairns that have appeared where there were none before, knowing that if they are left, a trail will soon follow. Painting waymarks in hitherto unspoiled terrain is vandalism. On a weeklong hike in the Western Highlands of Scotland, I was horrified to discover a series of large red paint splashes daubed on boulders all the way down a 3,300-foot mountain spur that is narrow enough for the way to be clear. There wasn’t even a trail on this ridge before. Now it has been defiled with paint that leaps out from the subtle colors of heather, mist, and lichen-covered rock. May the culprit wander forever lost in a howling Highland wind, never able to locate a single spot of paint!
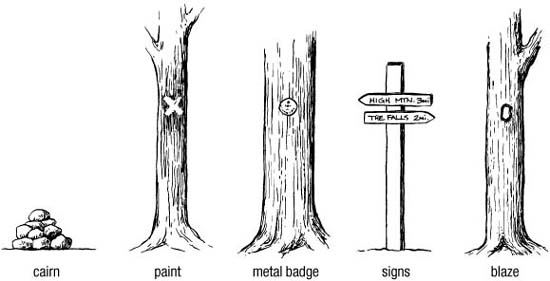
Trail markers. Know what they mean, but please refrain from making your own—you might confuse future hikers.
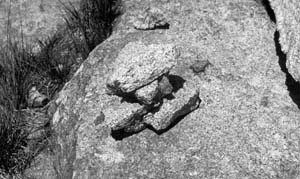
A cairn or duck marks the line of a trail.
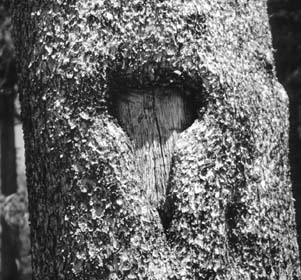
Tree blazes also show the line of a trail.
There are two kinds of wilderness guidebooks: area guides and trail guides. The first give a general overview, providing information on possible routes, weather, seasons, hazards, natural history, and so on. Often lavishly illustrated, they are usually far too heavy to carry in your pack. I find such books interesting when I return from an area and want to find out more about some of the places I’ve visited and things I’ve seen. They’re also nice to daydream over.
Trail guides are designed as adjuncts to maps. Indeed, some of them include the topographic maps you need for a specific location. If you want to follow a trail precisely, they’re very useful, though your sense of discovery is diminished when you know in advance about everything you’ll see along the way. Some cover only specific trails; others are miniature area guides, with route suggestions and general information. Most popular destinations or routes have a trail guide, and many have several. Since trail guides frequently contain up-to-date information not found on maps, I often carry one, especially if I’m visiting an area for the first time.
There are a vast number of guidebooks. Good trail guides include the 100 Hikes series from Mountaineers (mountaineersbooks.com); the 50 Hikes series from Countryman (countrymanpress.com); the Sierra Nevada guides from Wilderness Press (wildernesspress.com); the Sierra Club’s guides (sierraclub.org/books), which cover areas from the Smoky Mountains to the Grand Canyon; and the hiking guides from Falcon (now part of Globe Pequot, globepequot.com), which cover a selection of states and wild areas. The Appalachian Mountain Club’s White Mountain Guide, now in its twenty-seventh edition, is a classic for this region. Lonely Planet (lonelyplanet.com) has an increasing number of good hiking guides, including excellent ones to the High Sierra and Yellowstone and Grand Teton National Parks, as well as a good overseas travel guide series. Bradt (bradttravelguides.com) publishes a series of invaluable trekking guides to remote places, from South America to Spitsbergen.
The big three long-distance trails all have detailed guidebooks. Those on the Appalachian Trail are published by the Appalachian Trail Conference, those on the Continental Divide Trail by the Continental Divide Trail Society, those on the Pacific Crest Trail by Wilderness Press, which also publishes a guide to the John Muir Trail. There are also a couple of very useful annual guides to the AT: Dan “Wingfoot” Bruce’s The Thru-Hiker’s Handbook and the Appalachian Trail Long Distance Hikers Association’s Appalachian Trail Thru-Hikers’ Companion. (See Appendix 2.)
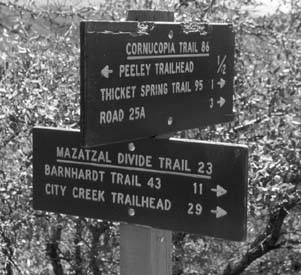
Trail sign at a junction with distances to trailheads and other trails. Mazatzal Mountains, Arizona.
What constitutes being lost is a moot point. Some people feel lost if they don’t know to the yard exactly where they are, even if they know which side of which mountain they’re on, or which valley they’re in. It’s possible to “lose” a trail you’re following, but that doesn’t mean you’re lost.
I think it’s very hard to become totally lost when traveling on foot; I’ve never managed it. I was “unsure of my whereabouts” during the week I spent in thick forest in the foothills of the Canadian Rockies, but I knew my general position, and I knew which direction to walk to get to where I wanted to go. Although I couldn’t pinpoint my position on a map (indeed, I couldn’t locate myself to within twenty-five miles in any direction, and I’ve never been able to retrace my route on a map), I wasn’t lost, because I didn’t allow myself to think I was. Being lost is a state of mind.
The state of mind to avoid is panic. Terrified hikers have been known to abandon their packs in order to run in search of a place they recognize, only to die from a fall or of hypothermia. As long as you have your pack, you have food and shelter and can survive, so you needn’t worry. I’ve spent many nights out when I didn’t know precisely where I was. But I had the equipment to survive comfortably, so it didn’t matter. A camp in the wilderness is a camp in the wilderness, whether it’s at a well-used, well-posted site or on the banks of a river you can’t identify.
The first thing to do if you suspect you’re off course is to stop and think. Where might you have gone wrong? Check the map. Then, if you think you can, try to retrace your steps to a point you recognize or can identify. If you don’t think you can do that, use the map to figure out how to get from where you are (you always know the area you’re in, even if it’s a huge area) to where you want to be. It may be easiest to head directly for a major destination, such as a road or town, as I did in the foothills of the Canadian Rockies, rather than trying to find trails or smaller features. Often it’s a matter of heading in the right direction, knowing that eventually you’ll reach somewhere you want to be.
I don’t mind not knowing exactly where I am—sometimes I enjoy it. There’s a sense of freedom in not being able to predict what lies over the next ridge, where the next lake is, and where the next valley leads. I enjoy the release of wandering through what is, from my perspective, uncharted territory. I never intend to lose myself, but when it happens I view it as an opportunity rather than a problem.
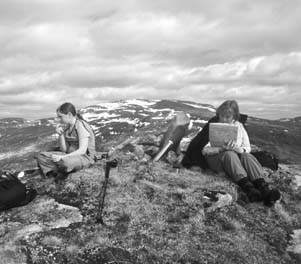
Checking the map on a high point with a good view of the surrounding terrain.
As long as you stick to good, regularly used trails, you should have no problems with terrain except for the occasional badly eroded section. Don’t assume that because a trail is marked boldly on a map it will be clear and well maintained. Sometimes the trail won’t be visible at all; other times it may start off clearly, then fade away, becoming harder to follow the deeper into the wilderness you go. Trail guides and ranger stations are the best places to find out about specific trail conditions, but even their information can be inaccurate.
Many people never leave well-marked trails, feeling that cross-country travel is simply too difficult and too slow. They’re missing a great deal. Going cross-country differs from trail walking and requires a different approach. The joys of off-trail travel lie in the contact it gives you with the country you pass through. The 15-to-20-inch dirt strip that constitutes a trail holds the raw, untouched wilderness a little at bay. Once you step off it, the difficulties you will encounter should be accepted as belonging to that experience. You can’t expect to cover the same distance you would on a trail or to always find a campsite before dark. Uncertainty is one of the joys of off-trail travel, part of the escape from straight lines and the prison of the known.
Learning the nature of the country you’re in is very important. Once you’ve spent a little time in an area—maybe no more than a few hours—you should be able to start interpreting the terrain and modifying your plans accordingly. In the northern Canadian Rockies, I learned that black spruce forest meant muskeg swamps so difficult to cross that it was worth a detour of any length to avoid them; if the map showed a narrow valley, I knew it would be swampy, so I would climb the hillside and contour above the swamps; if it showed a wide valley, I would head for the creek because there probably would be shingle banks I could walk on by the forest edge. It’s useful to be able to survey the land ahead from a hillside or ridge—for which binoculars are well worth their weight—and I often plan the next few hours’ route from a hilltop.
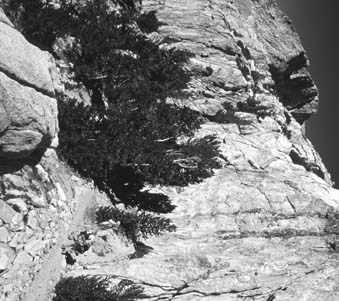
A well-constructed mountain trail. The John Muir Trail below Selden Pass. Note the rocks lining the trail to keep it in place and the smooth tread.
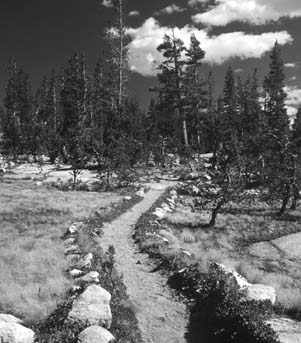
A trail through a meadow edged with stones.
A sketchy trail above timberline. Glacier Peak Wilderness, North Cascades. Keep an eye on the map in areas where trails vanish.
Compared with walking on trails, cross-country travel is real exploration, both of the world around and of yourself. To appreciate it fully you need to be open to whatever may happen. Distances and time matter far less once you’ve shrugged off the trail network. What matters is being there.
Steep slopes can be unnerving, especially on descents. If you’re not comfortable going straight down and there’s no trail, take a switchback route across the slopes. Look for small flatter areas where you can rest and work out the next leg of the descent. Making a careful survey of the slope before you start down is always wise. Work out routes between small cliffs and drop-offs.
Slopes of stones and boulders, known as talus, occur on mountainsides the world over, usually between timberline and the cliffs above. Trails across them are usually cleared and flattened, though you may still find the going tricky. Balance is the key to crossing rough terrain, and trekking poles are a great help, though you need to be sure they don’t get caught between two rocks. Cross large boulder fields slowly and carefully, testing each step and trying not to slip. Unstable boulders, which may move as you put your weight on them, can easily tip you over. The key to good balance is to keep your weight over your feet, which means not leaning back when descending and not leaning into the slope when traversing.
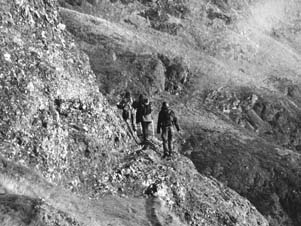
Watch your footing on narrow trails on steep, rocky mountainsides like this one in the Ochil Hills, Scotland.
You may go crazy trying not to slip on the smallest stones, known as scree, though, so you just have to let your feet slide. Some people like to run down scree—a fast way to descend—but the practice damages scree slopes so quickly that it should no longer be indulged—too much scree running turns slopes into slippery, dangerous ribbons of dirt embedded with rocks. Be very careful if you can’t see the bottom of a scree slope—it may end at the edge of a cliff. Because climbing, descending, or crossing a scree slope without dislodging stones is impossible, a group should move at an angle or in an arrowhead formation so that no one is directly under anyone else. Because other groups may be crossing below you, if a stone does start rolling you should shout a warning—“Rock!” is the standard call. If you hear this, do not look up, even though you’ll be tempted to. Instead, cover your head with your pack or your hands.
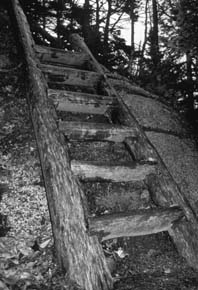
A ladder takes a trail over a rock slab in the White Mountains, New Hampshire.

A line of rocks marking where a trail crosses a large rock slab.
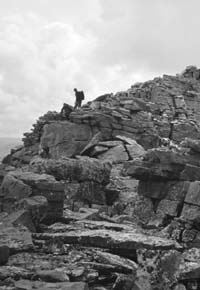
When descending a steep, rocky ridge—like this one on King’s Peak, Uinta Mountains, Utah—take short steps and watch for loose rocks.
Traversing steep, trailless slopes is tiring and puts great strain on the feet, ankles, and hips. It’s preferable to climb to a ridge or flat terrace, or descend to a valley, rather than to traverse a slope for any distance. You may think that traversing around minor summits and bumps on mountain-ridge walks will require less effort than going up or down, but in my experience it won’t. (Still, I’m frequently drawn to traversing. Heed my words, not my practice!)
In general, treat steep slopes with caution. If you feel uncomfortable with the angle or the ground under your feet, retreat and find a safer way. Backpacking isn’t rock climbing, though it’s surprising what you can get up and down with a heavy pack if you have a good head for heights and a little skill. Don’t climb what you can’t descend unless you can see that your way is clear beyond the obstacle. And remember that you can use a length of cord to pull up or lower your pack if necessary.
However, it’s unwise to drop packs down a slope; they may go farther than you intend. Bad route finding once left two of us at the top of a steep, loose, and broken limestone cliff in Glacier National Park in Montana; foolishly, we decided to descend rather than turn back, and it took us several hours of heart-stopping scrambling to reach the base. At one point my companion decided he could safely lower his pack to the next ledge, even though he would have to drop it the last few feet. The pack bounced off that ledge and a few more before being halted by a tree two hundred feet or so below. Amazingly, nothing broke—not even the skis strapped to the pack. If we’d lost the pack or the contents had been destroyed, we would have had serious problems.
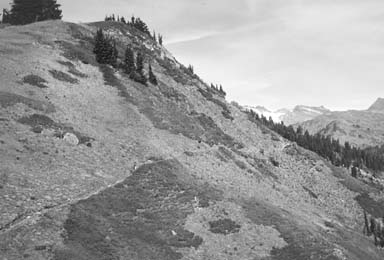
A narrow trail on a steep, vegetated mountainside. Glacier Peak Wilderness, North Cascades.

“Postholing” through deep snow is slow, hard work. This hiker should be using the trekking pole strapped to her pack for balance and support.
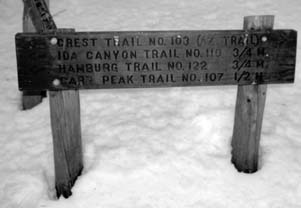
The trail may be buried in snow, but trail signs can still point the way.
Much of what I just said about traversing rock slopes applies to crossing snow. However, you may come upon small but steep and icy snow-fields in summer when you aren’t carrying an ice ax or crampons. Having a staff or trekking poles makes it easier to balance across snow on small holds kicked with the edge of your boots, though you shouldn’t attempt this if there is dangerous ground below the snow slope, since you can’t stop a slide with a staff. Without a support, take great care and, if possible, look for a way around a snow slope, even if it involves descending or climbing.
“Bushwhacking” is the apt word for thrashing through thick brush and scrambling over fallen trees while thorny bushes tear at your clothes and pack. It’s the hardest form of “walking” I know, and it’s to be avoided whenever possible—though sometimes you have no choice.
Bushwhacking takes a long time and a lot of energy, with very little distance to show for it; half a mile per hour can be good progress. Climbing high above dense vegetation and wading up rivers are both preferable to prolonged bushwhacking. But if you like to strike out across country, bushwhacking eventually will be essential.
Bushwhacking can be necessary even during ski tours. On one occasion in the Algäu Alps, four of us descended from a high pass into a valley. The snow wasn’t deep enough to fully cover the dense willow scrub that spread over the lower slopes and rose a yard or two high. Luckily the scrub didn’t spread very far, but skiing through it was a desperate struggle, since the springy branches constantly knocked us over and caught at our poles and bindings.
Unmaintained trails can quickly become overgrown, too. I made the mistake of wearing shorts while descending one in the Grand Canyon; the upper part of the trail ran through dense thickets of thorny bushes and small trees, and my legs were soon bloody. It was quite a relief to reach the desert farther down, where at least the cacti and yuccas were widely spaced.
A trail is a scar on the landscape, albeit a minor one. But where there is a trail, walk on it. Cross-country travel is for areas where there are no trails. Don’t parallel a trail in order to experience off-trail walking. Most damage is caused when walkers walk along the edges or just off a trail, widening it and destroying the vegetation alongside. Always stick to the trail, even if it means walking in mud.
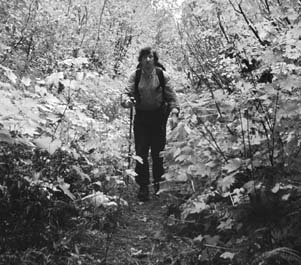
A slightly overgrown forest trail. Glacier Peak Wilderness.
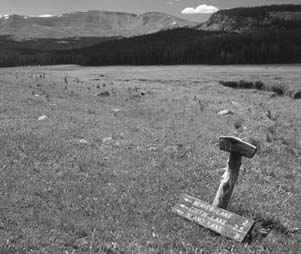
An old trail sign points the way through a trailless meadow. Here it’s best to try to follow the line of the original trail.
On slopes, you should always use the switchbacks. Too many hillsides have been badly damaged by people shortcutting switchbacks, creating new, steeper routes that quickly become water channels. In meadows and alpine terrain, where it’s easy to walk anywhere, multiple trails often appear where people have walked several abreast. In such terrain, you should follow the main trail, if you can figure out which it is, and walk single file. When snow blocks part of a trail, try to follow the line where the trail would be; don’t create a new trail by walking around the edge of a snow patch unless you need to do so for safety.
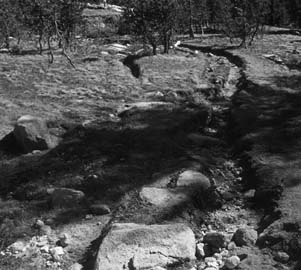
A trail in need of restoration and relocation. Note the multiple channels, eroded ground, and damage to the meadow.
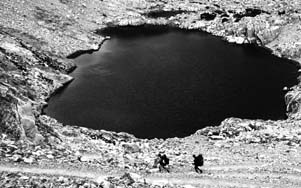
A steep switchbacking trail, High Sierra.
When you walk cross-country, your aim must be to leave no sign of your passing—that means no marking with blazes, cairns, or subtle signs like broken twigs unless they’re removed later. It also means avoiding fragile surfaces where possible, walking around damp meadows, and staying off soft vegetation. Rock, snow, and nonvegetated surfaces suffer the least damage; gravel banks of rivers and streams are regularly washed clean by floods and snowmelt, so walking on them causes no harm.
It would take a skilled tracker to follow a good solo walker’s cross-country route. Groups have a more difficult time leaving no sign of their passage. The answer is to keep groups small and to spread out, taking care not to step in each other’s boot prints. As few as four sets of boots can leave the beginnings of a trail that others may follow in fragile meadows and tundra. Where these new trails have started to appear, walk well away from them so you don’t help in their creation. The aim should be to use obvious trails but not make new ones or expand signs of faint ones.
In many areas, land-management agencies maintain and repair trails, often using controversial methods. However, wide, eroded scars made by thousands of boots (and sometimes hooves) hardly create a feeling of wilderness either. Unfortunately, some popular trails may be saved only by employing drastic regulations. Walkers can help by following trail-management instructions, staying off closed sections, and accepting artificial surfaces as necessary in places.
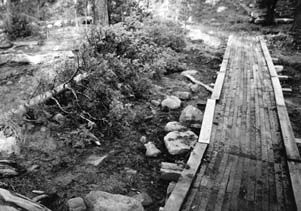
A boardwalk built to allow ground damaged by too many hooves and boots to recover.
Boardwalks to protect soft, wet ground on a trail in the White Mountains, New Hampshire.
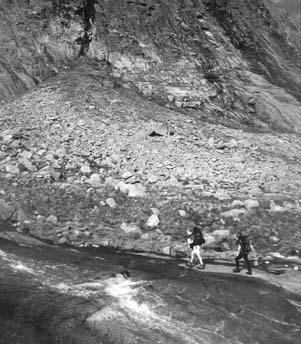
Hiking along the smooth slabs beside a creek when going cross-country in rocky mountain terrain.
Generally, when walking cross-country you should always consider your impact on the terrain and pick the route that will cause least damage.
Most outdoor hazards are caused by the weather. Wind, rain, snow, thunderstorms, freezing temperatures, thaws, and heat waves all introduce difficulties or dangers. Coping with weather is the reason backpackers need tents, sleeping bags, and other equipment.
With a little knowledge you can often predict the weather at least a few hours ahead, though you can’t compete with expert meteorologists using satellite images and computers. For any given trip, knowing in general what weather to expect should be part of your trip planning. Area guides, local information offices, and ranger stations are the places to get details of regional weather patterns. For a specific day, check Internet, radio, television, and newspaper forecasts if you can; park and forest service ranger stations often post daily weather forecasts. If you don’t see one, inquire. If you monitor forecasts for an area you visit regularly, you’ll soon be able to develop an annual weather overview. If you’re going to an unfamiliar area, checking weather patterns for some time in advance can give you an idea of what to expect. Before I hiked the Arizona Trail I followed Web weather reports for several months so I knew that it had been dry even by Arizona standards. I also knew that the first real storm for months was due about the time I reached Arizona, so I wasn’t too surprised (though delighted) to land in Phoenix in pouring rain.
Even the most detailed recent forecast can be wrong. Regional patterns can mean rain in one valley and sun in another just over the hill. Mountains are particularly notorious for creating their own weather. Weather has less impact on travel over low-level and below-timberline routes—if it rains, you don rain gear; if it’s windy, you keep an eye out for falling trees.
High up, however, a strong wind can make walking impossible, and rain may turn to snow. On any mountain walk you should be prepared to descend early or take a lower route if the weather worsens. Struggling on into the teeth of a blizzard when you don’t have to is foolish and risky. It even may be necessary to sit out bad weather for a day or more. I’ve done so on a few occasions and have been surprised at how fast the time passes.
Observation is the key to short-term weather forecasting. Watch out for slight changes. Which way are the clouds moving? What type of clouds are they? Thickening clouds can mean rain, thinning ones sun. Fast-approaching clouds may mean a storm soon. What direction is the wind blowing? Has it shifted, and if so which way? How strong is it? Any big change in the direction or strength of the wind suggests a change in the weather. Knowing the air pressure can greatly increase the accuracy of your forecasts. If the pressure is rising, dry weather is likely; if it’s falling, wet weather is probably on the way. The faster the rate of change, the quicker the weather will change. All altimeters are barometers and so can be used for forecasting. They have to be kept at the same altitude, however, so camp is the best place to do this. I set the altitude when I reach camp, then note the barometer reading on my Suunto Altimax. Next morning I check the barometer again and look at the overnight pattern. It’s heartening to see that the pressure is rising after several days of bad weather. Unfortunately, the opposite also is true.
I also have an instrument called the Brunton (Silva outside of North America) Atmospheric Data Center (ADC) Pro. This measures altitude, barometric pressure, temperature, relative humidity, and wind speed, and keeps twenty-four hours of records. The wind speed is measured by a tiny wind vane that you hold into the wind to record the speed. It gives the current, average, and highest speeds. With it you can keep a record of the wind speed and also discover just what various wind speeds mean when hiking and when camping. I now know that wind speeds above 30 mph are uncomfortable to walk in, so if the forecast is for speeds above that I plan on sticking to sheltered ground. I also know that a gusty 20 mph wind can rattle most tents. The humidity and temperature readings are useful, too. (I now know there can be a huge difference in humidity between the floor and peak of a tent, showing that vents should be high up.) By recording data from the ADC I can build up a picture of the weather in areas I visit often and know what to expect at different times of year. Of course, notes can be used for the same purpose, but knowing that the average nighttime temperature was 25°F (−4°C) with a low of 20°F (−7°C) and the average wind speed was 35 mph with gusts to 45 tells me much more than notes that say “frosty” for each morning and “windy” or even “very windy” for each day. The ADC only weighs 2 ounces and runs off a 3-volt lithium battery. It’s easily carried in a shirt pocket.
An excellent book on weather in the backcountry is Weathering the Wilderness, by William E. Reifsnyder. It describes the weather you can expect in the Sierra, Cascades, Rockies, Appalachians, Olympics, and the Great Lakes Basin at different times of year and includes tables covering temperature, rainfall, and hours of sunshine. It also explains weather patterns and has photographs of cloud types.
As you go higher, atmospheric pressure lessens, making it harder for your body to extract oxygen from the air. This may result in acute mountain sickness (AMS), typified by headaches, fatigue, loss of appetite, dizziness, and a generally awful feeling. AMS rarely occurs at altitudes below 8,000 feet, so many backpackers never need worry about it. But if you do ascend high enough and experience AMS, the only immediate remedy is to descend. If you don’t, the effects usually pass in a few days.
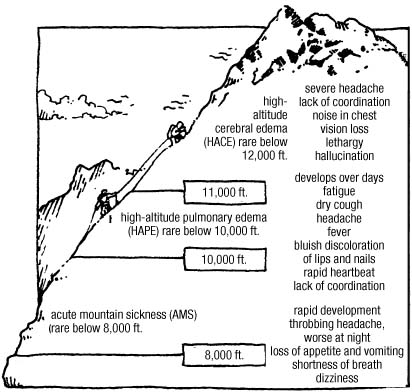
The possible effects of altitude.
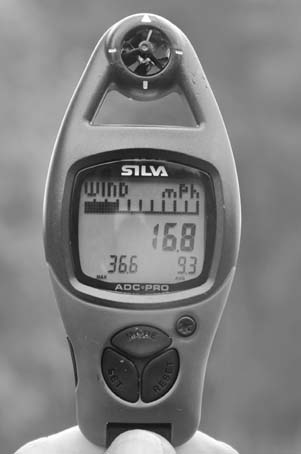
The Brunton (Silva) ADC Pro weather-recording instrument.
To minimize the chances of AMS, acclimatize slowly by gaining altitude gradually. If you’re starting out from a high point, you can aid acclimatization by spending a night there before setting off. It’s also important to drink plenty of fluids—dehydration is reckoned to worsen altitude sickness. Most backpackers won’t get higher than the 14,000 feet of the Sierra or the Rockies; spending three or four days hiking at 6,000 to 8,000 feet should minimize altitude effects, but it’s not always easy to do this. The altitude where you sleep is important too; if you sleep below 8,000 feet you can ascend to 14,000 feet without much likelihood of altitude sickness.
The only time I’ve suffered from mountain sickness was when I took a cable car up to 10,600 feet on the Aiguille du Midi in the French Alps. The moment I stepped out of the cable car I felt dizzy and a little sick and had a bad headache. But we’d gone up in order to ski down, so I was soon feeling fine again.
Much more serious than AMS are high-altitude cerebral edema and high-altitude pulmonary edema (fluid buildup in the brain or lungs), which can be fatal. Cerebral edema rarely occurs below 12,000 feet; pulmonary rarely below 10,000 feet. Lack of coordination and chest noises are among the symptoms, but you may not be able to differentiate between AMS and edema. Your only course is to descend—quickly.
Medicine for Mountaineering, edited by James Wilkerson, has a detailed discussion of high-altitude illness that is worth studying by those planning treks in high mountains.
Avalanches are a threat to every snow traveler who ventures into mountainous terrain, more so for the skier than for the walker. In spring, great blocks of snow and gouged terrain stripped of trees mark avalanche paths and show the power of these snow slides. Avalanches can be predicted to some extent, and many mountain areas, especially those with ski resorts, post avalanche warnings. Heed them. Anyone heading into snow-covered mountains should study one of the many books on the subject. Avalanche Safety for Skiers and Climbers, by Tony Daffern, is one of the best for home study, while The ABCs of Avalanche Safety, by Sue Ferguson and E. R. LaChappelle, is light enough at 2 ounces to carry in the pack.
Lightning is both spectacular and frightening. Thunderstorms can come in so fast that you can’t reach shelter before they break (although I’ve learned that I can run very fast with a heavy pack when I’m scared enough). If you see thunderclouds building up or a distant storm approaching, head for safety immediately—don’t wait until the thunder starts. In thunderstorms, avoid summits, ridge crests, tall trees, small stands of trees, shallow caves, lakeshores, and open meadows. Places to run to include low points in deep forests, near but not next to the bases of high cliffs, depressions in flat areas, and mountain huts (these are grounded with metal lightning cables). Remember that, statistically, being hit by lightning is very unlikely, though this may fail to comfort you when you’re out in the open and the flashes seem to be bouncing all around.
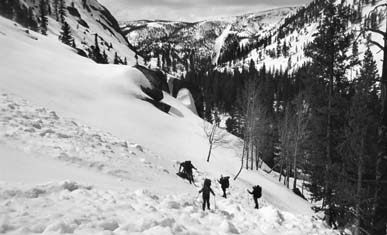
Avalanche debris, High Sierra.
In a lightning storm, beware of ground currents. Don’t lie or sit on the ground. Instead, squat on an insulating mat, with your hands and arms off the ground. Put metal gear, such as framed packs and hiking poles, some distance away so they don’t burn you if there’s a nearby strike.
During a storm, there’s danger from ground currents radiating from a lightning strike; the closer to the strike you are, the greater the current. Wet surfaces can provide pathways for the current, which may also jump across short gaps rather than go through the ground. If part of your body bridges such a gap, some of the current will probably pass through it. Your heart, and therefore your torso, is the part of your body you most need to protect from electric shocks, so it’s advisable to crouch with just your feet on your foam pad so that any ground current passes through your limbs only. I’d also keep away from damp patches of ground and wet gullies and rock cracks. Groups should spread out.
Metal can burn you after a nearby strike—if you’re caught in a storm, move away from pack frames and tent poles. The most frightening storm I’ve encountered woke me in the middle of the night at a high and exposed camp in the Scottish Highlands; all I could do was huddle on my foam pad and wait for it to pass, while lightning flashed all around me.
Anyone who is hit by lightning and knocked unconscious should be given immediate mouth-to-mouth resuscitation if breathing or the heart have stopped.
Hypothermia occurs when the body loses heat faster than it produces it. It can be a killer. The causes are wet and cold, abetted by hunger, fatigue, alcohol, and low morale. The initial symptoms are shivering, lethargy, and irritability, which develop into lack of coordination, collapse, coma, and death, sometimes very quickly.
Because wind whips away heat, especially from wet clothing, hypothermia can occur in temperatures well above freezing. Indeed, it is often in summer that unwary dayhikers get caught, venturing high into the mountains on a day that starts sunny but becomes cold and rainy. Too many people die or have to be rescued because they weren’t equipped to deal with stormy weather.
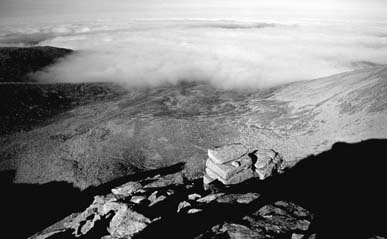
Cloud hanging on one side of a ridge in the White Mountains, New Hampshire.
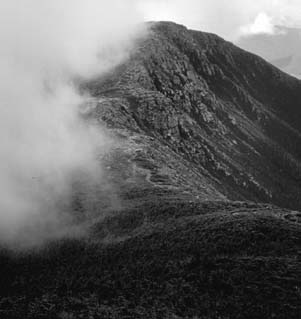
A temperature inversion with the valleys full of cloud (cold air) and the summits bathed in sunshine (warm air).
If you start to notice any of the symptoms of hypothermia in yourself or any of your party, take immediate action. The best remedy is to stop, set up camp, get into dry clothes and a sleeping bag, start up the stove, and have plenty of hot drinks and hot food. Pushing on is foolish unless you’ve first donned extra clothes and had something to eat. After you’re clothed and fed, exercise will help warm you up, since it creates heat. Even then you should stop and camp as soon as possible.
The best solution to hypothermia is to prevent it. If you’re properly equipped, stay warm and dry, and keep well fed and rested, you should be in no danger.
When body tissue freezes, that’s frostbite. It can be avoided by covering up and by keeping warm. Minor frostbite is most likely to occur on the extremities—the nose, ears, fingertips, and toes. If any of these areas feels numb and looks colorless, it may be frostbitten. Rewarming can be done with extra clothing, by putting a warm hand over the affected area, or in the case of fingers or toes, holding them against someone’s armpit, groin, or stomach. I’ve come across mild frostbite only once, to a companion’s nose on a windy mountaintop in February with a temperature about 0°F (−18°C); she pulled a woolen balaclava over her face, and within half an hour the color had returned. Deep frostbite is a serious condition and can be properly treated only in a secure shelter with a reliable source of heat. Frostbitten areas should not be rubbed; this can damage the frozen tissue.
Most walkers are afraid of the cold, but heat can be dangerous too. The opposite of hypothermia, heat exhaustion occurs when the body cannot cool itself sufficiently. Typical symptoms are muscle cramps, nausea, and vomiting. Because the body uses perspiration for cooling, the main cause of heat exhaustion is dehydration and electrolyte depletion—if you are severely dehydrated, you cannot sweat.
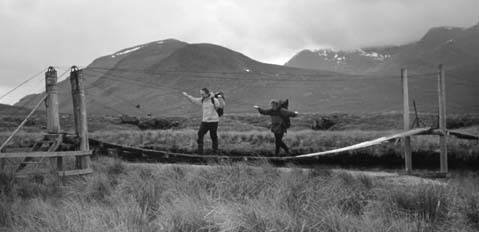
A suspension bridge. It’s always worth detouring to a bridge instead of risking a ford.
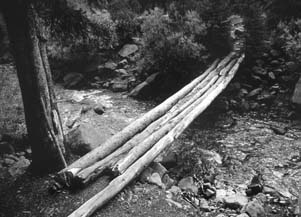
A simple pole bridge. Edge across slowly and watch for wet, slippery sections.
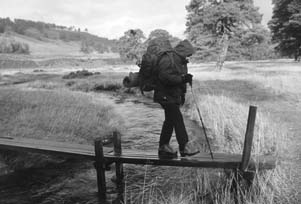
Plank bridges can be very slippery when wet.
The main way to prevent heat exhaustion is to drink plenty of water, more than you think you need on hot days. Don’t neglect eating as well; water alone won’t replace the salts lost when you sweat, so you could still become ill. If you start showing symptoms, stop and rest somewhere shady—exercise produces heat. If you feel dizzy or weak, lie down out of direct sunlight and drink water copiously. In very hot weather, travel in the early morning and the late afternoon and take a midday siesta in the shade to minimize the chance of heat exhaustion. A sun hat or umbrella also helps.
Unbridged rivers and streams can present major hazards. Water is more powerful than many people think, and hikers are drowned every year fording what may look like relatively placid streams. If you don’t think you can cross safely, don’t try.
If no logs or boulders present a crossing, wading a stream or river may be the only option. Whether you prospect upstream or downstream for a potential ford depends on the terrain. If you can view the river from a high point, you may be able to see a suitable ford. Otherwise, check the map for wide areas where the river channels may be braided. Several shallow channels are easier to cross than one deep one, and wide sections are usually shallower than narrow ones. Check the map for bridges, too—many years ago, after torrential rain had turned even the smallest streams into raging torrents, two companions and I walked many extra miles upstream and camped far from where we’d intended because we didn’t notice on the map that there was a bridge not far downstream of where we were.
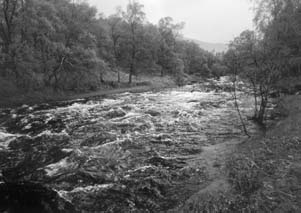
A river in spate. Crossing this would be dangerous and foolhardy. Search for an alternative route or turn back.
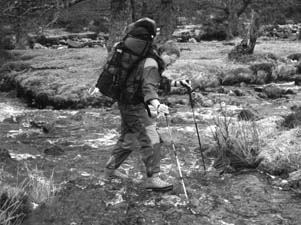
Crossing a small stream. The main aim here is to keep your feet dry.
On a weeklong trip during the height of the spring snowmelt in Iceland, my route was almost totally determined by which rivers I could cross and which I couldn’t (which was most of them). During my walk through the northern Canadian Rockies, I spent many hours searching for safe fords across the many big rivers there.
In the end, only experience can tell you whether it’s possible to cross. If you decide fording is feasible, study your crossing point carefully before plunging in. In particular, check that the far side isn’t deeper or the bank undercut. Then cross carefully and slowly with your hipbelt undone so that you can jettison your pack if you’re washed away. If this does happen, try to hang on to the pack by a shoulder strap—it will give extra buoyancy, and you’ll need it and its contents later. You should cross at an angle facing upstream so the current won’t make your knees buckle. Feel ahead with your leading foot, but don’t commit your weight to it until the riverbed beneath it feels secure. One of your trekking poles or a stout stick is essential in rough water. If the water is fast flowing and starts to boil up much above your knees, turn back—it could easily knock you over, and being swept down a boulder-littered stream is not good for your health.
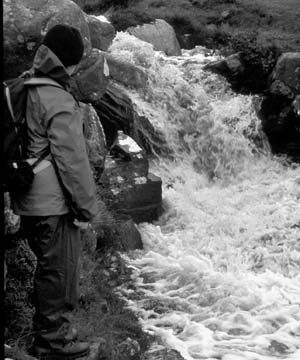
Even small streams can become raging torrents during snowmelt or after heavy rain and be unsafe to cross. If you can’t find a safe crossing point, you can camp on the bank and wait for the water to subside or look for an alternative route.
If I’m wearing sandals, wet feet are no problem. For shallow crossings, I don’t even break my stride. If I’m wearing shoes or boots and carrying sandals, I change into the sandals unless my footwear is already wet. If there are lots of fords, I keep the sandals on, even in cold weather, so I have dry shoes for campwear. If I can see that the river bottom is flat and sandy or gravely rather than rocky, I sometimes cross wearing just a pair of dirty socks.
Mountain water is very cold, and you’ll often reach the far side feeling shivery. I find that the best way to warm up is by gulping down some carbohydrates like trail mix or candy, then hiking hard and fast. The best clothes for fording are shorts and a warm top. Long pants can drag in the water and aren’t very warm when sodden.
Groups can use various techniques to make fords safer. Three people can cross in a stable tripod formation, or a group can line up along a pole held at chest level. In the past, I’ve used a rope to belay forders, but the newer thinking is that roped crossings are dangerous—there’s too great a chance of someone’s slipping and being trapped underwater by the rope.
I have never swum across a river—the water in the areas I frequent is generally too cold, too fast, and too boulder strewn for this to be practical. Bigger, warmer, slower rivers can be swum, however.
If you can’t find a safe crossing, you have one final option before you turn back—wait. In areas where mountain streams are rain fed, they recede quickly once the rain stops; a raging torrent can turn into a docile trickle in a matter of hours. (And placid streams can swell just as quickly, so you should camp after you’ve crossed a river, or you may wake to a nasty shock.) Glacier- and snow-fed rivers are at their lowest at dawn. If you camp on the near side, you may be able to cross in the morning. Meltwater streams are the worst to ford because you can’t see the bottom through the swirling silt.
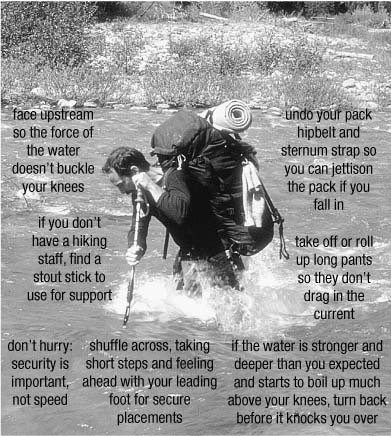
Good fording technique.
There are a few poisonous plants that can harm you by external contact. One is the stinging nettle, which has a sharp but transitory sting. Although painful, it’s nothing to worry about unless you dive naked into a clump. At low elevations you may find the nastier poison oak, poison ivy, and poison sumac. These closely related shrubs can cause severe allergic reactions, raising rashes and blisters in many people. They have leaves in groups of three that often hang across trails at knee height. If you brush against this stuff, immediately wash the affected area well with water (soap isn’t required), if you have any, since the oil that causes the problems is inactivated by water. The oil is also tenacious and long-lived, so also wash any clothing or equipment that has come into contact with the plants. If you still start to itch after washing the affected area, calamine lotion and cool saltwater compresses can help. Some cortisone creams can help with red and itchy rashes where no blisters have yet developed, as well as later when the rash has healed and is scaly yet still itchy.
A final plant to watch out for is devil’s club, whose stems are covered with razor-sharp spines that can break off and remain in the wound, causing inflammation. It’s found in montane forests in the Cascades and British Columbia. I came across large stands of this head-high, large-leafed shrub mixed in with equally tall stinging nettles in the Canadian Rockies, just south of the Peace River. I normally try to avoid any unnecessary damage to plants, but on this occasion I used my staff to beat my way through the overhanging foliage.
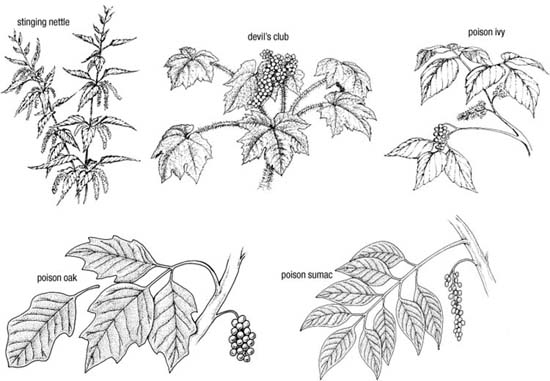
Clockwise from top left: Stinging nettle (Urtica dioica), devil’s club (Oplopanax horridus), poison ivy, poison sumac, and poison oak.
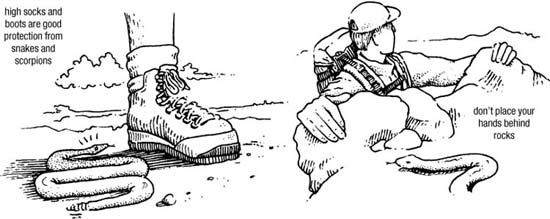
When hiking in rattlesnake or scorpion country, be wary around bushes and rock piles.
Many agencies, park offices, Web sites, and guidebooks provide identification information; you may also find warning notices at trailheads. If you rely on plants for food, you need to be very sure you know what you’re eating, especially with fungi. There are numerous guides.
Encountering animals in the wilderness, even potentially hazardous ones, is not in itself a cause for alarm, though some walkers act as if it were. Observing wildlife at close quarters is one of the joys and privileges of wilderness wandering, something to be wished for and remembered long afterward.
You are the intruder in the animals’ world, so don’t approach closely or disturb them, for their sake and for your safety. When you do come across animals unexpectedly and at close quarters, move away slowly and quietly and cause as little disturbance as possible. With most animals you need fear attack only if you startle a mother with young, and even then, as long as you back off quickly, the chances are good that nothing will happen.
Some animals pose more of a threat and need special attention, however. (Insects, of course, are also animals, and are the ones most likely to be a threat—to your sanity if not your physical health. The items and techniques needed for keeping them at bay were discussed in Chapter 8.)
The serpent is probably more feared than any other animal, yet most species are harmless, and the chances of being bitten by one are remote. In the major North American wilderness areas there are four species of poisonous snakes—the coral snake, rattlesnake, copperhead, and water moccasin (also called a cottonmouth). Not all areas have them. They are rarely found above timberline or in Alaska and Maine. Their venom is unlikely to seriously harm fit, healthy persons. In many parts of South America, Asia, Africa, and Australia, much more deadly species exist, and anyone intending to hike there should obtain relevant advice.
Snakebites rarely occur above the ankle, so wearing boots and thick socks in snake country minimizes the chances of being bitten. Snakes will do everything possible to stay out of your way; the vibrations from your feet are usually enough to send them slithering off before you even see them. However, it’s wise to be cautious around bushes and rock piles in snake country—there may be a snake sheltering there. At a snake-country campsite, do not pad around at night barefoot or in sandals or light shoes without checking the ground first.
Rattlesnakes seem to strike more fear into people than other snakes do, though I don’t understand why. By rattling, at least they warn you of their presence so you can avoid them.
While walking in the cool of the night can be a way to avoid the heat in deserts, it’s not a good way to avoid snakes. On the Pacific Crest Trail, I hiked through the Mojave Desert with three other backpackers. Battered by the heat of the day, we decided to take advantage of a full moon and hike at night. However, we quickly found that rattlesnakes, which abound in the Mojave, come out at night, and we couldn’t distinguish them from sticks and other debris. Several times we stopped and cast around anxiously with our flashlights for the source of a loud rattle. Once we found a snake, a tiny sidewinder, between someone’s feet. We didn’t hike at night again.
On that trip, I carried in my shorts pocket a snakebite kit with implements for cutting and sucking the wound. Such kits are frowned on now as being dangerous. Using them could easily cause more harm than the bite itself. The Sawyer Extractor, a suction device that doesn’t require cutting the wound, can be used. Otherwise wash the bite with soap and water, then bandage it and keep the limb hanging down to minimize the chance that venom will enter the bloodstream. The victim should stay still and rest while someone goes for assistance. If you’re on your own, you may have to sit out two days of feeling unbelievably awful unless you’re close enough to habitation or a road to walk to aid quickly. That’s if the bite contained any venom anyway—about 25 percent don’t.
For those who want to know more about snakebite treatment, I recommend Medicine for Mountaineering, edited by James Wilkerson.
In many mountain and wilderness areas, black bears and grizzly bears roam, powerful and independent. Knowing they’re out there gives an edge to your walking; you know you’re in real wilderness if bears are around. In many areas though, bears no longer roam. Grizzlies in particular have been exterminated in most of the lower states; there are now just tiny numbers in small parts of Montana, Idaho, and Wyoming (mainly in Glacier and Yellowstone National Parks). They’re found in any numbers only in Alaska and western Canada (the Yukon, Northwest Territories, British Columbia, and western Alberta). I like knowing they’re there, lords of the forests and mountains, as they have been for millennia.
The chances of seeing a bear, let alone being attacked or injured by one, are remote. In Yellowstone National Park, home to both grizzly and black bears, there were 47 million visitors between 1980 and 1997. Just twenty-three of them were injured by bears. That makes the odds on being injured by a bear in Yellowstone about 1 in 2.1 million. You are at far greater risk from drowning, falling, or vehicle accidents. In about ten thousand miles of walking in bear country, most of it alone, I’ve seen only eighteen black bears and three grizzlies, and none has threatened me—most have run away.
However, you should minimize your chances of encountering a bear. Dave Smith’s Backcountry Bear Basics is recommended reading for anyone venturing into bear country. I also recommend Doug Peacock’s Grizzly Years, an excellent personal account of two decades of studying grizzlies while living among them.
When you’re on the move, you want bears to know you’re there so they’ll give you a wide berth. Most of the time, their acute senses of smell and hearing will alert them to your presence long before you’re aware of them. However, a wind blowing in your face, a noisy stream, or thick brush can all mask your signals. In these circumstances, make a noise to let any bears know you’re around. Many people wear small bells on their packs for this purpose, but these aren’t really loud enough, and they tinkle annoyingly even when you don’t need them, scaring away other wildlife. It’s better to shout or sing and clap your hands in thick brush or when you can’t see far and the wind is in your face. Don’t forget to use your eyes—I once came across a hiker sitting on a log eating his lunch, all the while calling out to warn bears he was there. I walked toward him for several minutes without his seeing me and finally startled him by calling out a greeting when I was a few steps away.
In open terrain and on trails, scan ahead for bears. A pair of binoculars helps greatly with this. They’ll help you determine if that tree stump ahead is actually a grizzly sitting by the trail. Look for evidence of bears, too—paw prints and scat (dung) are obvious signs, but also look for scratch marks on trees and mounds of freshly dug earth in alpine meadows where grizzlies have been digging for rodents.
If you see a bear before it sees you, detour away from it quietly and quickly. Be particularly wary of female grizzlies with cubs—70 percent of known attacks are by mothers defending their young. If the bear is aware of you, move away from it, perhaps waving your arms or talking to help it identify what you are. Don’t stare at it or act aggressively; you don’t want to be seen as a threat. The only grizzly I’ve met at fairly close quarters moved slowly away from me once I’d made a noise and let it know I was there. The nearest it came was about fifty yards.
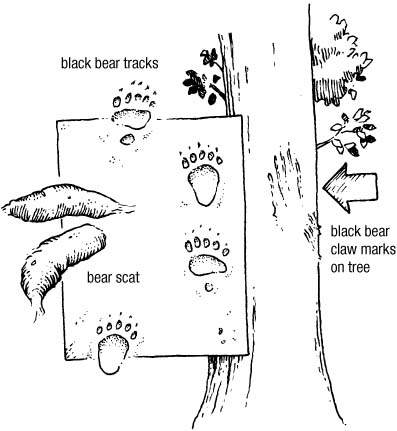
Be alert for signs of bears, which may appear on the ground as prints, droppings, or diggings, and on tree trunks as parallel scratches as high as 6 feet above the ground.
Many people suggest climbing a tree if a bear charges you. Dave Smith thinks this is a bad idea, since the bear will usually catch you and pull you down. (One bear-country saying is that the way to tell the difference between black bears and grizzly bears is to climb a tree—black bears will climb up after you, grizzlies will knock the tree down.)
Very occasionally, a bear will charge. Advice is mixed regarding what to do if one does. Don’t run—bears are much faster than you are. Dropping an object, such as a camera or an item of clothing, may distract it and allow you to escape. Don’t drop your pack—if the bear eats your food, it may learn to regard future walkers as food sources. Your pack will also help protect your body if the bear does attack. If dropping something doesn’t work, your choices are trying to frighten the bear by yelling, banging objects together (metal on metal may be effective), backing away slowly, or standing your ground while acting non-threatening by talking quietly to the bear (the option Dave Smith advises). If the bear actually attacks you (many charges don’t result in physical contact), you can play dead or fight back. The best position for the first is lying on your front with your legs slightly apart, your elbows tucked in, and your hands protecting your neck so the bear can’t easily roll you over. Keep your pack on to protect your back and neck. If the bear doesn’t leave you alone fairly quickly when you play dead, fight back instead, since it may view you as prey.
You could also use one of the powerful pepper sprays such as Counter Assault. This is a strong version of cayenne pepper–based antidog sprays that has been shown to repel bears both in the wild and in controlled tests. In one case a grizzly that had already knocked a man down and was biting him ran off when sprayed in the face. The manufacturer stresses that it isn’t a substitute for knowing about bear behavior and taking the usual precautions, but—the advertising says—“it’s better than no protection at all.” It doesn’t guarantee protection, however, and isn’t a reason to take risks or feel overconfident. Pepper spray is nontoxic (the bears aren’t harmed) and comes in an 8-ounce canister. There’s also a holster for carrying it on your belt. I’ve never carried it, though I might if I went hiking in Alaska again.
Bear-country ranger stations and information offices have up-to-date reports on areas that bears are using and whether any have caused trouble. Trails and backcountry campsites may be closed if necessary. For your own safety and that of the bears, obey any regulations that are in force.
In many areas the late summer and autumn see the backcountry fill up with hunters carrying high-powered rifles. Try to make sure they don’t shoot you by wearing something bright, like an orange hat or jacket. In some areas, officials recommend wearing two or more pieces of blaze orange. Hunting season is not the time to be wearing camouflage in the wilderness.