AIRBRUSHED UNDERWATER SCENE
SHERI HOEGER
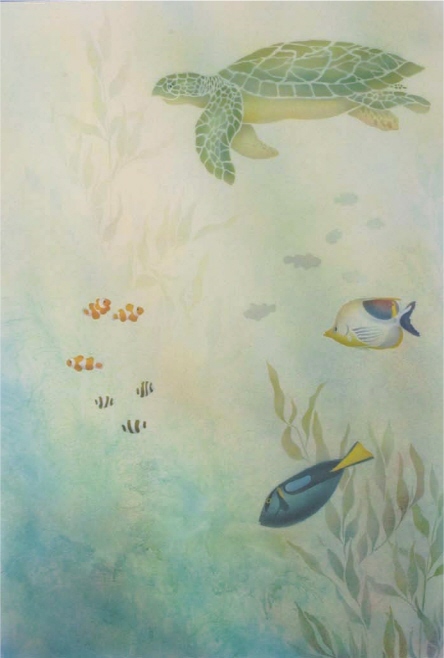
Airbrushing gives this mural the soft, diffused feeling of being underwater, while stencils create clean edges and shapes for the various sea creatures.
I painted this mural using only three colors, plus white where the fish were blocked out for contrast. Fine sprays of color are layered in various intensities to create the full spectrum of color in the mural. The colors are generally layered from light to dark, almost always starting with the yellow. I chose the colors partially for their transparency so that the order could be successfully interchanged. (If the yellow were opaque, spraying it back over a saturated red or turquoise would cause a pasty appearance.) The red and turquoise layers were interchanged to get different tones—the order of layering will always affect the final color.
MATERIALS
Golden Fluid Acrylics
Hansa Yellow Medium, Pyrrole Red, Titanium White, Turquoise
Additional Materials
Blue tape
Cambric cloth
Cheesecloth
Golden Airbrush Medium
Iwata Eclipse airbrushes, hoses and holder
Mad Stencilist Stencils: Clowns and Damsels, Hippo Tang, Saddleback Butterfly, Sea Turtles, Willow Boughs (available at www.madstencilist.com)
Masking film
No. 11 craft knife
Scotch repositional clear tape by 3M
Sea sponge
SilentAire compressor
Spray bottle
BEFORE SHE PAINTED

Some of us just fall into our careers and this is Sheri’s story: “My career started by a happy accident. I was introduced to the airbrush when I worked as a manicurist in the early 1980s. I had become known for painting little scenes on my clients’ nails, and airbrushed designs were just coming into vogue when I left that profession to stay home to raise my children. My husband gave me a beginner airbrush set for Christmas in 1983. I ‘played’ with it by painting an outer space mural for our son’s room.
“Later, a friend showed me the traditional drybrush method of stenciling. I stenciled my bathroom, and I was hooked. When I attempted to stencil my kitchen with geese, my stencil brushes were too small for the windows so I brought out that little airbrush, thinking it might work for those large spaces. I loved the soft look of the airbrushing combined with the crisp edge of the stencil, and it fascinates me to this day. In 1988, I started stenciling for friends and acquaintances who had seen my home, and in a very few months, word had spread and I was as busy as I wanted to be.”
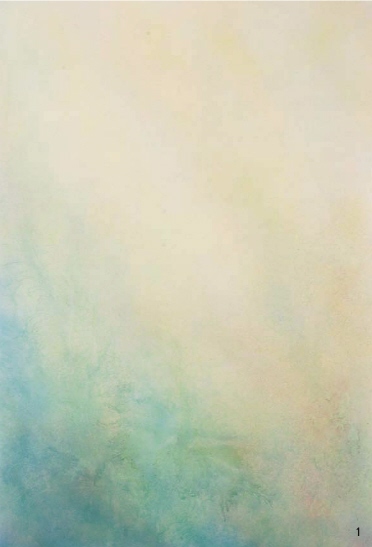
1. BACKGROUND. Spray Hansa Yellow Medium in diagonal bands from top to bottom, increasing the width of the band as you move toward the bottom. Reapply a fine spray to increase the color intensity.
Then spray some Turquoise lightly over the yellow, repeatedly applying a fine spray to build intensity near the bottom.
To suggest a coral bed, on only a small area at a time, spritz water onto the surface and quickly spray Turquoise lightly into the droplets, using a broad spray pattern. If the surface is too wet and drippy, blot with cheesecloth or a dampened sponge, but leave some small droplets.
Using only air, push the droplets of water in an upward and/or sideways motion. The droplets will carry the turquoise color along. Keep checking for drips and either blow into them or blot them off before they make a permanent mark.
Now apply Pyrrole Red in the same manner as the Turquoise, but cover less area. Allow the fine spray of red to create some orange tones when falling onto the yellow, and some slightly purple tones when falling onto the turquoise. Too much red will muddy the green combination created with the yellow and turquoise. A little goes a long way.
2. TURTLE. Position the turtle stencil and spray with Hansa Yellow Medium. Shade so that there is a highlight area at the upper part of the shell and a darker area at the junction of the shell plates.

3. TURTLE. Insert masks over the far flippers and abdomen to preserve the yellow. Spray with Turquoise, shading as described in step 1, to create a green color. Lightly spray details of far flippers.
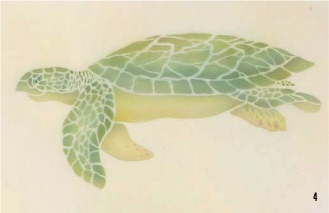
4. TURTLE. Remove the masks and lightly shade with Turquoise, going slightly darker on the upper side of the far flippers and the abdomen. Repeat very lightly with Pyrrole Red. The red tones down the green and helps the yellow abdomen stand out against the background. Very lightly spray Turquoise over the bridges (the areas that were masked by stencil material) so the appearance is not so stark.
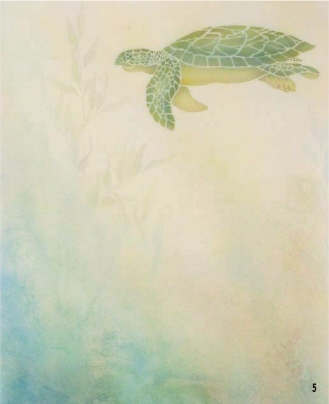
5. DISTANT SEAWEED. Position, spray and reposition Willow stencil. Use the same color order: yellow, turquoise, and red. Spray very lightly to suggest diffused seaweed. Allow the weeds to fade as they run into the coral bed.
Add more soft color streaks to the water, spraying right through the turtle. It’s OK for there to be this small amount of color added to the turtle, since it’s already in the mix.
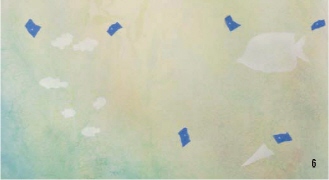
6. FISH. Arrange a variety of fish and mark the alignment registrations onto pieces of blue tape affixed to the painting surface. You really only need to stencil two alignment registrations, usually across the top of the design. This is the most accurate way to assure exact alignment. Spray with Titanium White to lighten against the water background. These don’t have to be totally blocked out white. In fact, if a little of the water colors show through, it will help everything to relate. However, these fish do need to be distinctly lighter. I have blocked out only the tail of the Hippo Tang.
EXPERT ADVICE
Tip: When airbrushing water, pull back away from the surface to maintain a wide, soft spray pattern. You want to suggest bands of light streaming down, but if the spray pattern is too narrow, it will look like stripes. Track with your eyes slightly ahead of where you are actually spraying for a smooth movement. If you get off track, just lift off by pulling backwards and start again. Practice spraying evenly and smoothly in any direction.
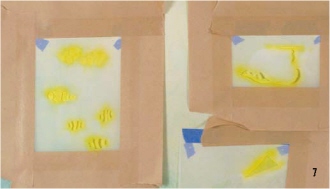
7. FISH. Spray the yellow details of the fish.
8. FISH. Lightly spray red over the yellow. Repeat on the Clown Fish and the Damsel Fish to create bright orange.
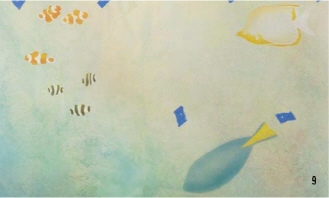
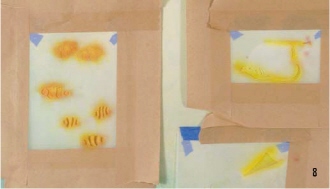
9. FISH. Spray Turquoise over the Damsel Fish details and Hippo Tang body, shading darker at underside. Shade lightly with red.
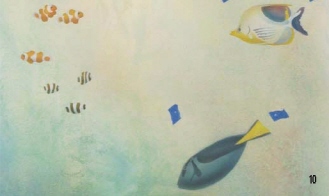
10. FISH. Proceed through the details in this manner, layering the three colors to create the full spectrum. Shade very lightly with Turquoise, then red on the bodies of Clown and Zebra fish, just enough to suggest volume and keep enough contrast so they show up against the background. This will be the same for the light area of the Butterfly Fish.
Spray some White first for the light details of the Hippo Tang. Add color if needed to the Butterfly Fish.
11. DISTANT FISH AND SEAWEED. Using just the body shapes of the Clown and Damsel fish, position and spray just a light silhouette with Turquoise, then red to suggest distant fish. They should get lighter and cooler the farther away they are.
Arrange, spray and rearrange weeds, shading darker than previously so they will look more substantial. Use masking film to mask off the leafy area that falls across the Hippo Tang. This preserves the weeds behind the fish.
To finish, spray in final layer of light color overall, following the established band pattern, increasing intensity where needed. This will also serve to unite the fish with the water.