Good Grains
Growing up in Virginia meant eating lots of corn. Cornbread, corn pone, and grits were important parts of our cooking. Nashville offers a similar perspective, but Charleston presents something different. The South Carolina Lowcountry is where rice was born in America, and the plantation agriculture that it brought along profoundly shaped the people and their way of life. It also shaped my cooking.
It took me some time in Charleston to fully appreciate the significance of rice, how it contributed to the city’s wealth, created winners and losers, and wove itself into the fabric of Charleston’s history. Its story ultimately led me to mentors like Glenn Roberts and David Shields, expert seedsmen and researchers interested in the history of Lowcountry agriculture. My understanding of the rice plantation pantry was the starting point of my journey and I’m still in awe of its depth, which I’ve only begun to explore.
Antebellum plantations were where grain was grown, be it rice, corn, or wheat. Today we take the bags of bleached and bromated white flour on every grocery store shelf for granted. Most people don’t know the difference between what’s on grocery-store shelves and grains straight from the field because they’ve never tasted fresh-milled grains. I’m convinced that once people taste flavorful heirloom grains, they won’t want to go back to the often genetically engineered versions sold in big grocery stores.
This is what Husk in Charleston is all about. We translate the plantation pantry of antebellum Charleston for a modern palate, using all of those lost flavors that others in the Lowcountry are reintroducing and growing for our local market. Husk may be known for pork butter, spicy fried pig’s ears, and bourbon, but all of that flavor starts in a field of rice, that becomes one of field peas next season, and maybe some rows of corn the next, a rotation of crops that some antebellum planters designed to cycle over more than a dozen years.
What started as an experiment in finding old flavors of grains that used to grow around Charleston has completely changed my way of looking at food, and if you start cooking with heirloom grains, you will also see the rich diversity that’s been lost to industry. Recipes like Wheat Thins, Cracklin’ Cornbread, and Rice Griddle Cakes will certainly work with regular store-bought grain, but if you want to get the full experience of the Old South, seek out authentic ingredients. See Resources, for some of my favorite purveyors.
Corn Grist

Corn is prepared in more forms than you can count. Whether it is mashed up into gruel, or ground into cornmeal for hushpuppies and cornbread, the aroma of a kitchen changes considerably when corn gets involved. It simply starts to smell Southern.
Cornmeal
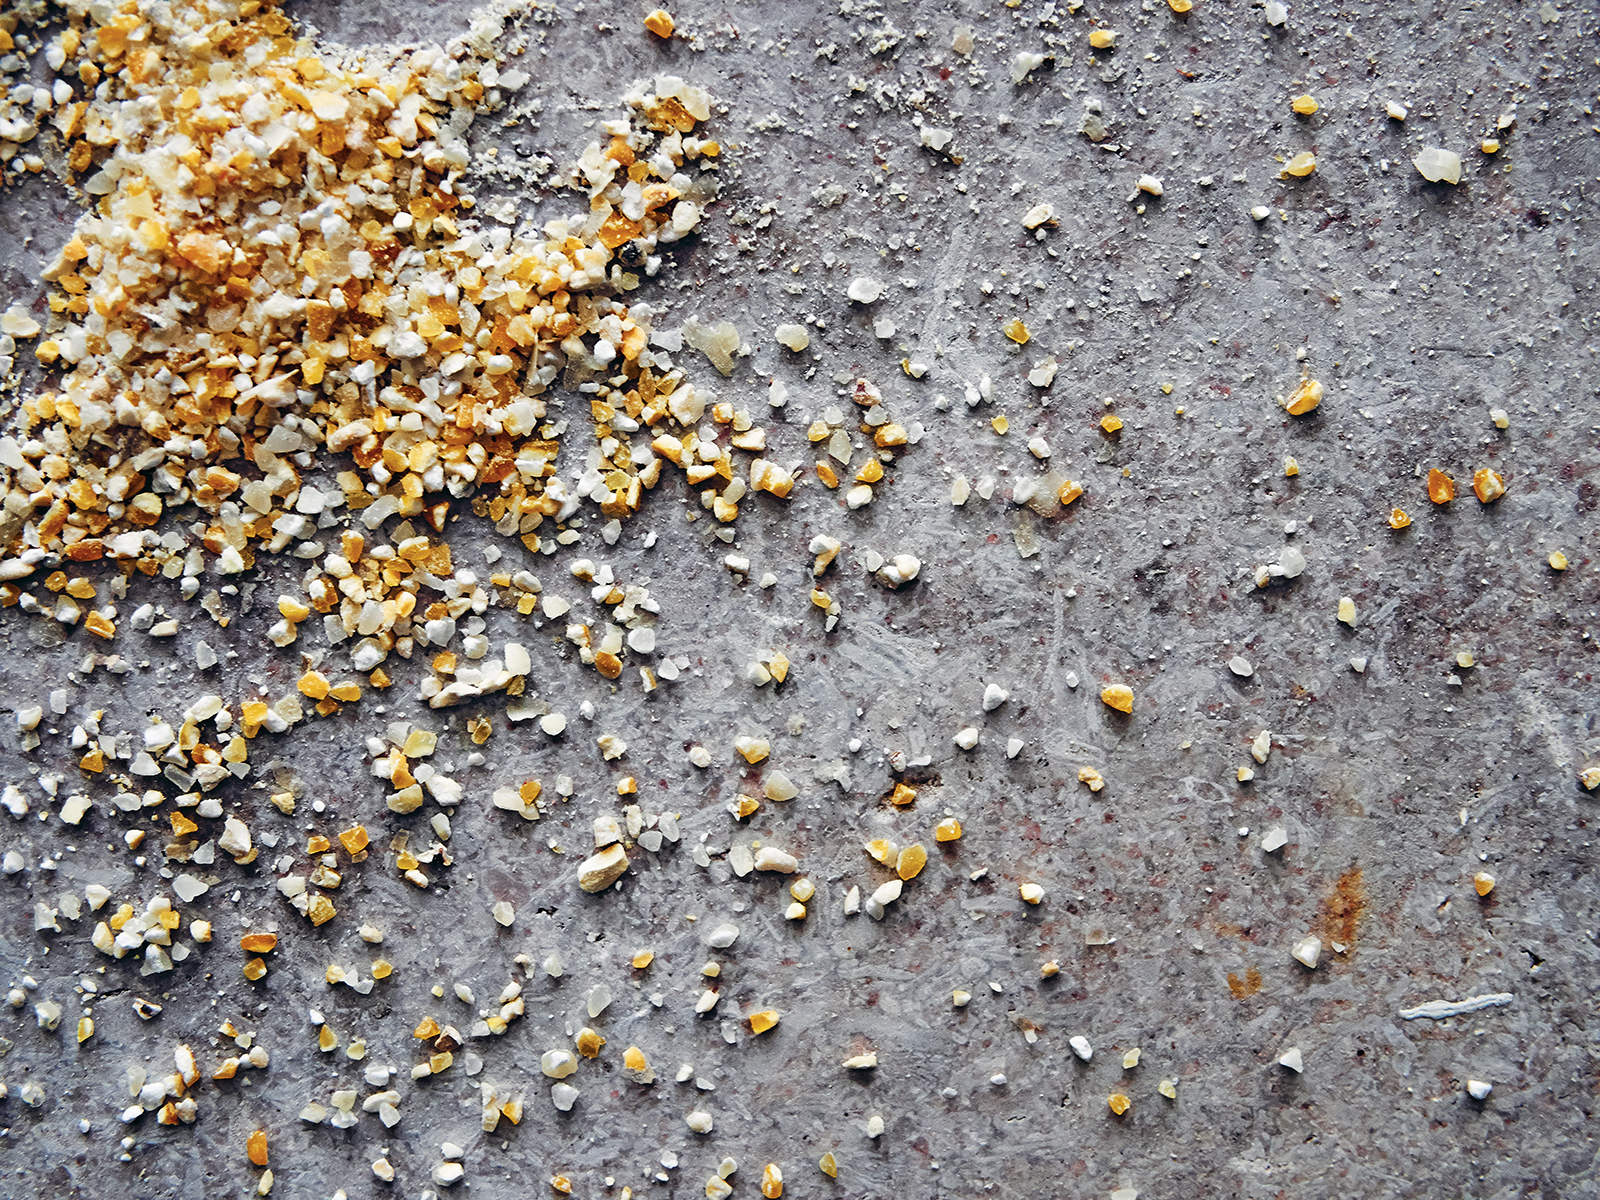
Cornmeal is ground dried corn. You can find it at any chain grocery store, but the best cornmeal is stone ground and you may need to source that at a mill or through mail order. Unlike more modern methods of milling, the stones don’t substantially heat up the grains, resulting in a superior flavor and texture. Find a miller who grinds corn to order or purchase a small home grinder that will allow you to vary the size of the grind. Many millers ship grains via mail order, and a home mill can be easily purchased on the Internet.
Hominy
If you take dried flint corn and cook it in lye until the outer hull of the kernel separates, you’ll leave the germ of the kernel behind—and get hominy. This process, called nixtamalization, originated with Mesoamerican Indians and has a very specific effect: it unlocks the nutritional power of corn, making it much more digestible, especially when combined with rice or beans. Unlike Native Americans, Southerners and Europeans didn’t fully adopt this practice and thus they often lacked the complete nutritional protein that it creates, leaving their populations who subsisted on cornmeal and preserved meat susceptible to a vitamin deficiency disease called pellagra.
Hominy Grits
Old-timers call it “little hominy,” but modern commercial grits bear little resemblance to the staple grist of yesteryear. Industrial milling and commercial corn production mean that most of the grits you find are simply coarsely ground cornmeal, but hominy grits are nixtamalized dried kernels ground to a coarse consistency.
Masa
Latin Americans take fresh hominy and grind it while still wet, producing a soft corn flour that constitutes the basis for everything from tortillas to tamales. The commercial kind is called masa harina and comes dried in bags, like cornmeal or flour.
Polenta
Corn traveled quickly to Italy after its “discovery” in the Americas, and it soon replaced buckwheat and farro as the grain of choice for polenta. Very similar to the South’s grits and African ugali, polenta is a cornmeal mush originally eaten by peasants, a staple of the cuisine Italians call la cucina povera, but it is often made from flint corn, a very hard variety that has a lower starch content.
Samp
Early colonists used the terms “grits” and “samp” interchangeably, but when we talk about samp today, we are referring to cracked hard flint corn. It’s hard to make, since the best samp is cracked by hand, but the kernels of good samp can be shattered, producing very little corn flour in the process. This type of rough corn cooks up like rice, tender and fluffy.
Makes one 9-inch round loaf
My favorite ball cap, made by Billy Reid, has a patch on the front that reads “Make Cornbread, Not War.” I’m drawn to it because cornbread is a sacred thing in the South, almost a way of life. But cornbread, like barbeque, can be the subject of great debate among Southerners. Flour or no flour? Sugar or no sugar? Is there an egg involved? All are legitimate questions.
When we opened Husk, I knew that we had to serve cornbread. I also knew that there is a lot of bad cornbread out there in the restaurant world, usually cooked before service and reheated, or held in a warming drawer. I won’t touch that stuff because, yes, I am a cornbread snob. My cornbread has no flour and no sugar. It has the tang of good buttermilk and a little smoke from Allan Benton’s smokehouse bacon. You’ve got to cook the cornbread just before you want to eat it, in a black skillet, with plenty of smoking-hot grease. That is the secret to a golden, crunchy exterior. Use very high heat, so hot that the batter screeches as it hits the pan. It’s a deceptively simple process, but practice makes perfect, which may be why many Southerners make cornbread every single day.
4 ounces bacon, preferably Benton’s (see Resources)
2 cups cornmeal, preferably Anson Mills Antebellum Coarse Yellow Cornmeal (see Resources)
1 teaspoon kosher salt
½ teaspoon baking soda
½ teaspoon baking powder
1½ cups whole-milk buttermilk
1 large egg, lightly beaten
Preheat the oven to 450°F. Put a 9-inch cast-iron skillet in the oven to preheat for at least 10 minutes.
Run the bacon through a meat grinder or very finely mince it. Put the bacon in a skillet large enough to hold it in one layer and cook over medium-low heat, stirring frequently so that it doesn’t burn, until the fat is rendered and the bits of bacon are crispy, 4 to 5 minutes. Remove the bits of bacon to a paper towel to drain, reserving the fat. You need 5 tablespoons bacon fat for this recipe.
Combine the cornmeal, salt, baking soda, baking powder, and bits of bacon in a medium bowl. Reserve 1 tablespoon of the bacon fat and combine the remaining 4 tablespoons fat, the buttermilk, and egg in a small bowl. Stir the wet ingredients into the dry ingredients just to combine; do not overmix.
Move the skillet from the oven to the stove, placing it over high heat. Add the reserved tablespoon of bacon fat and swirl to coat the skillet. Pour in the batter, distributing it evenly. It should sizzle.
Bake the cornbread for about 20 minutes, until a toothpick inserted in the center comes out clean. Serve warm from the skillet.
════ Note ════
Use any leftovers to make Cornbread and Buttermilk Soup.
Makes about 12 small cakes
Hoecakes reference a time when people didn’t have proper vessels for cooking. So hoecakes were made using whatever tools were available. Often it was a straightened “chopping hoe” that could be held over the fire, providing a flat surface on which to bake. Of course, if you didn’t have a pan to cook in, you probably didn’t have chemical leavening of any type either. When heated until very hot on the embers of a fire, the scorching metal would cause the water in the batter to expand very rapidly, giving a bit of rise to the finished cakes.
Made with a little pork fat stirred into a simple cornmeal-and-water mixture, hoecakes are one of the most evocative of working-class foods. Eat them plain with some sorghum drizzled over the top. If you’re feeling fancy, top them with a salad of smoked trout and a few watercress leaves—or go completely over the top: dollop them with a bit of fresh trout roe, and serve with a bowl of thick buttermilk for spooning on the side.
2 cups cornmeal, preferably Anson Mills Antebellum Fine Yellow Cornmeal (see Resources)
1 teaspoon baking soda
1¾ cups plus 2 tablespoons water
3 tablespoons Rendered Fresh Lard, plus more if needed
2 tablespoons unsalted butter, plus more if needed
Combine the cornmeal and baking soda in a small bowl.
Bring the water to a boil in a medium saucepan over high heat. Remove the pan from the stove and stir in the cornmeal. Stir in 1 tablespoon of the lard.
Heat the butter and the remaining 2 tablespoons lard on a griddle pan, preferably cast iron, over high heat. Cooking in batches if necessary, spoon the batter onto the griddle to make cakes about 1 inch in diameter. When you see craters in the tops of the cakes, after about 2 minutes, flip them and cook for about 2 minutes on the other side. They should be golden and crispy on both sides. Wipe out the pan with paper towels between batches if the butter scorches, and add fresh butter and lard. Serve the hoecakes immediately.
Heirloom Corn

I’ve got corn in my blood, literally and figuratively. From the small bit of Native American Cherokee blood to my predilection for saving jar upon jar of old corn seeds for my collection, sometimes I think I was simply born to grow corn, and I aim to preserve one variety every year. I think that would be a respectable contribution to the world thirty years down the road. Corn is the most widely grown crop in the Americas, and it has a rich history reaching back to the time of the Mayans (who domesticated the plant from a native Mesoamerican grass), but few people understand how deeply corn production reaches into our lives and how rare the older heirloom varieties have become. In the wake of industrialization, Americans have become accustomed to hybridized ears of sweet corn designed to be cooked and eaten fresh, and there’s nothing wrong with that; I love a good ear of corn in the summertime. But most corn is grown to be dried, maybe ground, and it ends up in everything from grits to ethanol fuel.
Heirloom corn is actually responsible for most of my favorite things, starting with bourbon. Of course, it’s also responsible for grits and cornbread, and I can’t imagine life without those two things on the table.
One of the reasons for corn’s value is its ability (when dried) to keep through the winter and into the spring. Growing corn and squirreling it away in one form or another was commonplace in the Old South and allowed the early settlers to survive. I find it somewhat ironic that European immigrants (and now their descendants) became so dependent on this American plant. The first crop I ever planted for seed-saving purposes was an old Indian variety, Jimmy Red Corn, and now I have a collection of more than 100 different types that I hope to never stop growing and sharing with others. The corn varieties I’m after are honest, edible products and when I find some I like, I save every old seed I can.
One of the interesting things I’ve noticed while collecting seeds is how specifically regional the older corn selections are. Each variety tells a story of its respective region and the people who have lived there, and I love it when I find myself in a discussion with someone about their favorites. John Koykendall of Blackberry Farm can tell you the history of Webb Watson. My friend Glenn Roberts waxes on for hours about Carolina Gourd Seed or Henry Moore corn. Ask Celeste Albers what she prefers, and she’ll say John Haulk, named for a well-known farmer from Wadmalaw Island, where she grew up. Ask Gra Moore his preferred corn, and he’ll name ten, saying that it’s like asking him to pick his favorite child.
We trade seeds like kids used to trade baseball cards, and for us they’re every bit as valuable. I hope this book inspires a few others to become connoisseurs of corn, and its many stories, as well.

How to Cook Grits Like a Southerner
Grits have played an important part in the history of the South because corn was a crop that could be grown easily in the region and dried and stored for winter consumption. A bowl of grits can tell the story of a region, a family, or a time period. Most regions in the South have a favored variety of corn with historical reference of some sort. Some people like their grits very thick; others prefer them very fine and soupy. Some use milk; some use water to cook them. Some have them for breakfast only and would never eat them for dinner. But in some places, like in the Lowcountry, people have been known to consume grits at three meals a day.
When I was a kid, I didn’t love grits the way that I love them now. Where I grew up, we didn’t have a mill and the grits I ate came from a box. I liked them just fine, but I wasn’t in love with them. These days it’s a different story. I remember the first time that I tasted grits freshly milled from heirloom corn and slowly cooked on the stove with care. It was a revelation, one of those moments where you realize how much you have to learn. Few things make me happier than a bowl of grits. Anytime I travel out of the South I find myself craving grits; they are my go-to comfort food.
Everyone has their own way of cooking grits. To be honest, the way I cook grits changes almost every time I cook them because each bag of grits cooks differently. It all depends on a few variables: the variety of the corn, the freshness of the grits, and the coarseness of the grind.
The particular variety of corn used plays a role too. It’s important to know what the starch and sugar contents are. Each variety of heirloom corn has a different starch content—dent corn has less starch than flint corn. Corn that has a high starch content will need more water in order to hydrate properly. Corn with a high sugar content will need less butter before it goes on the plate. I’ve also found that the length of time the corn spends drying in the field makes a difference in how fast the grits cook. The coarseness of the grind will also determine the cooking time and the end texture. The finer the texture, the faster the grits will cook.
Of course it’s best if the corn is used right after it’s milled. If you don’t have that luxury, keep the grits in a Ziploc bag in the freezer, where they will keep for a month or so.
Here are a couple of rules to follow when cooking grits:
Here is my preferred method for cooking grits (for the most part). The precise timing and the amount of water depend on the factors mentioned above.
1. Put 2 cups grits (see opposite, but Anson Mills Antebellum Coarse Grits [see Resources] are always a good choice) in a bowl and cover with 8 cups spring water. Don’t use tap water; the flavor and calcium content of tap water vary depending on the source, and that will affect the flavor of your grits—trust me. Allow the grits to soak for at least 6 hours, preferably overnight.
2. Use a skimmer to remove the hulls and chaff from the top of the water. Be careful not to disturb the water too much, or they will fall back down into the grits and you’ll have to wait again until they rise back to the top of the water.
3. Pour the grits and soaking water into a pot with twice the capacity of the volume of grits and water; this is important, because as the grits hydrate, they expand. Turn the heat to high. With a silicone spatula, stir like crazy to keep the grits moving until the water comes to a boil. When it comes to the boil, you will see the starch take hold (you’ll know it when you see it): the water goes from clear to creamy.
4. At this point, I take the grits off the stove and let them relax for a bit. Put a lid on the grits to hold in the steam (I think it helps trap a lot of the flavor in too).
5. After about 10 minutes, take the lid off the grits, put them over low heat, and add a couple of fresh bay leaves. Cook the grits for about an hour, stirring frequently. Taste the grits, every 15 minutes or so. After an hour, you’ll feel a textural change, and the grits will be very soft and tender. They will tell you when they are done—it’s not something you set a timer for.
6. Remove the bay leaves and add salt, hot sauce, lemon juice, and butter to taste. I like to eat grits all by themselves—yup, just grits in a bowl. And I think about the history and future of the South with every bite.
Serves 4
When I was a child, for a late-night snack or an early-morning breakfast, I would crumble leftover cornbread into a coffee cup, pour buttermilk over the top, and then sprinkle it with salt and black pepper. I had always wanted to serve some form of this in the restaurant, and my friend chef John Fleer gets the credit for turning the idea into this cornbread soup, which triggers great memories for me. Before you serve this to your guests, try it yourself the original way—just cornbread and buttermilk in a coffee cup.
2 tablespoons unsalted butter
½ cup diced sweet onion
½ cup diced celery
2 cups crumbled cold Cracklin’ Cornbread
1 cup Vegetable Stock, plus more if needed to thin the soup
2 cups whole-milk buttermilk
Kosher salt and freshly ground black pepper
Heat the butter in a large saucepan over medium-high heat. When it is frothy, add the onions and celery and cook, stirring frequently, until tender, about 5 minutes. Add the cornbread and vegetable stock, bring to a simmer, and simmer for 2 minutes. Cool to room temperature.
Working in batches if necessary, transfer the mixture to a blender and slowly pour in the buttermilk, blending until the mixture is emulsified. Add more vegetable stock if needed to thin the soup to the consistency of a cream soup. Season with salt and pepper.
Serve hot or cold, depending on the weather. Tightly covered, the soup will keep for up to 2 days in the refrigerator.
════ Note ════
I like to top the soup in various ways: with a dollop of sour cream, a drizzle of buttermilk, or a sprinkle of chopped scallion.
Glenn Roberts

Glenn Roberts is on a mission. He scours moonshiners’ cornfields, looking for new grains with abandon. A tipoff about a long-lost grain of rice can set off a three-state journey to find the seed stocks of the antebellum agriculture that defined the cooking of Charleston. But to talk rice is only to scratch the surface of what Glenn and, by extension, I are trying to do.
I found Glenn early on in my exploration of Charleston’s native foods, and I’d hate to think what Husk and McCrady’s would be without his help and guidance. His business, Anson Mills, is the most important supplier of milled grain products in the South, and the only real commercial source for many important varieties of corn, benne, and, of course, rice. But Glenn didn’t become the guru of Southern grain overnight. His journey began in childhood, with a Southern mother who brought her Depression Era experiences with African nannies and cooks on Edisto Island, South Carolina, to the family dinner table in Delaware and, later, California. He attended college in North Carolina, studied mathematics, joined an architectural design firm, and dropped out. He came to Charleston and found jobs on shrimp boats and in restaurants, and through it all, he searched for the elusive taste of heirloom grits, remembrances of his mother’s childhood. In the end, he found that he would have to raise them himself.
Glenn’s work with the Carolina Gold Rice Foundation has helped to further the cause of recovering the famous rice, but beyond even that, Glenn puts the crops back to work, contracting hundreds of acres of heirloom crop production each year. It’s these crops that find a ready market in some of America’s best restaurants, and they are an important backbone of the cookery at Husk and McCrady’s. When Glenn speaks, he reveals an incredible passion for all things Lowcountry, and it’s his tireless commitment to reviving the pantry of the antebellum period and his passion for the craft as a miller, seed saver, and farmer that have inspired many of my own pursuits.
Raising awareness and educating people about the food of our past and, more important, the food of our future in the South has been Glenn’s mission for many years. Much of my success has come from this quest as well. Before I knew Glenn, I looked at heirloom products in a very different way, as mere ingredients rather than stories unto themselves. I have him to thank for showing us the way and helping us preserve a small part of the Southern past.
Makes about 32 hushpuppies; serves 8
I worked for chef Bob Carter at Peninsula Grill when I was in culinary school, and I made a lot of hushpuppies. Bob is a true Southern cook, and he is obsessive about hushpuppies. Only he could make them right, but I occasionally got lucky and made a batch that he was happy with. I was always amazed at how he inspected each batch of puppies. He tested them every day, and we always had to fry one for him before service. It was an incredible feeling to pass “the hushpuppy test.” He would touch them and make sure that they were really crispy and perfectly round. He would then tear one open, smell it, and gently squeeze it to test for lightness.
Perfect hushpuppies are hard to find, but I try to honor Bob with this riff on his recipe, spiked with earthy ramps and fresh Atlantic blue crab. If you have access to good fresh lard, I suggest using it. Butter can be used otherwise, but lard makes a discernible difference in the flavor and texture of the finished result.
½ pound ramps, cleaned and hairy root ends removed
2 cups self-rising flour, preferably White Lily
2 cups cornmeal, preferably Anson Mills Antebellum Fine Yellow Cornmeal (see Resources)
1 to 2 cups all-purpose flour
1 tablespoon kosher salt
1½ teaspoons sugar
1¼ teaspoons freshly ground white pepper
1½ teaspoons baking soda
1½ teaspoons baking powder
¼ cup small dice sweet onion
3 large eggs
1 cup whole milk
½ cup plus 2 tablespoons whole-milk buttermilk
¼ cup Rendered Fresh Lard, melted
8 cups canola oil or a combination of 5½ cups peanut oil and 2½ cups Rendered Fresh Lard
1½ cups fresh crabmeat (see Note), picked over for shells and cartilage
Green Goddess Dressing, for dipping
Equipment
1-ounce scoop
Preheat the oven to 400°F. Line two rimmed baking sheets with parchment paper.
Bring a large saucepan of salted water to a boil. Make an ice bath in a bowl with equal parts ice and water. Put the ramps in a strainer and submerge them in the boiling water for 45 seconds. Remove and submerge them in the ice bath until completely cold. Drain and shake off the water, then drain and dry on paper towels. Chop the ramps into small pieces.
Put the self-rising flour, cornmeal, 1 cup all-purpose flour, the salt, sugar, white pepper, baking soda, and baking powder in a large bowl and whisk to mix well. Add the onion and half of the chopped ramps and mix well. Lightly beat the eggs in a medium bowl, then whisk in the milk, buttermilk, and lard. Stir the wet ingredients into the dry ingredients.
Pour the canola oil into a deep fryer or a large pot and heat it to 350°F.
While the oil is heating, blend the remaining ramps in a blender on high, adding just enough water to keep them moving, until very smooth, about 4 minutes. Add the puree to the batter. (Because the size and moisture content of the ramps vary, you may need to add all-purpose flour to the batter after frying a test hushpuppy.)
When the oil is hot, dip a 1-ounce scoop into the hot oil to coat it, then fill the scoop with batter and tap it a time or two to release any air pockets. Hold the scoop 1 inch above the hot oil and carefully drop the batter into the oil. If the batter seems too thin, add more all-purpose flour, whisking until smooth. The desired result is a hushpuppy that is golden brown and crispy on the outside and light as a feather inside. When the batter is correct, carefully fold in the crab.
Scoop the batter into the hot oil, without crowding the hushpuppies, and fry, without touching them, for about 1 minute. Then carefully tap the hushpuppies to loosen them if they have stuck to the fryer basket or the bottom of the fryer or pot and fry until golden brown, 5 to 7 minutes. Transfer the hushpuppies to one of the prepared baking sheets. Repeat until you’ve used all the batter. Be sure that the oil returns to 350°F before you put in the next batch.
Bake the hushpuppies for about 4 minutes to ensure that they are cooked through. Drain on paper towels and serve hot, alongside the dressing for dipping.
Any crabmeat will work with this recipe. I use a mix of blue and stone crab meat.
Makes 18 fritters
Pokeweed only grows wild in the South. You can find it growing on the side of the road, and you have to pick it young and tender. When I was a kid, my mom would pull the car over and have us pick wild pokeweed. Then she would make these fritters.
Many people won’t eat pokeweed because the mature plant is known to be poisonous, but generations have enjoyed it in the springtime—as long as the pokeweed is picked before it shows a hint of purple coloration.
4 cups fresh pokeweed (about 8 ounces)
2 cups cornmeal, preferably Anson Mills Antebellum Fine Yellow Cornmeal (see Resources)
2 tablespoons kosher salt
½ teaspoon baking powder
¼ teaspoon baking soda
¼ teaspoon cayenne pepper
1 large egg
1½ cups whole-milk buttermilk
¾ cup peanut oil or Rendered Fresh Lard, melted
Equipment
¾-ounce scoop
Preheat the oven to 300°F. Line two rimmed baking sheets with parchment paper.
Wash the poke leaves in a sink filled with cold water, changing the water twice, to remove any sand. Drain and dry with kitchen towels. Remove the stems. Make stacks of the leaves, roll them into cylinders, and cut them into very thin ribbons.
Combine the cornmeal, salt, baking powder, baking soda, and cayenne pepper in a large bowl. In a small bowl, whisk the egg into the buttermilk. Stir the wet ingredients into the dry ingredients to combine. Stir in the poke.
Heat a large cast-iron skillet over medium heat. Add 2 tablespoons of the oil. When the oil shimmers, use a ¾-ounce scoop to add scoops of batter to the skillet. Do not overcrowd the skillet; cook about 3 fritters at a time. Cook the fritters until their tops begin to have bubbles like a pancake, about 1 minute. Flip them over and cook for another 2 minutes, or until a cake tester inserted in the middle comes out clean. Transfer the fritters to a wire rack. Add another 2 tablespoons of oil to the skillet and repeat the procedure. After you have cooked 9 fritters, pour out the oil, wipe out the skillet, and start with fresh oil.
Once all fritters have been cooked, place them on the prepared baking sheets and place them in the oven for 10 minutes. When they are done, they should be crispy and cooked through.
Serve immediately, with the pepper jelly.
Carolina Rice
The exact year that rice was introduced to Charleston is still a bit of a mystery, but by the tail end of the seventeenth century, it had certainly taken hold. An old legend credits a ship captain sailing in from Madagascar with a bag of the seed that became the basis for the famous Carolina Gold variety. But the basis for most South Carolina rice varieties was likely rice brought in from West Africa by enslaved Africans predating this story by many years; it’s something that current genetic research validates. One thing is for sure: Africans knew rice, rice built Charleston, and without either, neither the city nor its cuisine would be what it is.
Some of the first Charlestonians emigrated from Barbados, where their fathers and grandfathers established massive sugar plantations, covering the land with cane fields and the slaves to work them. Our subtropical climate was a bit too cold for sugarcane, but these early settlers knew the wealth of the Atlantic trade world. They found a suitable crop in rice, developed the industry into the premier source, and Charleston became one of the richest places in America because of it.
The importance of the crop led to its incorporation in all aspects of the culture, and when you visit Charleston, you’ll see vestiges of the rice trade everywhere. The furniture companies make fancy “rice beds” that sit in nearly every upscale bed-and-breakfast in town. Gullah ladies, who set up shop on street corners, sell woven sweetgrass “winnowing” baskets that were once used to separate the rice grain from its chaff. And no proper Charleston meal would ever come to the table without the ubiquitous bowl of rice. Rice became so important to Charleston’s sense of identity that plantations kept growing rice even after the slaves were emancipated and competition from growers in Texas and Louisiana made it less than lucrative to do so.
At Husk and McCrady’s, we try to bring the pantry of the Carolina rice kitchen, as Glenn Roberts calls it, back into today’s light. Our breads are spiked with benne and rice flour (rice bread being a mainstay of the Colonial Charleston table), and we experiment with everything from rice wines to aged rice. It is an old cuisine reinterpreted—not so much a culinary relic, but an attempt to recapture the heirloom aspects of a complex food culture.
Serves 4
Gullah people of West African origin often cooked rice using a one-pot method known as “soaked rice,” where the rice is simmered covered with twice its volume of water for about twelve minutes and then left to sit without lifting the lid for at least another fifteen or twenty minutes. Some Charlestonians call this the “no-peek” style, and it works well with most commercial brands of long-grain rice. True Carolina Gold rice takes a good bit more effort, but the result is the subtle flavors of the rice at their finest. We serve Carolina Gold simply, in bowls, with a dollop of good butter, scattered with herbs and flowers that are in season at the time. Because of its creamy texture, this has been called “Charleston ice cream” for hundreds of years—plus, it can be scooped.
2 teaspoons kosher salt
¼ teaspoon freshly ground white pepper
1 fresh bay leaf
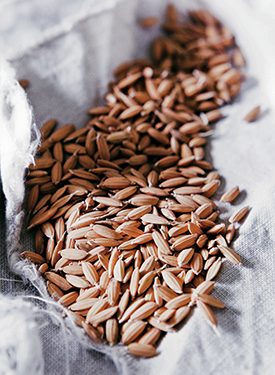
1 cup Anson Mills Carolina Gold Rice (see Resources)
4 tablespoons unsalted butter, cubed
Herbs, flowers, and benne seeds (optional)
Preheat the oven to 300°F.
Put 4 cups water, the salt, pepper, and bay leaf in a medium heavy-bottomed saucepan and bring to a boil over medium-high heat. Stir to be sure the salt has dissolved, then reduce the heat to medium. Add the rice, stir once, and bring to a simmer. Simmer gently, uncovered, stirring occasionally, until the rice is al dente, about 8 minutes. Drain.
Spread the rice out on a rimmed baking sheet. Dry the rice in the oven, stirring it occasionally, for 10 minutes. Scatter the butter evenly over the rice and continue stirring every few minutes. The rice should be dry in approximately 5 minutes more: all excess moisture should have evaporated and the grains should be separate. Serve immediately with a sprinkle of herbs, flowers, and benne seeds, if you wish.
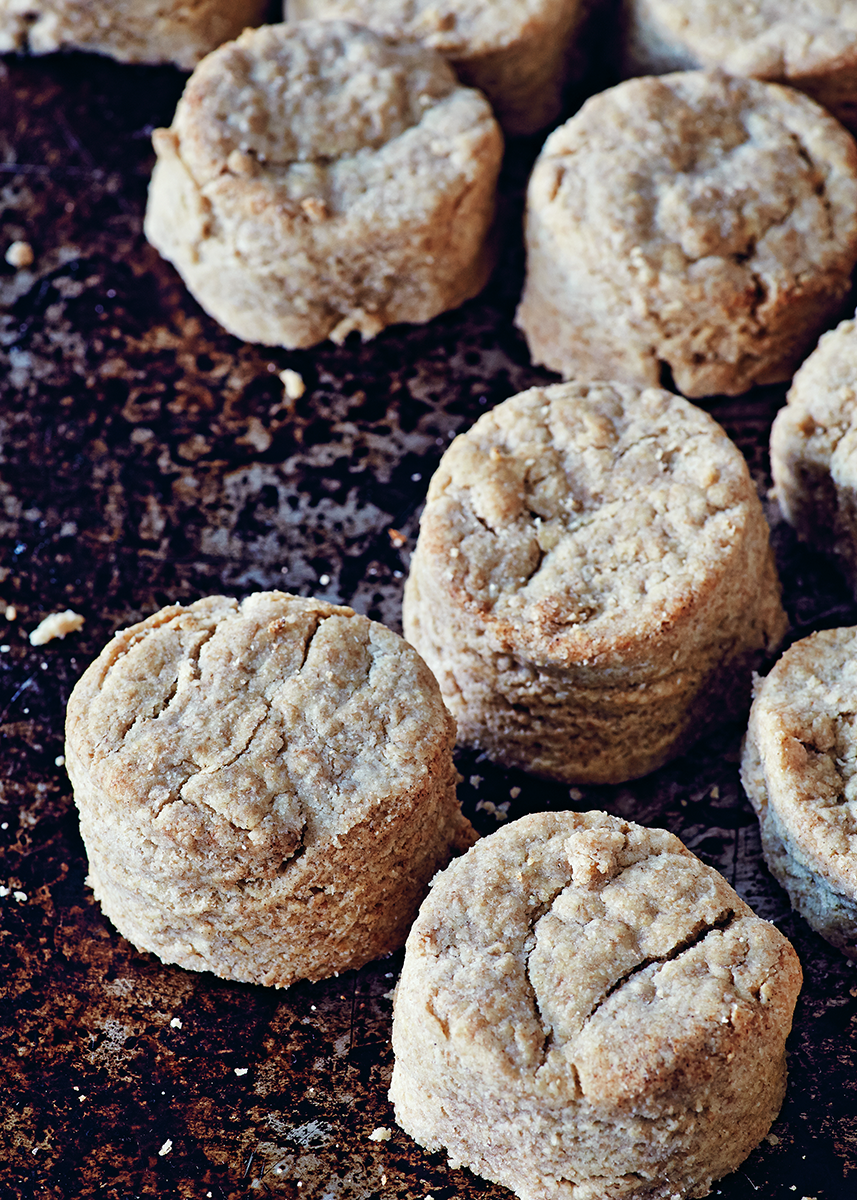
Makes 10 biscuits
Einkorn is technically wheat, but the variety is so old that it can behave very differently from the bag of bleached flour you might pick up in the supermarket. In botanical terms, einkorn is very closely related to the first wild forages from which all wheat is derived and, because of that, it’s very hard to grow on a large scale: it simply doesn’t want to be cultivated. I like that about einkorn. Wild plants sometimes want to stay that way, and the struggle adds intrigue to the flavor.
¾ cup Rendered Fresh Lard
6 tablespoons unsalted butter
4½ cups Anson Mills Einkorn Flour (see Resources)
1 tablespoon plus ½ teaspoon baking powder
1½ teaspoons kosher salt
12 ounces very cold whole-milk buttermilk
Preheat the oven to 425°F. Line a baking sheet with parchment paper.
Freeze the lard and butter for 20 minutes, or until they are solid enough to grate on the large holes of a box grater. Grate them and return to the freezer.
Combine the flour, baking powder, and salt in a large bowl and mix well. Work the frozen lard and butter into the flour with your fingertips until the pieces of butter and lard are about the size of peas. Add the buttermilk and stir until the dough comes together.
Turn the dough out onto a floured work surface. Use a lightly floured rolling pin to roll it out to a ½-inch thickness. Cut out the biscuits with a 2-inch round cutter, flouring it between cuts if necessary, and place them on the prepared baking sheet. The biscuits should just barely touch each other.
Bake the biscuits for 15 to 20 minutes, until golden brown. Remove them from the baking sheet and serve.
════ Note ════
The biscuits are best served immediately, but they can be made up to 6 hours ahead and reheated briefly in a 350°F oven.
Makes 16 small cakes
The inspiration for this recipe came from a book called What Mrs. Fisher Knows about Old Southern Cooking, written in 1881. Many believe it to be the first African-American cookbook. Mrs. Fisher was a former slave from Mobile, Alabama, and she offered up some incredible recipes, like Calf’s Head Stew and Lamb Vigareets. I particularly like this one because it makes use of leftover rice from dinner the night before, a tradition that many can appreciate. These cakes were often served for breakfast, but I eat them any time of day.
½ cup Anson Mills Carolina Gold Rice (see Resources)
1 cup cornmeal, preferably Anson Mills Antebellum Fine White Cornmeal (see Resources)
1 teaspoon baking powder
1 teaspoon kosher salt
1 cup whole-milk buttermilk
3 large eggs, lightly beaten
1 tablespoon Rendered Fresh Lard, melted
4 tablespoons unsalted butter or lard, plus more if needed
Bring 3 cups water to a boil in a medium heavy-bottomed saucepan over medium-high heat. Reduce the heat to medium, add the rice, stir once, and bring to a simmer. Simmer gently, uncovered, stirring occasionally, until the rice is overcooked and a little mushy, about 15 minutes. Drain.
Combine the cornmeal, baking powder, and salt in a small bowl, then stir the mixture into the hot rice. Add the buttermilk, eggs, and melted lard.
Heat the butter on a griddle pan, preferably cast iron, over medium-high heat. Cooking in batches if necessary, spoon the batter onto the griddle to make cakes about 1 inch in diameter. When you see craters in the tops of the cakes, after about 2 minutes, flip them and cook for about 2 minutes on the other side, or until golden and crispy on both sides. (If working in batches, wipe out the pan with paper towels between batches if the fat scorches and add fresh fat.) Serve the griddle cakes immediately.
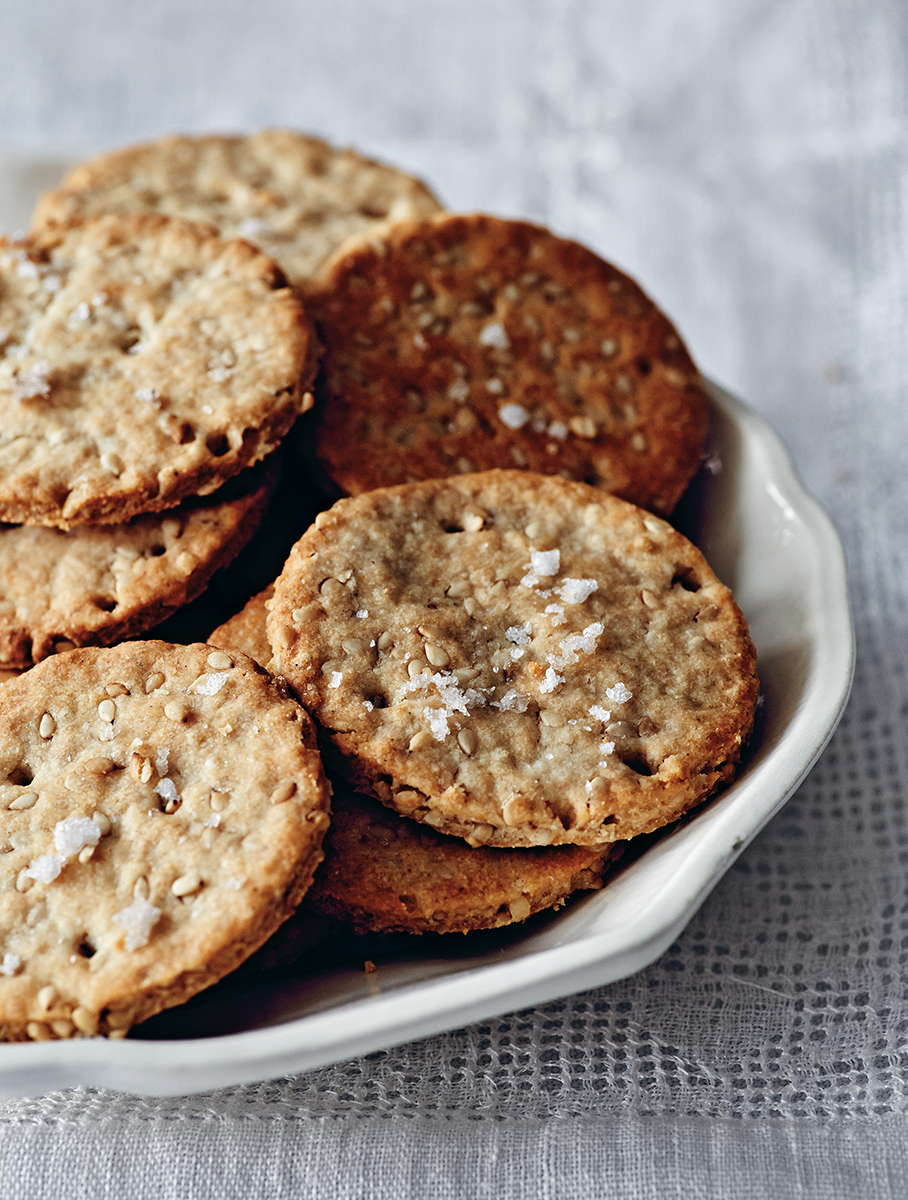
Makes about 10 dozen wafers
Wheat thins are almost foolproof and a perfect vehicle for tasting different types of wheat. Anson Mills sells all different kinds of Colonial-period wheats, and they each have different characteristics. I suggest ordering several types of wheat flour and experimenting with them in this recipe.
Wheat thins are the perfect platform for a swipe of Pimento Cheese.
4 cups Anson Mills Artisan Whole Grain Wheat Flour (see Resources)
2 tablespoons plus 2 teaspoons sugar
1 tablespoon kosher salt
1 teaspoon baking powder
5 tablespoons cold unsalted butter
5 tablespoons cold Rendered Fresh Lard
1 cup boiling water
Position the racks in the upper and lower thirds of the oven and preheat the oven to 350°F. Line two baking sheets with parchment paper.
Combine the flour, sugar, salt, and baking powder in a food processor and pulse to mix well. Add the butter and lard and pulse 10 times. With the processor running, slowly add the water. The dough will be tacky.
Transfer the dough to a floured work surface and lightly knead it into a ball. Using a lightly floured rolling pin, roll it out into a square about ⅛ inch thick. Using a knife or a pizza cutter, cut the dough into 2-inch squares. Prick them with a fork. Arrange the wheat thins on the prepared baking sheets. You will have only a few scraps because of the square cuts, but the scraps can be pressed together, rerolled, and cut again.
Bake the crackers for about 20 minutes, until brown and crispy; halfway through, rotate the sheets top to bottom and front to back to ensure even baking. Remove the wheat thins to a wire rack to cool.
The wheat thins will keep for up to 4 days in an airtight container.
Makes about 4 dozen crackers
A great soda cracker should shatter when you bite into it. It should be thin and crispy, like the industrial saltine crackers available at any old grocer, but when you make these crackers using fresh lard and smoky bacon fat, your opinion of the lowly cracker will change. And your clam chowder may never be the same. I use raw milk, which adds extra fat and flavor to the crackers, but you can substitute whole milk, if you’d like.
2¼ cups Anson Mills Einkorn Flour (see Resources)
½ teaspoon baking soda
½ teaspoon kosher salt, plus more for sprinkling
¼ cup cold Rendered Fresh Lard
¼ cup cold bacon fat
½ cup whole milk, preferably raw
Position the racks in the upper and lower thirds of the oven and preheat the oven to 375°F. Line two baking sheets with parchment paper.
Combine the flour, baking soda, and salt in a medium bowl and mix well. Cut in the lard and bacon fat with two forks until the pieces are the size of peas. Make a well in the center of the mixture, add the milk, and stir well to combine. The dough should look smooth.
Turn the dough out onto a floured work surface and knead it until firm and no longer sticky, about 2 minutes. Using a lightly floured rolling pin, roll the dough out into a square about ⅛ inch thick. Using a knife or a pizza cutter, cut the dough into 2-inch squares. Prick them with a fork and sprinkle lightly with salt. Arrange the soda crackers on the prepared baking sheets. You will have only a few scraps because of the square cuts, but the scraps can be pressed together, rerolled, and cut again.
Bake the crackers for 20 to 25 minutes, or until golden brown; halfway through, rotate the sheets top to bottom and front to back to ensure even baking. Remove the crackers to a wire rack to cool.
The crackers are best eaten when really fresh, but they can be kept for up to 2 days in an airtight container.
Makes 7 to 8 dozen wafers
Benne wafers are synonymous with Charleston, and loads of them leave Market Street every day in the hands of tourists. Unfortunately, most of those benne wafers are made with modern forms of sesame seeds, not the older West African benne, which has a much different flavor. Older forms of benne are harder to grow than newer varieties, but they have a much more savory and floral character, with a beautiful bitterness at the end, giving these wafers an incredible depth of flavor.
1 cup Anson Mills Antebellum Benne Seeds (see Resources)
2 cups Anson Mills French Mediterranean White Bread Flour (see Resources)
1 cup Anson Mills New Crop Heirloom Bennecake Flour (see Resources)
1 teaspoon kosher salt
½ teaspoon baking powder
½ teaspoon baking soda
⅔ cup cold Rendered Fresh Lard
⅔ cup cold whole milk
Fleur de sel
Position the racks in the upper and lower thirds of the oven and preheat the oven to 425°F. Line two baking sheets with silicone baking mats or parchment paper.
Toast the benne seeds in a heavy skillet over medium heat, watching carefully and stirring occasionally, until light brown and fragrant, about 5 minutes. Spread them out on a baking sheet to cool.
Sift the bread flour, bennecake flour, salt, baking powder, and baking soda into a large bowl and mix well. Cut the lard in with two forks until the pieces are the size of peas. Fold in the benne seeds. Stir in the milk.
Turn the dough out onto a lightly floured work surface and knead until it comes together, about 3 minutes. Divide it into 3 parts. Pat each part into a disk, then wrap 2 pieces loosely in plastic wrap and set aside. (You do not need to refrigerate them unless your kitchen is very hot.) Using a lightly floured rolling pin, roll the remaining piece of dough out on the floured surface into a paper-thin circle. Prick it all over with a fork and cut out rounds with a 2-inch cutter. Transfer the rounds to the prepared baking sheets and sprinkle them lightly with fleur de sel. Repeat with the remaining dough. Press together any scraps, reroll them paper-thin, and cut out more rounds.
Bake the wafers for about 8 minutes, until golden brown; halfway through, rotate the sheets top to bottom and front to back to ensure even baking. Remove the wafers to a wire rack to cool.
The wafers will keep for up to 5 days in an airtight container.
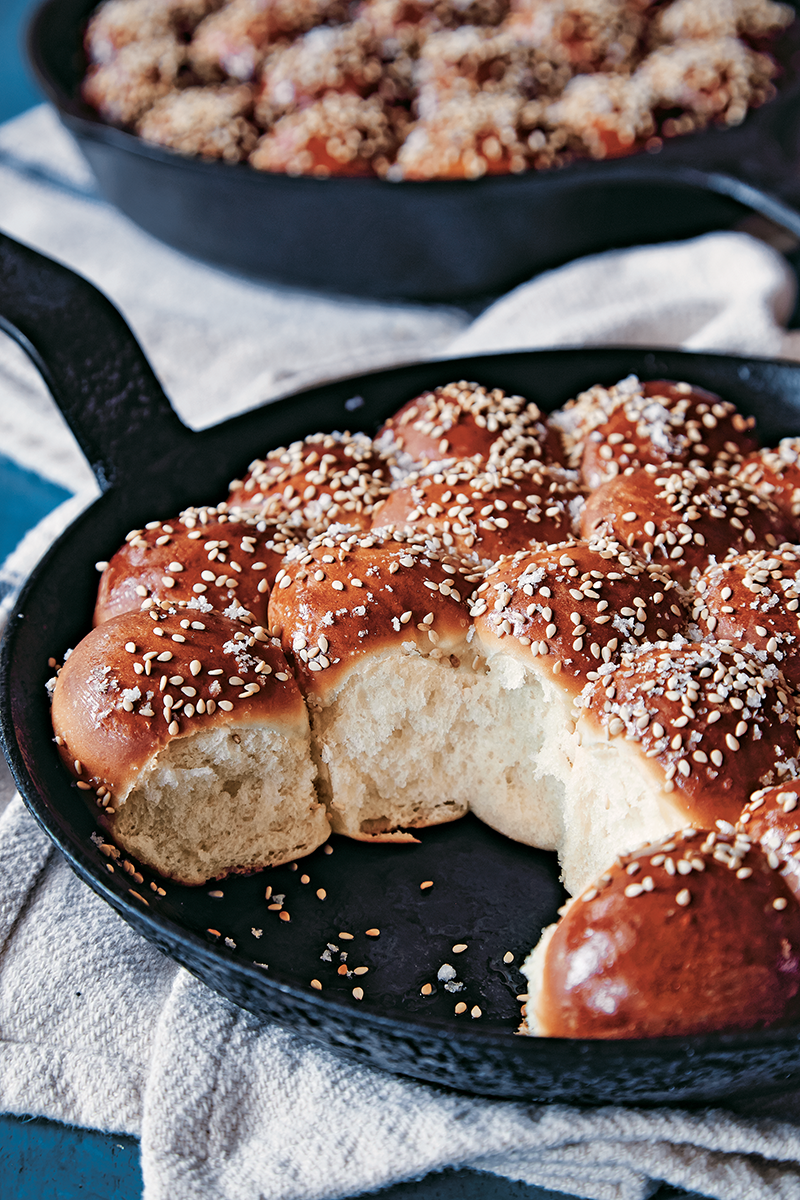
Makes 44 rolls
I could eat my weight in these tasty little rolls. We serve them every day at Husk. They are the first things that hit the table when guests arrive, so they have to be special. Bread should make everyone feel comfortable before a meal starts, whether it’s in a restaurant or at home.
I like the food at Husk to tell a story, so we make these using Blé Marquis flour, which is a specialty wheat flour from Anson Mills. I want our guests to taste how older varieties of wheat pack so much more flavor. You can substitute all-purpose flour, if you must. A sprinkling of crunchy salt and benne seeds at the end makes the rolls irresistible.
¼ cup sugar
¼ cup local honey
1 teaspoon kosher salt
3 cups all-purpose bread flour
1½ cups all-purpose flour, preferably Blé Marquis flour (see Resources)
¼ cup crumbled fresh yeast
2 cups whole-milk buttermilk
1 large egg
1 tablespoon water
2 tablespoons Anson Mills Antebellum Benne Seeds (see Resources)
Fleur de sel
Make a paste with the sugar, honey, and salt in a large bowl. Add both the flours and stir them in with a wooden spoon. In a small bowl, mix the yeast with the buttermilk, then add this to the flour mixture all at once and stir in.
Turn the dough out onto a lightly floured work surface and knead it until smooth, 5 to 6 minutes.
Lightly spray a large bowl with a nonstick spray and place the dough in the bowl. Cover the bowl with a kitchen towel and put it in a warm place. Let the dough rise until it has doubled in size, about 1 hour.
Remove the towel and gently punch the dough down. Cover the bowl again with the kitchen towel and let the dough rise again until doubled in size, about 45 minutes.
Spray two round 9-inch cast-iron skillets with nonstick spray. Portion the dough into 1-ounce rolls: divide the dough in half and then in half again, and divide each portion into 11 pieces. Roll each piece into a ball and carefully place 22 rolls in each pan; they should fit snugly. Cover the pans lightly with kitchen towels, put them in a warm place, and let the rolls rise until they have doubled in size, about 2 hours.
About 20 minutes before the rolls have finished rising, preheat the oven to 400°F.
Whisk together the egg and water to make an egg wash. Using a pastry brush, lightly brush the tops of the rolls with the wash. Sprinkle the rolls with the benne seeds and lightly with fleur de sel. Bake the rolls for about 25 minutes, rotating the pans once halfway through. Test the rolls using a thermometer: the internal temperature should read 195°F. Cool the rolls in the pans on a rack.
The rolls are best served as soon as they have cooled, but they can be kept covered in the pans for up to 1 day and reheated in a 350°F oven for 10 minutes.
Serves 6 as a side dish or 4 as an entrée
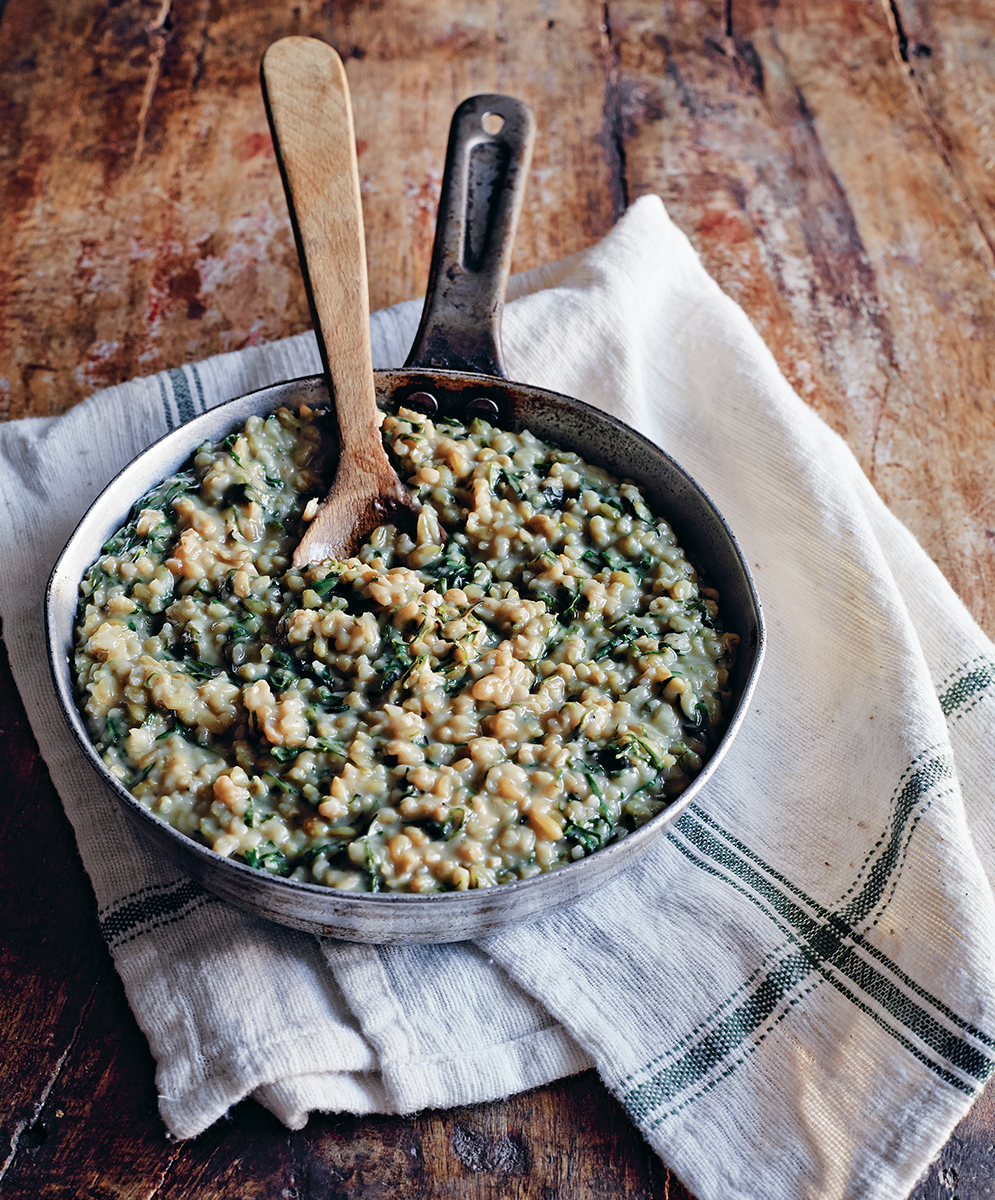
Like einkorn, farro is an early form of wheat that can be traced back to the Mediterranean, where it was first domesticated. Actually, the word farro can refer to the hulled grains of einkorn as well as to emmer wheat and spelt. Spelt is the largest variety, what the Italians call farro grande, and it’s what I often source from Anson Mills. I like farro for its nutty flavor and chewy texture. If you have ever made risotto, this recipe will look familiar; it uses the same approach—hence the name. Here I pair farrotto with fall flavors, but it can be a vehicle for whatever looks great at the farmers’ market. Just keep in mind that farrotto brings a bit more heft to the plate than a traditional risotto.
Acorn squash
1 small acorn squash (about 2½ pounds)
1 tablespoon unsalted butter
1½ teaspoons kosher salt
Scant 1 teaspoon freshly ground white pepper
1 cup Vegetable Stock
1 bunch Red Russian or other kale (about 3 pounds)
Farrotto
2 quarts Vegetable Stock
1½ teaspoons canola oil
1½ cups Anson Mills Farro Verde (see Resources)
4 tablespoons unsalted butter
½ cup diced white onion
1 garlic clove, sliced paper-thin
½ cup dry white wine
1 cup freshly grated Parmigiano-Reggiano cheese
For the squash: Preheat the oven to 425°F.
Cut the squash in half. Remove and discard the seeds and rinse the squash under cold water. Place the squash cut side up on a rimmed baking sheet. Divide the butter between the two halves and sprinkle with the salt and white pepper. Roast the squash for 35 minutes, or until fork-tender.
While the squash is roasting, prepare the kale: Remove the stems and ribs from the leaves. Make stacks of the leaves, roll them into cylinders, and cut them into very thin ribbons. Wash the kale in a sink of cold water, changing it several times, to remove any sand. Drain and dry with paper towels.
When the squash is done, remove it from the oven and pour the butter and juices from the cavities into a container. Let the squash cool enough to handle.
Warm the stock in a small saucepan over medium-high heat. Add the butter and juices from the cavities of the squash.
Peel the squash. Place the pulp in a blender, add the warm stock and juices, and blend on high to a very smooth puree, about 3 minutes. Set aside.
For the farrotto: Preheat the oven to 425°F.
Heat the stock in a partially covered large saucepan over medium heat; keep warm over low heat.
Heat the canola oil in a medium ovenproof skillet over medium heat. When the oil is shimmering, add the farro and stir to coat it with the oil. Place the skillet in the oven and toast the farro for 8 minutes, stirring after 4 minutes. Transfer the farro to a bowl and reserve. Wipe the skillet clean.
Put the empty skillet over medium-high heat. When the skillet is hot, about 2 minutes, add 2 tablespoons of the butter and reduce the heat to medium. Add the onion and cook, stirring occasionally, until translucent, about 4 minutes. Add the garlic and cook, stirring constantly, until soft, about 2 minutes. Add the wine, increase the heat to high, and cook until the wine is almost evaporated, about 2 minutes.
Add the toasted farro to the pan and stir to coat. Add ½ cup of the warm stock, reduce the heat to medium, and stir until the liquid is almost absorbed. Continue cooking, adding ½ cup of warm stock at a time, stirring to prevent scorching and letting each addition be absorbed before adding the next, until the farro grains have expanded and are al dente, about 1 hour. The farro will look creamy like risotto. (The farro can be made up to 3 days ahead. Cool to room temperature, cover, and refrigerate. Reheat over low heat before proceeding.)
To complete: Remove the farro from the heat, add the squash puree and kale, and stir until the kale is wilted. Put the skillet back over medium heat and add the remaining 2 tablespoons of butter and the cheese. Stir and serve.