Classic Cheese Ball (here)
IF YOU’RE A NOVICE COOK, or new to setting up a vegan kitchen, this chapter will be a valuable resource. Over the years, we’ve figured out the tools and gadgets that work best for us. We favor ones that make our time in the kitchen more efficient and more fun, and that don’t take up too much space. We love multitaskers and versatile equipment—basically, we like a sous chef that we can plug in or turn off. Your favorite tools will depend on the recipes you make regularly and the skills you feel a machine does better. To get you started, we’ve included an overview below of the equipment we rely on daily in our kitchens and for all the recipes in this book.
Blender: With the smoothie revolution, blenders have seen a significant resurgence in recent years. Once relegated to the back of a cupboard, blenders now seem to have secured their spot as a countertop essential. Blenders are designed to liquefy, but that doesn’t mean you can only make liquids. They are a versatile tool we depend on. If you’re simply making smoothies and sauces, there are a lot of great, affordable blenders that can do the job. But you’ll see throughout this book that we turn to our blenders for a whole lot more than liquefying fruit, which has led us to rely on multitasking superstar Blendtec. It isn’t a quiet blender but it can easily churn up a cheesecake batter, blitz oats into a quick flour, or turn tomatoes into a silky smooth sauce.
The easiest way to clean your blender is to fill it about a third of the way with water and add a couple drops of dish detergent. Pulse to swirl around the suds. Pour out the mixture and rinse thoroughly.
Citrus reamer/hand juicer: Fresh citrus juice is a culinary game changer. To make it easier to infuse your recipes with these bright, bold flavors, a handheld citrus reamer (usually made from metal or wood) or a small hand juicer (which looks like a citrus reamer secured to the top of a small container that holds the juice) is ideal. Both are easy to find and inexpensive.
If you get into the habit of using fresh citrus, it is an amazing time- saver to juice a batch of lemons and limes once a week and store the juice in jars in the fridge to have on hand and ready for recipes.
Cooling rack: A wire cooling rack is a common tool for bakers. When cookies, breads, or pastries are pulled from the oven and transferred to a cooling rack on the counter, it provides just enough space underneath the confections for air to circulate and for the treats to cool evenly. But that’s not all it can do. With parchment paper placed underneath, a cooling rack makes a great garnishing station. Just imagine how much easier it is to evenly drizzle chocolate over a tray of snack bars, and then pull away the parchment from underneath and place the whole cooling rack in the fridge for the chocolate to firm. Air-aged cheeses also benefit from a cooling rack. As with the warm treats mentioned above, the cooling rack lets the air circulate around the cheese, allowing a rind to form and the cheese to firm evenly.
Food processor: The best sous chef we’ve ever had is the food processor. This is the magic machine that can make butter from nuts, turn bananas into ice cream, and make the most incredible hummus we’ve ever tasted. Unlike a blender, which tries to make everything into a liquid, a food processor is designed to grind or chop. It won’t seize up from lack of liquid like a blender will; instead, it makes steady work of breaking things down. Cuisinart is our brand of choice because they seem to last forever. Depending on the number of people in your household or how much batch cooking you do, try to work with the smallest bowl size that will accommodate the recipe. The contents need to have lots of contact with the blades for the food processor to do its work, so if you add just a couple of almonds, they will bounce around, avoiding the blade, but add a couple of handfuls and you’re in business.
Many food processors come with other attachments, including ones for slicing vegetables, which can save you lots of time when preparing salads and slaws—and will contain the stain of beet juice. A plastic S-blade is a great attachment to use for kneading dough for breads and pizzas.
Kitchen scale: In Canada and the United States, we tend toward cups, teaspoons, and tablespoons to measure out our recipes, while in the United Kingdom, Australia, and other areas, the kitchen scale is king. Although we agree that a kitchen scale ensures more reliable results as the size of cups can vary and some ingredients are just hard to fit into a measuring cup for an accurate measurement, we know it is a cooking style few in North America have adopted. However, we find a kitchen scale is the ideal way to measure chocolate, which is often listed in recipes by the number of ounces.
Mandoline: Most home cooks do not have the knife skills of a sushi master—meaning paper-thin slices can be difficult to produce and time-consuming to create. So, we recommend a mandoline or V-slicer, which turns that laborious process into a two-second task. A mandoline has a very sharp blade inserted into a piece of metal or plastic. The thickness of the desired slice can be adjusted using a dial. Then grasping the vegetable you need to slice in one hand (wearing a hand guard) and holding the mandoline with the other, you run the vegetable across the blade with even force in a fluid motion. The perfect slices slip out the underside of the blade as you go. A V-slicer is similar but has only a standard set of thicknesses available and is adjusted by changing the blades for the thickness required. For recipes where thickness matters, a mandoline or V-slicer is an incredible tool—think crispy, crunchy sweet potato chips in particular.
Mason jars: Our entire pantries are contained in mason jars. Mason jars are endlessly reusable, available in a myriad of sizes, and easy to stack, store, and transport. Glass jars with a screw-on lid keep dry ingredients fresh longer, can be used to shake up salad dressing and sauces stored in the fridge, and can become the most versatile lunchbox you’ve ever owned. Mason jars can go from microwave to fridge to freezer to dishwasher, which makes them the go-to container in our kitchens. We like to pick them up from grocery stores or hardware stores at the end of the summer when the time for preserving the harvest makes them readily available.
Measuring cups: If nothing else, your kitchen needs measuring cups. Making recipes reliable all comes down to ratios. For better results, we recommend using dry measuring cups (the ones you often see stacked inside each other) for dry ingredients and liquid measuring cups (usually plastic or glass, with a spouted edge and the amounts written up the side) for liquids.
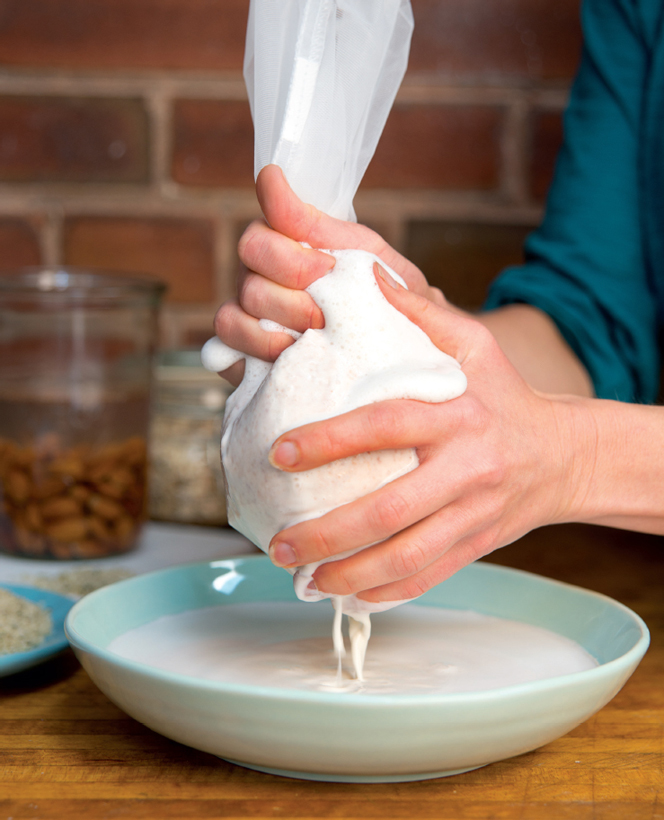
Nut milk bag: This could be the punchline to some X-rated jokes, but in our context it’s just a thin cloth bag with a drawstring top. It is used to make nut milks and cheeses because the weave is fine enough to let just the liquid through, retaining the pulp or cheese base, for a super-smooth result. Although cheesecloth can be used as an alternative, it is a bit more complicated, as you need to layer pieces of cloth to get the right weave for straining. As nut milk bags can be tossed in the washing machine to be ready for their next use, they are a practical, eco-friendly investment. Nut milk bags are becoming increasingly popular and can be found in many health food stores and online at very reasonable prices.
Offset spatula: Lisa’s very favorite kitchen utensil. An offset spatula looks a little like a knife that is bent in the middle. It is an amazing tool for spreading frostings and chocolate, scraping down the sides of blenders and food processors, and any general smoothing tasks in your kitchen. Affordable and versatile, it gets an A+ from us.
Pizza cutter: Although typically used for rolling across saucy pies to slice a circle into perfect wedges, the pizza cutter can do so much more. The thin blade makes it ideal for precise cuts, and the ease of rolling it makes quick work of cutting a big batch of crackers into perfect diamonds.
Sieve: Sieves are available in a vast variety of shapes and sizes. For most of the recipes in this book, we use a fine-mesh metal sieve to drain the liquid. The fine weave makes sure we don’t lose anything unintentionally, and the metal is easy to clean. Our metal sieve is an essential part of the cheese-making process.
Silpat baking mat: Although many of our recipes call for parchment paper–lined baking sheets, our preference is always to use something reusable, which is where Silpat comes in. A Silpat is a silicone-based baking mat you can place on top of your baking pan to make sure there is no sticking or scraping. Silpat is easily washed with a gentle scrub in soap and water and rolled up for its next use. We are big fans of this French invention, but there are times when we prefer parchment. The thickness and silicone texture of the Silpat can make it harder to achieve a crispy crust, so if you’re looking for crunch, parchment works best.
Spice grinder: Often used by coffee lovers for a fresh daily grind, spice grinders are perfectly designed for grinding seeds and spices into fine powders. Relatively inexpensive and incredibly effective, these are a great tool for making your own fresh spice blends, powders, and pastes. We also use a spice grinder to grind vanilla beans into a fine powder for some special treats.
Getting rid of the coffee taste—if you already use a spice grinder for your daily java but want to start creating your own spice blends, you don’t need to get a second grinder. Instead, run a handful of dry white rice through the grinder to absorb all of the coffee flavor before starting to grind your spices. Discard the rice, remove any residue with a dry cloth or paper towel, and you’re ready to toss together your favorite whole spices.
Stand mixer: You might think you don’t need a stand mixer. But imagine this: you start the process, and the machine whips up the coconut cream while you casually steep yourself a cup of tea and sip it while browsing through a magazine. Oh, look, the cream is all whipped. Wasn’t that easy? A stand mixer can be a powerhouse in your kitchen. It can provide the muscle for recipes that require extended whipping, kneading, or mixing. Although not required for many of the recipes in this book, a stand mixer can save you time and improve the reliability of your recipe results. We use our mixer for recipes like whipped cream, frosting, pizza dough, and bread.
Thermometer: We use a couple of different types of thermometers in this book, but the one we recommend most strongly is the oven thermometer. Everyone assumes that turning your oven to 350°F means it will heat to 350°F, but the surprising thing is that most ovens are a little bit off, and they can become more so over time. A cheap investment with reliable results, an oven thermometer is hung from an oven rack and will tell you precisely the temperature your oven reaches. With ingredients like coconut flakes and seeds, a few degrees can mean the difference between terrifically toasty and charred beyond recognition.
Whisk: Why stir when you can whisk? The whisk is a great tool for bringing liquids together. It has an amazing ability to emulsify and adds air as you stir. Readily available and affordable, every kitchen should have a whisk.
Zester: Another citrus ambassador, the zester makes it easy to infuse recipes with bright flavor without adding additional liquid. There are many different types of zesters available. We prefer to use a Microplane-style zester as it makes a very fine zest, which enhances recipes without changing their texture. Microplanes are chef makers—for some reason, topping off a dish with a fine sprinkle of citrus zest makes us all feel like we deserve a series on the Food Network. On our show, we won’t stop at citrus—we’ll use that Microplane to grate ginger, garlic, nutmeg, and chocolate. (But we’ll never say “BAM.”)
TECHNIQUES AND TROUBLESHOOTING
THE SECRET TO ROLLING DOUGH FOR PASTRY, COOKIES, AND CRACKERS
We once had a pretty rocky relationship with dough that required rolling. Pie crusts, cookies, and crackers—we love them, for sure, but rolling out the dough was beyond intimidating. So we did what most people would do: we avoided making them. That is, until we gained confidence—by making pie dough over and over and over, making mistakes, fixing those mistakes, and remembering not to make the same mistakes the next time around. Messy, flour-covered countertops and sticky rolling pins, no more! The know-how is what we’re here for.
HOW TO CULTURE NUT CHEESES WITH CHEESECLOTH OR A NUT MILK BAG
Cheese-making is a process, but with a little investment of time (and cashews) you’ll be turning out incredible, artisan-style nut cheese, customized to your tastes, regularly and reliably.
Classic Cheese Ball (here)
WHAT IF …? MORE QUESTIONS AND ANSWERS ABOUT MAKING VEGAN CHEESES
1. I’ve added all the water the recipe called for, but my cheese is still chunky/gritty.
In cheese-making, smoothness is paramount. If your blender is struggling to produce a silky-smooth result, we suggest grinding the nuts in a dry blender before adding the liquid. Grind the nuts into a fine meal or flour. Add the liquid a little at a time, scraping down the sides between each addition, to allow time for the blender to work on incorporating the liquid and further breaking down the nuts. As a very last result, add a teaspoon more liquid. But patience often works better in the end than the addition of extra liquid.
2. I added more water than the recipe called for and my cheese is too soft.
When you set up the cheese to ferment, add a little extra weight to see if you can get some of the excess liquid out of the cheese before you attempt to shape it.
If you have a dehydrator, it can work magic on soft cheeses. Place the cheese in a ring mold in the dehydrator and dehydrate at 110°F for 24 hours. Release the cheese from the mold, flip it over to dry out the underside, and dehydrate for 4 to 6 hours more.
If you do not have a dehydrator, transfer the cheese as best you can onto a small piece of parchment paper. Shape it into a round. Sprinkle the top and sides with salt, and allow to air-dry according to the recipe instructions. If after air-drying it is still too soft to slice, store it in the freezer and slice while frozen, or shape it into a log and wrap in plastic wrap to keep in the fridge for spreading and slicing.
3. I made a beautiful cheese, but it is too sour for my taste.
This time around, serve it up with something sweet, like Strawberry Chia Jam (here). But make a note for next time. The best part about making your own cheese at home is being able to customize the flavor to your taste. If it is too sour, it may be that the amount of culturing time in the recipe is too long for your flavor preference. Try reducing the air-drying time by 12 hours to see if that takes off the edge. If the result is still too sour, reduce the amount of lemon juice in the recipe by one-third.
4. I’m allergic to cashews. Is cheese-making out of the question for me?
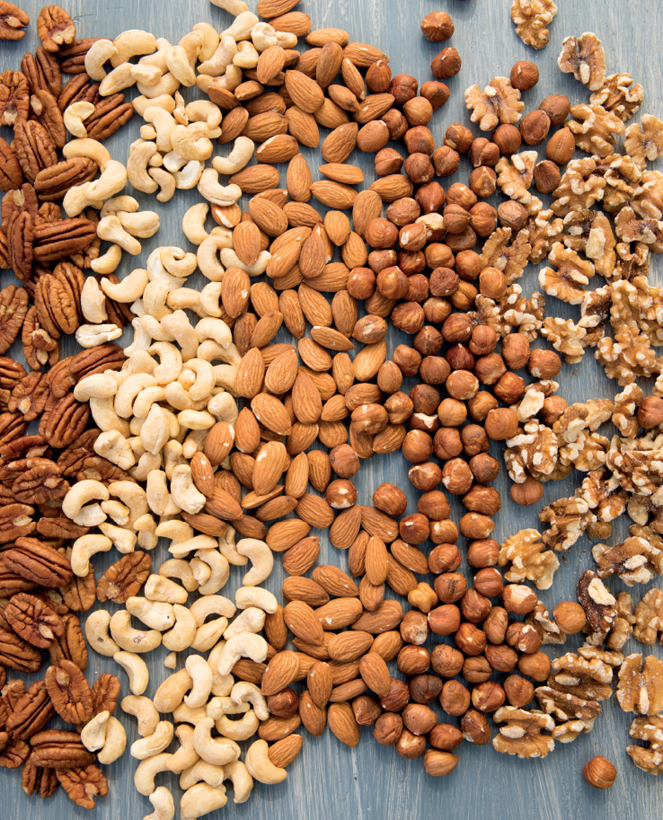
Absolutely not. Vegan cheese can be made from a variety of ingredients. If you are allergic to cashews, try macadamia nuts instead. They produce a firmer cheese and may require just a touch more liquid to achieve a creamy result. Cheese can also be made from almonds, sunflower seeds, Brazil nuts, and hemp hearts. Experiment with different combinations until you discover the perfect cheese for you.
5. I’m ready to get fancier with my cheese-making. How do I create a beautiful cheese plate to serve my guests?
First, decide if you’re setting up a sweet or savory cheese plate. Sweet is ideal for after dinner, while savory makes for a wonderful appetizer course.
For a sweet plate:
• Pick out three to five sweet and creamy cheeses, such as Cultured Nut Cheese (rolled in dried fruit and chopped nuts; here), Date and Fig Cashew Cheese (here), and Cheddar Cheese (here). Set out a small knife beside each type of cheese.
• Add dried fruits like cherries, figs, or cranberries and fresh fruits like grapes, berries, and apples to start to fill the plate. A few small handfuls of lightly toasted nuts is another great addition.
• To complete the plate, consider the addition of sweet preserves or spreads, such as berry jams or fruit preserves, crackers (especially the Pecan and Raisin Rice Crackers here), and a sliced baguette.
For a savory plate:
• Pick out three to five savory or spicy cheeses, such as the Classic Cheese Ball (here), Spicy Jalapeño Cheese (here), and Buffalo Mozzarella (here). Set out a small knife beside each type of cheese.
• Add smoked or marinated olives, sun-dried tomatoes, or roasted bell peppers or zucchini to start to create a party platter. Roasted tamari almonds are a wonderful addition.
• Finish the plate with some crunchy, seedy crackers, a firm rye or pumpernickel bread, or a firm, crusty baguette.
HOW TO MELT CHOCOLATE IN A DOUBLE BOILER
If you don’t own an actual double boiler, you can use this method to make sure your chocolate melts slowly, evenly, and without any grittiness.