Our troops command vast firepower in the form of squad-based automatic weapons, hand-held anti-tank projectiles, and long ranged mortars and machine guns. Deploying and manoeuvring skilfully will enable your infantry to bring their weapons to bear most effectively against their enemy.
Units that have been given a Fire or Advance order can shoot, whilst units that have been given an Ambush order can shoot when they spring their ambush – in which case their order is flipped to Fire. Other units can sometimes shoot in special circumstances as described throughout the rules: for example, stand and fire during an assault.
When one of your units shoots follow the procedure below:
1.Declare target
2.Target reacts
3.Measure range and open fire
4.Roll to hit
5.Roll to damage
6.Target takes casualties
7.Target checks morale
Pick a target and declare you are opening fire. Except as noted below, a target is always one enemy unit. When a unit shoots, it fires all of its weapons at one target: for example, a tank, a squad of infantry, or an anti-tank gun and its crew.
When a unit opens fire only those models that can draw a clear line of fire to their target actually shoot. Any models unable to shoot will not fire, for example because they either can’t see a target or because their weapons are out of range. Note that we do make an exception for panzerfaust armed infantry, who are allowed to select a different target to the rest of their unit; see Dividing Fire.
Example: An infantry unit can see two enemy units – a machine gun team and an infantry squad further away. As the machine gun is already suppressed with two pin markers, the player decides to ignore it and declares that his unit is firing against the enemy infantry.
Infantry models are always allowed to see and shoot through other models in the same unit as if they were not there. This is because the unit is assumed to be in constant motion, troopers working as a team and not getting in each other’s way. Sometimes you will find it convenient to momentarily lay down a model or place it aside whilst checking line of fire, and this is perfectly fine.
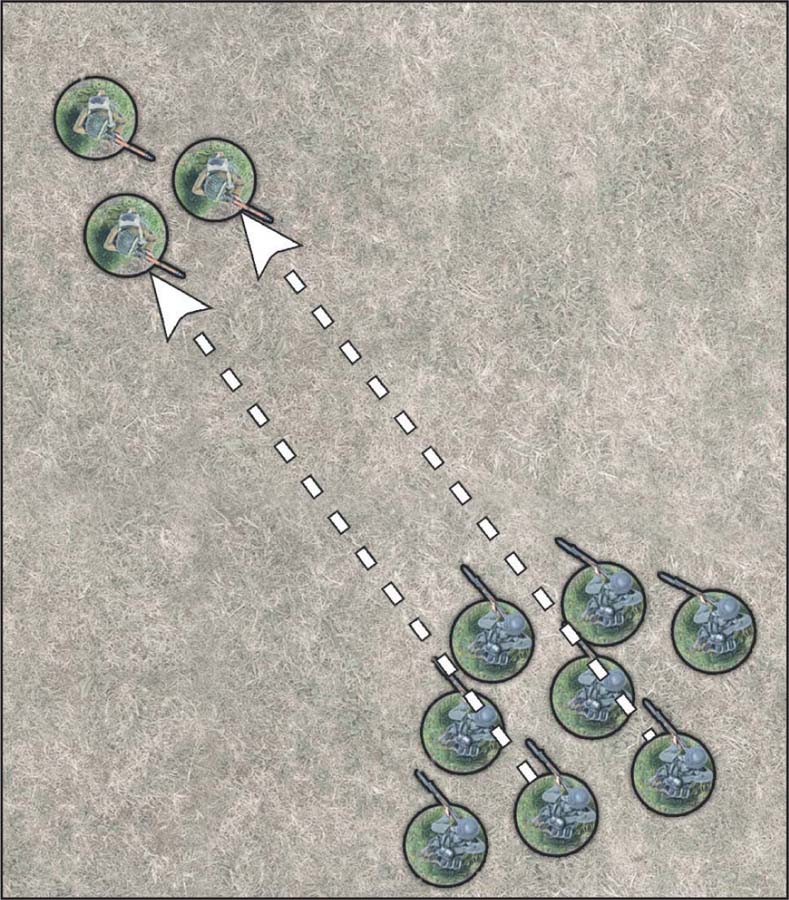
Models are not allowed to shoot through other friendly units or to draw a line of fire within 1” of a model from another friendly unit. Even though a shooter may be able to see the target, the shot is not permitted if it would pass through or within 1” of a model from a different friendly unit. In such cases the friends are too close to the line of fire. We make an exception to the rule that you can’t draw a line of fire within 1” of your own side where shots cannot possibly score damage on the friendly unit.
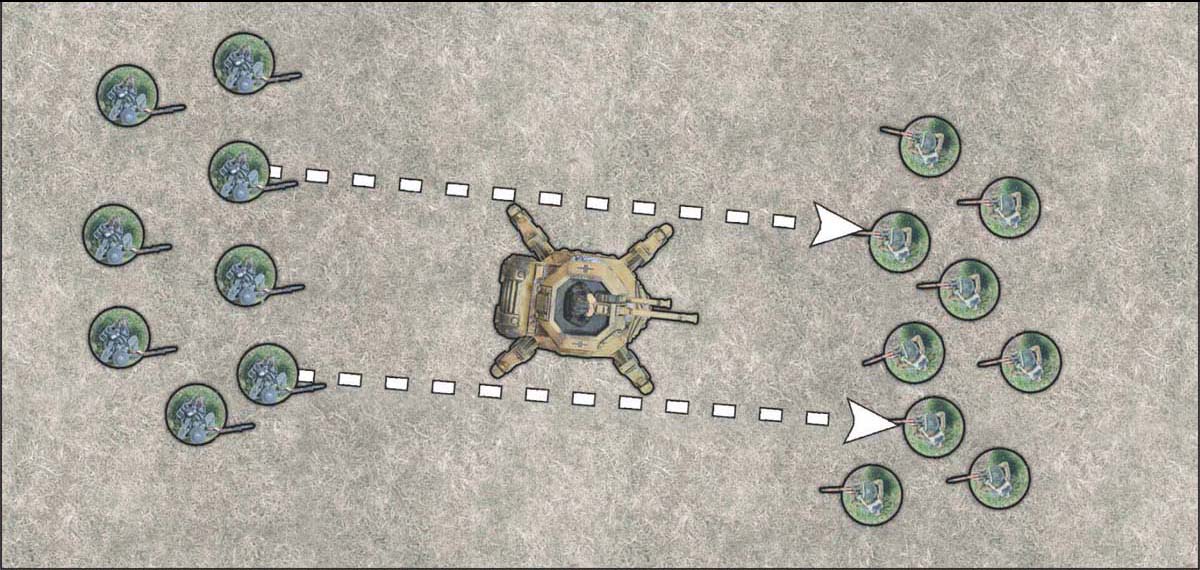
For example, infantry armed with small arms cannot possibly damage an armoured personnel carrier, so they are allowed to draw a line of fire within 1” of it. In such a case shooters must still be able to see the target to shoot – they cannot see ‘through’ the vehicle – but the closeness of the carrier does not block their fire. The same exception also applies when shooting mortars and howitzers over the heads of friendly units using indirect fire as explained later. These weapons fire with a high trajectory, lobbing shells high into the air so they fall onto the enemy from above. When mortar and artillery crews shoot indirect fire they can therefore shoot at any enemy they can see without intervening friends blocking their fire.

All of the German soldiers in the firing unit have line of sight to the target unit.

Models A and B can fire at the German soldiers because their shots won’t pass within 1” of friendly models. The other models in their unit cannot fire as friends are in the way!

The German soldiers’ shots can pass within 1” of the friendly walker, as their weapons cannot possibly damage it.

The mortar can shoot at the German squad as it can see through the friendly unit in between.
If the nominated target has not yet taken an action in this turn the player can, if he wishes, immediately choose to attempt a Reaction. Each Reaction will have a tactical impact on the situation and may allow the target unit to reduce the damage it suffers, to take cover, or even return fire on its attackers.
Example (continued): The target has not taken any action yet so the opposing player could decide to order the unit down or take a Firefight Reaction. The player decides against ordering his men Down, judging that the shooters are out of range and also therefore doesn’t want to risk failing a Reaction Test trying to return fire.
Every weapon in the game has a maximum range at which it can fire effectively. For example, a rifle can hit targets up to 24” distant whilst a medium machine gun can hit targets up to 36” away.
Each weapon has a number of shots. This is the number of dice rolled on behalf of the model firing the weapon. For example, a rifle has just 1 shot, but a medium machine gun has 4 shots representing its rapid rate of fire.
Every model that is within range and which can draw a line of fire to at least one enemy model in the target unit shoots at the nominated target. Note that players cannot hold back a unit’s fire – when a unit fires every model that can shoot must shoot. Check the range from each shooter to his target to make sure he is within range. If within range, roll a D6 for each shot the weapon has as shown on the weapons chart. If the target is out of range then the shot automatically misses and there is no need to roll.
Example (continued): The player measures the range to the target and finds that three of his riflemen and the sergeant’s submachine gun are out of range, but the squad’s light machine gun and four riflemen are in range. He can therefore fire three shots from the machine gun and one each from the four rifles, making a total of seven shots.
If a unit of infantry includes a proportion of men armed with one-shot anti-tank weapons – such as a panzerfaust – then any of these models are allowed to direct their fire against an enemy vehicle, even if the rest of their unit shoots against a different target. This enables a unit to split its fire between two different enemy units and is therefore an exception to the rule that normally prevents this.

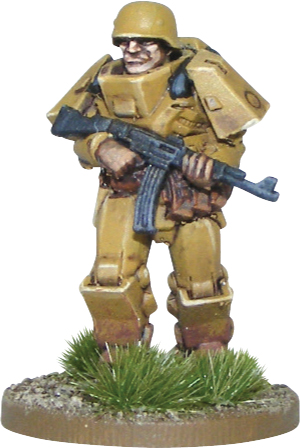
German Heavy Infantry
Each D6 rolled has a chance of scoring a hit on the target. Successful hits represent accurate fire placed in the immediate vicinity of the target, with a good chance of killing or incapacitating an enemy.
Each die roll of 1 or 2 misses and is ignored, whilst each die roll of 3, 4, 5 or 6 results in a hit. This is usually expressed as a roll of 3+, meaning a roll of 3 or greater on the die.
However, there are a number of factors that affect this roll, making it easier or more difficult to score a hit as explained below.
The basic 3+ chance of hitting assumes that the firer is not distracted by the battle raging around him, has time to aim his shots, and that the target lies in plain view without the benefit of cover of any kind. During a firefight this will rarely be the case, and a target can be considerably more difficult to hit as a result. This is represented by means of the following modifiers.
| HIT MODIFIERS | |
| Shooting at point blank range | +1 |
| Per pin marker on the firer | –1 |
| Long range | –1 |
| Inexperienced | –1 |
| Fire on the move | –1 |
| Target is Down infantry/artillery | –1 |
| Target is a small unit | –1 |
| Target is in soft cover | –1 |
| Target is in hard cover | –2 |
Shooting at point blank range: if a target is very close it is easier to hit. If the target is within 6” shooters receive this bonus to their roll to hit.
Per pin marker on the firer: if the shooters are pinned down they will be more concerned about keeping a low profile than aiming carefully at the enemy. For every pin marker on the firing unit, the firer suffers a –1 to hit modifier. So, two pin markers suffers –2, three pin markers suffers –3, and so on.
Long range: each weapon has an optimum range beyond which it loses accuracy. This modifier applies if the target is at a distance of over half the maximum range of the weapon. Note that this may mean some shooters in the same unit might require a greater score to hit than others.
Inexperienced: inexperienced or poorly trained troops are far less likely to hit anything. Inexperienced units suffer a –1 penalty to their roll to hit.
Fire on the move: if the firing unit is making an Advance action the unit is spending some time moving and its fire will be less accurate. Hence the unit suffers this penalty to its roll to hit.
Target is Down infantry/artillery: this applies if the target unit is either infantry or artillery that has gone Down, as shown by the order die placed next to it; individual soldiers lying flat trying to offer the smallest possible target.
Target is a small unit: this applies if the target unit consists of either one or two infantry models. One or two men can easily escape attention on a crowded battlefield. Note it doesn’t matter how many men were in the target at the start of the game – it is the number of men in the target when it is shot at that counts.
Target is in soft cover: this applies if the majority of the target unit is in soft cover from the point of view of the majority of the models firing against it. For more about cover see the box here.
Target is in hard cover: this applies if the majority of the target unit is in hard cover from the point of view of the majority of the models firing against it. For more about cover see the box here.
If penalties to the score to hit a target mean that a die roll of more than 6 is needed it is still possible to shoot – though the chances of success are small. Open fire as normal rolling one die per shot. Pick any dice that have rolled a 6 and roll them again. Any further rolls of a 6 hit the target – nice shot! Although this means it is necessary to roll a 6 followed by another 6 to score a hit, it is still well worth an attempt.
If a shooting unit scores one or more hits place a single pin marker on the target. Note that it doesn’t matter how many hits a unit scores on the target; so long as at least one hit is scored the target takes a single pin marker. There are some very heavy weapons that inflict more than one pin marker when hits are scored, but these are exceptions that need not concern us immediately. See the Orders section for more about how pinning works.
Example: The player calculates the chances of scoring a hit. The basic score needed is 3+, but the shooters suffer a –1 because they moved this turn (with an Advance order) and a further –1 because both the rifles and the machine gun are firing at targets that are over half of their maximum range away. Therefore the player will need to roll at least 5s to score hits. The dice are rolled and get three hits, a very good result. Because the shooters scored at least one hit, a pin marker is placed on the target.

Soviet Heavy Infantry Squad
In situations where most of the shooters in the firing unit can draw a clear line of fire to most of the models in the target unit, then no modifiers are applied for cover. It doesn’t matter if cover obscures a few models in the target unit, or even if some models are completely out of sight; so long as the majority of the shooters can clearly draw a line of fire to the majority of the target no modifiers for cover apply.
Majority of Targets Obscured by Terrain or Other Models
If the majority of the shooters in the firing unit cannot draw a clear line of fire to the majority of the models in the target unit then the enemy is in cover. If the target is in cover, it is more difficult to hit (either –1 or –2 on the dice).
Cover is most likely to take the form of vegetation such as hedgerows or trees, or something more solid like rubble, wreckage or ruins. In other situations, the presence of other units, whether friends or foes, obscures a portion of the target making it harder for the shooters to draw a line of fire.
Majority of Targets Within Terrain
A scattering of tree models, tumbled ruins, rocks and such like is assumed to stand for a fairly dense tangle of woodland, rubble, or rocky outcrop which is impractical to represent literally on the battlefield. It is enough that we know a wood is a wood, and we can easily imagine the tangle of undergrowth and closely packed tree trunks.
For practical purposes we assume that a unit is always in cover if the majority of its models are inside a wood or comparable area of dense terrain. It is convenient to assume all models whose bases touch the wood/etc. are ‘within it’, as this avoids any uncertainty in the case of troopers who may be partly inside.
Shooting Through Terrain and From Cover
For the reasons outlined above we also assume that where shooters draw a line of fire through woodland, over tumbled ruins, rocky outcrops, walls, hedges or other comparable terrain at a target beyond, then the target counts as in cover if the majority of the target models can only be shot at over or through such terrain.
Where troops are firing from directly behind a wall or similar obstacle, or from the edge of a wood at a target that is otherwise in the open, no penalty is applied on account of the wall/wood/etc. Models count as behind a wall when they touch it. Models count as at the edge of a wood when they are positioned touching its boundary. This simply recognises that troops can take up good firing positions along the edge of a wood or behind a wall and shoot without the wood or wall itself getting in the way.
Not Sure?
In the vast majority of cases it will be obvious enough whether a target is in cover or not. However, sometimes it might not be so easy to make a judgement either because the situation is very marginal, or because it might be impractical to get the necessary model’s eye view. To quickly resolve situations where it is otherwise impossible to make a clear judgement, simply roll a die to decide. On a roll of 1, 2 or 3 the target is in cover, on the roll of 4, 5 or 6 the target is not in cover.
Soft or Hard Cover?
Soft cover describes the sort of concealing cover that makes a target hard to pick out, but does not necessarily offer much in the way of physical protection. This includes woodland, hedgerows, and other vegetation such as leafy undergrowth and fields of tall crops. It includes friendly infantry units, artillery or soft-skins – if these partly obscure a target and make it harder to see. Camouflage nets or mesh designed to conceal a target from plain view would also count as soft cover. Soft cover can also include fences and light wooden barricades or similar constructions.
Hard cover describes the kind of cover that offers real physical protection as well as a degree of concealment. This includes stone, brick, concrete or similarly substantial walls or ruins, rocky outcrops, foxholes, ditches, and trenches or sandbagged defences. It also includes armoured vehicles that partially obscure the target, whether friends or foes.
Before the game begins it is important that the players rate the terrain according to type and decide for themselves what amounts to soft and hard cover.
Pick all of the dice that scored a hit and roll them again to see if the target suffers damage and takes casualties. The score needed to inflict a casualty depends on the Damage value of the target, as shown in the table below. We have included Damage values for vehicles, including tanks, to give an idea of relative values. Heavy weapons add a modifier to the damage roll, allowing for a score of greater than 7. This is described in detail in the section Weapons. Regardless of any modifiers that apply, a roll of a 1 on a damage roll is always a failure.
| DAMAGE VALUE TABLE | |
| TROOPS AND SOFT-SKINNED TARGETS | RESULT NEEDED |
| Inexperienced infantry and artillery | 3+ |
| Regular infantry and artillery | 4+ |
| Veteran infantry and artillery | 5+ |
| Soft-skinned vehicle, scout walker | 6+ |
| ARMOURED TARGETS | RESULT NEEDED |
| Armoured car, carrier or light walker | 7+ |
| Light tank, medium walker | 8+ |
| Medium tank, heavy walker | 9+ |
| Heavy tank, super-heavy walker | 10+ |
| Super-heavy tank | 11+ |
Example: If a regular infantry unit is hit by rifle fire then a die is rolled for each hit and all further rolls of 4, 5 or 6 will score damage, i.e. rolls of 4+, or 4 or more. In this instance rolls of 1, 2 or 3 would fail to score damage and have no effect.
The damage table makes a distinction between troops and soft-skins with a Damage value of up to 6+ and armoured targets with a Damage value of 7+ or greater. This divides potential targets into two categories: soft targets that can be readily damaged by small-arms fire and armoured targets that can only be damaged by fire from heavy weapons. We will describe the rules for different kinds of weapons in a later section. For now all it is necessary to know is that heavy weapons add a bonus to the roll to damage, making it possible to score more than 6. For example, a Browning .50 calibre heavy machine gun has a bonus of +1, so a die roll of 6 scores 6 + 1 = 7. Small arms and light automatic weapons such as rifles, submachine guns and light or medium machine guns don’t add a bonus to damage. This means it is it is impossible to score more than 6 when rolling to damage using these weapons.
You will have noticed that infantry and artillery of better quality are harder to score damage against, whilst those of lower quality are easier to score damage against. This represents the advantage of combat experience, vastly increasing the survivability of veteran, highly trained and experienced soldiers compared to green recruits.
Example (continued): the enemy are regular troops, so each hit scored will need to roll 4+ to score damage. Three dice are rolled and two succeed in scoring damage on the enemy squad.
For every hit that scores damage the target unit loses one man as a casualty. Casualties represent soldiers stunned, wounded, or killed in action – they may be dead or temporarily incapacitated. Either way, they are out of action and the model is removed. The player whose unit has taken casualties normally chooses which men to remove. This obviously means that casualties will fall amongst the most expendable men first – for example, riflemen rather than machine gunners and squad leaders. In reality, if a squad’s machine gunner were to be shot, one of his comrades would take over the weapon, so it is entirely reasonable to remove ordinary troopers as casualties first.
When a 6 is rolled to score damage – before any modifiers are applied – roll that die again and if a further 6 is rolled the shot scores exceptional damage. This means the shooter picks which model falls casualty rather than his opponent. This represents the fact that sometime it’s the Sarge who gets it, or that a machine gun can jam or be damaged beyond repair. For example, exceptional damage allows the opposing player to remove a squad’s NCO reducing its morale value by –1. Alternatively, the player might choose to remove a model carrying a particular weapon such as the squad’s light machine gun or a panzerfaust. If the target is a weapons team, for example a bazooka or medium machine gun team, then exceptional damage indicates that the weapon itself has been damaged or rendered inoperable in some fashion, so remove the weapon and its firer as a casualty.

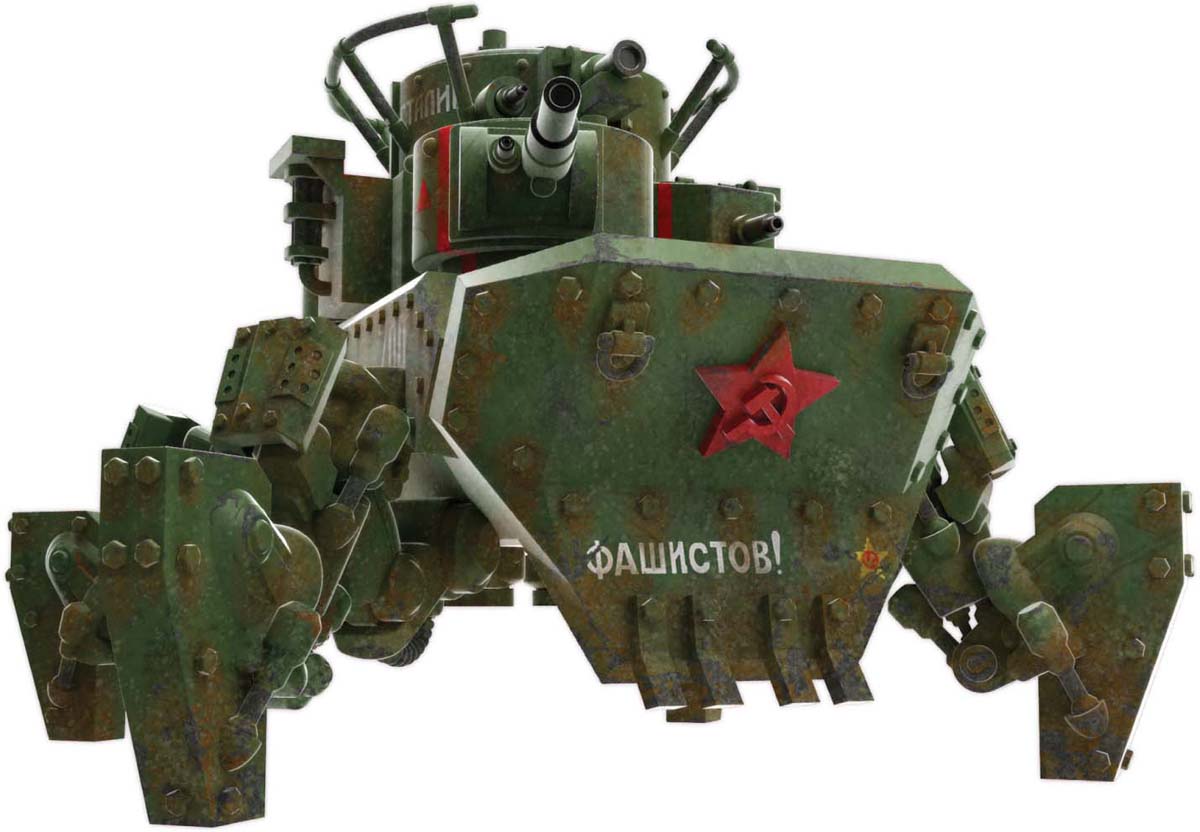
Soviet Mammoth Heavy Mech
If a target loses half or more of its men from the fire of one enemy unit, then the player makes an immediate morale check. This is the same as an order test, and all modifiers that apply to an order test also apply to a morale check. If the unit passes the check, then there is no effect and it continues to fight on as normal. If the morale check is failed, the unit’s nerve has broken and the troops run for their lives, scatter, or surrender to the enemy. In any case, the unit is removed from the game and counts as destroyed, just as if it had been completely wiped out by enemy fire.
Example (continued): As the squad had only six models remaining when shot at it, two casualties are not enough to force a morale check. Had the shooters managed to cause three casualties, a morale check would have been required, and if failed would have resulted in the unit being destroyed. Now, with only four men remaining, it will be easier to force a morale check the next time the unit is shot at.