CHAPTER 9
Configuring Workflow
Using Workflow Rules
Workflow rules support business logic by triggering certain actions or reducing the number of clicks needed to perform a task. You can use workflow rules to automate common processes, including status and field updates, email alerts, Salesforce messages, and task assignments. For example, you can create a new workflow rule task that runs whenever someone on the team brings in a new customer to assign the customer to that person automatically.
Understanding Workflow Rules
You can set up workflow rules to test for certain kinds of changes to records. For example, a rule can be triggered when the status of a sales lead changes, or a customer changes his or her contact details. Rules are bound to specific records; they can access information only in the record that triggers them, or in a parent record. More than one rule can be triggered at a time. You can add rules to all standard and custom objects. However, you cannot use rules to process records in bulk. Rules triggered as records are saved and you cannot apply them manually. To perform more complex record processing, you can use Apex technology or other custom code.
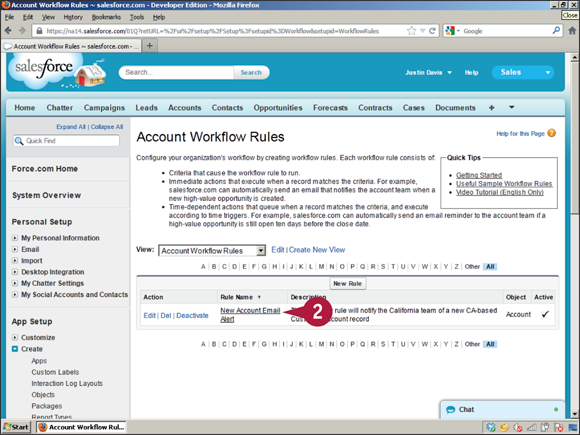
Viewing Workflow Rules

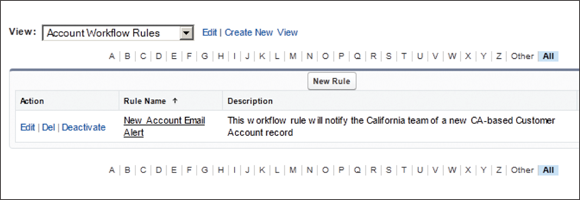
You can view rules on the App Setup page in the Create menu in the Customize area. Click the View  and then select Account Workflow Rules to view and edit rules.
Creating and Managing Workflow Rules
To create a new workflow rule, click the New Rule button. Each Salesforce instance can have up to 500 workflow rules, but resources are limited. For example, you can use rules to send up to 1,000 emails per day per standard Salesforce license, and up to 2 million emails across the organization as a whole. When you exceed the resource limit, Salesforce generates a warning email, and eventually suspends your access to rule-based features.
Creating Tasks, Field Updates, and Email Alerts
Rules check for changes to records. To make them perform a useful task, you must create supporting workflow actions. Actions typically include record field updates, email alerts, and Salesforce tasks, which you can schedule to occur automatically for specific Salesforce users.
Linking Workflow Rules with Tasks, Emails, and Field Updates
To make actions work with rules, link them together. You can either create actions separately and link them manually to one or more rules, or create a new action and add it to a rule immediately after creating it.
Create a Workflow Rule
You can use workflow rules to create an automated response that is triggered when Salesforce users change or create records. For example, you can create a rule that assigns a new customer record created in a certain area to a relevant territory manager. Or you might set up an automated notification for sales managers, which is triggered when unusually large orders are booked.
Note that rules on their own simply check for changes. They do not create a response. To add a response, you must link a rule with a workflow action, as described later in this section.
Create a Workflow Rule
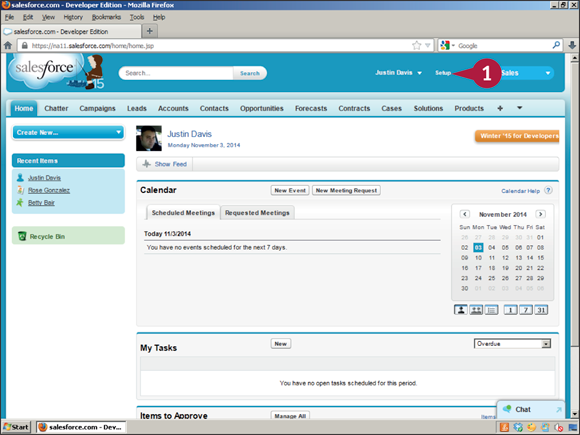
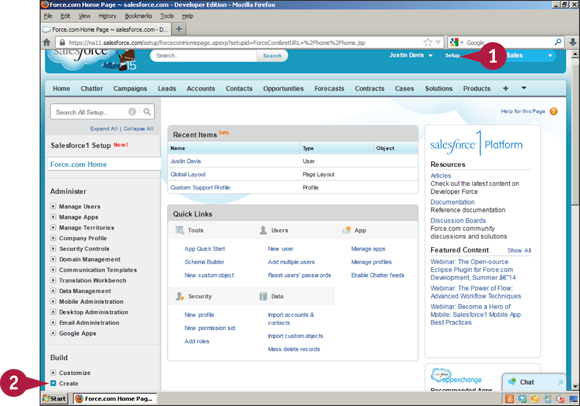
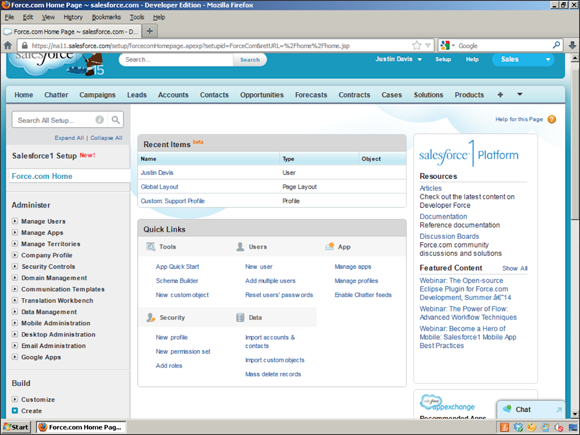
 Click Setup to show the configuration area.
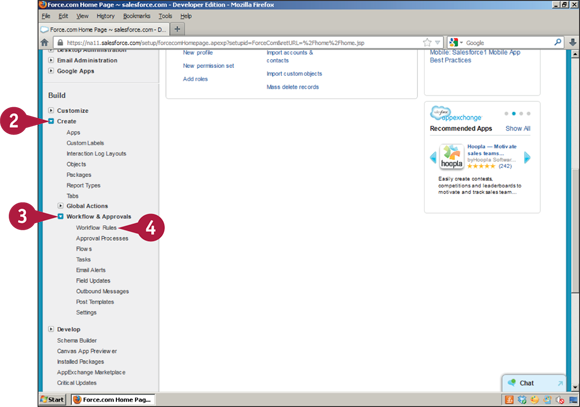
 Click the Create
  .
.
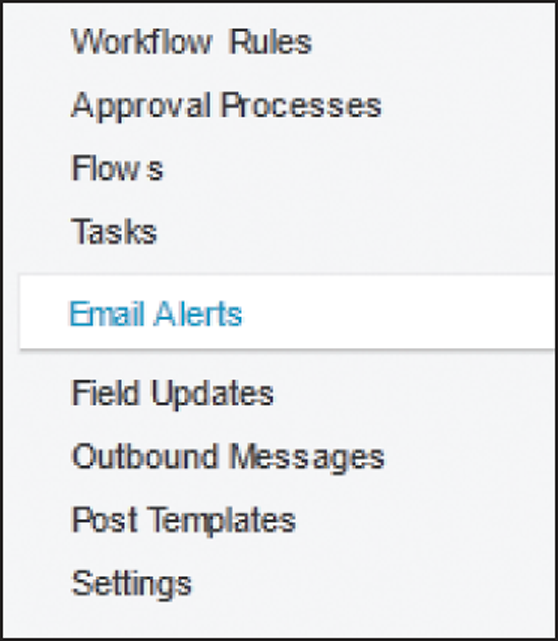
 Click the Workflow & Approvals .
 Click Workflow Rules.
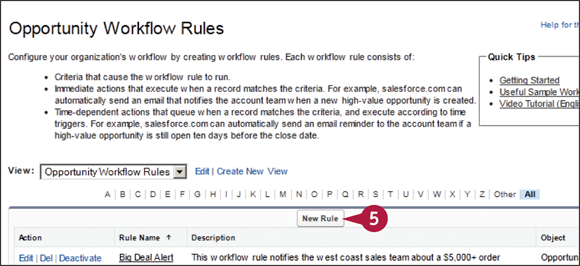
 Click New Rule.
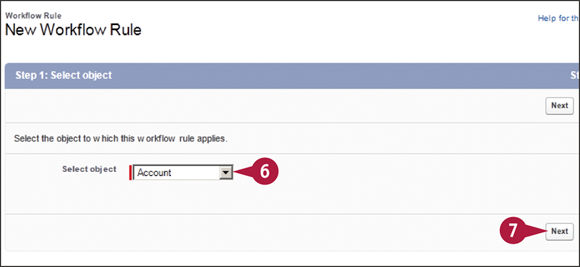
 Click the Select object and select an object.
Note: The workflow rule will be created for that object.
 Click Next.
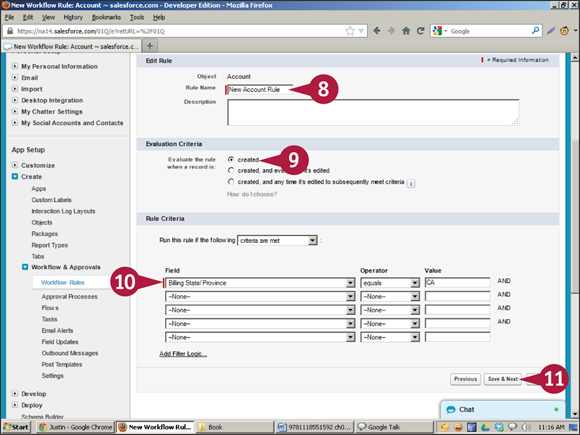
 Type a name into the Rule Name field.
Note: Make the name unique and descriptive. If possible, suggest the business process supported by this rule.
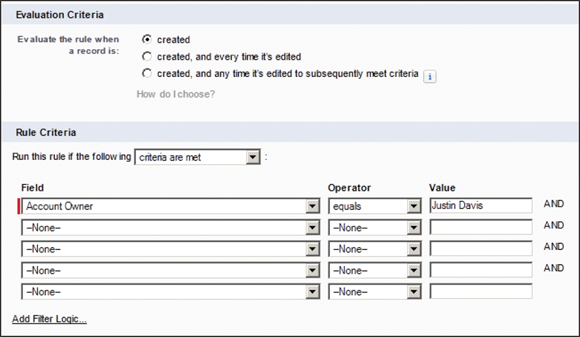
 Click a radio button to select one of the evaluation criteria (
 changes to
  ).
).
Note: This example creates a rule that runs when a record is created. You can also create a rule that triggers when a record is edited or when the edit operation meets further criteria.
 Select a record field and an operator and type a value.
Note: This example triggers the rule for billing addresses in California, as set by CA in the Value field.
 Click Save & Next.
 Click Done on the next screen (not shown).
Salesforce creates the workflow rule.
Create a Workflow Field Update
You can use a workflow field update to automatically change or update information in a record when a workflow rule is triggered. Depending on the structure of the records, the update may change the triggering record or its parent. For example, if a new won opportunity is created, you can set up a field update that changes the status of the parent account from Prospect to Customer when the opportunity closes. To make this possible, Salesforce allows you to select the relevant field on a parent record rather than the field on the child record that triggered the update.
Create a Workflow Field Update
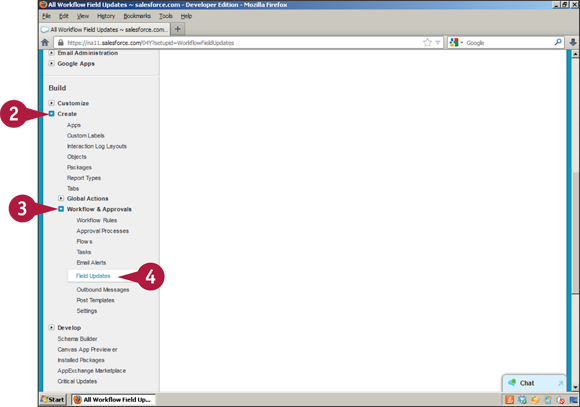
Click Setup to show the configuration area.
Note: See the previous section, “Create a Workflow Rule,” for details.
Click the Create .
Click the Workflow & Approvals .
Click Field Updates.
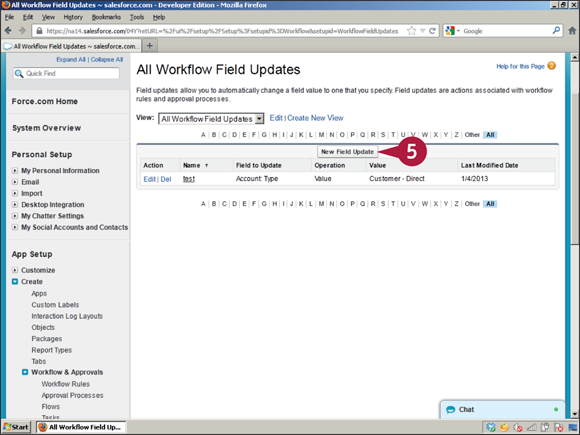
Click New Field Update.
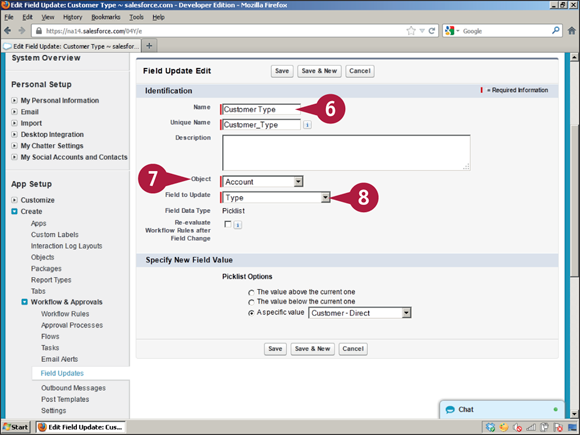
Type a unique name for the update in the Name field.
Click the Object and select the object you want to create the update for.
Click the Field to Update and select a target field.
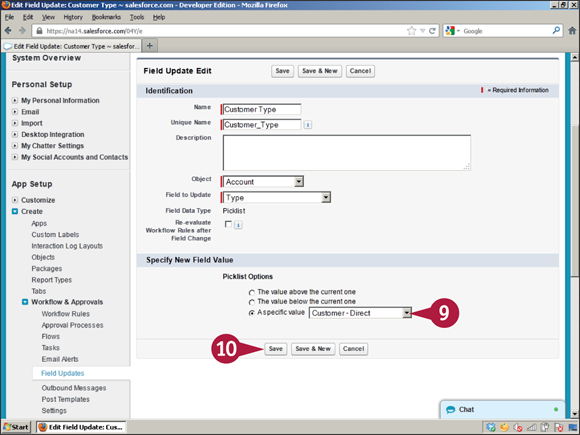
Click one of the Picklist Options ( changes to ).
Note: This example copies the Customer-Direct value of the record into the Account Type field.
Click Save.
Salesforce triggers the workflow rule when the revised conditions occur.
Add a Field Update to a Rule
You can make a workflow rule and field update “live” by associating them. This tells Salesforce to perform the field update when the rule is triggered.
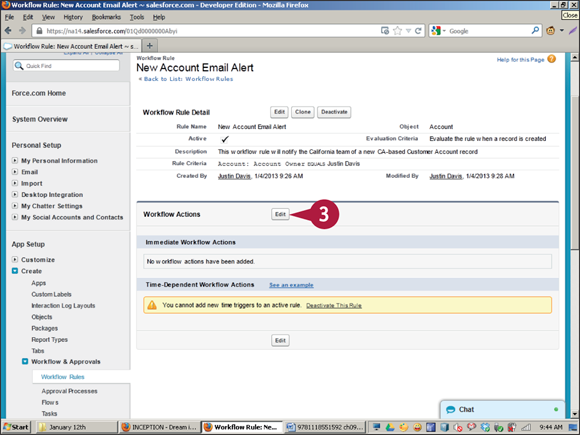
You must deactivate time-based workflow rules before you can add a new field update. Salesforce will not permit you to add workflow actions to active time-based workflow rules. This prevents any conflicts from taking place with workflow actions.
Add a Field Update to a Rule
Click Setup to show the configuration area.
Note: See the section “Create a Workflow Rule” for details.
Select the rule you want to link to an update.
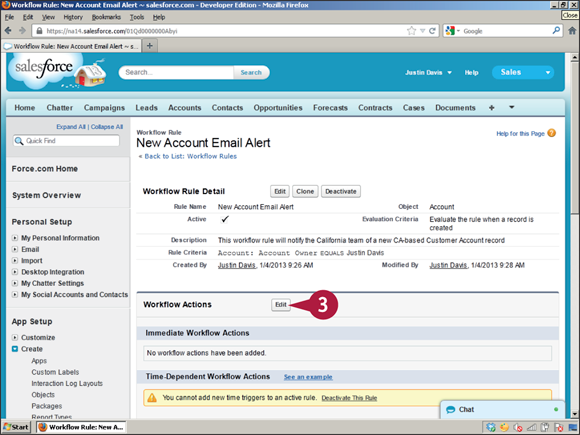
Click Edit.
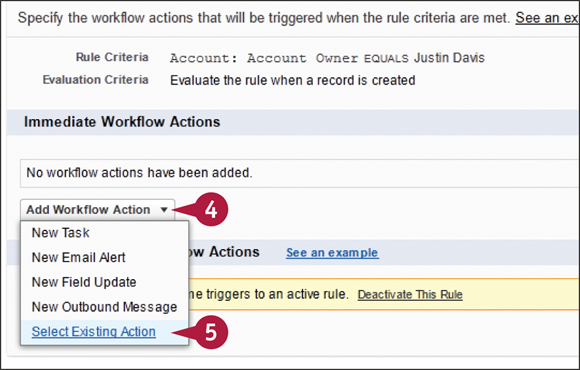
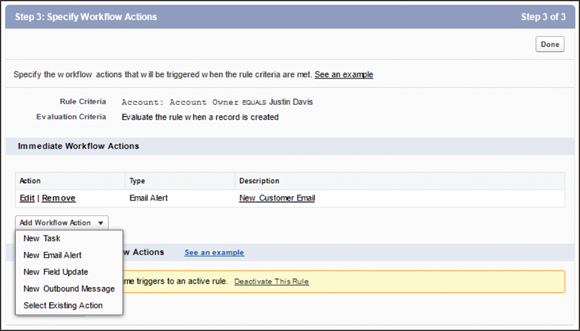
Click Add Workflow Action.
Click Select Existing Action.
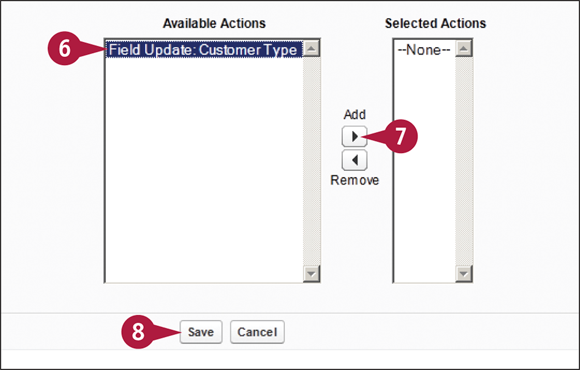
Select an action from the Available Actions list.
Click the Add arrow ( ).
).
Salesforce adds the action to the list of available actions and links it to the rule.
Click Save.
Salesforce performs the update when the rule is triggered.
Create a Workflow Task
You can use the workflow task feature to assign tasks to users when certain workflow rules are triggered. This is a powerful feature because you can use it to automate standard business processes. For example, you can create a follow-up call task to remind a sales team member to call a lead a specific amount of time after the lead has been created.
Note that you must link a task to a workflow rule after creating it. Otherwise, Salesforce never assigns the task. For details, see the next section, “Link a Task to a Rule.”
Create a Workflow Task
Click Setup to show the configuration area.
Note: See the section “Create a Workflow Rule” for details.
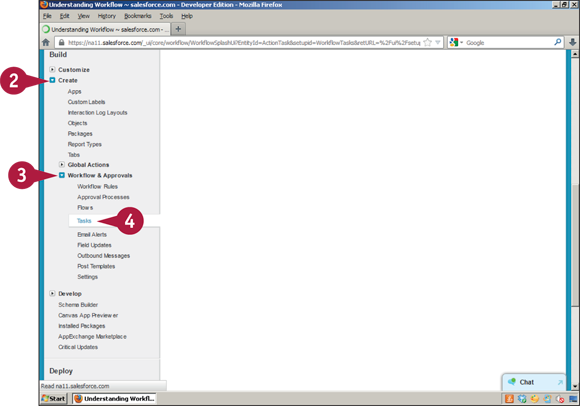
Click the Create .
Click the Workflow & Approvals .
Click Tasks.
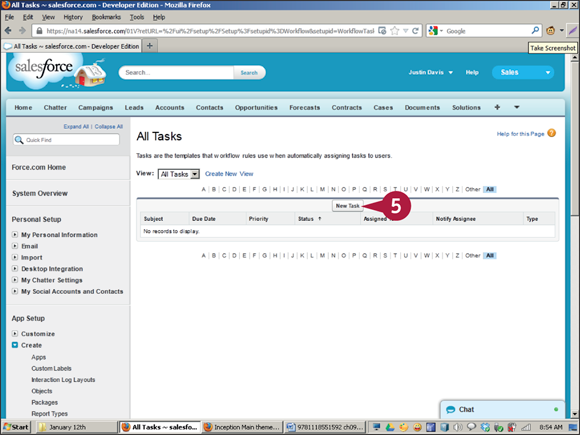
Click New Task.
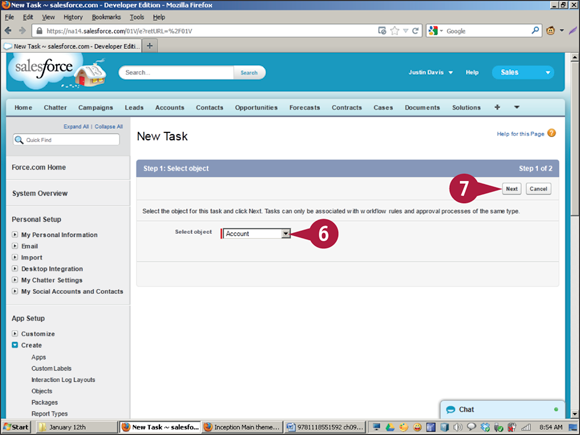
Select an object to be linked to the task.
Click Next.
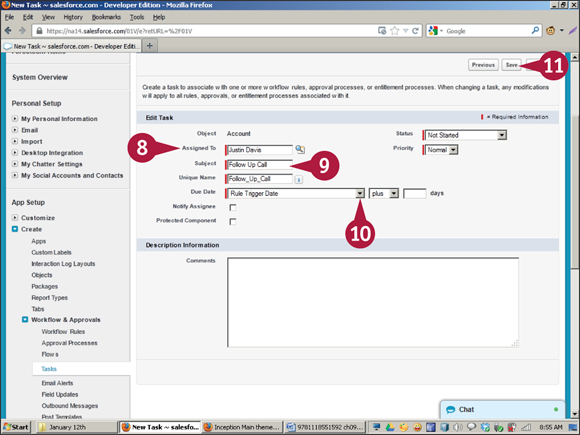
In the Assigned To field, type the name of an active Salesforce user.
In the Subject field, type a name for the task.
Note: The name you enter appears under My Tasks on the user’s home page. Make the name as descriptive as possible.
Click the Due Date and select Rule Trigger Date.
Note: This option tells Salesforce to assign the task as soon as the rule is triggered.
Click Save.
Salesforce creates the task as soon as the rule is triggered.
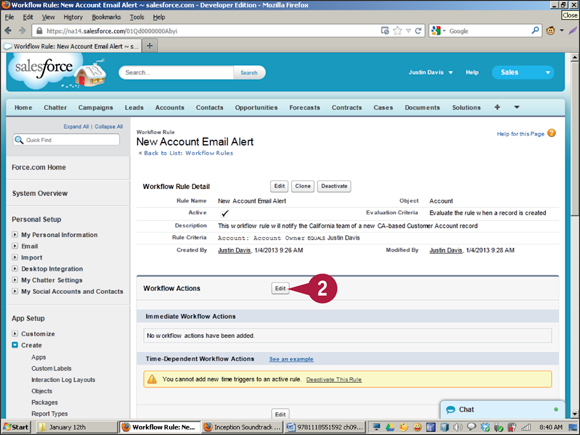
Link a Task to a Rule
Workflow tasks do nothing unless you link them to a workflow rule. Link creation is a straightforward process.
You can use tasks and rules creatively to automate processes and improve efficiency. For example, if a customer complaint is logged in Cases, you can create a follow-up call workflow task that is assigned 30 days later.
Link a Task to a Rule
Click Setup to show the configuration area.
Note: See the section “Create a Workflow Rule” for details.
Click Edit.
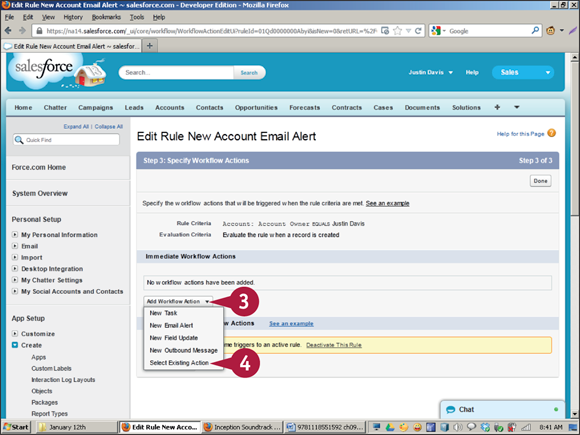
Click Add Workflow Action.
Click Select Existing Action.
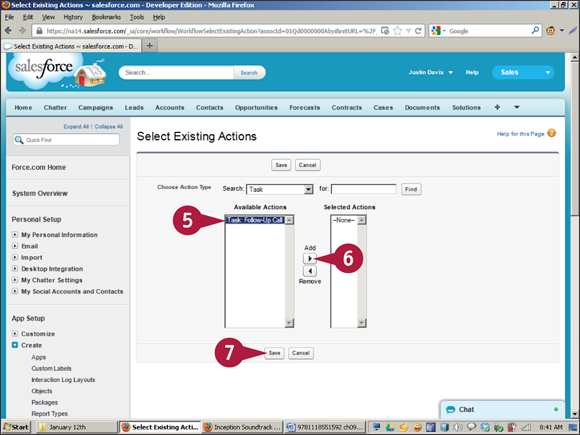
Select a task in the Available Actions column.
Click the Add arrow () to move this task to the Selected Actions column.
Click Save.
Click Done.
Salesforce links the task you specified to the rule.
Create an Email Alert
Email alerts can be sent to Salesforce users or to customers. You can also specify up to five email addresses that do not belong to Salesforce users or customers. Emails use predefined templates, which are covered in Chapter 2. You will need to navigate to the communication templates area during setup to create these email templates before creating a workflow rule email alert.
You can use the email alert feature to inform users of significant events, notify management whenever a large sale completes, or remind customers to renew a contract or restock products.
Create an Email Alert
Click Setup to show the configuration area.
Click the Create .
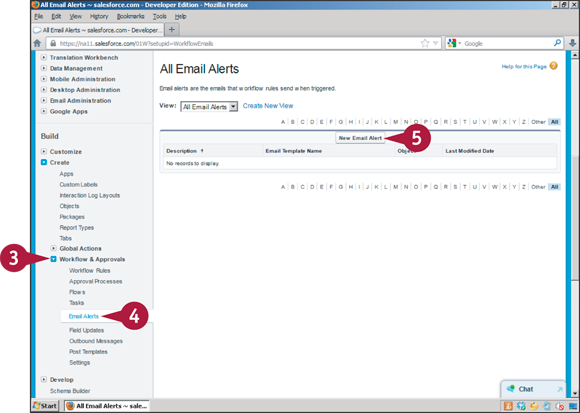
Click the Workflow & Approvals .
Click Email Alerts.
Click New Email Alert.
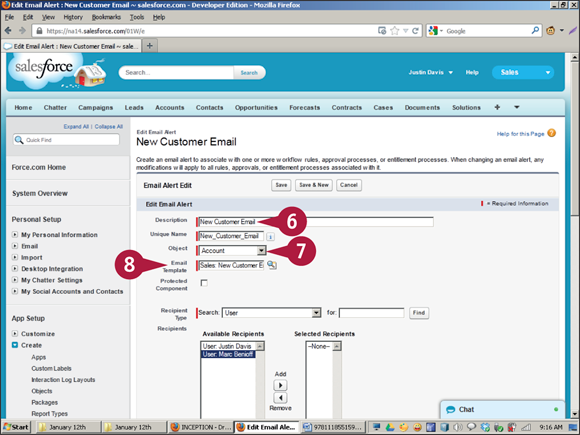
Type a descriptive name for the alert in the Description field.
Click the Object and select the object that generates the alert.
Click the Email Template and select a template for the email.
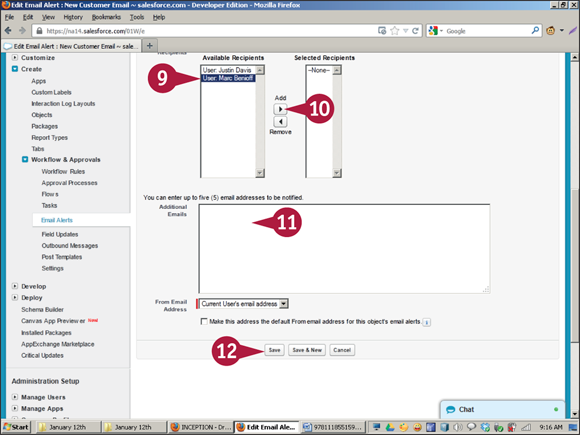
Select a user from the Available Recipients column.
Click the Add arrow ().
Note: You can add as many recipients as you want.
Optionally, type up to five external email addresses for recipients who are not Salesforce users.
Click Save.
Salesforce creates an email alert.
Note: You must link the alert to a workflow rule before it goes “live.” For more information, see the next section, “Add an Email Alert to a Rule.”
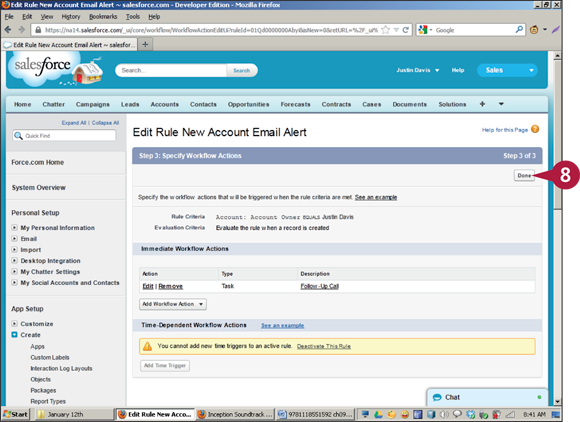
Add an Email Alert to a Rule
After you create an alert, you must add it to a workflow rule. This makes the alert “live” so it will be triggered by the rule. If you leave out this step, the alert remains on the system but does nothing. Alerts can be added to active or inactive rules; however, you should deactivate a rule before adding an email alert.
Add an Email Alert to a Rule
Click Setup to show the configuration area.
Note: See the section “Create a Workflow Rule” for details.
Select the rule to which you want to add an alert.
Click Edit.

Click Add Workflow Action.
Click Select Existing Action.
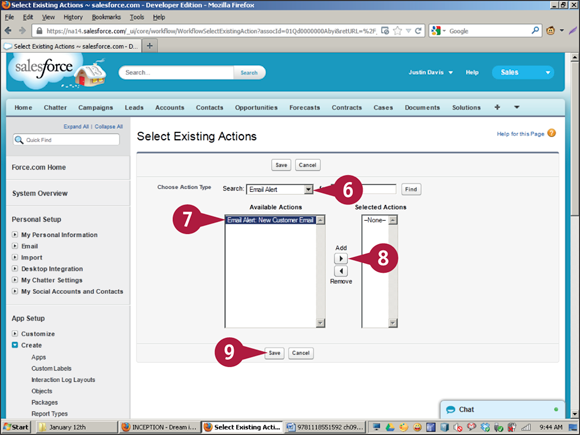
Click the Choose Action Type and select Email Alert.
Select one of the email alerts.
Note: This example shows a single alert. Typically Salesforce shows a longer list of alerts.
Click the Add arrow ().
Click Save.
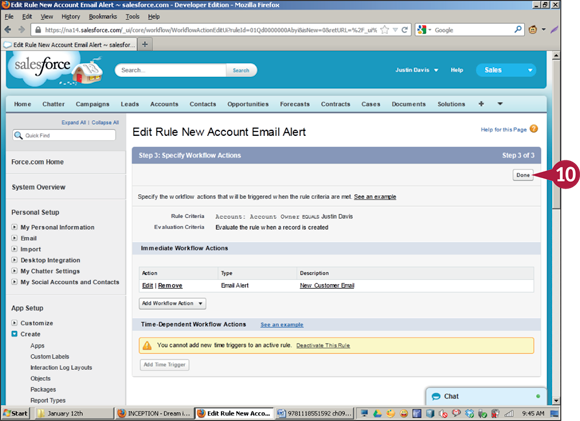
Click Done.
Salesforce adds the email alert to the rule.
 changes to
  ). If a field changes after an update, Salesforce evaluates the record again to see if further rules should be triggered.